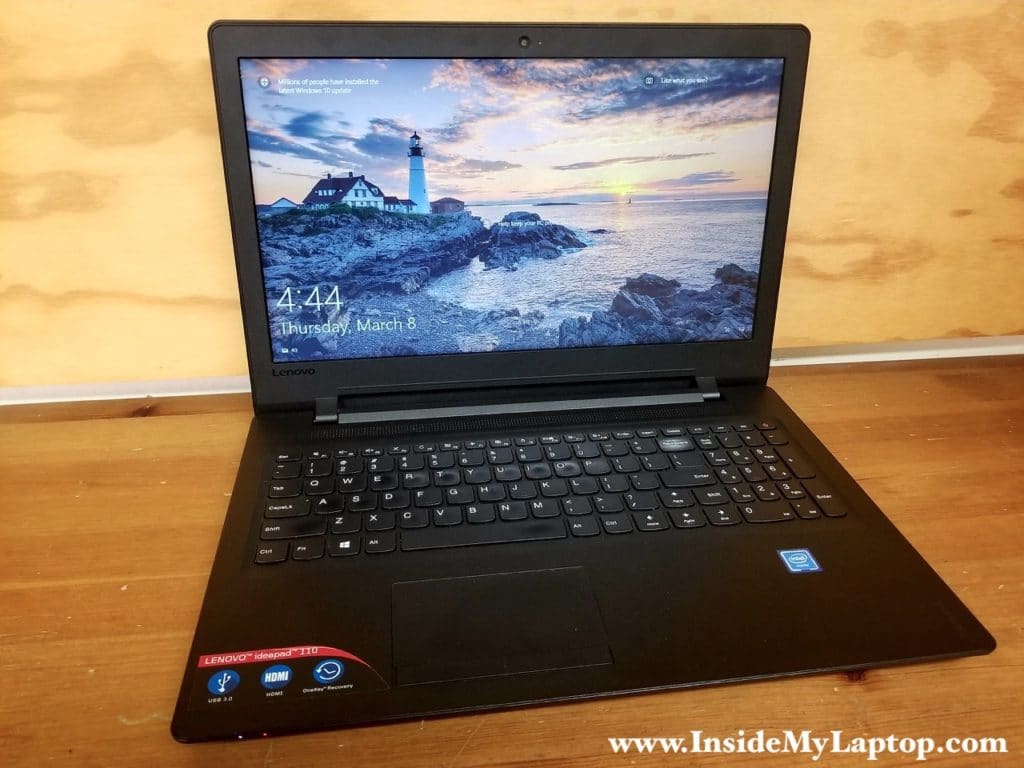
In this post I present a complete teardown guide for a 15.6″ Lenovo Ideapad 110 laptop. Model name: 80T7.
You can use it to disassemble the following Lenovo Ideapad 110 models: 110-15IBR, 110-15ACL and probably some other models manufactured in the year 2016.
For a newer ideapad 110 model 80UD manufactured in 2017, check out my next disassembly guide.
In the first part I will take apart the laptop body. In the second part I will take apart the display assembly. Both parts are independent from each other.
Laptop body disassembly instructions
STEP 1.
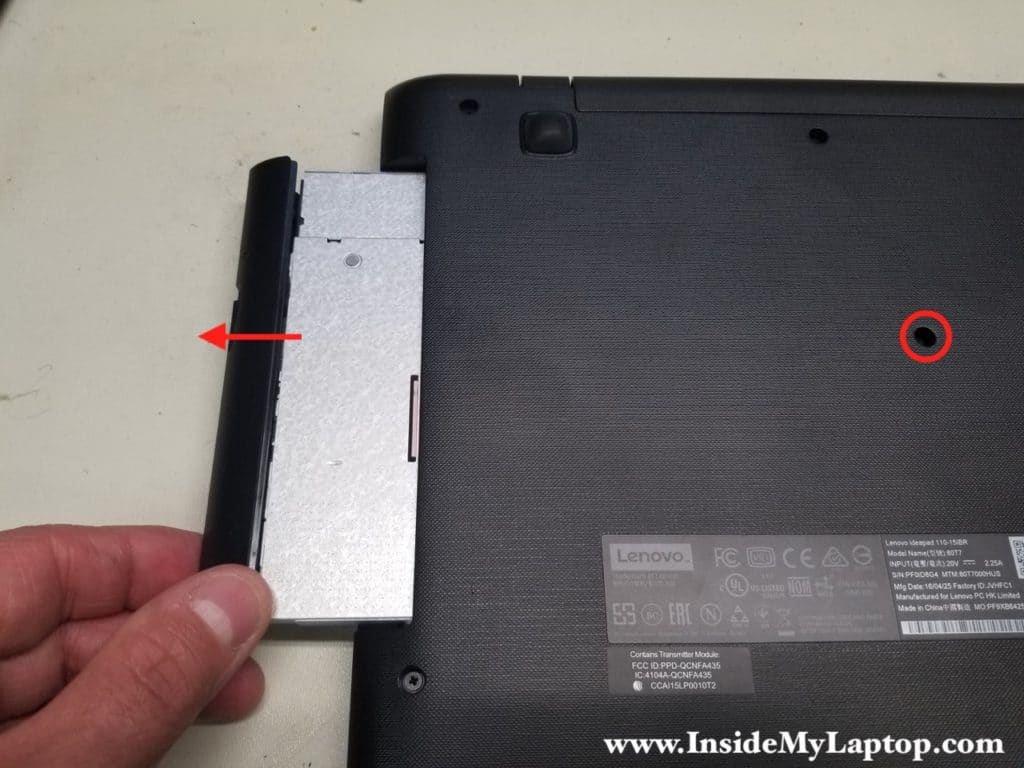
Remove one screw securing the CD/DVD drive. Pull the drive out and remove it.
STEP 2.
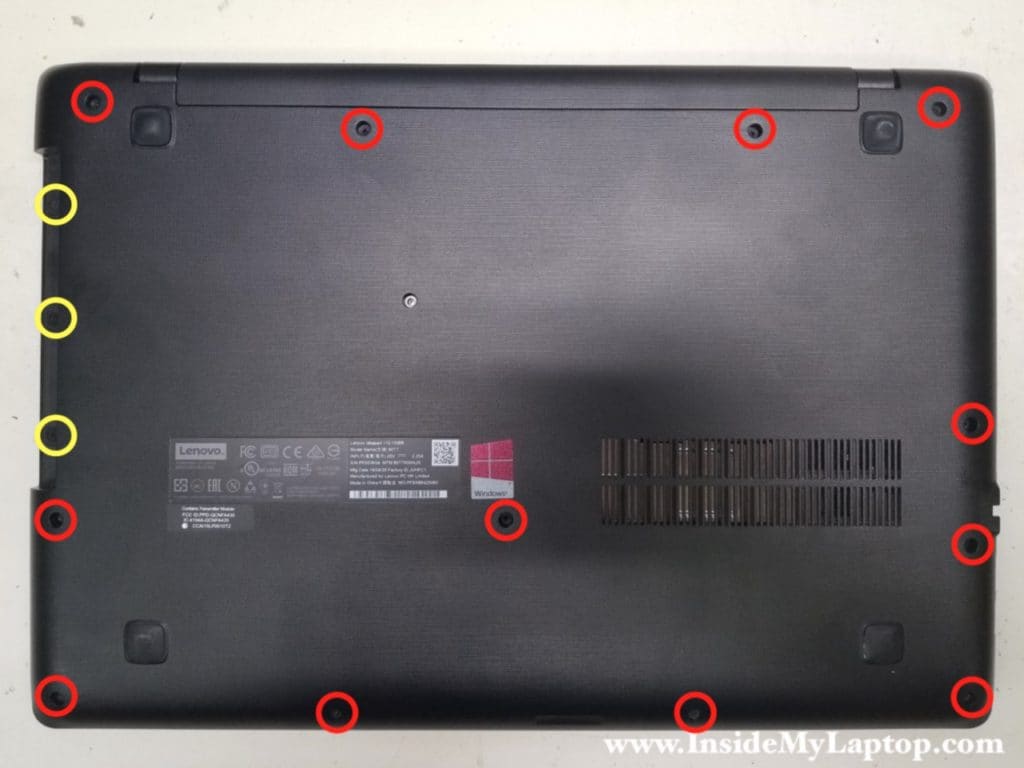
Remove all screws from the bottom cover. Don’t forget three screws in the CD/DVD drive bay (yellow circles).
STEP 3.
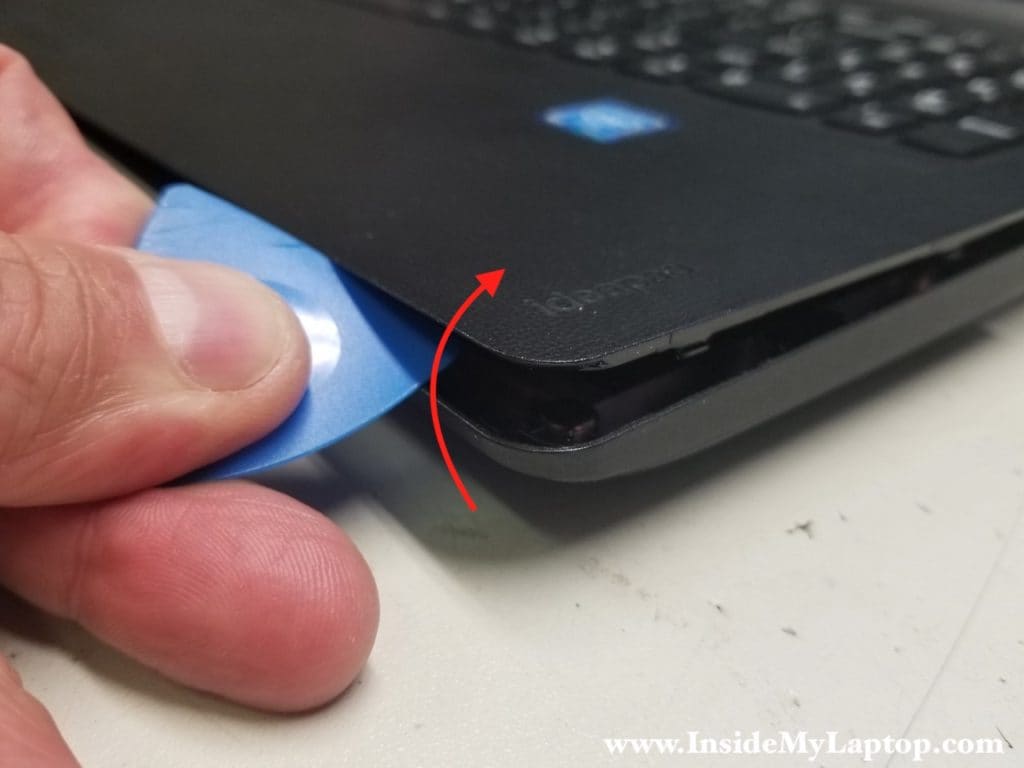
Start separating the palmrest assembly from the bottom cover using a plastic case opener.
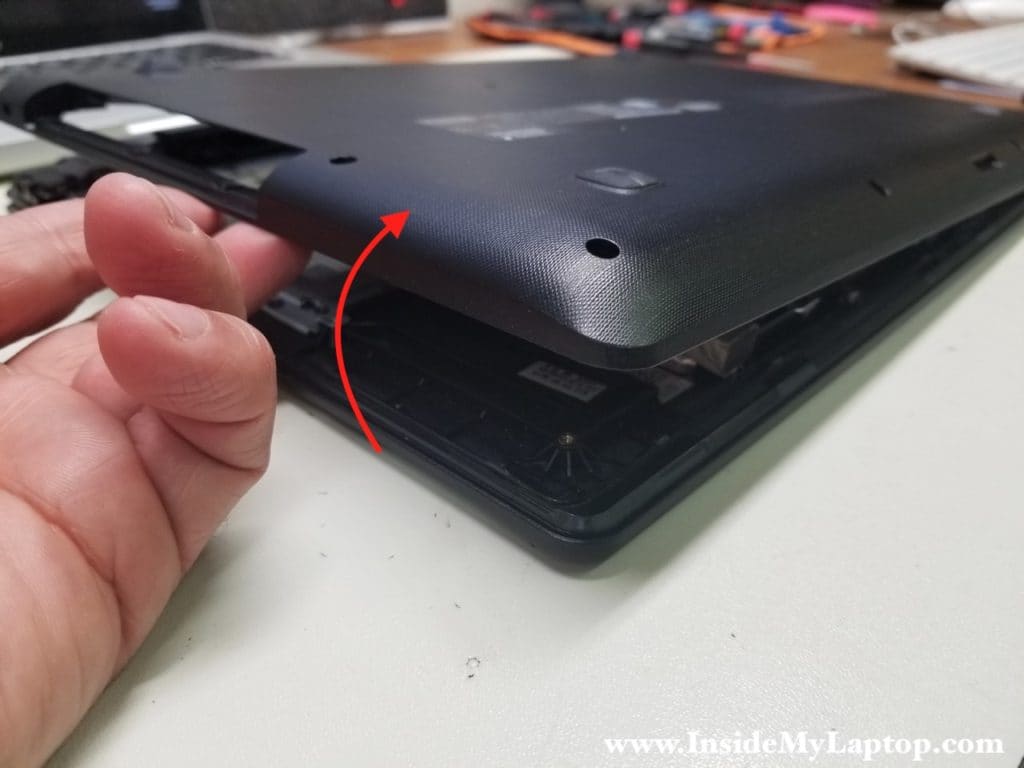
STEP 4.
Turn the laptop upside down and continue removing the bottom cover.
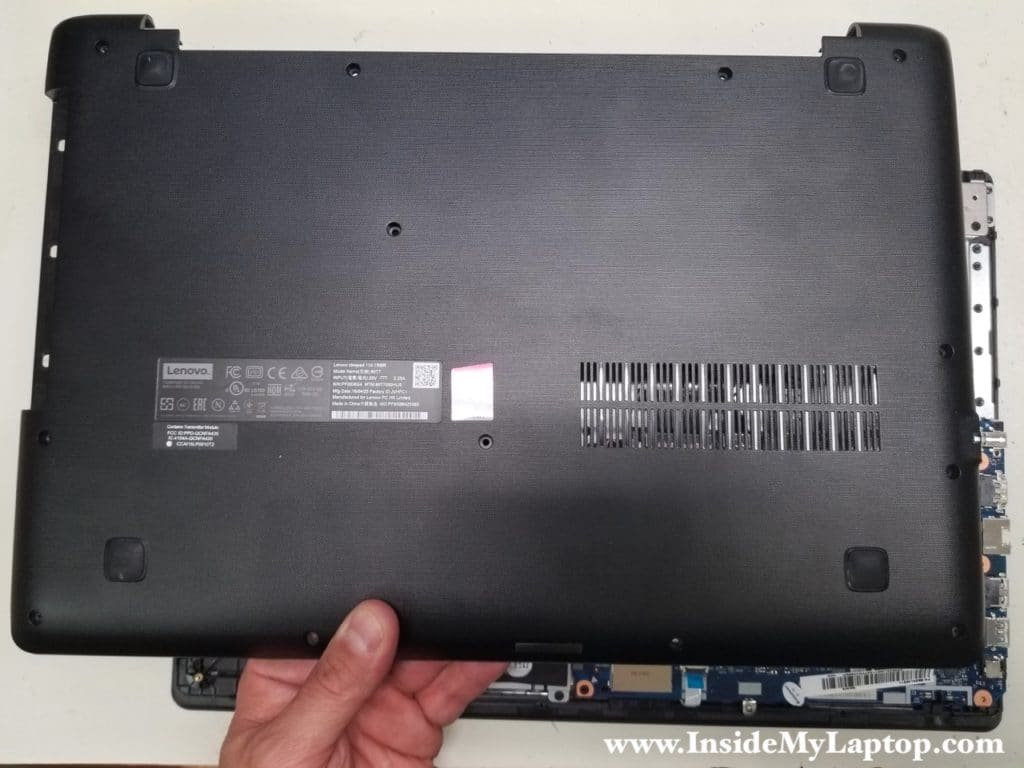
STEP 5.
Remove the bottom cover.
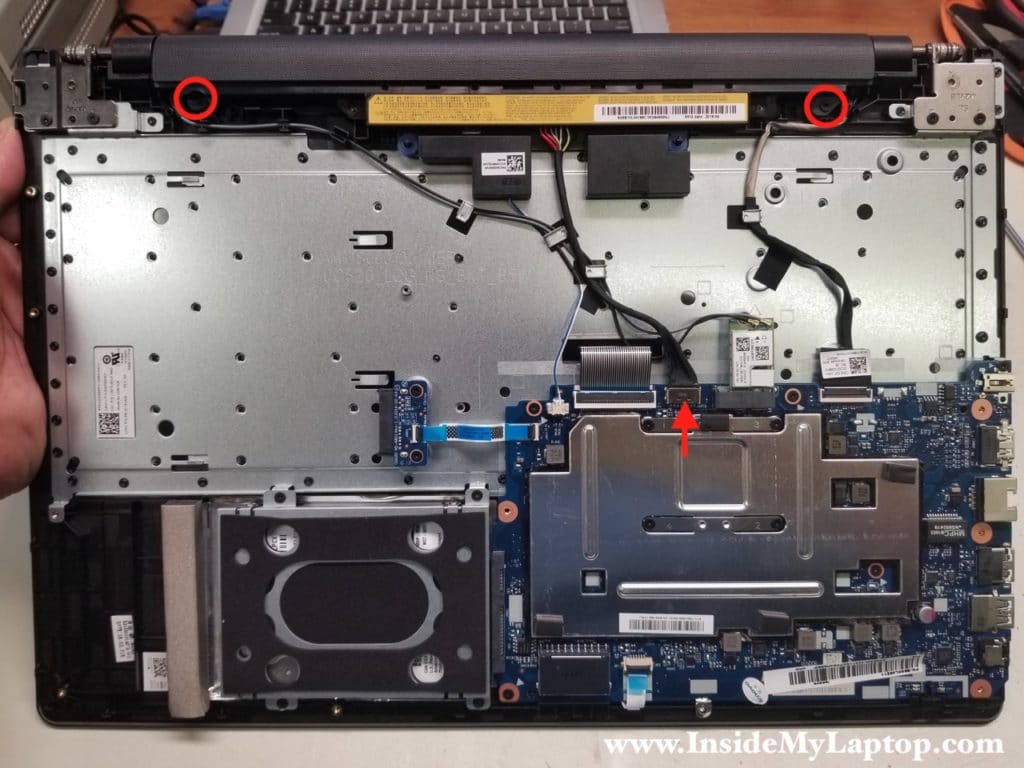
STEP 6.
Remove two screws securing the battery.
Disconnect the battery cable from the motherboard.
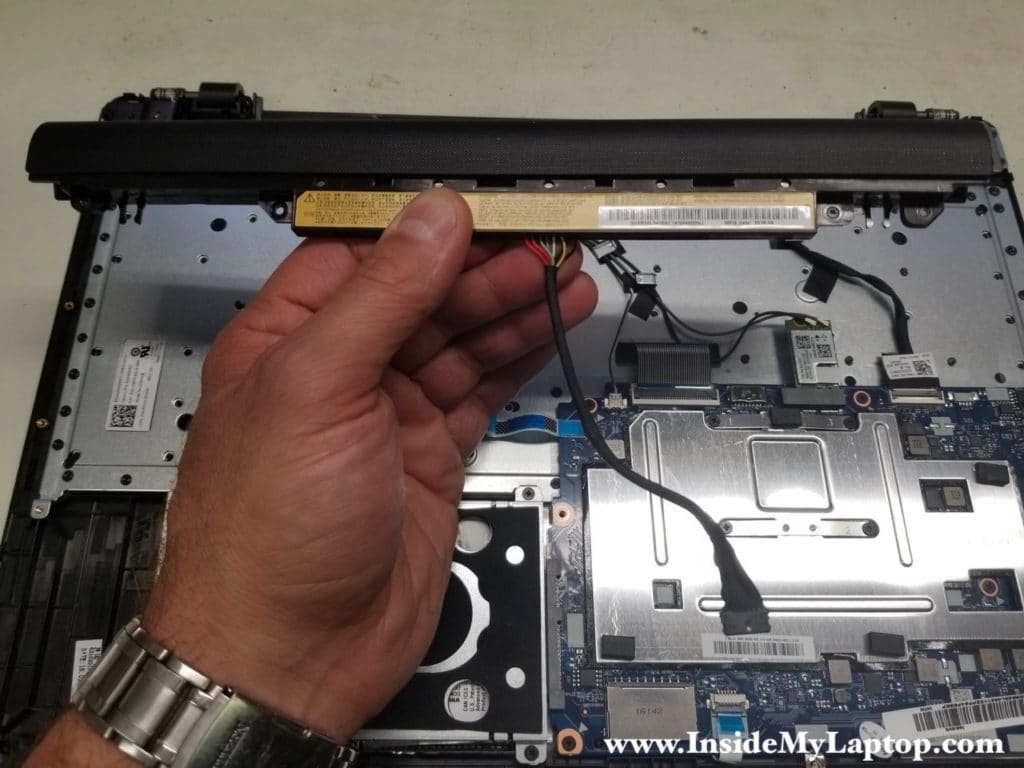
STEP 7.
Remove the battery.
STEP 8.
The hard drive caddy attached to the top case by four screws.
Remove the screws and slide the hard drive to the left to disconnect it from the motherboard.

STEP 9.
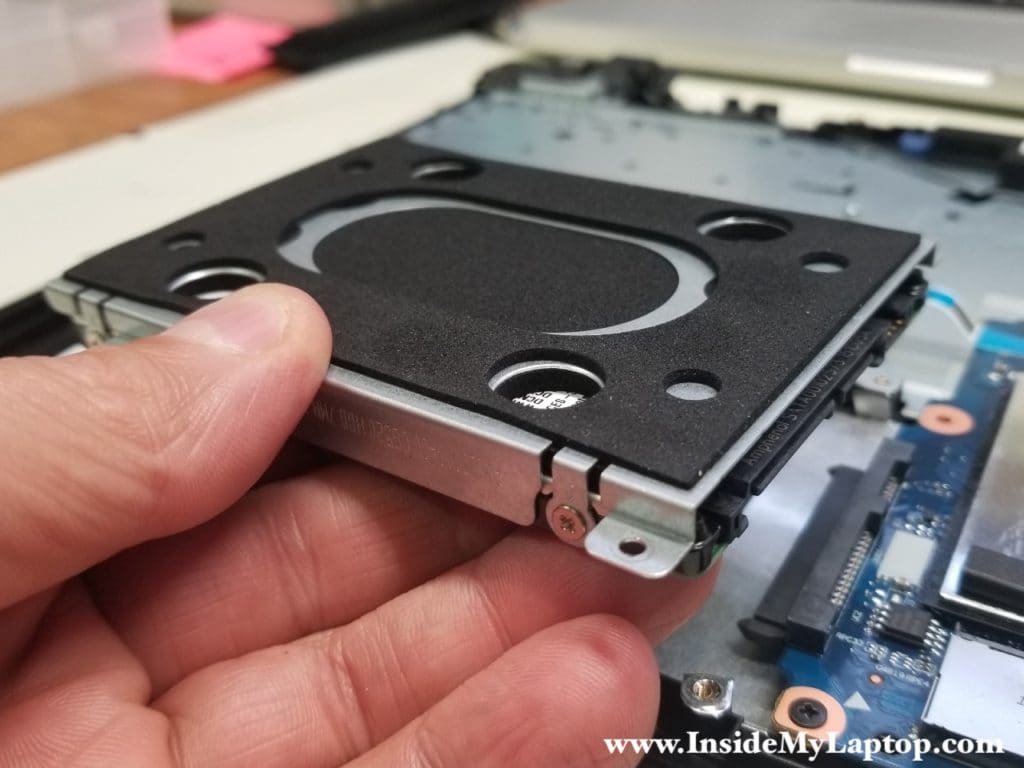
Remove the hard drive.
The hard drive secured inside the caddy by two screws on each side.
Installing a 2.5″ SATA solid state drive instead of the regular hard drive will improve laptop performance significantly.
STEP 10.
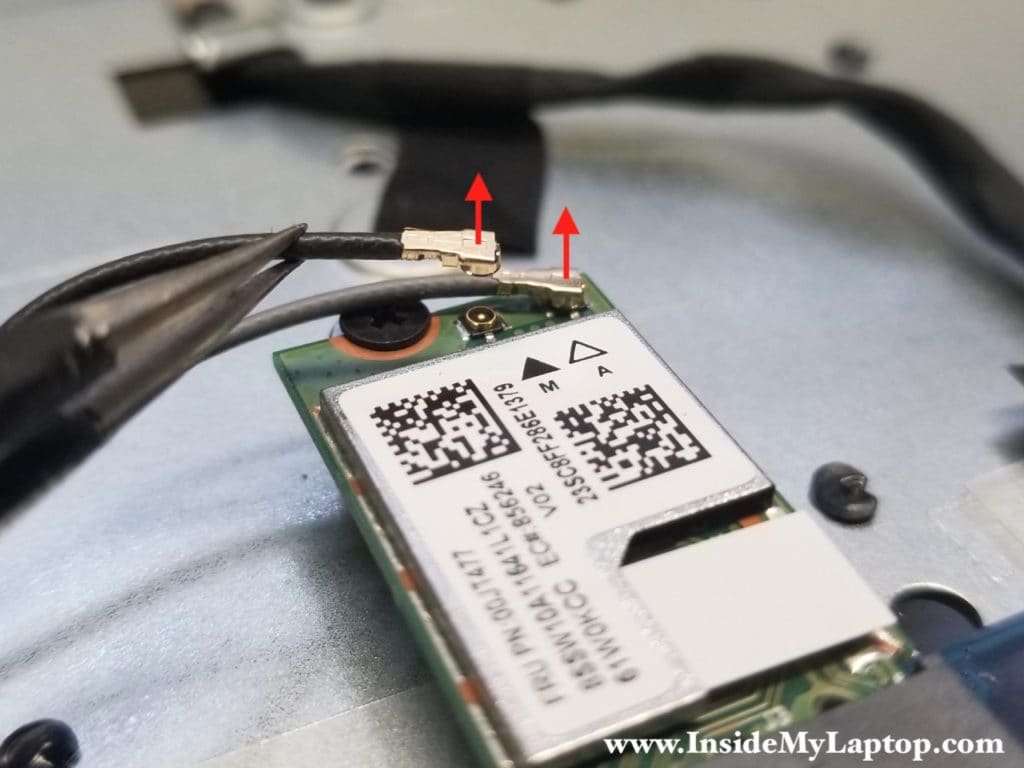
Disconnect both antenna cables from the wireless card.
STEP 11.
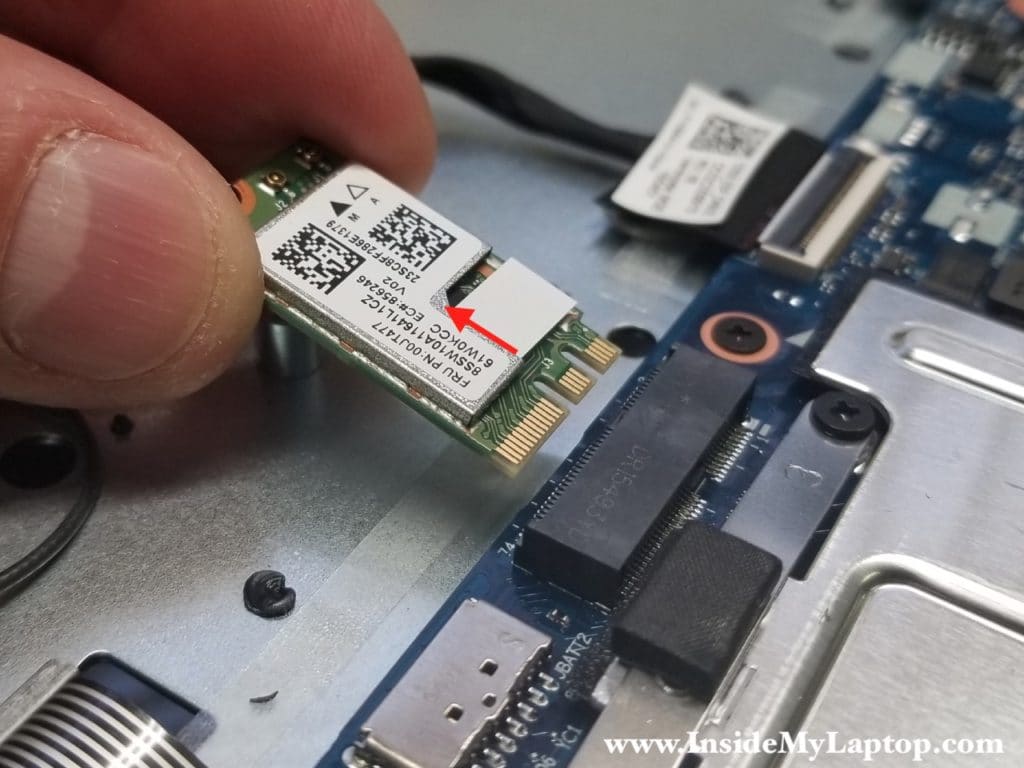
Remove one screw securing the wireless card and pull it out of the socket.
STEP 12.
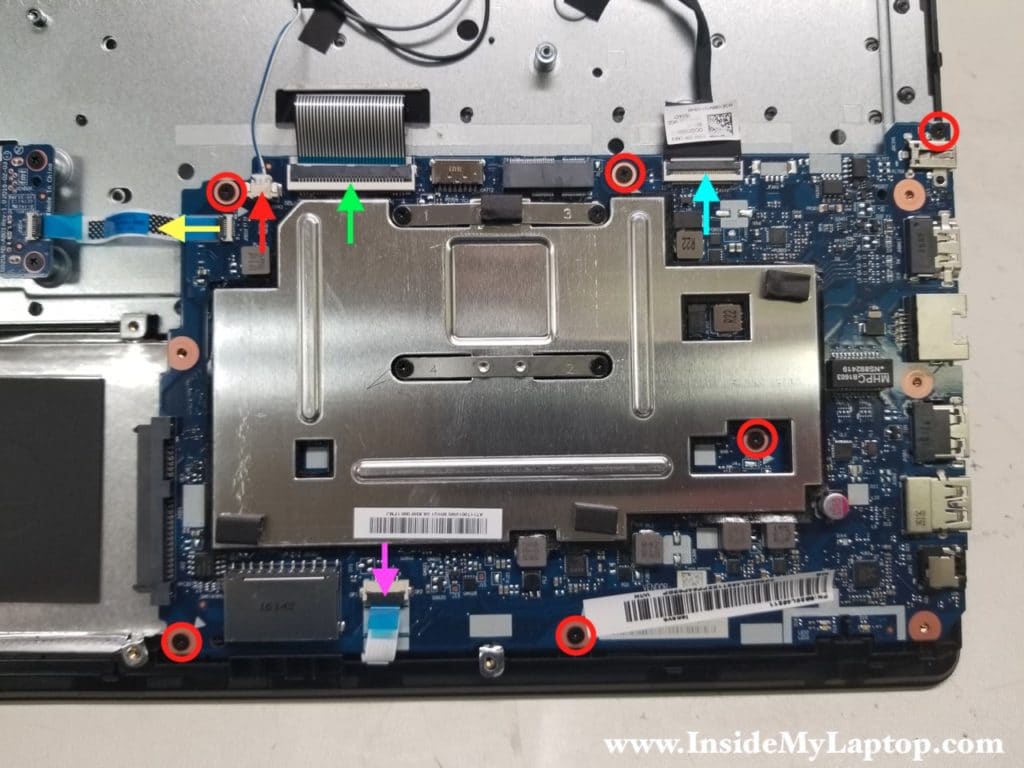
Remove six screws from the motherboard.
Disconnect all cables I marked with the arrows:
- CD/DVD drive connector board (yellow)
- Speaker cable (red)
- Keyboard cable (green)
- Display video cable (blue)
- Touchpad cable (purple)
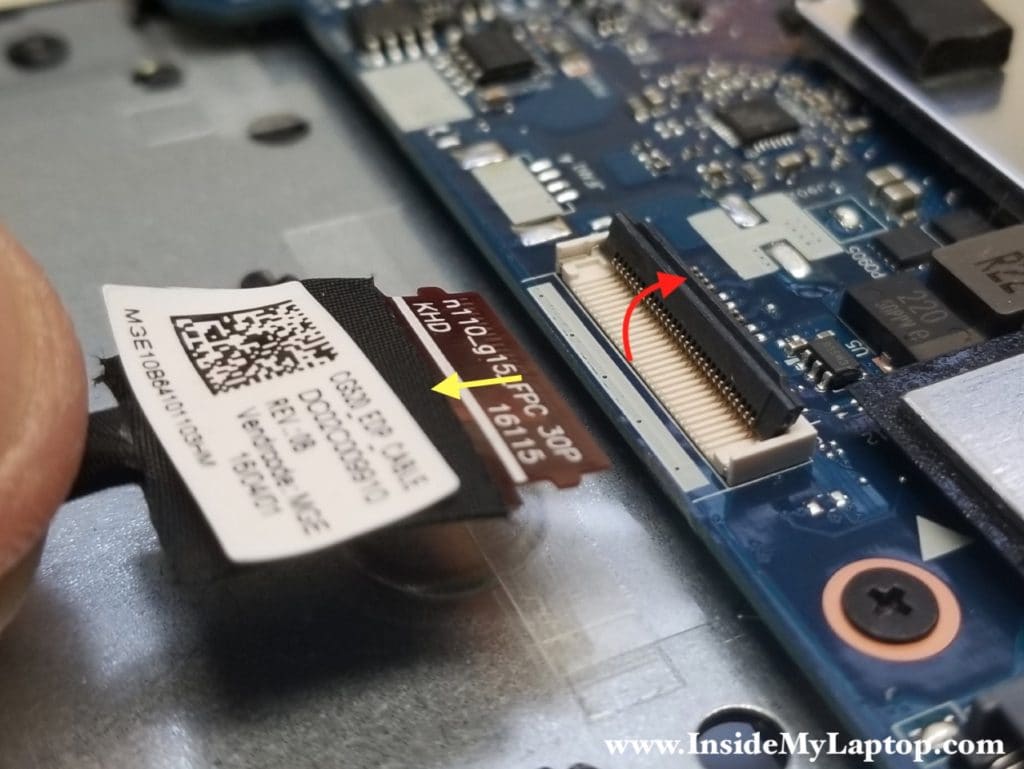
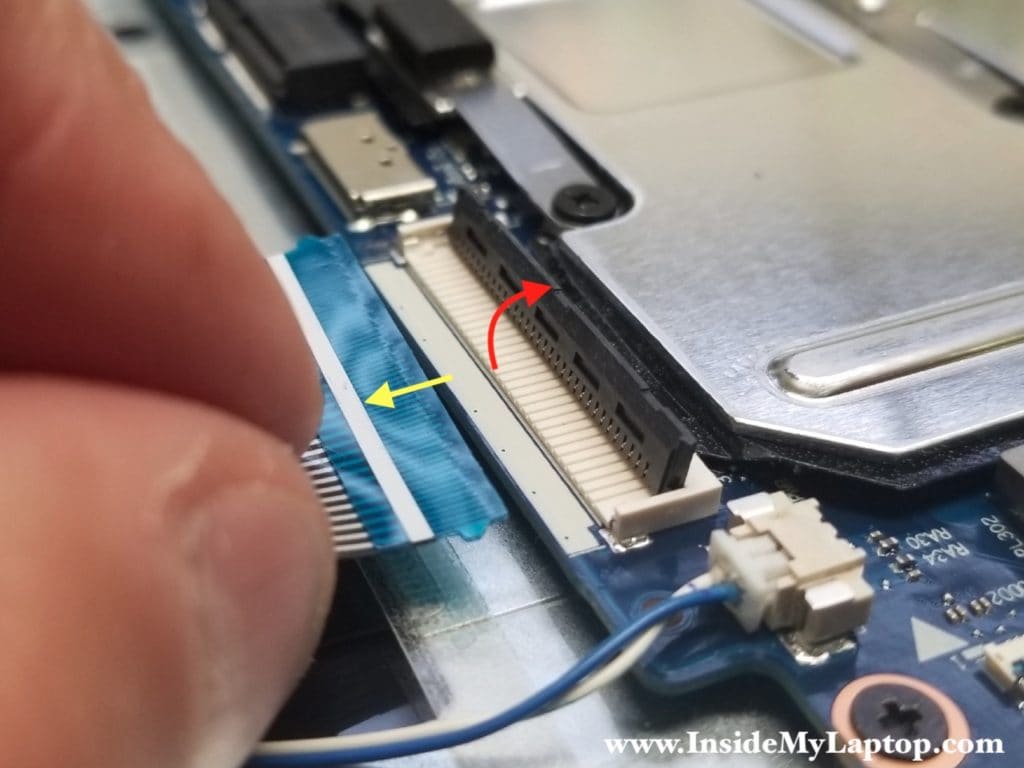
On the following two pictures I show how to disconnect the flat cables.
Unlock the connector by lifting up the locking tap. It opens up at a 90 degree angle. Pull the cable out of the connector.
The keyboard cable can be released the same way.
STEP 13.
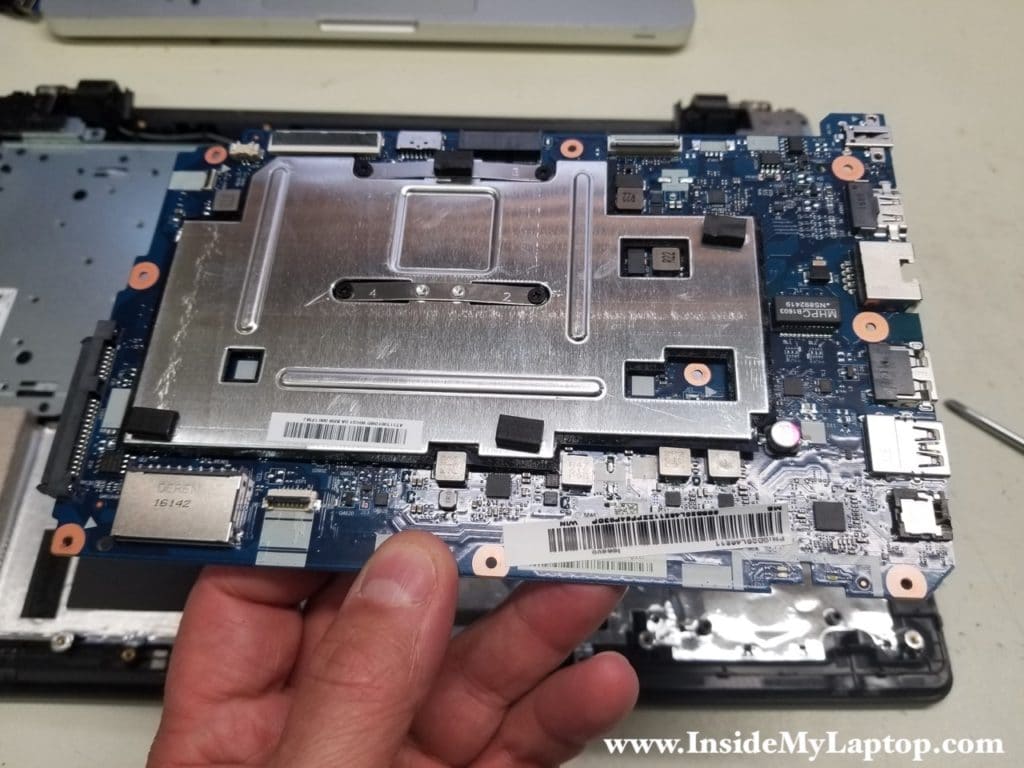
Remove the motherboard.
Motherboards for different Lenovo Ideapad 110 laptops look similar but they have different specs:
- 110-15IBR comes with a Celeron processor and RAM integrated into the motherboard. On this board RAM cannot be upgraded. This board has no cooling fan.
- 110-15ACL comes with an AMD processor and RAM slot. On this board RAM module is removable. This board comes with a removable heatsink and cooling fan.
STEP 14.
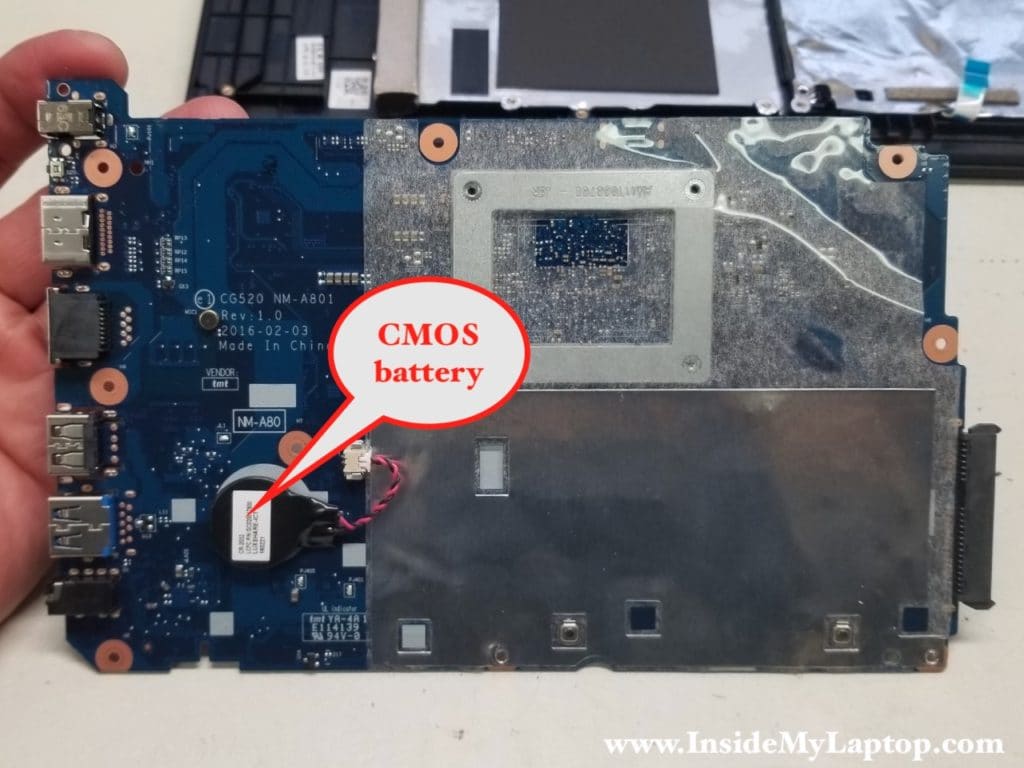
On the other side of the motherboard you can access the CMOS battery.
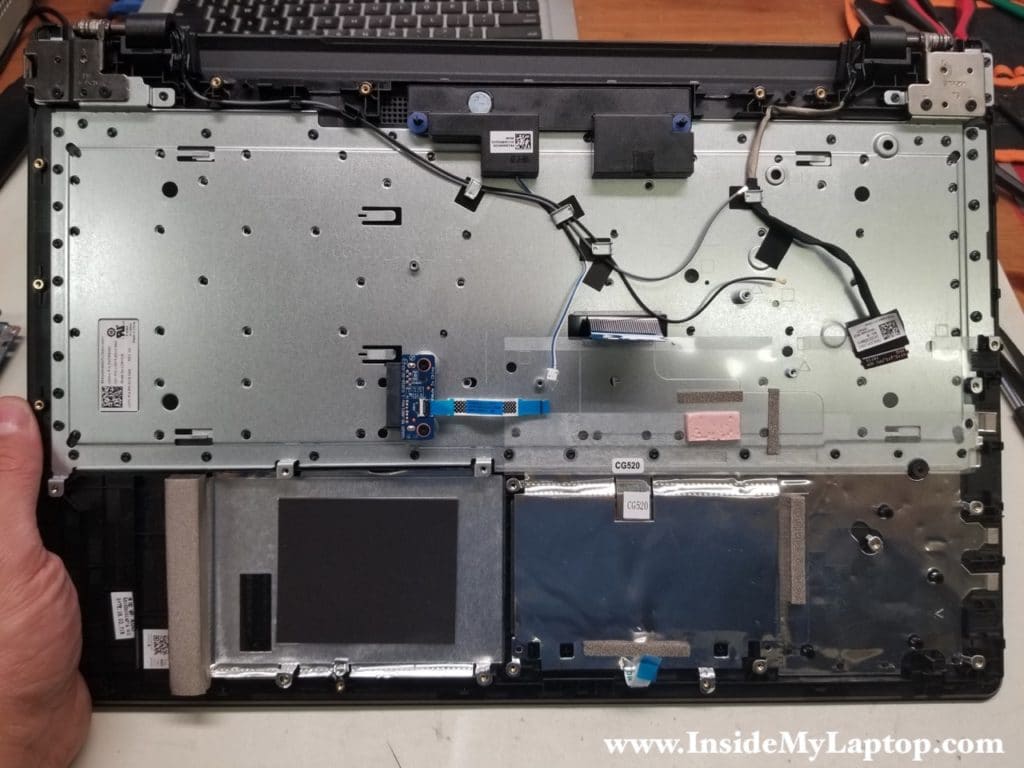
The keyboard on Lenovo Ideapad 110-15IBR and 110-15ACL models is not easily removable. It’s permanently riveted to the top case.
LCD screen removal instructions
STEP 15.
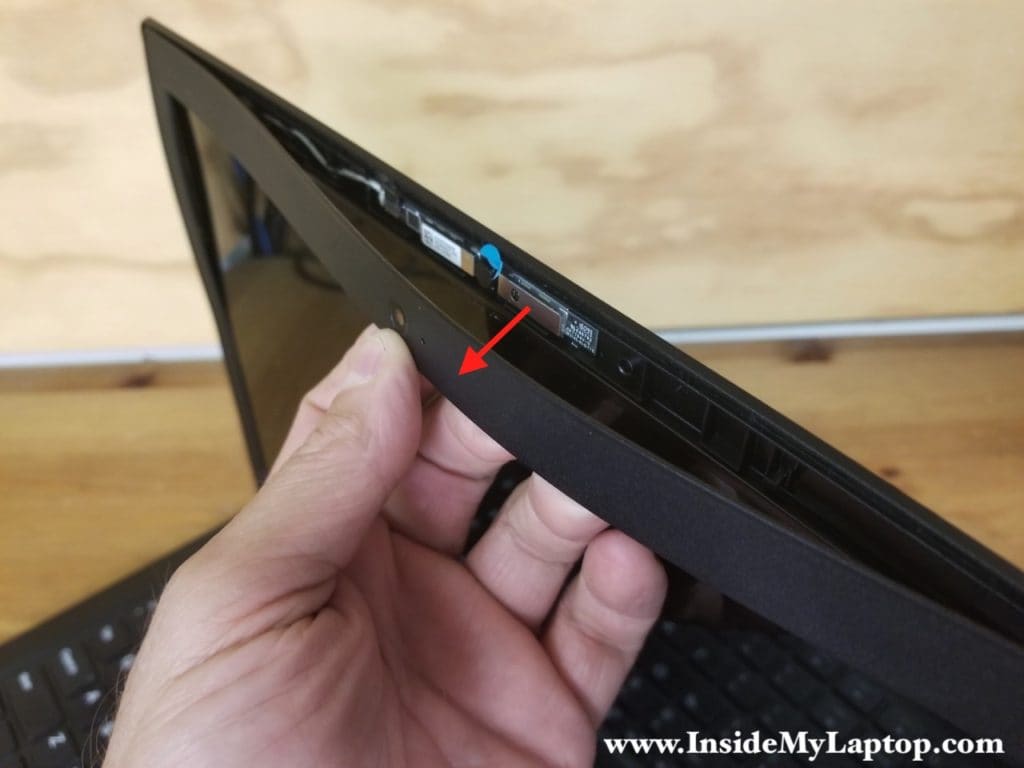
Start separating the display bezel on the top. Insert your fingers between the bezel and the screen and wiggle the bezel to unfasten it from the back cover.
STEP 16.
Continue removing the bezel.
STEP 17.
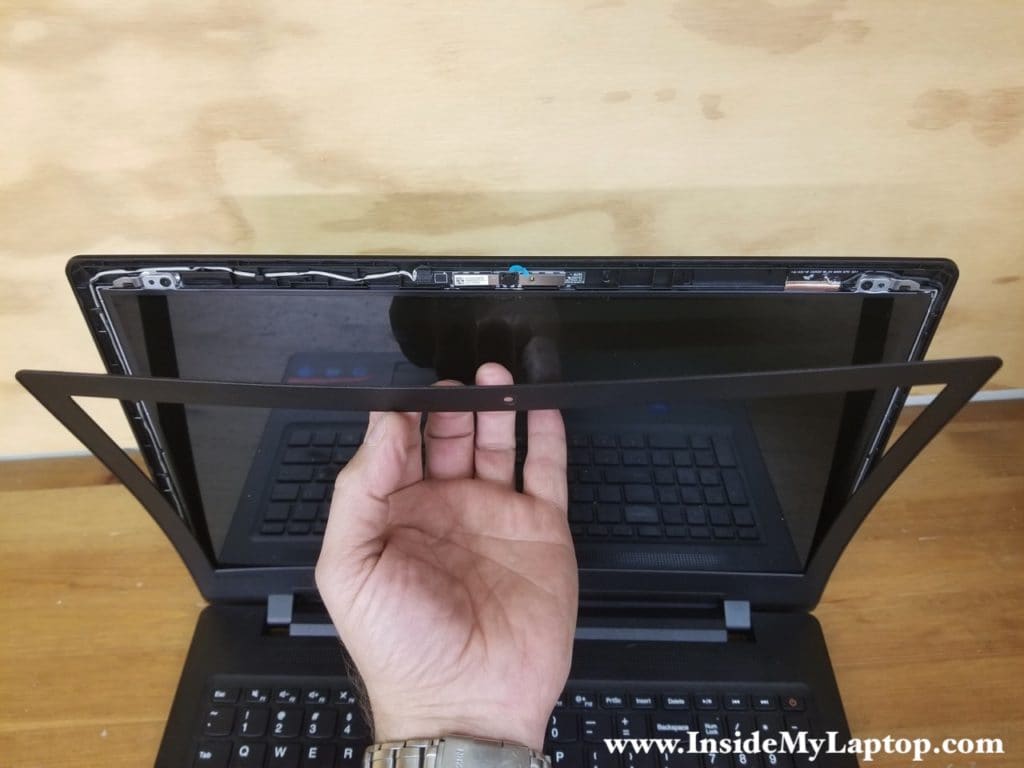
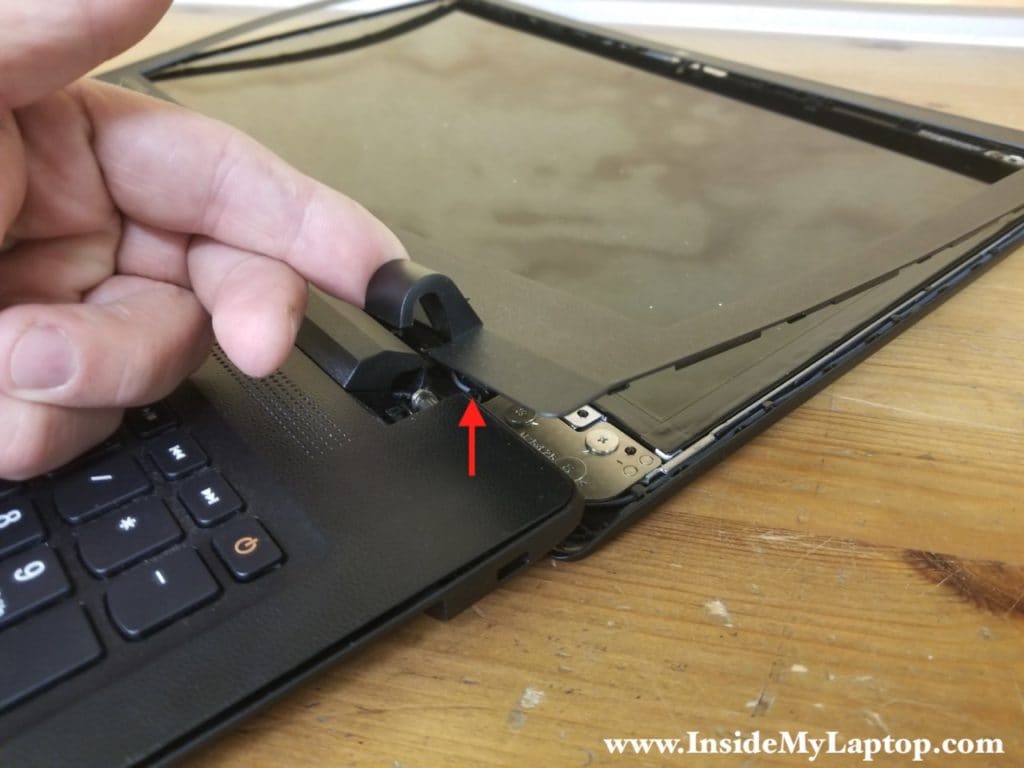
Open the display all the way back and separate the bezel from the hinges.
Remove the bezel.
STEP 18.
Remove four screws attaching the LCD screen to the back cover.
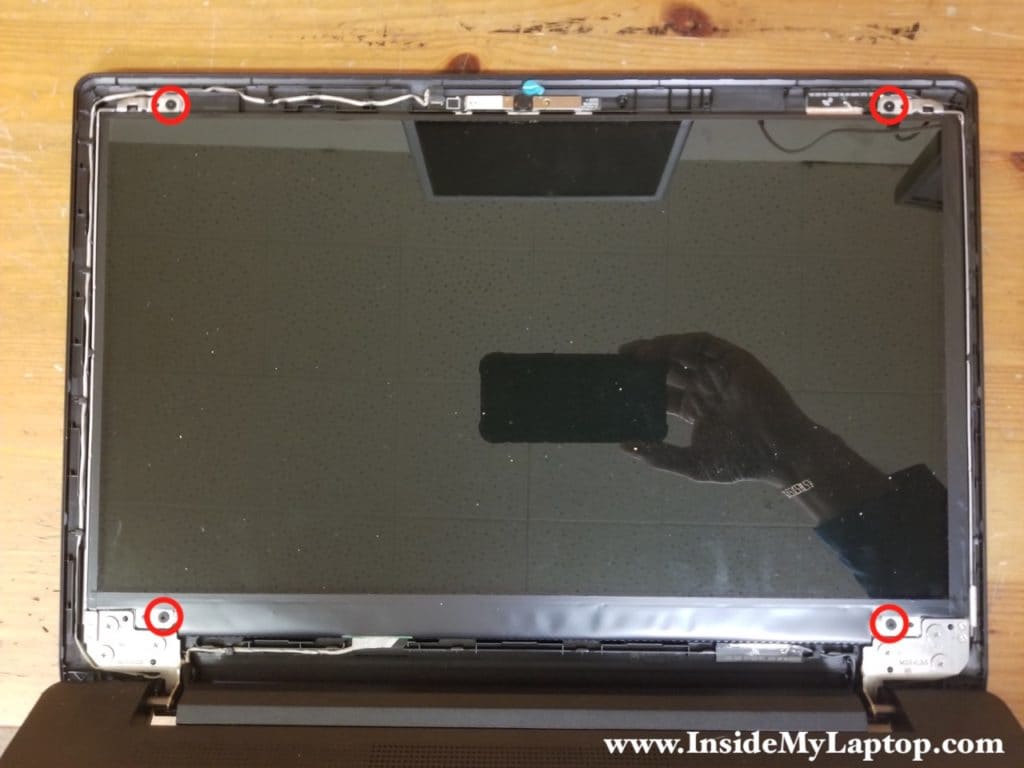
STEP 19.
Separate the LCD screen from the back cover and place it on the palmrest.
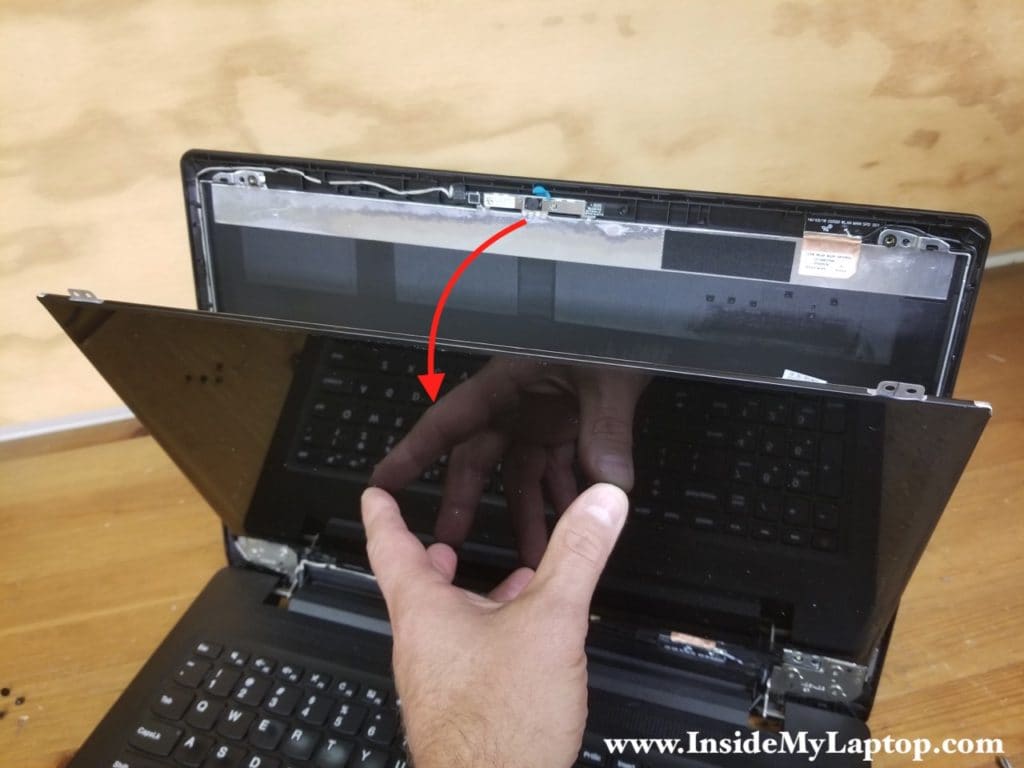
STEP 20.
Now you can access and disconnect the video cable.
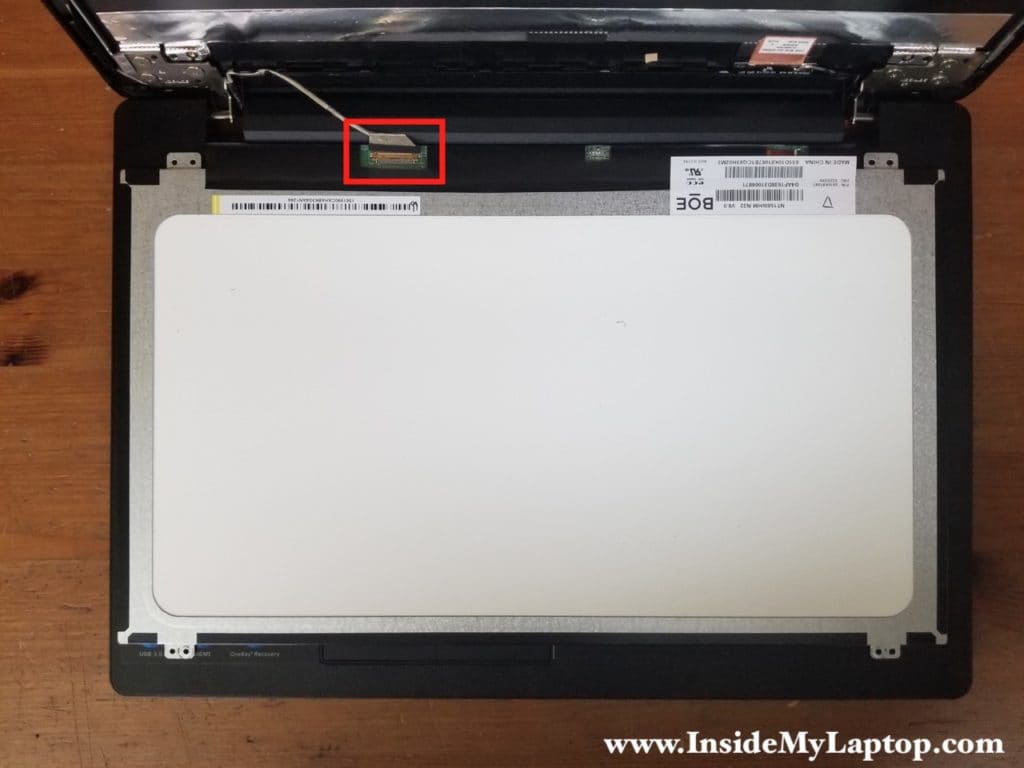
Peel off the clear tape securing the connection. Unplug the video cable from the LCD screen.
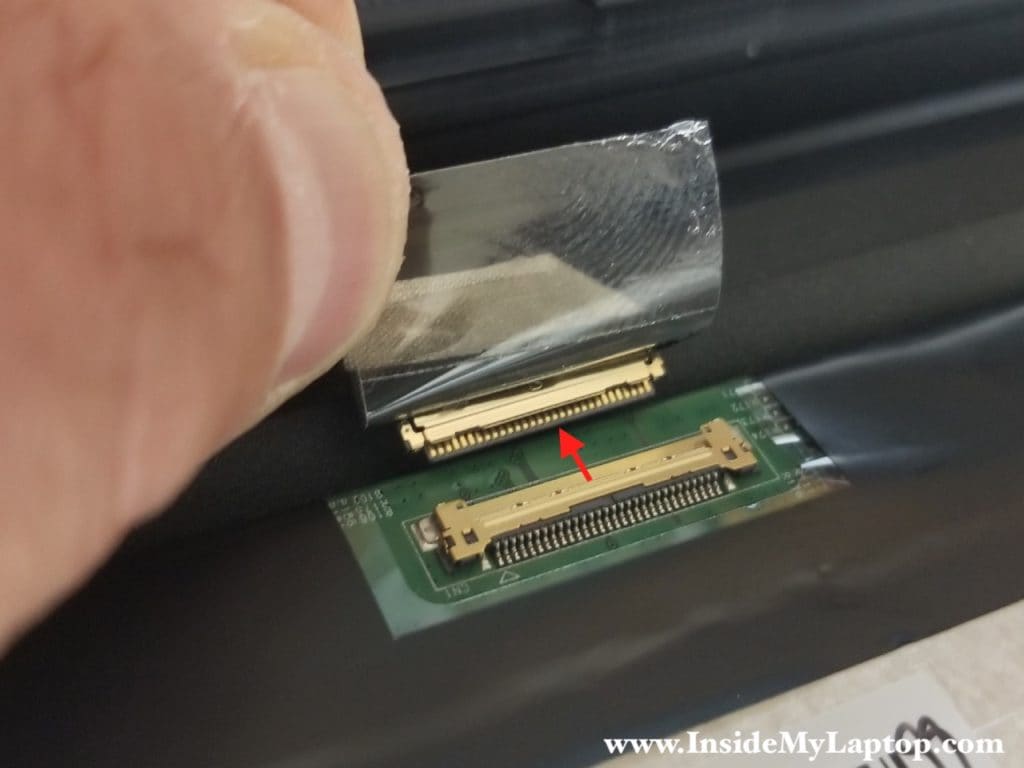
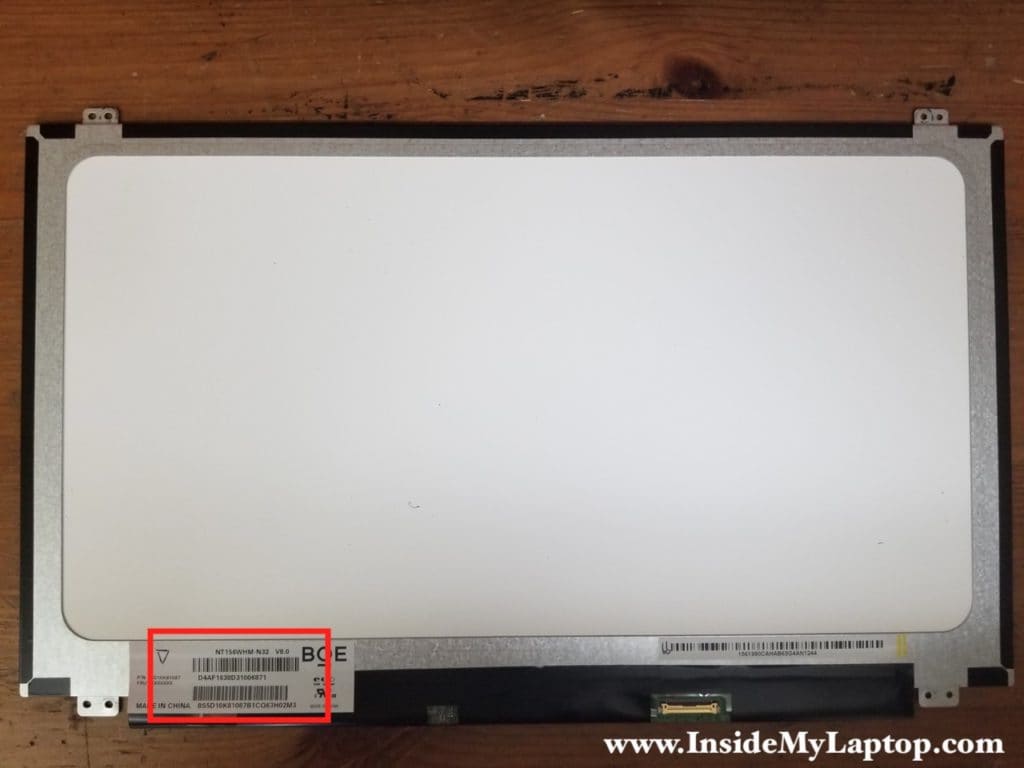
The LCD screen part number printed on the back. In my case the screen model: NT 156WHM-N32 v.8.0
lenovoLaptopOwner69
pls help i removed the screw holding the cd drive but i can’t pull it out. should i force it out hard to remove it?
IML Tech
Removing the optical drive shouldn’t be hard. There is only one screw securing the drive.
Marcial Ramos
What if it is the keyboard I want to remove since some of its keys are not responding and after a few software checks I can only conclude it is the hardware, it is only hold by a few extra screws and some easily removed plastic “rivets”, will removing these “rivets” compromise it being held in place after it is all assembled back
Steve North
I took apart my IDEAPAD 110-15ACL like you said. The problem was my laptop battery died and the computer was just over a year old. The laptop would not power up at all. I got the battery out. My only question is where can I get another CMOS battery?
IML Tech
@ Steve North, you can find a new CMOS battery on eBay. It’s available for $7+shipping. Just search eBay for “ideapad 110 CMOS battery”.
Mario D Petrella
??? Where is the RAM chip …??
IML Tech
In this laptop RAM chip integrated into the motherboard and cannot be removed or upgraded. There is no RAM slot.
Lehlohonolo
Why’s that when I connect the keyboard cable my laptop won’t switch on but shows an orange and white LEDs flashing then when I disconnect it then it then the laptop switches on
IML Tech
Lehlohonolo, it’s likely the keyboard is bad. Did you spill anything on the keyboard in the past?
Make sure the keyboard properly connected to the motherboard and the cable is seated all the way in. Take a look at the connectors on the keyboard cable. If pins appear to be dirty, try cleaning them with a pen eraser.
Dillon Ashmore
what size screws are the ones keeping the external back panel on ?
IML Tech
Dillon, at the end of my guide I just added a link to the Lenovo ideapad 110-14 15 Series Hardware Maintenance Manual. You can find a list of all screws in there.
Fiko
How can I reset the bios password for 110-15IBR
IML Tech
Fiko, I’m not sure if this will work but you can try disconnecting the CMOS battery from the motherboard. The CMOS battery shown in the step 14.
Kn0
Quite late, but my Ideapad110-15IBR powers up for less than 10 seconds. Both power and charging LEDs working but power is cut within seconds, with no apparent life from display. Not even the Novo button works. Can’t isolate the problem. Is it a short? Is it cooling? Or even the display? Please help.
IML Tech
This is not cooling related issue. 10 seconds is not enough for a laptop to overheat.
I really doubt this is the display issue. With a bad display the laptop has no video but it should stay powered on.
Most likely the motherboard failed.
You can find a replacement motherboard here: https://ebay.to/2u1UJAY
NAGENDRA KUMAR
my lenovo ideapad 110-15IBR BATTERY IS 100% FULL CHARGED , BUT LAPTOP WONT SWITCH ON WITHOUT AC CHARGER , ONCE SYSTEM IS SWITCHED ON IT WORKS FOR 4 HOUR EVEN CHARGER IS REMOVED
Mercy Zuze
I have a question please kindly help, my 110-15IBR display screen is remaining black but its showing a power supply and ON lights ,,what could be the problem ..and also how can i update my BIOS from an external hard drive for this laptop
IML Tech
Disconnect the display cable from the motherboard as it shown in the step 12. After that test the laptop with external monitor connected to the HDMI port. If there is no video on the external monitor, most likely you have a problem with the motherboard. If external monitor works fine, it’s likely you have bad laptop screen.
You cannot upgrade BIOS until you can start the laptop with video.
Paul Procter
great procedure and photos. My problem is, Open the lid , everything works fine as long as you don’t move the lid. Tilt the lid backwards, and the screen goes black. Close the lid, and open again, screen display comes back immediately. No problem if you close the the lid slightly, just if you tilt it back. Is this just what you call the video cable? Are there any other parts which may be faulty.
IML Tech
Hard to tell. When you move the display, you flex the laptop base (and motherboard). This could be faulty motherboard too.
Here’s what you can try. Test your laptop with external monitor. While the external monitor connected and working, try moving the laptop display, flex the base. If video disappears on both, internal and external screens, you have a problem with the motherboard.
If external monitor works fine and video disappears just on the internal screen, most likely you have a faulty display cable or failing LCD screen.
Chamikara
Please help me to find bios password reset pins. Where is it?