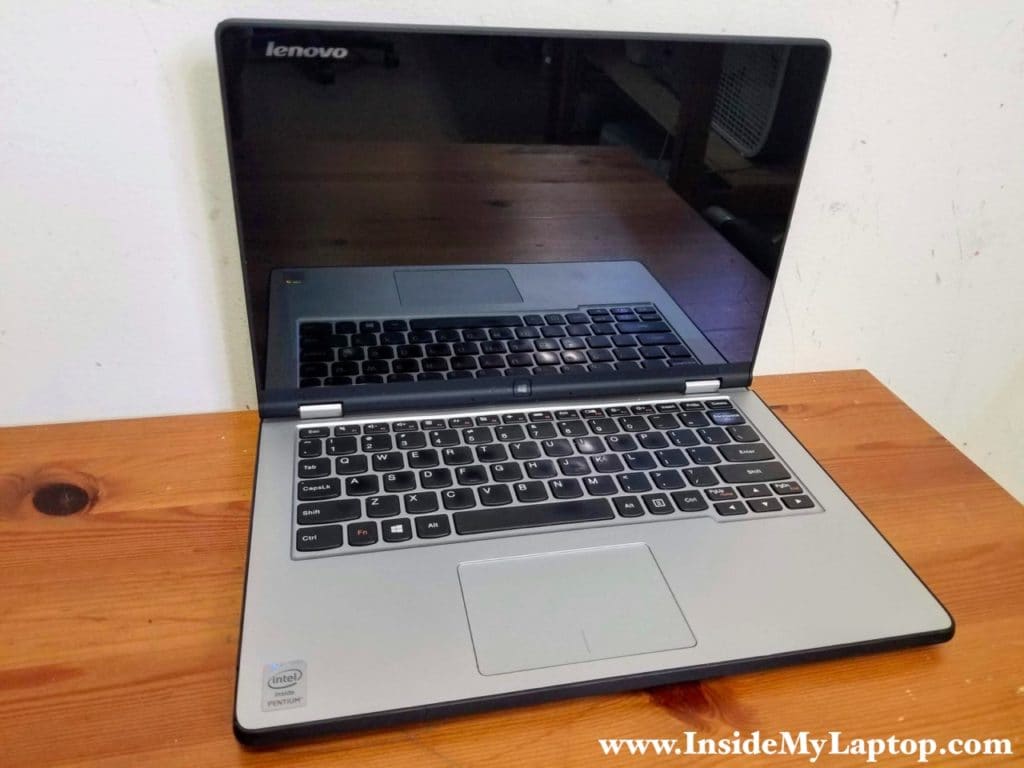
Today I will be taking apart a Lenovo Yoga 2 11 model 20332 laptop.
I will show how to remove all major laptop components and separate the display panel from the base assembly.
For the display panel disassembly and LCD screen removal please check out my next guide. You will find a link at the end of this tutorial.
STEP 1.
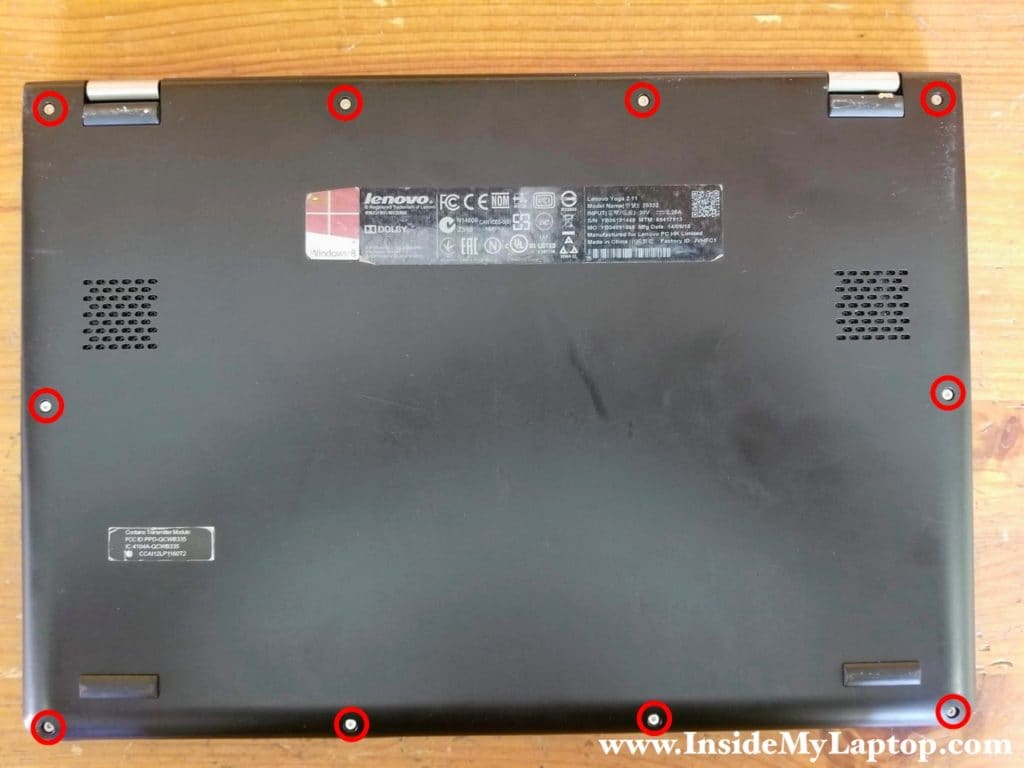
Remove ten Torx5 screw from the base cover.
STEP 2.
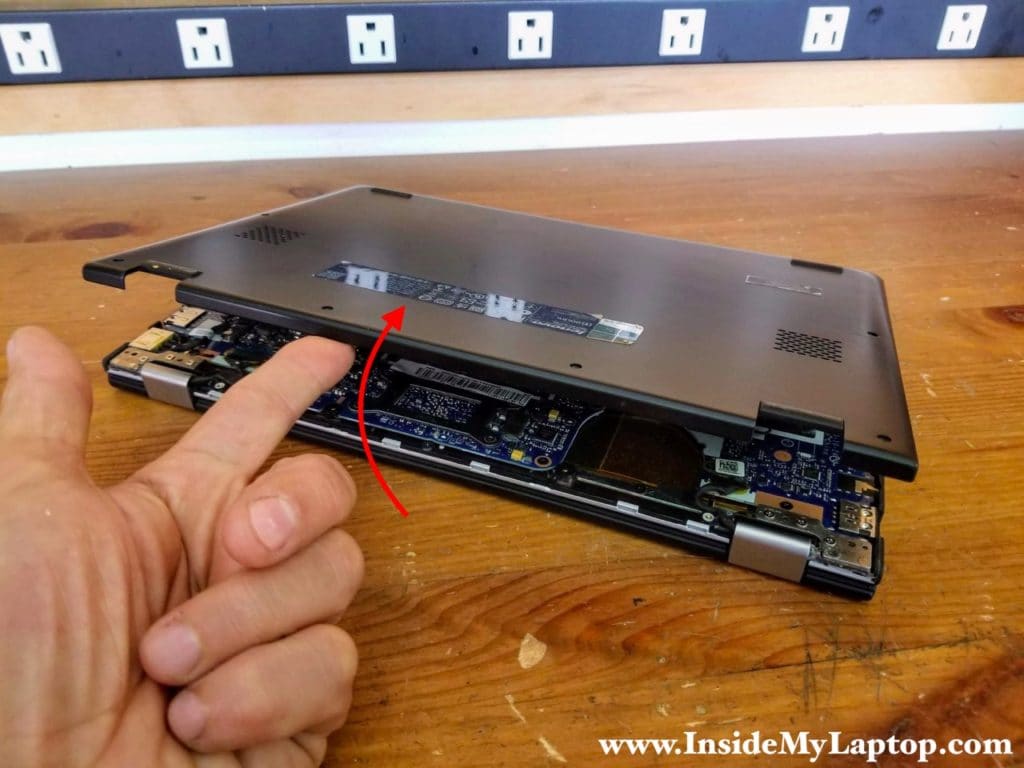
Start removing the base cover from the back side of the laptop.
Remove the cover.
STEP 3.
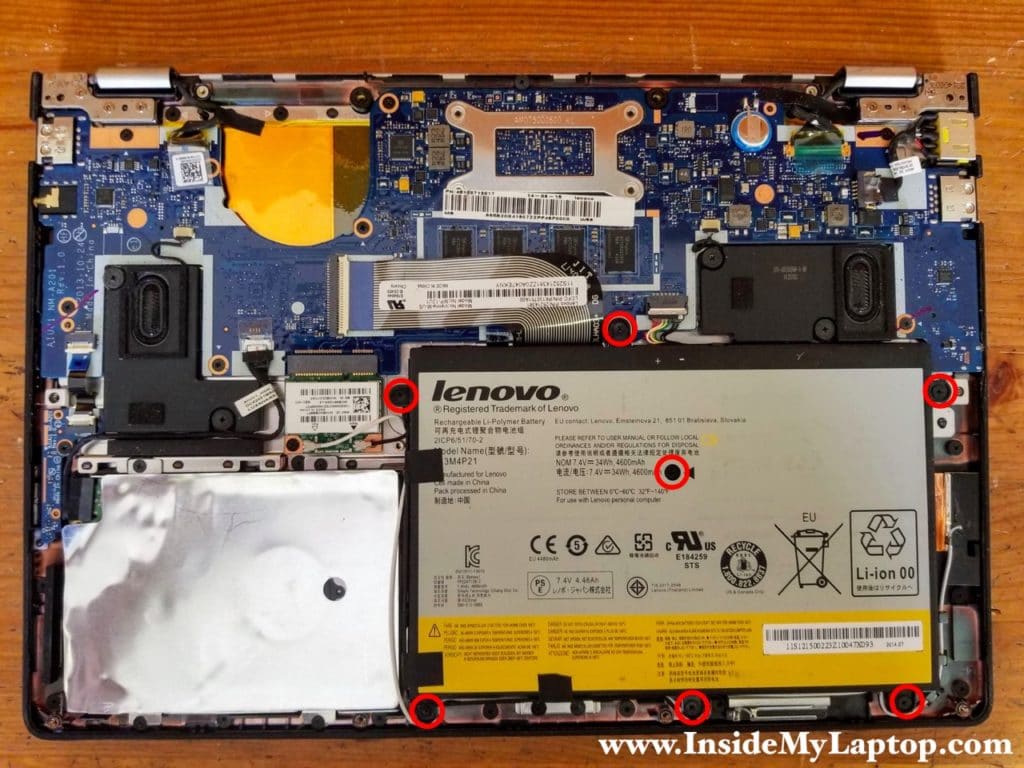
Remove all screws securing the laptop battery. Don’t forget one screw in the middle of the battery. It’s easy to overlook this screw.
STEP 4.
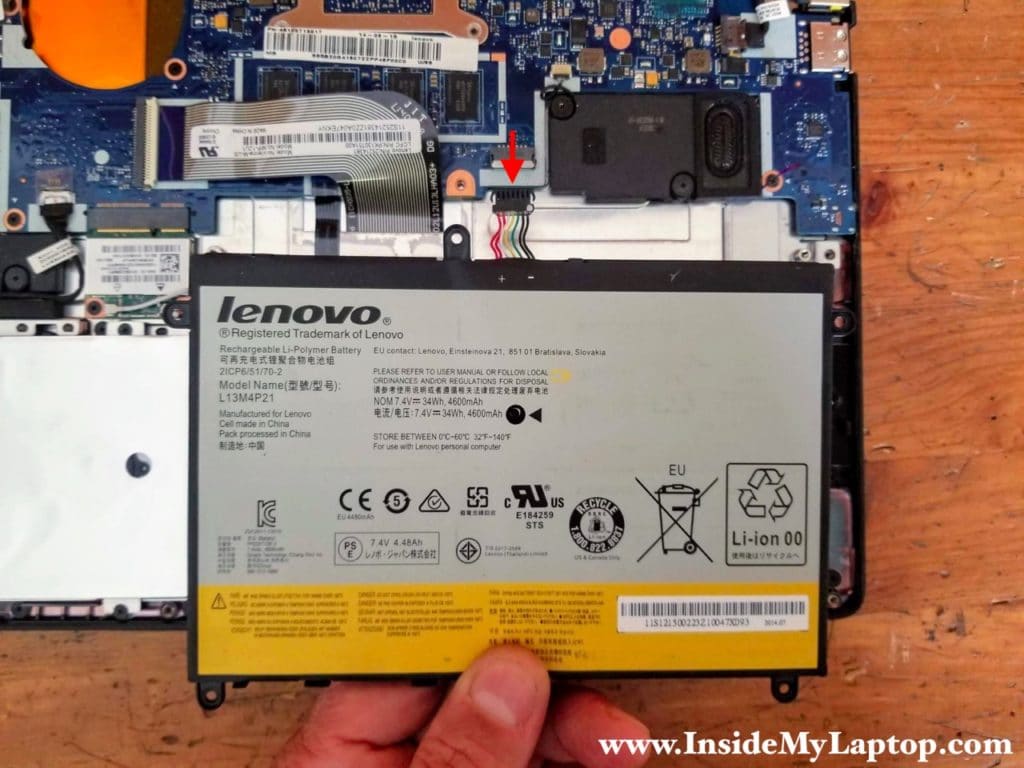
Lift up the battery and disconnect the battery cable from the motherboard.
The wireless card cables are taped to the left side of the battery. It’s necessary to separate the cables before removing the battery.
Lenovo Yoga 2 11 battery model: L13M4P21.
STEP 5.
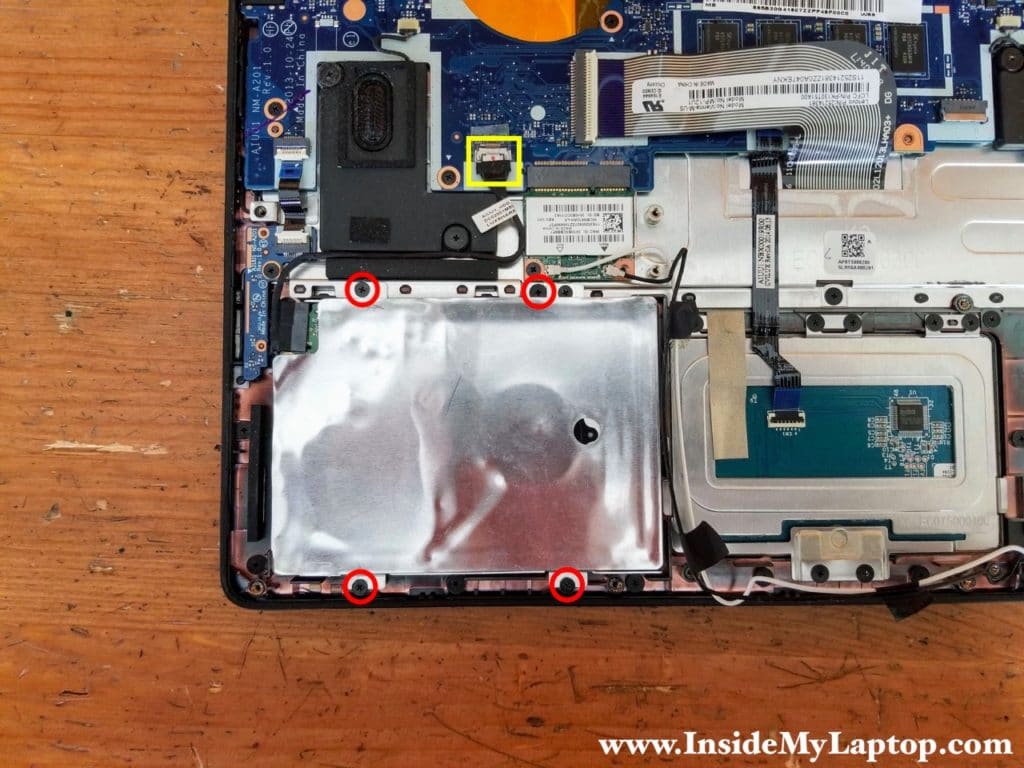
Remove four screws attaching the hard drive assembly to the frame.
Disconnect the hard drive cable from the motherboard.
STEP 6.
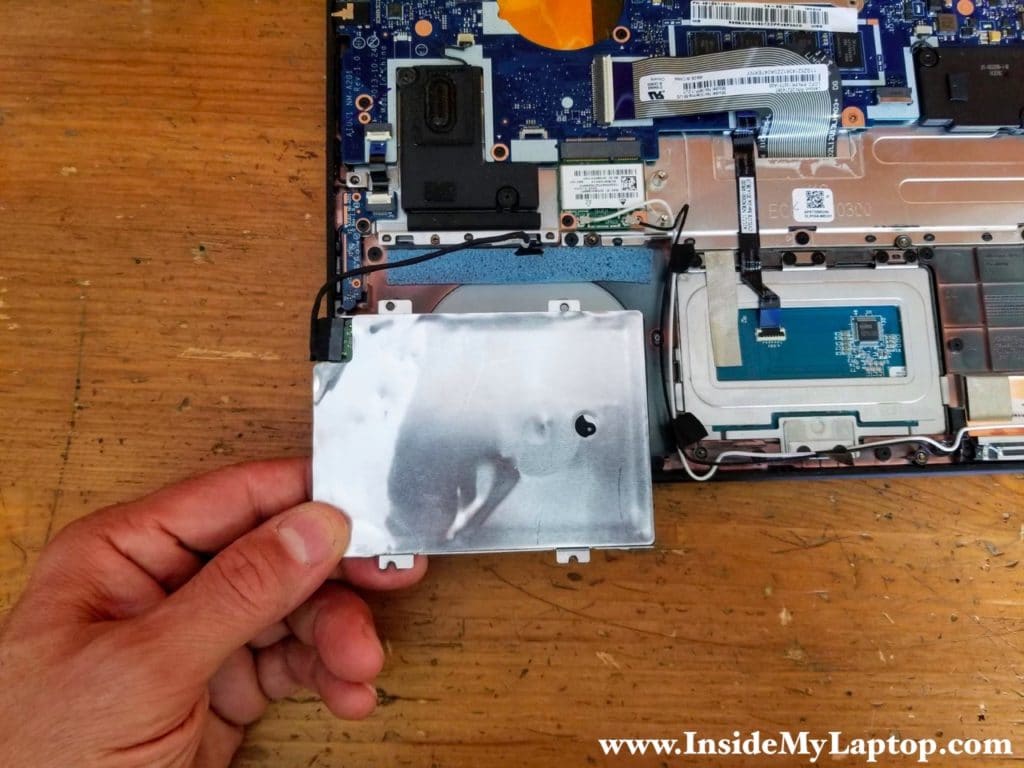
Remove the hard drive assembly. Replacing regular hard drive with a 2.5″ solid state drive will improve laptop performance significantly.
STEP 7.
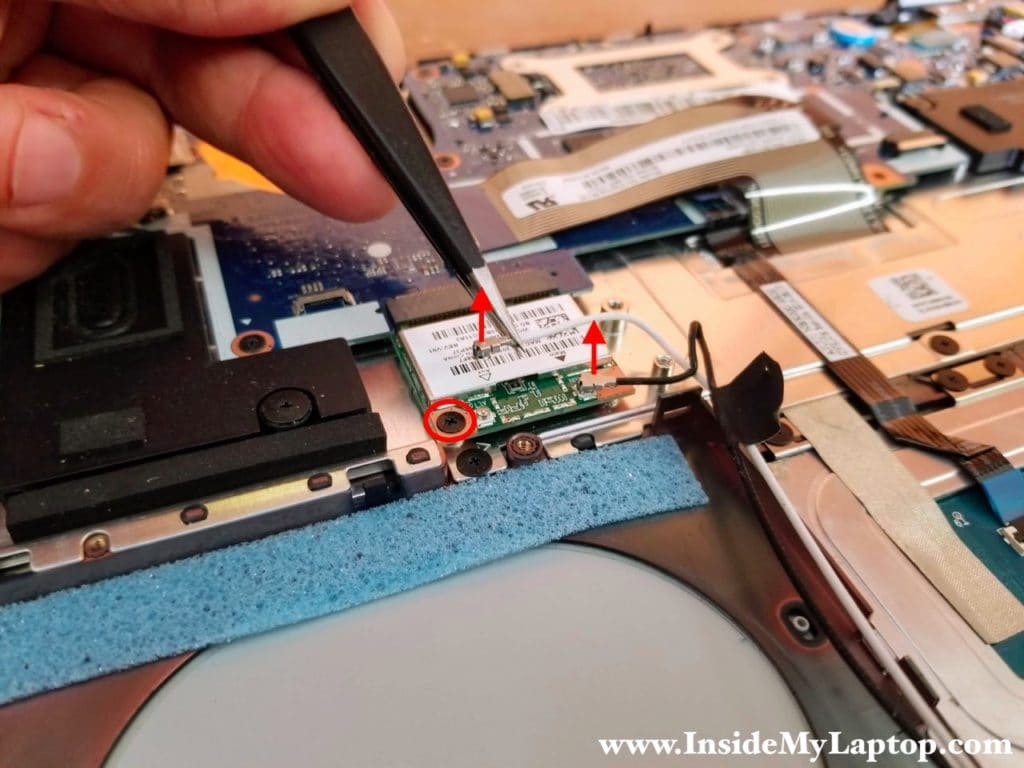
Disconnect two antenna cables (black and white wires) from the wireless card.
Remove one screw securing the wireless card.
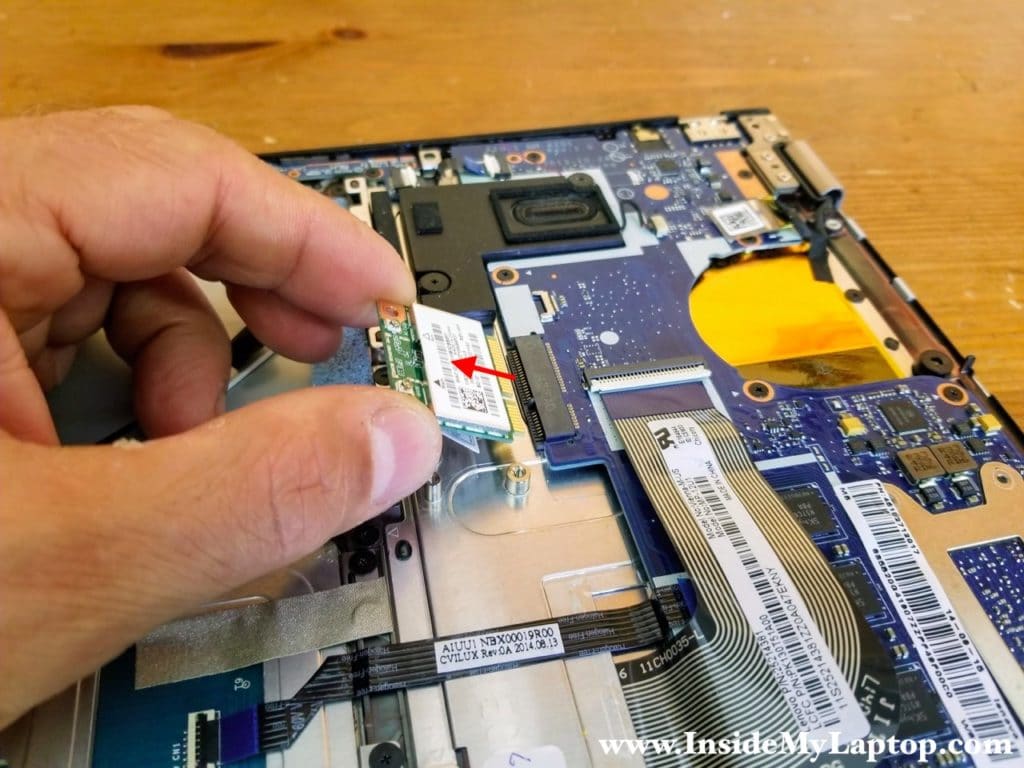
STEP 8.
Pull the wireless card out.
STEP 9.
Remove one screw securing the power button board.
Disconnect the power button board cable from the motherboard.
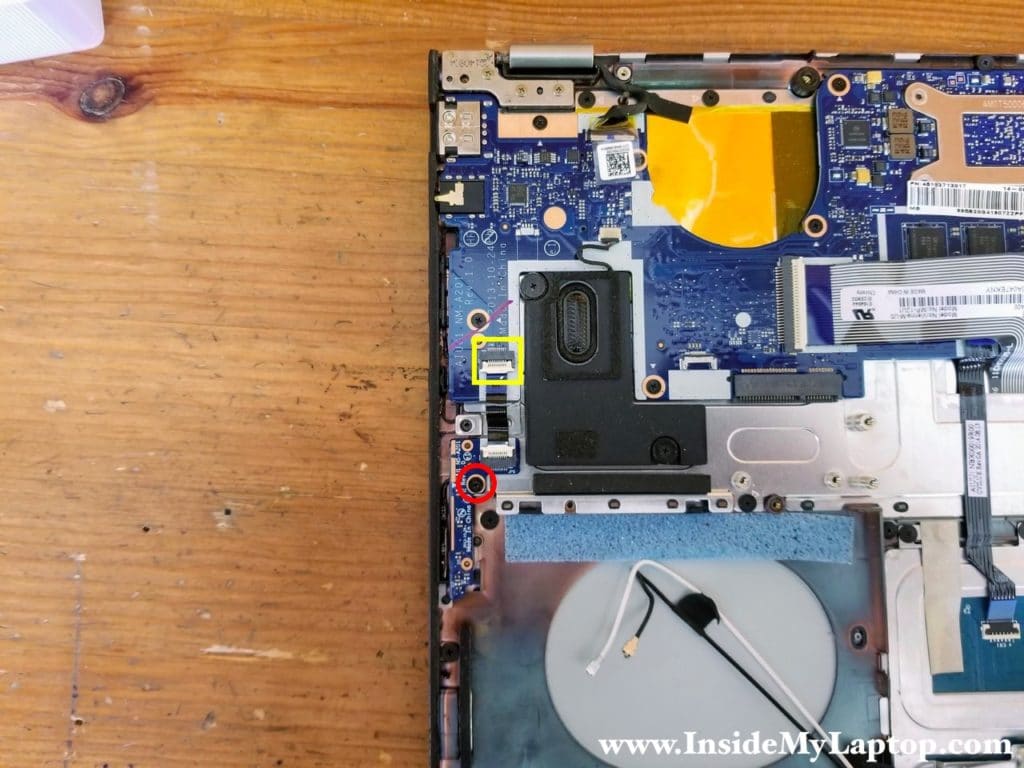
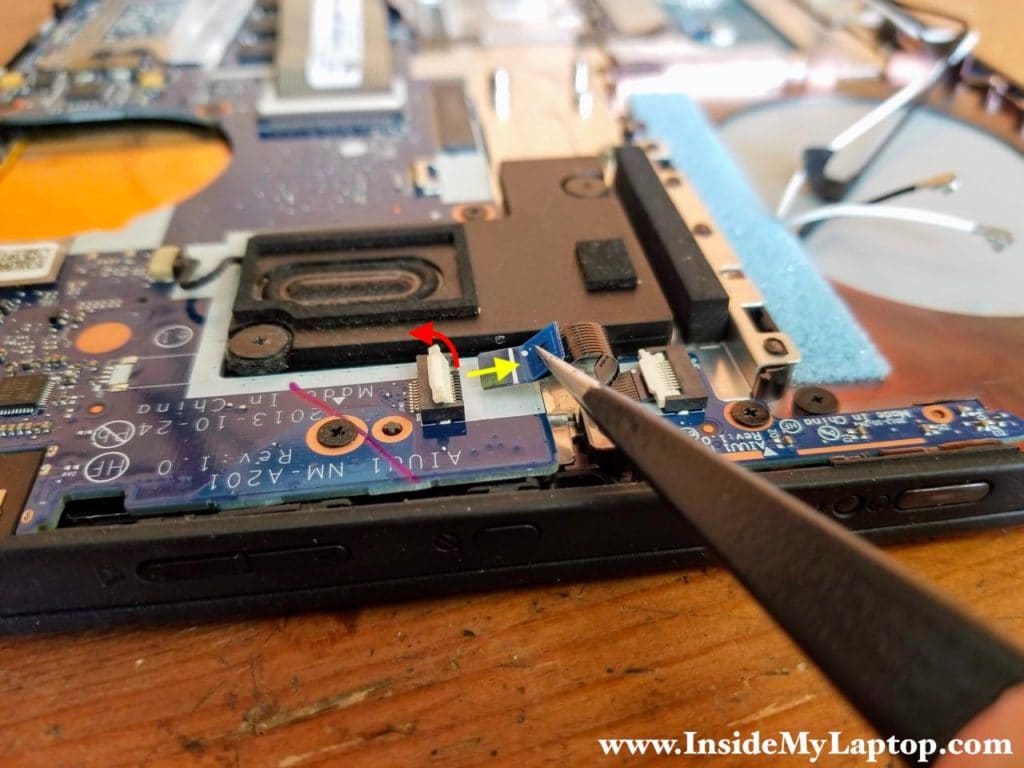
Here’s how to release the cable:
1. Unlock the connector by lifting up the white locking tab (red arrow).
2. Pull the cable out (yellow arrow).
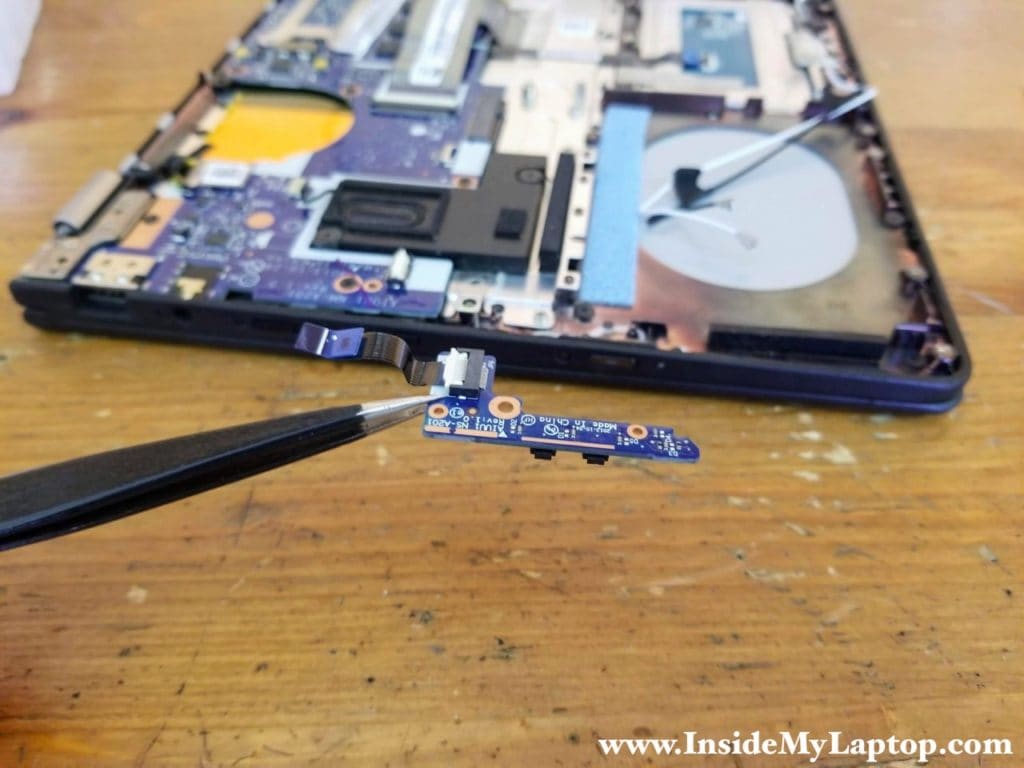
STEP 10.
Remove the power button board.
STEP 11.
Disconnect the webcam cable (color-coded in yellow) and the display video cable (color-coded in orange).
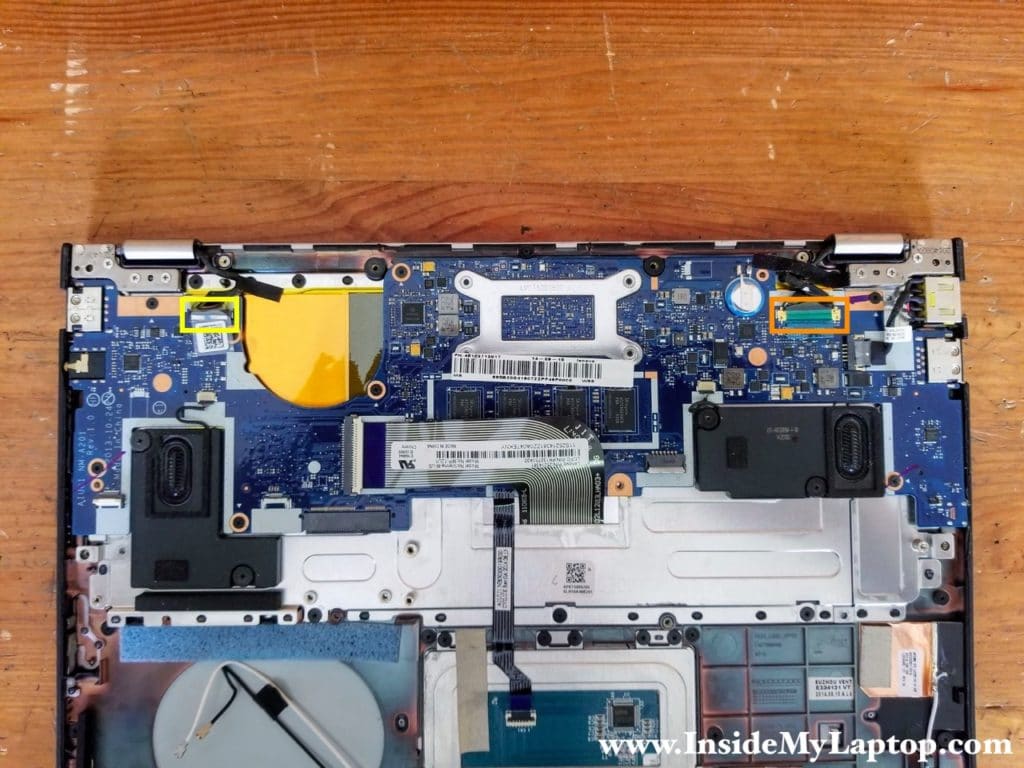
In order to disconnect the webcam cable it is necessary to remove sticky tape securing the connection. After that pull the cable connector up to unplug it from the motherboard.
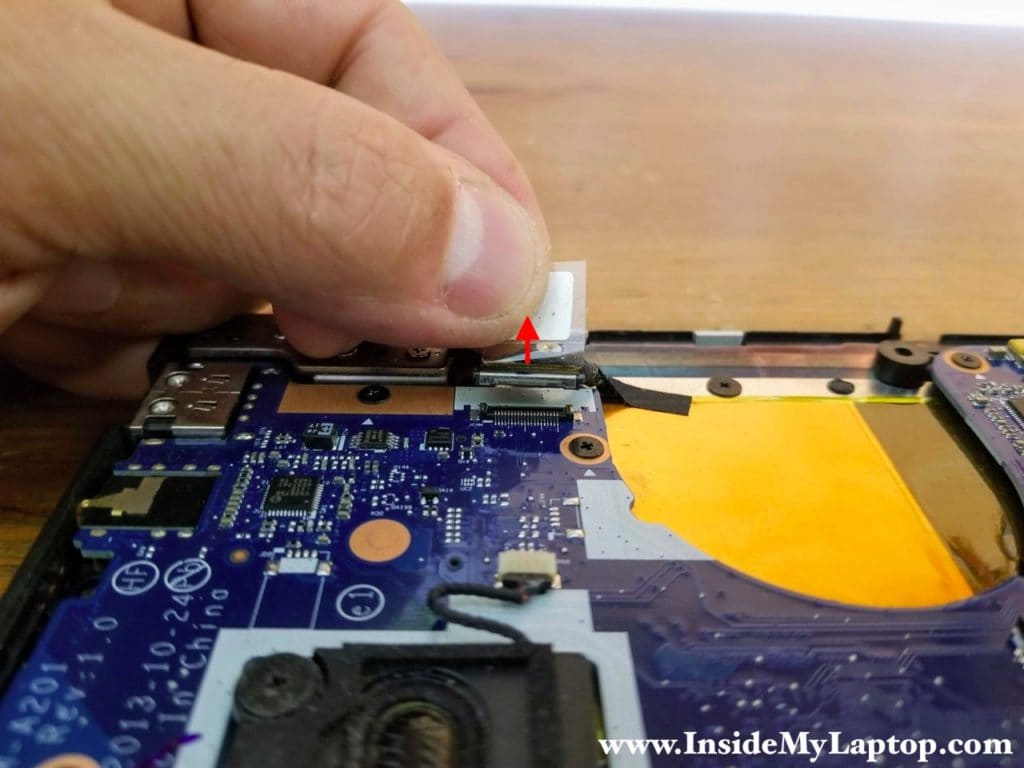
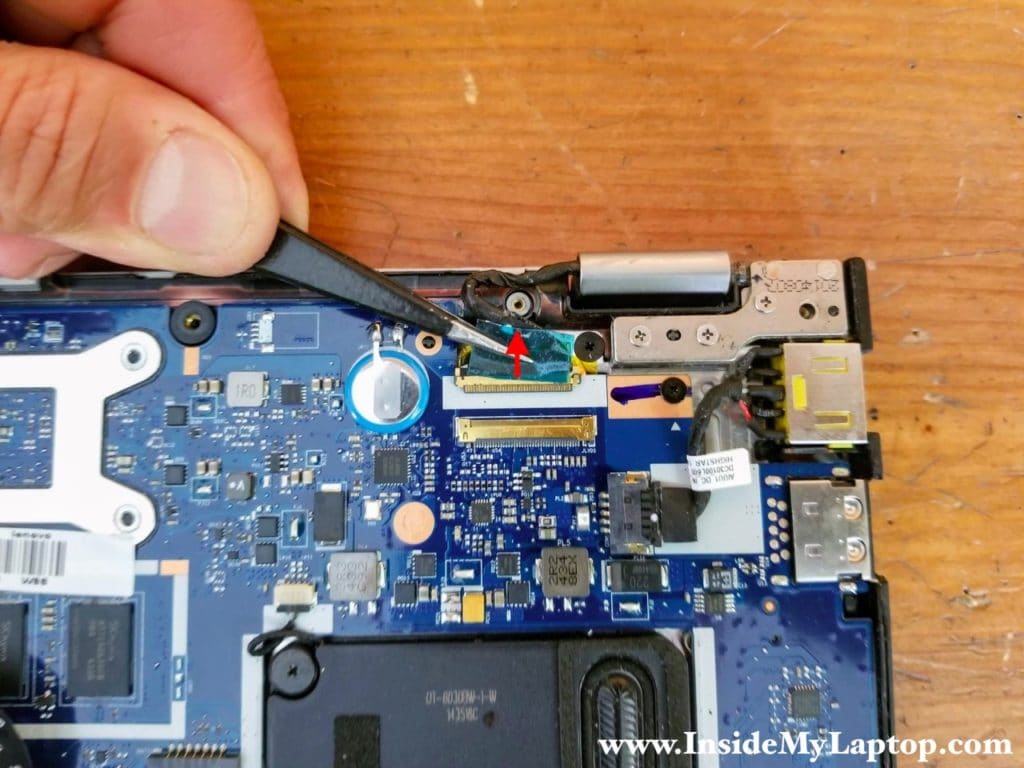
The display video cable shown on the following picture.
Remove sticky tape securing the connection and pull the video cable out.
STEP 12.
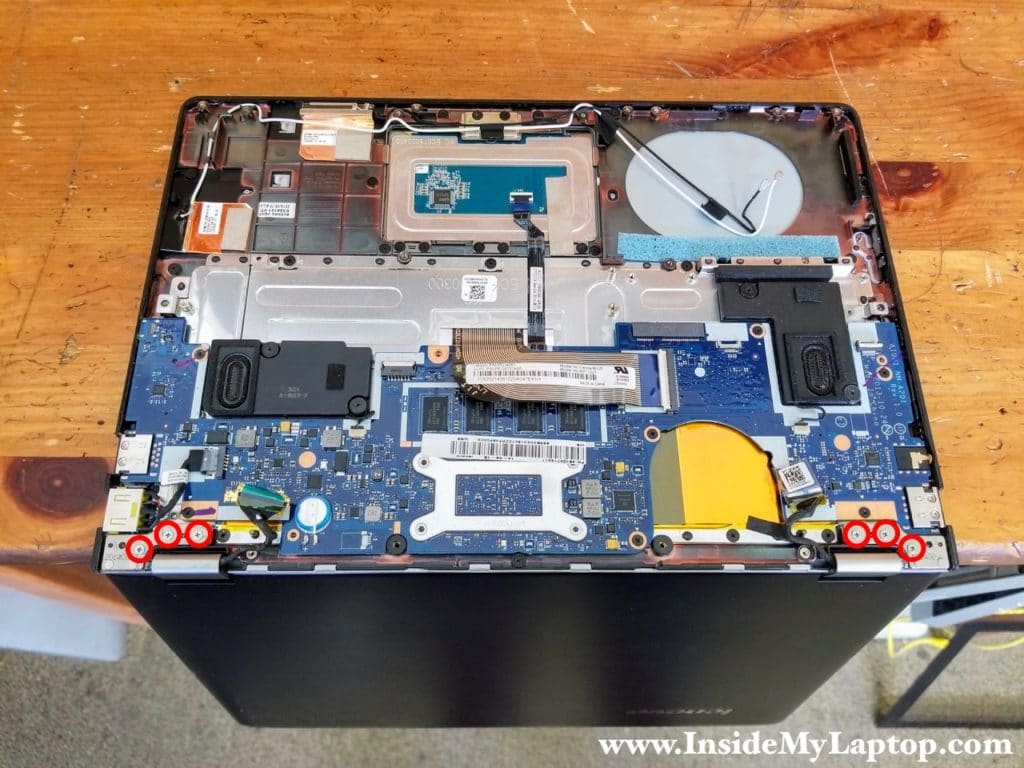
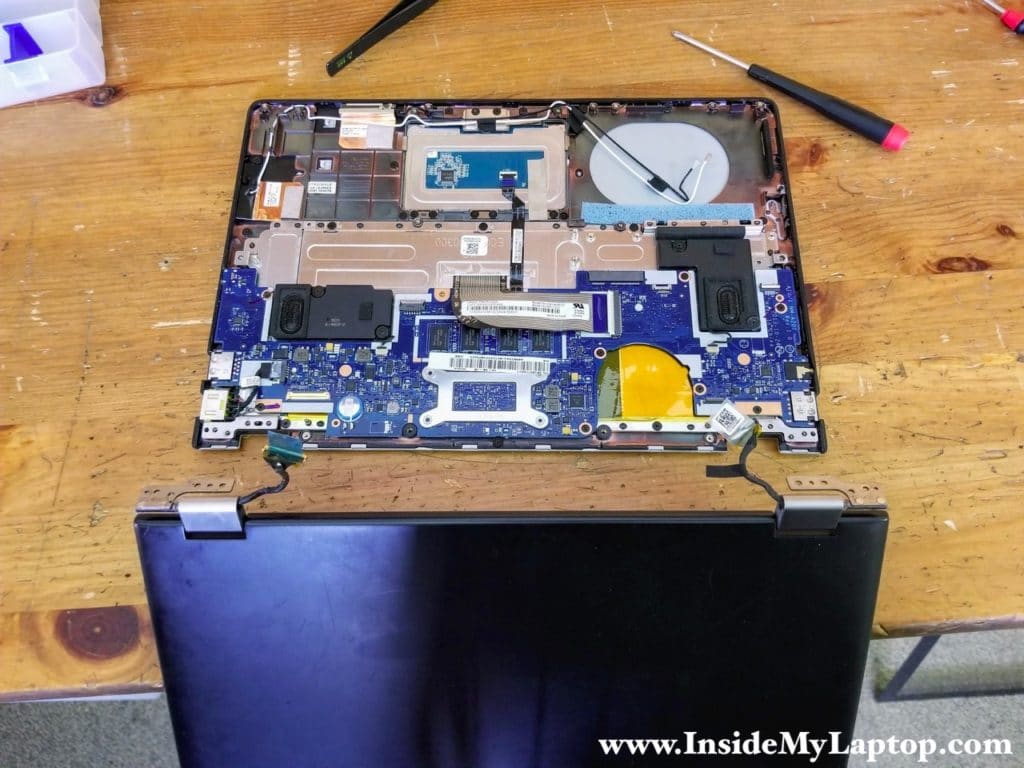
Place the laptop upside down with the display opened on the side of your desk.
Remove six screws securing the left and right display hinges to the top case.
STEP 13.
Separate the display panel from the top case assembly.
As I mentioned earlier, I’ll be removing the LCD screen in my next tutorial (link at the end of this post).
STEP 14.
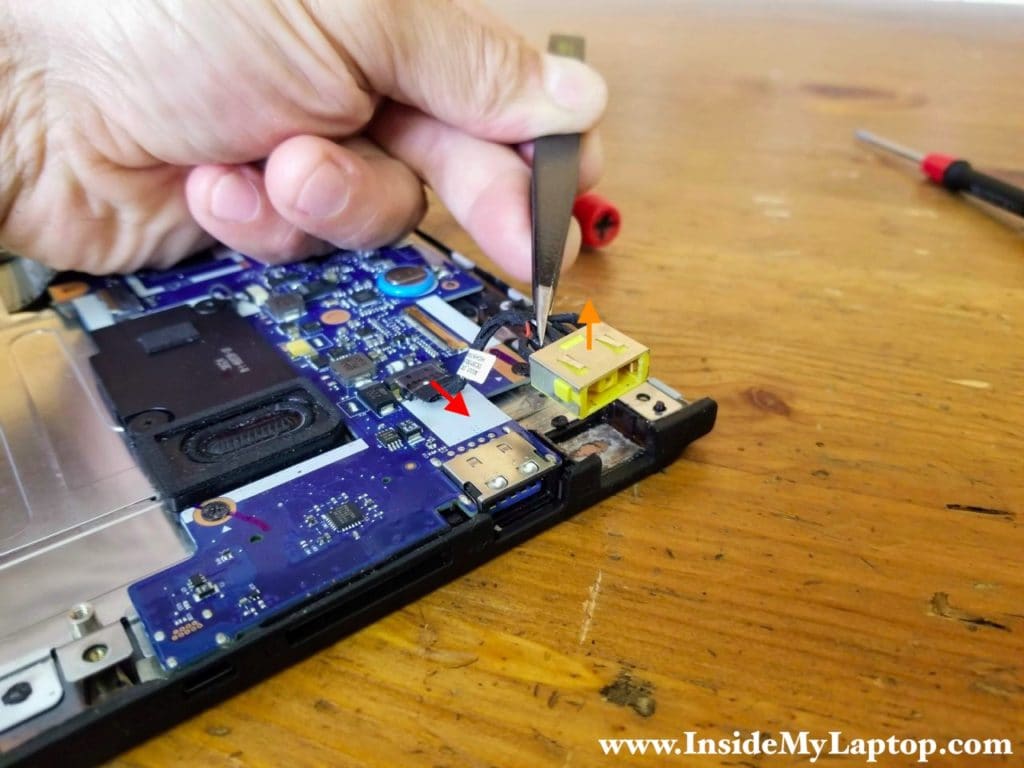
Lift up the DC power jack. It’s necessary to apply some reasonable force to separate the DC jack from the top case because it’s secured by adhesive tape.
Unplug the DC power jack cable from the motherboard (red arrow) and remove it.
STEP 15.
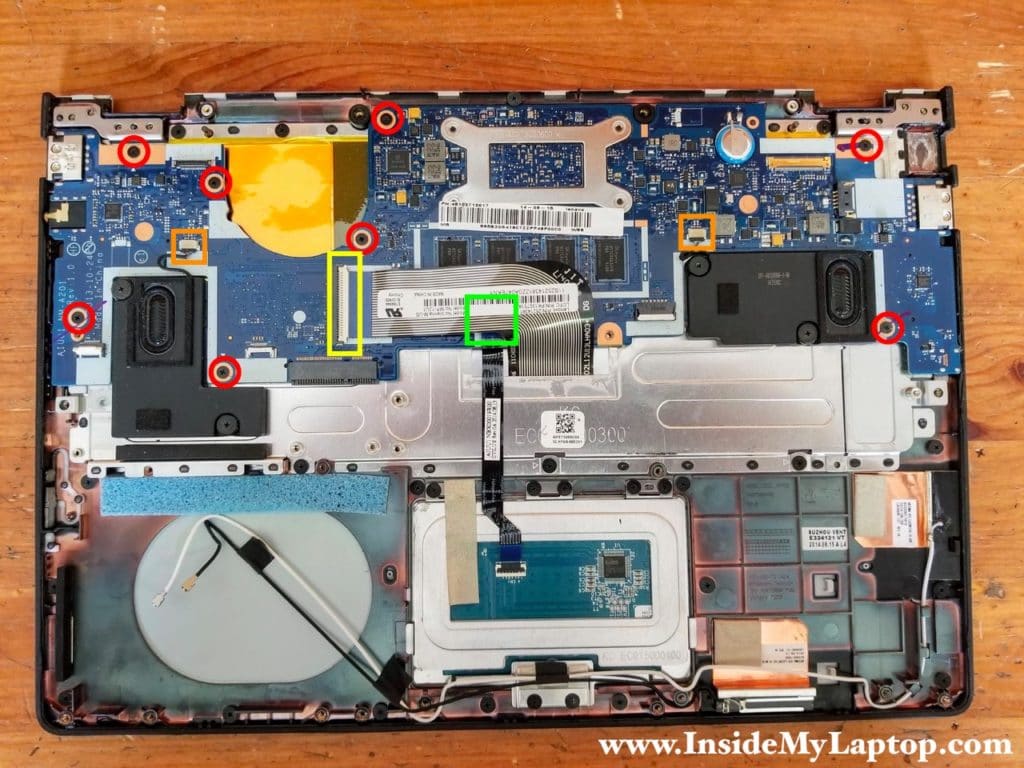
Remove eight screws securing the motherboard.
Disconnect the following color-coded cables:
– Left and right speakers cables (orange).
– Keyboard cable (yellow).
– Touchpad cable (green). The touchpad cable connector located under the keyboard cable.
STEP 16.
Remove the motherboard.
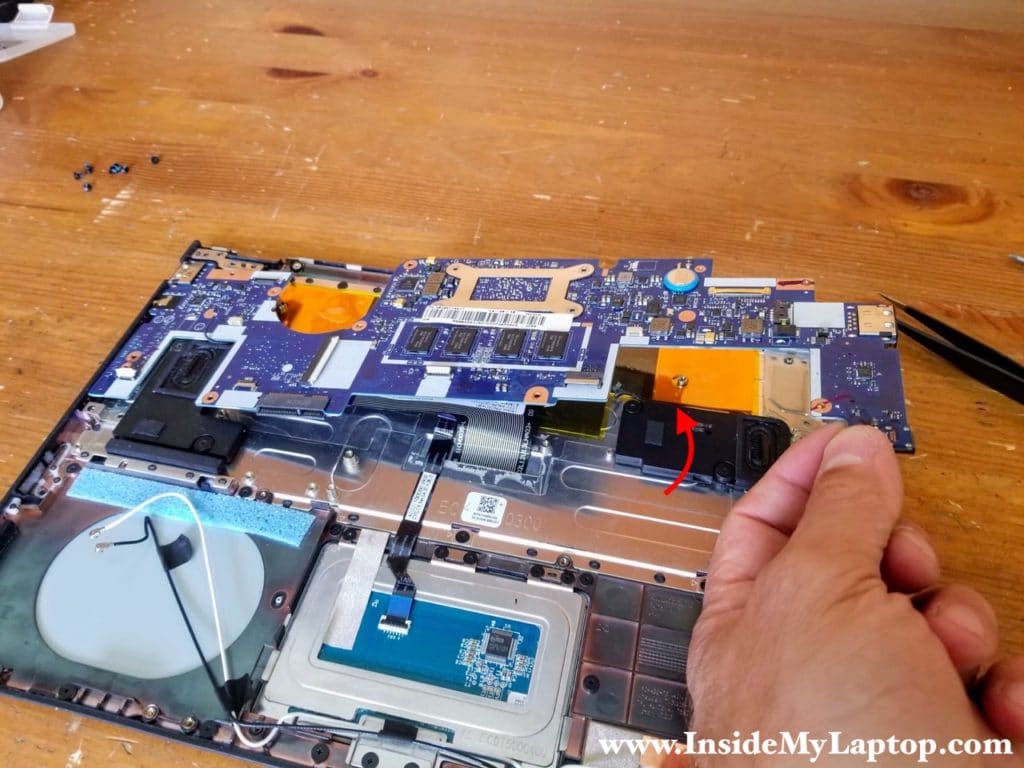
Lenovo Yoga 2 11 motherboard has memory chips built-in. Memory cannot be removed and replaced. If memory failed it’s necessary to replace the motherboard.
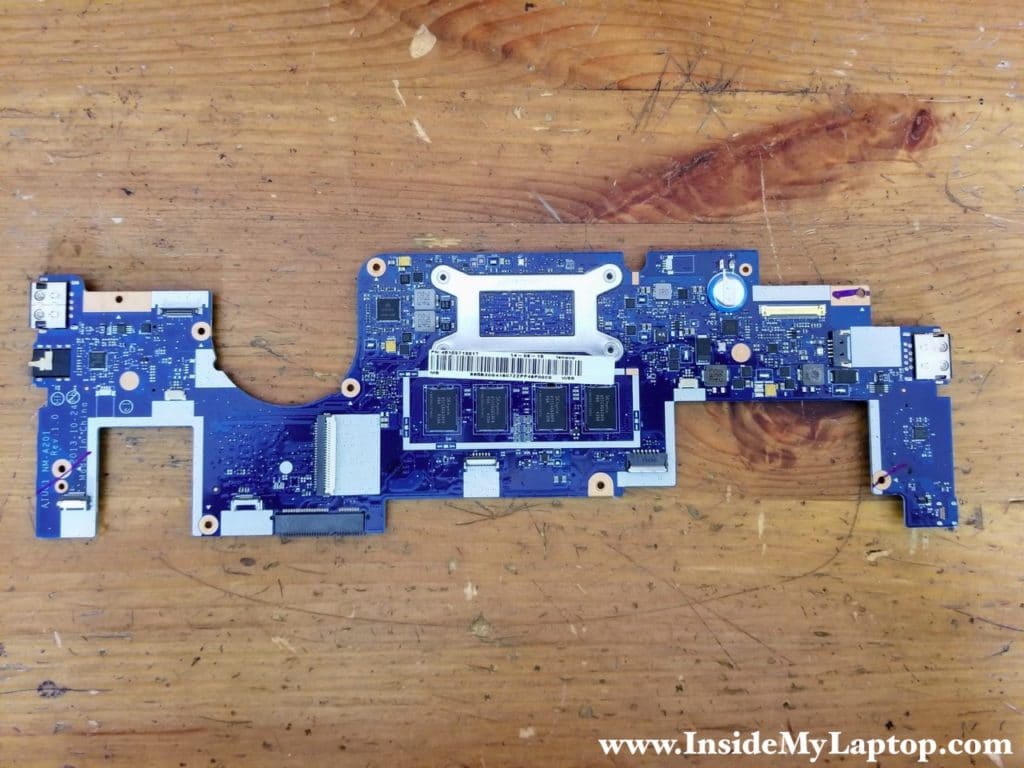
Here’s the other side of the motherboard.
This particular Lenovo Yoga 2 11 model 20332 laptop has no cooling fan installed. It’s possible that other models come with a fan.

Here’s a photo of the top case assembly without motherboard installed.
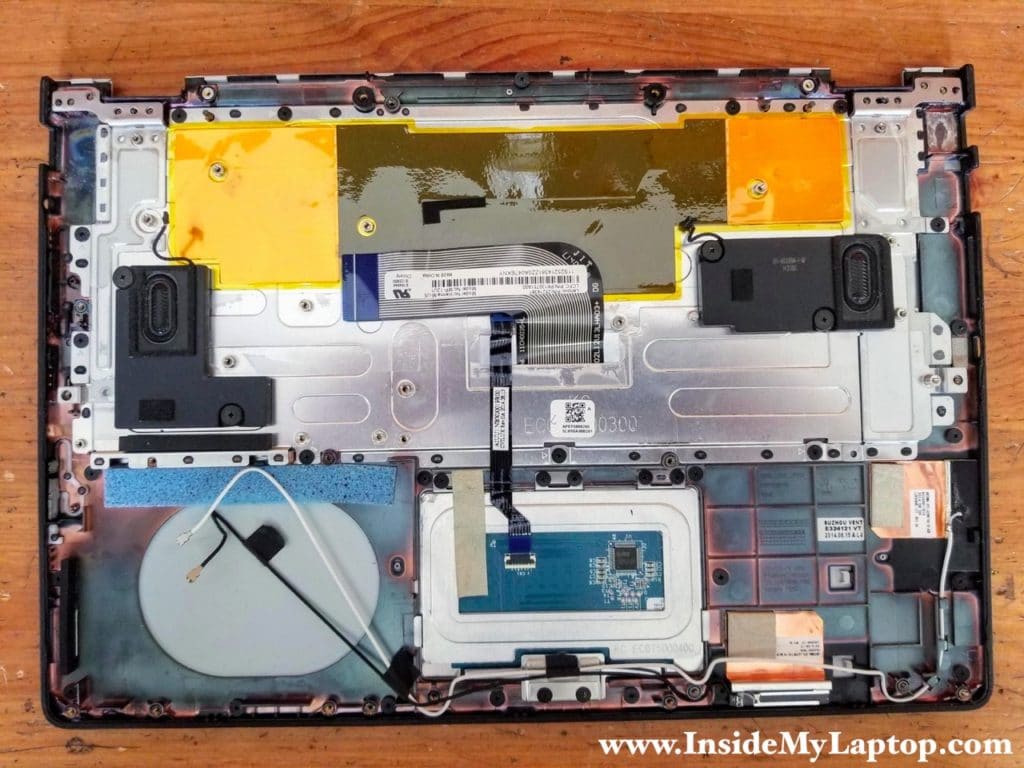
For the touchscreen removal and replacement instructions follow this Lenovo Yoga 2 11 20332 display disassembly guide.