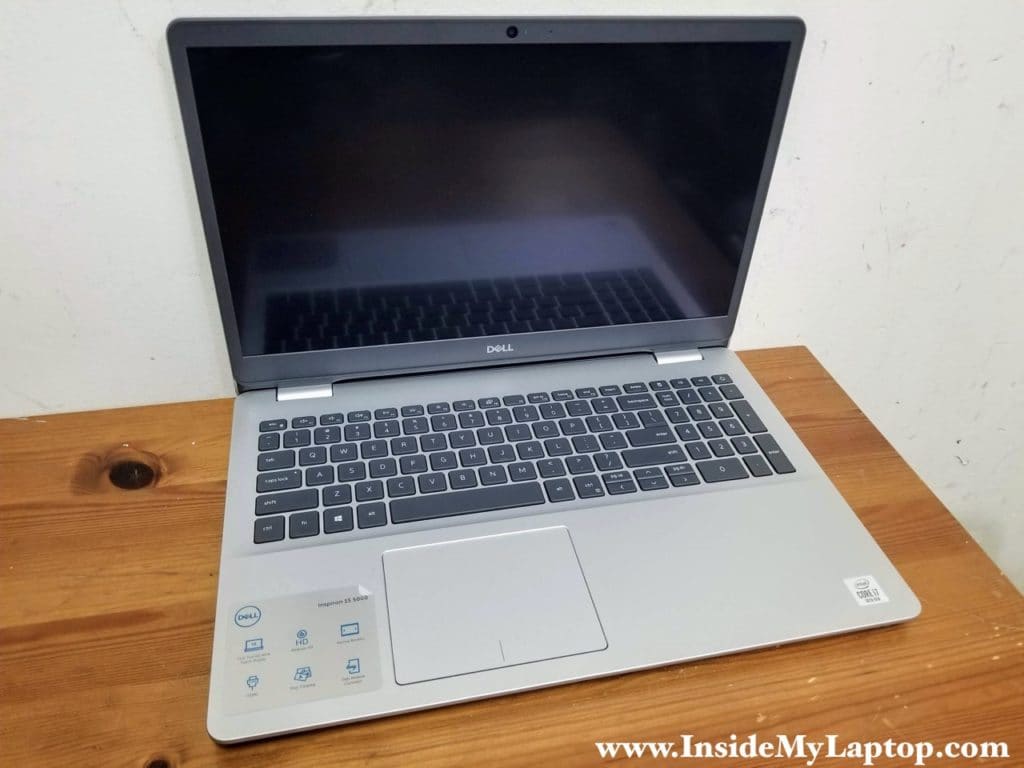
In this guide I’ll be taking apart a Dell Inspiron 15 5593 (Reg model P90F) laptop. At the time of writing this disassembly guide (December 2019), 5593 is one of the latest Insprion 15 5000 series models with a 10th Gen Intel processor.
Here are a few design features that make Dell Inspiron 5593 easy to upgrade and service:
– The motherboard has two memory slots and can support up to 64GB RAM (2x32GB DDR4-2666 SODIMM modules) according to Crucial website.
– The motherboard has two storage interfaces: M.2 PCIe (for NVMe SSDs) and SATA-3 (for regular size 2.5″ hard drives).
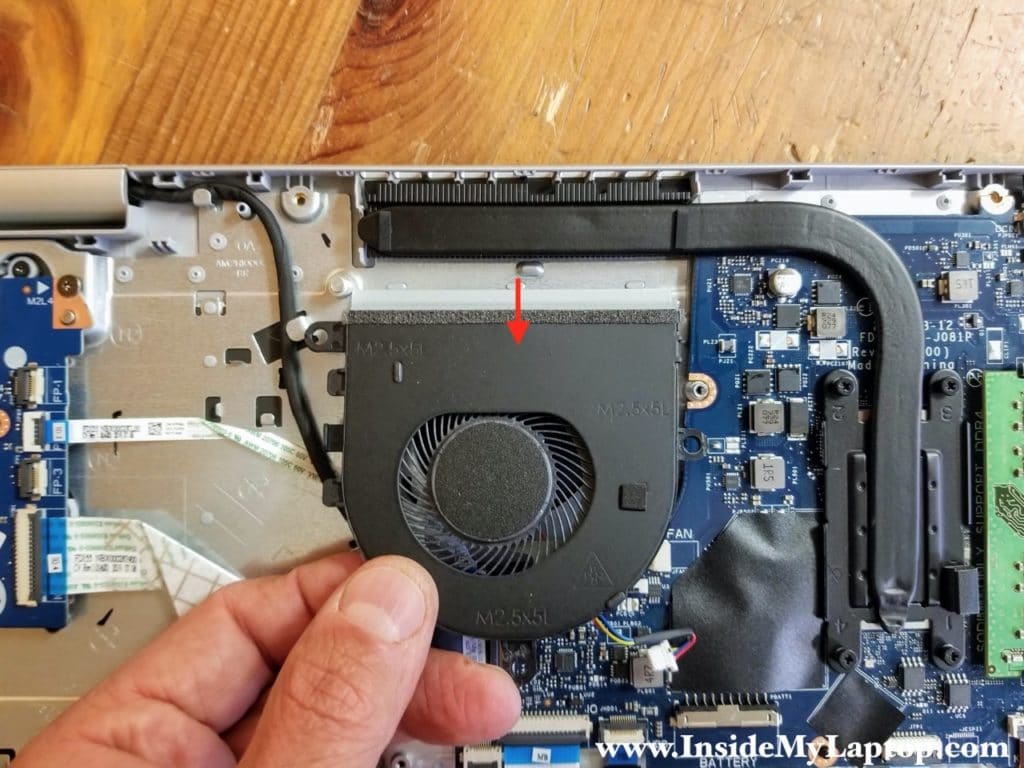
– The cooling fan is not attached to the heatsink and can be easily removed for cleaning.
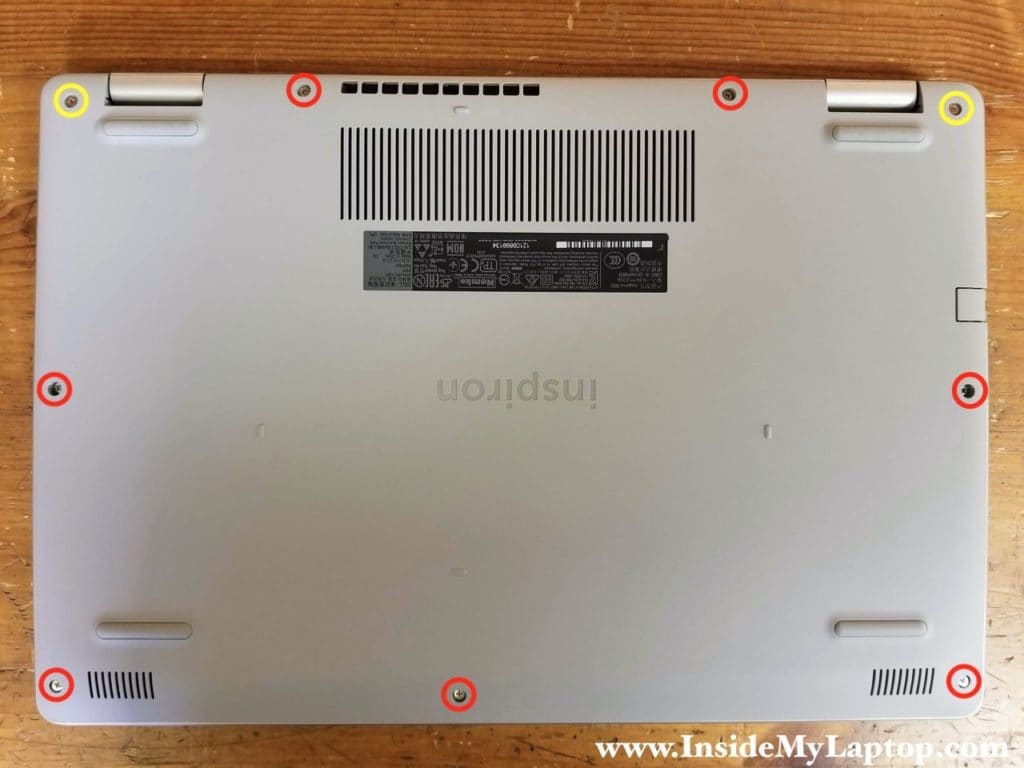
STEP 1.
Remove seven regular screws (red) and loosen two captive screws (yellow). Two captive screws will stay attached to the base cover when it’s removed.
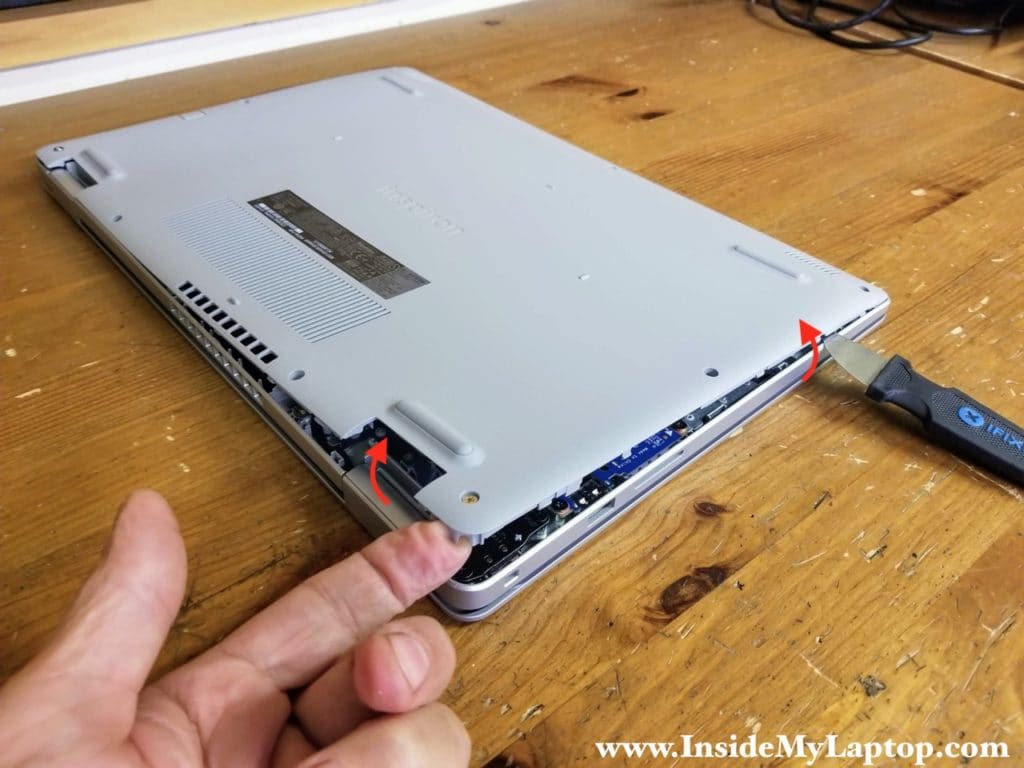
STEP 2.
Using a case opener tool carefully pry up the base cover. Continue lifting up the base cover with your fingers while prying up the other side with the case opener. There are many hidden latches securing the base cover to the laptop frame.
STEP 3.
Remove the base cover completely.
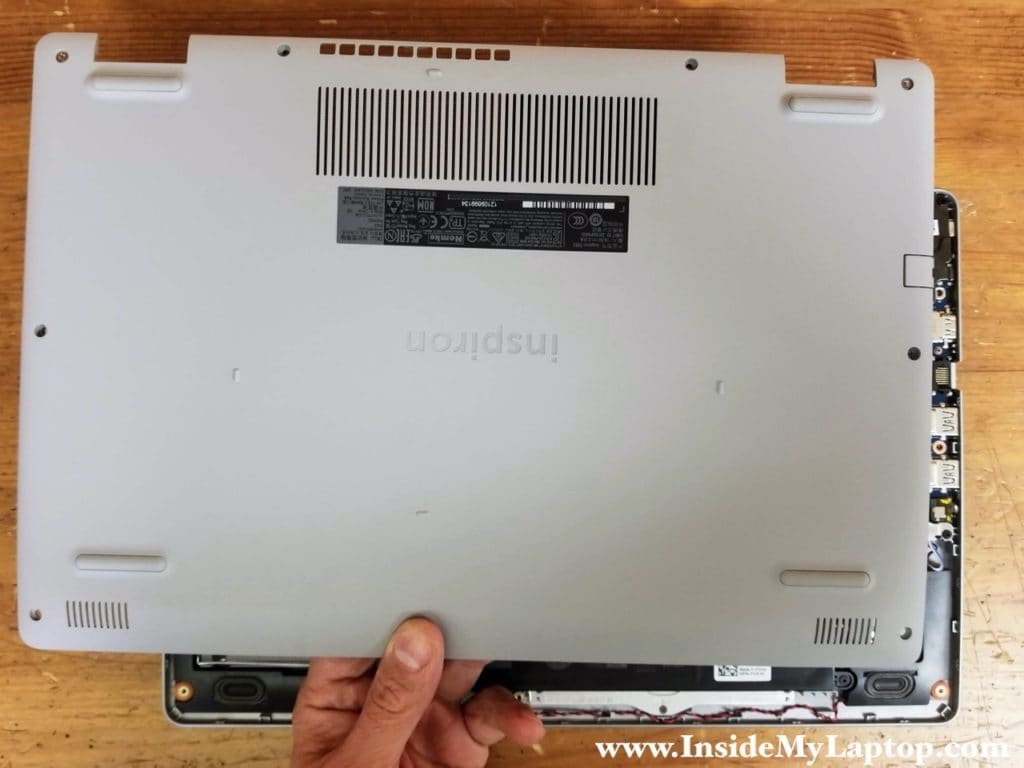
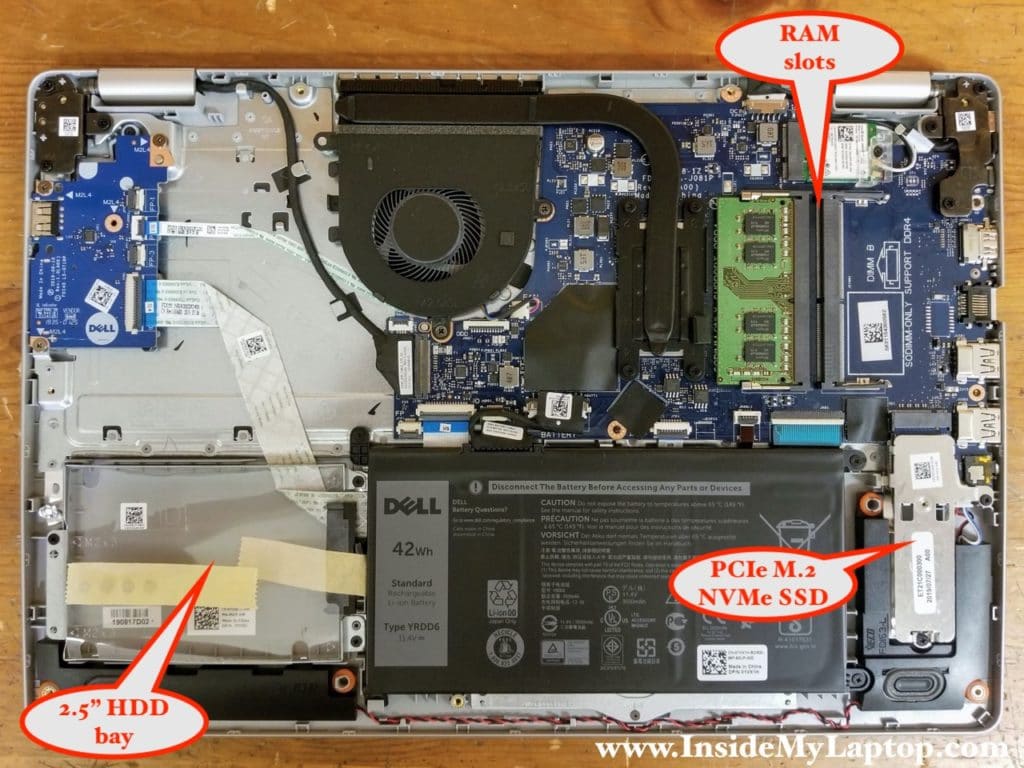
With the base cover removed, you can access most important internal laptop components.
The 2.5″ SATA bay located on the lower left side. It has the hard drive mounting bracket already installed. If you would like to increase the storage space, you can install an additional hard drive here.
This laptop can handle up to 64GB (2x32GB) DDR4-2666 SODIMM memory.
STEP 4.
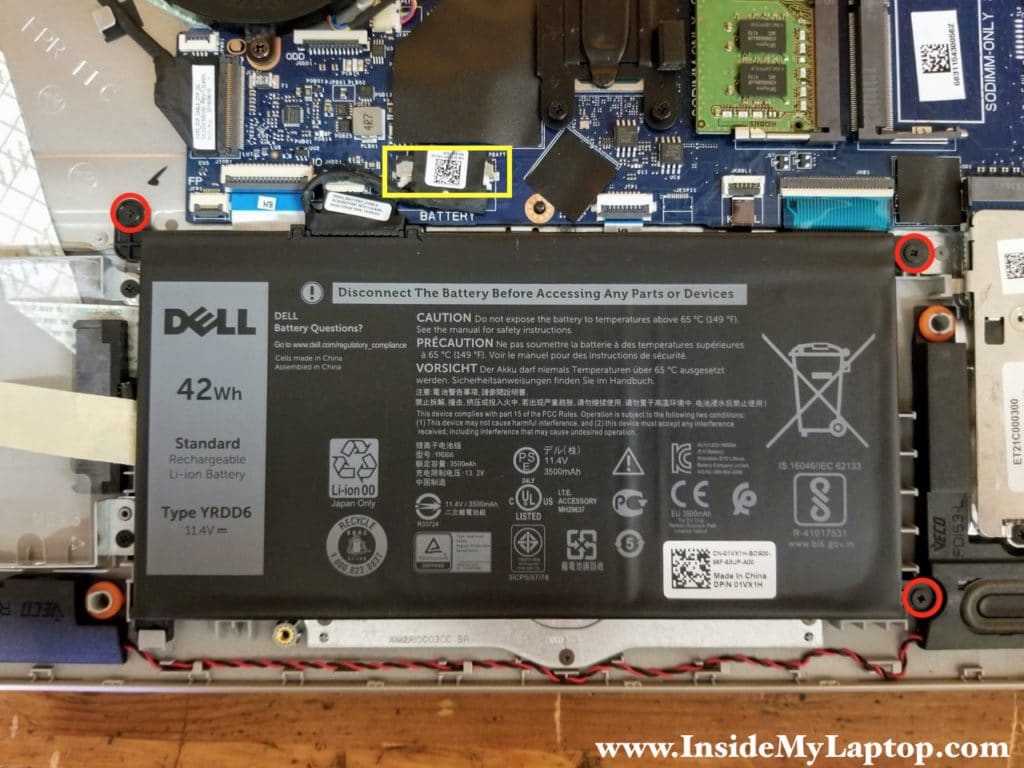
Remove three screws securing the battery and disconnect the battery cable.
STEP 5.
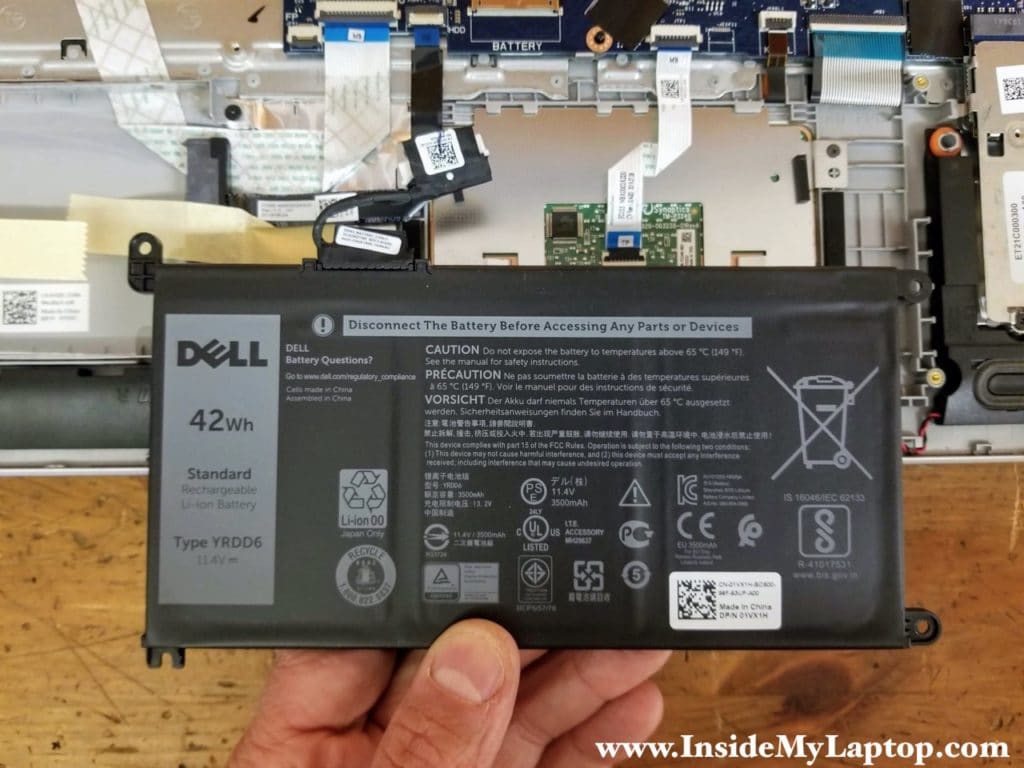
Remove the battery.
Dell Inspiron 5593 battery type: YRDD6. Dell part number: 01VX1H.
STEP 6.
Remove one regular screws (red) and loosen one captive screw (yellow) securing the SSD support bracket/heatsink.
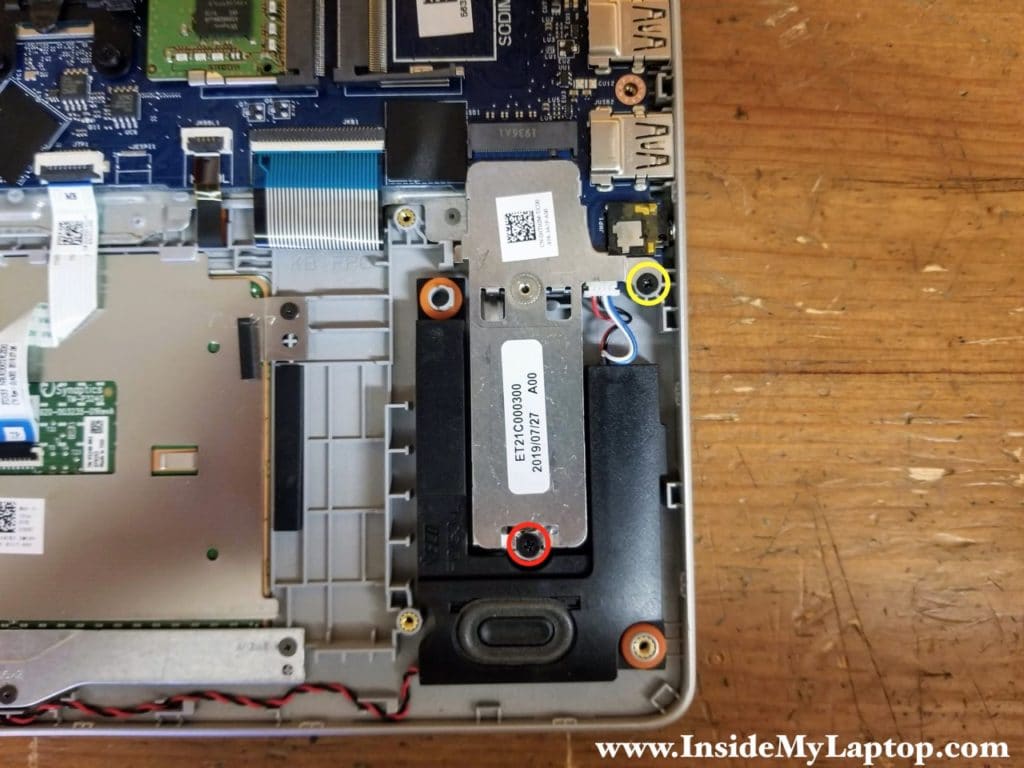
The support bracket will pop up at a 30 degree angle. The SSD is secured to the bracket.
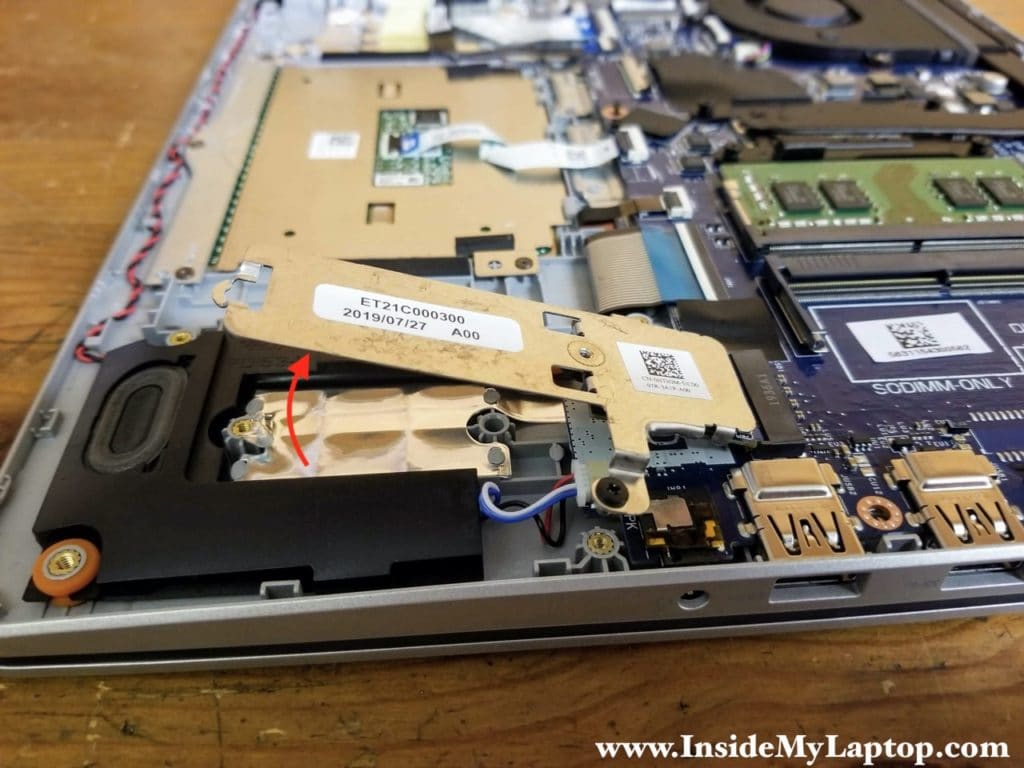
STEP 7.
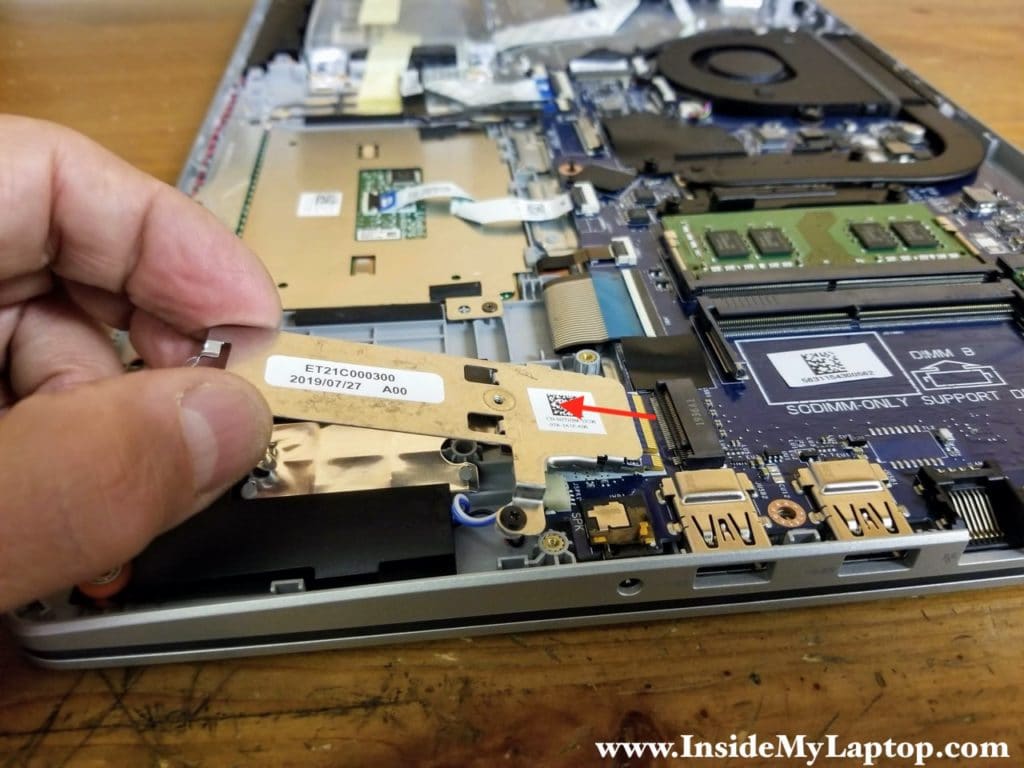
Pull the support bracket with SSD out.
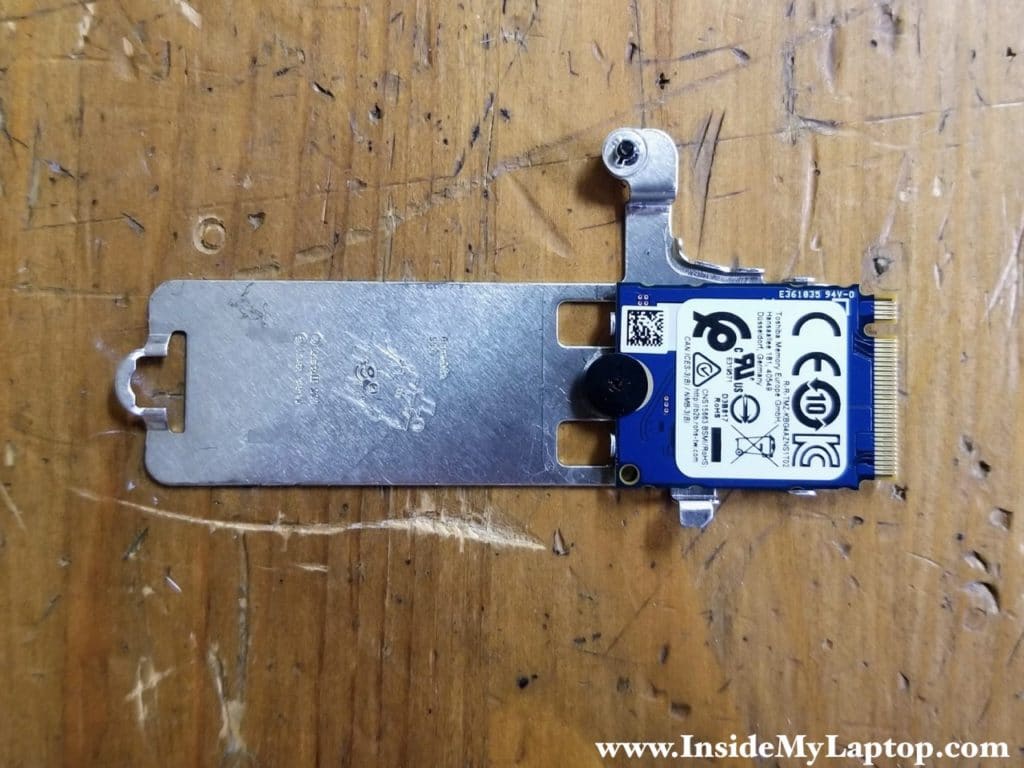
Here’s the other side of the support bracket. As you see the SSD it attached to it with one screw.
This particular Dell Inspiron 5593 was configured with a Toshiba M.2 SSD (Type 2230).
You can install 128GB/256GB/512GB/1TB M.2 PCIe NVMe Solid State Drive. Type 2280 SSD also will fit into this laptop.
Instructions for replacing type 2230 SSD with a type 2280 SSD can be found in the official Inspiron 15 5593 service manual. I linked to the pdf file at the end of this guide.
STEP 8.
Remove two screws securing the cooling fan and disconnect the fan cable from the motherboard.
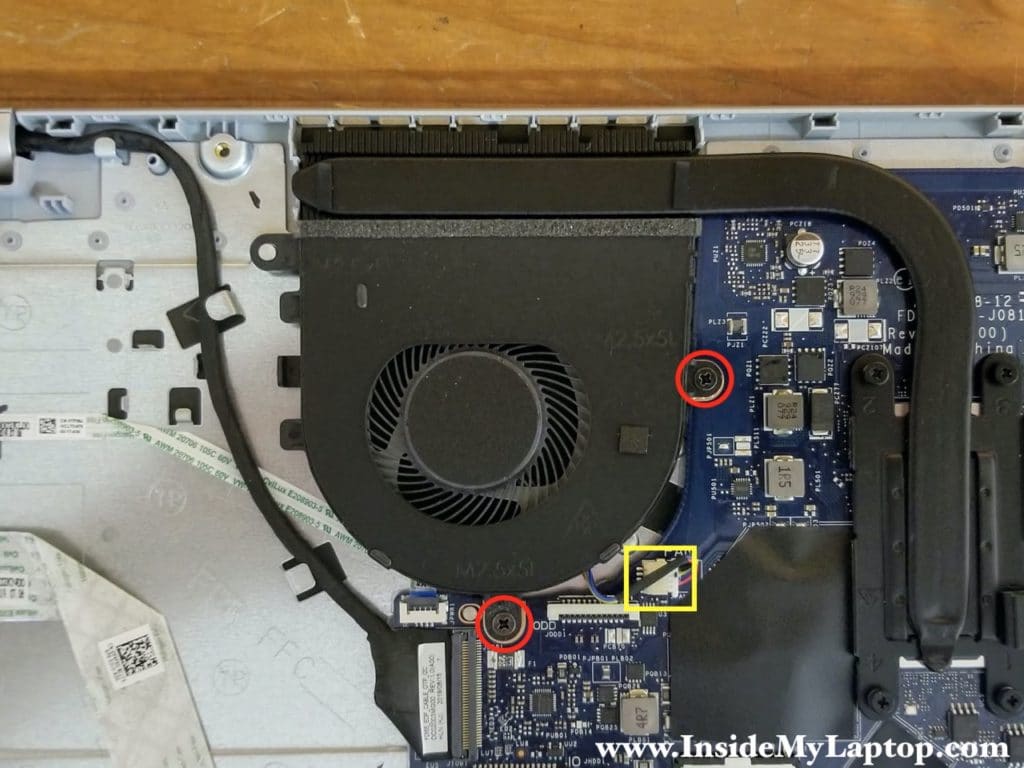
STEP 9.
Pull the cooling fan from under the heatsink and remove it.
STEP 10.
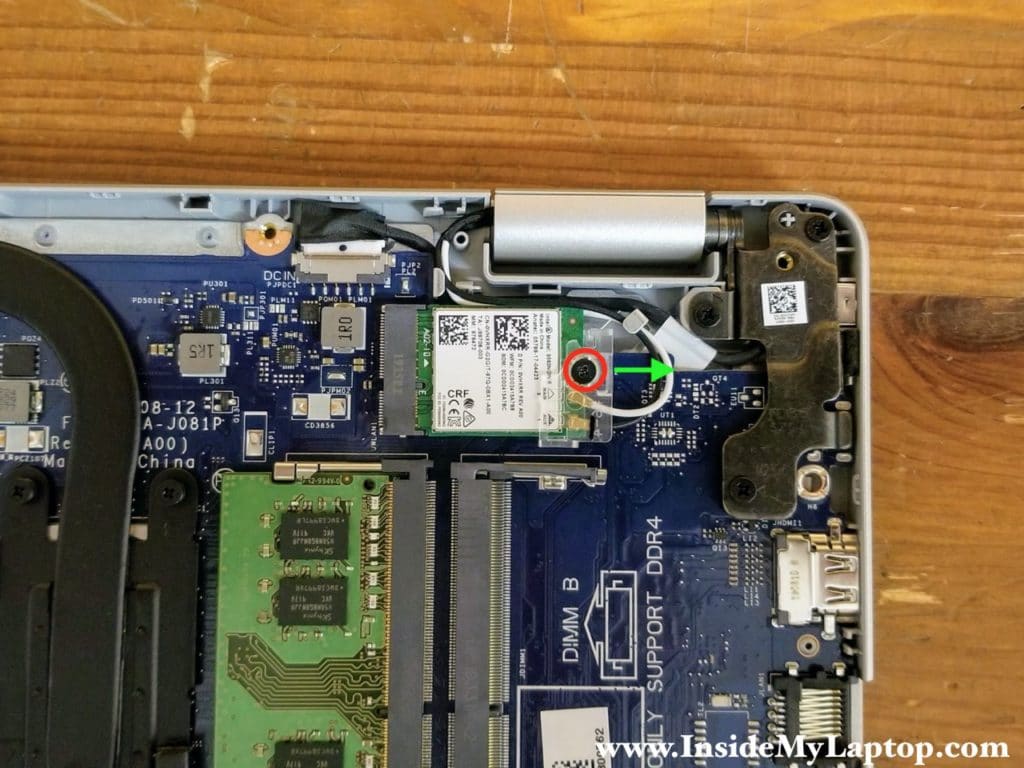
Remove one screw securing the Wi-Fi card and antenna cover.
Pull the clear plastic cover to the right to separate it from the Wi-Fi card.
STEP 11.
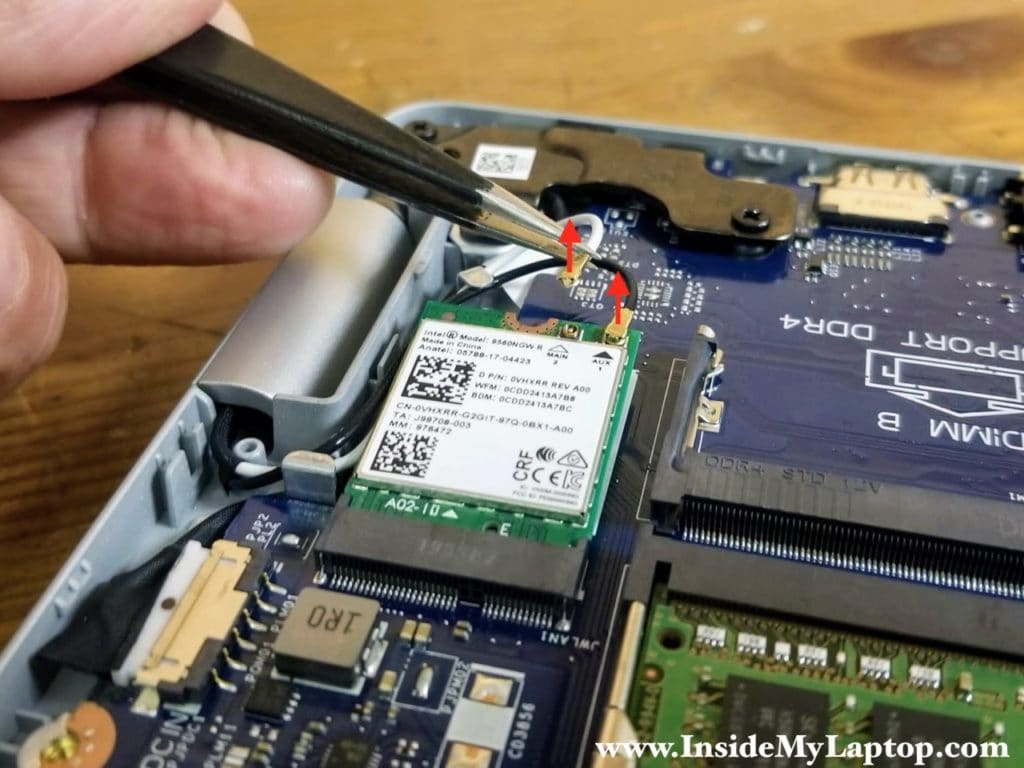
Disconnect two antenna cables from the Wi-Fi card.
STEP 12.
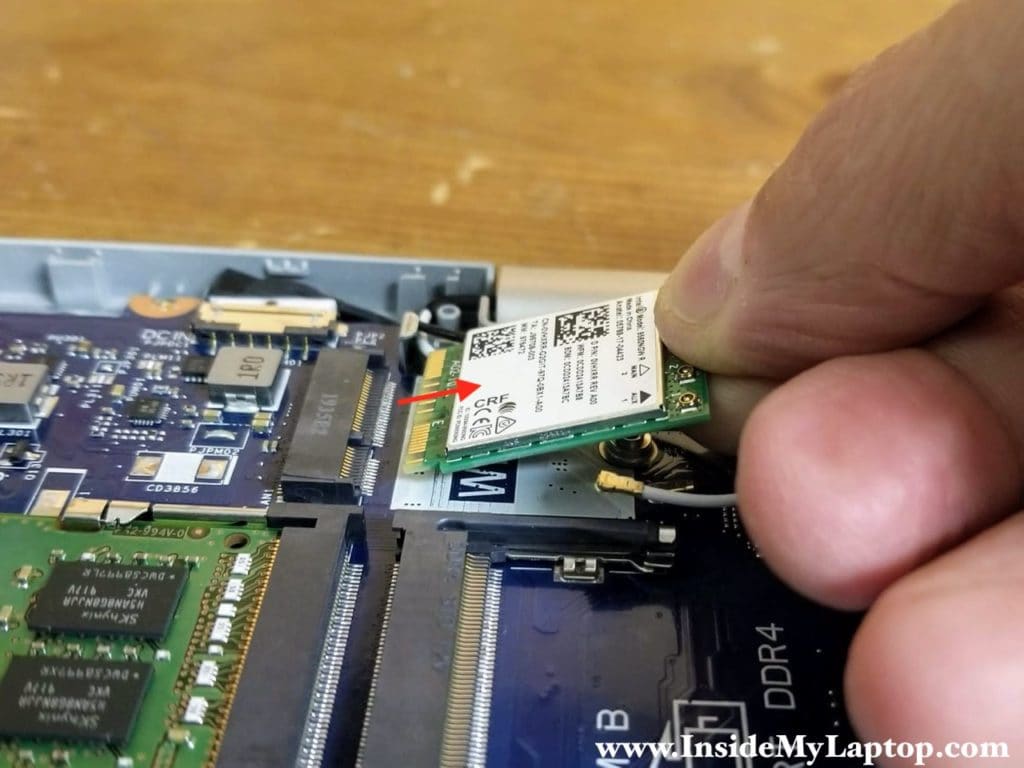
Pull the Wi-Fi card out.
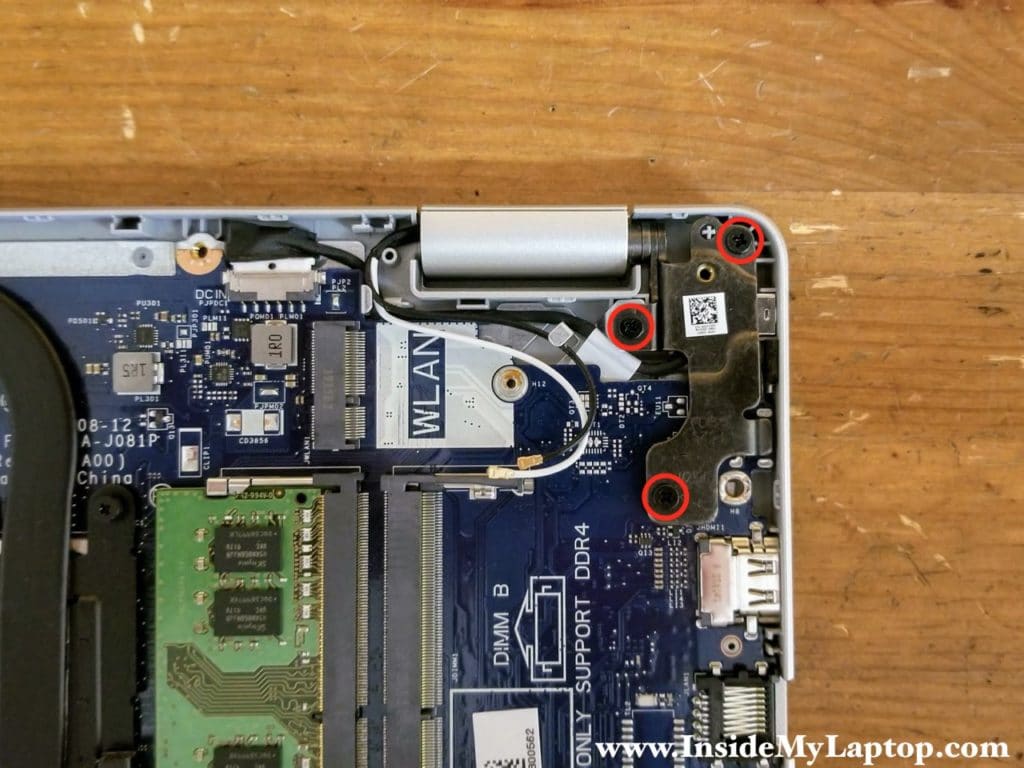
The DC-IN power jack is mounted under the left display hinge. The service manual says it’s necessary to remove the display panel before removing the jack but it’s not the case.
STEP 13.
Remove three screws securing the left display hinge.
STEP 14.
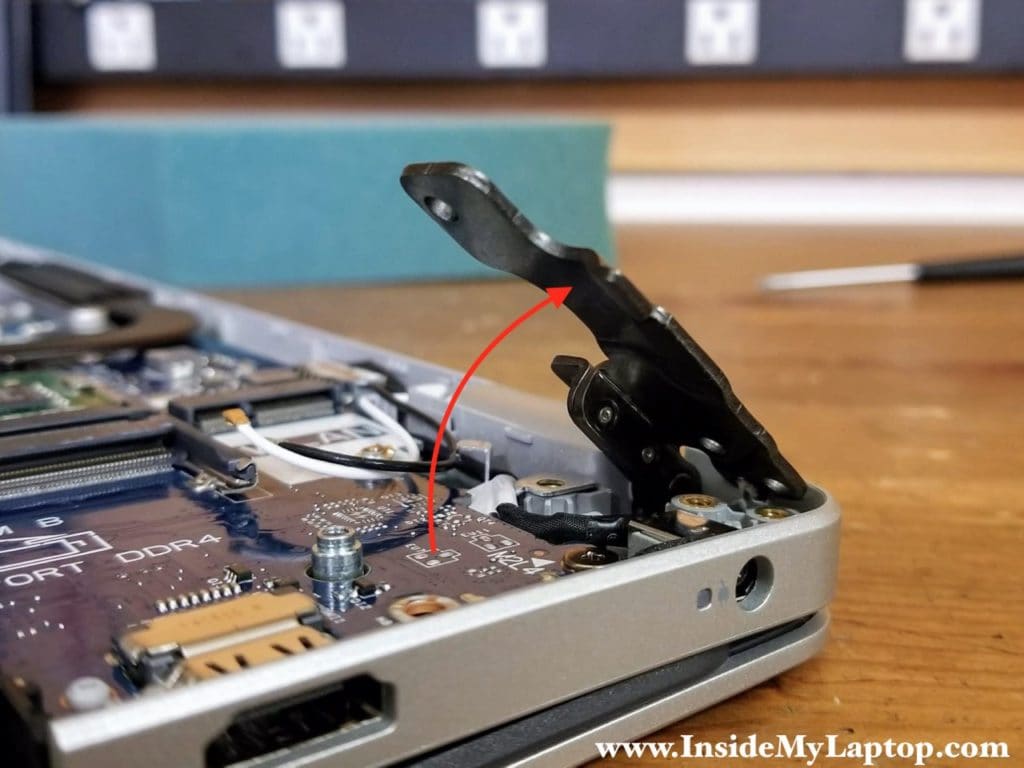
Lift up the hinge just enough to access the DC-IN jack.
Be careful. If you open the hinge any further it will push on the case and might damage it. Use your best judgement here.
STEP 15.
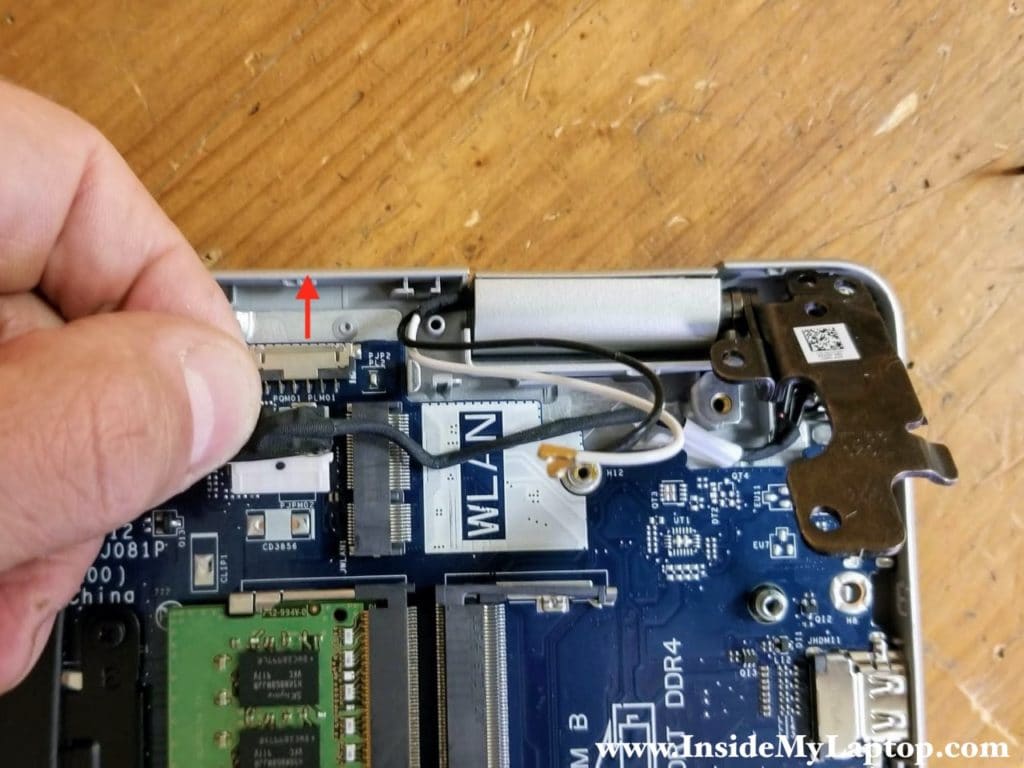
Disconnect the DC-IN jack cable from the motherboard.
STEP 16.
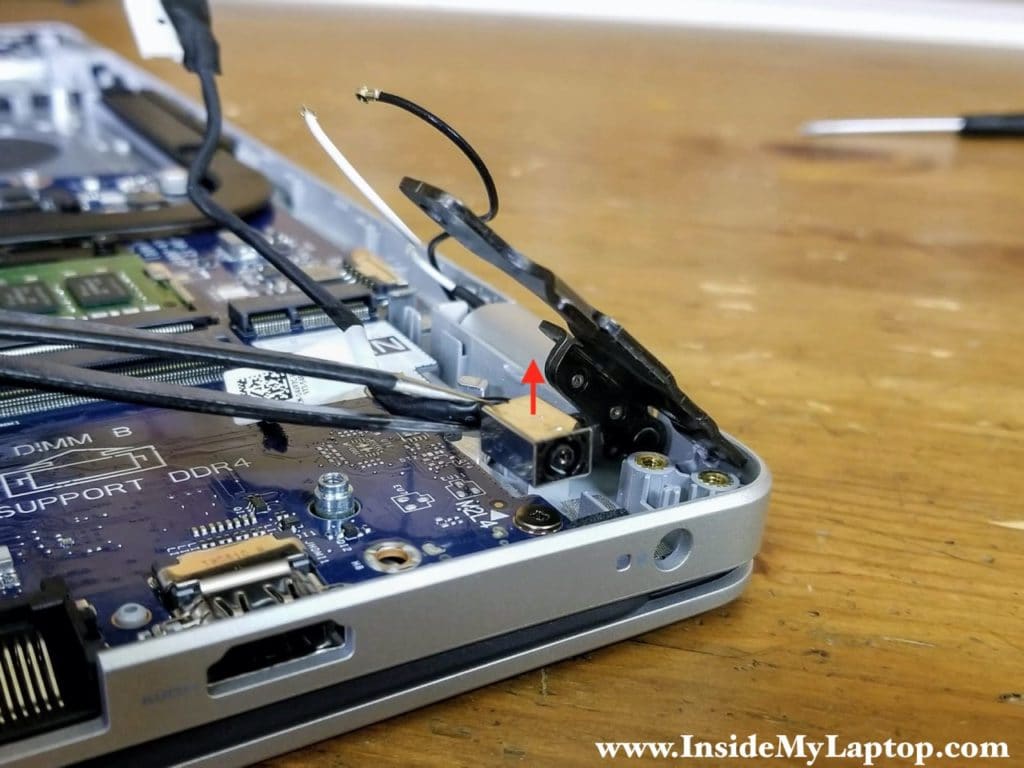
Lift up and remove the DC-IN power jack.
STEP 17.
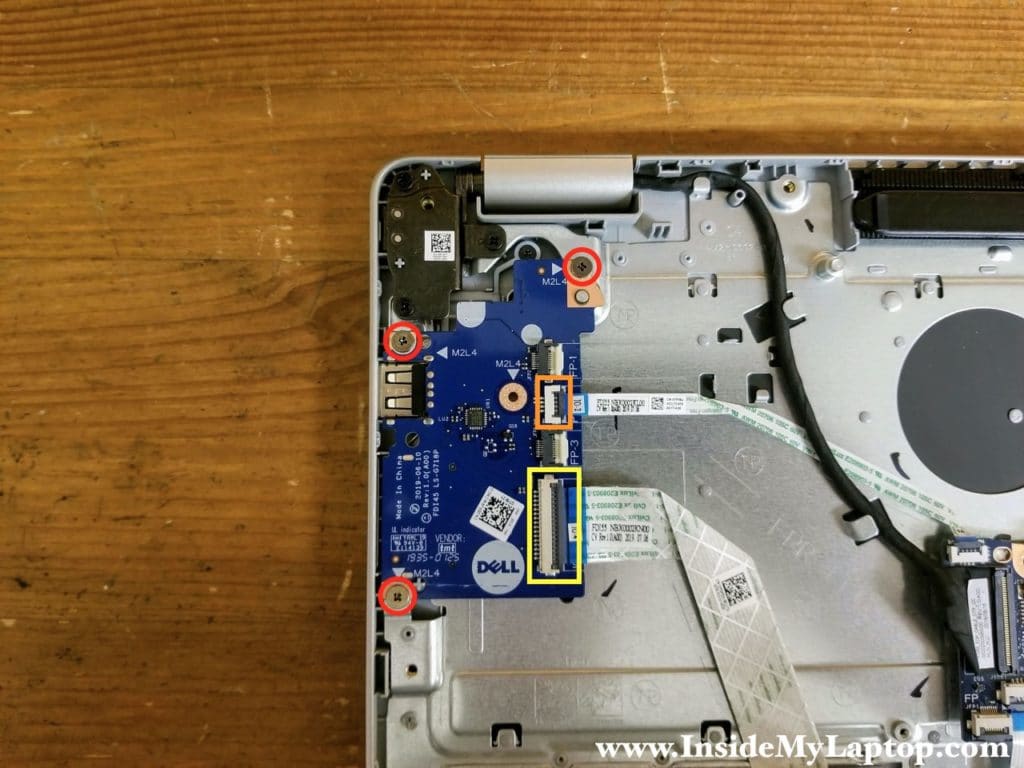
Remove three screws securing the USB SD card reader board and disconnect two cables.
Before removing the cable don’t forget to unlock the connector by lifting up the locking tab (red arrow).
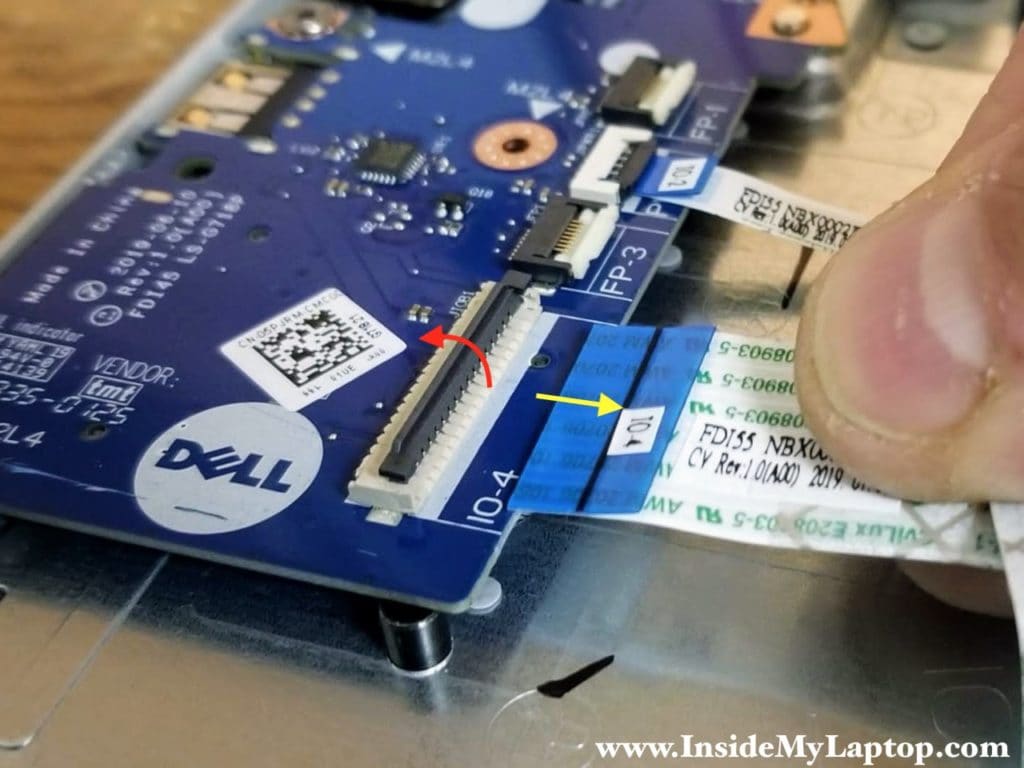
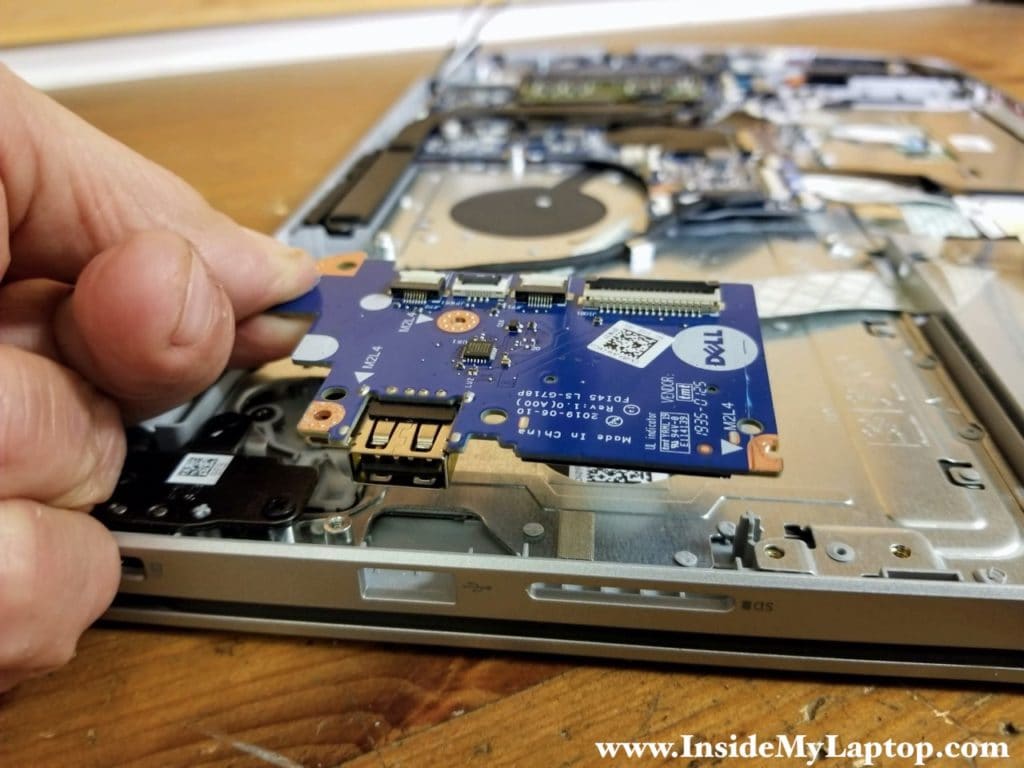
STEP 18.
Remove the USB SD card board.
NOTE: the RTC battery is located on the other side of this board.
STEP 19.
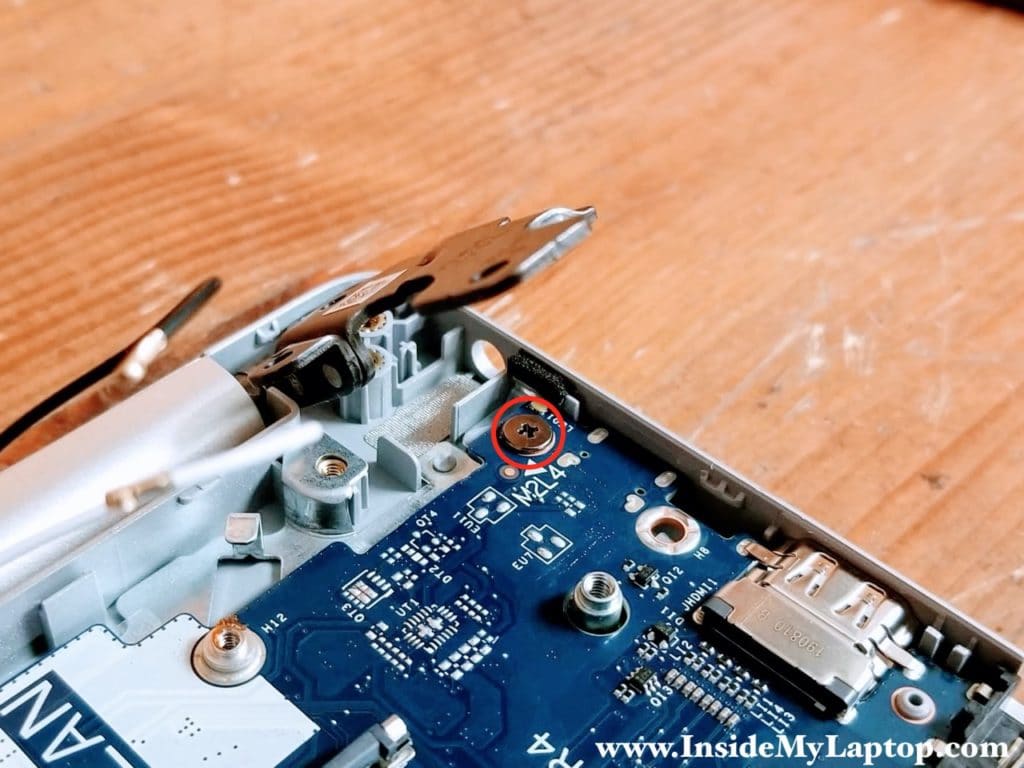
In order to remove the motherboard it’s necessary to remove one screw which is located under the hinge (pointed with red arrow) and disconnect the following cables:
– Display cable (yellow).
– USB SD card reader cable (orange).
– SATA cable (green).
– Touchpad cable (blue).
– Keyboard and keyboard backlight cables (pink).
– Speaker cable (red).
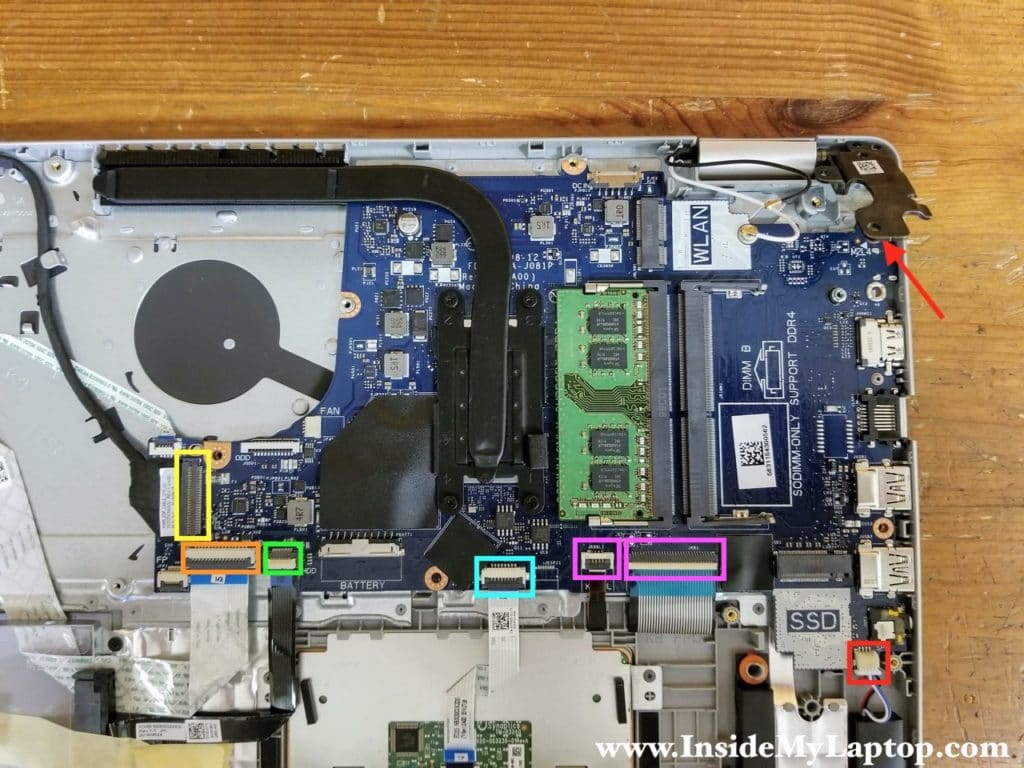
Here’s one screw securing the motherboard to the top case.
Karim
I wonder if it is possible to remove 2.5″ SATA bay and install a larger battery inside this laptop
IML Tech
I don’t think so. The laptop case designed for this particular battery and there is no way to mount a larger battery.
Michael Carrillo
Do you think there is a way to connect an extra fan in some of the empty space (not the drive area)?
IML Tech
Fan works when it’s connected to the heatsink. Just placing it inside the case will not do much for cooling the laptop.
saeed
thanks a lot
Megan
Could you post a video on how to remove the back cover (that has the shiny Dell logo)? Mine is damaged but I don’t want to break anything while attempting to take it off
IML Tech
Megan, removing the display back cover is not easy. First, it’s necessary to separate the display panel from the laptop base. Second, it’s necessary to disassemble the display panel. Not for a novice for sure. This procedure is explained in the service manual on the page 61. The link to the manual included at the end of my disassembly guide.
Bruce Corson
I need to replace the keyboard. Is there a guide for that?
Richard
Hi there, I am not getting any sound from this laptop’s speakers – I have updated the latest drivers for it, reinstalled drivers etc – I did a sound test in the BIOS but no beeps coming from the speaker. I get sound when using head phones. Is it possible that the speakers are disconnected somewhere to the motherboard? Where can I check this?
Many thanks in advance