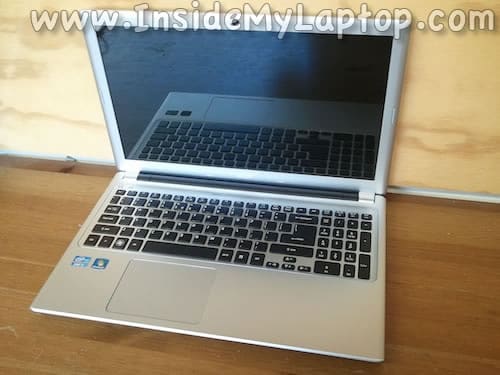
In this guide I will take apart an Acer Aspire V5-571 series laptop.
The main purpose of this disassembly is removing and replacing the hard drive which is mounted under the palm rest.
STEP 1.
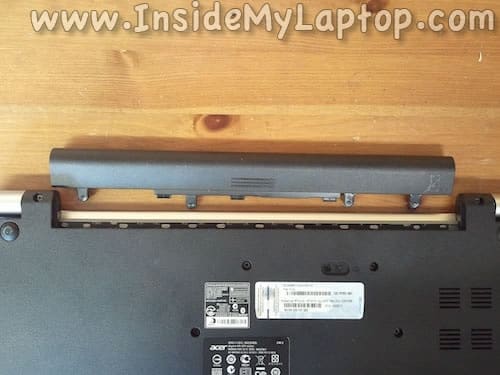
Make sure the laptop is turned off.
Unlock and remove the battery.
STEP 2.
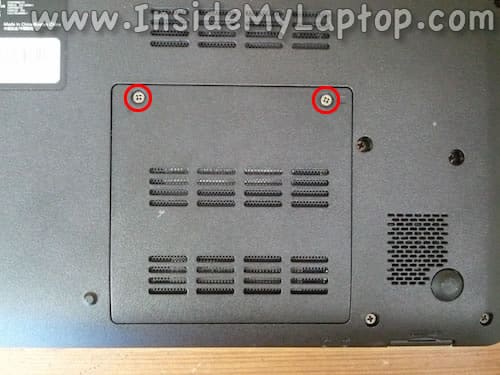
Remove two screws securing the RAM cover.
Lift up and remove the cover.
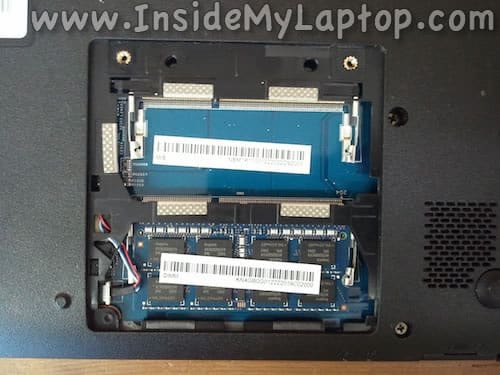
Under the cover you’ll get access to both RAM slots.
This Acer Aspire-V5-571-6889 came with only one memory module installed.
This laptop can handle up to 8GB (2x4GB) DDR3-12800 SODIMM RAM modules.
STEP 3.
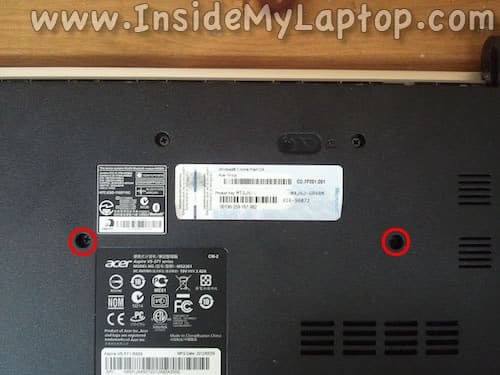
Remove two screws securing the keyboard.
STEP 4.
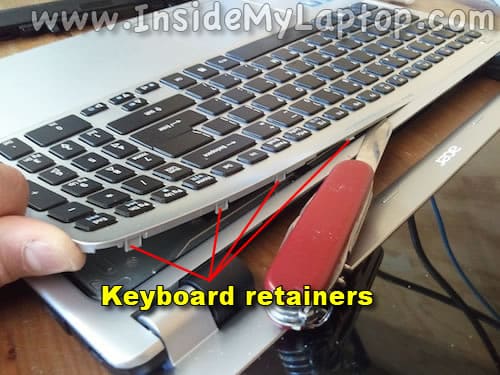
Removing the keyboard on this model is a little bit tricky. You’ll have to use a knife.
Insert the knife blade between the keyboard and top cover.
Carefully (not to damage the plastic part) push the keyboard to the show direction and at the same time lift it up.

There are a few retainers securing the keyboard.
You’ll have to release them with the knife blade.
Continue lifting up the keyboard and at the same time work with the knife to release the retainers.
STEP 5.
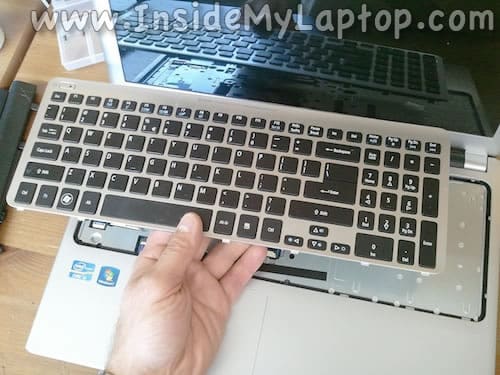
Lift up the upper side of the keyboard and move it towards the display assembly.

STEP 6.
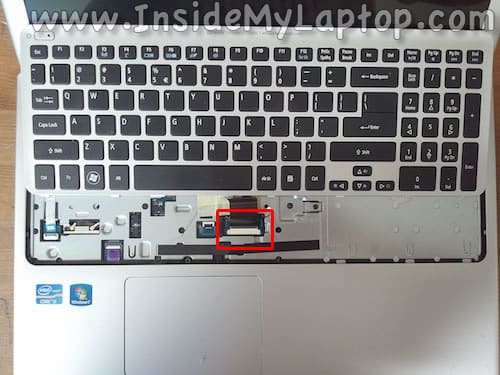
Now you can access the cable connector.
STEP 7.
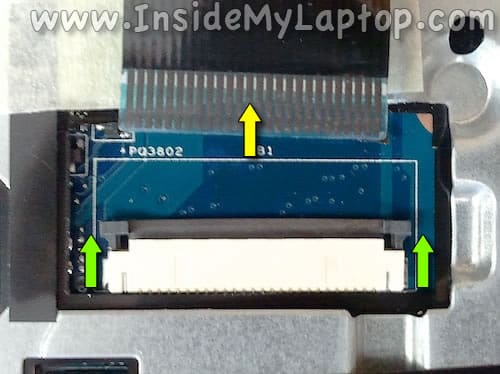
Slide the brown tap about 2-3 millimeters to the shown direction (green arrows). This will unlock the connector.
Now you can pull the cable from the connector.
STEP 8.
Remove the keyboard.
STEP 9.
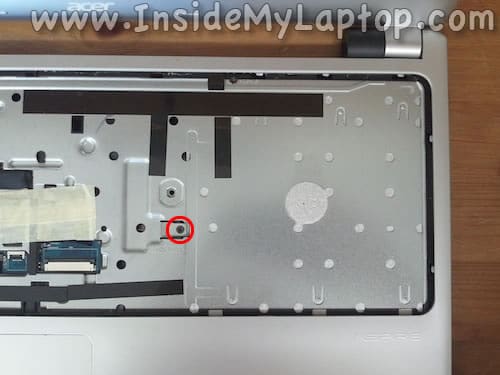
The optical drive secured by one screw located under the keyboard.
Remove the screw and turn the laptop upside down.
STEP 10.
Pull the optical drive and remove it.

STEP 11.
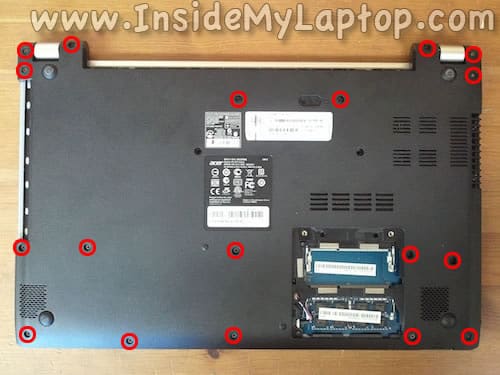
Remove all shown screws from the bottom.
STEP 12.
Remove four screws securing the top cover (palm rest) assembly.
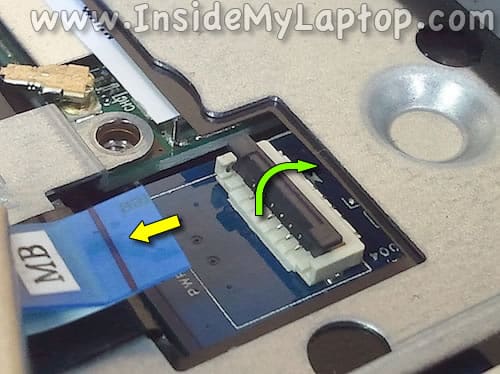
Disconnect the power button cable (left arrow) and touchpad cable (right arrow).

Here’s how to unlock both connectors.
Lift up the locking tap with your fingernail (green arrow). It will open up at a 90 degree angle.
Pull the cable from the connector (yellow arrow).
STEP 13.
Start separating the top cover assembly from the bottom case.
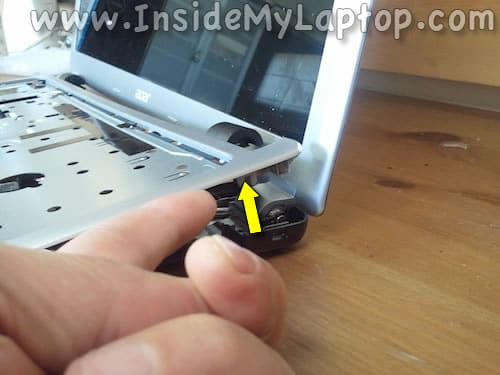
I’m using a guitar pick to split two parts in the palm rest area.

STEP 14.
Remove the top cover.
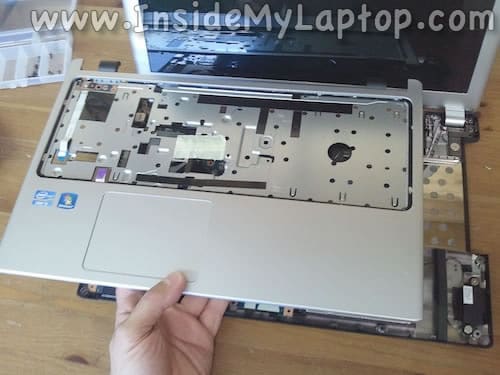
The power button board secured to the top cover by one screw and can be easily replaced if necessary.
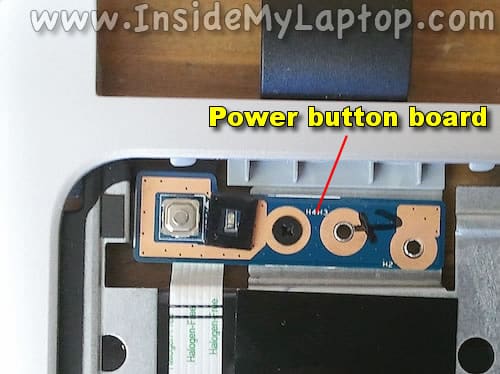
On the bottom side of the top cover you can access the touchpad.

STEP 15.
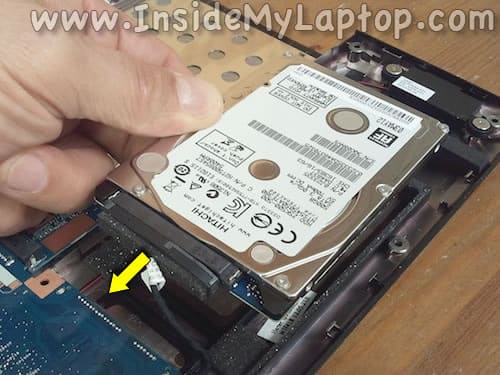
After the top cover removed you can access the hard drive.
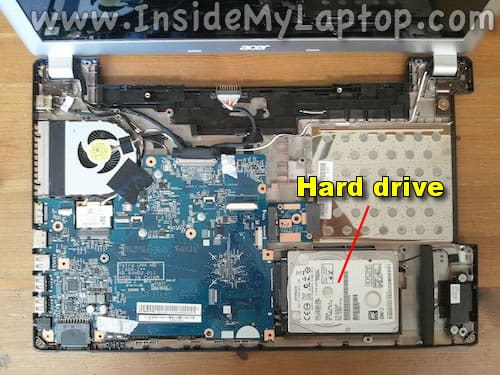
STEP 16.
There are no screw securing the hard drive, it’s just fitted between support walls.
Lift up the hard drive and disconnect the cable. Simply unplug it from the hard drive.
Now you can replace the hard drive with a new one or upgrade it.
Upgrading this regular 2.5″ hard drive to a 2.5″ solid state drive will speed up the laptop significantly.
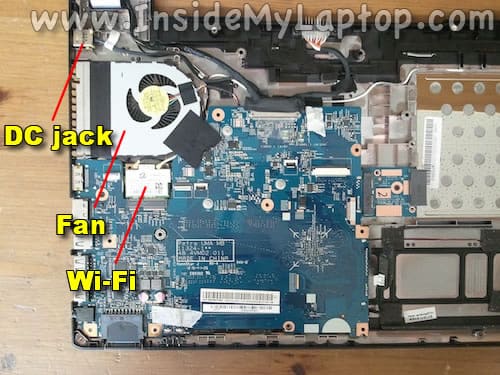
Also, under the top cover you can access the DC jack harness, cooling fan and wireless card.
The cooling fan is a part of the heatsink assembly. In order to replace the fan it’s necessary to remove the motherboard (shouldn’t be difficult).
You can clean up the fan without removing it. Just use an air compressor (or canned air) to blow off the dust.
Sam
Hello and thanks for the great guide.
I need to reset the BIOS settings, but I can’t see any battery in your pictures. Is it on the other side of the motherboard? Is it easy to access the other side or is there anything else to remove?
Thanks and sorry for my english.
IML Tech
@ Sam,
I believe it’s located on the other side of the motherboard.
If you look at the second picture in the step 2 you’ll see both RAM slots. The CMOS battery should be on the left side from these slots.
In order to access the battery you’ll have to disassemble the laptop and remove the motherboard.
James
Is the CPU soldered onto the motherboard or is it a socket form? Have a spare i5 laying around and if i can drop it into the ol V5 thatd give it a nice kick in the pants for performance. 8GB ram did a nice trick but more is always better right? Thank you for your work and input! Have a great day!
-cj
IML Tech
@ james,
The CPU is soldered.
Louis
Do you have a guide for the touchscreen replacement. My wife cracked hers. The LCD is fine. I just need to replace the digitizer.
Barry
Lot of work to replace a HDD. My partner has 500gb drive running out of space .Can I upgrade to 750 or 1Tbdrive. I read somewhere that 500gb was maximum size?
IML Tech
@ Barry,
This laptop should be able to handle 1TB HDD with no problem. Go for it.
Oliver
What tools would I need to do this to my Acer(same model)? And where would be an appropriate place to disassemble my laptop?
bambi
Hello, I have a 2012 acer aspire v5 571 series laptop with a broken bottom case( my golden retreiver knocked it off the table, Do you know the part # for a new one/ Itried to order one but they asked me if it was a touch screen and finger printer? I dont know, they say they make 2 differant bottom cases and I dont want to order the wrong one.Thanks, I plan on doing this myself with the great instructions you paosted.Thanks for your time, Bambi
lana
is the fan replaceable? i noticed the inside of my laptop looks a little bit different, the fan is all plastic.
Nasim
Hi, I am using Accer Aspire V5 Mani laptop, its features are CPU: AMD Dual-Core processor, A4-1250(1.0FHz) Memory: 4GB DDR3 memory, Battery: 3-cell Li-ion battery, Storage: 500 GB HDD. Please let me advised Could I change my Processor to speed up and as well as could i change the three cell abttery to 9 cell.
Looking forward to hear from you.
levi jones
I spilt coffee on acer v571 touch keyboard the machine works fine after an emergency clean and dry but the keyboard is messed up. can i wash the keyboard somehow to remove the coffee or do i have to replace it and if so do i need to get the key with the frame or can i reuse the old one?
Michael
How to you unlock the battery ? Aspire V5 571 shown in your clip
Jordan
could you remove the CPU that has been soldered? safely for packaging and for the motherboard to accept a new CPU?
Eagerly awaiting your response.
May thanks – Jordan
Peter
Great article I was looking on instructions on how easy it was to replace the hard drive. Thanks a lot. Is the hard drive 7.5mm or 9.5mm?
Angela
Dear IML Tech,
Hi, This is a great tutorial.
I managed to break the portion of the plastic bottom on my Acer V5 (no finger-print). The jack still works, but it’s loose.
Can I re-stabilize the jack by replacing the plastic bottom cover?
Is this something you would advise a ‘greenhorn’ to take to a computer repair shop, or is it something so easy that I could probably do it myself by following tutorials like this one?
(or a similar one with you performing the exact operation. lol)
Any advice is greatly appreciated 😀
Jared Spahn
I have an Aspire V5-571P and would like to use 2 SSD drives. Is there internal space to install and a place on the Sata buss to connect a second SSD on the mother board? Secondly, is it possible to exceed the factory specs of 8 GB Max ram to install 16 or 32 GB and have it all usable? Once a 500 GB SSD or 1 TB SSD is installed it is real easy to use a dedicated Primary Partition as Vmem and really speed up the system
Danny
How do you unlock the battery? Usually (on all my other acer laptops) there are two slide buttons to unlock it, but on my laptop there is non, it’s the same as your photo. Do you just use pen to push into the small hole? I do not want to damage the laptop/battery, I still get a few hours power time from it but not the 7 hours i’m supposed to, so I want to replace the battery, I just can’t get the bugger off!