
In this guide I’ll be taking apart Acer Aspire E15 Model E5-573-77S3. The disassembly process is relatively easy.
As always, keep track of screws. For this guide I’ll need a Phillips screwdriver, plastic case opener and tweezers.
STEP 1.
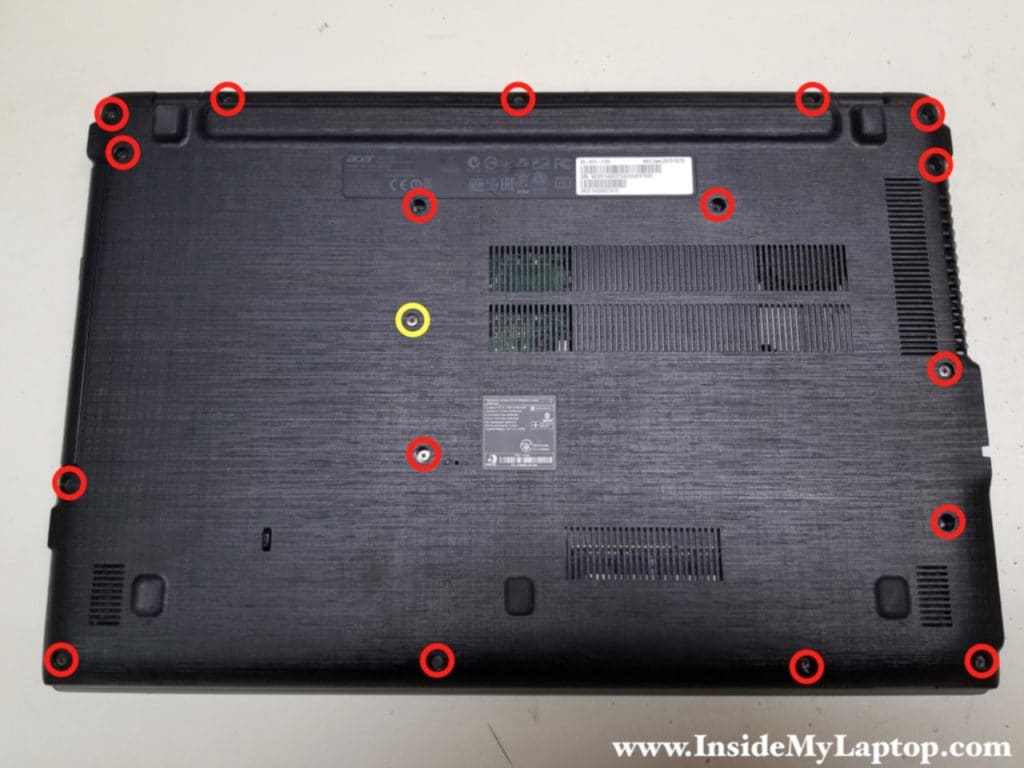
Remove all screws from the bottom of the laptop.
One screw I circled in yellow securing the optical drive.
STEP 2.
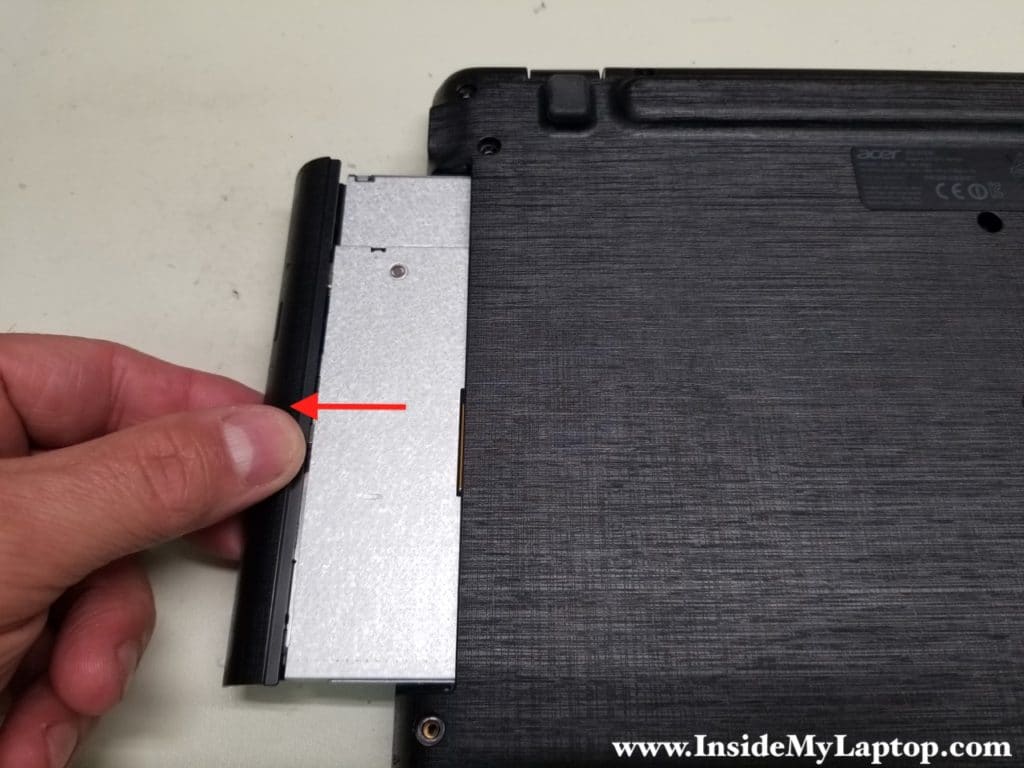
Pull the optical drive out and remove it.
STEP 3.
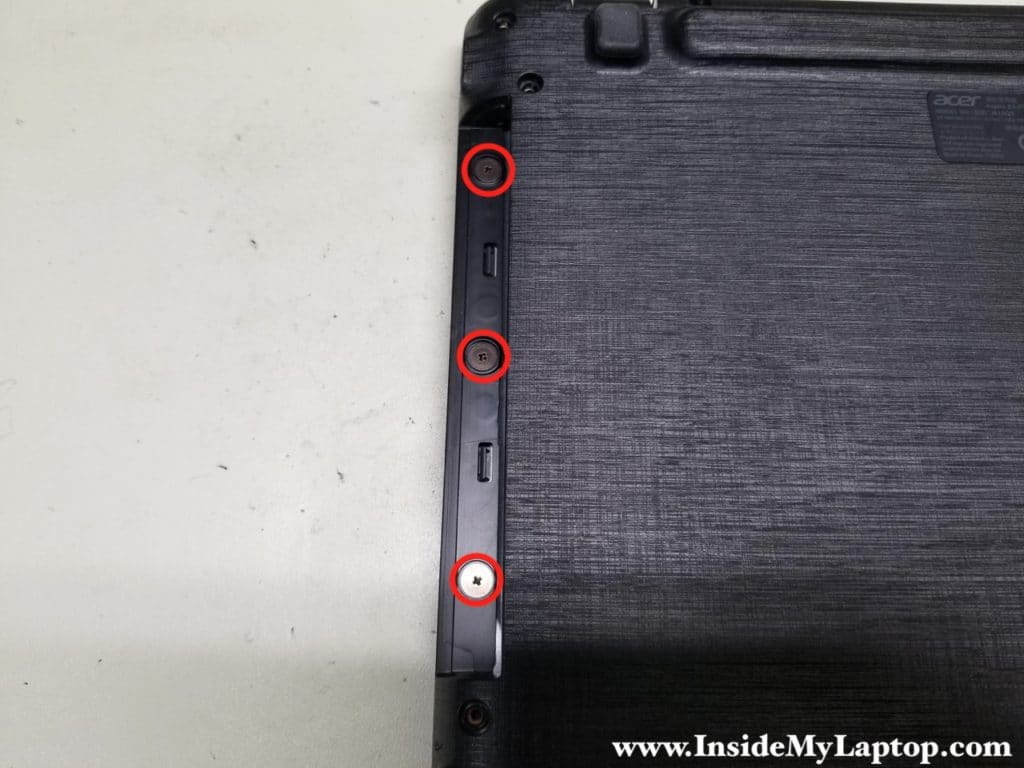
Remove three screws located in the optical drive bay.
STEP 4.
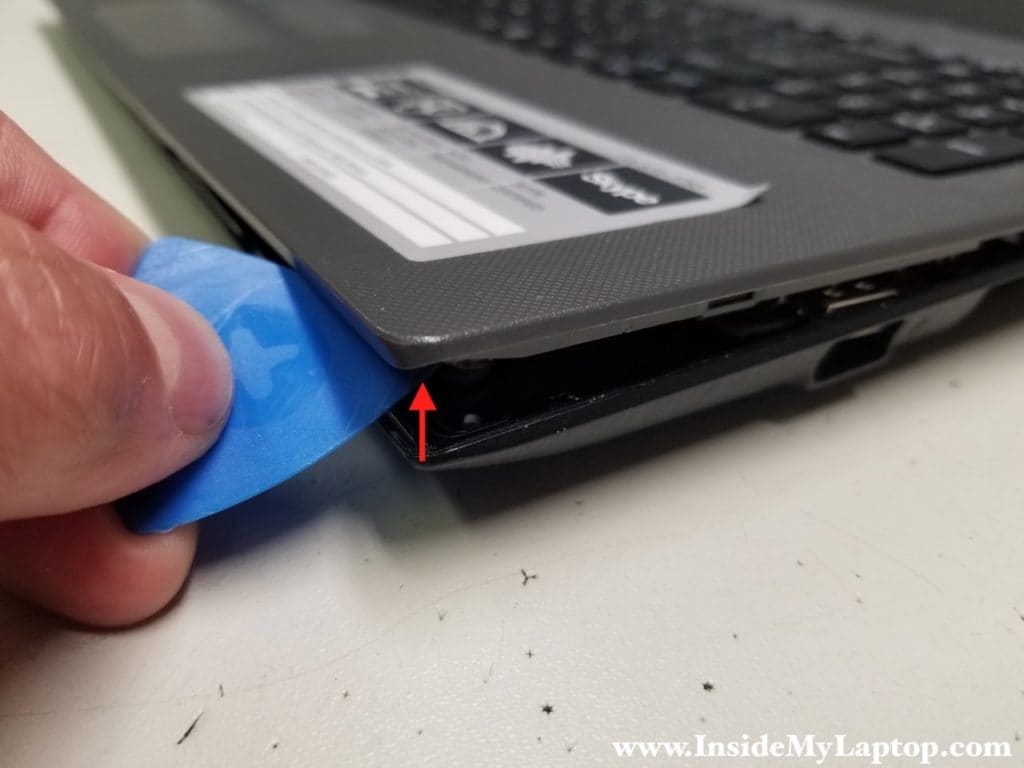
Start separating the top case (keyboard) assembly from the bottom case.
In Acer Aspire E15 E5-573-77S3 laptop all internal components mounted to the top case so we’ll have to remove the bottom case.
STEP 5.
Turn the laptop upside down and continue separating the bottom case from top case.
The side with the optical drive bay should be lifted up first.
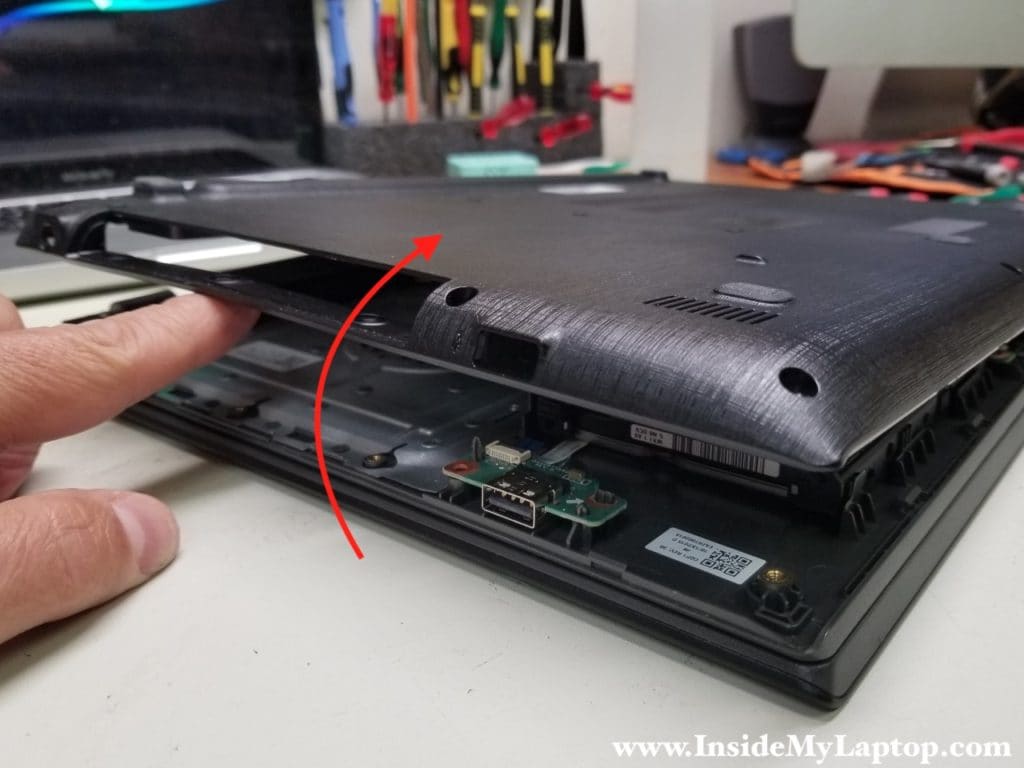
STEP 6.
While lifting up the other side, slide the bottom case to the shown direction to separate it from connection ports on the motherboard.
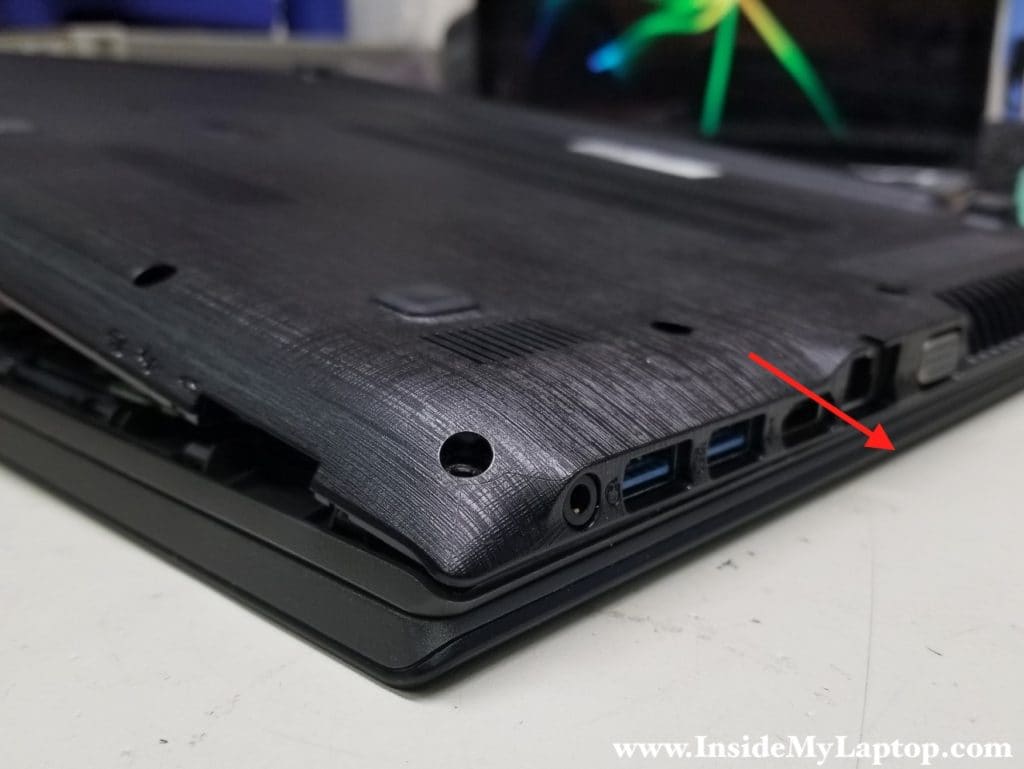
STEP 7.
Be careful, the speaker cable is still connected to the motherboard.
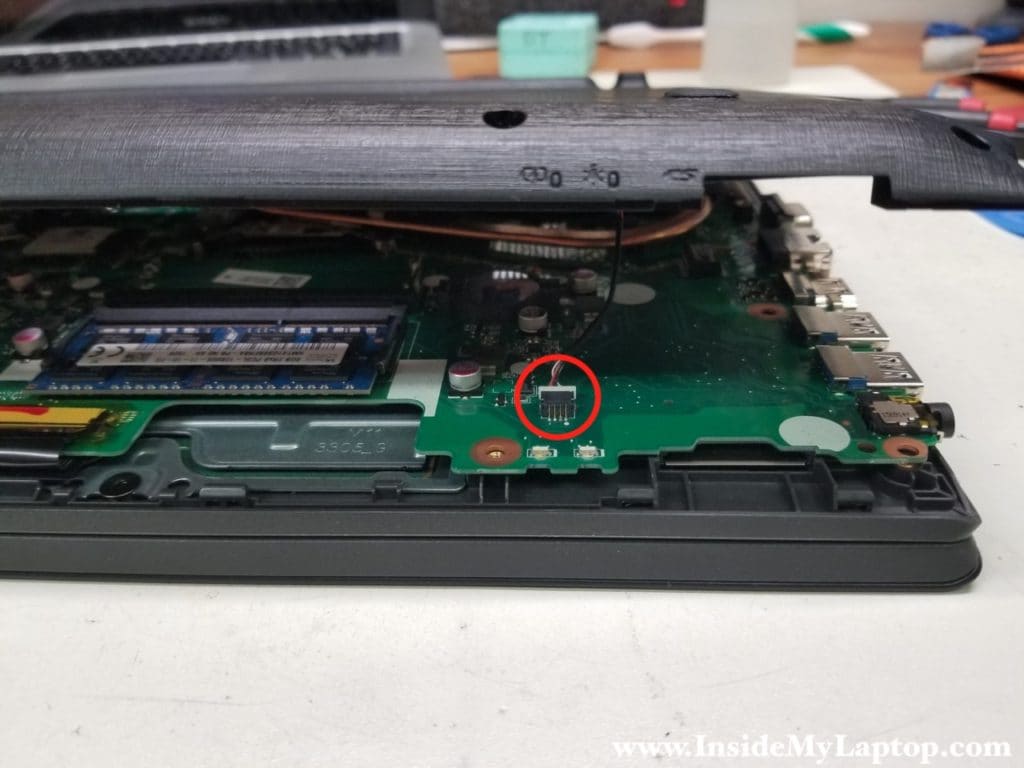
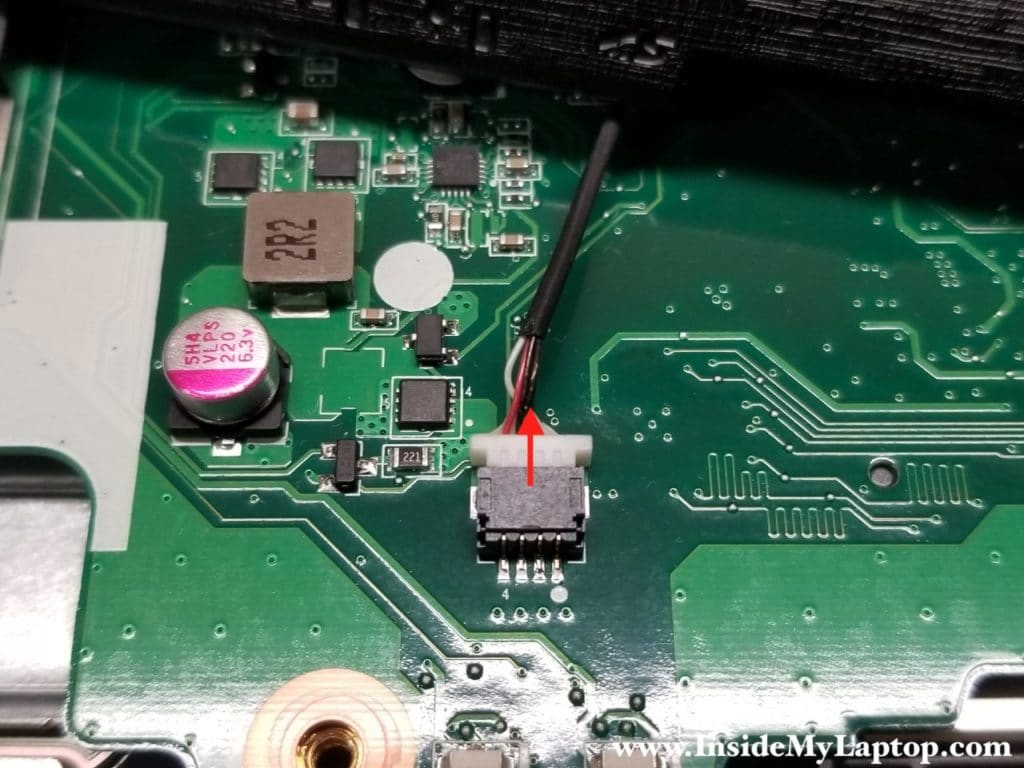
Disconnect the speaker cable from the motherboard. Do not pull by the cable.
Pull the cable connector out by the edges.
STEP 8.
Now you can remove the bottom cover.
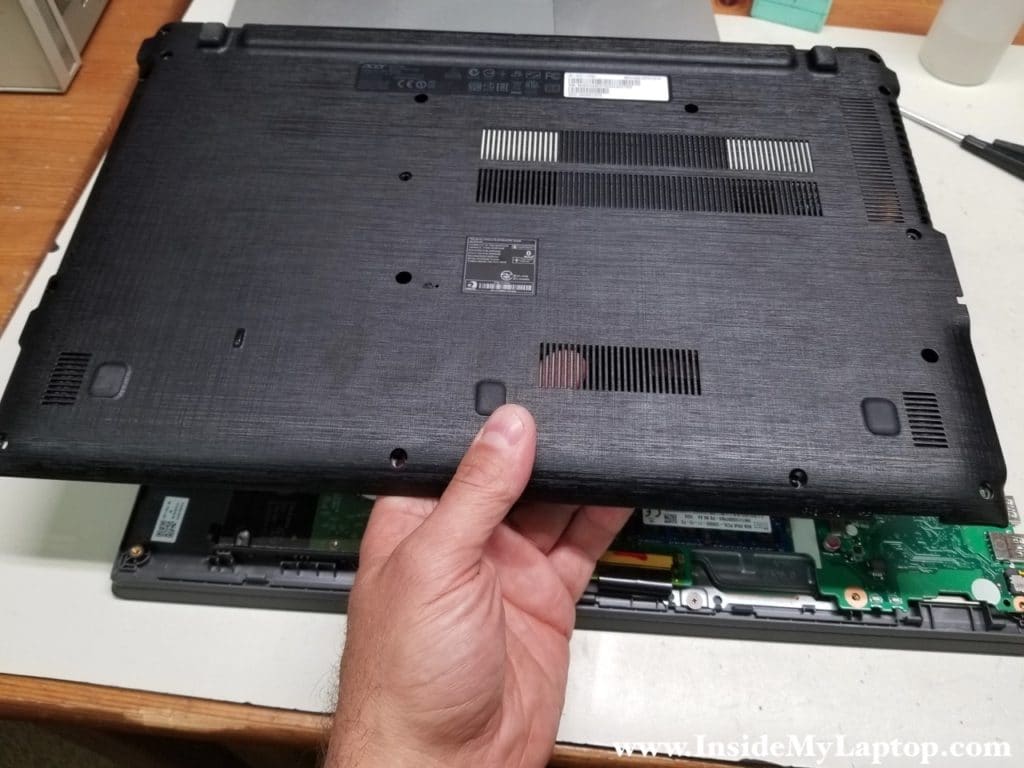
With the bottom cover removed you can access most internal components.
Acer Aspire E15 E5-573-77S3 has two memory slots and I noticed that only one is occupied. You can add second 8GBÂ DDR3-12800 1600MHz SODIMM module to upgrade total RAM to 16GB.

STEP 9.
There are no screws securing the battery.
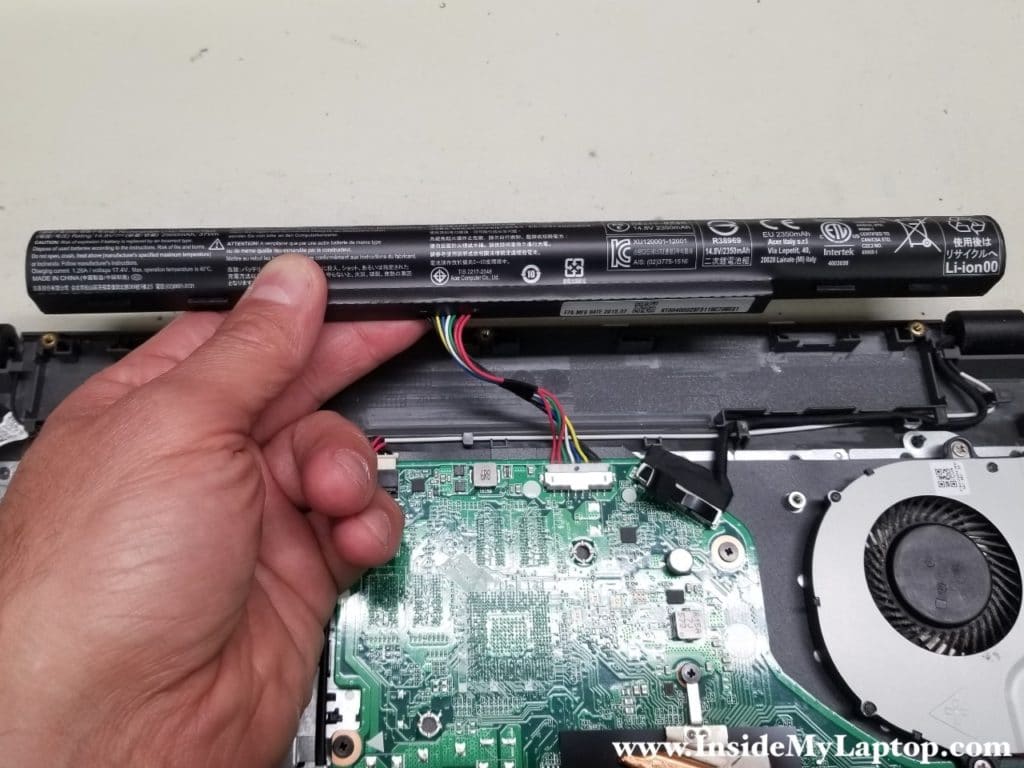
Lift up the battery and unplug the battery cable from the motherboard.
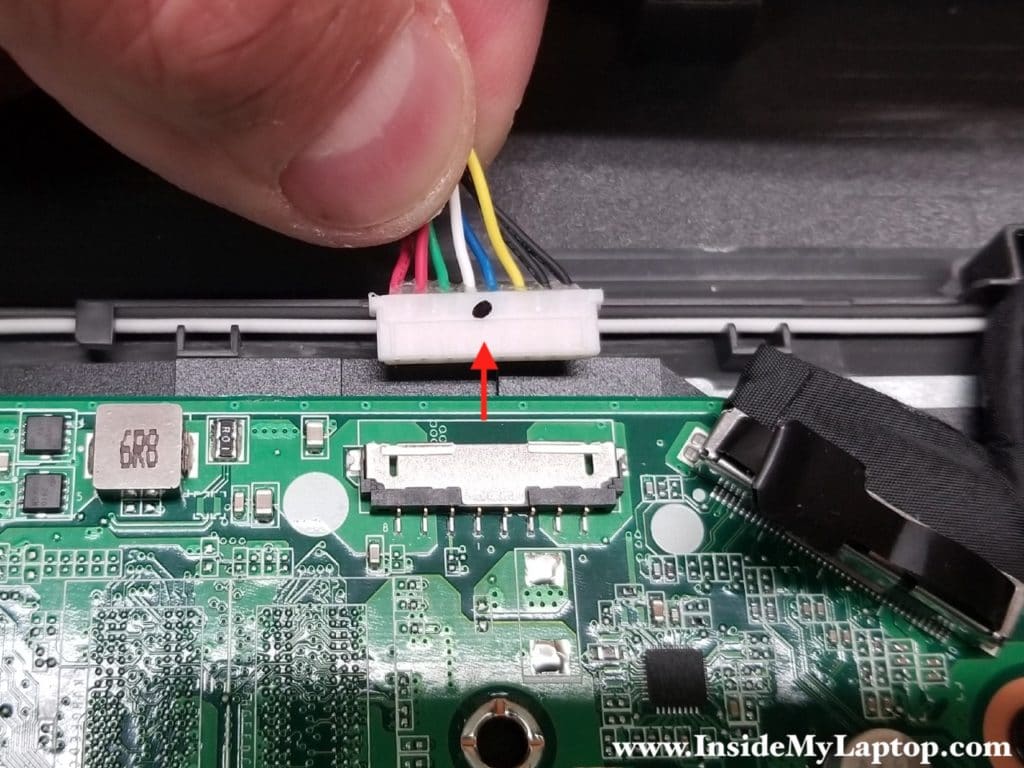
STEP 10.
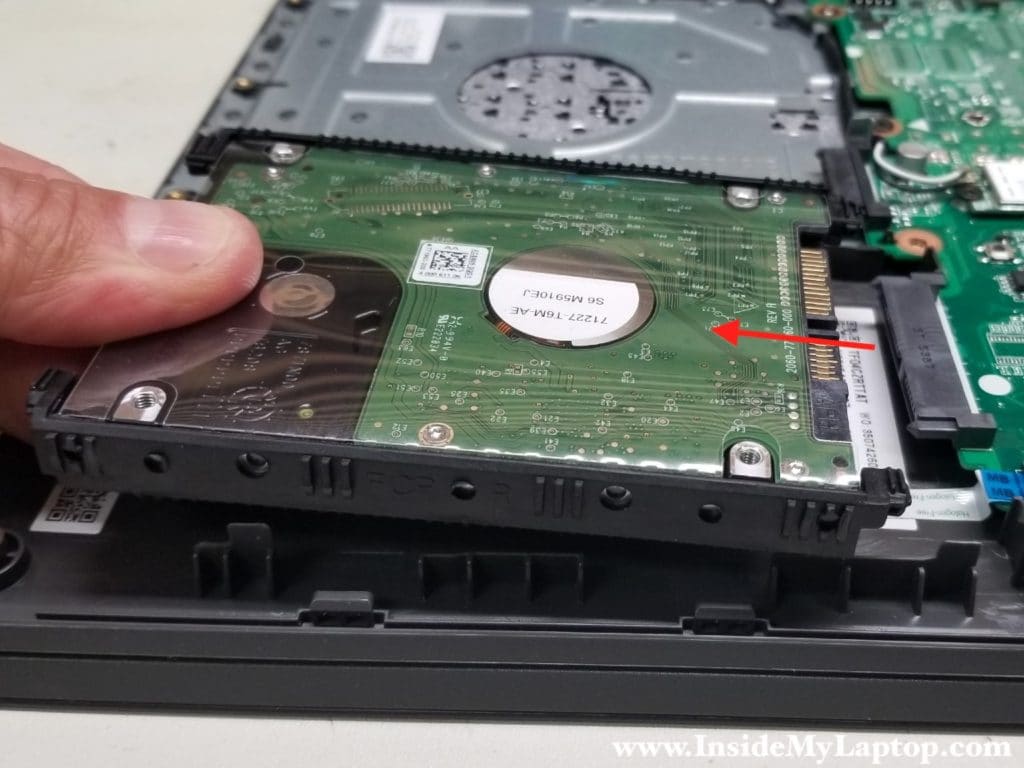
Lift up the left side of the hard drive about 1/2 inch up.
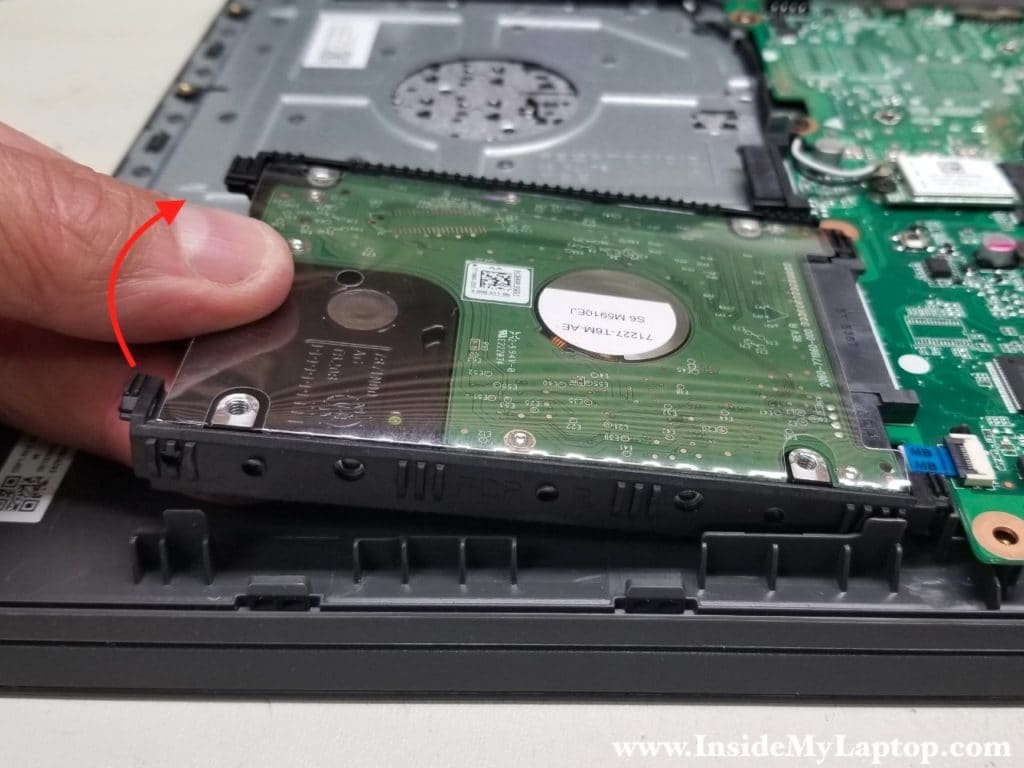
Pull the hard drive to the left to disconnect it from the motherboard.
Remove the hard drive.
Replacing the hard drive with a 2.5″ SATA solid state drive will improve laptop performance significantly. That’s the best upgrade you can do for your laptop.
STEP 11.
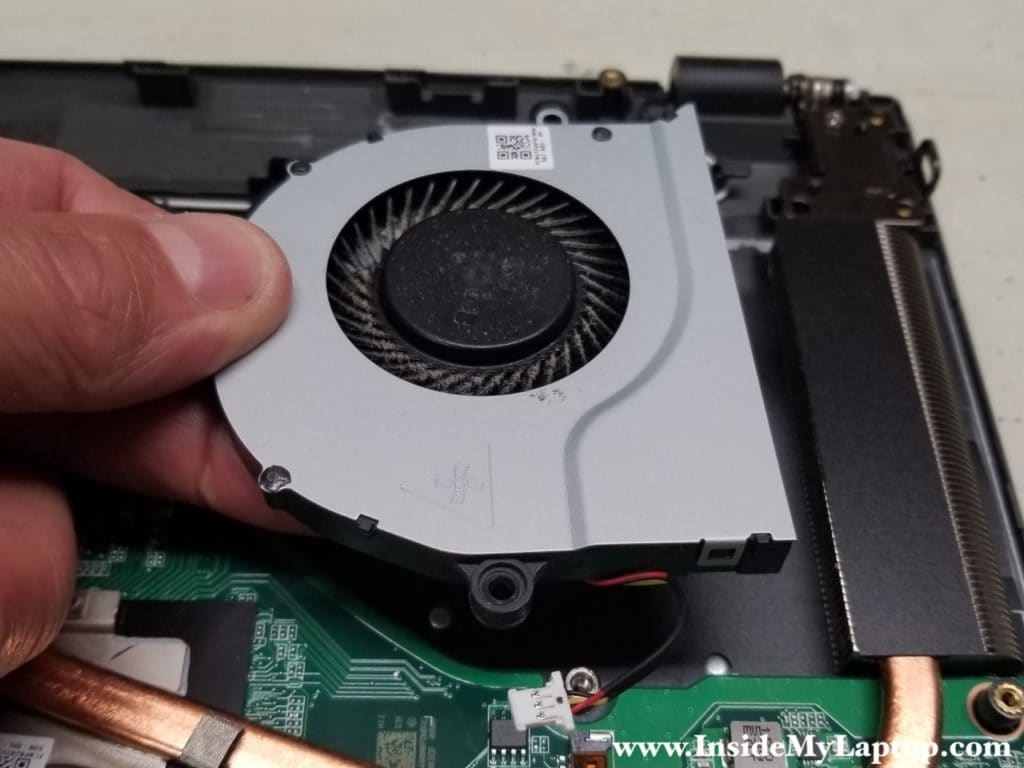
Remove two screws securing the cooling fan.
Disconnect the fan cable from the motherboard.

Lift up and remove the fan.
STEP 12.
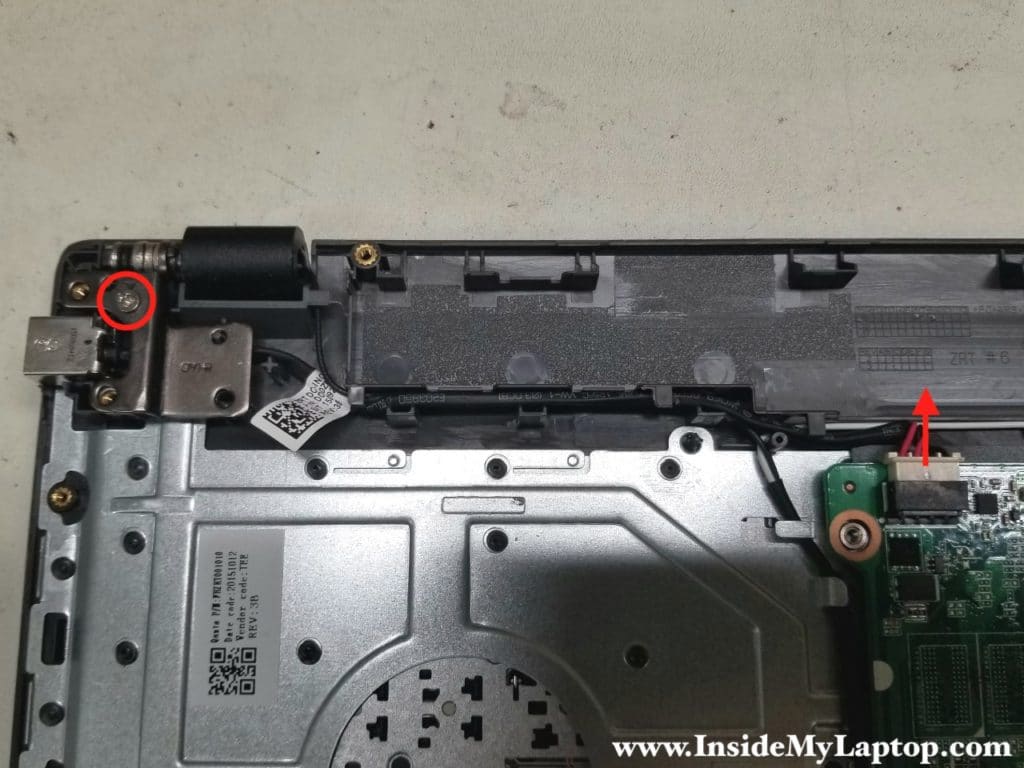
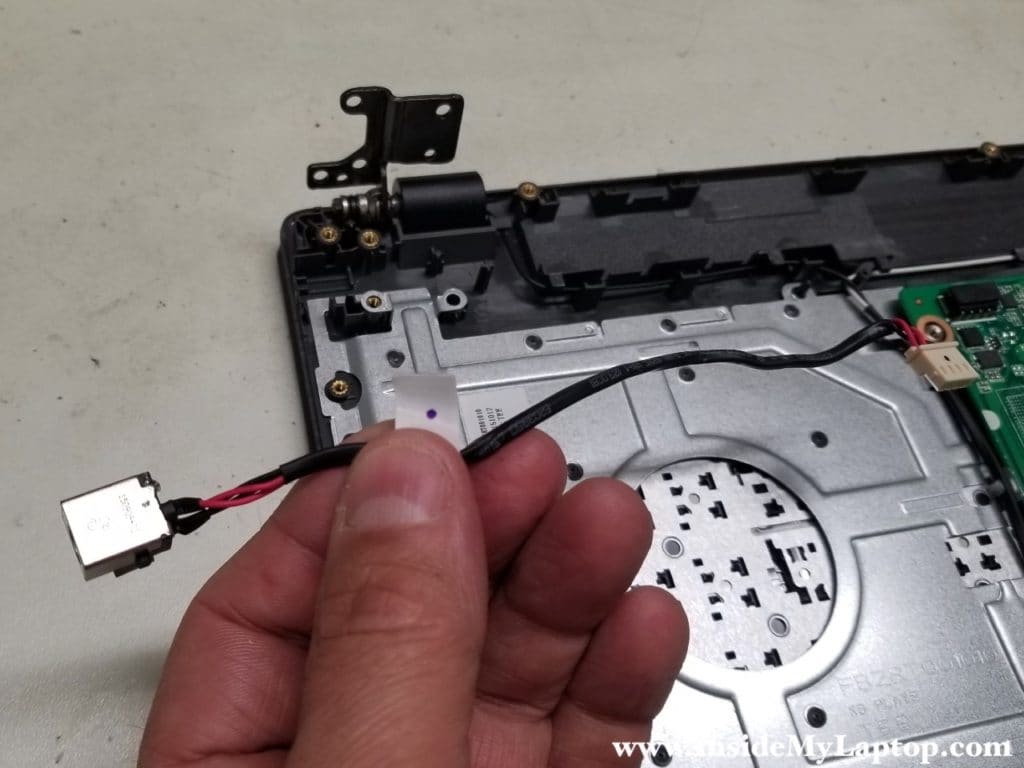
In Acer Aspire E15 E5-573-77S3 laptop the DC power jack attached to the harness.
The DC jack mounted under the right hinge.
Remove one screw securing the hinge. Disconnect DC jack harness from the motherboard.
Lift up the hinge so it opens up at a 90 degree angle.
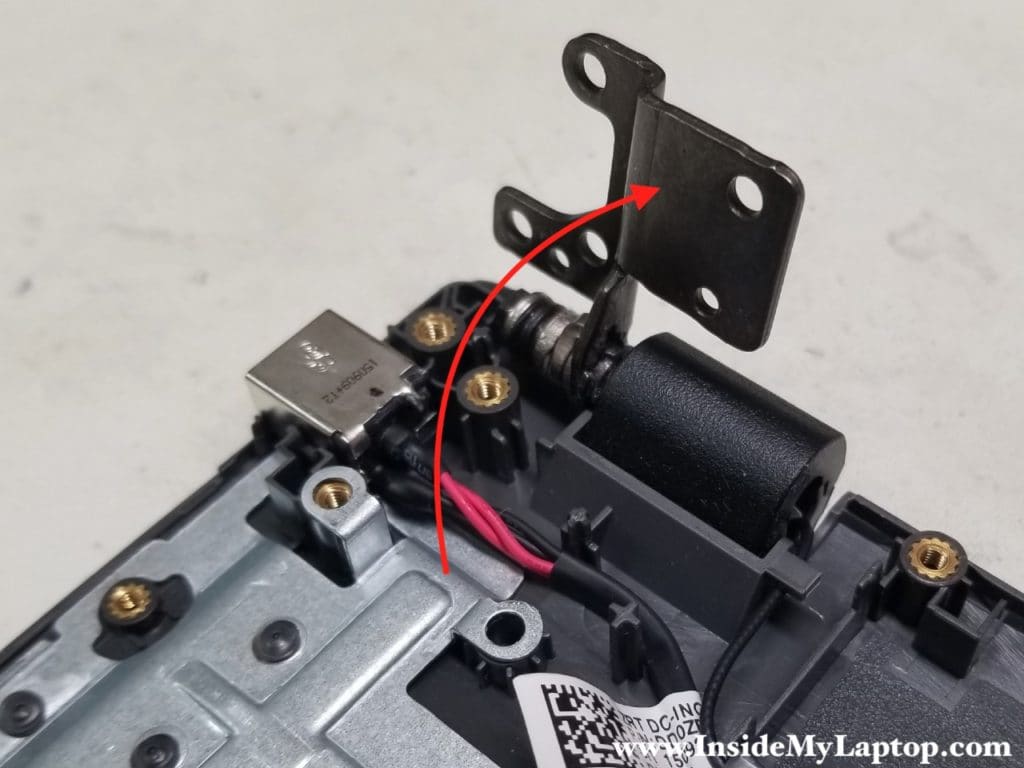
Now you can remove the DC jack harness.
STEP 13.
Remove one screw securing the left hinge.
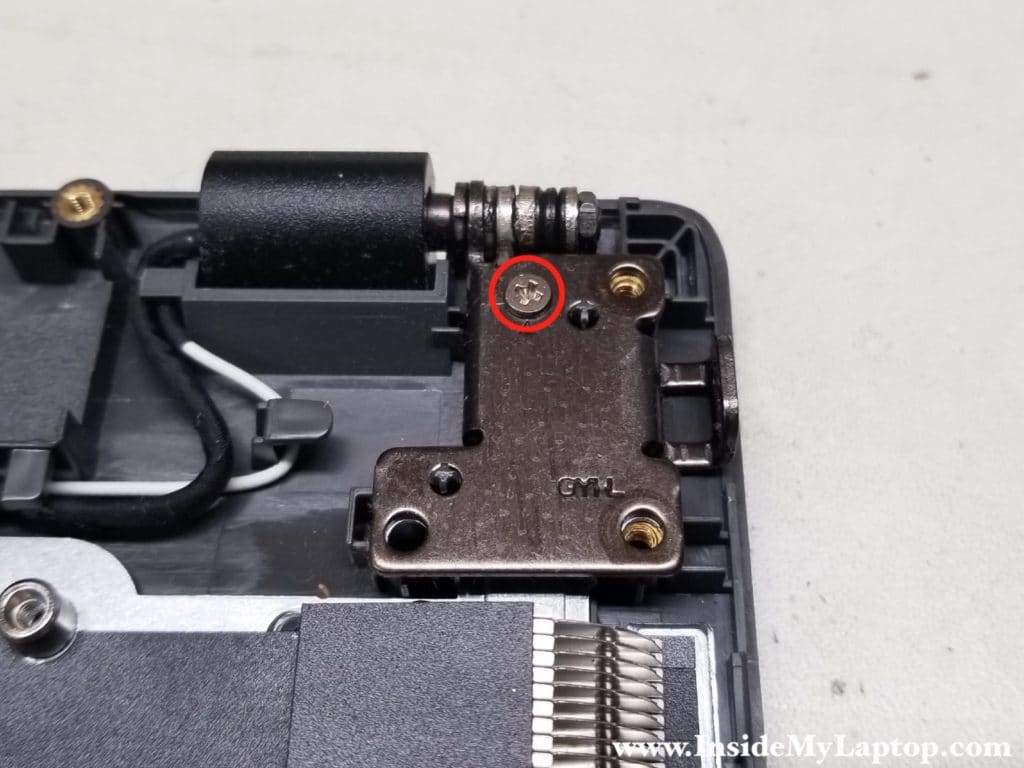
Lift up the hinge.

STEP 14.
Unplug the display cable connector from the motherboard.
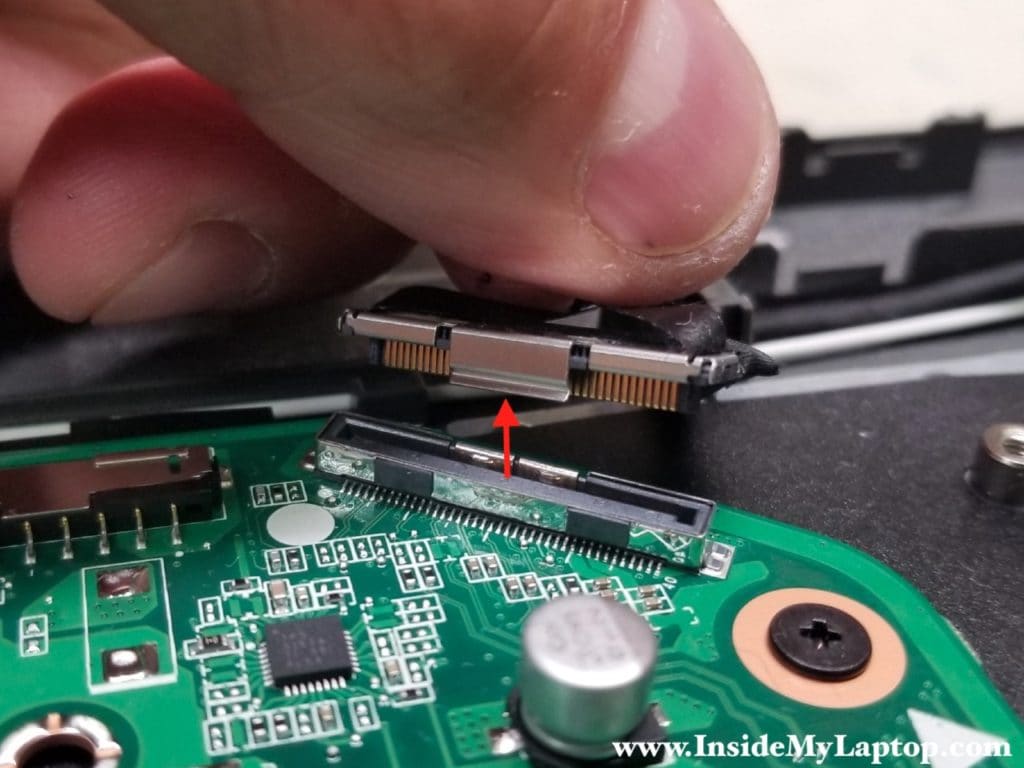
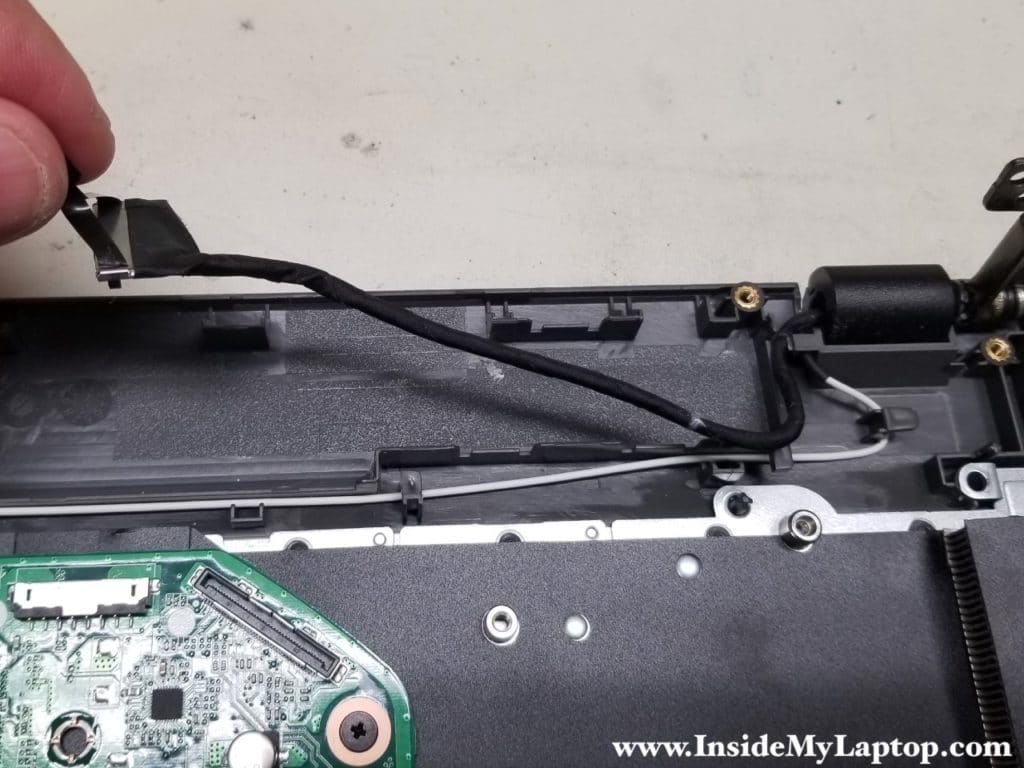
Unroute display cable from the guided path.
STEP 15.
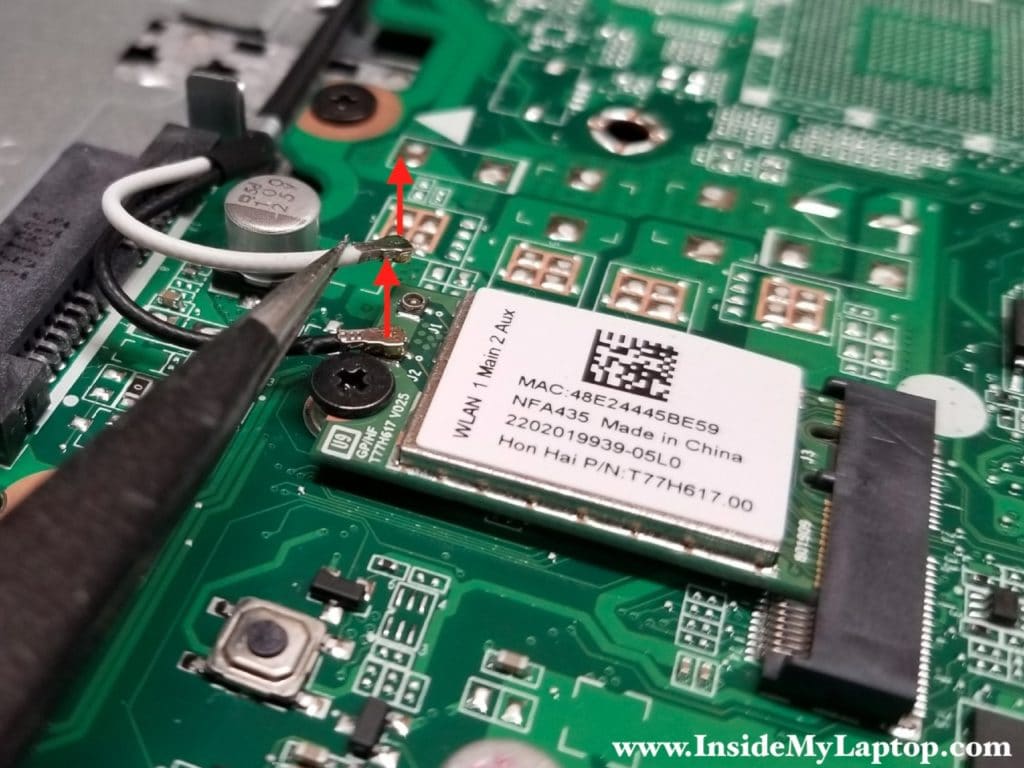
Disconnect Wi-Fi antenna cables from the wireless card.
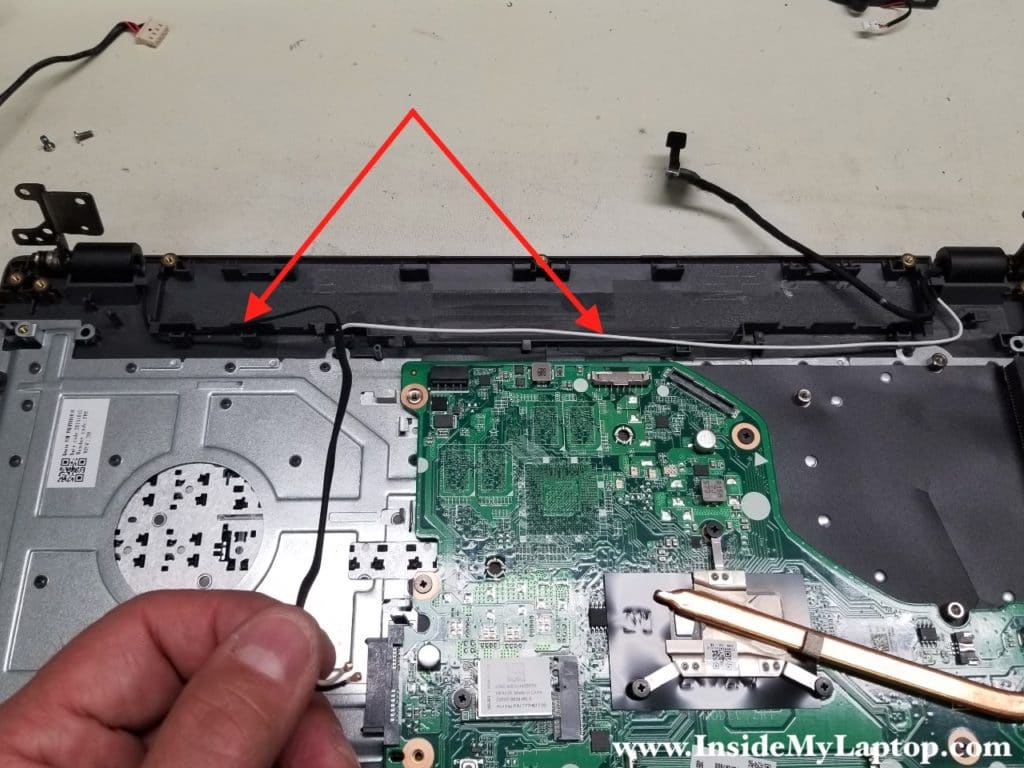
Unroute Wi-Fi antennas from the guide path.
STEP 16.
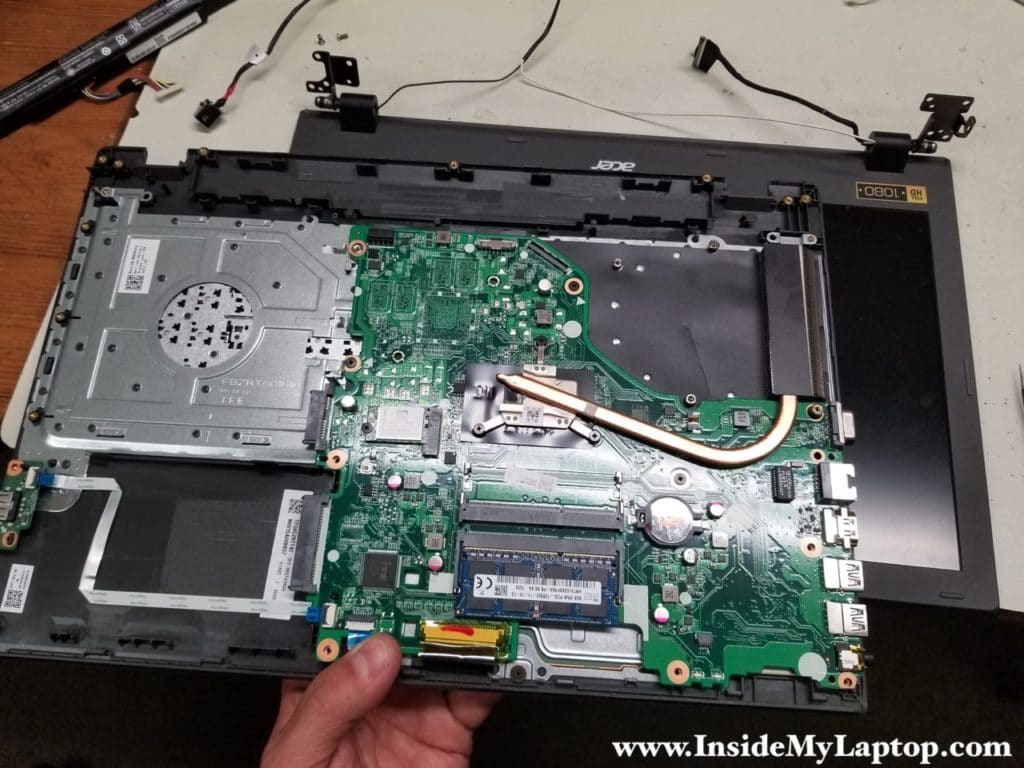
Now you can separate the top case assembly from the display panel.
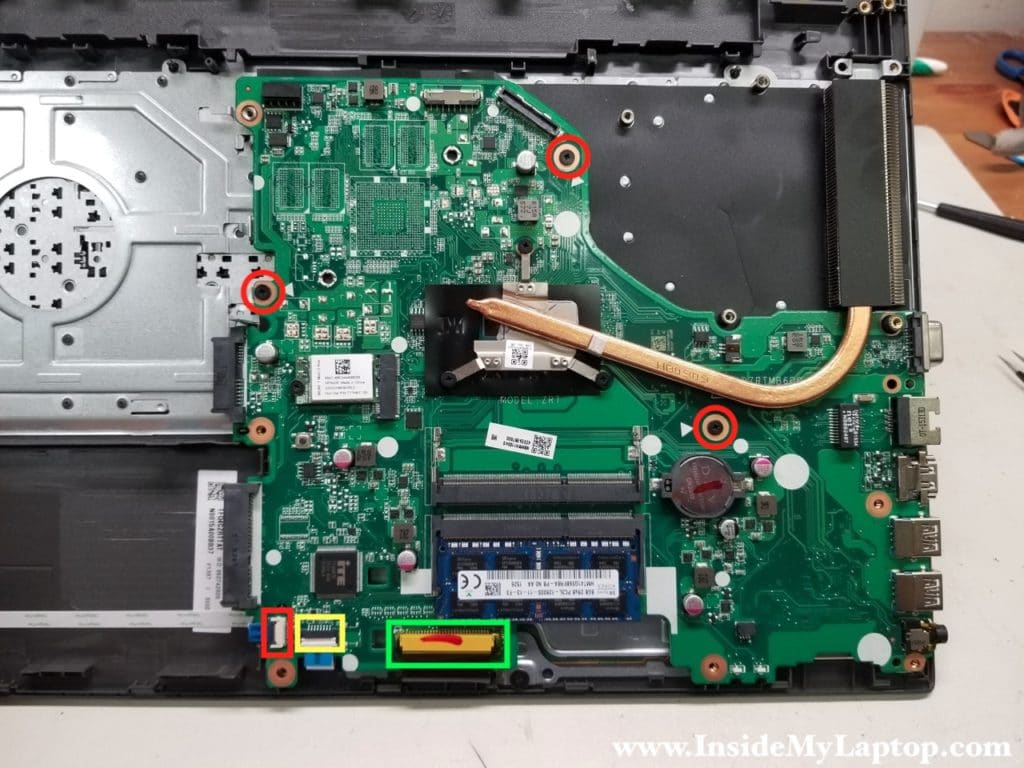
In order to remove the motherboard you’ll have to remove three screws and disconnect the following cables:
- USB board cable (red rectangle)
- Trackpad cable (yellow rectangle)
- Keyboard cable (green rectangle)
In you have failed keyboard, I would recommend replacing the entire top case.
In Acer Aspire E15 E5-573-77S3 laptop the keyboard permanently riveted to the top case.

In the next guide I explain how to remove and replace the LCD screen.
Tom
Superb pictures, really helped me as I have an Acer Aspire E15, E5-523-904B which is not working after rain soaked while plugged in gulp! I’ve tried most things like removing the battery (after seeing how you do it) and plugging in power adapter but still no joy. No led lights showing, also removed hard drive, memory, fan (which was very dirty). I can’t find a cmos battery on the motherboard though, should I have one?. Any help you can offer would be appreciated. An internet site I was on said it might be the power button board/cable. Best wishes Tom
IML Tech
@ Tom,
In my example the CMOS battery shown in the step 8. It’s a CR2032 type battery.
For liquid spill check out this article: Fix MacBook Pro liquid spill yourself.
It’s located in Apple Products category. It’s for Macs but maybe will give you some ideas how to proceed.
Sorry, I disable links in comments so you’ll have to search the site.
Techi
I want to Touchpad body in white colour