
In the following guide I will take apart an Acer Aspire 4743 series laptop.
In my case the full model name is:Â Aspire 4743z-4861.
STEP 1.
Make sure it’s turned off completely before starting the disassembly process.
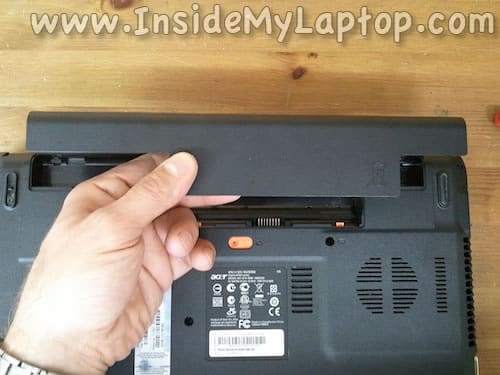
Unlock and remove the battery.
STEP 2.
Remove three screws securing the service cover on the bottom.
Lift up and remove the cover.
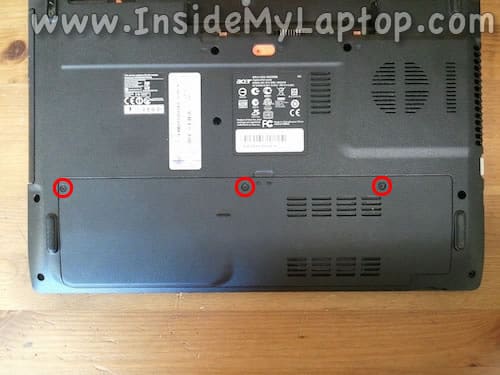
Under the cover you will find the hard drive, wireless card and both RAM modules.
Remove one screw securing the hard drive.
This laptop can handle up to 8GB (2x4GB) DDR3-12800 SODIMM RAM modules.

STEP 3.
Slide the hard drive to the left to disconnect it from the motherboard.
Remove the hard drive assembly from the laptop.
Upgrading this regular 2.5″ hard drive to a 2.5″ solid state drive will speed up the laptop significantly.

STEP 4.
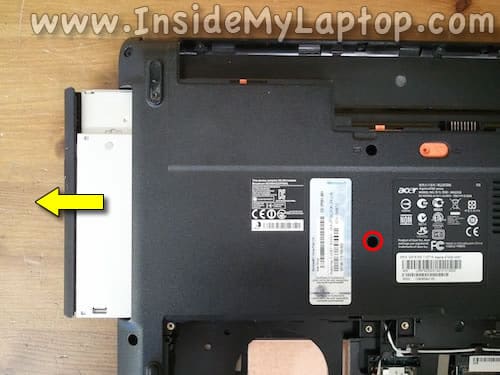
Remove one screw securing the optical drive.
Pull the drive to the left and remove it from the case.
STEP 5.
Remove two screws securing the keyboard.

STEP 6.
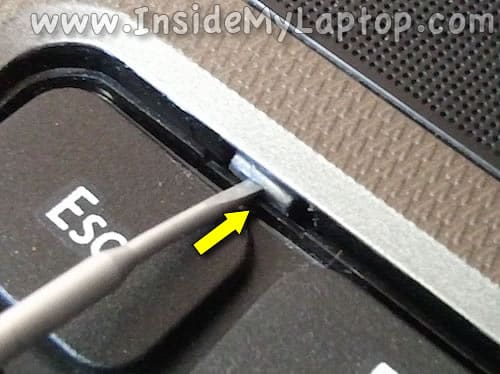
There are five latches securing the keyboard to the top cover.
Push on the latch with a small screwdriver until it moves into the case.
When the latch pushed in, the keyboard will lift up a little bit and the latch will not be able to lock back in.
Do the same with all remaining latches.
STEP 7.
Separate the keyboard from the top cover and turn it upside down. Place on the palm rest.
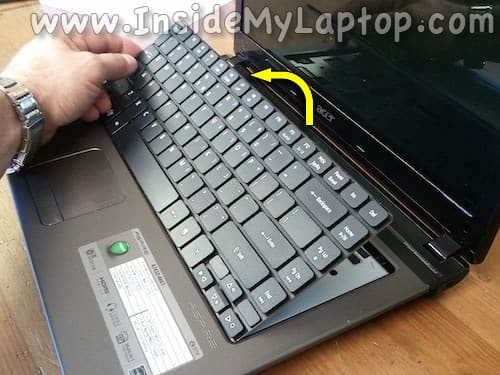
STEP 8.
Now you can access the keyboard cable connector, unlock it and release the cable.
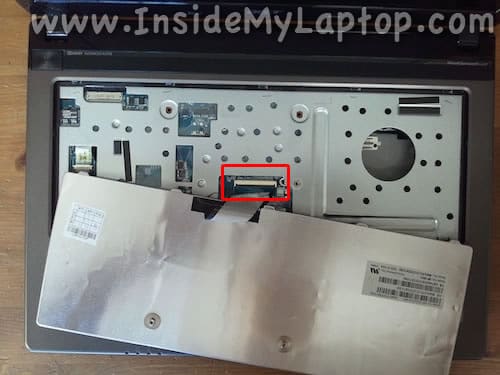
STEP 9.
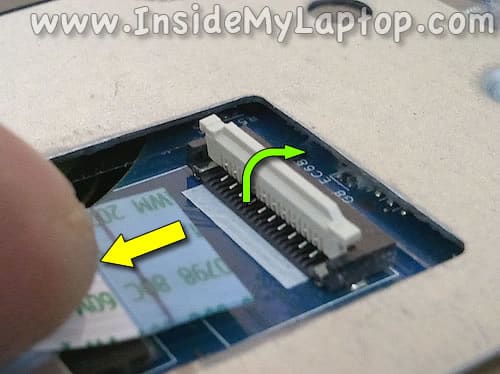
Lift up the left side of the retaining tab until it opens up at a 90 degree angle (green arrow).
Pull the cable out of the connector (yellow arrow).
Now you can remove the keyboard completely.

STEP 10.
Remove shown screws from the bottom case.

STEP 11.
Remove one screw securing the top cover (palm rest) assembly.
Disconnect the power button cable (left arrow).
Disconnect the touchpad connector (right arrow).

Unlock the connector by lifting up the retaining tab.
STEP 12.
Start separating the top cover assembly from the bottom case.
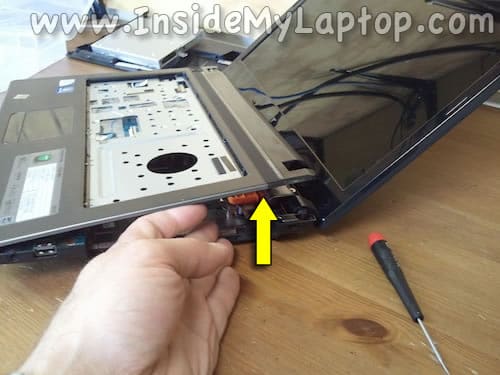
I’m using a guitar pick to separate two parts from each other.

STEP 13.
Remove the top cover.

On the other side you can access both speakers, touchpad and power button board.

When the top cover removed you can access the CMOS battery and USB board.
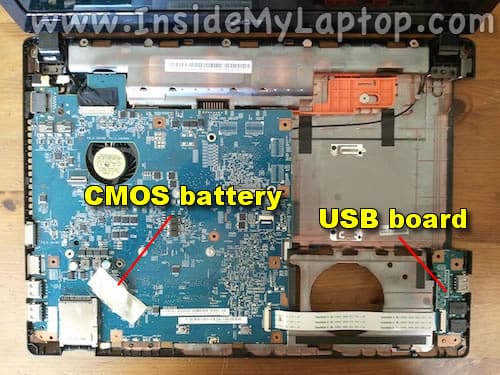
STEP 14.
Before you can remove the motherboard from the case it’s necessary to disconnect two antenna cables from the wireless card.
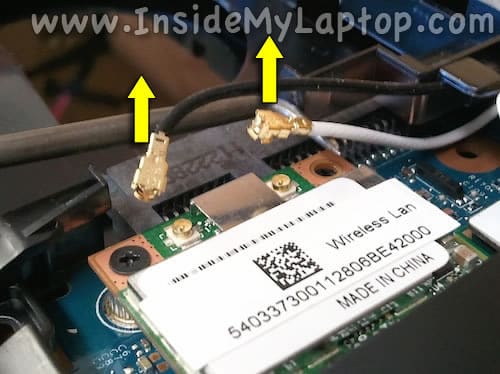
STEP 15.
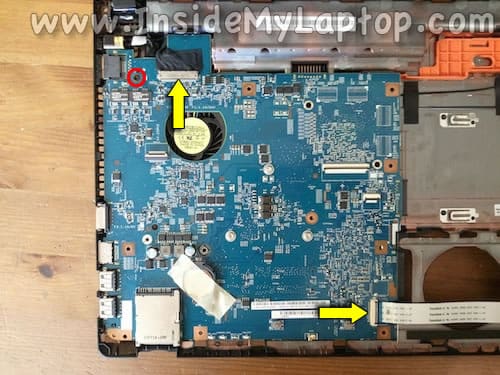
Remove one screw securing the motherboard.
Disconnect the display cable and USB board cable.
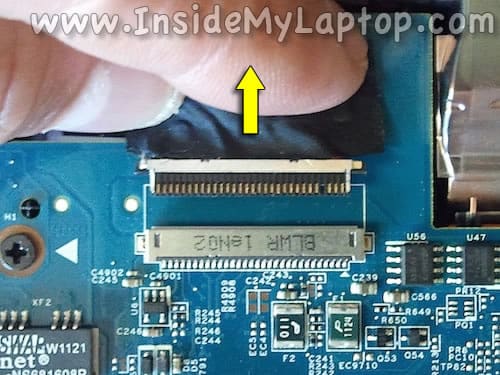
Here’s how to unplug the display cable.
STEP 16.
Start lifting up the motherboard on the right side.

STEP 17.
Remove the motherboard from the case. It comes out with the power connector attached to it.
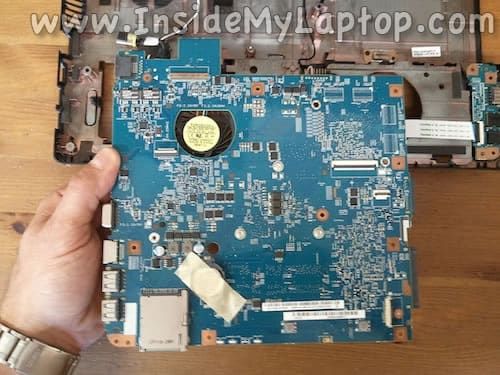
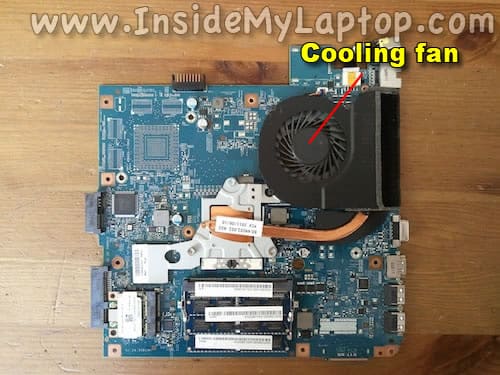
On the other side of the motherboard you can access the cooling fan and heat sink.
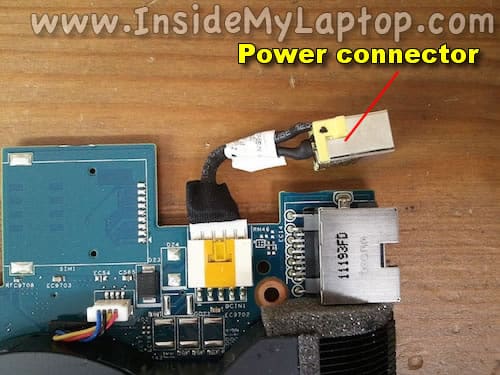
In Acer Aspire 4743 series laptops the power connector can be easily replaced.
Simply unplug the cable from the motherboard and replace with a new one.
Hami
Hi, thanks. It works for my Aspire-4750G too.
Cyberdyne
It works also for my Acer 5742z.Thanks !
vin
I just replaced my hard drive on my acer aspire 4743. How do I get the computer to recognize the disk that Acer sent me? Or maybe I should ask what do I do next. The computer turns on but I get this black screen with scrolling data going fast and then it stops and asks “Do you want to set up VLANs now y:n?” At the top of the screen is says “Welcome to pfSense 2.1.5-RELEASE …”
Some other things it says: “No core dumps found.” “Creating symlinks……done.” “External config loader 1.0 is now starting…” Launching the init system… done.” “Initializing…………………done.” “Starting device manager (devd)…done.” “Loading configuration……done.” “Default interfaces not found — Running interface assignment option. alc0: link state changed to DOWN”
Any help would be fantastic. Thanks
Yeyen
Thank you.. Just now wanna open all of it just because want to change the keyboard only. Luckily bump this webside.
Amir
Thank you very much. Its help me changing the CMOS battery easily. Your sharing really helps me.
Ken Church
My acer was working great one day then we turned it off and tried to turn it on again and no power. The 2 lights come on but it won’t boot. We get like one click from the hard drive that’s it. I’ve pulled it all apart as you instructed looking for some obvious flaws but all looks good. There’s a bit of fluff in the fan and dirt in places but no corrosion or hot spots. Could it be one of the small coin batteries? or the power jack like you said you could put a new one in??? I know its an old computer but its been great and we love Win 7, hate the new 10, just want my computer back.
REINA CONDE
HELLO MY LAPTOP, ASPIRE 4743Z DILI NA MO ON, I REMOVE THE BATTERY WHILE ON CHARGE .
THERE IS A SMALL LIGTH BLUE INDICATE THE LIKE DRAWING HERE BULB. . SIGA, BUT MY MONITOR IS OFF.
FOUR SMALL LIGTHS BULBS, HERE NEXT TO TOUCH PAD…
i dont know how to fix this…
pls,,.. text me here my number 0923-085-4486
please i need some idea, please help me ma on balik akoa laptop….