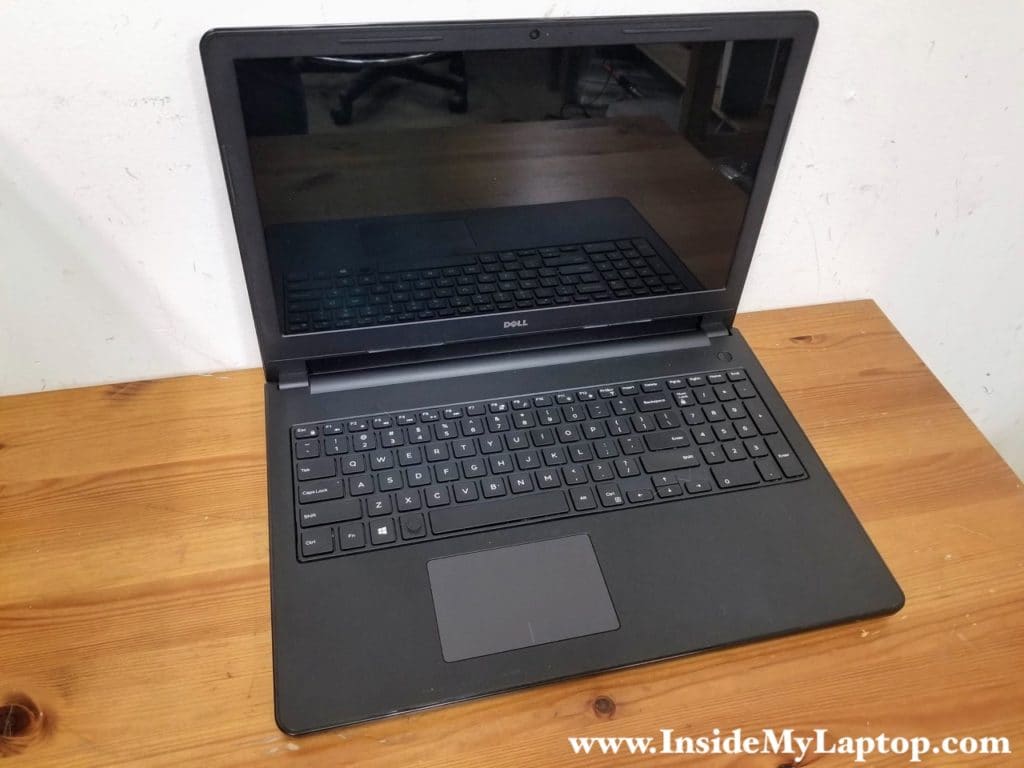
In this guide I’m taking apart a Dell Inspiron 15 3558 laptop (model P47F) for adding more RAM and upgrading from a regular hard drive to SSD. In order to access the original hard drive and memory slots it’s necessary to remove the laptop base cover and keyboard. There is no service hatch on the bottom in this model.
Dell Inspiron 3558 has one SATA connector for 2.5″ hard drives and two memory slots. You can install up to 16GB (2x8GB) DDR3-1600 memory modules.
If this guide doesn’t fit your needs, at the end of this post you will find a link to the official Dell Inspiron 15 3558 service manual.
Removing base cover and keyboard
STEP 1.
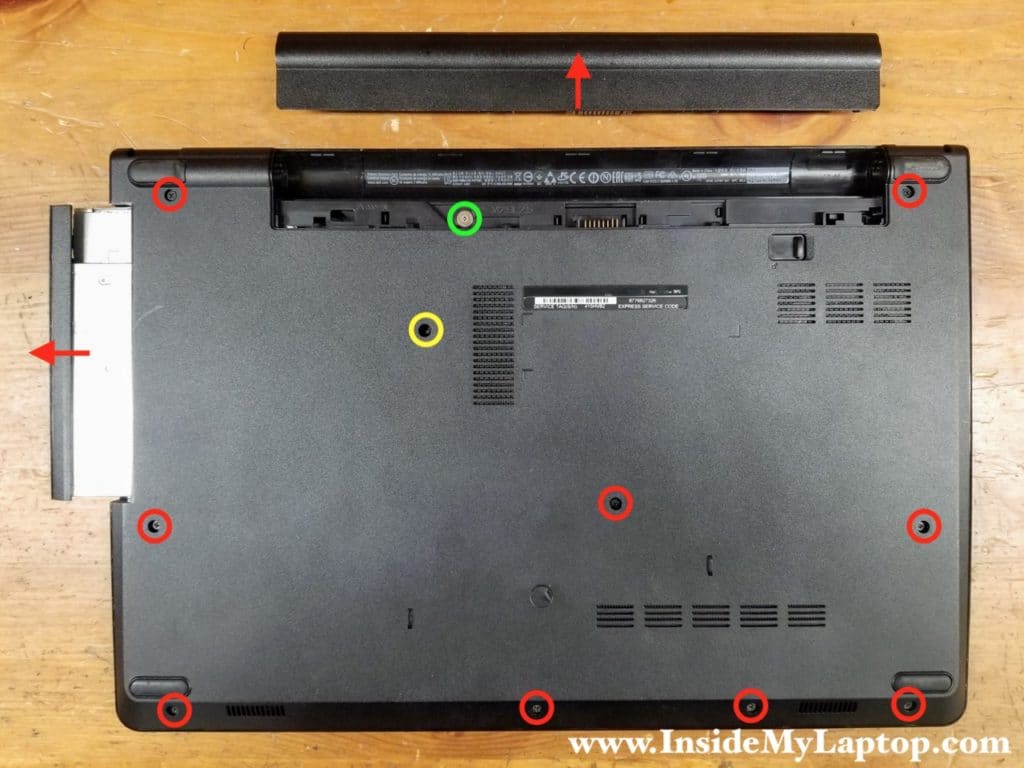
Remove the battery.
Remove all screws from the base cover.
Pull the CD/DVD drive out.
One screw color-coded in yellow secures the CD/DVD drive. Don’t forget to remove one screw (green) located in the battery compartment.
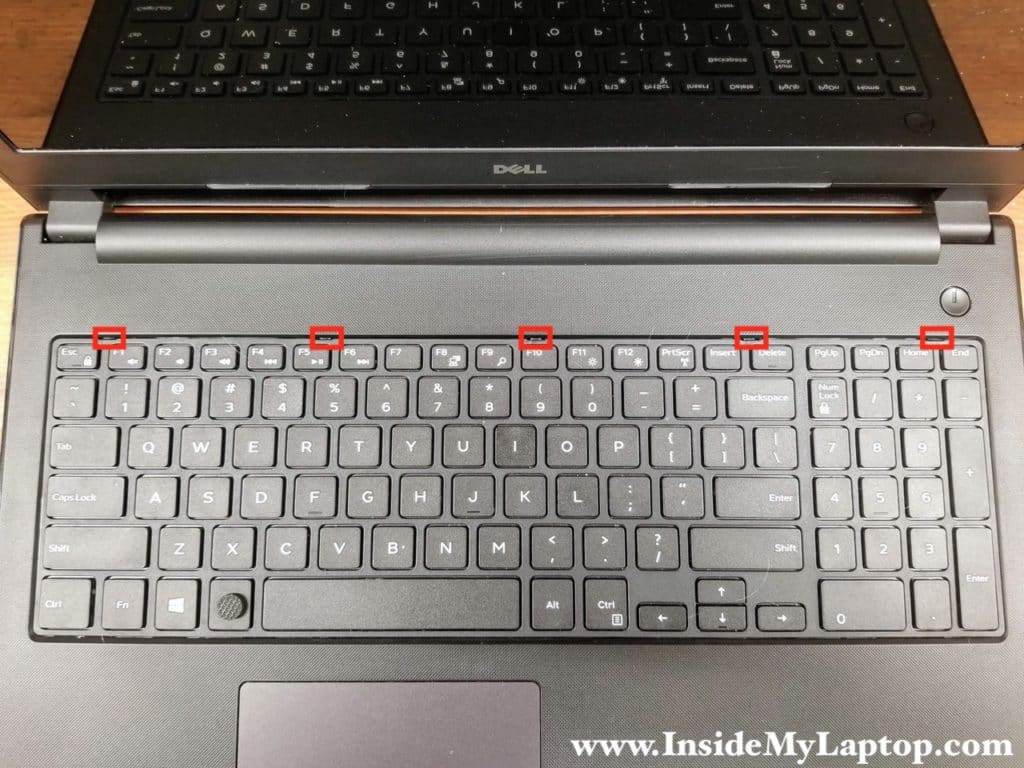
The keyboard is attached to the top case by five spring-loaded latches located just above the top row keys.
Attention: it is not necessary to remove bottom screws in order to remove the keyboard. If replacing the keyboard is your goal, skip the previous step (except for battery removal).
STEP 2.
Insert a thin case opener tool between the keyboard and the latch. The case opener will push the latch inside the case.

STEP 3.
Pry the keyboard up to elevate it above the latch. Do the same with all remaining latches.

STEP 4.
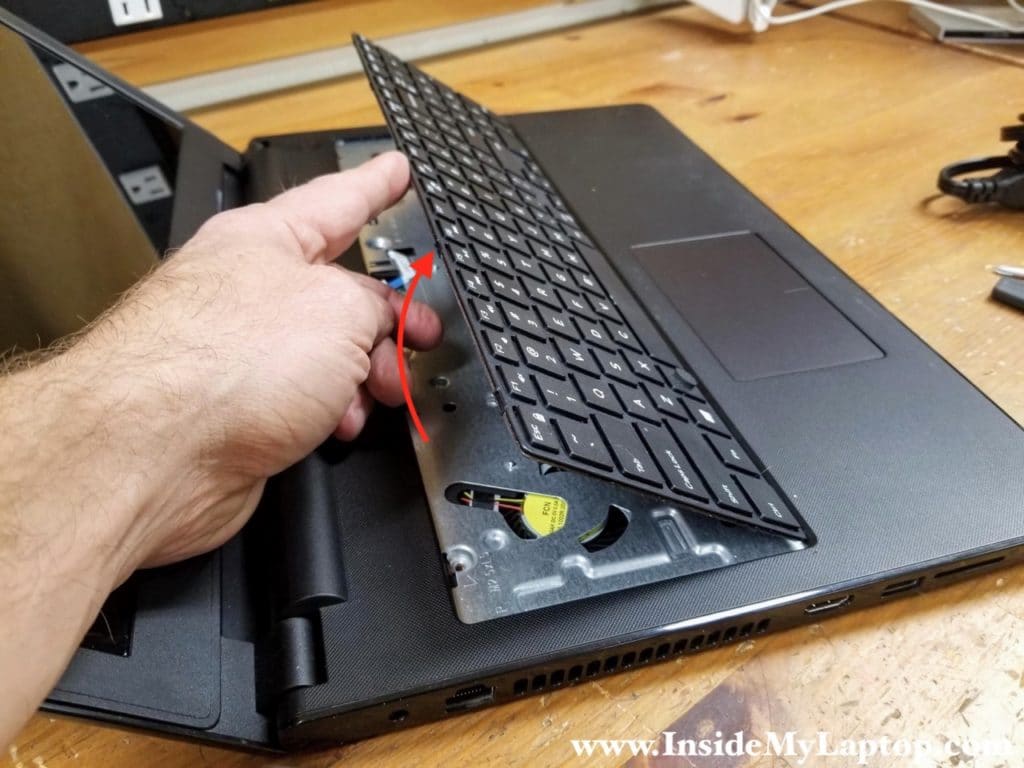
When all latches are unlocked, continue removing the keyboard with your hands and place it upside down on the palmrest.
STEP 5.
Disconnect the keyboard cable from the motherboard.
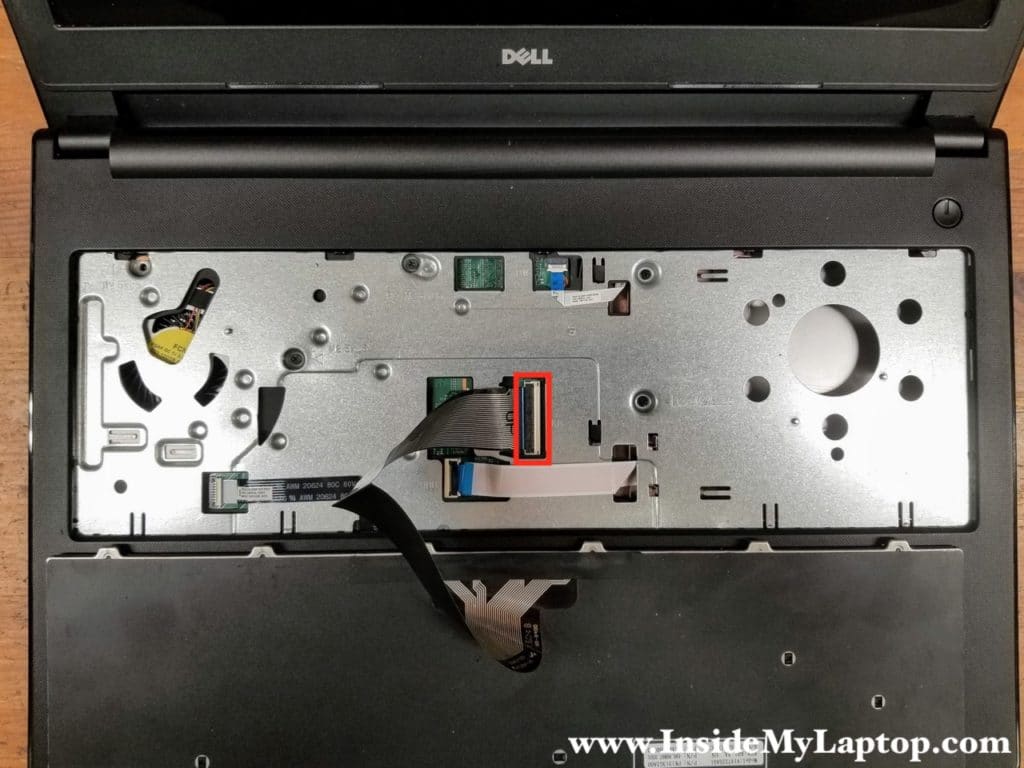
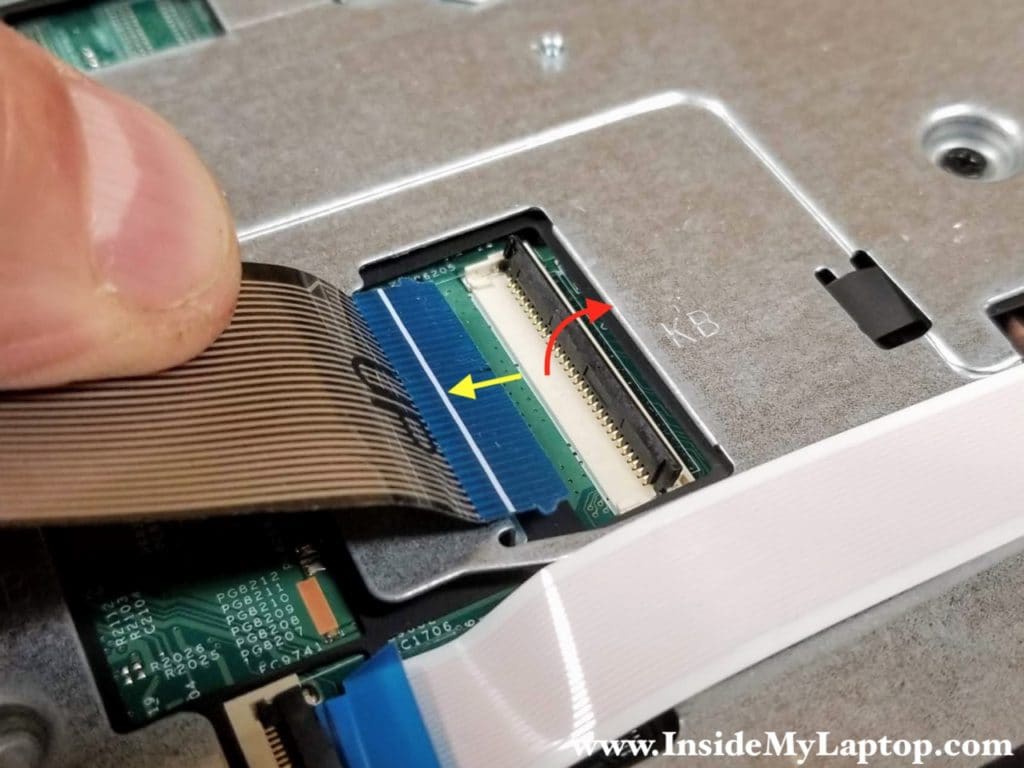
Lift up the locking tab at a 90 degree angle (red arrow) to unlock the connector. Lift up the cable and pull it out.
STEP 6.
Remove five screws located under the keyboard. Disconnect one CD/DVD drive cable.
Attention: while remove the base cover it’s necessary to feed this cable through the opening in the top case.

STEP 7.
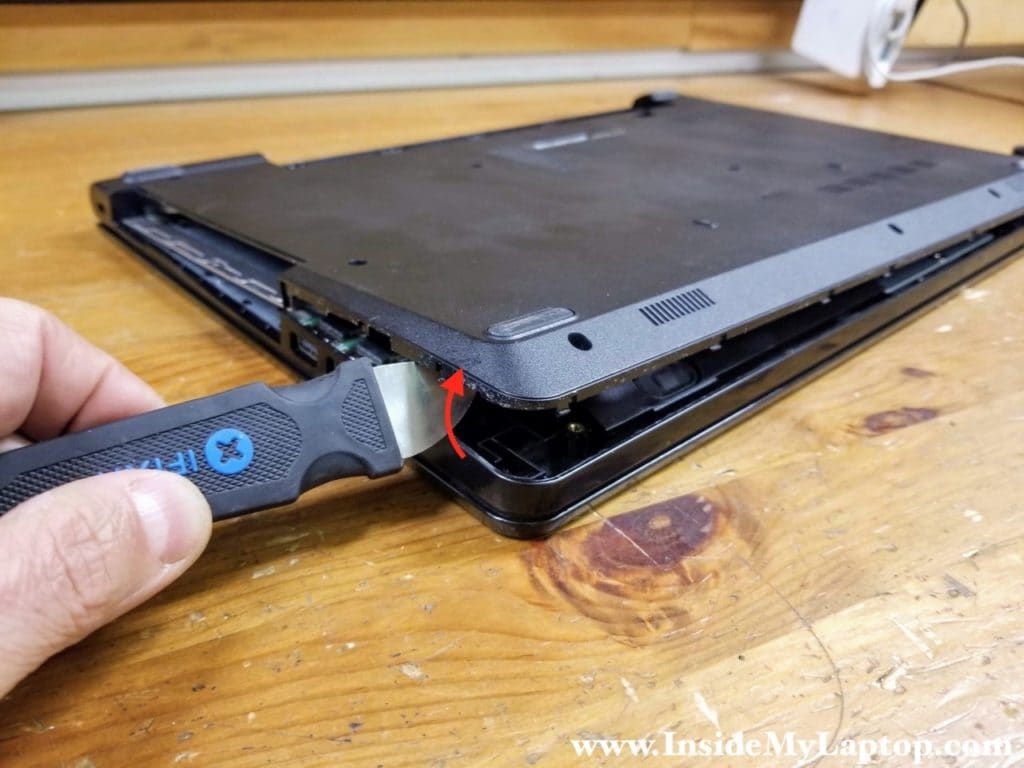
Start separating the base cover from the top case with the case opening tool. There are multiple hidden latches securing the base cover. Continue removing the cover with your fingers.
STEP 8.
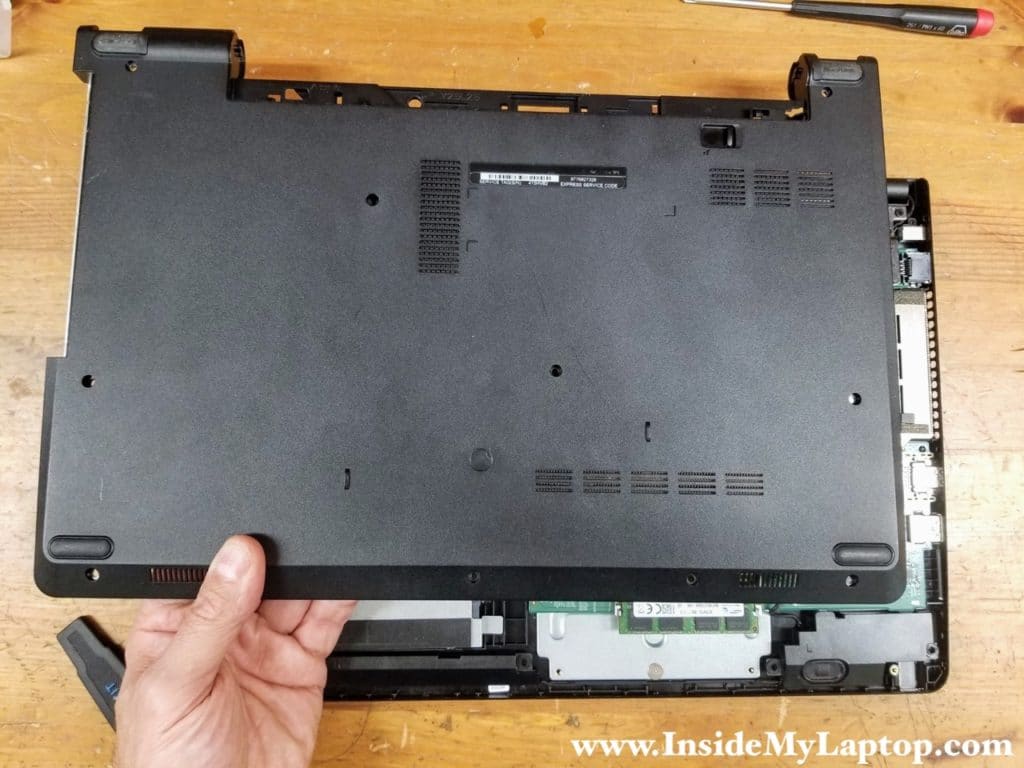
Remove the base cover.
Installing new SSD and more RAM
STEP 9.
Remove two screws attaching the hard drive caddy to the top case.
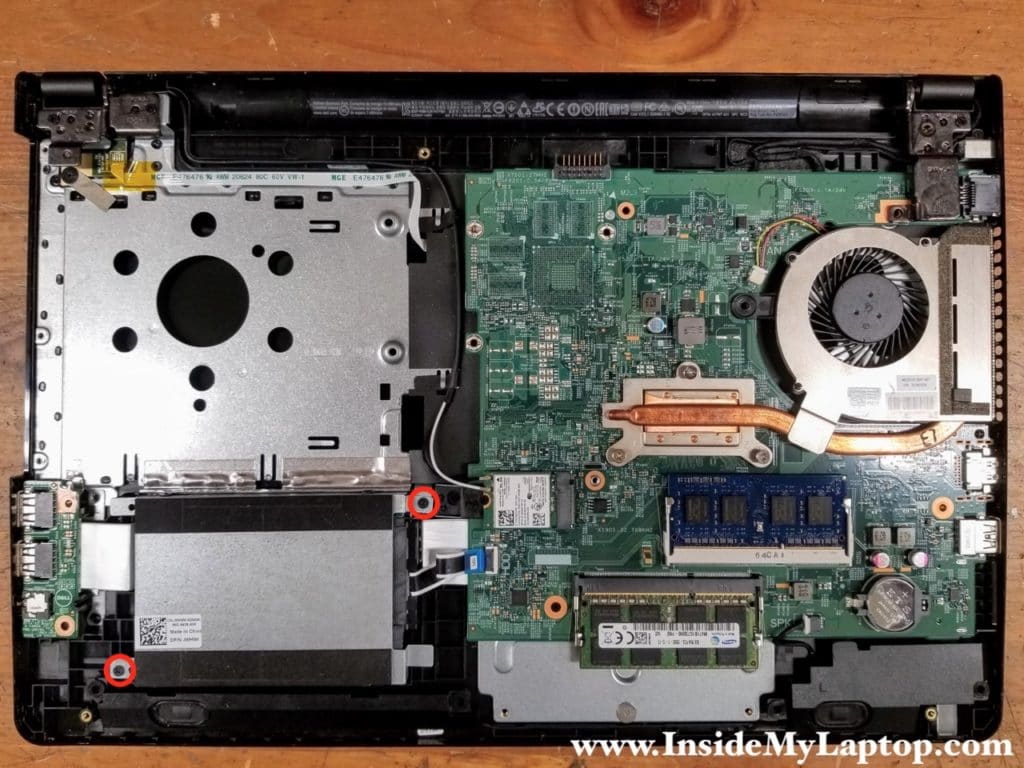
STEP 10.
Carefully lift up the hard drive assembly and disconnect it from the SATA cable.
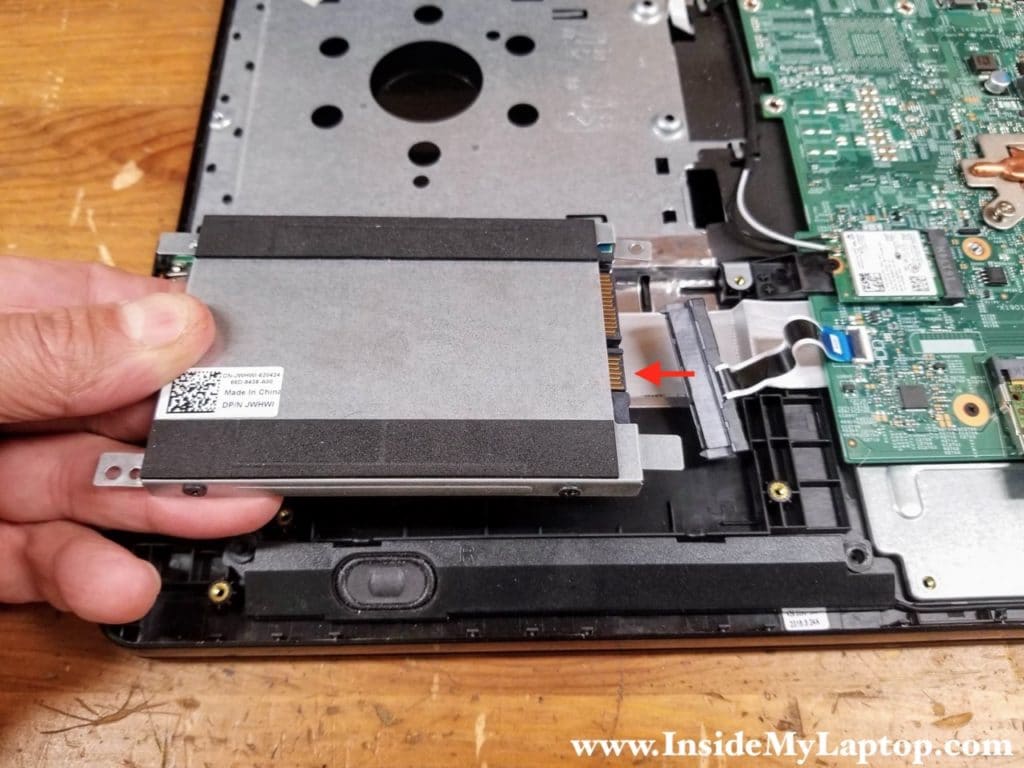
STEP 11.
Remove four screws (two on each side) securing the hard drive to the caddy.
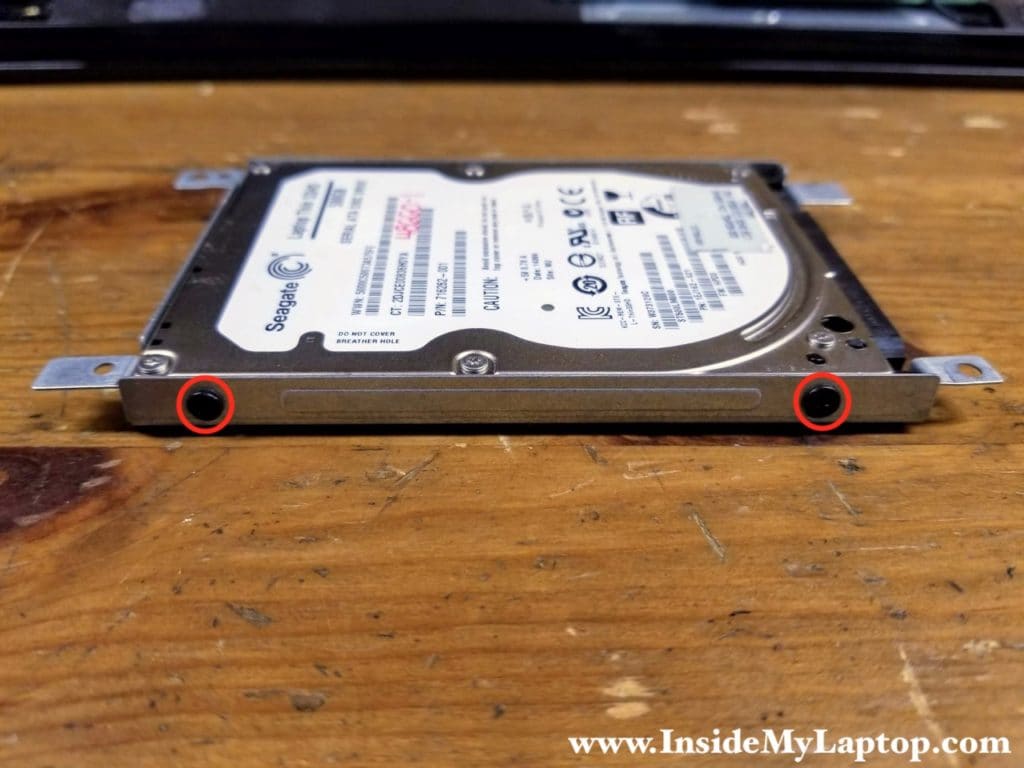
STEP 12.
Remove the old hard drive from the caddy.
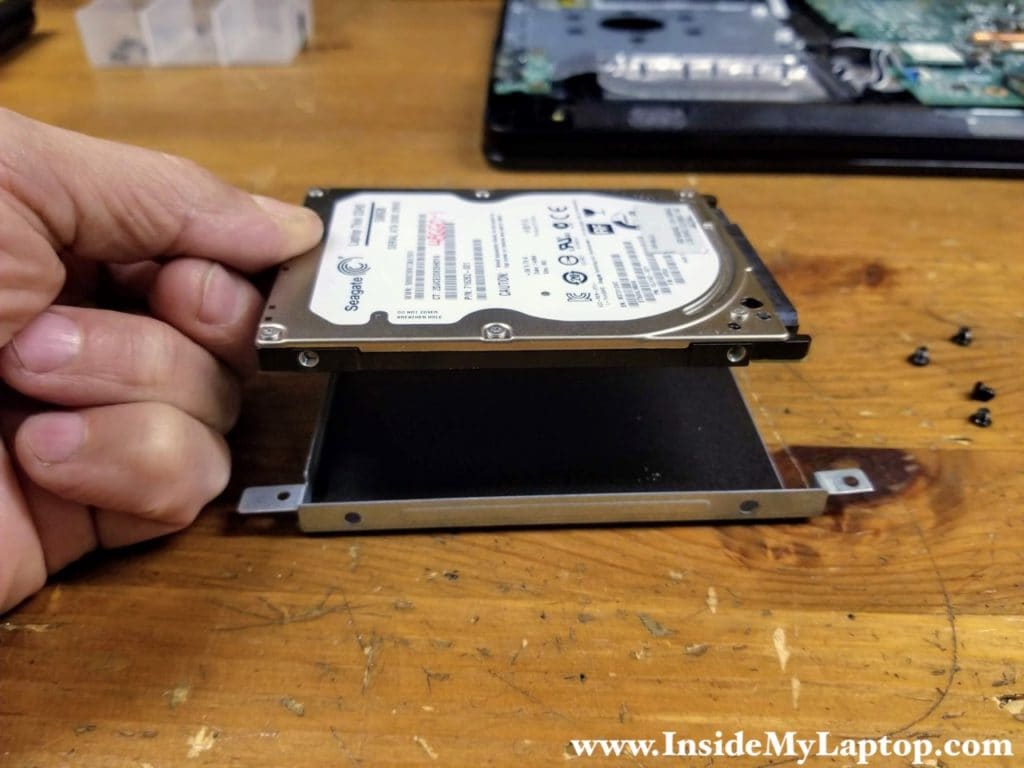
STEP 13.
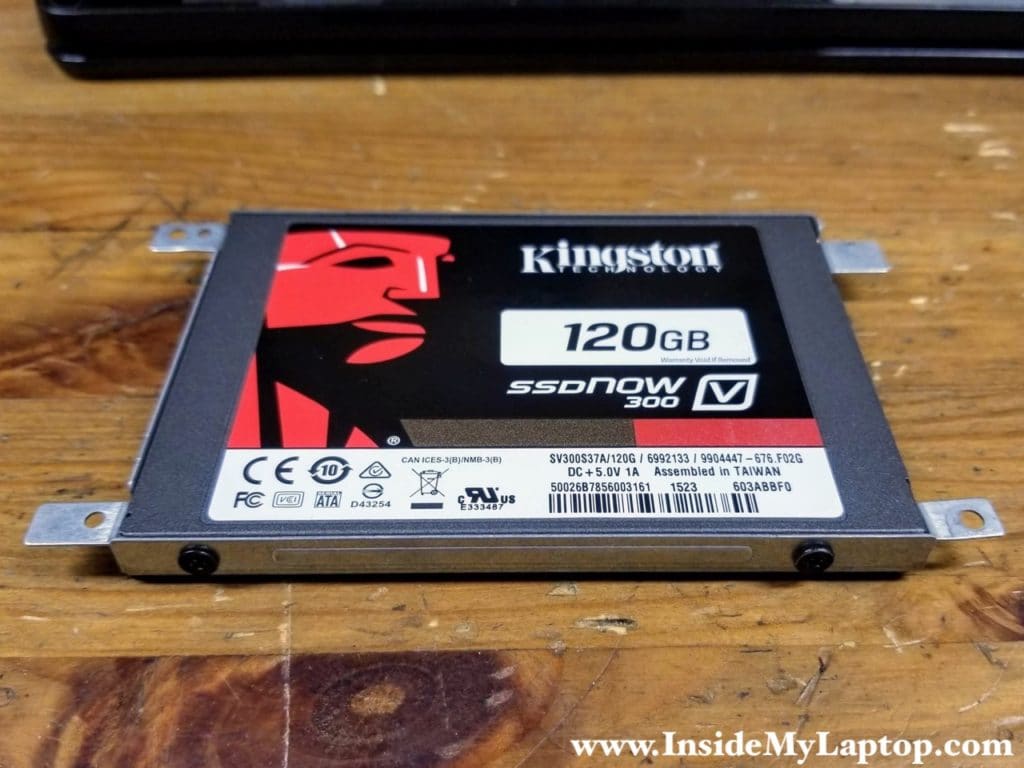
Install a new 2.5″ SSD into the caddy and secure it with four screws. Install the SSD back into the laptop.
STEP 14.
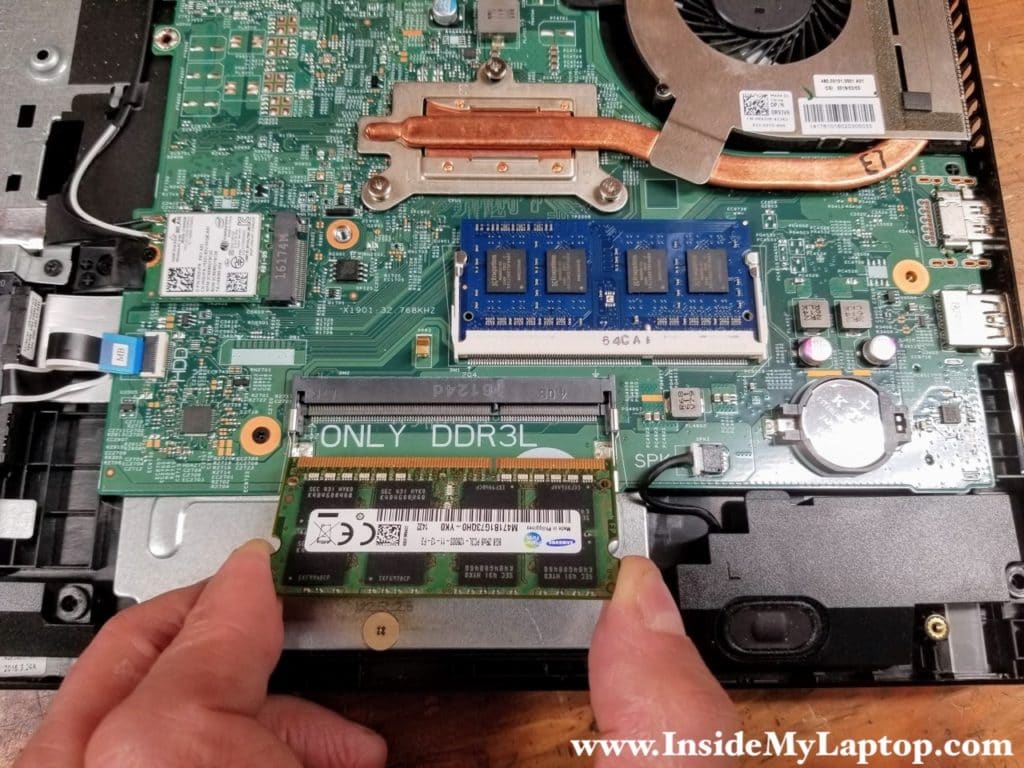
Remove both memory modules and replace them with new once. I would recommend upgrading RAM to the maximum allowed 16GB.
After the SSD and RAM upgrade assemble the laptop back together following all steps in reverse order.
Miles
Great step by step guide!
I am looking into upgrading my Inspiron 15 3558, too (RAM only though). I am finding conflicting information. You are obviously able to upgrade to 16 GB but I’ve come across forums where Dell employees/techs claim that the max is 8GB.
On Crucial.com, though, they say the max this laptop will support is — 16GB.
I am about to order 2x8GB RAM cards but not sure 100% what I should do.
Thanks for any advice you can offer!
IML Tech
Miles, I’m pretty sure you’ll be fine with 16GB. Crucial 16GB Kit (8GBx2) DDR3/DDR3L available at Amazon:
https://amzn.to/373m3Ny
It’s cheaper than buying directly from Crucial website plus one day shipping and FREE returns. You have nothing to lose even if it doesn’t work for you.
Miles
Great! I’ve ordered the 8GB card, but only because I already have 2x2GB in the slots, so I’ll have 10GB total for some $53 Canadian (vs $120 for 2x8GB and two wasted 2GB cards). I’ll come back for the guide as soon as Amazon drops it off! 🙂
Thanks again!
IML Tech
Excellent, let me know how it goes. It will help other Inspiron 15 3558 owners.
Also, if 10GB works fine (meaning the laptop can support more than 8GB), probably you should buy another 8GB module to enable dual-channel mode (faster). It is enabled when a pair of same-size memory modules are installed into matching memory banks.
Miles
Alright!
Got the 8GB module a day early and I installed it right away. First, a correction: I actually had a 4GB one and an empty slot, so my Inspiron now runs on 12GB!
Works perfectly OK. When I started the laptop back up after the installation, a BIOS-type screen popped up saying “Memory has changed”. That’s it. I checked the System info to see if the laptop was registering the new RAM and it was.
The performance difference is amazing. There’s barely any lag now at +300% the RAM! Running RAM-destroying ProTools with all the plug-ins is a breeze now.
The upgrade was quick and easy. To everyone attempting this: take your time, don’t rush. Go through the guide a couple of times before you start taking the laptop apart and follow the steps.
anonimo
is it possible to replace the i3 5005u processor to an i5 or an i7 of the same generation?
IML Tech
You cannot replace the processor because it’s soldered to the motherboard but you can find a new motherboard with a better processor.
Chuck Bartz
Hello,
I have a Dell Inspiron 15 3558 with a 6th gen intel i5-6 200U Processor up 2.8 GHz, is there a i7 motherboard with a dedicated graphics card slot available to replace in my laptop.
Paul Nordberg
Paul
Thanks for this guide. I have a 3558 core i3 & added 4GB ram and swapped for a Western Digital blue 500GB SSD.
When booting & re-installing Windows 10 I get an error message saying I am missing a media driver (says for usb or optical or Hard Disc drive.) & offers to search for one. (never finds one of course) Since CD & usb work & bios does not see the SSD I’m guessing that is the missing driver.
I had his same problem & error message some time ago with an inspiron 3521. After some searching I found that the 3521 cannot use a SSD.
Any Help?
Thanks
Paul
GME
The drive it comes with is formatted as a GPT drive, and boots from the EUFI entry in the BIOS.
When you do a fresh install of the Win10 OS you wipe out the GPT table, and it installs an MBR table instead. MBR disks cannot boot from the EUFI entry, and the BIOS has to be changed to “Legacy” for it to recognize the SSD with the freshly installed OS.
You have to press F2 when the machine is first booting to get into the BIOS. Then click down I believe it’s 3 lines to get to the startup configuration, and check the “Legacy” check box.
Then it will recognize the SSD with the new OS.
Once you’re up and running, you can convert the MBR disk type to GPT, if you’d like…
Just remember, if it’s an MBR disk, you have to set the BIOS to “Legacy”, and if it’s a GPT disk, you have to set the BIOS to EUFI.
That’s the secret… 😉
Paul Nordberg
Hi,
I installed a 500GB Western Digital SSD in a Inspiron 3558 i3.
I’m getting a “media driver missing” error when trying to install Windows 10.
Thoughts ?
Thanks
Paul
Juan
Thank you very much for this guide! It was very helpful!