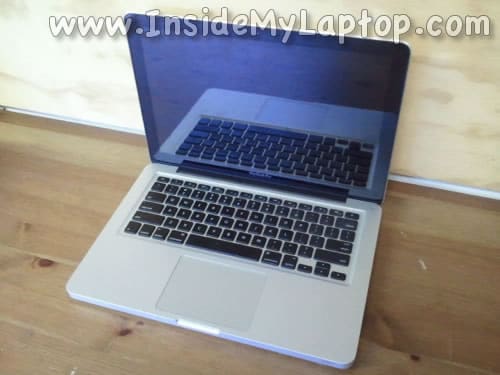
In this guide I explain how to replace the keyboard on a MacBook Pro 13-inch (Late 2011).
According to Apple, the keyboard is part of the palmrest assembly and if the keyboard fails, the entire palmrest assembly has to be replaced.
This is not 100% correct. Of course, you can buy a new palmrest/keyboard/trackpad assembly and replace the whole thing but it’s possible to replace just the keyboard itself.
For this repair you’ll need the following tools:
– T6 torx screwdriver.
– PH0 Phillips screwdriver.
– PH00 Phillips screwdriver.
Also, I would recommend making notes of all removed screws (they all have different length). It will help greatly during the reassembly process.
Before you start, make sure the computer is turned off.
STEP 1.
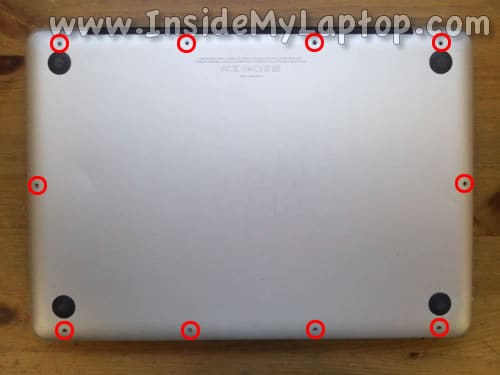
Remove all screws from the bottom cover. Lift up and remove the bottom cover.
STEP 2.
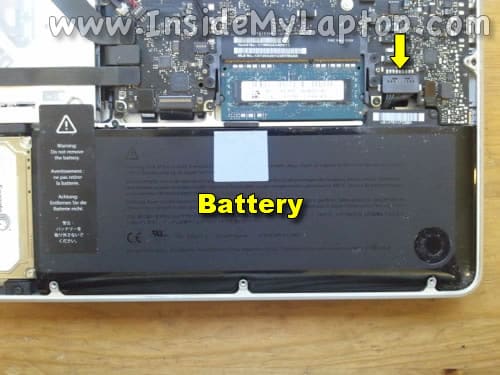
You can leave the battery attached to the case but it’s necessary to unplug it from the logic board.
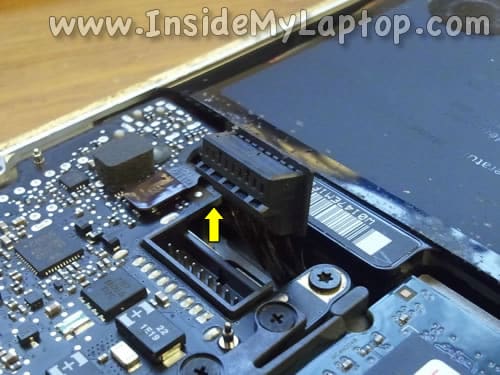
Disconnect the battery cable from the logic board.
STEP 3.
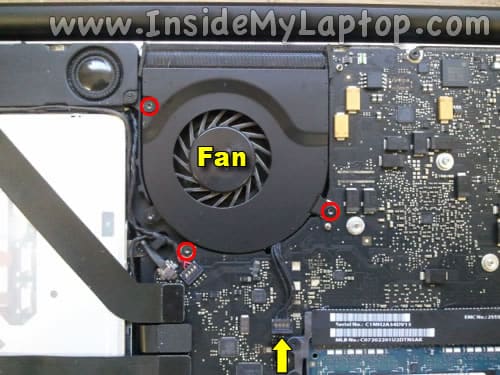
Remove three screws securing the cooling fan.
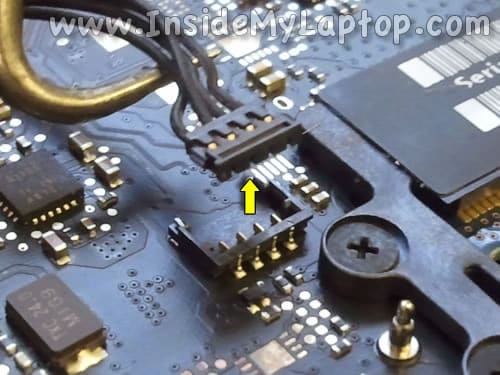
Disconnect the fan cable from the logic board.
Here’s how to disconnect the fan cable.
STEP 4.
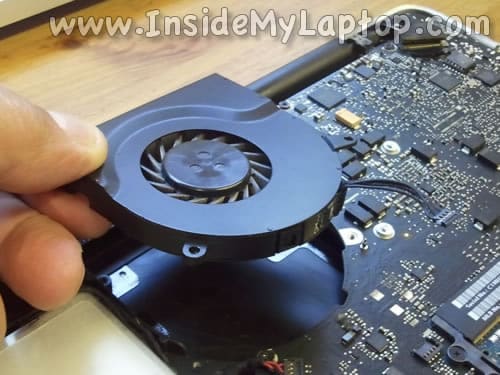
Remove the cooling fan.
STEP 5.
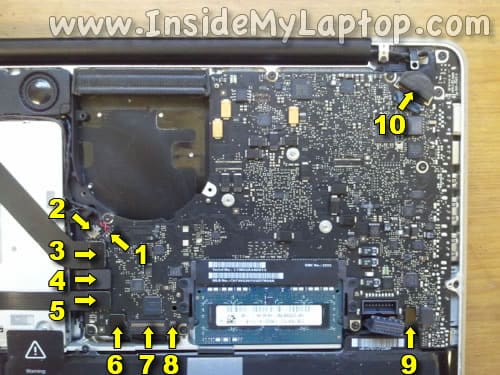
Now we’ll have to disconnect all other cables from the logic board. I will show how to disconnect them in the following steps.
Cables to disconnect:
1. Speaker/subwoofer cable.
2. Camera cable.
3. AirPort/Bluetooth cable.
4. Optical drive cable.
5. Hard drive cable.
6. Trackpad cable.
7. Keyboard cable.
8. Keyboard backlight cable.
9. Battery indicator light cable.
10. Display video cable.
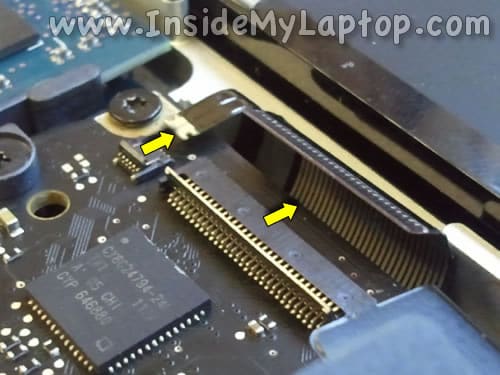
Here’s how to disconnect the display video cable connector.
Lift up the metal retainer securing the connector and disconnect the cable from the logic board by the black tab.
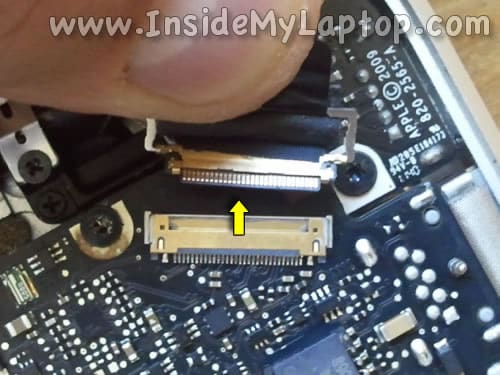
Connectors 1, 3, 4, 5, 6 and 9 disconnect the same way.
Simply lift up the connector and unplug it from the logic board.
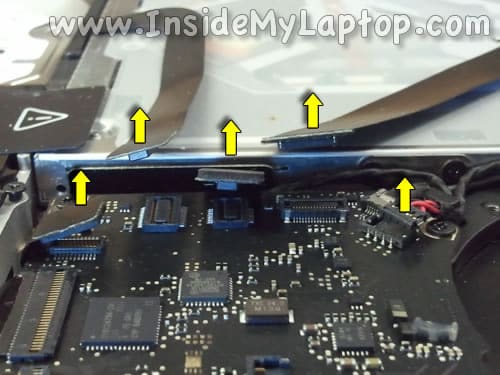
Here’s how to unplug the camera cable.
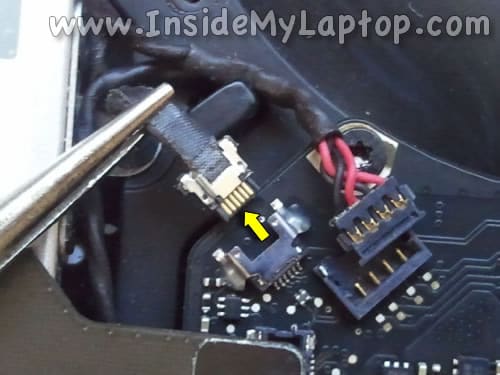
You have to be very careful with the keyboard and backlight connectors. They are fragile.
Here’s how to unlock the connectors.
Lift up the retainer with your fingernail. The retainer will open up at a 90 degree angle.
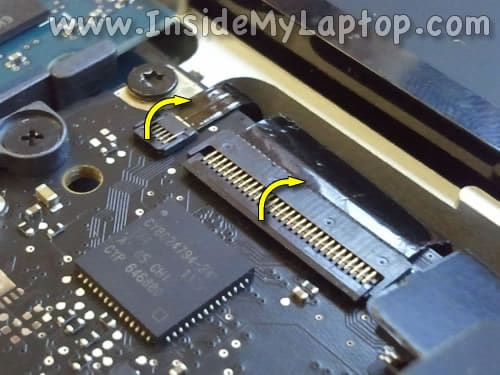
After both connectors unlocked, you can pull cables from the connectors.
STEP 6.
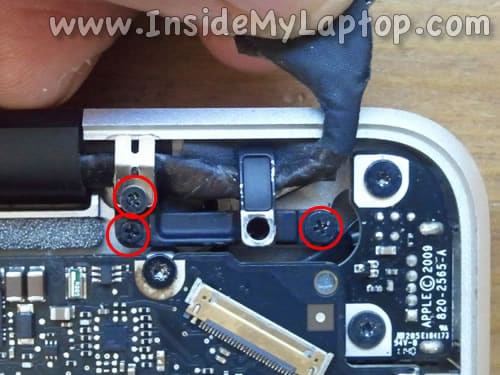
Remove three screws securing the silver grounding plate and display cable retainer.
Remove the grounding plate.
STEP 7.
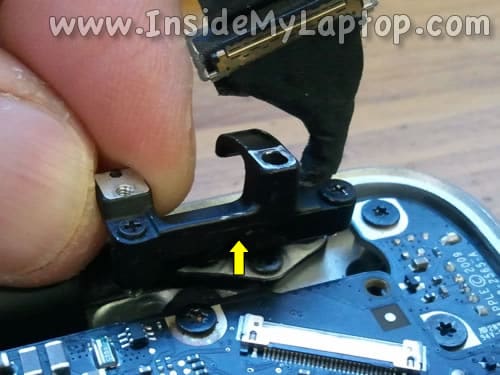
Remove the display cable retaining bracket.
STEP 8.
Here’s a tricky part.
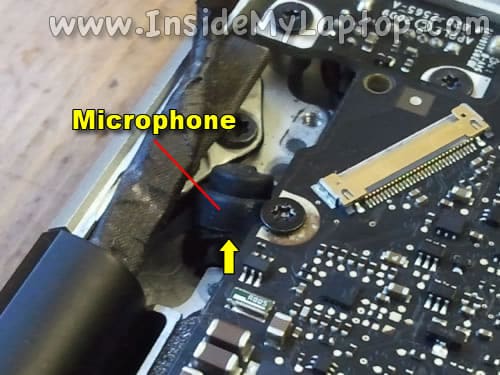
In this MacBook Pro the microphone is glued to the palmrest assembly.
It’s possible to lift up the logic board, unplug the microphone cable, unroute the cable and remove the logic board without separating the microphone from the logic board BUT… it will be very difficult to install the logic board back into the laptop and connect the microphone cable. You might easily damage the microphone cable connector during this procedure.
Here’s an easy way.
Using a sharp object carefully unglue the microphone from the palmrest assembly.
Most likely it will not come out clean and some sticky tape and cushion rubber will remain attached to the cover but that’s OK.
STEP 9.
Remove all screws securing the logic board and MagSafe board (power connector board).
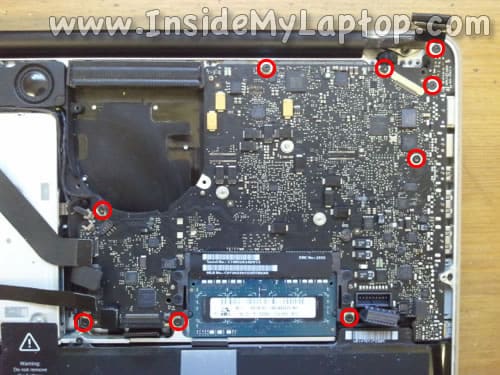
STEP 10.
Start separating the logic board from the palmrest assembly.
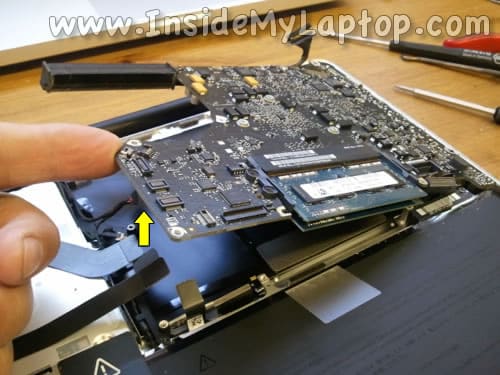
STEP 11.
Remove the logic board.
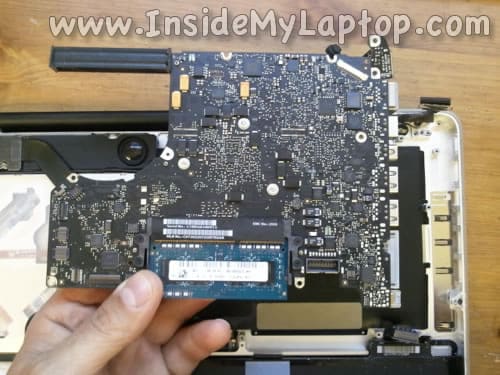
STEP 12.
The logic board was removed with the MagSafe board and microphone attached to it.
Now you can see why we separated the microphone from the palmrest assembly in the step 8.
The microphone cable routed very tightly and hard to access.
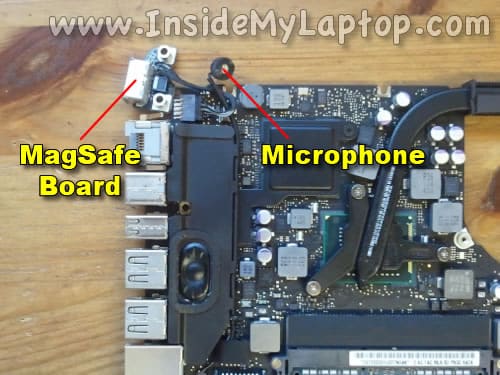
STEP 13.
Remove four screws securing the AirPort/Bluetooth/speaker assembly.
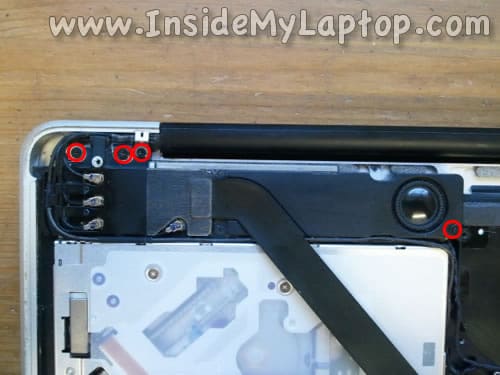
STEP 14.
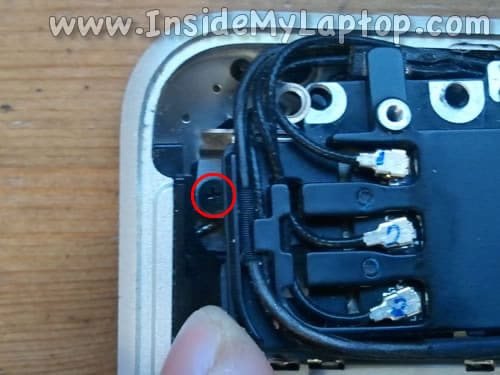
Move the assembly a little bit to the right so you can access one screw securing the optical drive.
Remove the screw.
STEP 15.
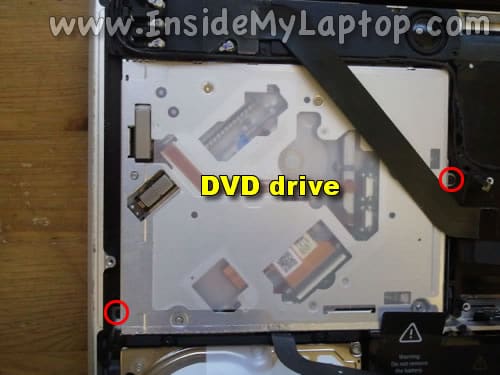
Remove two more screws securing the optical drive.
STEP 16.
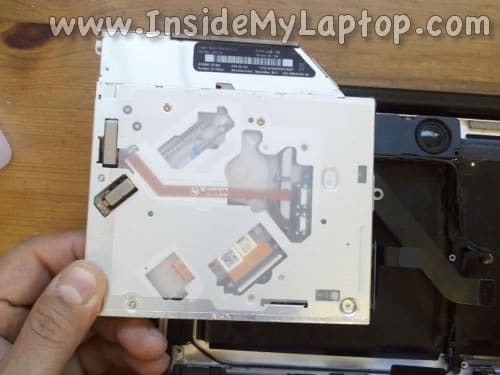
Remove the optical drive.
STEP 17.
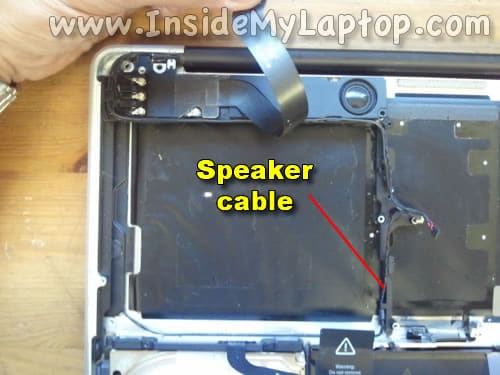
Unroute the speaker cable from the center bracket.
STEP 18.
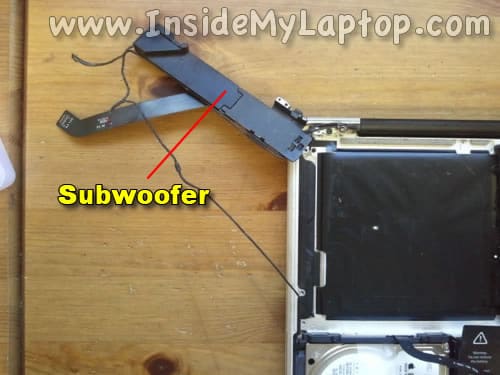
Move the AirPort/Bluetooth/speaker assembly aside.
STEP 19.
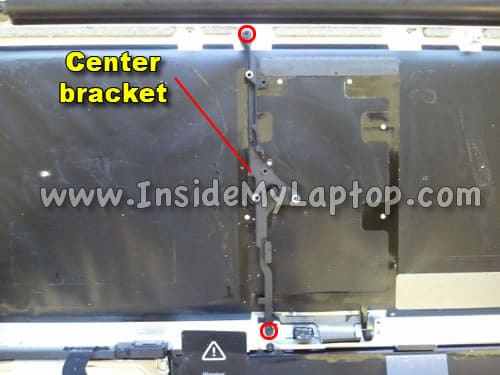
Remove two screws securing the center bracket.
Lift up and remove the center bracket.
STEP 20.
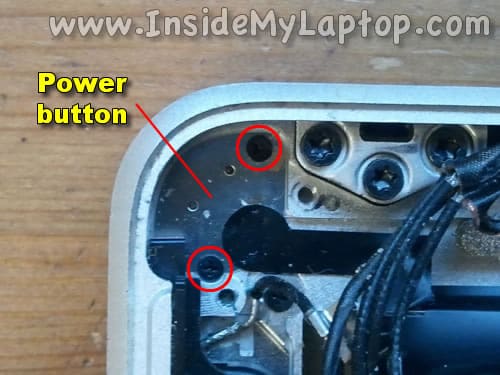
Remove two screws securing the power button to the palmrest assembly.
STEP 21.
Lift up the power button.
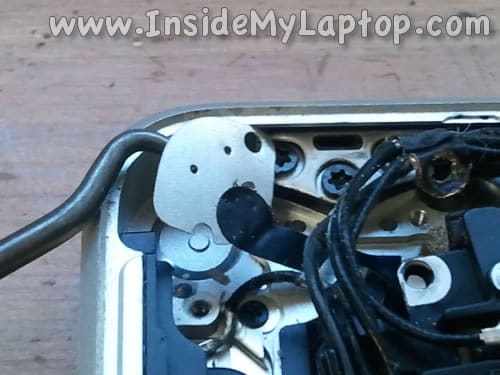
STEP 22.
The power button cable routed under other cables.
Unroute the power button cable.
NOTE: the power button is part of the keyboard. When you remove the keyboard the power button also has to be removed.
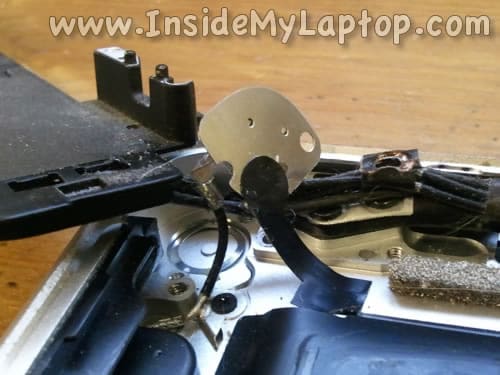
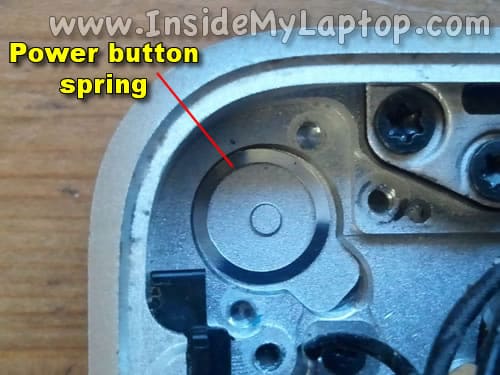
There is a silver spring located under the power button. Do not lose the spring.
Make sure the spring is in place when you install the new power button/keyboard.
STEP 23.
Now the keyboard and backlight ready for the removal.
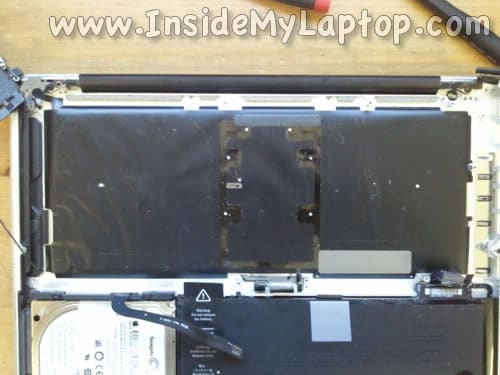
STEP 24.
Start separating the old backlight from the keyboard/plamrest assembly.
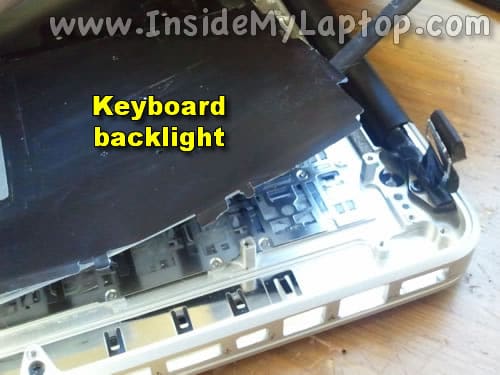
The backlight has a few layers. If you plan to reuse the bakclight, make sure those layers don’t get separated.
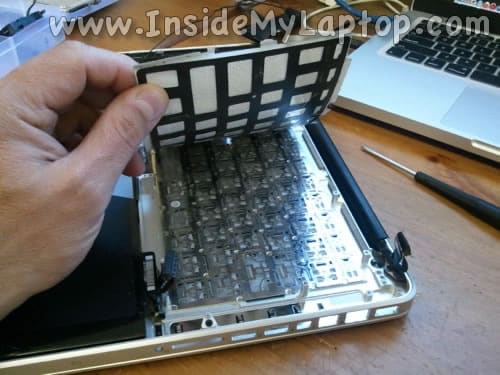
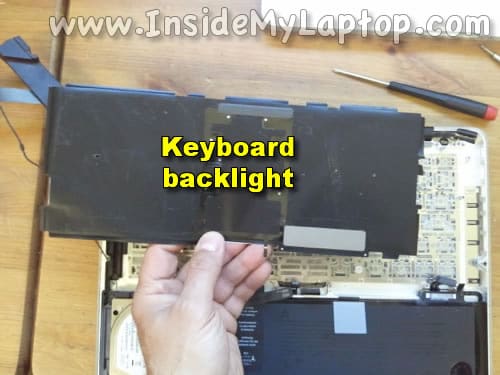
STEP 25.
The keyboard backlight removed.
STEP 26.
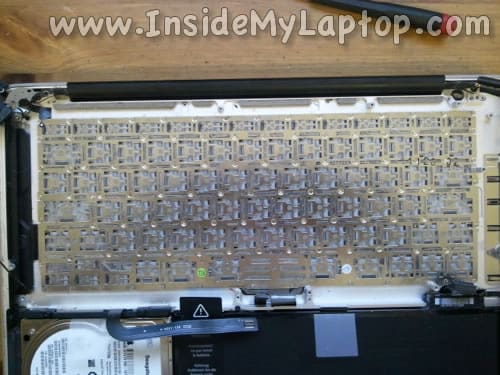
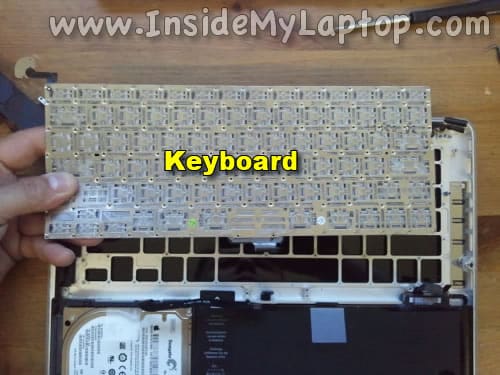
Now you are ready for the keyboard removal.
There are many tiny screws (about 60) securing the keyboard to the palmrest assembly.
Remove all screws.
STEP 27.
Now you can remove the old failed or damaged keyboard and replace it with a new one.
Assemble the laptop following all steps in the reverse direction.
By the way, sometimes it’s possible to repair damaged keyboard keys instead of replacing the entire keyboard.
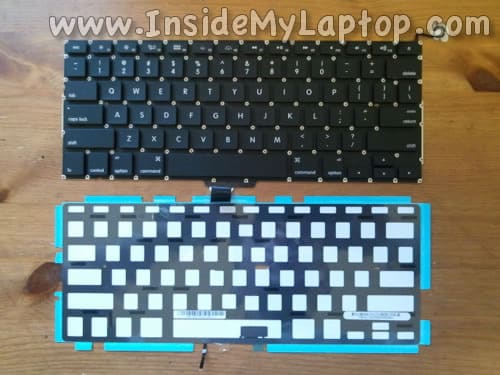
When I replace the keyboard I always replace the backlight too. It’s easier to install a new backlight than reuse the old one.
It looks cleaner and sticks better to the new keyboard and palmrest assembly.
New replacement keyboards (with or without backlight) for MacBook Pro 13-inch available on eBay.
By the way, if the keyboard failed because of liquid spill, you should go though the liquid spill diagnostic first.
Related articles:
emre
Good work. Nice and clean. Thanks.
Brian
what screwdriver did you use to remove the keyboard screws? i have tried 0, 00 and 000 and no luck, i wound up drilling the screws out and super gluing the keyboard on and works great but now i purchased a 2011 15″ and have the same problem keyboard not working and want to do it the right way by removing the screws
IML Tech
@ Brian,
I’m using Wiha PH00 Phillips screwdriver. It’s a very good one and perfect for removing keyboard screws.
danny
Amazing detail thank you! I have one broken key, and rather than pay $350 at Apple to have the whole bottom replaced, I’ve purchased an OEM keyboard online for $30. How difficult will this be if I decide to try and do it myself? I’m a handy guy and good at following instructions, but by no means a computer tech. Would you advise against it and recommend I take it to an apple mechanic, or put a few hours aside and try it myself? Of course the last thing i’d want to do is break something in my computer….
IML Tech
@ danny,
It’s pretty difficult and probably wouldn’t be my first repair attempt on a laptop.
How badly it’s broken? Is it missing or stopped working? Take a look at this key repair guide.
Danny
Thanks for the response. All of my keys are intact physically, but my DELETE key stopped working, and it failed the diagnostic test.
IML Tech
@ Danny,
Yeah, this sounds like keyboard failure. If you decide to do it yourself, proceed with caution.
chitra b
I have macbook pro 17 inch os x. Everything fine with macbook but keyboard types numbers only. power button not working black light also not working. Power on from f5 key. From external keyboard it works fine. Why this happening. Is this require keyboard replacement or something else ?
IML Tech
@ chitra b,
I think your MBP keyboard failed and has to be replaced.
Carl Freeman
Great pictures and instructions. I had liquid damage and had to replace the keyboard. I went cheap and bought a used one. It fixed the keyboard problem but the backlight was bad so I got to do the whole thing twice. Thanks for the helpful website.
Michael
absolutely wonderful tutorial. step for step, spot on. thank you.
Barbie
If’ing did it!!!! I can’t believe it!!!!
Molly
So I have a 2010 MacBook Pro. My battery overcharged (and basically exploded) while still in the computer. I’m not a techy person so I apologize if my lingo isn’t correct. Anyway. I replaced the battery but I believe I snapped the Battery indicator light cable in the process. The thing that doesn’t make sense to me is when I originally replaced the battery it worked fine. For over a month now. Well last night my computer was on and running and went black. I thought it just needed charged. Plugged it in and nothing, the light for the charger Itself lights up, but when I press the power button, the light on the bottom right does not light up and the screen stays black. Is this fixable or am I totally screwed?
toni
when removing the cable from the camera I’ve broken. I bought the cable and my idea is to welding wire cable old. but for this I need to know the pinout, can you help?
Prince
Can someone please tell me where i can get the part that the light cable should go in??.. 🙁 theres none in my mac. my keyboard works fine but the is no connector to connect the light to..
Jonathan
Hi, only the down arrow is not working after liquid damage. Do I have to replace the whole keyboard, or do I just need to clean the area where is the down arrow key?
Thanks!
Alejandro Guerrero
Thank you Sir for this tutorial, It worked flawlessly and you have saved me a lot of money!