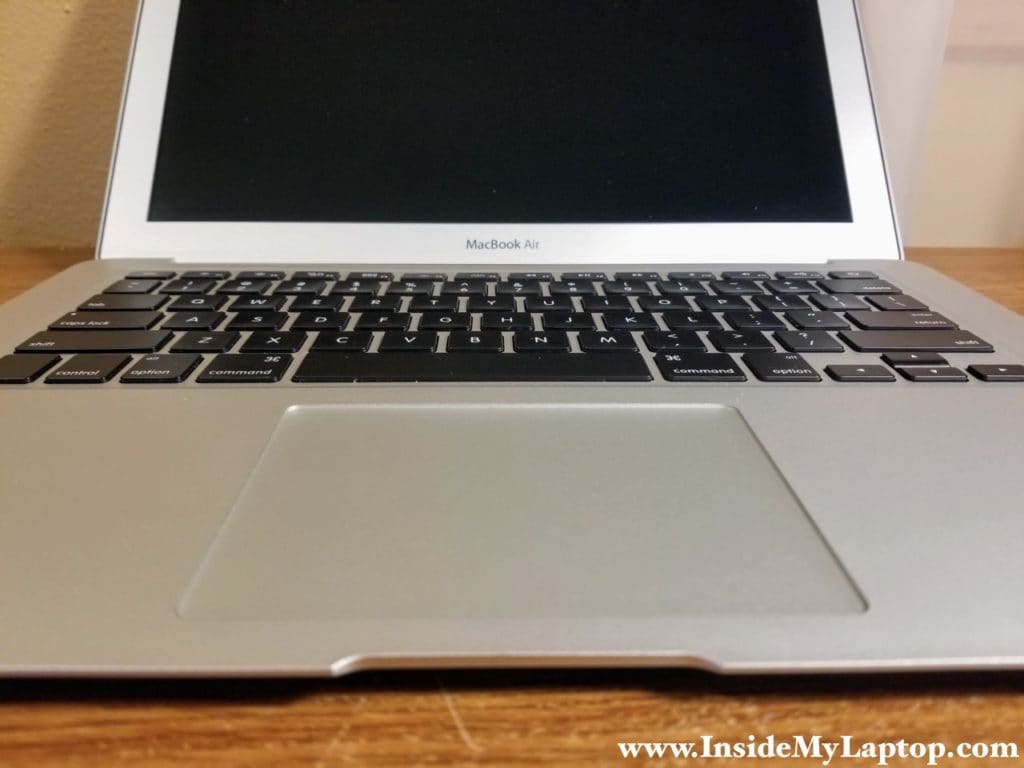
In this guide I show how to replace failed trackpad on a MacBook Air 13-inch or 11-inch laptop.
In my case the trackpad started working erratically. The cursor was jumping all over the screen and moving on its own even if the trackpad wasn’t touched.
TIP: if your trackpad stopped clicking, check the battery. It’s likely the battery is swollen and blocking the trackpad from moving freely. If the trackpad clicks properly with the battery removed, you’ll have to replace the battery.
STEP 1.
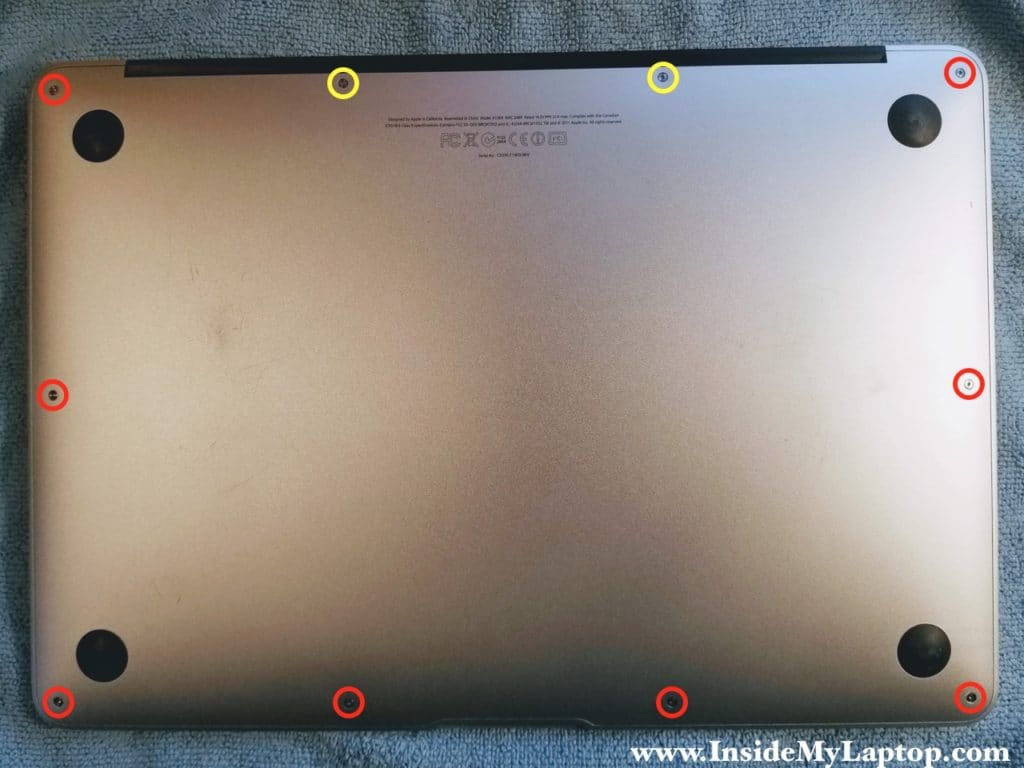
Place the laptop upside down and remove ten P5 Pentalobe screws securing the bottom cover.
Remove the cover.
NOTE: two screws I marked with yellow circles are longer than screws marked with red circles.
STEP 2.
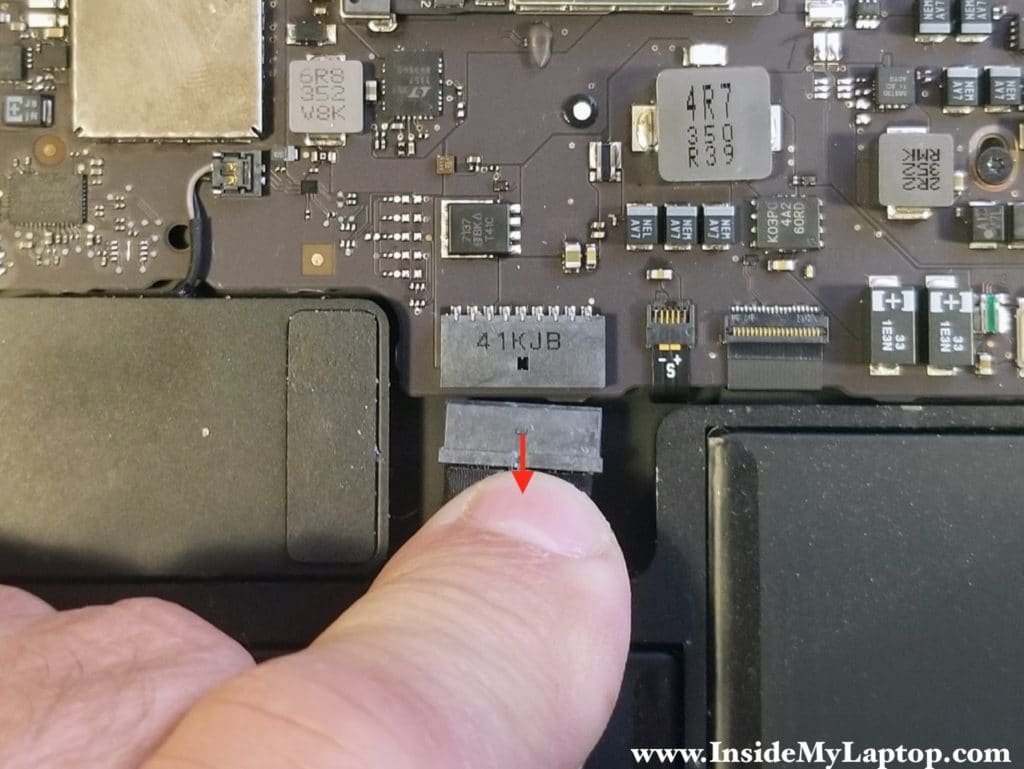
Pull the battery cable out of the connector on the logic board.
STEP 3.
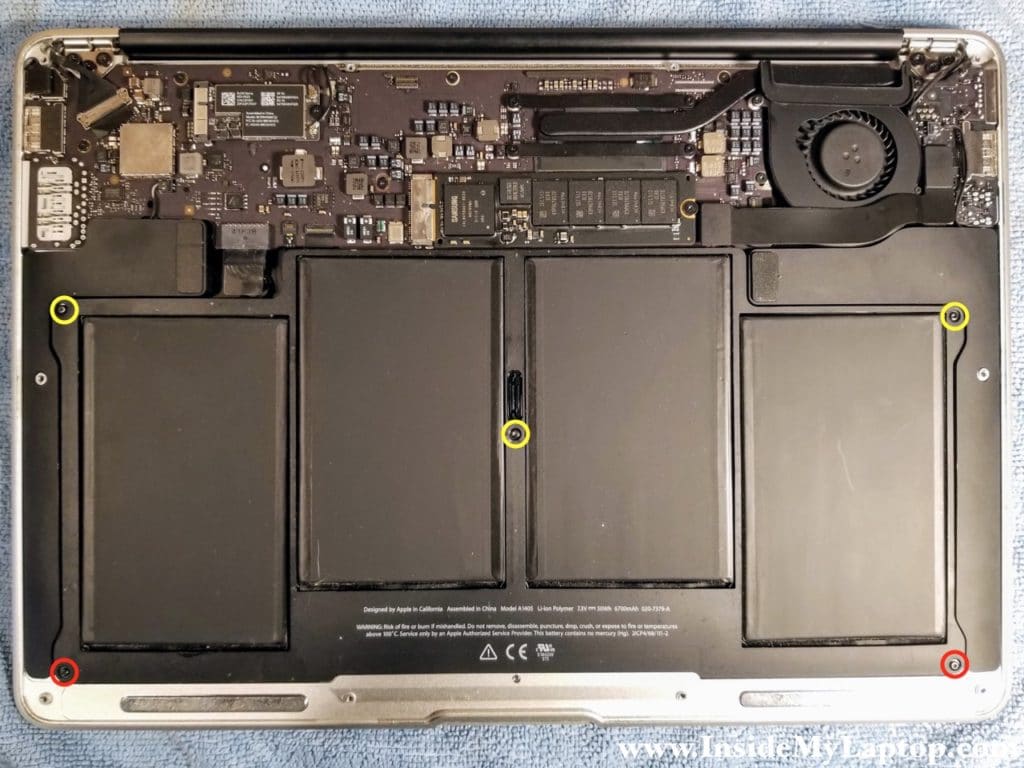
Remove five T5 Torx screws securing the battery. Three screws on the top (yellow circles) are longer that two screws on the bottom (red circles).
Remove the battery.
STEP 4.
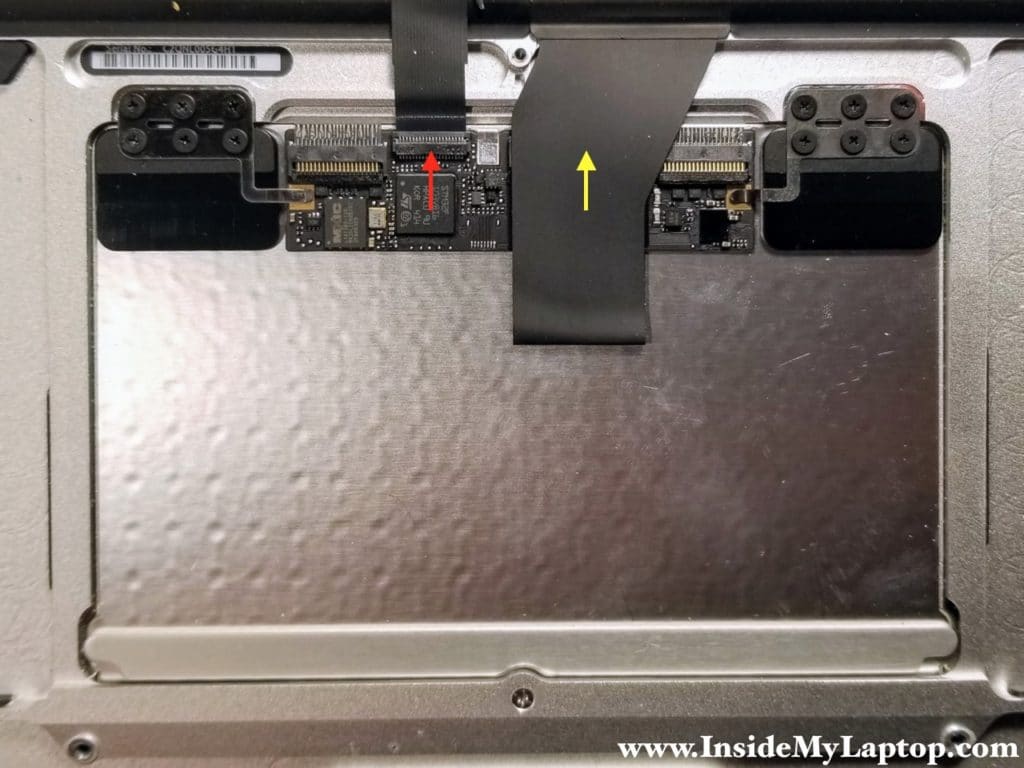
Now you can access the trackpad.
In the following steps I’ll show how to disconnect the trackpad cable (red arrow) and keyboard cable which is hidden (yellow arrow).
STEP 5.
On the following picture the trackpad cable connector shown in the locked state.
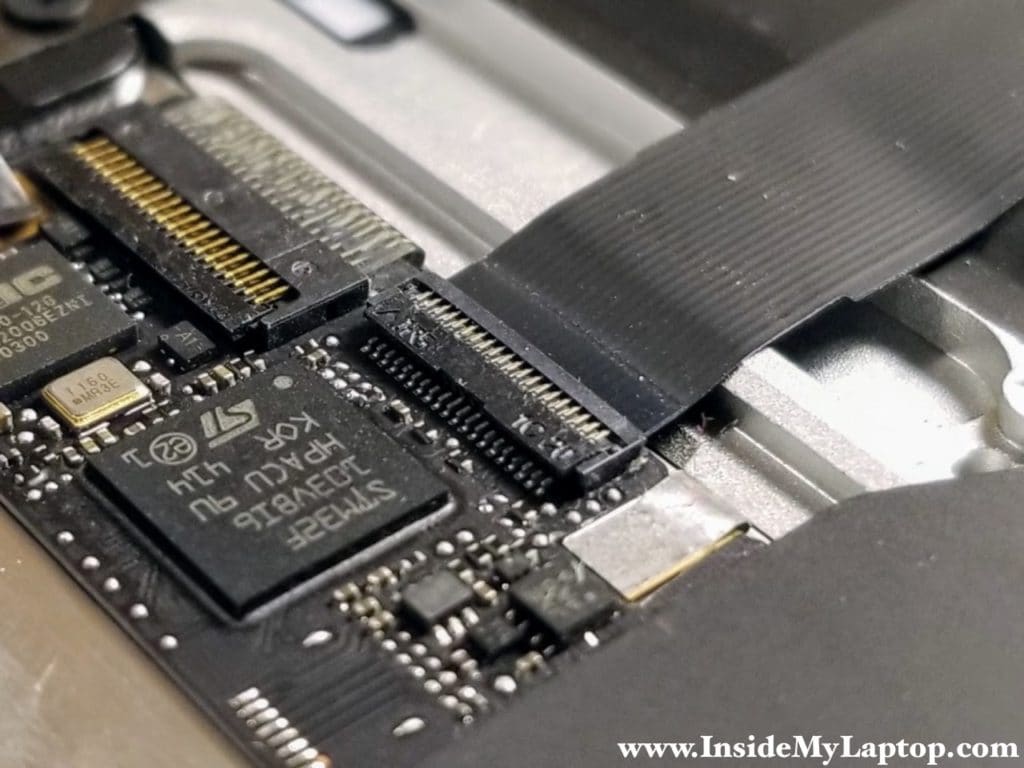
Open up the connector by lifting up the locking tab. You can use tweezers or your fingernail.
The locking tab will open up at a 90 degree angle.

Carefully pull the trackpad cable out of the connector.

STEP 6.
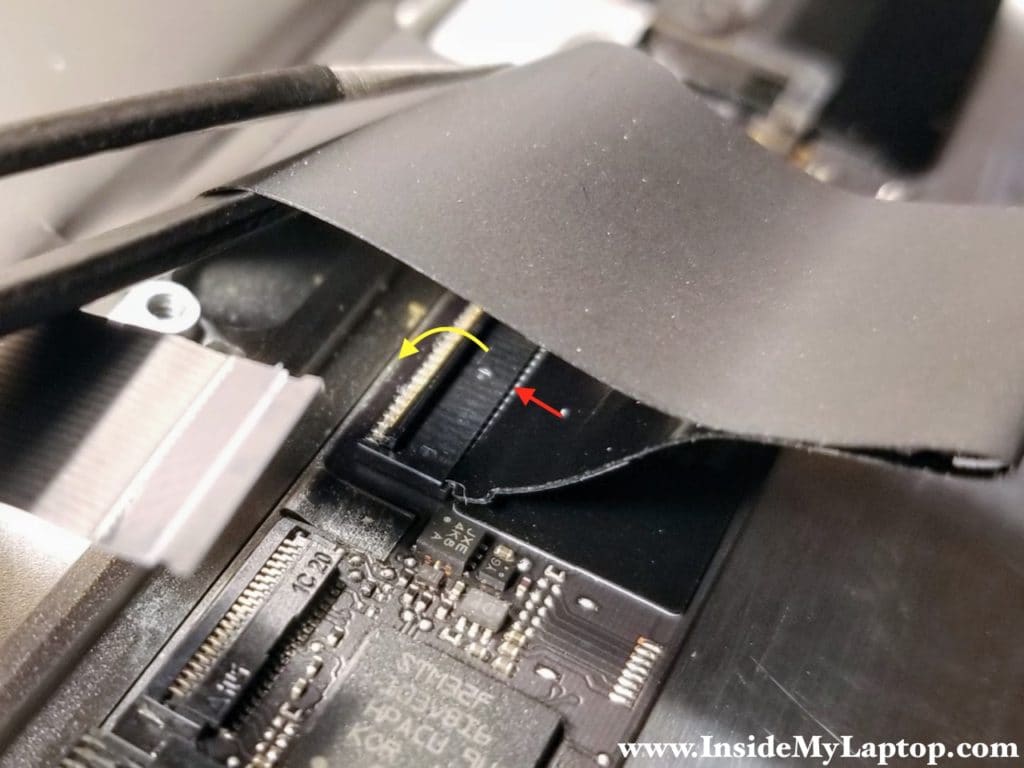
The keyboard plugs in into the connector which is hidden under the flex cable.
On the following picture the keyboard connector shown in the locked state.

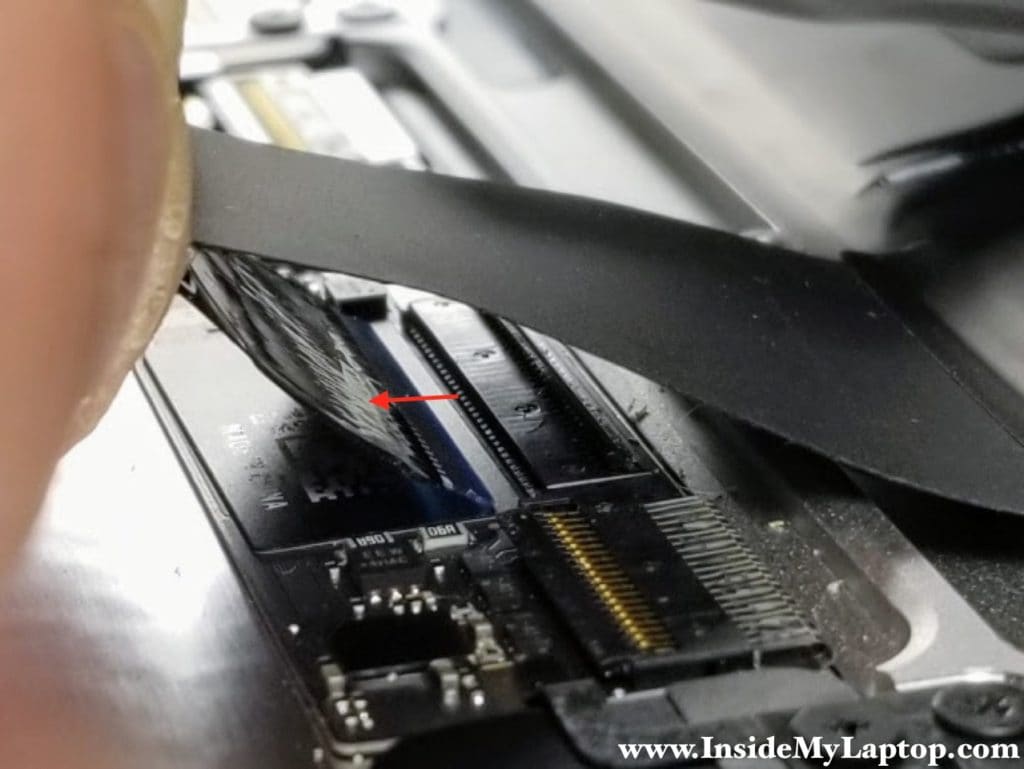
Open up the connector by lifting up the black tab in the shown direction. You can use tweezers for that.
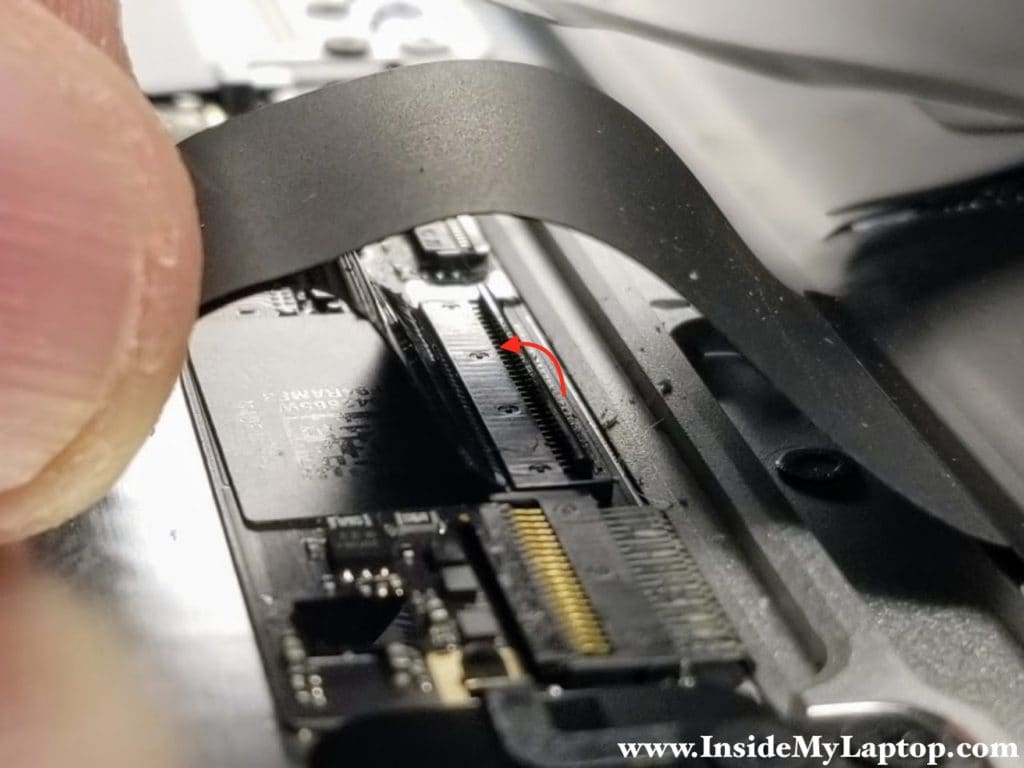
Pull the keyboard cable out of the connector.
STEP 7.
When all cables are disconnected, we can start removing the trackpad.
Remove six screws securing brackets to the laptop case.
You will need a very fine PH00 Phillips screwdriver.
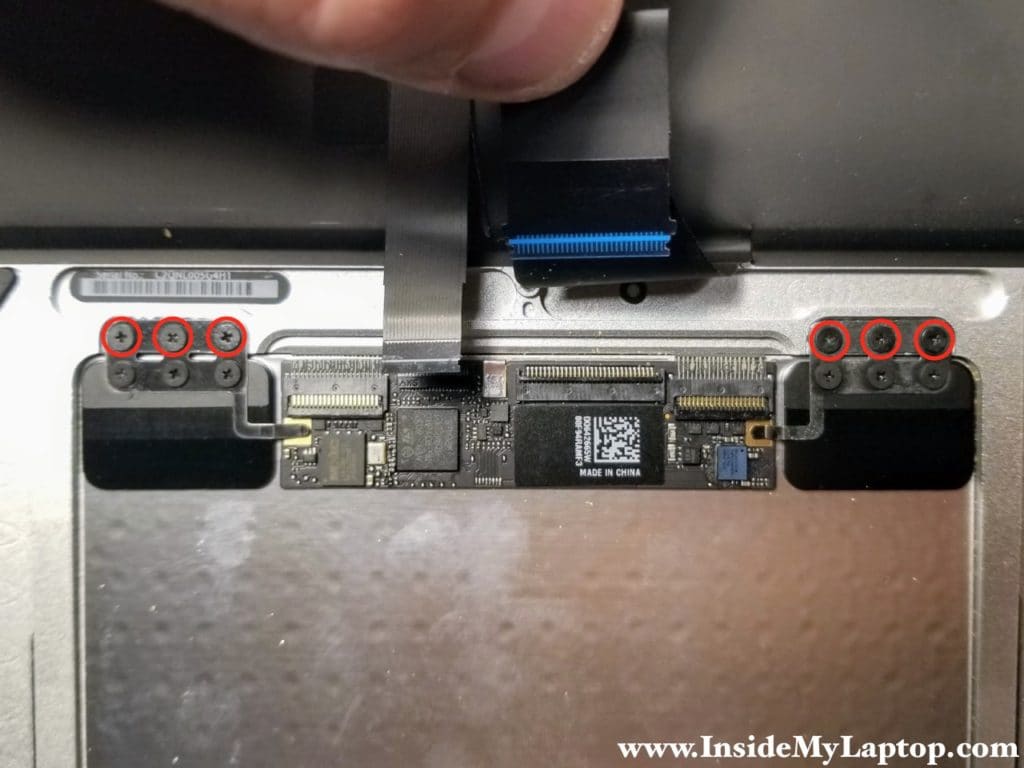
Start separating the trackpad from the laptop case.
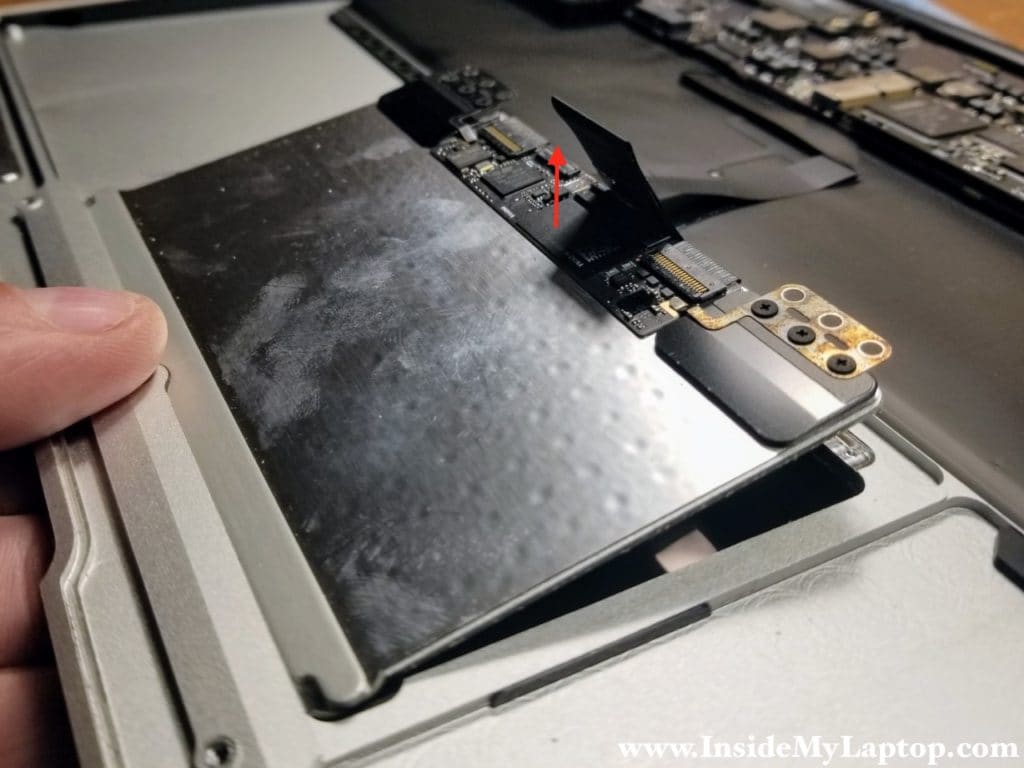
Remove the trackpad. Now it’s ready for the replacement.

STEP 8.
It’s likely that your new trackpad will not have metal brackets installed.
In this case you’ll have to transfer them from the old one. Each bracket is secured by three screws.
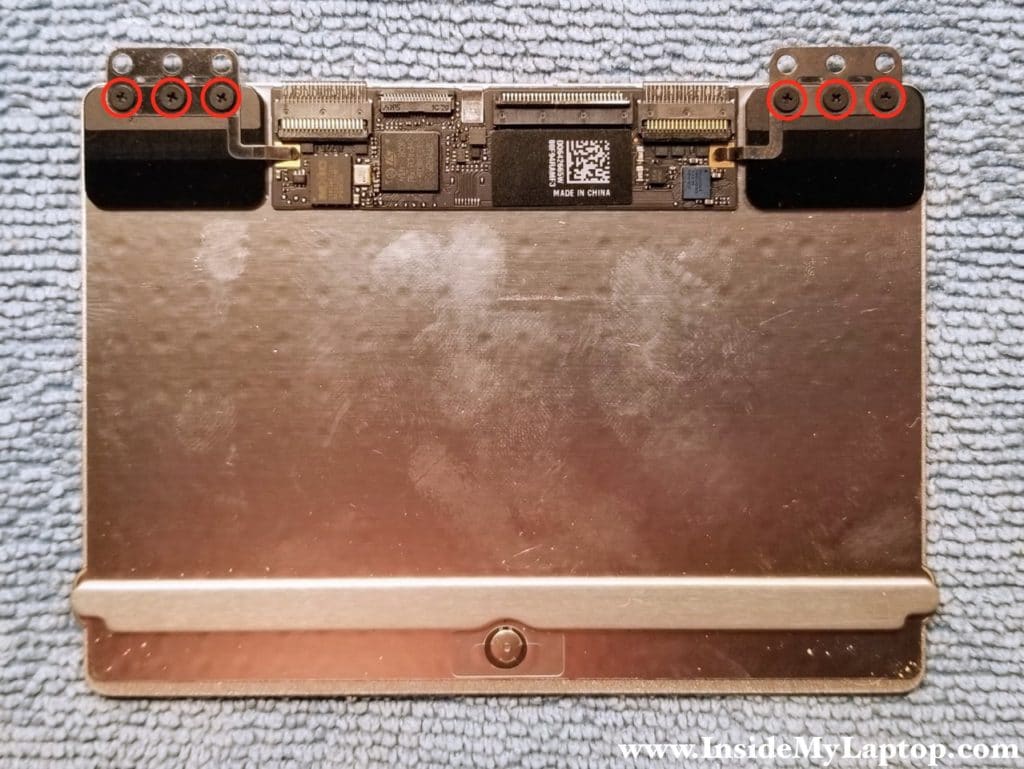
STEP 9.
Start installing the new trackpad. Position the lower side (red arrow) first.
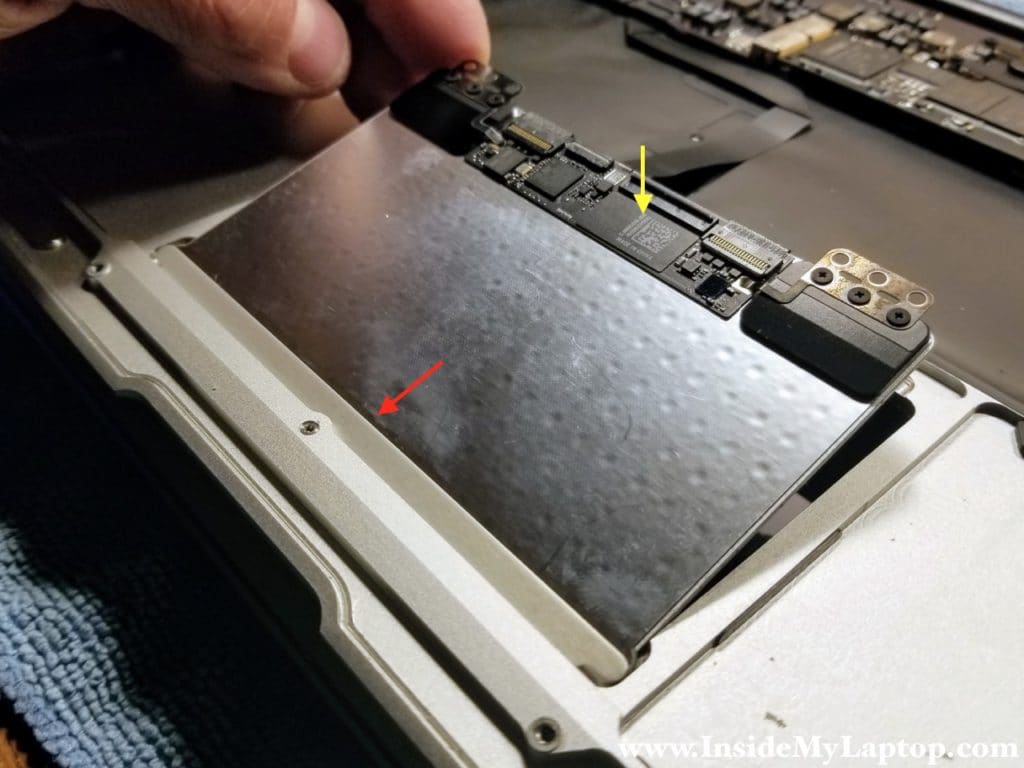
STEP 10.
Install only two screws but do not tighten them completely.
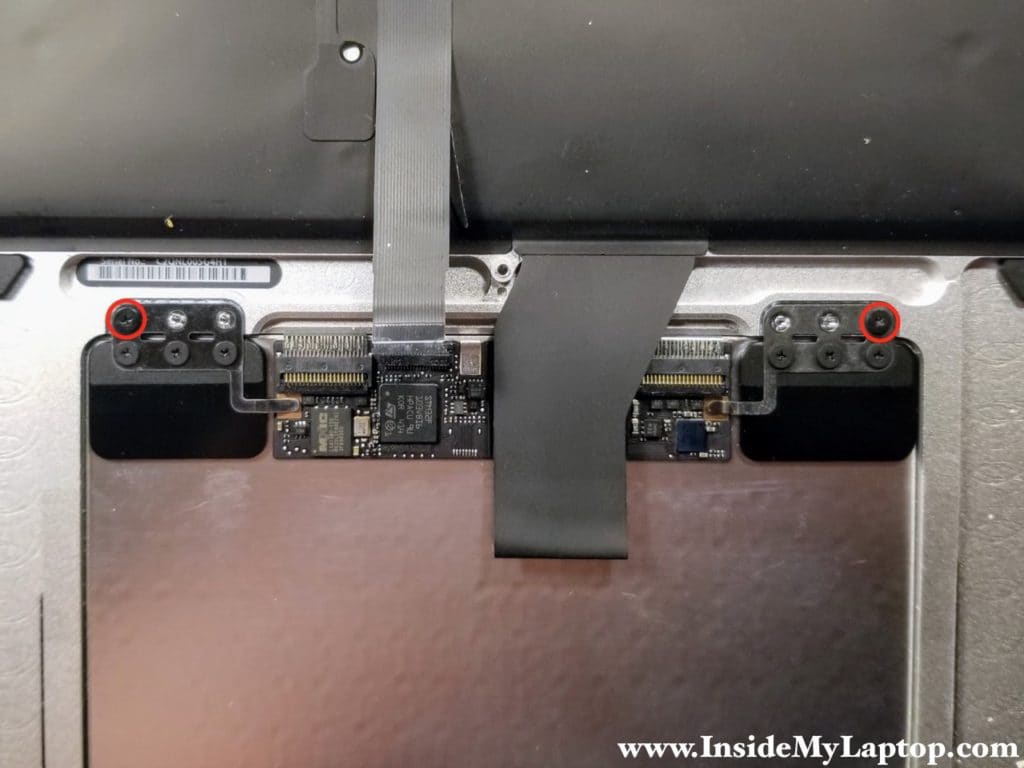
STEP 11.
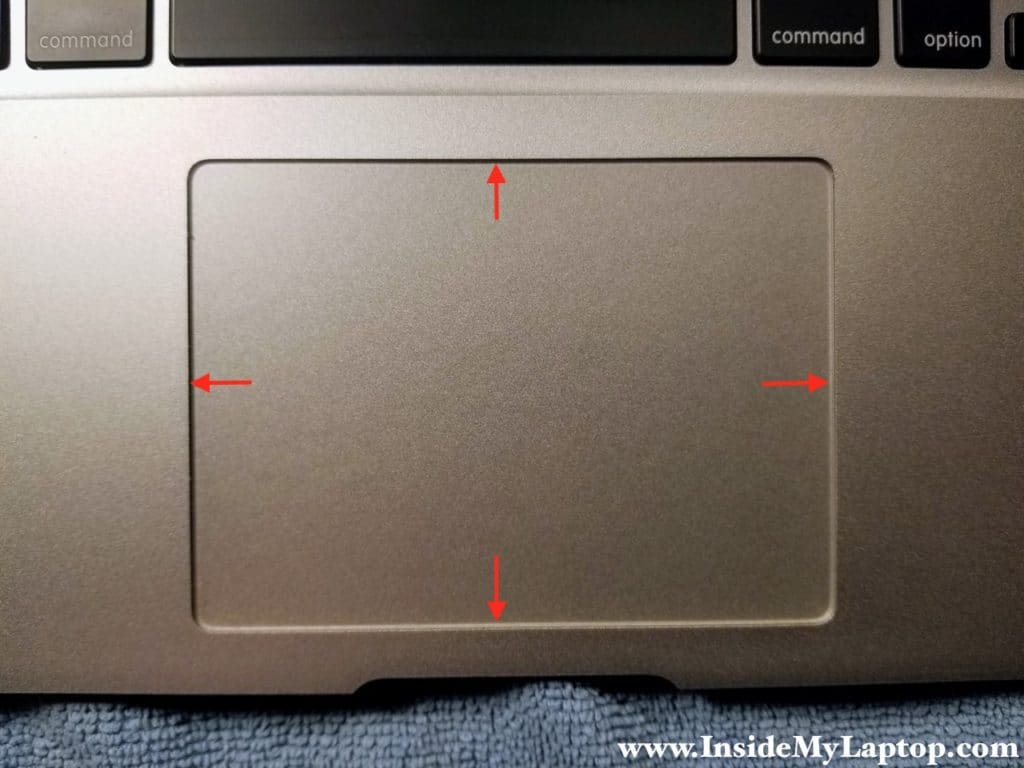
Adjust position of the trackpad. Make sure it’s seated evenly and gaps on each side are equal.
After that you can tighten the brackets and install remaining four screws.
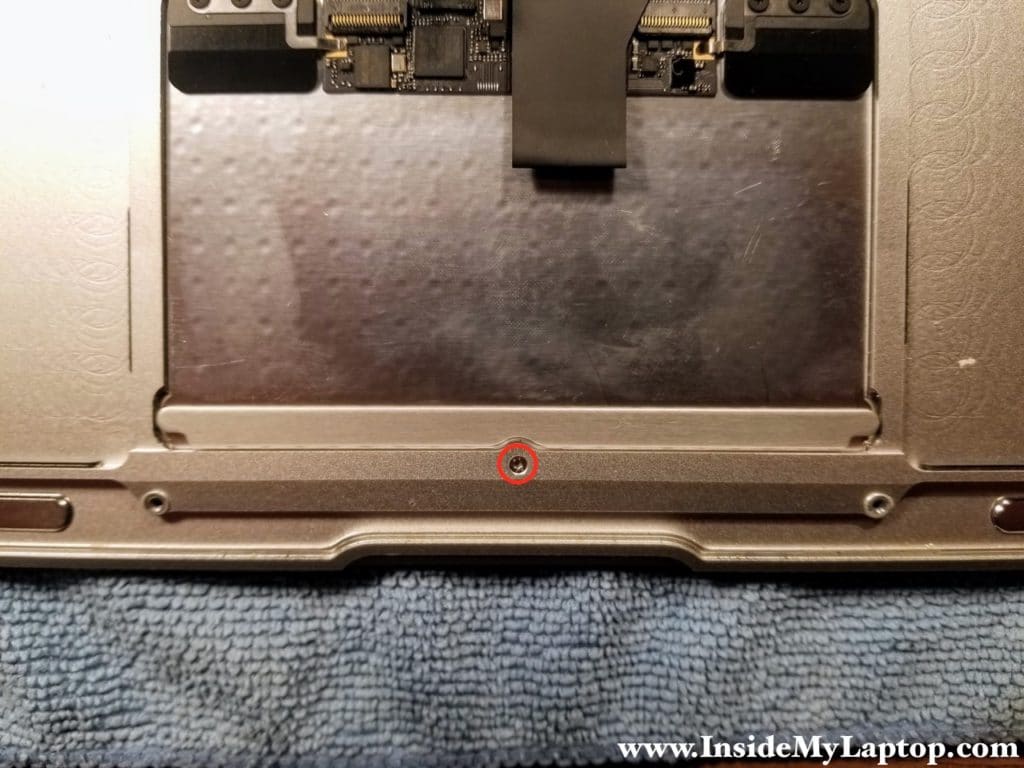
TIP: if the trackpad doesn’t click properly, you can try adjusting the screw. In most cases it’s not necessary.
STEP 12.
Insert the keyboard cable back into the connector.
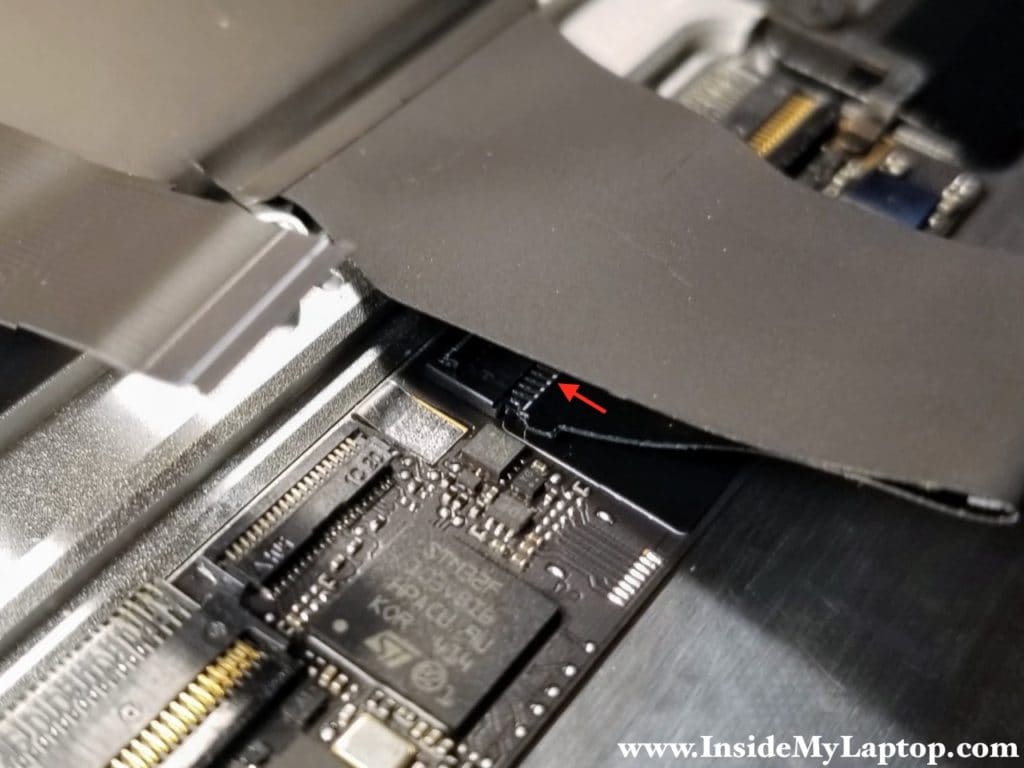
There is a white line on the keyboard cable. Make sure the cable goes all the way down into the connector and the white line levels with the connector.
Close the locking tab (yellow arrow).
Finally, connect the trackpad cable back in place and assemble the laptop.
Harvey
Wow, that a is great step by step dyi instruction w matched photos.
You hit all the correct taking points so even though I don’t have my air opened , your clear steps make the process much easier to understand, so thank you very much!
Kudos and hats off to you!
Ps can I buy those tools together?
IML Tech
Harvey, you can buy all tools together. Search on Amazon for “MacBook Air tools” and you’ll find a set for $10-15.