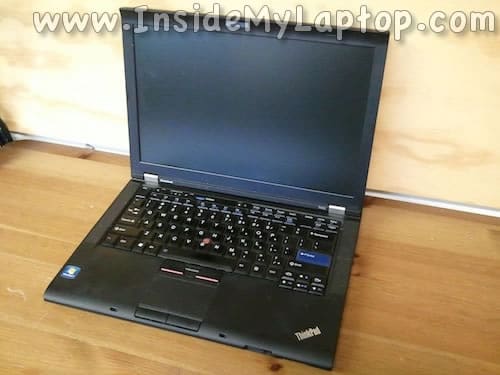
In this guide I explain how to replace failed cooling fan in a Lenovo ThinkPad T410.
In my case the fan stopped spinning properly and the laptop was displaying “Fan Error” on startup.
Cleaning the fan fixed this issue for a while but it started giving the same fan error again soon.
STEP 1.
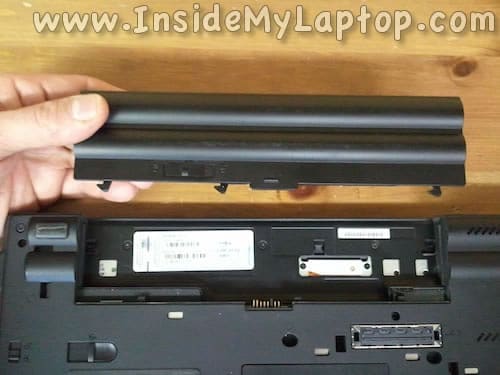
Make sure the computer is turned off. Unlock and remove the battery.
STEP 2.
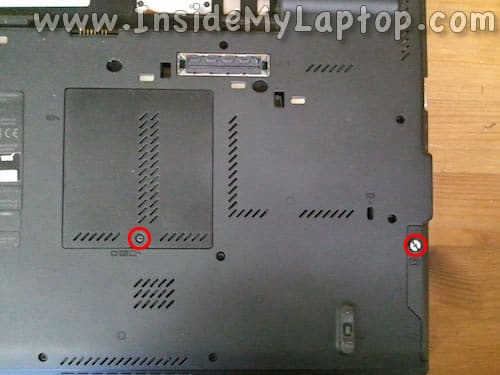
Remove two screws securing the RAM and hard drive covers on the bottom.
STEP 3.
Pull the hard drive out.
Upgrading this regular 2.5″ hard drive to a 2.5″ solid state drive will speed up the laptop significantly.

STEP 4.
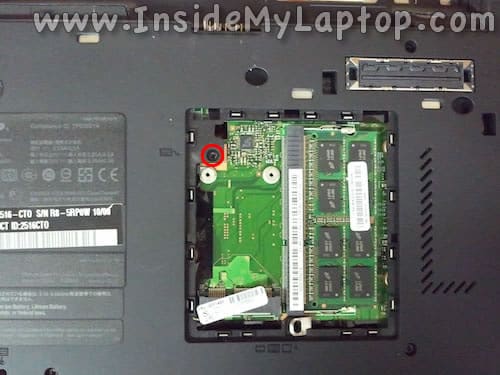
Remove one screw securing the keyboard.
This laptop has two memory slots and can take up to 8GB (2x4GB) DDR3-SODIMM RAM modules.
STEP 5.
Slide the entire keyboard towards the display about 2-3 millimeters.

STEP 6.
Lift up the lower part of the keyboard as it shown on the following picture.
Place the keyboard on the palm rest. Be careful, it’s still connected to the motherboard.

STEP 7.
Disconnect the keyboard cable from the motherboard.
Now you can remove the keyboard completely.

STEP 8.
Under the keyboard you can get some limited access to the cooling fan.
This should be enough if you decide to clean up the fan with canned air or air compressor.
Also, you can access the wireless card, CMOS battery and second RAM slot.

STEP 9.
The internal RAM module located under the black mylar cover.
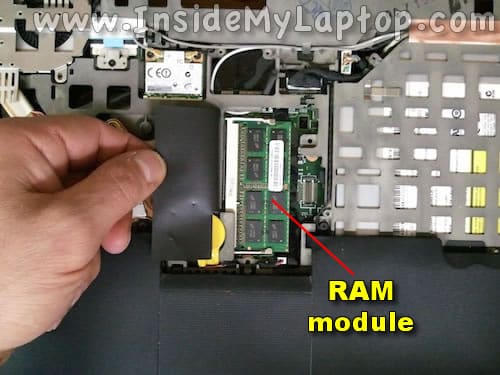
STEP 10.
Remove all shown screws on the bottom.

STEP 11.
Remove four screws securing the palm rest assembly.
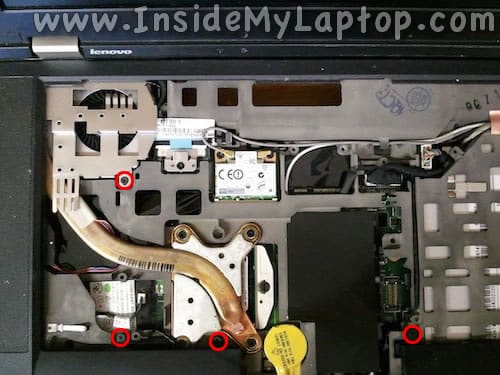
STEP 12.
Start separating the palm rest assembly from the bottom case.
I’m using a guitar pick for that.

STEP 13.
Continue separating the palm rest assembly.
Before removing the palm rest assembly take a closer look at how it’s seated.
I had some hard time putting it back in place.

STEP 14.
When you lift up the palm rest assembly you have to access and disconnect the trackpad cable from the motherboard.

STEP 15.
Simply unplug the cable from the connector on the motherboard.

STEP 16.
Pull the palm rest assembly away from the display and remove it from the base.
NOTE: when you install it back in place, you’ll have to seat the further part of the assembly first and after that attach the rest or the assembly back to the bottom case.
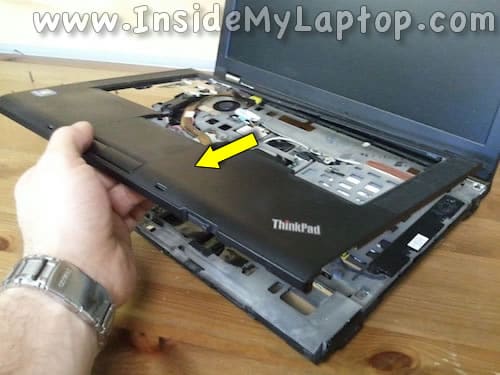
STEP 17.
The palm rest assembly has been removed.
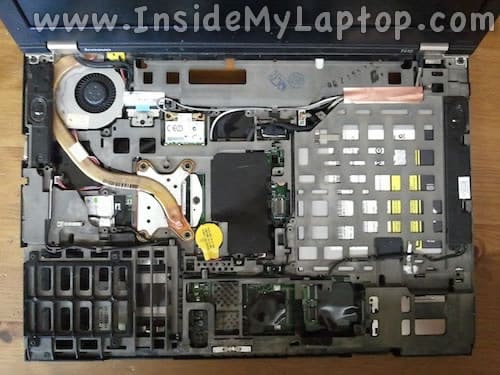
STEP 18.
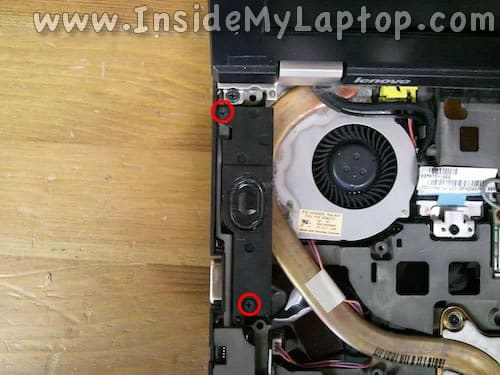
Remove two screws securing the left speaker.
STEP 19.
Lift up the speaker and put it aside.

STEP 20.
Remove four screws securing the heat sink assembly.

STEP 21.
Disconnect the cooling fan cable from the motherboard.

STEP 22.
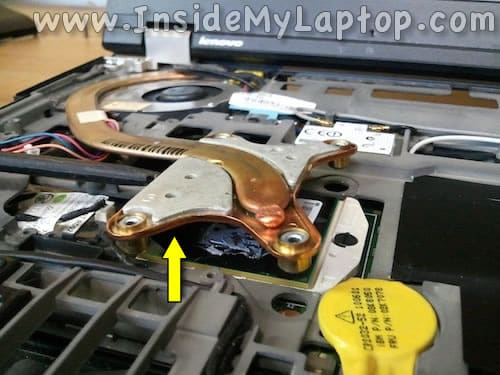
Carefully lift up the heatsink and separate it from the processor.
STEP 23.
Lift up the heatsink as it shown on the following picture and remove it.

STEP 24.
The cooling module (heatsink and fan) has been removed.
By the way, your Lenovo ThinkPad T410 laptop might have a slightly different heatsink.
It shouldn’t be a big problem. All disassembly steps should be very similar.

STEP 25.
Now I’m going to replace the failed fan with a new one.
STEP 26.
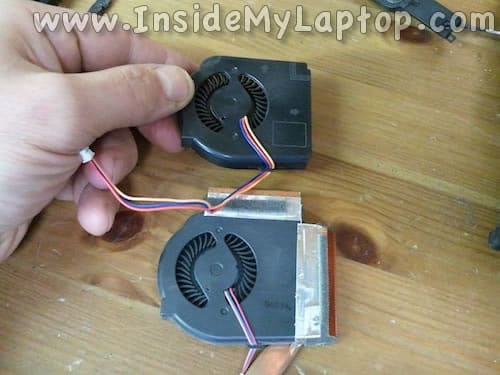
Separate two foil strips from the fan and heatsink.
STEP 27.
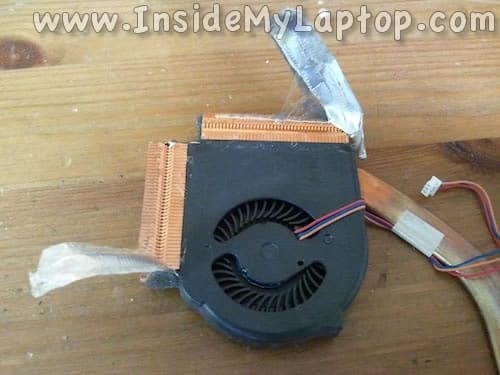
Remove two screws securing the fan to the heatsink.
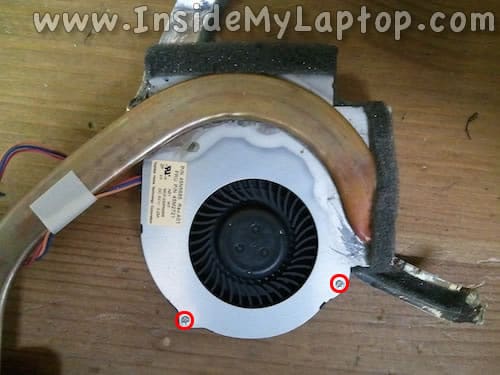
STEP 28.
Cut the tape securing the fan cable to the heatsink.
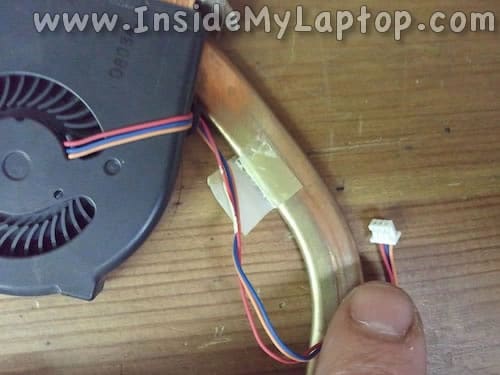
STEP 29.
Remove the failed cooling fan.
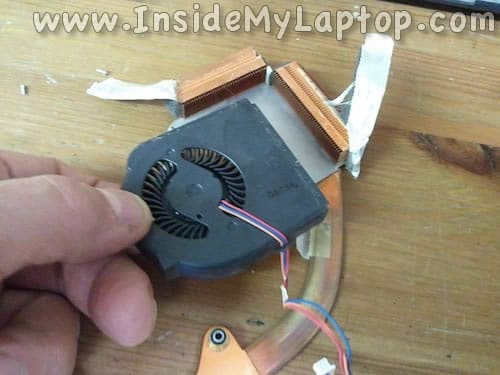
STEP 30.
Install new fan and assemble the cooling module back together.

STEP 31.
Before you instal the cooling module back in place you’ll have to clean up the old thermal grease and apply new thermal grease.

Now you can assemble the laptop back together following all disassembly steps in the reverse order.
The hardest part for me was installing the palm rest assembly back in place and connecting the trackpad cable.
When you install the palm rest assembly do not hurry. Make sure it’s seated correctly and all latches on the palm rest assembly locked correctly to the bottom case.
Roberto
Hi,
first of all, thank you for this useful guide.
I’ve same problem, and as I can read on Lenovo forum, many people have this trouble.
I’m wondering a laptop like this has a fan error after 3 years or less…this is a bussiness level laptop!
Anyway, I know there is a Lenovo bullettin about.
I’m not sure, a free assistance is for warranty expired T410 or for everyone with FRU 45M2723 and 45M2724 , but not 45M2722 (Why??).
Maybe you can solve this question.
I’d like to know where I may read the FRU number: can I read it just after pulled out the keyboard ?
Thank you so much,
Roberto
IML Tech
@ Roberto,
I believe it’s possible to read the fan FRU part number when you remove the keyboard.
There is a metal plate above the fan (you can see it in the step 8).
You can carefully lift up the plate and read the FRU part number from the fan.
I assume in your laptop the sticker with FRU located on the same spot as in my laptop.
Christopher
Thank you so much for the useful guide. Very helpful to replacing cooling fan in lenovo, We having the same piece. Doesn’t know yet, Catalog is vague to find such doubts. Here its been clear to us.
ramon
Thank you so much for the useful guide.
Andy @ Alphagen
Great job – thanks very much for the concise and clear instructions.
shawn
just have to say great info nice clear pics lots of info well done and thank you for this !!
just a side note is that you can take screws out squirt a little wd40 as close to the fan assembly as possible and you can get some more miles out of your old fan 😉
Elaine M
Thank you, Thank you, & THANK YOU! This was a great guide! Clear step-by-step instructions, enabled even this novice techie to successfully replace the fan in my lenovo laptop.
sadamu a.
thanks my friends for your 32 clearly steps
John A
Thank you for the well done guide. Made my fan replacement go smoothly. John.
Barry S.
An excellent guide, especially the gentle reminder regarding the palm rest. Thank you
Matt C.
Just wanted to say thank you for this guide! I have been back to it a couple of times when fixing laptops at work, it’s spot on! 🙂
Paulo Corceiro
Thank you for the guide. Did it and was not do difficult as it looks. I didn´t disconnect the trackpad cable from the motherboard, it´s not needed if you carefully move the top plastic lid to the right, the heatsink comes out easily this way. Bought a fan+thermal paste in UK Ebay for 10 pounds and works fine, a bit nosier but I guess the original fan wasn´t spinning as it should because now I can feel air coming out of the laptop!!! No more fan error.
Shawn Dolt
@ Shawn.. ! WD40 inside a computer, and something for dust to stick to !
Nice advice ! NOT !!!
Giddy doyle
Just blow with you’re mouth hard into the exhaust on the left side of the laptop.
You can here the fan spinning and the the dust will blow out.
No need to take the laptop apart which is crazy.
Make sure it’s plugged out, put you’re mouth right up to it and blow very hard.
Worked for me.
Wess
Thank you for the really amazing guide. The fan on my son’s T410s is buzzing and then seizing up. I have DIY compulsion that gets me into trouble. I have replaced a fan on a Dell laptop. Your guide helped me “throw in the towel” on the T410s even though it’s a great in every other way. For those still using this guide, I have to caution that it is indeed labor intensive to replace a laptop fan and just keeping track of the various screws (I usually create a template) can be a real challenge.
Andrew
This is a great guide, but if you are doing a T410s or T420s, I would check out this video for heat sink replacement: https://www.youtube.com/watch?v=M3aivW-7qJk
There are some important differences, mainly that the processor and heat sink and pipes are on the bottom of the main board and so a bit more disassembly is required. That said, I replaced the heat compound on an i5 T410s that was crashing, and it was like night and day. It still gets hot, but the fan can actually bring the temp back down at relatively low rpm. Use TPFan to diagnose fan speed and temperature.
Erik Skytthe
Thanks for your great guide! – saved me 🙂
Sandy
Your guide is the best one I found and ended up being what I followed step by step. Thank you for providing the clear photos and instructions, I have never attempted to repair my laptop before and this empowered me! My laptop is up and running again without the “fan error” induced shut-down!
sethu
thank you so much for the useful guide.