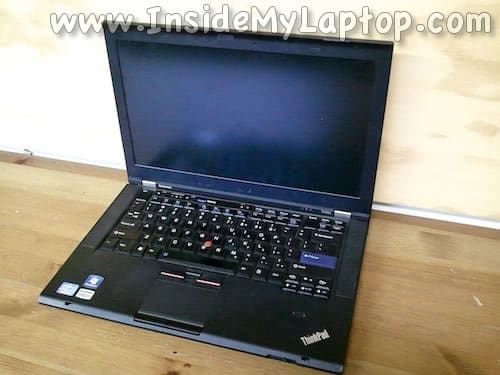
In the following guide I explain how to remove the keyboard from a Lenovo ThinkPad T420s.
This guide will help you to replace failed or damaged keyboard, access the CMOS battery and cooling fan (for cleaning in case of overheating).
Before you start, make sure the laptop is turned off.
STEP 1.
Unlock and remove the battery.
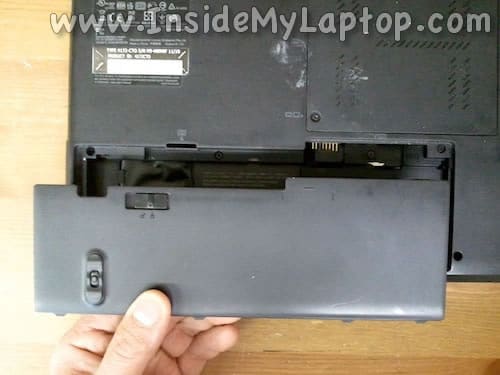
STEP 2.
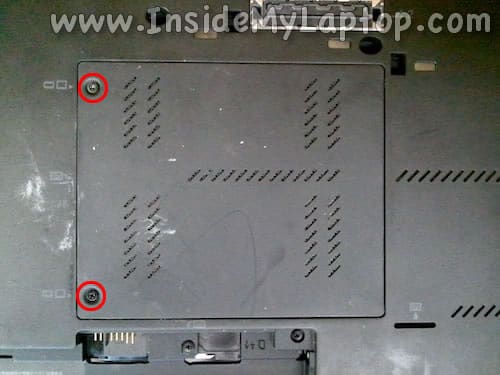
Remove two screws securing the service cover located on the bottom.
Lift up and remove the cover.
STEP 3.
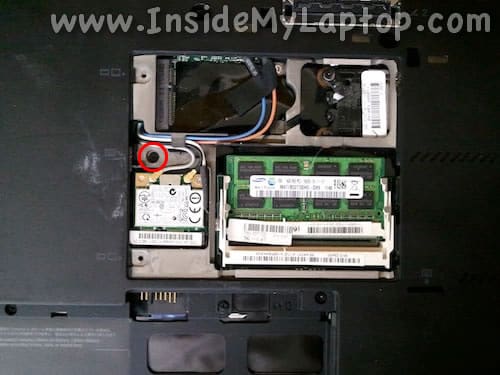
Remove one two screws securing the keyboard.
Update: there are two, not one screw securing the keyboard. The second one located on the right from the battery connector.
Also, under the service cover you can get access to both RAM slots and wireless card.
This laptop can handle up to 8GB (2x4GB) DDR3-12800 SODIMM RAM modules.
STEP 4.
Slide the entire keyboard about 2-3 millimeters towards the screen.
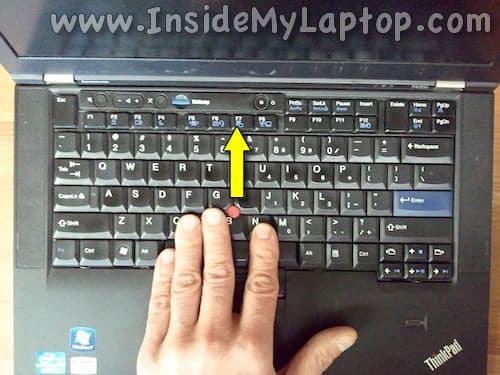
STEP 5.
Insert a piece of plastic (or knife blade) under the keyboard click buttons and carefully lift it up.
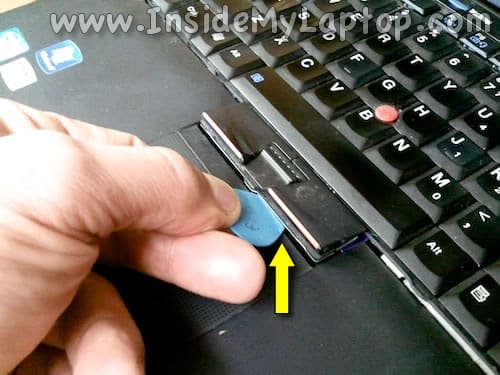
STEP 6.
Continue separating the keyboard from the top cover.
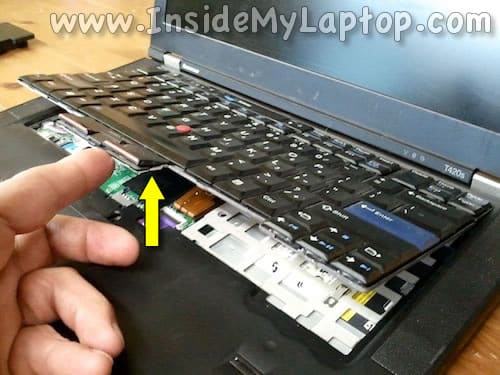
STEP 7.
Lay down the keyboard on the palm rest.
Now you can access the keyboard cable and unplug it from the motherboard.
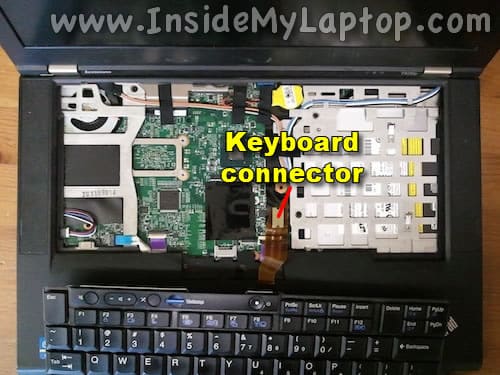
STEP 8.
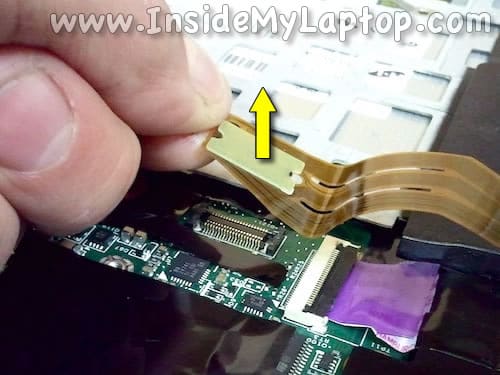
Here’s how to disconnect the keyboard cable.
Simply lift up the connector and unplug it from the motherboard.
STEP 9.
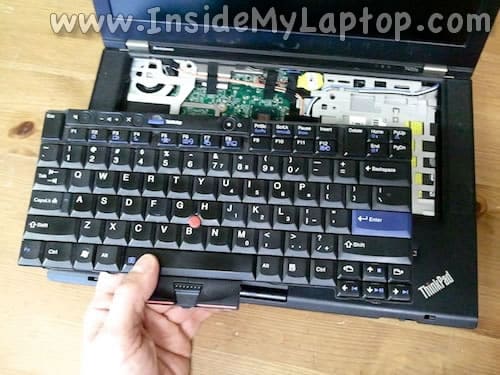
Now you can remove the keyboard and replace it with a new one.
STEP 10.
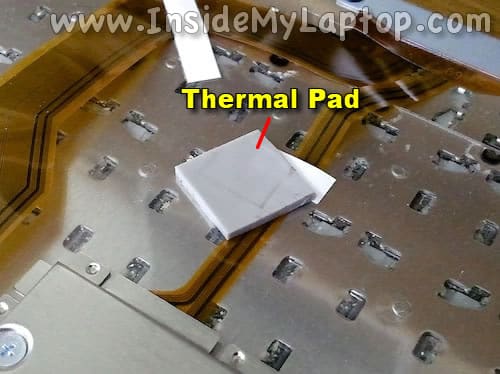
When the old keyboard is removed, take a look at the bottom side.
In my case I had thermal pad stuck to the keyboard. This thermal pad should go back on the chip.
If your thermal pad still attached to the chip you can skip the following three steps.
STEP 11.
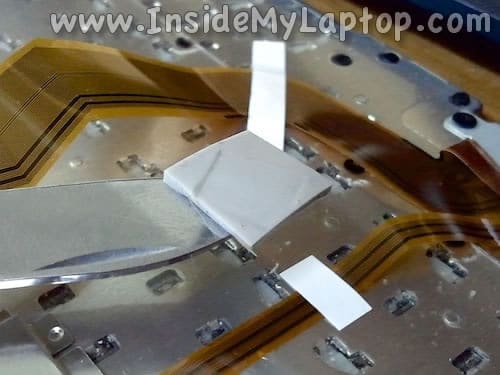
Separate thermal pad from the keyboard using a knife blade, do not touch it with your fingers.
STEP 12.
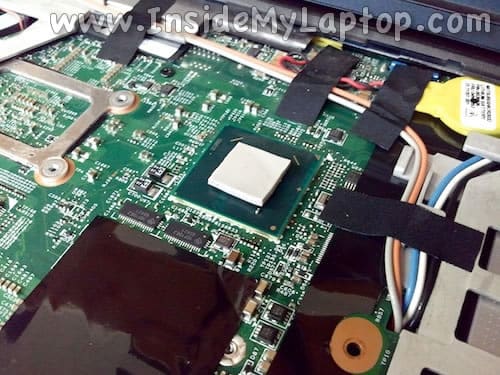
Place thermal pad back on the chip.
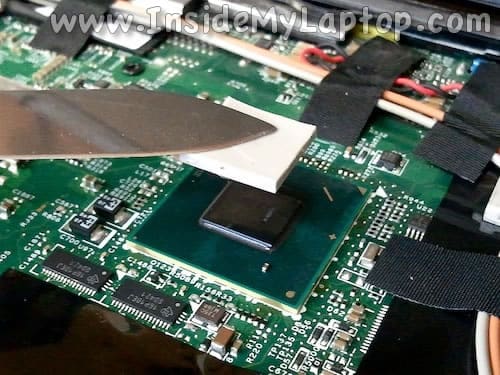
STEP 13.
Now you can install the new keyboard back in place and assemble the laptop back together.
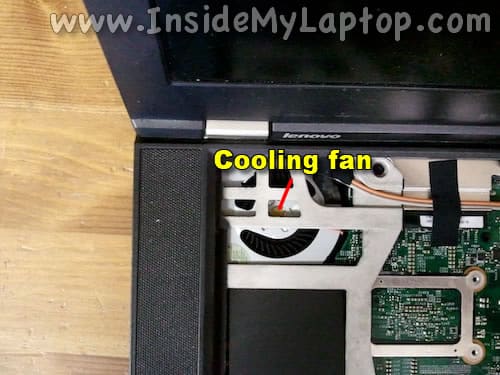
When the keyboard is removed you can get some limited access to the cooling fan.
This should be enough for cleaning the cooling fan and heatsink from dust in case of overheating.
Find an air compressor or canned air and blow air into the fan until all dust is gone.
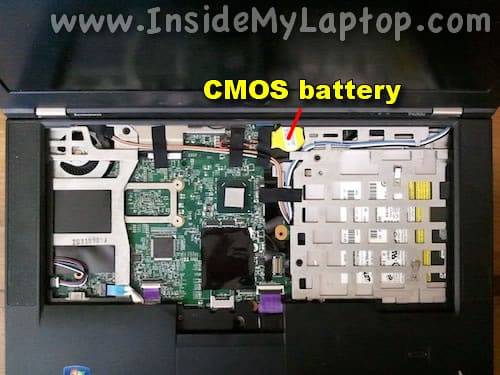
Also, under the keyboard you can access the CMOS battery.
Mark
Do you have complete guide for this model? I’m trying to change failed fan. Thanks.
IML Tech
@ Mark,
I haven’t created the compete guide yet but you can find fan removal instructions in the service manual. You’ll find it on the page 96.
Sello
My Lenovo Thinkpad T61 backlight doesn’t light.
Greg
An important step is missing in Step 3. There are actually two screws holding in the keyboard. Not one. The second screw is located directly under the mouse buttons. It also has a little keyboard icon next to it.
IML Tech
@ Greg,
Thank you. I mentioned that in the post.
Andreas
Hi,
do you know the height of the thermal pad which is between keyboard and the chip? I changed my keyboard several months ago and just noticed that the thermal pad is missing. Now 8 want to order a new one but I need to know the height.
Best regards,
Andreas
Carol
I made it halfway thru step 3. Then i found that the 2nd screw mentioned in step 3 is stripped. I can’t remove it. Any tips?
Wazaii Karina
u missed one screw under battery that holds keyboard, these is your epic fail
IML Tech
Well… I forgot to circle the screw but I mentioned it in the step 3 many years ago.