In the following guide I explain how to remove the inverter board and LCD cable from a Gateway Solo 1400/1450 laptop. This guide should work for many other Gateway models.
First of all, remove the battery.
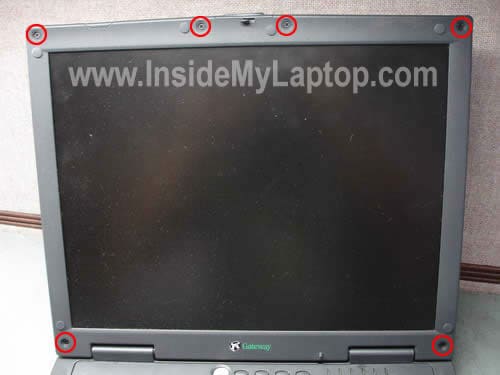
The display bezel has six rubber plugs covering screws. Remove all rubber plugs with a sharp object.

Remove six screws found under the rubber plugs.
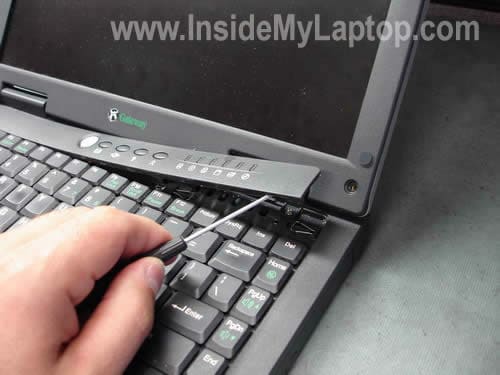
Using a small flathead screwdriver remove the keyboard bezel.
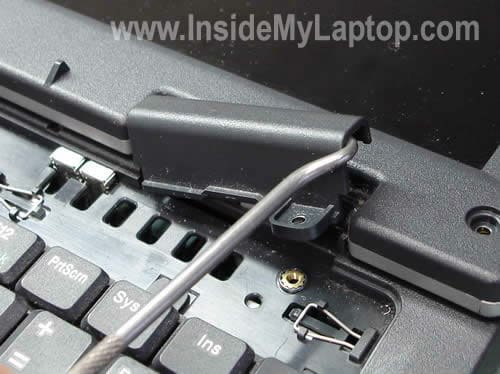
Remove three screws from hinge covers.

Remove both hinge covers.
Now you can start separating the display bezel from the cover as it shown on the picture below.
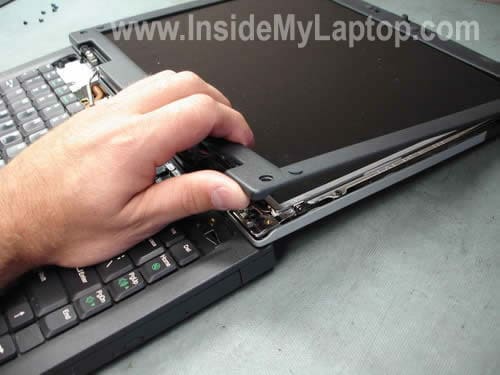
Remove the bezel.

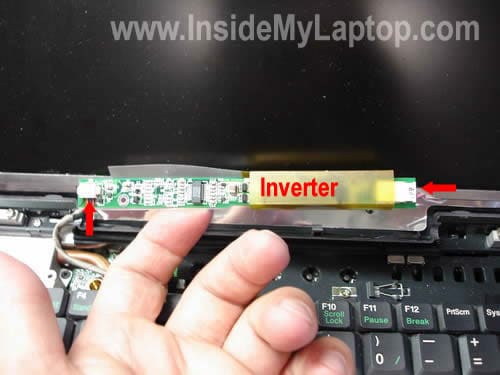
You’ll find the inverter board below the screen. The board is glued to the display cover with a double sticky tape.
Carefully separate the inverter from the cover.
Unplug cables from both sides of the board and remove it.
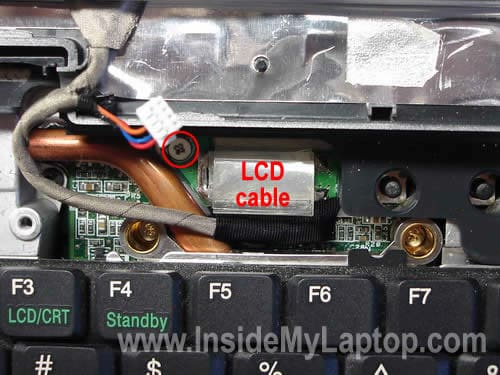
Remove one screw securing the LCD cable connector to the motherboard.
Carefully disconnect the cable connector from the motherboard.
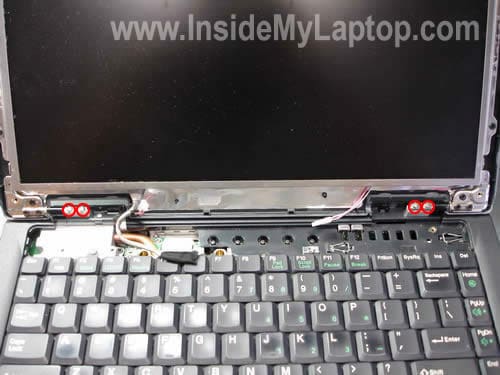
Remove four screws securing display hinges.
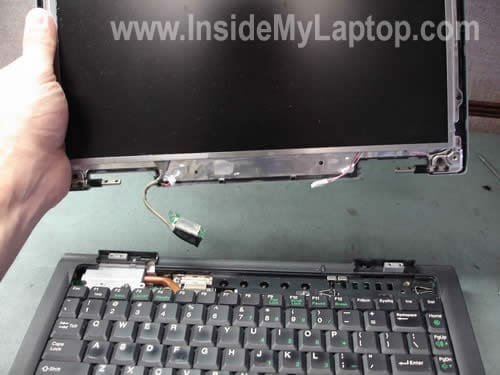
Carefully lift up and remove the display panel assembly.
Remove ten screws securing the LCD assembly to the cover.
Remove the LCD panel.
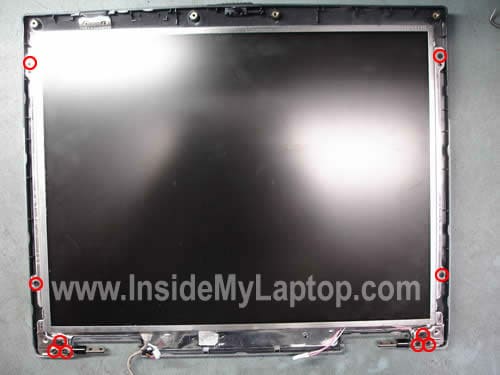
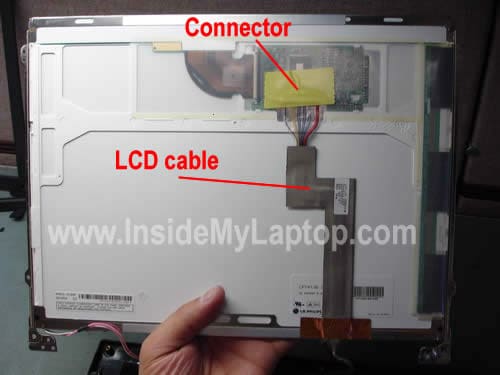
Now you can access the back side of the screen and remove the cable.
Remove the yellow sticky tape covering the cable connector.
Unplug the cable from the screen and replace it with a new one if necessary.
Ken
I have a Gateway Solo 1450 with a 15″ LCD. When I attempt to remove the ten screws securing the LCD assembly to the cover I only have access to the six near the hinges. I don’t have access to the four remaining screws because they are facing the inside edge of the rear bezel. Do you have any suggestions on how to remove the LCD assembly?
Ken
How is the 15″ monitor in a Gateway Solo 1450 attached? I have removed the six screws near the hinges but I am unable to separate the LCD from the top cover. Any information you can provide would be helpful. Thank you.
IML Tech
Ken,
I’m not sure why my guide is not working for you. I took pictures from a Gateway Solo 1450 laptop and I thought they are all the same.
Ken
I can post pics of my laptop to flickr if you are interested.
John Ruschmeyer
The four remaining screws are under “stickers” on the sides of the LCD back case.
Jerry Bales
Sir :
I have a Gateway Solo 1450 and the power connection has a loose center pin and I am trying to get the bottom cover off but I have all the outside screws out but there seems to be something holding the center of the cover on and I don’t see any more screws
Can anyone help ?
Jerry..
Howard
Hi,
I have the same model of laptop and I can’t seem to get the screw securing the LCD cable connector to the motherboard loosened. I’m using a precision screwdriver and it gets a pretty good bite on the screw, but it just won’t budge. Any tips?
Also, do you know the part or model number of that LCD cable? Mine is damaged and I need to find a new one.
Thanks
IML Tech
Howard,
Can you heat up the screw a little bit with a solder gun? Sometimes it helps.
I don’t know the part number.
Disassemble the display panel and search for the part number right on the cable. Google it.
Howard
Thanks for the tip. Unfortunately, heating up the screw didn’t help. I had to bend the board up and loosen the screw by turning the board. The board was shot anyway, so I don’t care bending it.
I got a new cable and installed it, and it booted up cleanly and everything looked happy for about an hour. Then the screen just turned off. When I reboot, the screen flickers once at boot-up and once right about when Windows starts to load. Other than that it’s black. I can hear the hard drive and optical drive spin up and the external video works just fine.
I checked the connections from cable-to-motherboard, cable-to-LCD, cable-to-inverter, inverter-to-LCD, and cable-to-WiFi card and everything is connected properly and securely.
I really hope I don’t have to replace the LCD. Any suggestions? I don’t have another machine to test the LCD or inverter.
Thanks
bob borum
I have a gateway solo 1450 the screen is bad , I have new screen but can not get the screen out of lid cover I can see screws on the sides but can not access the screws , it looks like break out s in the cover but I dont want to break the cover , how can I get to the side screws ?
M. Moser
The “breakouts” are actually very thin (.015″) self adhesive screw covers. There are four covers with two screws each behind them. Use a razor blade to get behind the covers and pry them off.
John
I have gateway solo 1450, it’s not turning on, it shows red charging light but nothing happen when I press power button. Any suggestions what may be the problem?