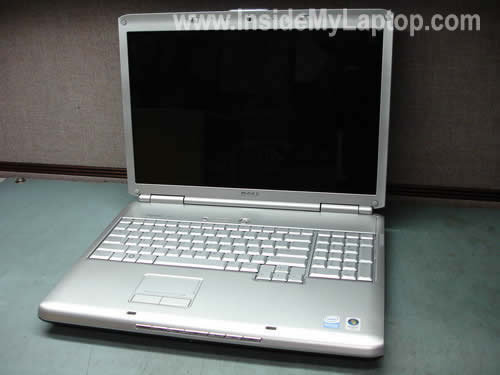
How to take apart Dell Inspiron 1720 Vostro 1700

Here are instructions for taking apart a Dell Inspiron 1720/1721 or Dell Vostro 1700 laptop.
You can use these guide for removing and replacing:
1. Â Memory modules, hard drive, wireless card, modem.
2. CD/DVD optical drive.
3. Keyboard.
4. LCD panel.
5. Heat sink, CPU, motherboard and other internal components.
How to take apart Sony Vaio VGN-S360P

In the following guide I explain how to take apart a Sony Vaio VGN-S360P and replace broken power jack (DC jack). I’m not sure if this guide will fit all Vaio VGN-S models but I think it will be pretty close.
How to replace keyboard on Dell Latitude C840
In this tutorial I show how to remove and replace the keyboard on a Dell Latitude C840 laptop.
This is a few years old computer but I still like it and use every day.
The removal and replacement procedure is pretty much straightforward and shouldn’t take more more than 15 minutes.
Turn off the laptop, unplug the power adapter and remove the battery.
On the bottom you’ll find four screws with a letter “K” witch means keyboard. Remove all four screws.

How to replace keyboard on IBM ThinkPad T30
In this guide I explain how to remove and replace the keyboard on an IBM ThinkPad T30 laptop.
This guide should work for many other IBM ThinkPad models because they all have similar cases.
You can easily remove and replace it at home yourself.
First of all, turn off the computer, unplug the power adapter and remove the battery.

How to upgrade RAM in Toshiba Portege M400
Here’s how you can replace or upgrade memory (RAM) in a Toshiba Portege M400 Tablet PC.
As you see on the picture below, there is no access to the RAM slots on the bottom.
Why? Because both RAM slots are hidden under the keyboard.

According to manufacturer specifications a Toshiba Portege M400 Tablet PC can handle up to 4GB memory total.
That means you can install up to 2GB module into each slot.
Toshiba Portege M400 laptop configured with PC2-5300 DDR2 667MHz RAM.
How to replace screen on Acer Aspire 5100
In this tutorial I’ll explain how to remove the LCD screen and replace the inverter board on an Acer Aspire 5100 laptop.
This tutorial will work for many other Acer models with a similar body style.
In my previous article I was taking an Acer Aspire 5100 apart.
First of all, turn off the computer, unplug AC adapter and remove the battery.

The display bezel has four screws hidden under for seals.
Two rubber seals on the top of the bezel and two plastic seals on the bottom.
Removing keyboard and memory on HP Compaq nc6400
In this guide I’ll explain how to remove the keyboard and replace the internal memory module on a HP Compaq nc6400 series laptop.
HP Compaq nc6400 has two memory slots. One of them can be easily accessed from the bottom but the second one is hidden under the keyboard. In order to replace the internal module you’ll have to remove the keyboard.
First of all, turn off the notebook, unplug it from the power adapter and remove the battery.
There are three screws securing the keyboard on the bottom.
You can remove these screws with a #8 torx or flathead screwdriver. Remove all three screws.

How to apply thermal grease on processor
This guide explains how to apply new thermal grease on a laptop processor (CPU).
Thermal grease (thermal compound or paste) has to be applied on the top of the processor before you install the heat sink. Thermal grease helps to conduct heat more efficiently.
In some laptops you can remove the heat sink without removing the CPU fan. In my case, I had to remove the fan first.

Taking apart Acer Aspire 5100

In this guide I’ll explain how to take apart an Acer Aspire 5100 laptop.
I’ll show how to remove major internal components.
Upgrading hard drive in Sony Vaio PCG-V505DXP

Here’s how I upgraded the hard drive in a Sony Vaio PCG-V505DXP laptop.
It had an older 60GB 4200RPM IDE HDD (Toshiba MK6021GAS) installed. The original one failed and I decided to upgrade it with a faster one.
I installed an inexpensive 120GB 5400RMP WD Scorpio IDE drive (WD12000BEVE) and it works like a charm.
The drive replacement procedure is pretty simple and here it is.