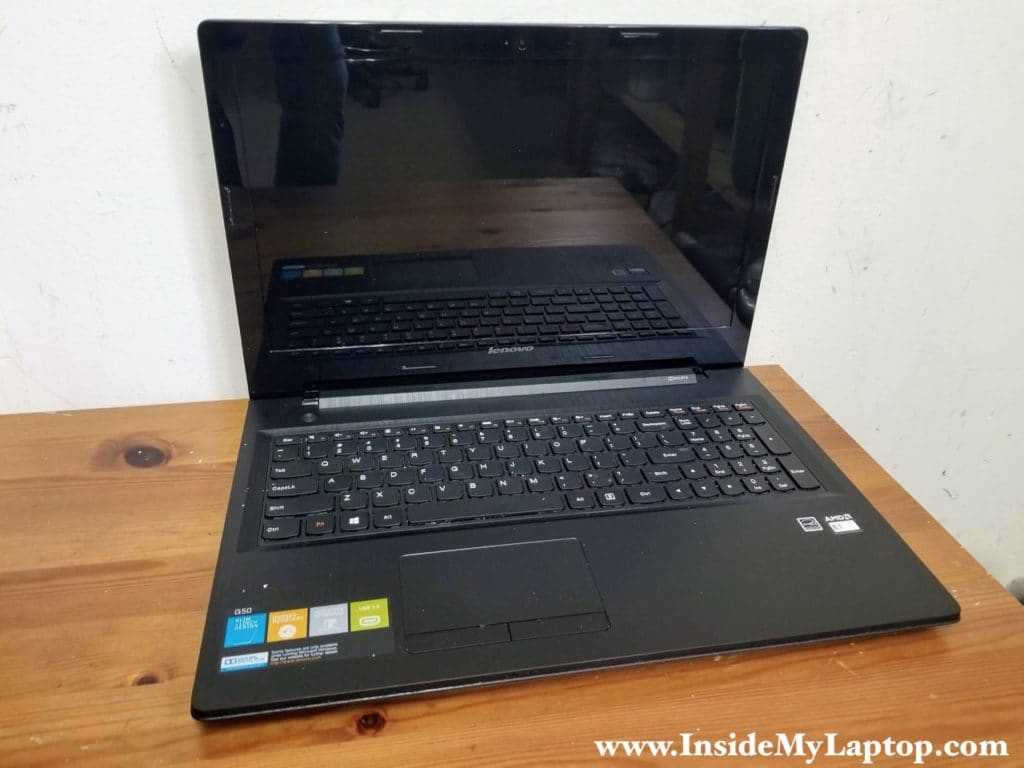
In this tutorial I show how to disassemble a Lenovo G50-45 laptop (model 80E3).
At the end of this tutorial you will find a link to the official Lenovo G50-30/G50-45/G50-70/G50-70m/Z50-70/Z50-75/G50-80 hardware maintenance manual.
STEP 1.
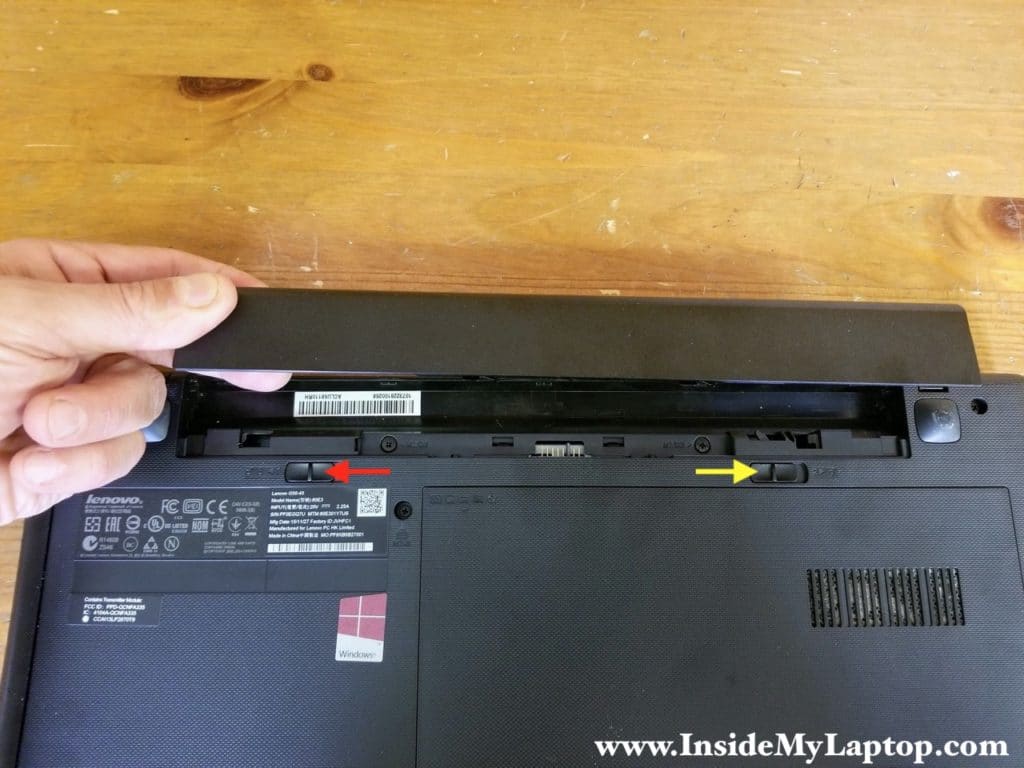
Slide the lock #1 to the left to unlock the battery (red arrow).
Slide the lock #2 to the right to lift up the battery (you’ll have to apply some reasonable force).
Remove and replace the battery if necessary.
STEP 2.
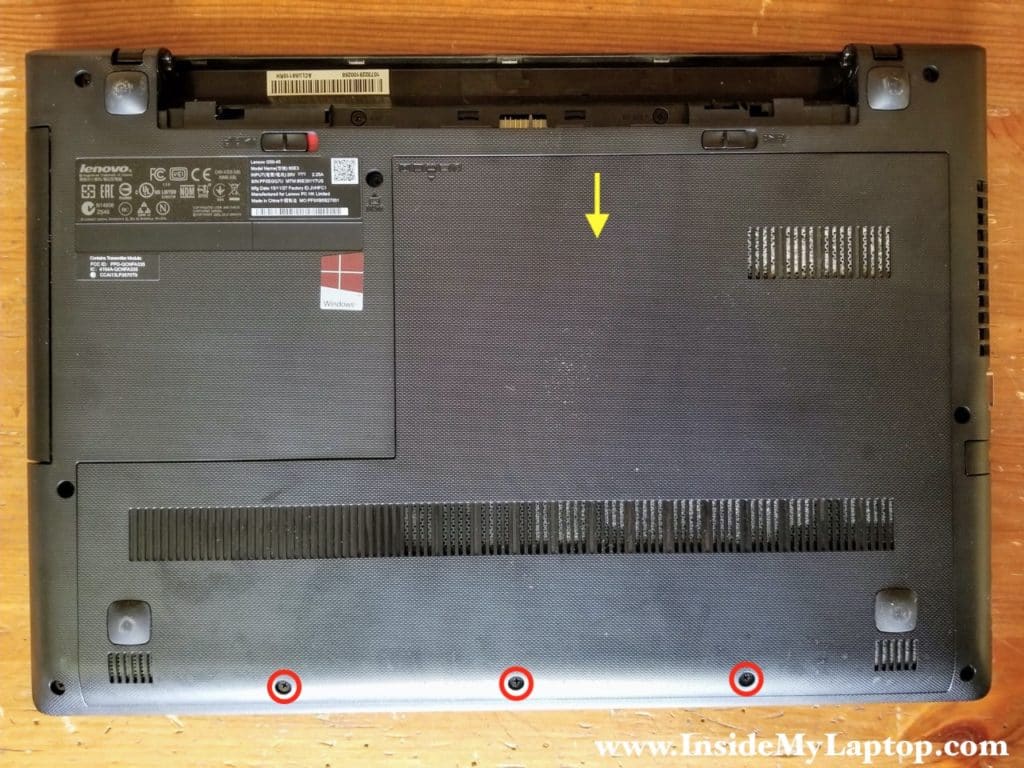
Remove three screws securing the bottom cover.
Slide the bottom cover to the shown direction and remove it from the laptop.
STEP 3.
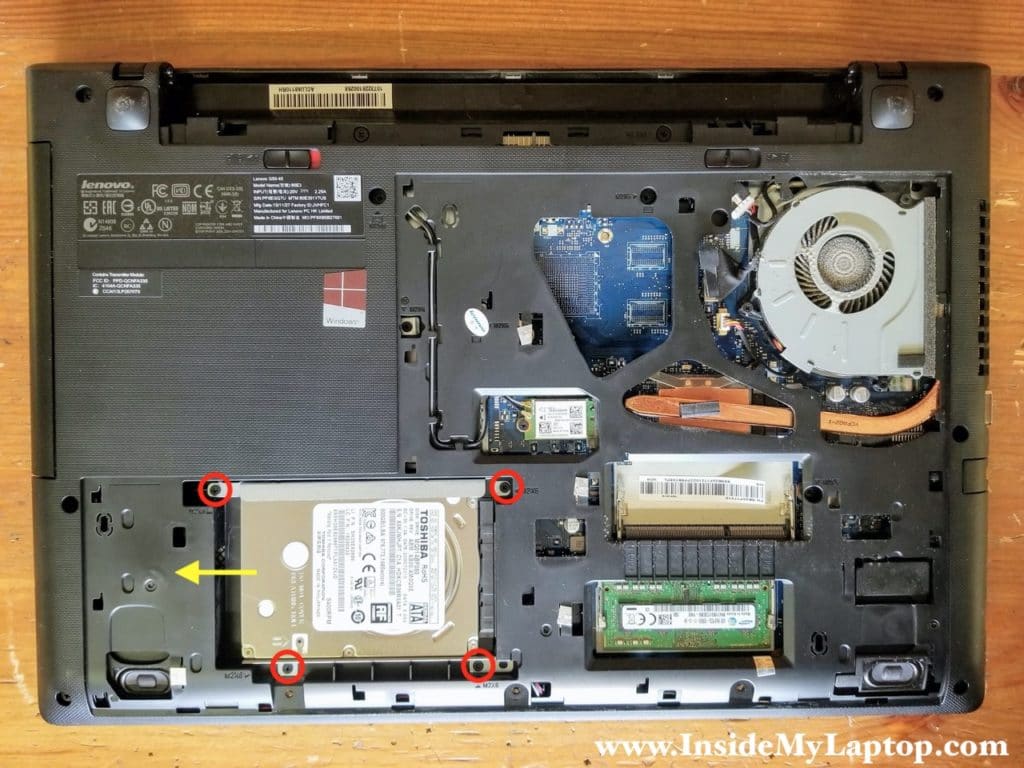
Remove four screws securing the hard drive bracket.
Slide the hard drive assembly to the left to disconnect it from the SATA port on the motherboard.
STEP 4.
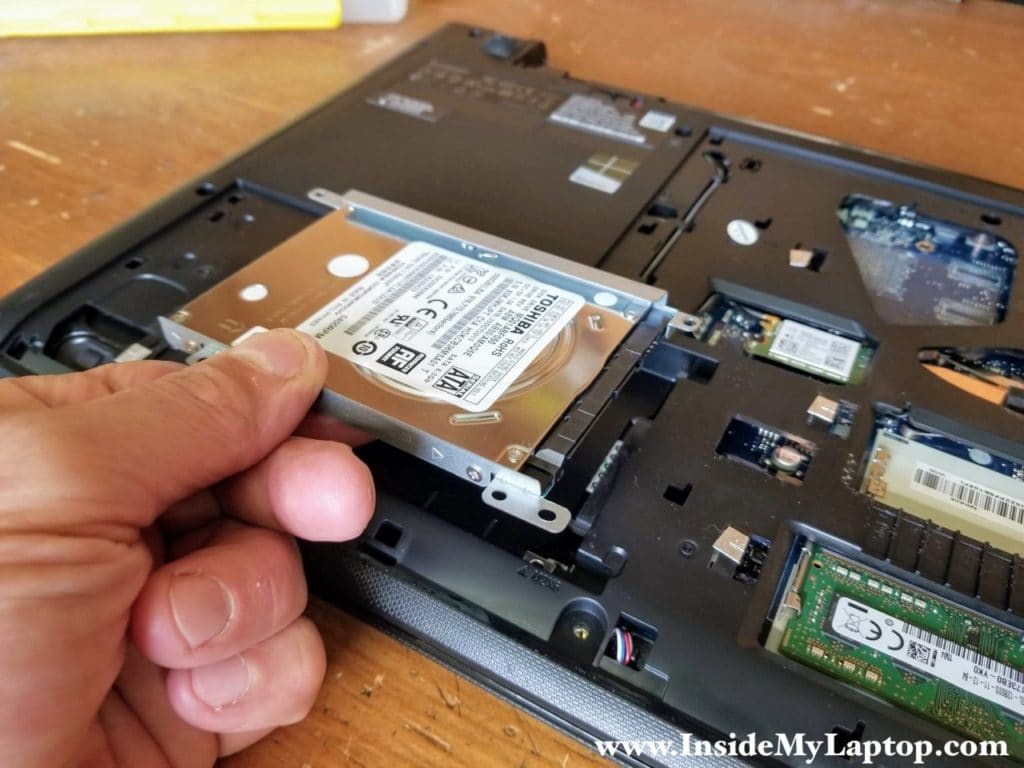
Lift up and remove the hard drive assembly. Upgrading this drive to a 2.5″ solid state drive will improve laptop performance significantly.
STEP 5.
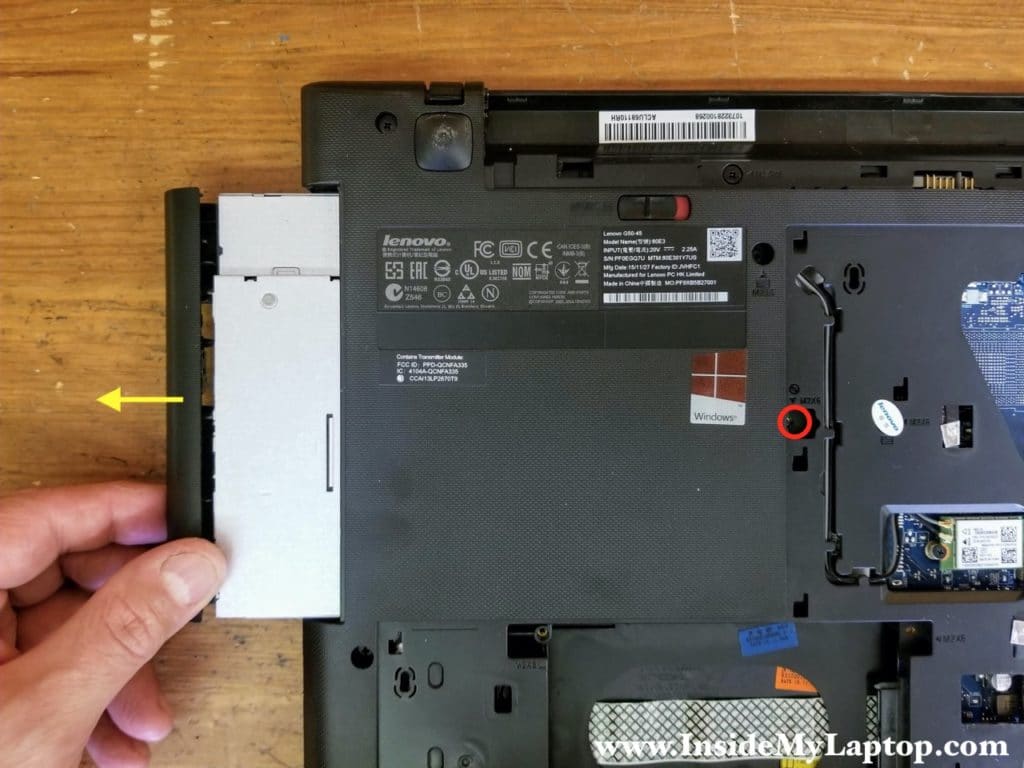
Remove one screw securing the optical drive.
Pull the optical drive out.
STEP 6.
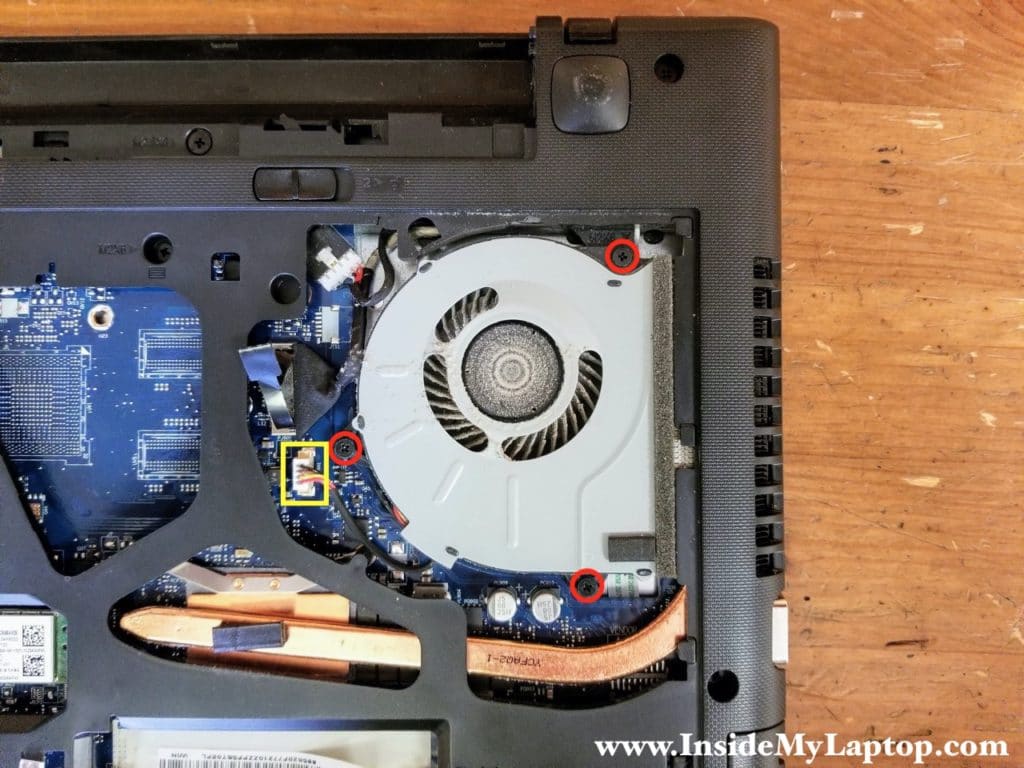
Remove three screws securing the cooling fan and disconnect fan cable from the motherboard.
STEP 7.
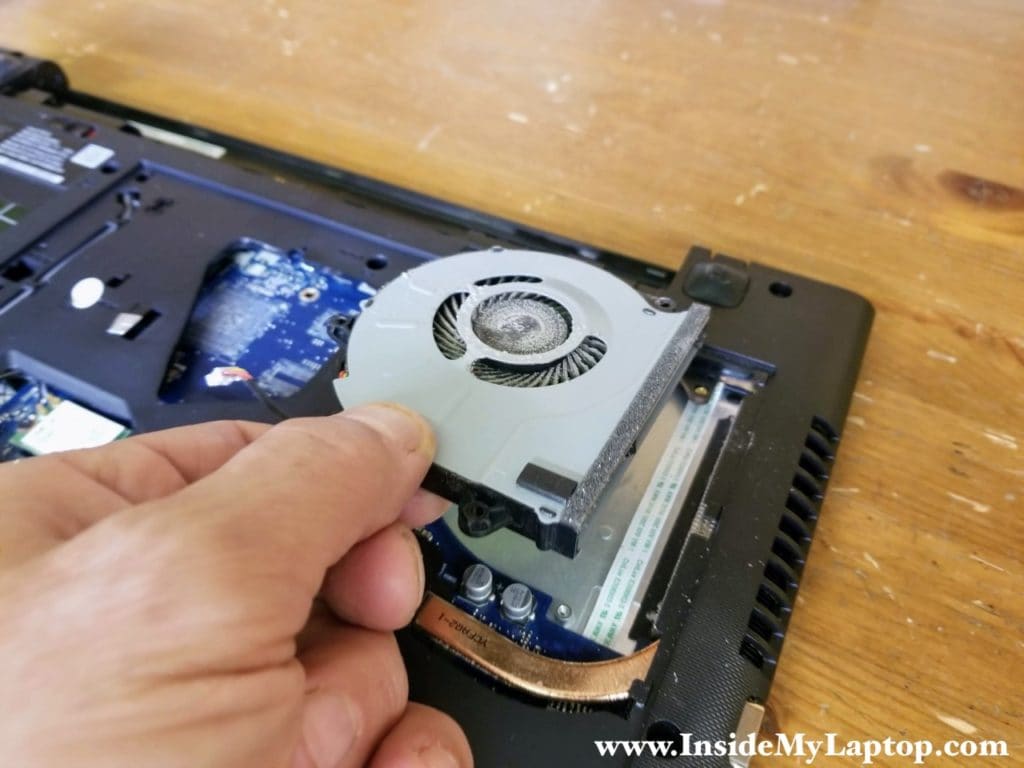
Remove the fan.
NOTE: without removing the fan you will not be able to remove the palmrest. The fan is attached to the palmrest.
STEP 8.
Remove three screws securing the keyboard.
NOTE: just for the keyboard removal and replacement you can skip disassembly steps 3 through 7.
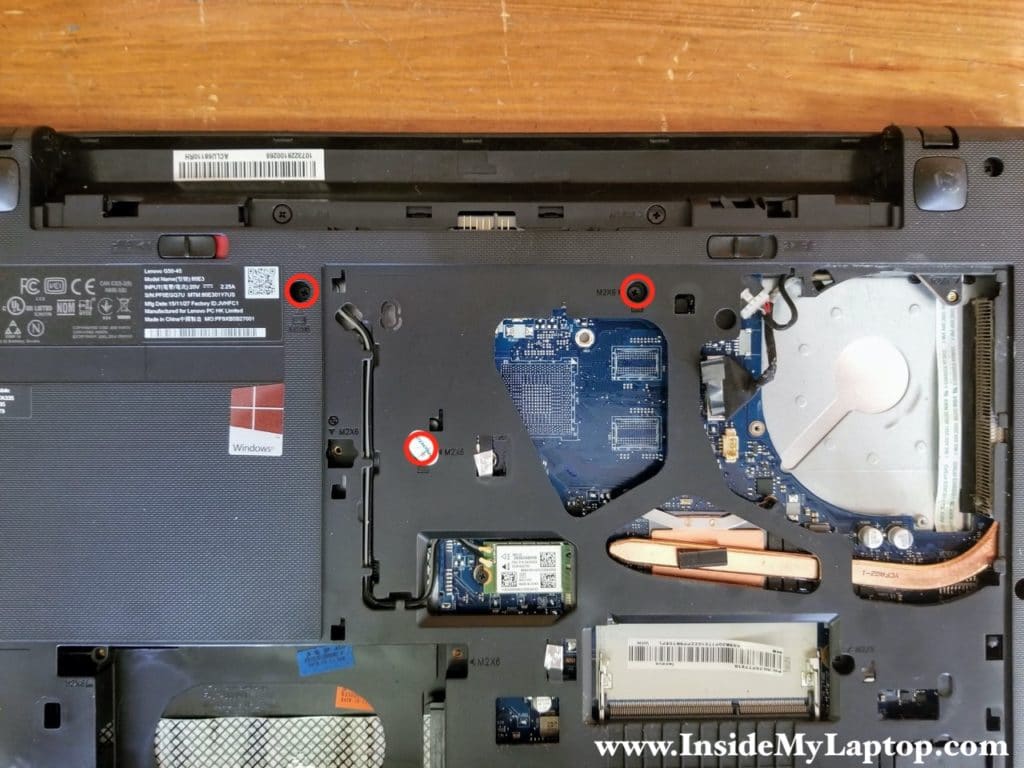
STEP 9.
Using a thin case opener tool start separating the keyboard from the palmrest.
There are hidden latches securing the keyboard to the palmrest.
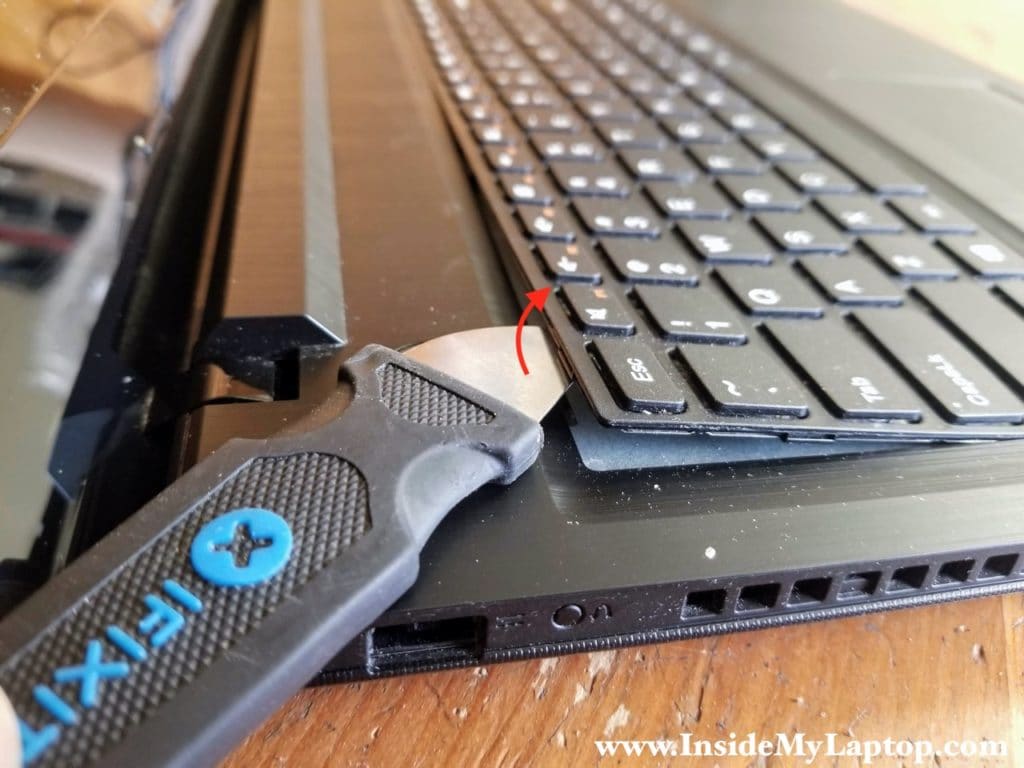
STEP 10.
Continue separating the keyboard as it shown on the following picture.
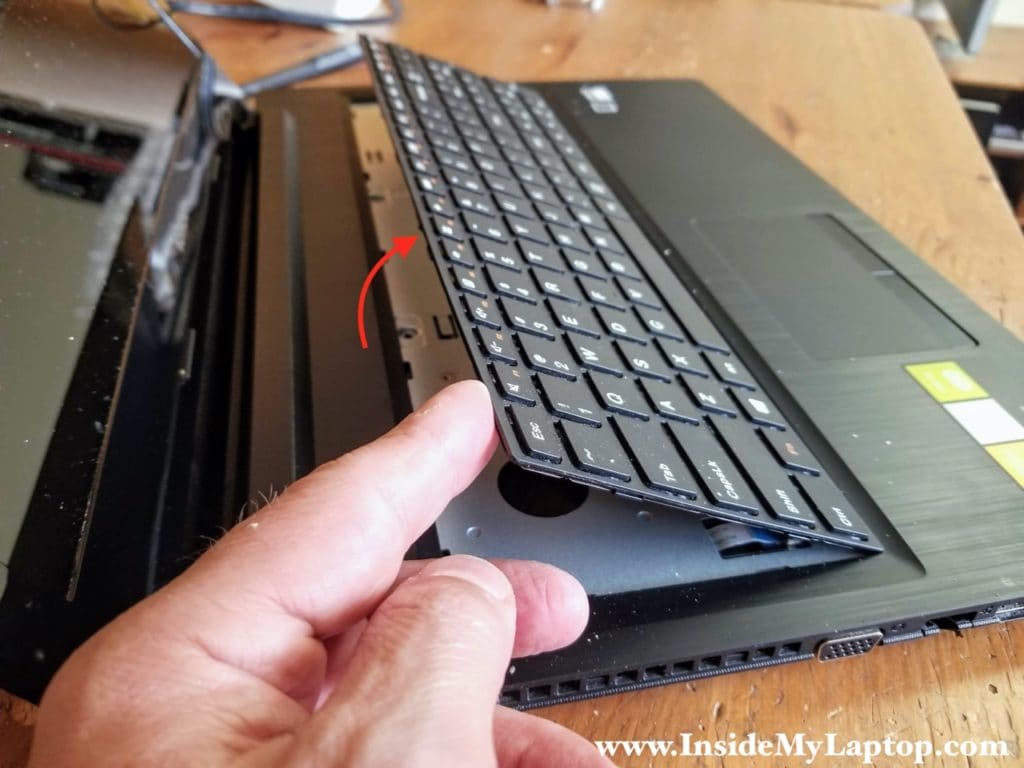
STEP 11.
Move the keyboard towards the display assembly in order to access the keyboard cable connector underneath.
Unlock the keyboard cable and remove the keyboard.
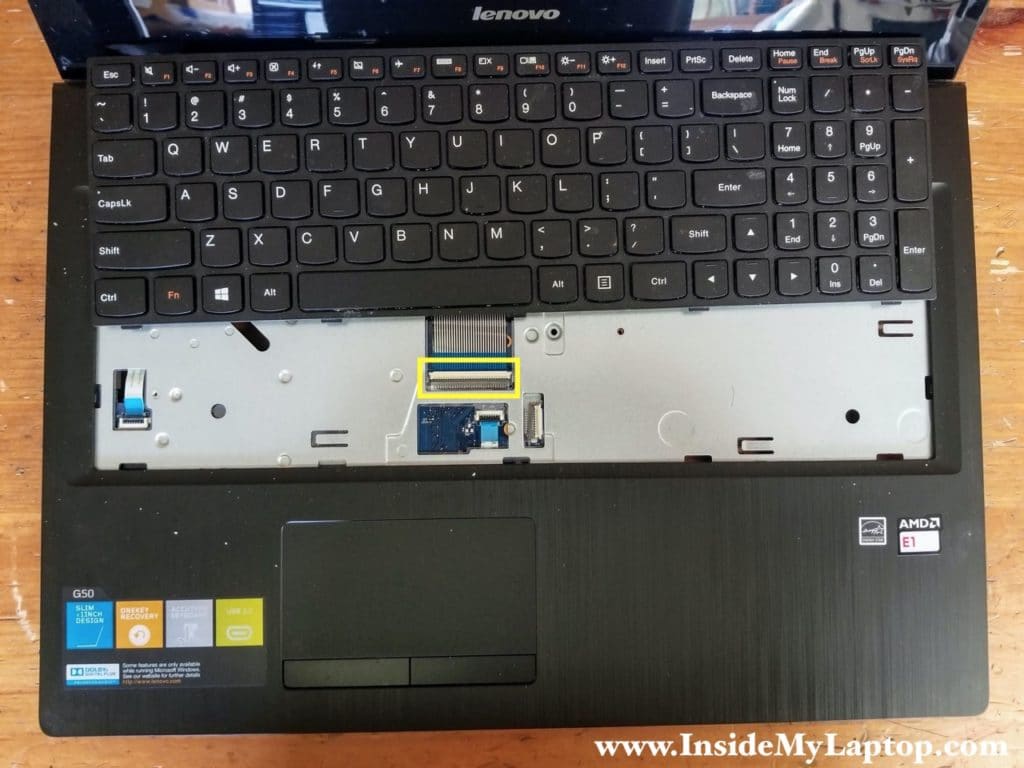
Here’s how to disconnect the cable.
1. Lift up the locking tab to unlock the connector (red arrow).
2. Pull the cable out.
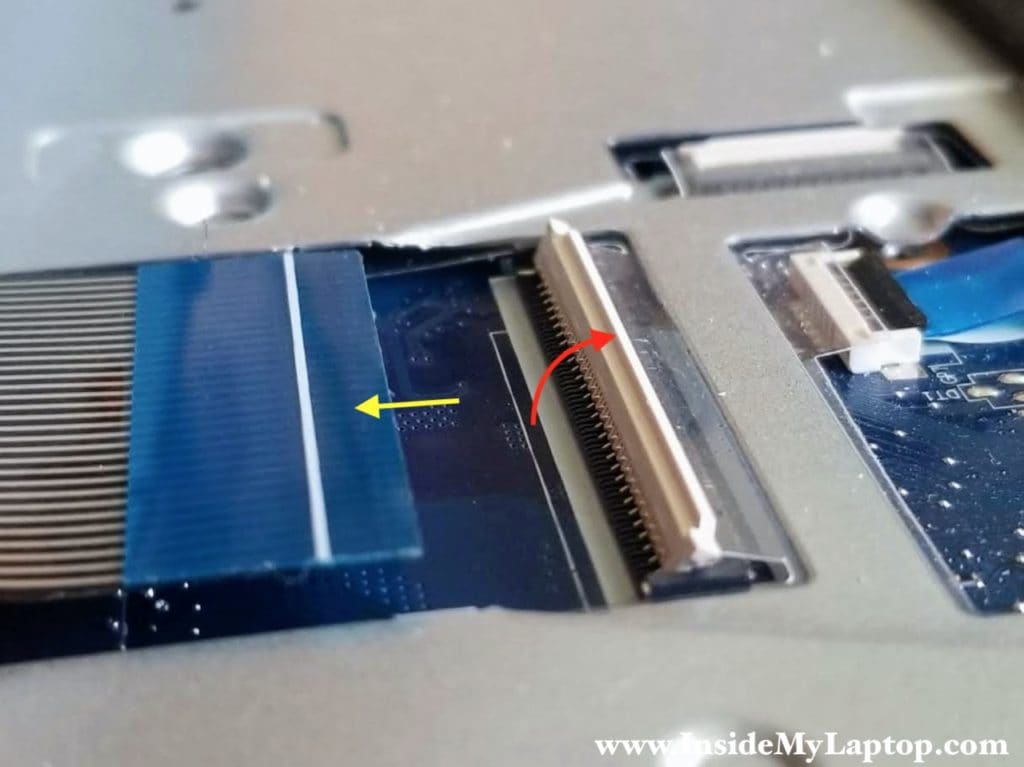
STEP 12.
Disconnect the power button cable (color-coded in orange) and touchpad cable (color-coded in green). Use same technique as for disconnecting the keyboard cable.
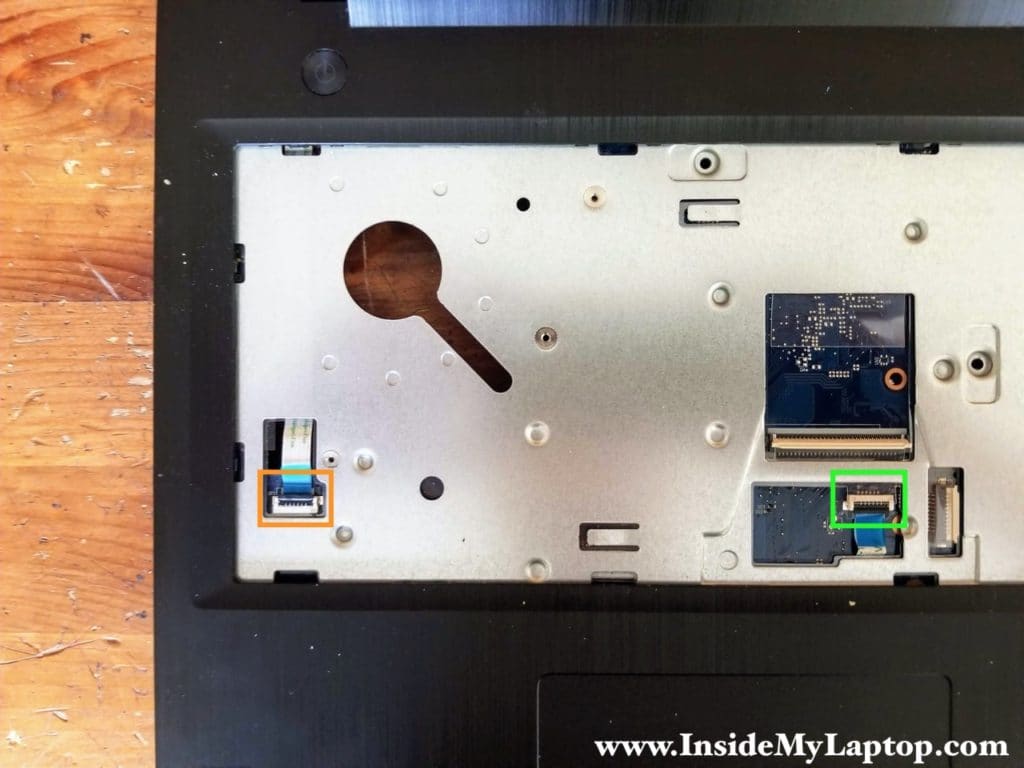
STEP 13.
Remove eight M2.5×6 screws (red) and one M2x6 screw (yellow).
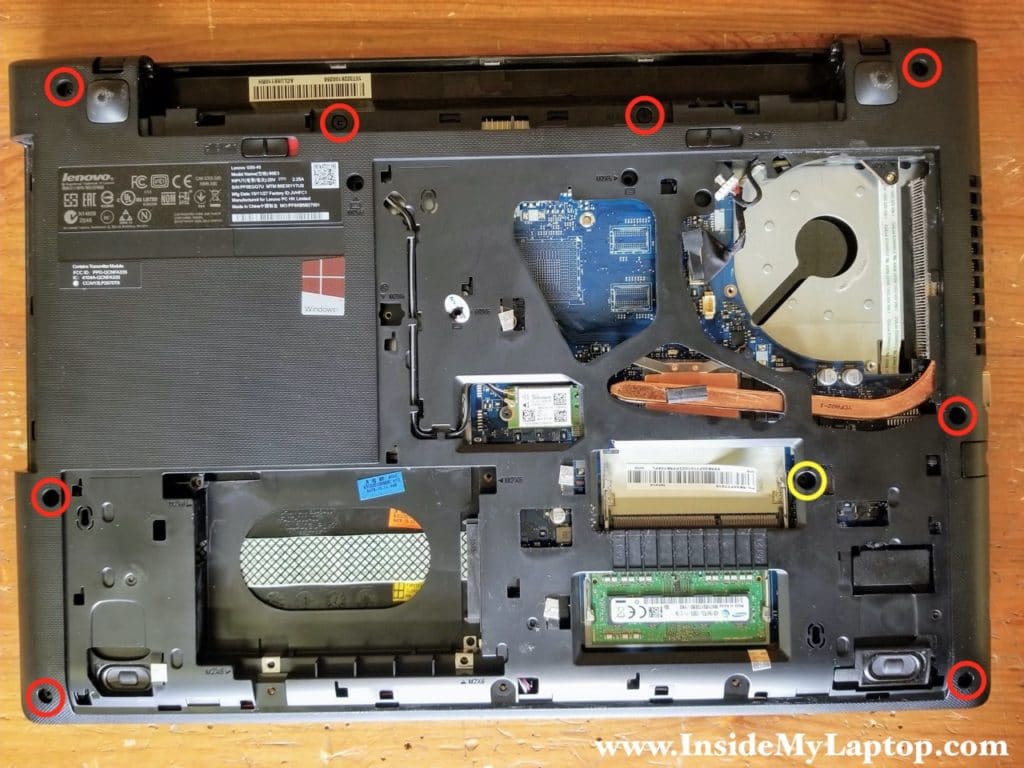
STEP 14.
Start separating the palmrest from the base assembly.
You’ll have to apply some reasonable force to disengage hidden latches fastening two parts together.
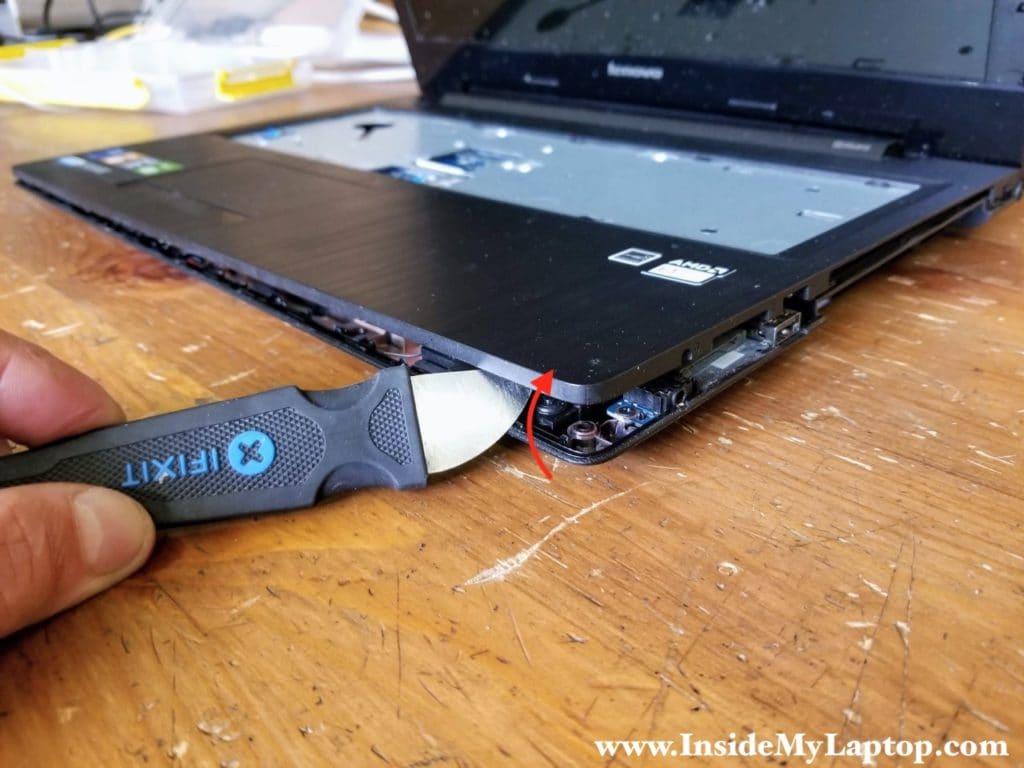
STEP 15.
Remove the palmrest assembly.
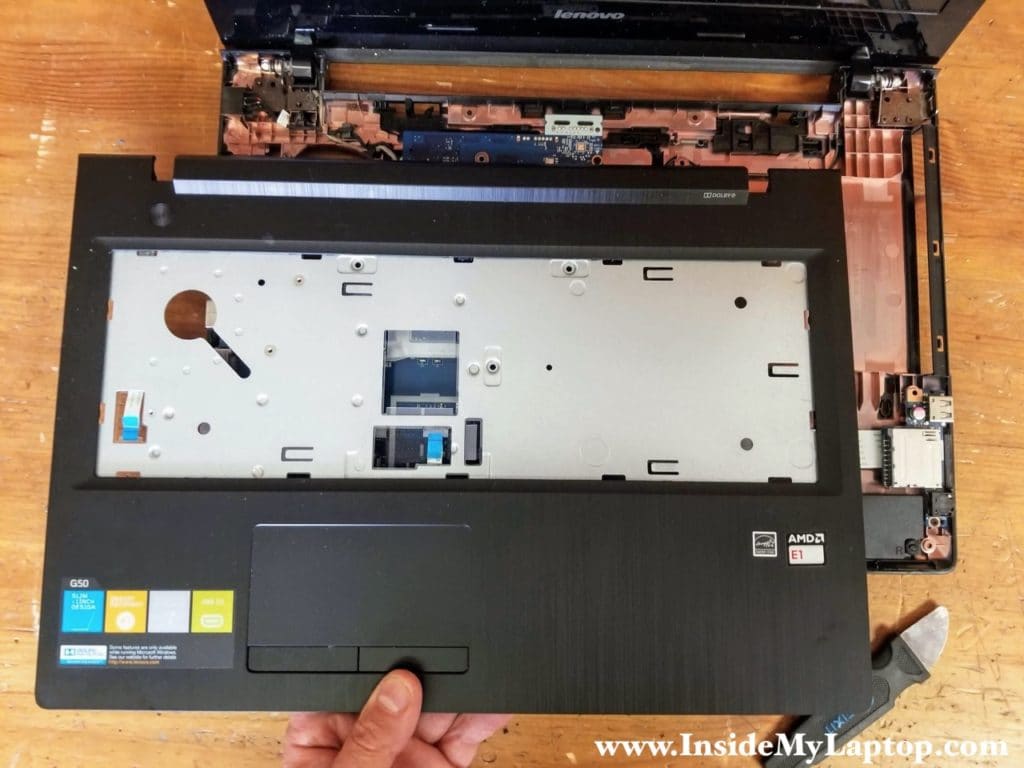
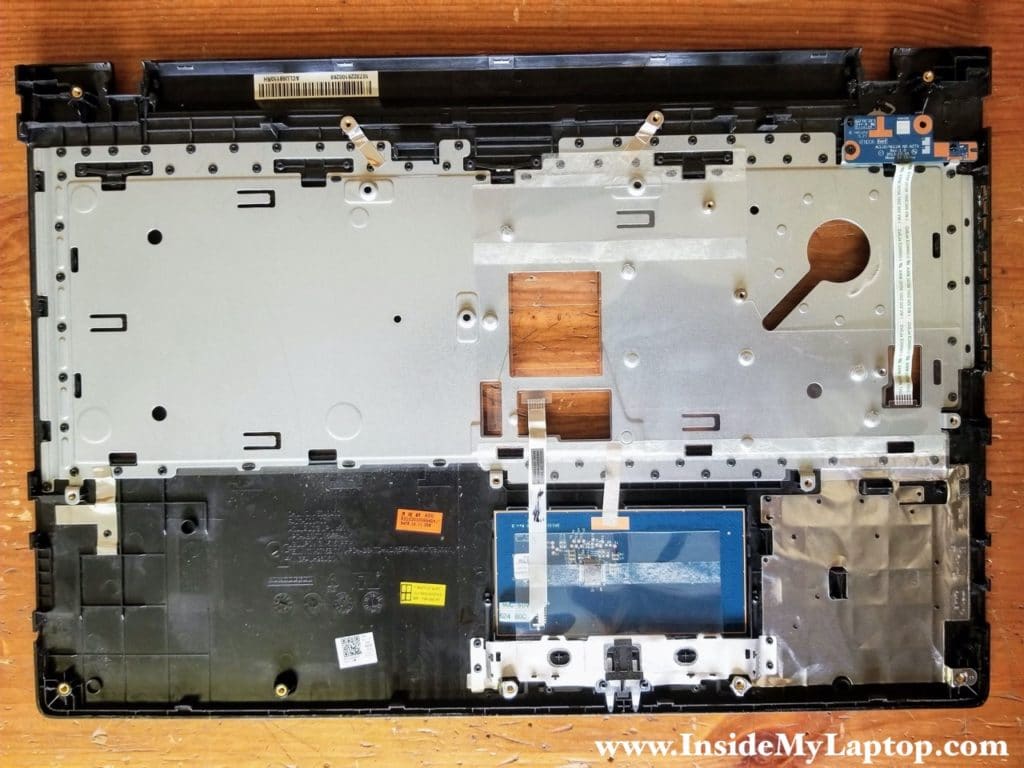
On the other side of the palmrest you can access the touchpad and power button board.
STEP 16.
Unplug the DC power jack cable from the motherboard.
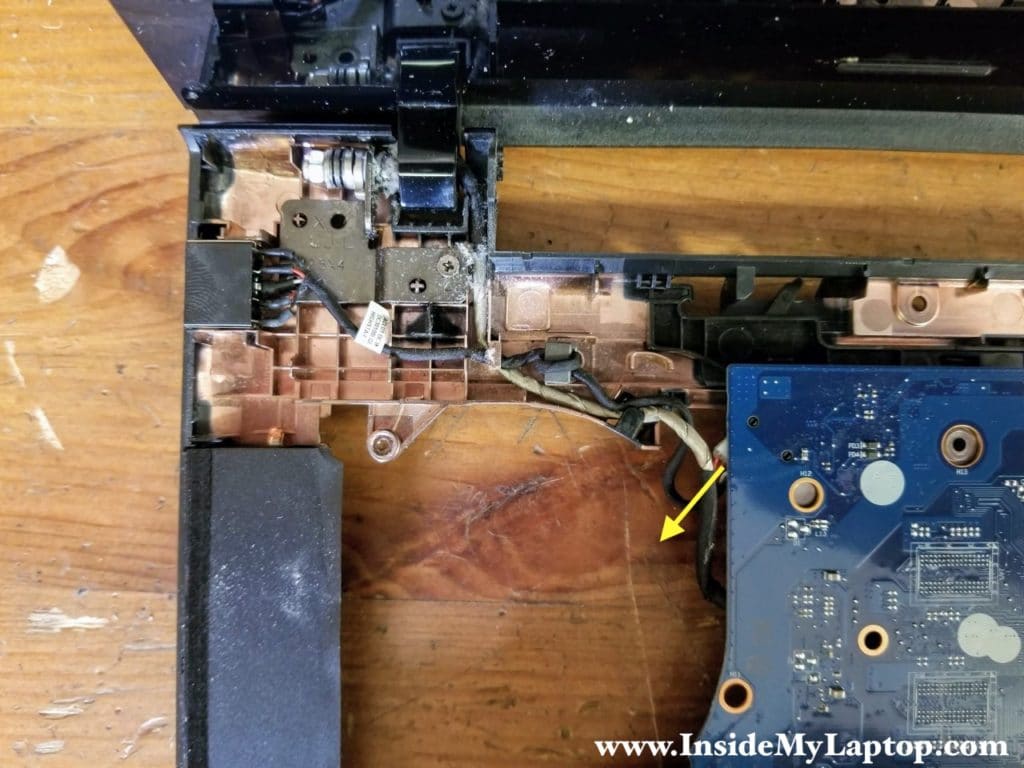
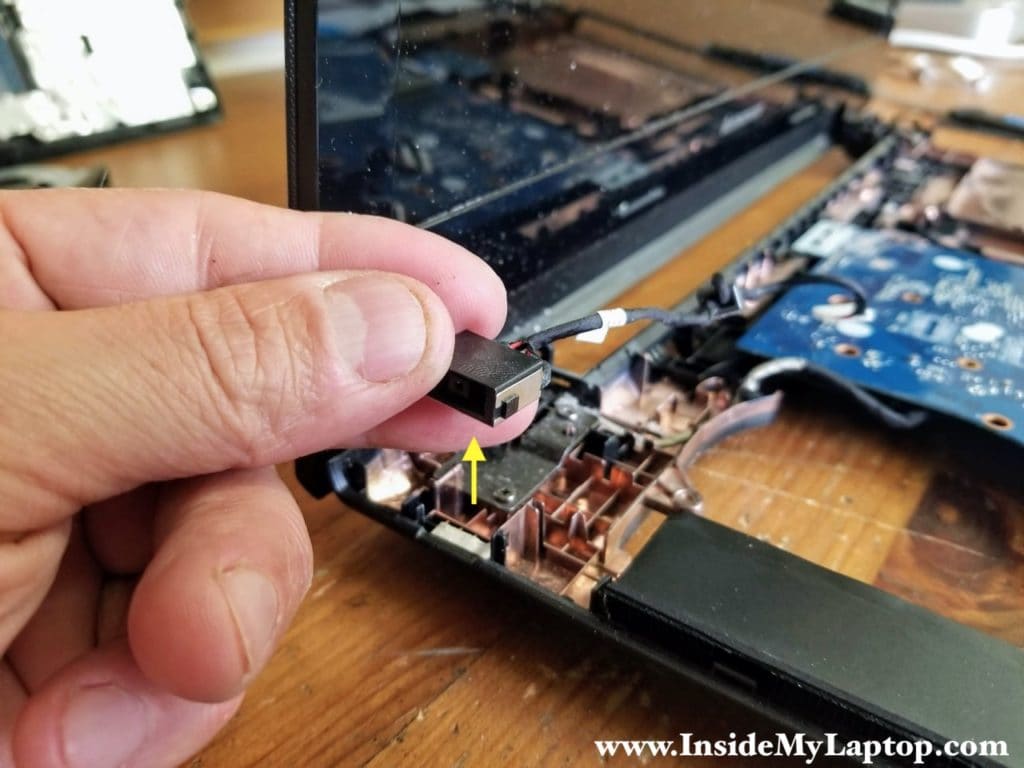
STEP 17.
Lift up the DC power jack and separate the DC jack harness from the guided path on the base.
STEP 17.
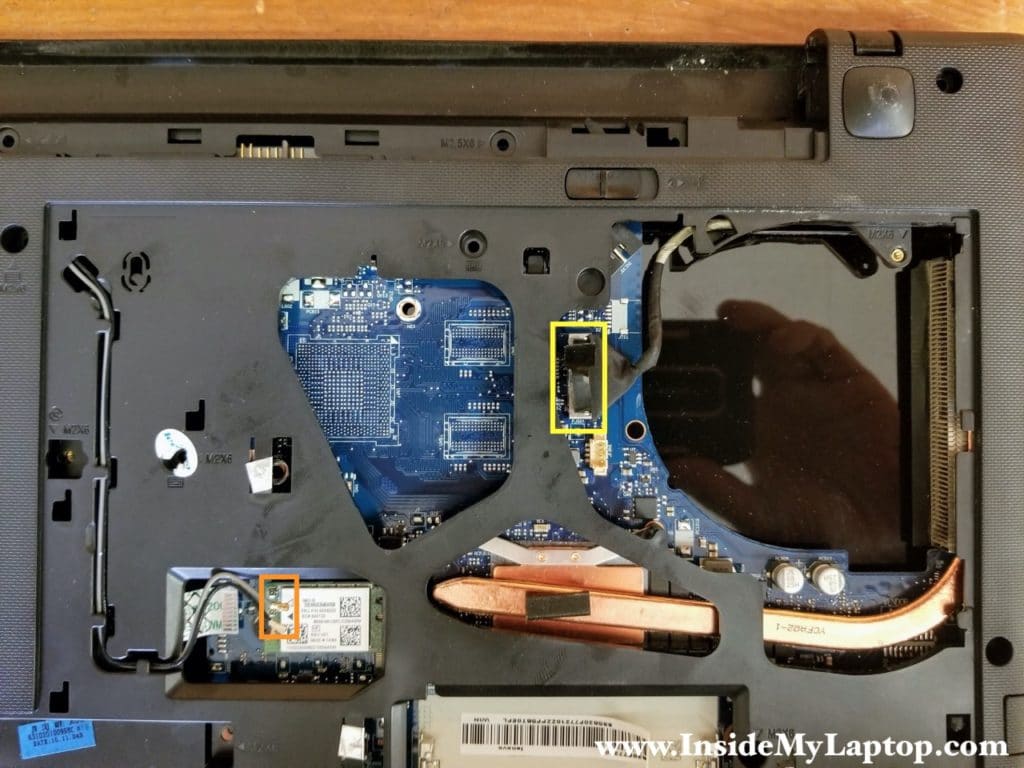
Before removing the motherboard it’s necessary to unplug the display cable (color-coded in yellow) and disconnect Wi-Fi antenna cables from the card (color-coded in orange).
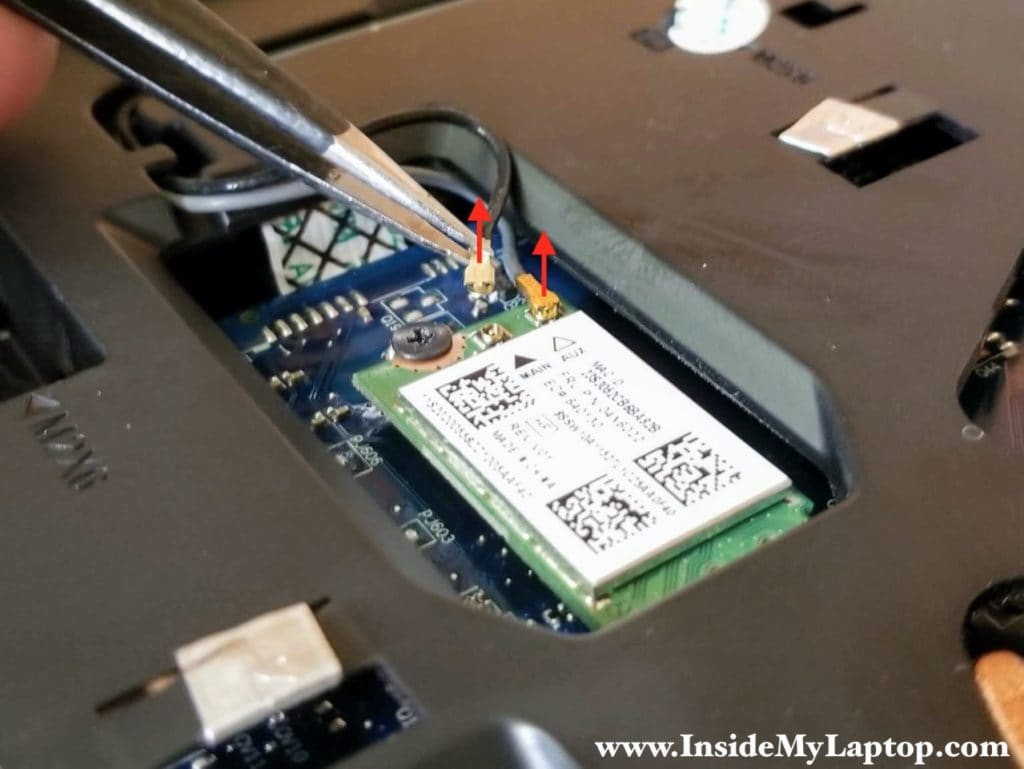
In order to disconnect the Wi-Fi cable simply lift up the golden connector an an-snap it from the card.
STEP 18.
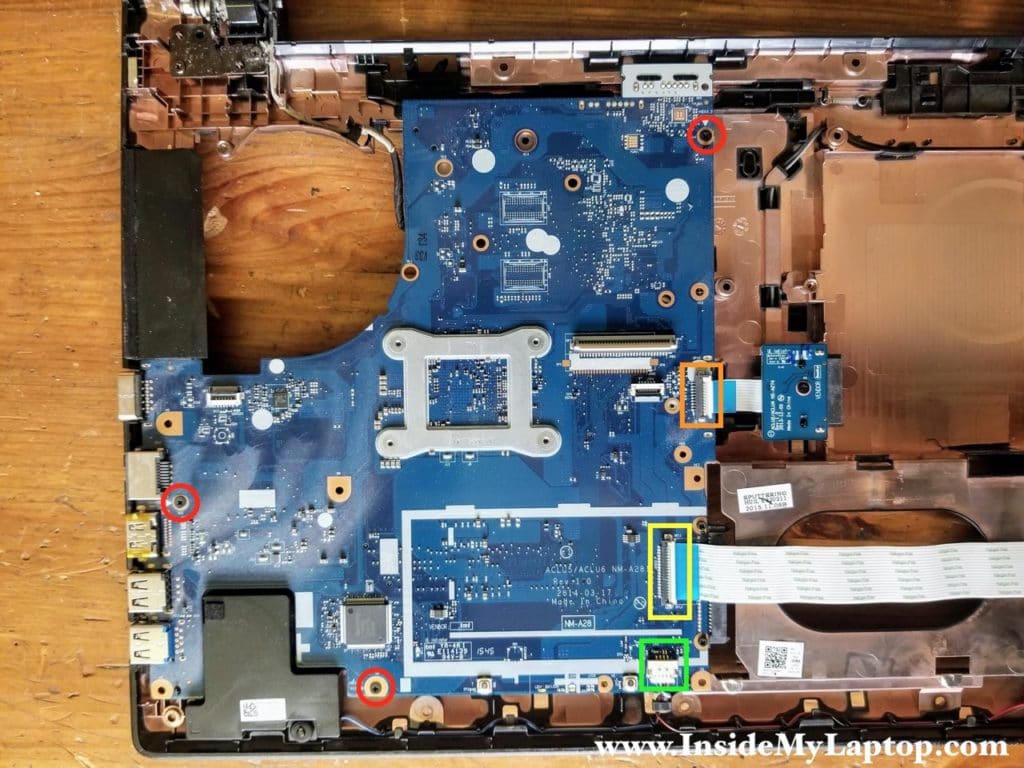
Remove three screws securing the motherboard.
Disconnect the CD/DVD board cable (orange), SD card reader USB Audio board cable (yellow) and speaker cable (green).
STEP 19.
Lift up and remove the motherboard.
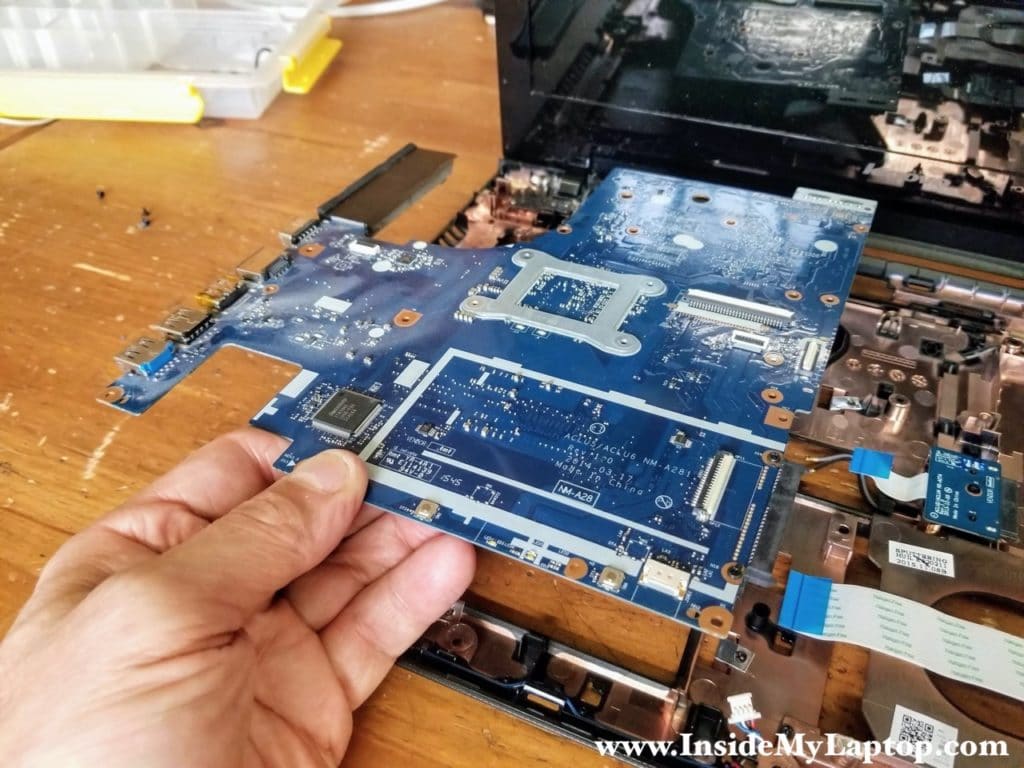
Here’s a photo of the base assembly with the motherboard removed.
