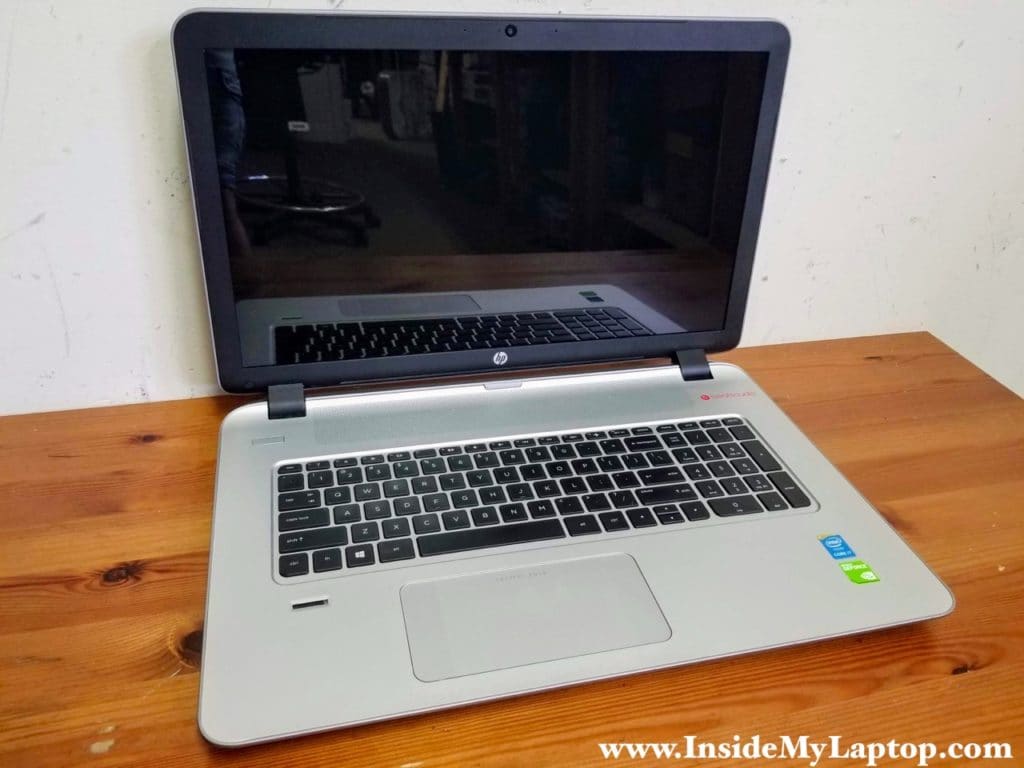
In this HP ENVY 17t-K200 disassembly guide I explain how to open up the laptop body and access all internal components. There is a good chance this guide will fit some other models in the HP ENVY 17 Notebook PC line.
I’m taking it apart in order to access the CMOS battery which is mounted on the bottom side of the motherboard.
This HP laptop stopped booting without any reason. It was turning on but the Caps lock LED blinked twice every 3 seconds and nothing appeared on the screen. I found that removing the CMOS battery might resolve the problem and it did help.
STEP 1.
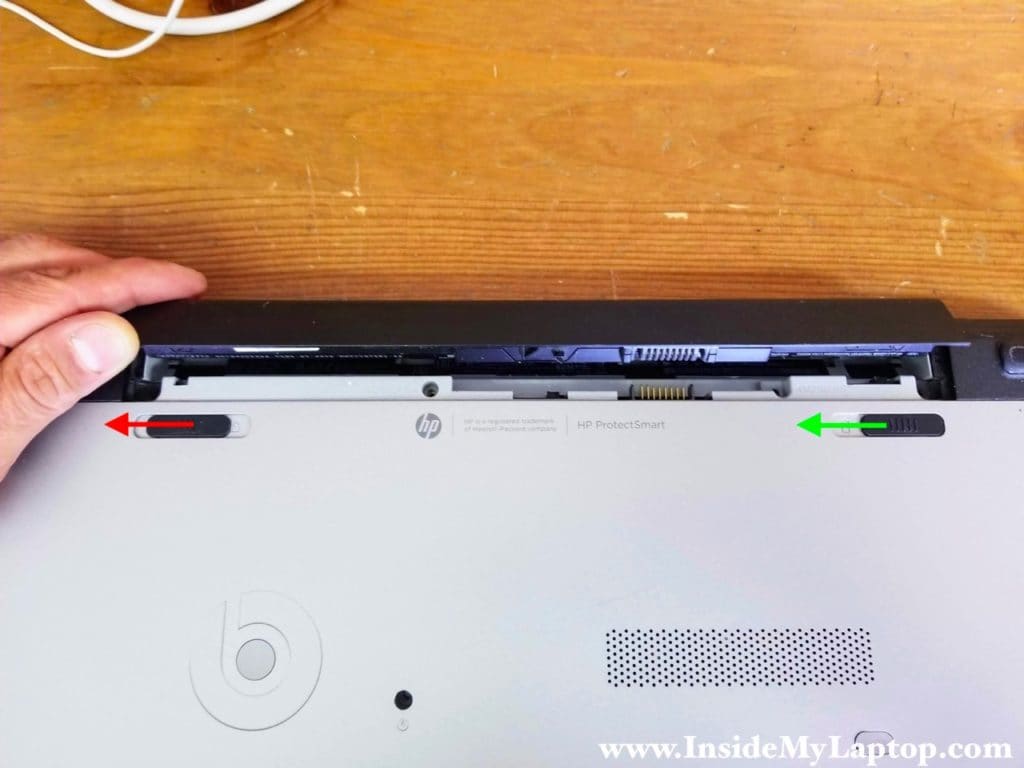
Start the disassembly process with removing the battery.
Unlock the battery first by pushing the left tab to the left (red arrow).
Lift up the battery by pushing the right tab to the left (green arrow).
Replacement battery model VI04.
STEP 2.
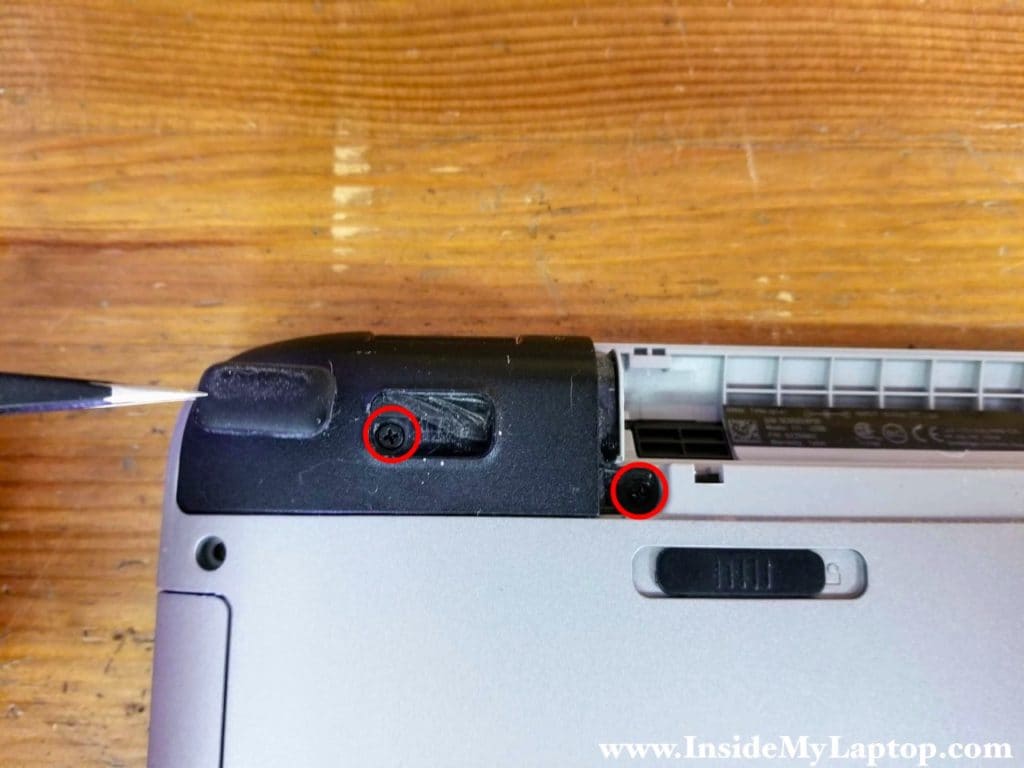
Remove two screws securing each hinge cover.
One of the screws hidden under the rubber foot.
STEP 3.
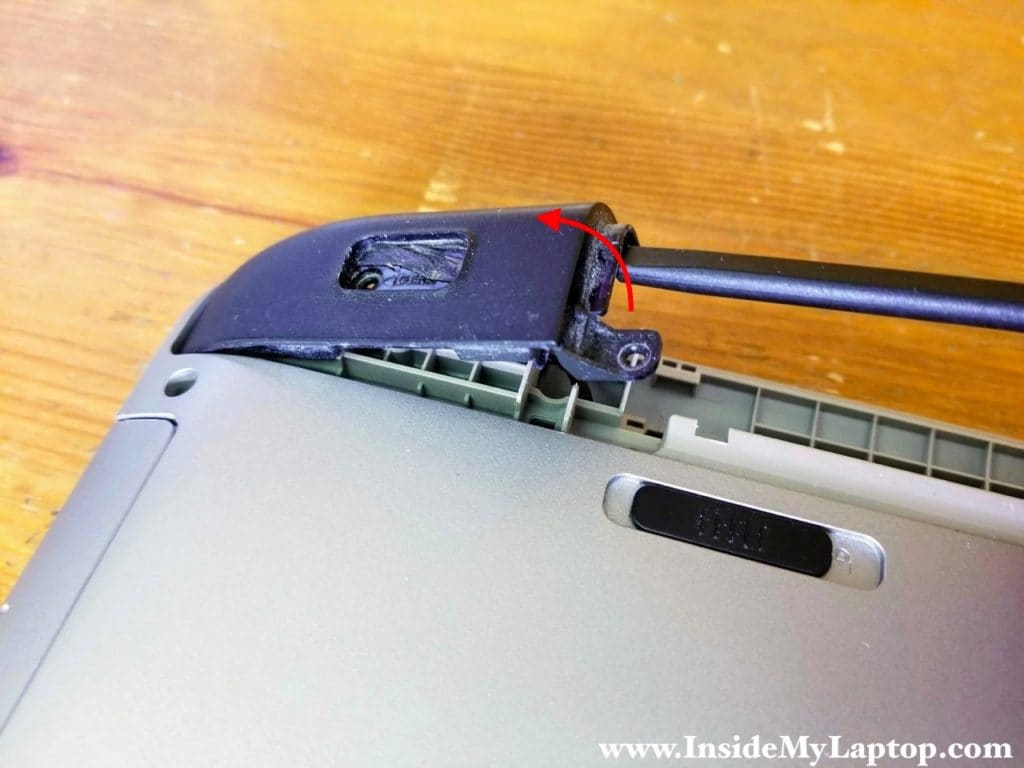
Pry up the right hinge cover and remove it. Do the same with the left cover.
STEP 4.
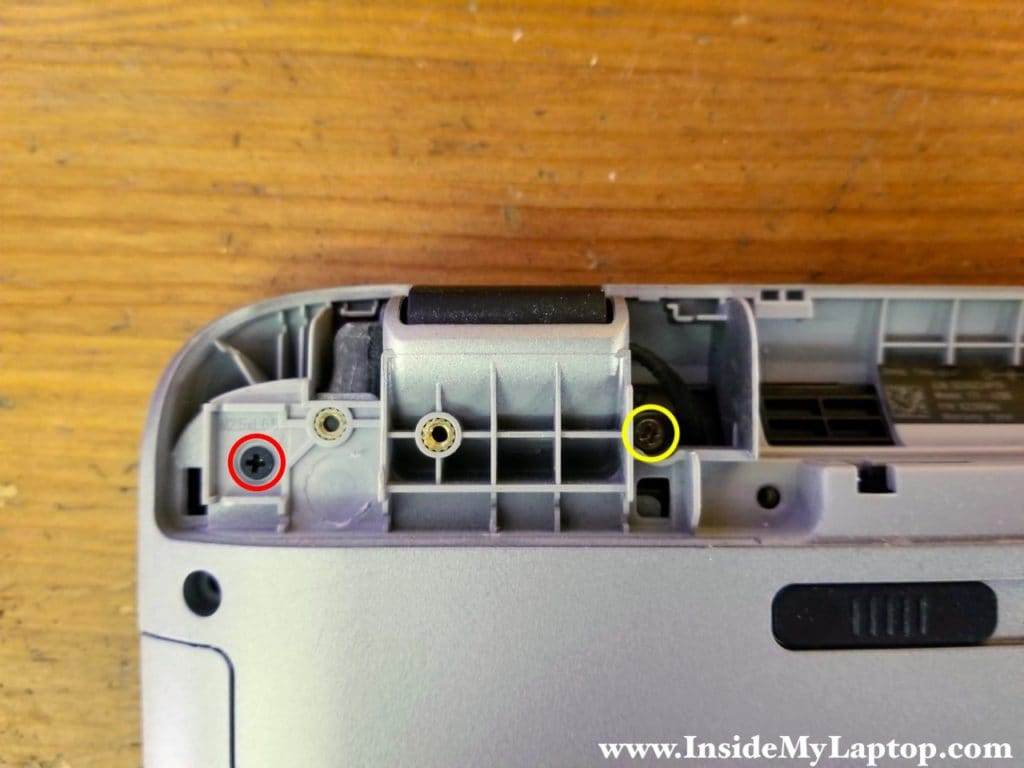
Remove two screws located under the right hinge cover. The silver screw (color-coded in yellow) is shorter than the other screw (red). Make sure to install them back correctly when putting the laptop back together.
STEP 5.
Remove two screws located under the left hinge cover.

STEP 6.
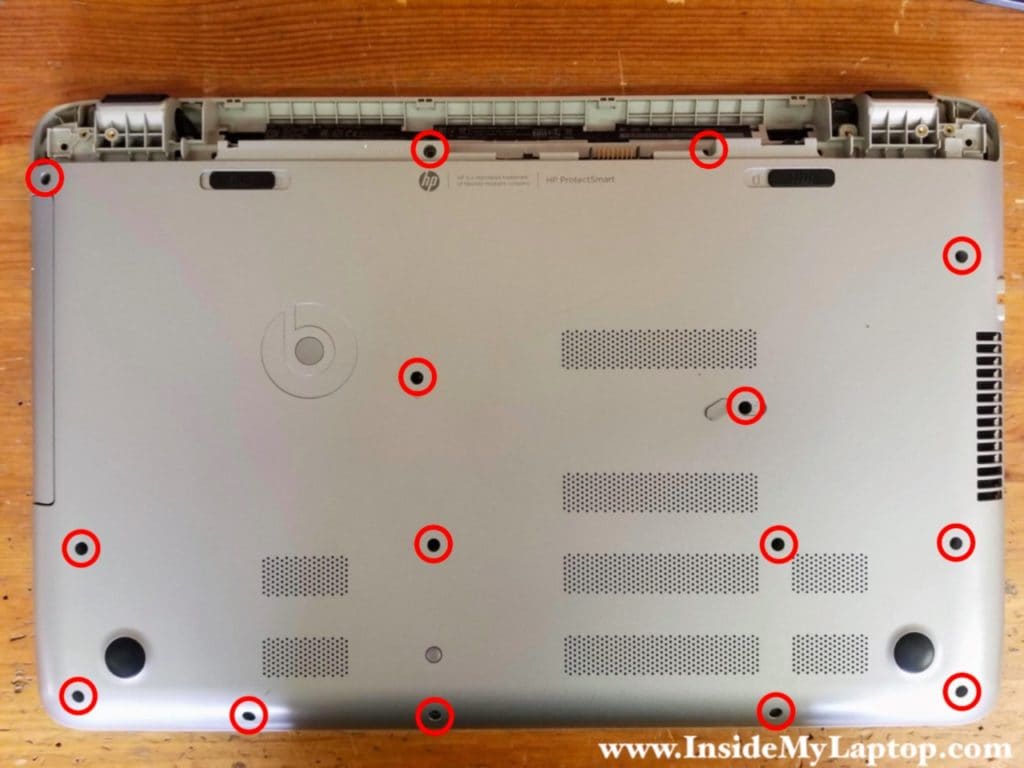
Remove all screws from the bottom of the laptop. All these screws are the same size.
STEP 7.
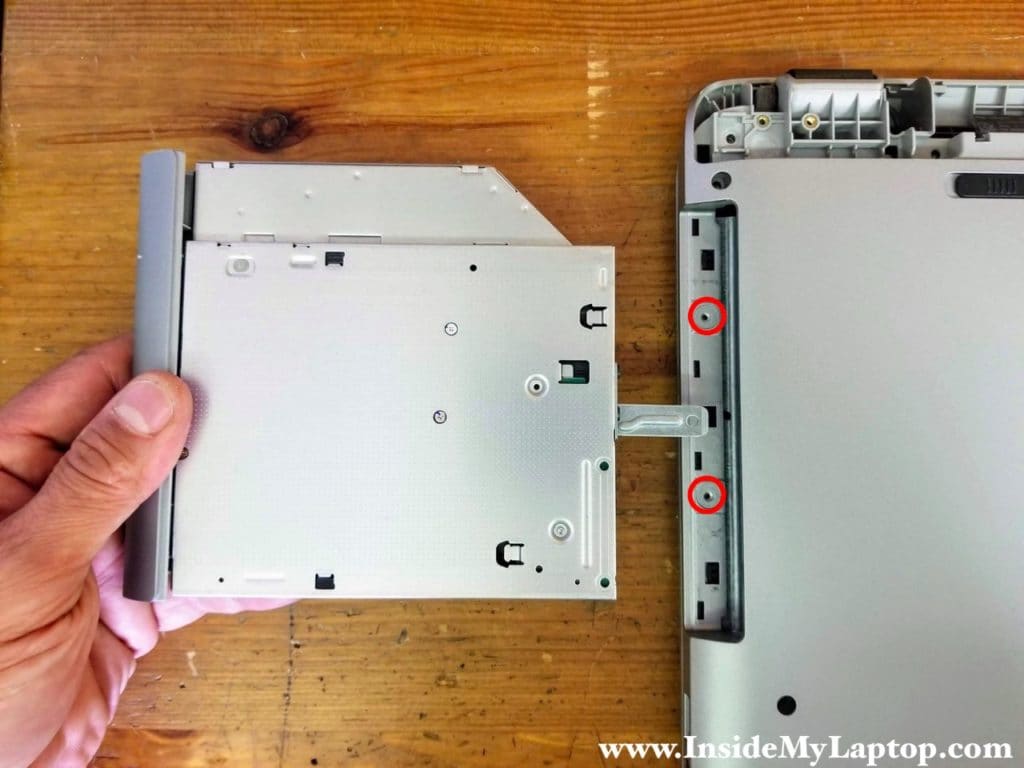
Pull the optical drive out and remove two more screws hidden under the drive.
STEP 8.
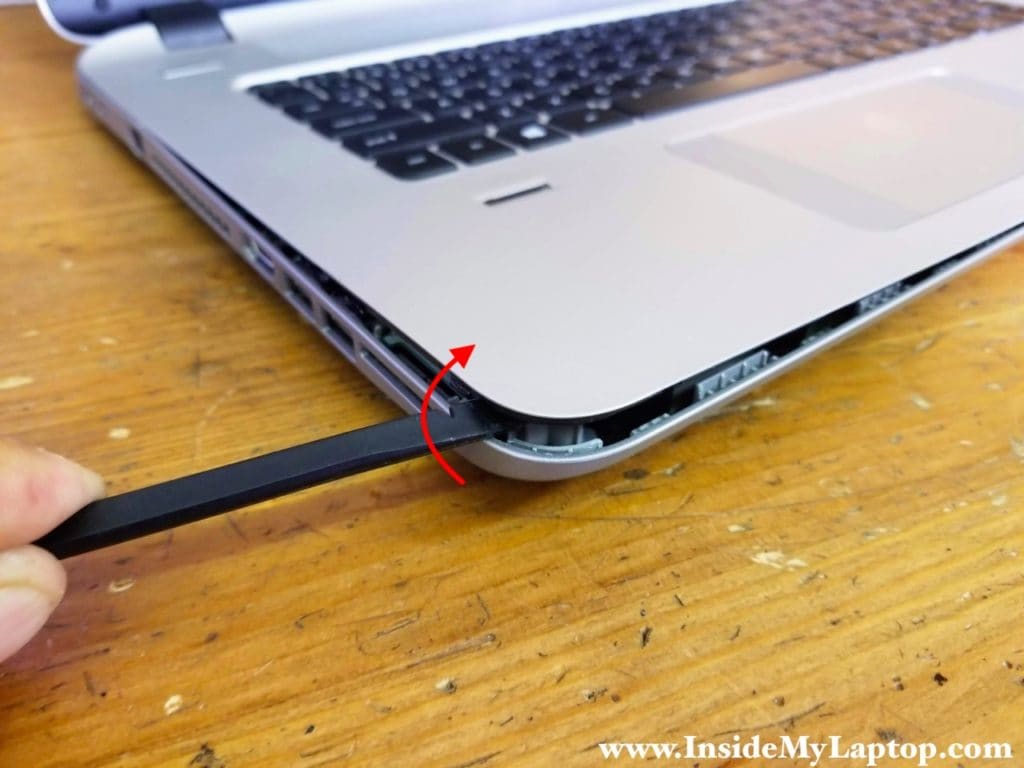
Now you can start separating the palmrest assembly from the base. I’m using a plastic case opening tool for that. Move the tool along the side and pry the palmrest up to unlock hidden latches.
STEP 9.
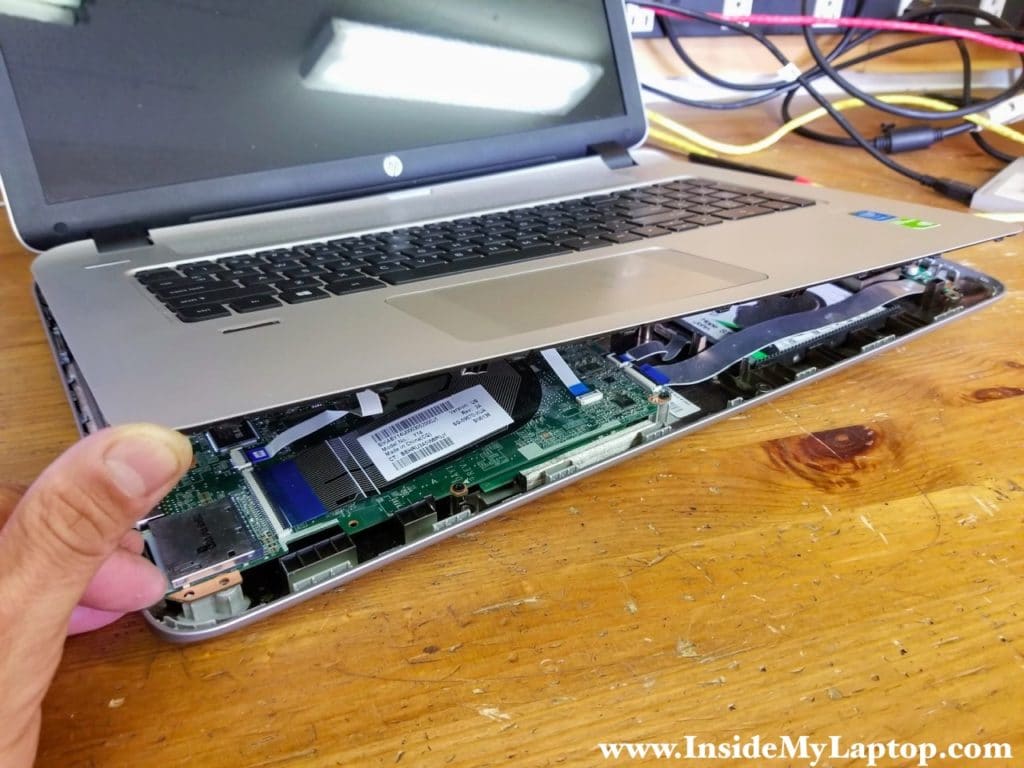
Continue separating the palmrest assembly with your fingers. There are many hidden latches. Wiggle the palmrest until it separates from the base.
STEP 10.
I found that moving the palmrest assembly away from the display helps to release latches on the back.
STEP 11.
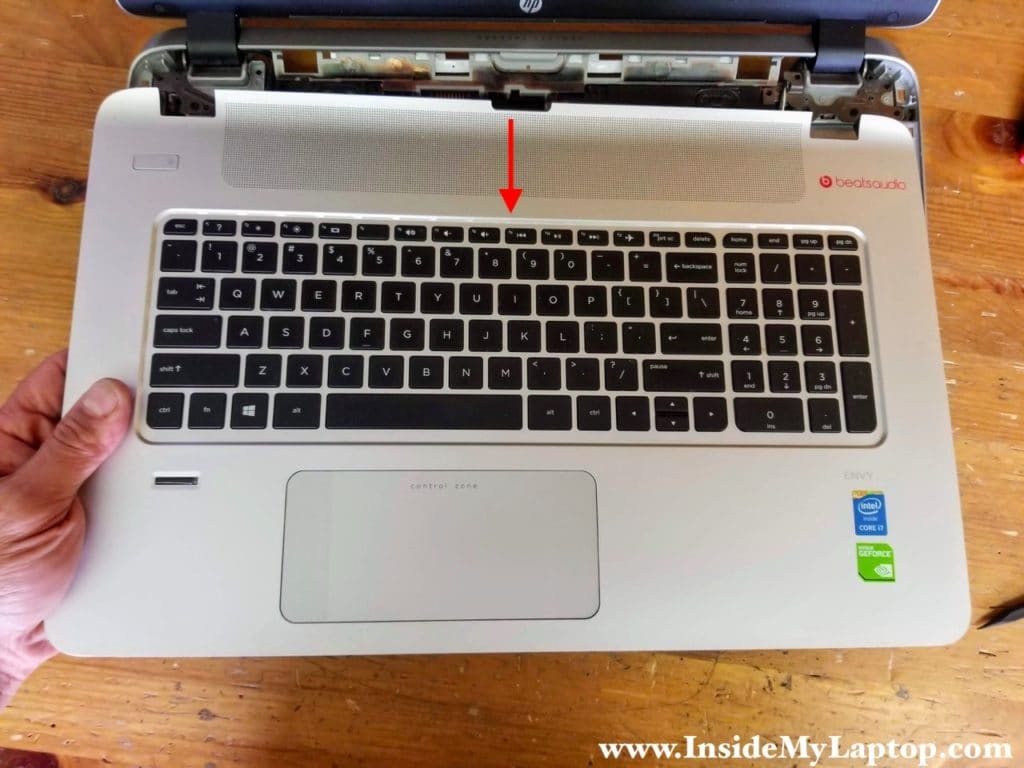
Before you remove the palmrest completely, you’ll have to disconnect for flat cables from the motherboard. These are: power button cable, finger scanner cable, keyboard cable and trackpad cable.
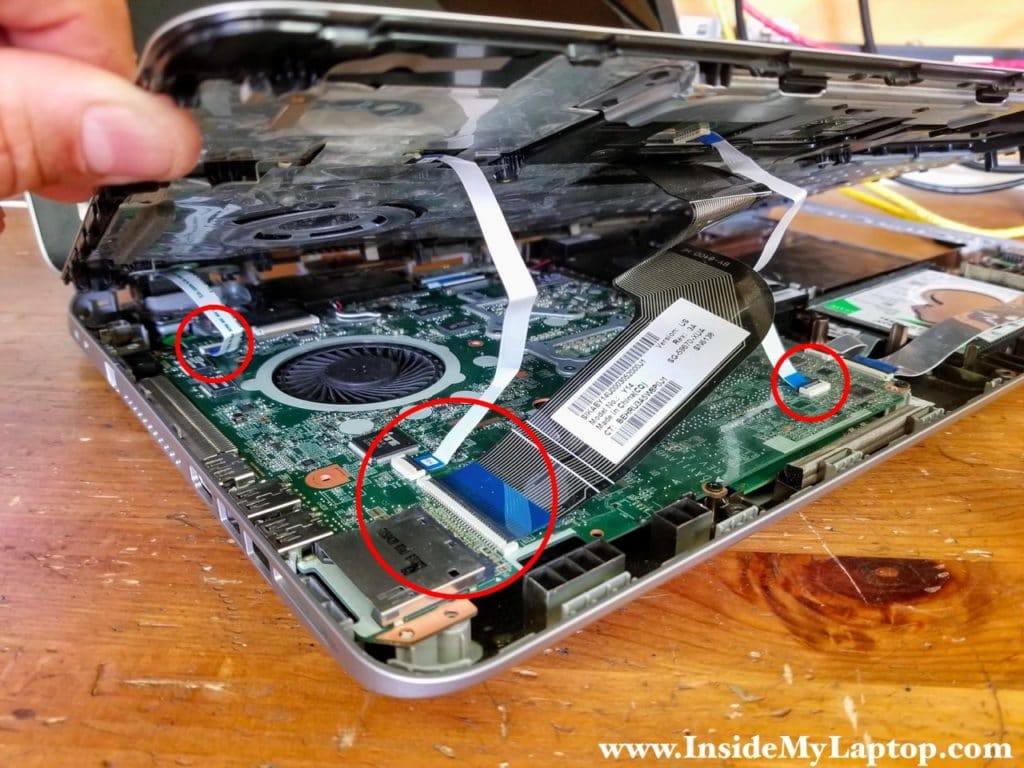
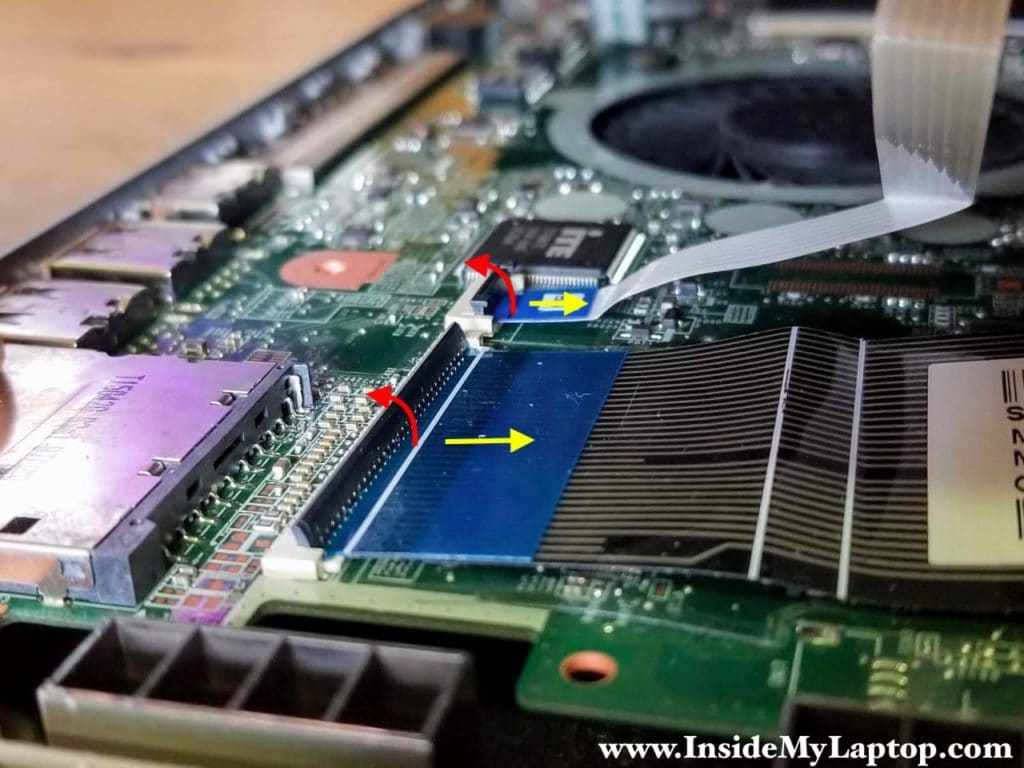
Here’s how to release the cable. First, unlock the connector by lifting up the locking tab (red arrow). After that pull the cable out (yellow arrow).
STEP 12.
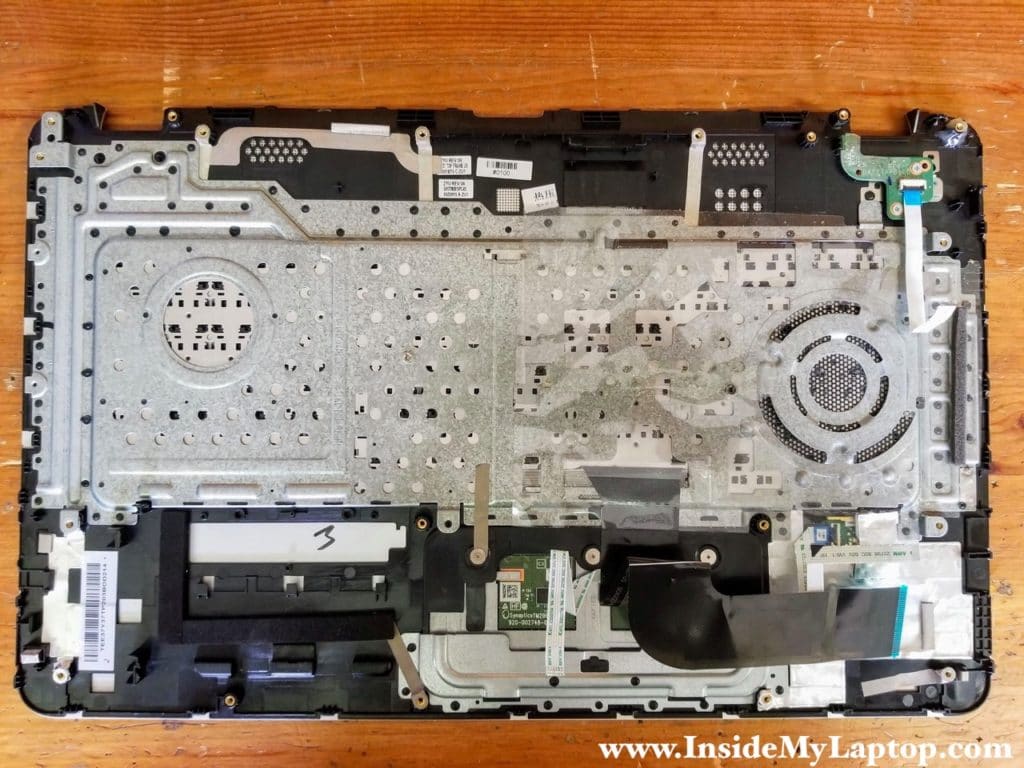
Here’s the back side of the palmrest assembly. Here you can access and remove the power button board and trackpad.
The keyboard is permanently riveted to the case and cannot be easily replaced.
STEP 13.
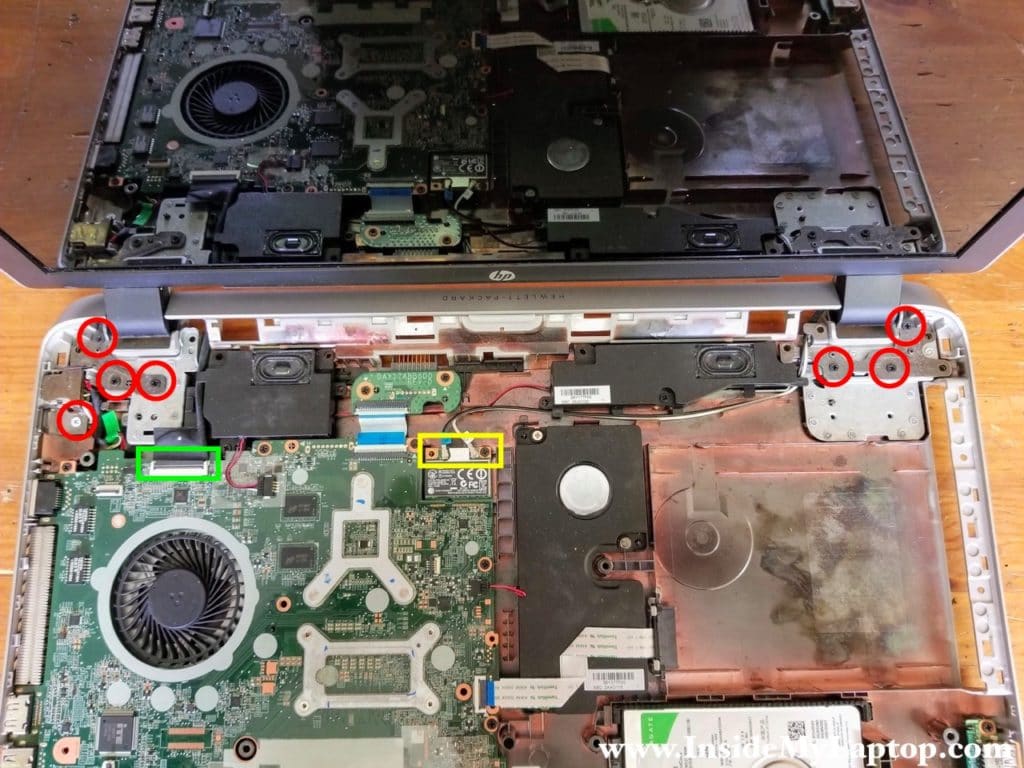
Now we are going to separate the display assembly from the base. We’ll have to remove screws from the display hinges and disconnect display cable (color-coded in green) and wireless antenna cables (color-coded in yellow).
There are four screws securing the left hinge to the base. One of them (silver) is shorter than three other screws.
There are three screws securing the right hinge to the base.
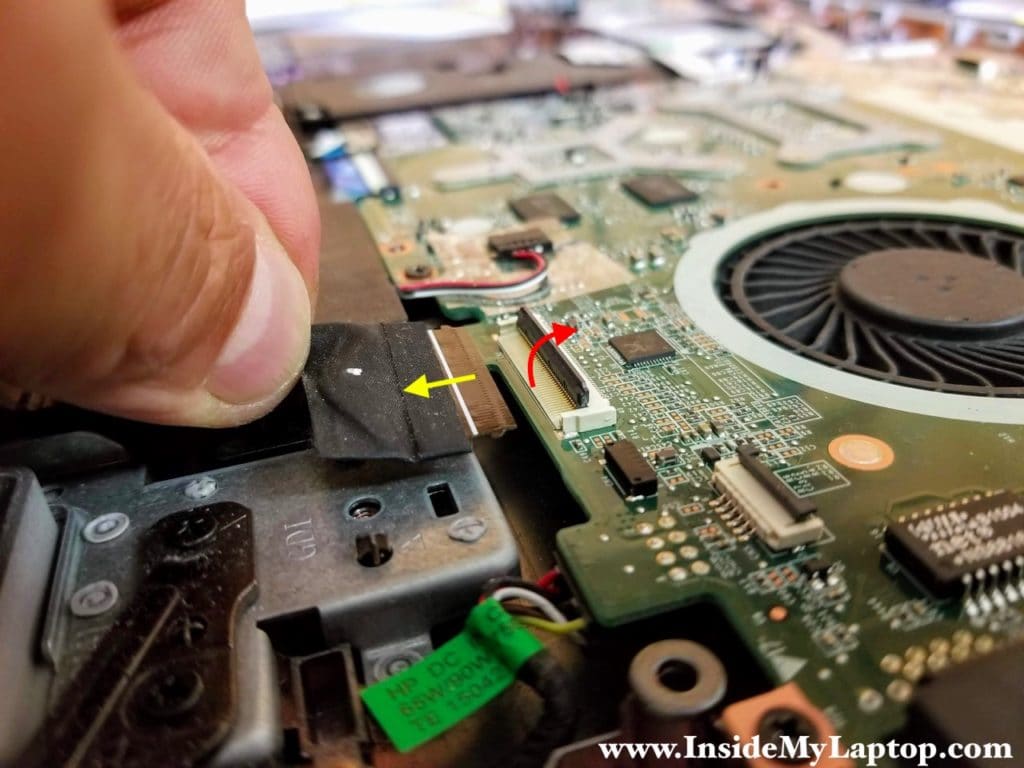
Here’s how to disconnect the display cable from the motherboard. Unlock the connector and pull the cable out.
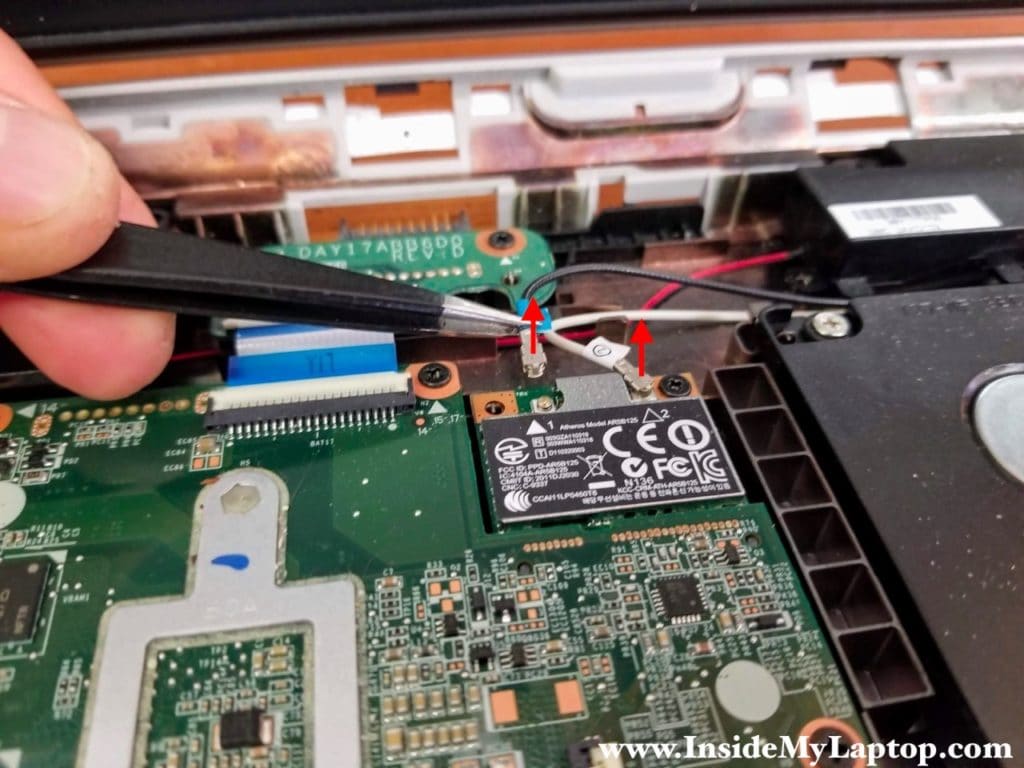
Carefully lift up wireless antenna cables to unsnap them from the wireless card.
STEP 14.
Separate the display assembly and remove it from the base.
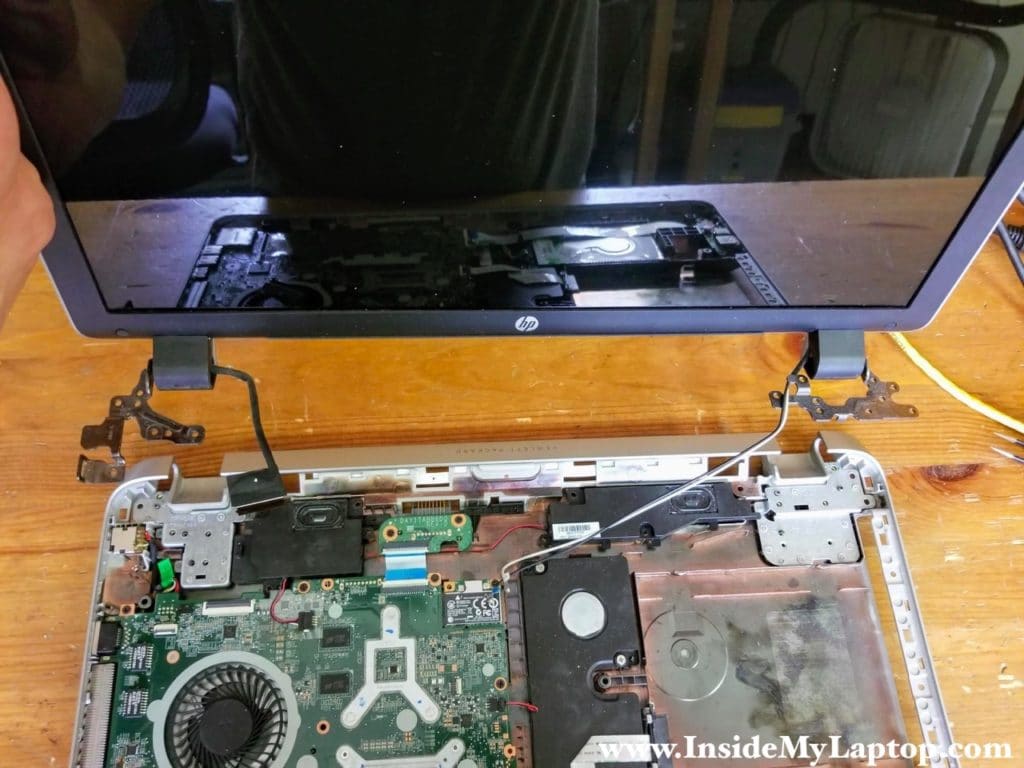
STEP 15.
Remove two screws from the USB audio board and disconnect the flat cable from the motherboard. Lift up and remove the USB audio board with the cable attached to it.
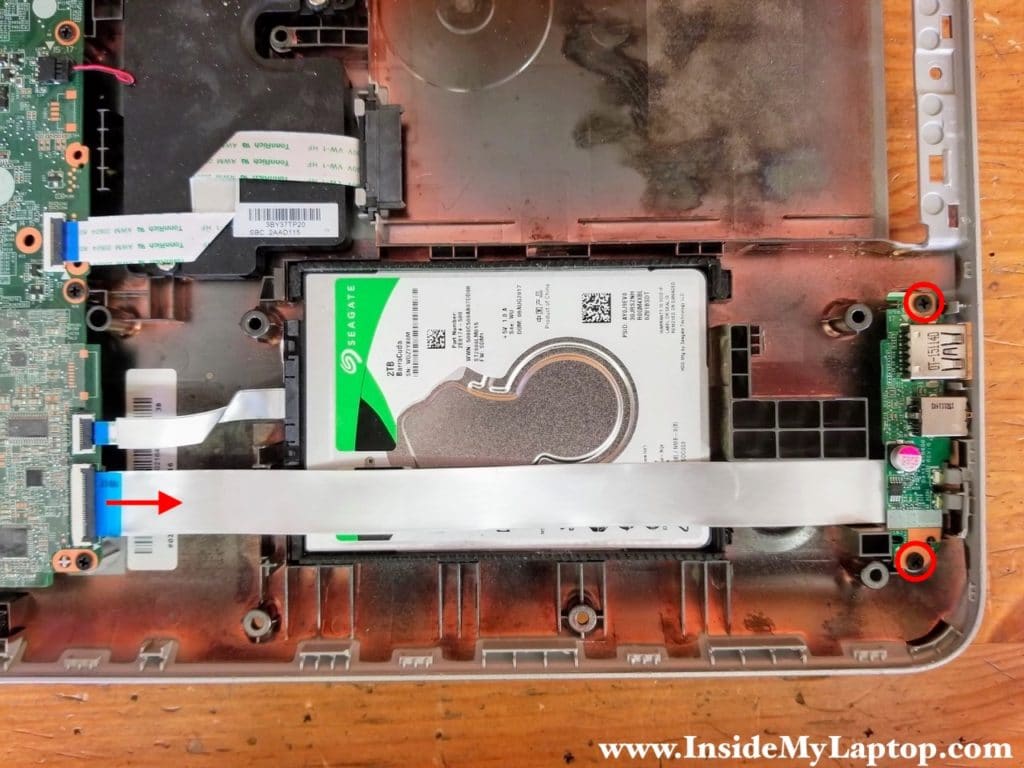
STEP 16.
Disconnect the hard drive cable from the motherboard.
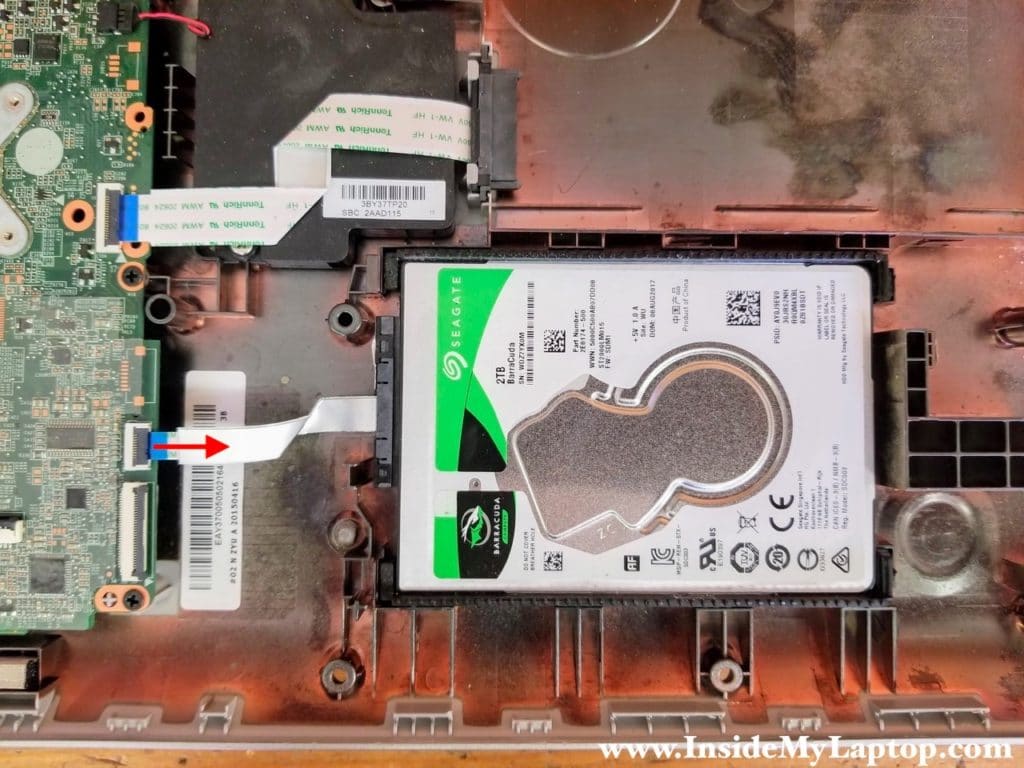
STEP 17.
Lift up and remove the hard drive with both mounting brackets attached to its sides.
Upgrading this regular hard drive to a 2.5″ solid state drive will speed up the system significantly.
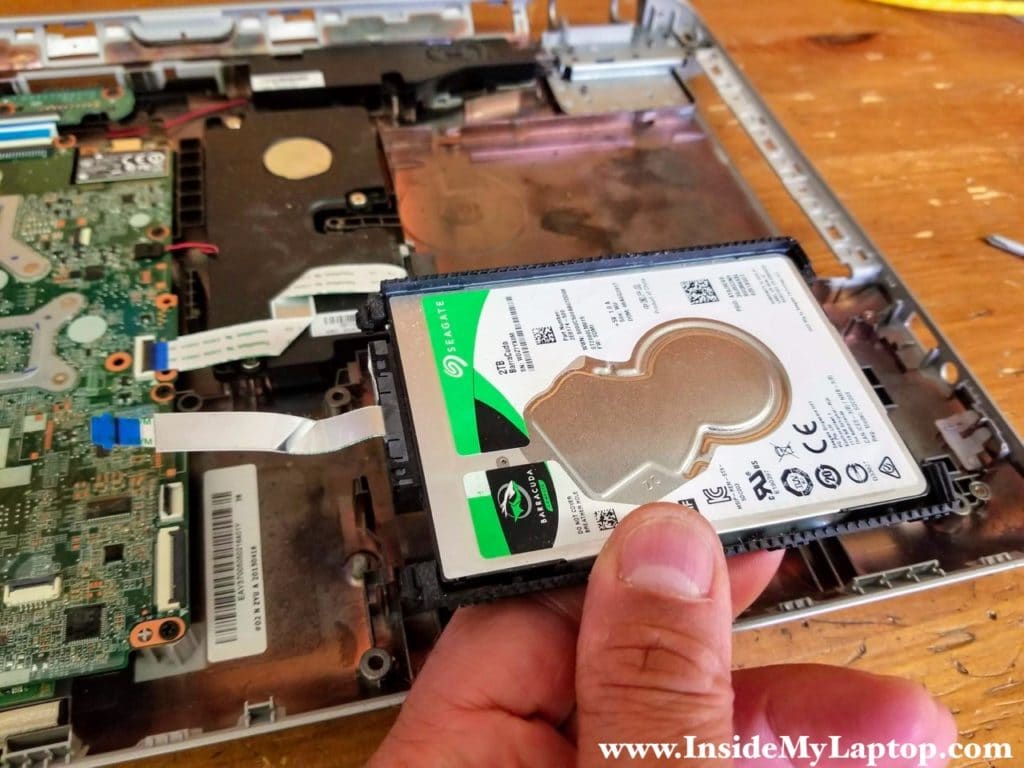
STEP 18.
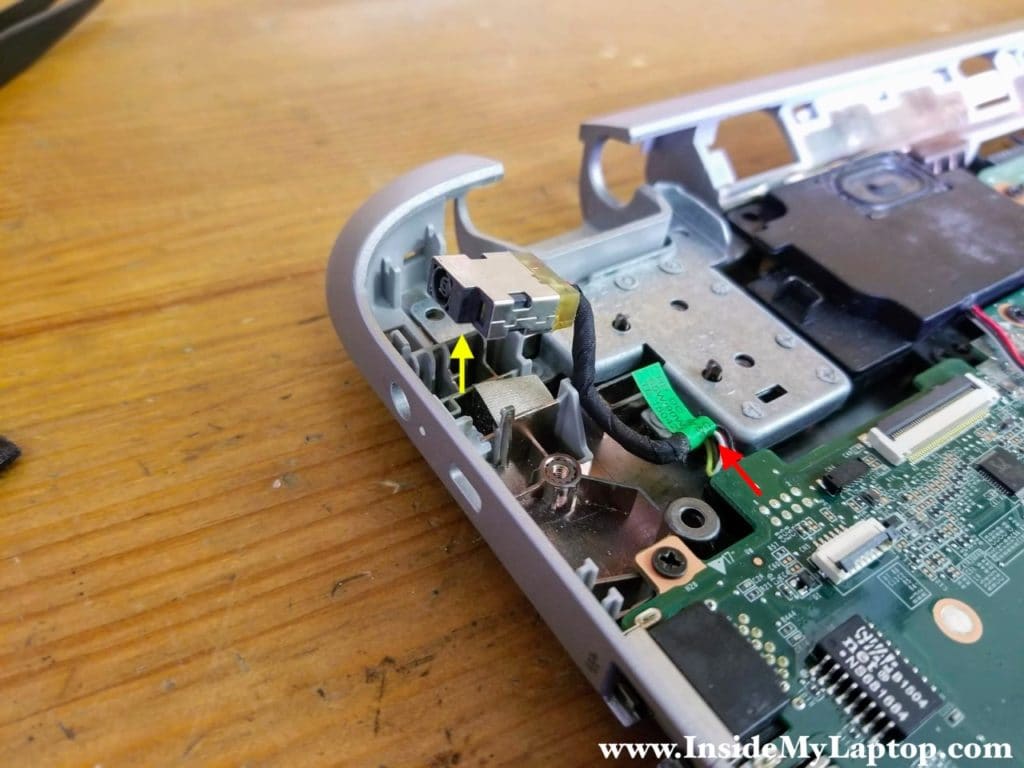
In HP ENVY 17t-K200 laptop the DC power jack mounted under the left hinge.
When the display assembly removed, you can lift up the DC jack from the base and unplug it from the motherboard.
STEP 19.
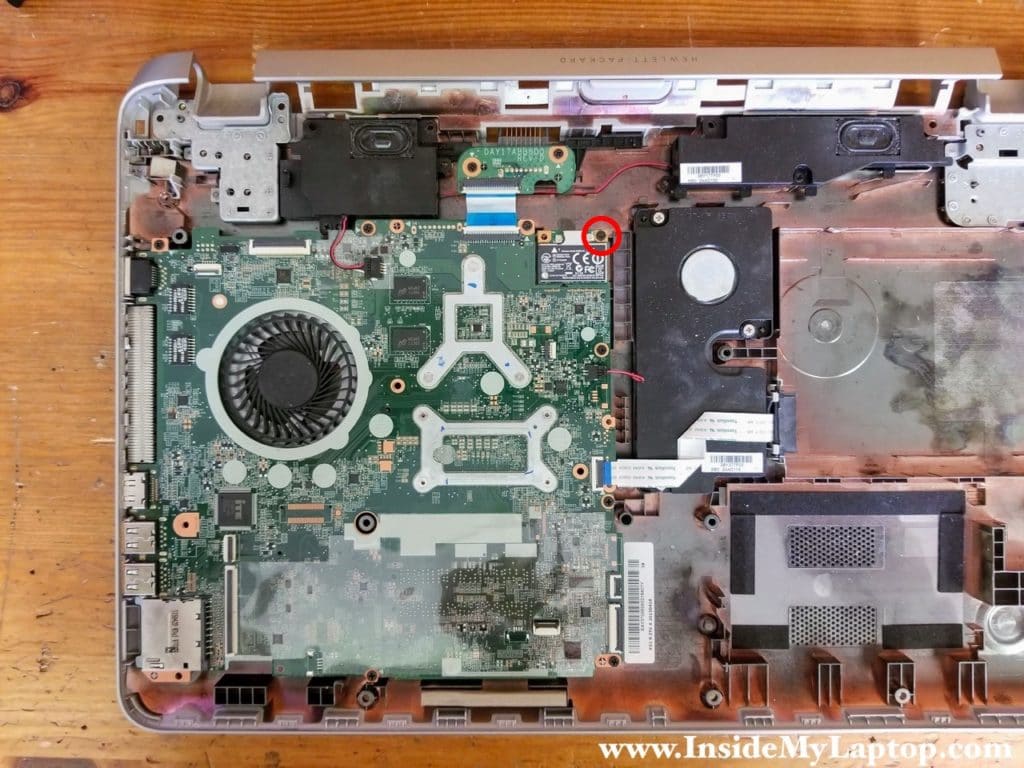
Remove one screw securing the wireless card.
STEP 20.
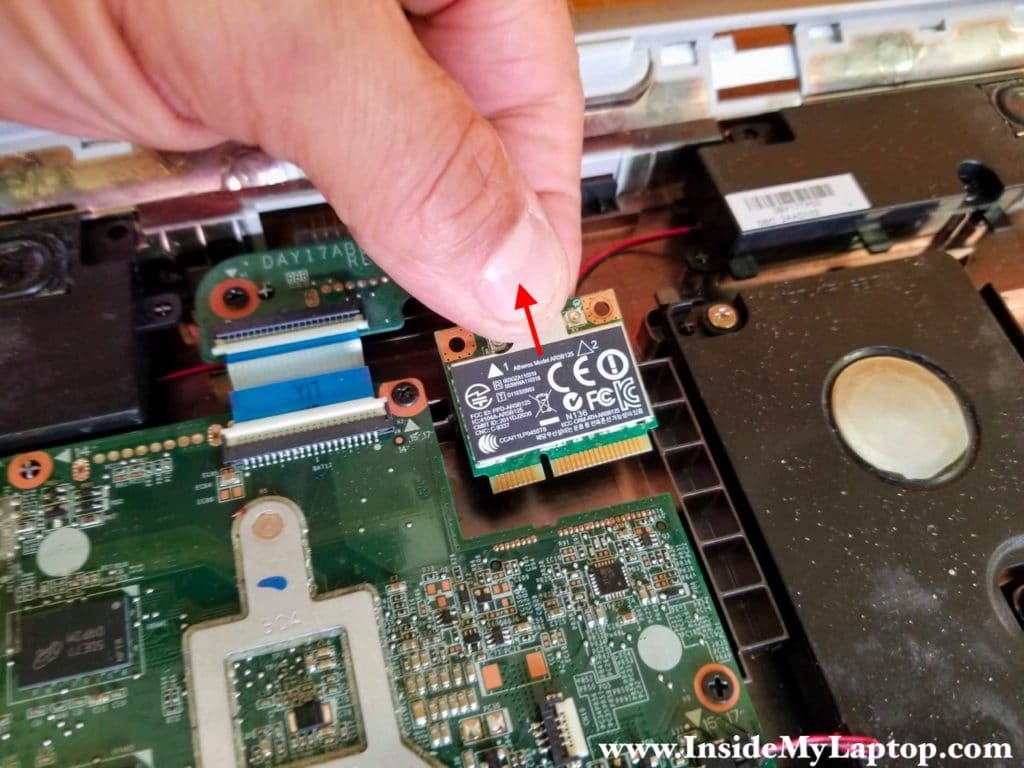
Pull the wireless card out.
STEP 21.
Now we can start removing the motherboard.
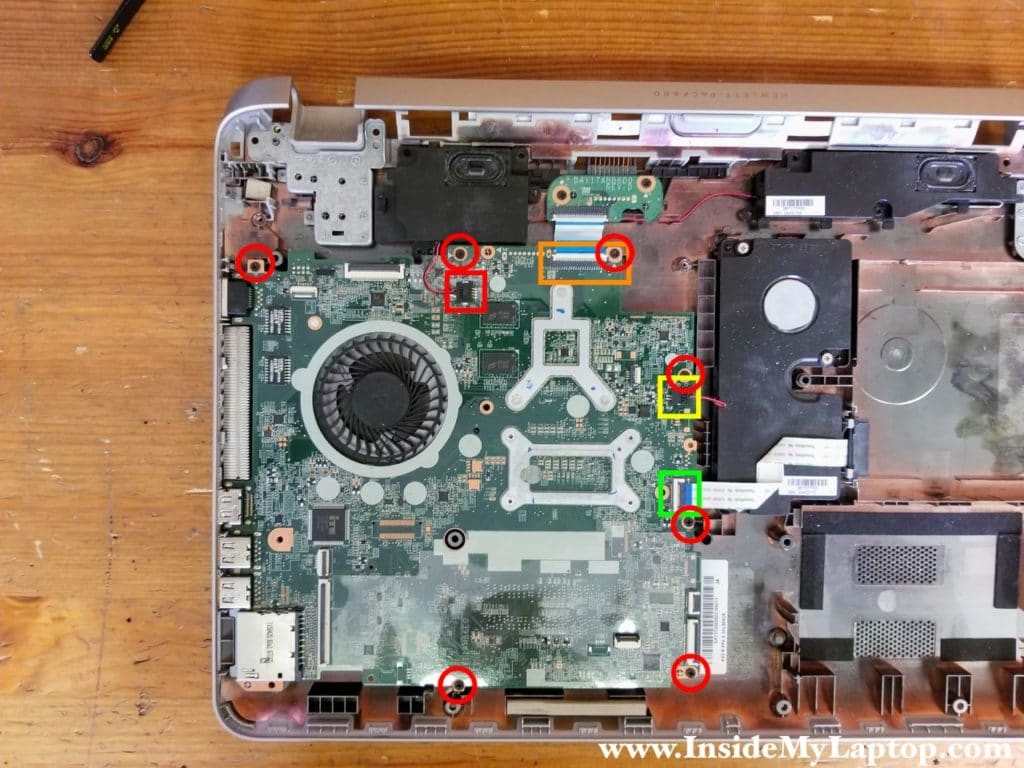
Disconnect the speaker cable (red), battery connector board cable (orange), subwoofer cable (yellow) and optical drive cable (green).
Remove seven screws securing the motherboard to the base.
STEP 22.
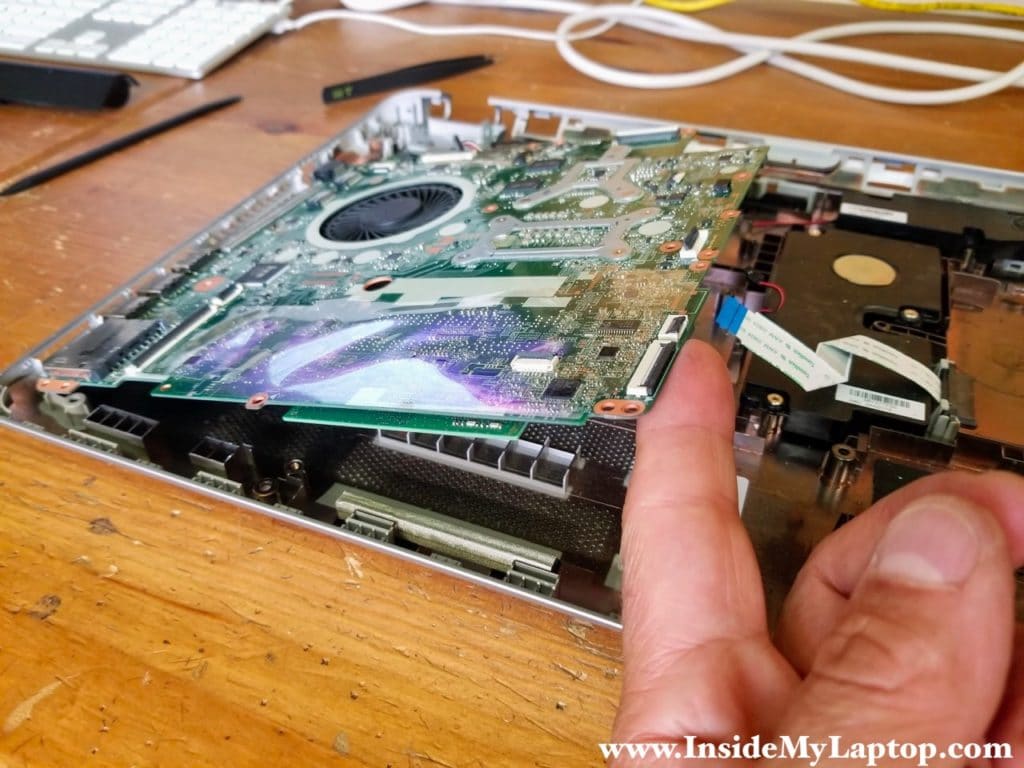
Carefully separate the motherboard from the base and remove it.
STEP 23.
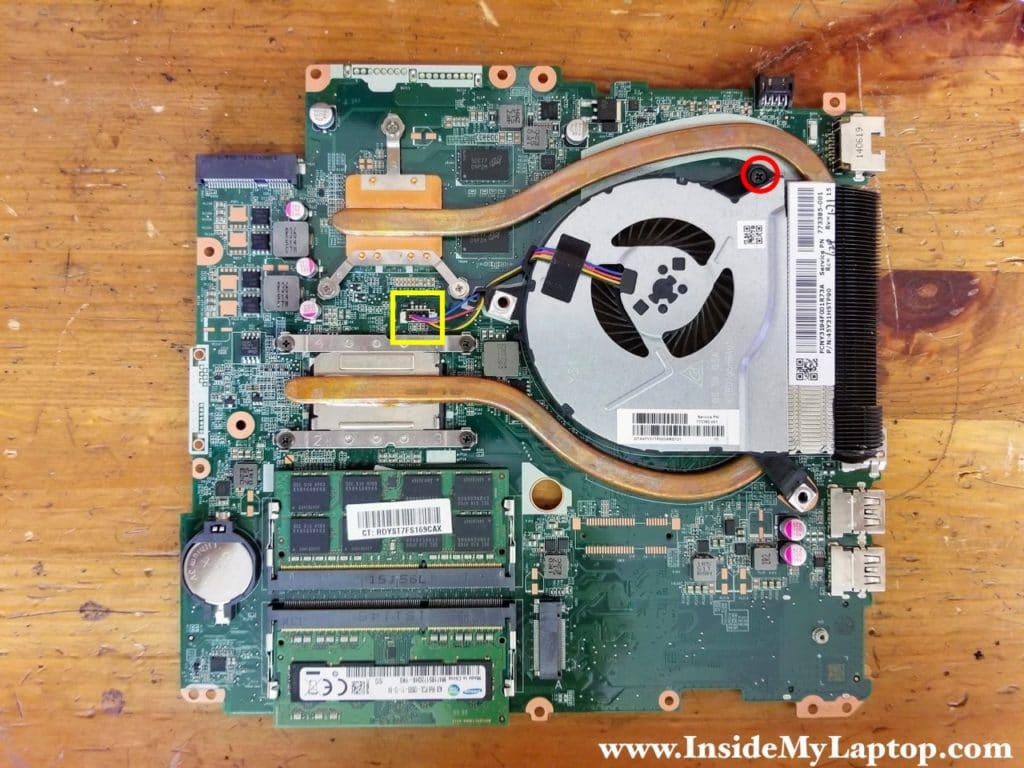
On the hidden side of the motherboard you can access both memory modules, cooling fan and CMOS battery. It’s a regular CR2032 3V lithium coin battery.
Remove one screw securing the cooling fan and disconnect fan cable from the motherboard.
This motherboard has two memory slots and can handle up to 16GB (2x8GB) DDR3-12800 SODIMM RAM modules.
STEP 24.
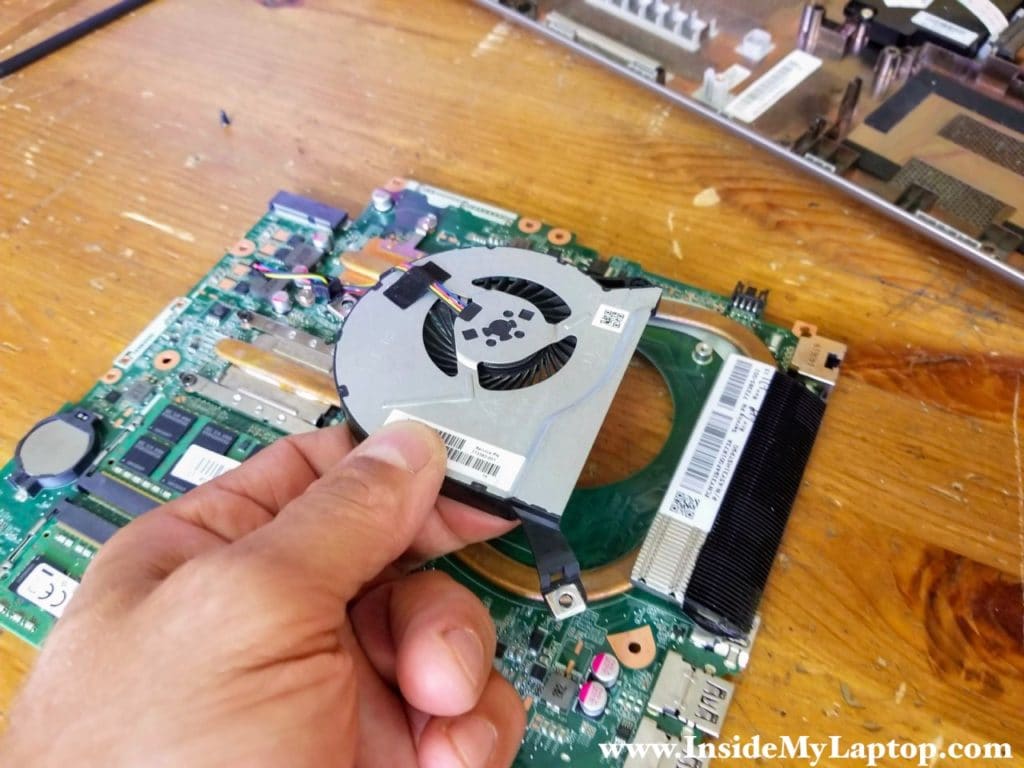
Now you can remove the fan.
Fixing caps lock blinking twice and blank screen
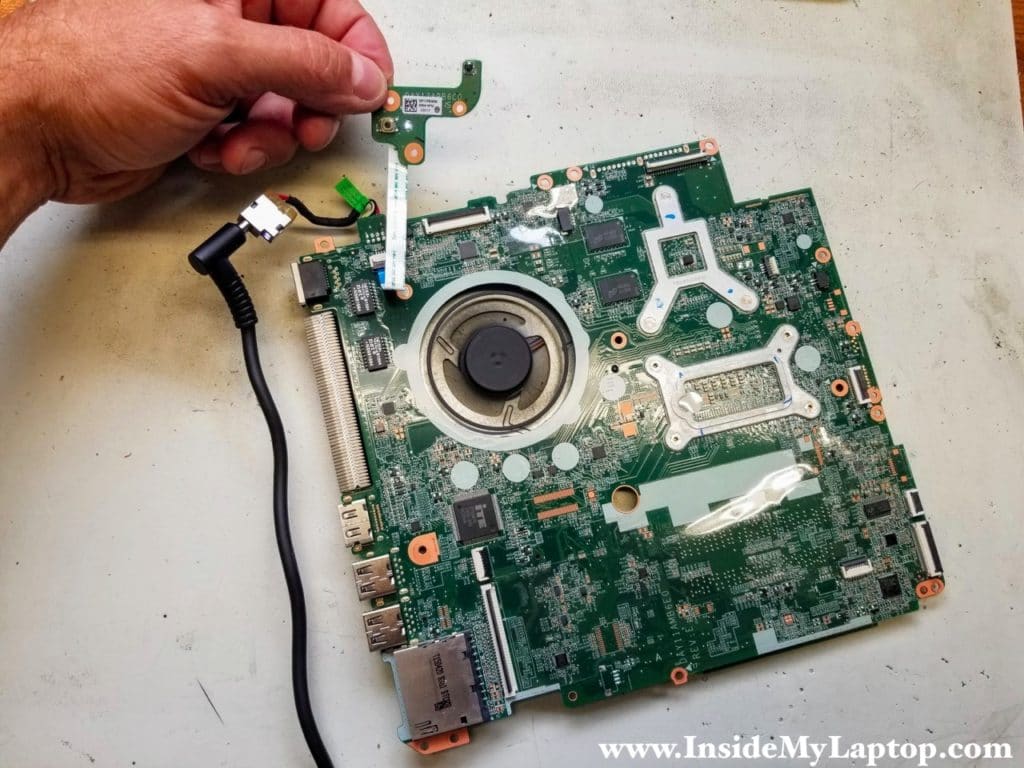
As I mentioned earlier, this HP ENVY 17t-K200 laptop stopped booting properly showing a blank screen and caps lock blinking twice. In order to fix this problem I had to remove the CMOS battery and turn on the logic board from the AC adapter. Thank you to HP forums for the solution.
After re-assembly, the laptop turned on properly with video on the screen.
Lorenze
I found some keyboard sold on eBay but you said it cannot be replaced. Would you clarify please? Thank you.
IML Tech
Lorenze, technically it is possible to replace just the keyboard but it’s not easy. Take a look at the step 12. As you see the keyboard is mounted under the metal plate which is riveted to the top case. In order to replace the keyboard it’s necessary to break all the rivets securing that metal plate. After that you should be able to replace the keyboard but you’ll have to find a way to reattach the metal plate back in place.
Greg Lange
I had a problem removing the 2 screws hidden under the cd rom. They have a larger head than the other screws and it looks like they need a tiny phillips head screwdriver to remove them. I tried my tiny phillips screwdriver but there very tight and I didn’t want to take a chance messing uo the screws. I really couldn’t get enough leverage with my screwdriver to loosen them. Is there a tool I can get that would make it easier? I have the HP Envy 17 model K200 silver which this article was intended for.
IML Tech
You just need a quality screwdriver with good grip.