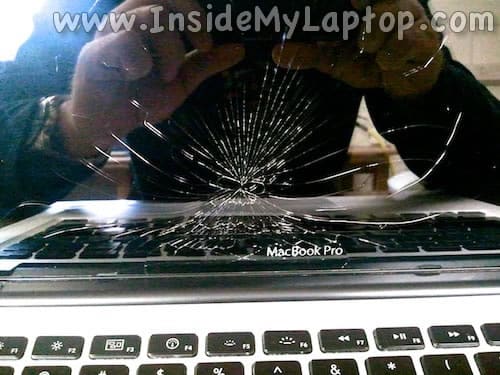
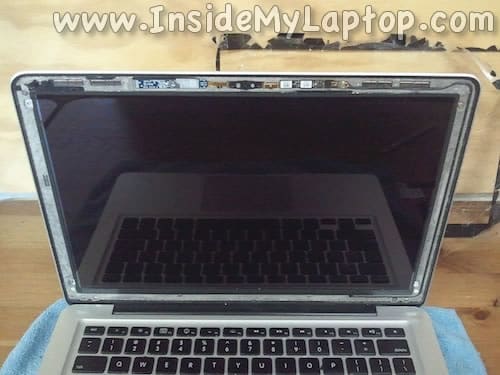
Today I show how to replace cracked glass on a MacBook Pro unibody display. It is not as easy as might appear in my tutorial but definitely doable.
This method will for for a regular MacBook Pro display, not a Retina display.
I’ve seen different tutorials on the internet where they explain how to remove a non cracked glass with a suction cup. This method doesn’t work with a cracked glass. If you try to pull out a damaged glass with a suction cup, it will break even further, shiver into small pieces and probably scratch the screen underneath. Instead, I’ll be using X-Acto knife to remove broken glass piece by piece.
Before you start, make sure your MacBook Pro is turned off. Also, probably it’s a good idea to disconnect the battery from the logic board.
New display glass for MacBook Pro 13″, 15″, 17″ laptops available on eBay.
STEP 1.
Apply clear Scotch tape on the display glass. This tape will hold broken pieces together if the glass shivers.

STEP 2.
Cut excessive tape with X-Acto knife between the glass and rubber display gasket.

STEP 3.
One layer of tape has been applied horizontally.

STEP 4.
I’ll apply one more layer of tape vertically.

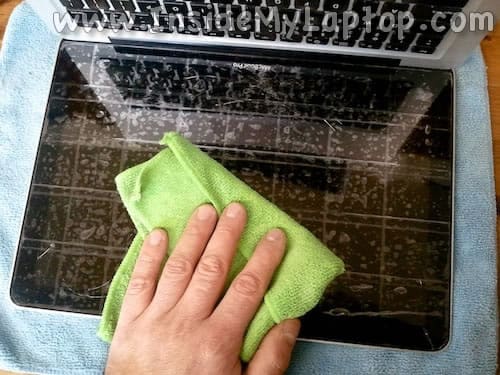
STEP 5.
Smooth out the tape with a soft cloth.
STEP 6.
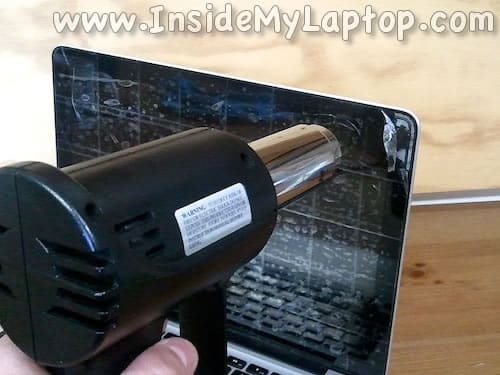
The glass is glued to the aluminum display frame with double sticky tape. It will come out easier if you warm it up with a heat gun.
Apply only reasonable amount of heat around the area you’ll be working on until it is warm. Warm up the area by slowly moving the gun along the side of the display.
Do not hold the heat gun too close to the display or you will burn the tape and rubber gasket.

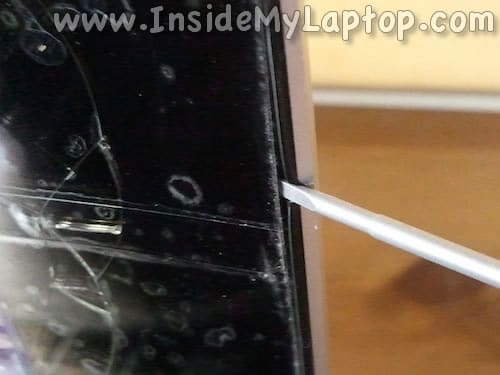
STEP 7.
Now the most difficult part of the repair – separating the old glass from the display frame.
Carefully insert a thin steel pry tool between the glass and rubber gasket and carefully lift up the glass.
I didn’t have my pry tool handy so I used a small flat head screwdriver (probably a bad idea).
For this step you should use a special pry tool like on shown on the following picture.
With a tool like that you have better chances to remove glass without breaking it into small pieces.

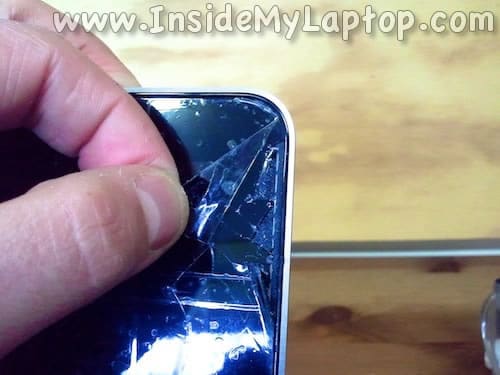
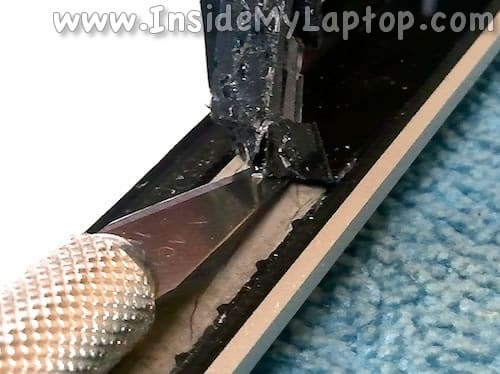
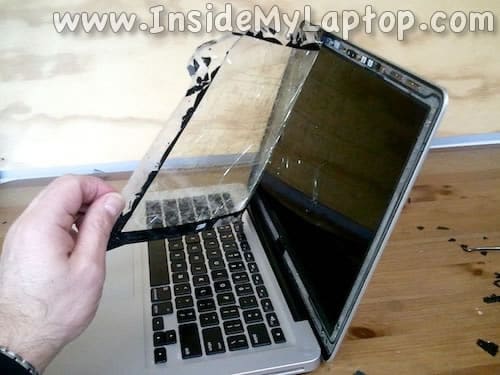
STEP 8.
Well, my glass did break and I will have to remove it piece by piece.

STEP 9.
You can remove small pieces with X-Acto knife, as I did.
Try inserting the knife blade between the black sticky tape and aluminum frame.
STEP 10.
Constantly heat up the area you are woking on.
STEP 11.
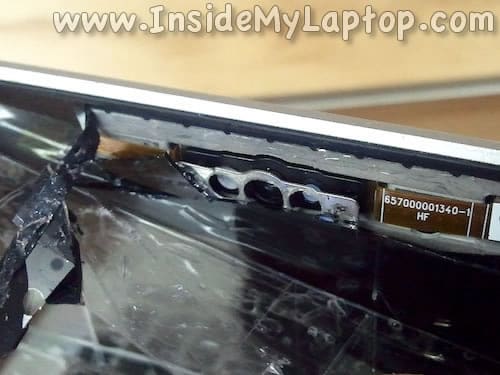
There are wires routed in the frame. Be ver careful while operating with the knife.
STEP 12.
Each time I was trying to lift up a big chunk of glass it was breaking into smaller pieces.
I was moving from the upper right corner towards the webcam.
You’ll need lots of patience.

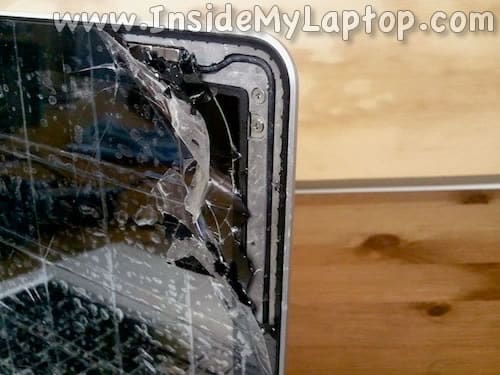
STEP 13.
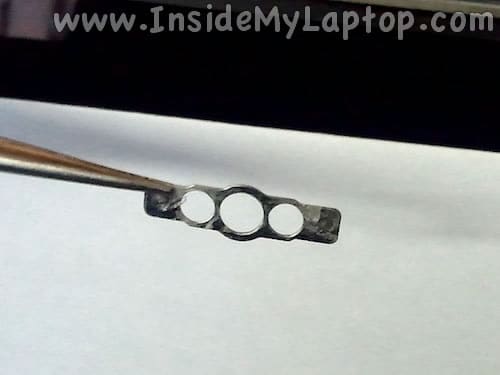
Be careful while working in the webcam area because you’ll be exposing the webcam module.
STEP 14.
Most likely the metal webcam cover will come out attached to the old glass.
Do not lose this piece, you’ll have to install it back in place later.
STEP 15.
After the damaged glass separated on the top side of the display assembly you can move to the side.

STEP 16.
Continue removing the glass.
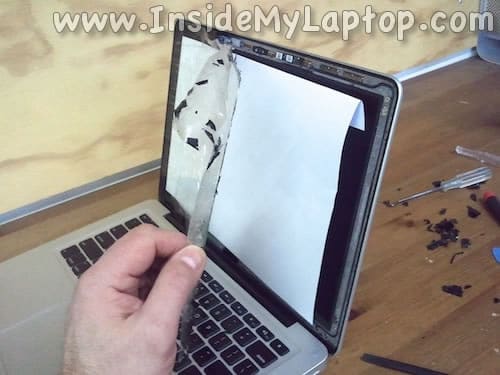
STEP 17.
In order to protect the screen from scratches I used a piece of paper.
STEP 18.
Keep heating up the area you are working on.

STEP 19.
I was able to remove most of the cracked glass from the display.

STEP 20.
Do not forget about the webcam cover. You will have to install it back in place before installing the new glass.
STEP 21.
Remove all remaining pieces of glass from the display frame.

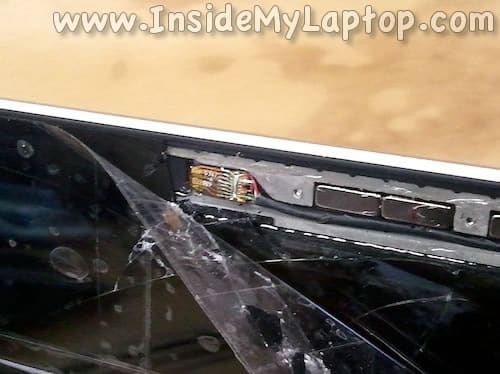
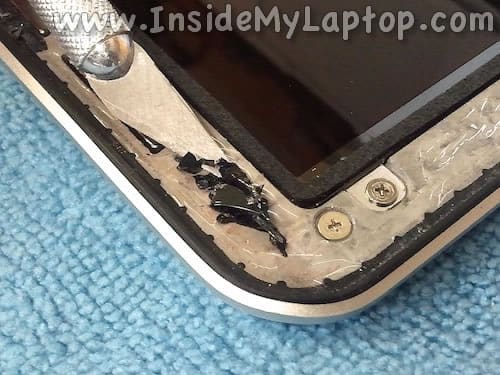
STEP 22.
Almost done.
On the following picture you can see how cables are routed in the display frame.
They are running from the top side to the lower right corner along the right side.
Be very careful while operating with a knife in these display areas.
Do not touch the screen with your fingers. It’s hard to remove fingerprints.
STEP 23.
Take a closer look at the frame. Remove all small pieces of glass and old black sticky tape.
If you leave a piece, the new glass might not seat properly.
STEP 24.
Finally, turn on the laptop and check if everything works properly. Don’t forget to test the webcam.

Installing the replacement glass is very simple. It comes with a new adhesive tape.
Make sure the screen is clean. Try to work in a dust free environment. You can remove dust form the screen with a soft microfiber cloth.
Remove protective film from the new glass and adhesive tape. Align it with the display frame and put back in place.
Apply some pressure along the edges of the display to make sure the new adhesive tape glued to the frame properly.
MacGuy
Where did you purchase the glass?
Thanks.
IML Tech
@ MacGuy,
From PowerbookMedic. In the search box type “13” glass” or “15” glass” etc… It starts from $59.95
Greg
What about covering the area where the cables are routed? Did you just leave it like that?