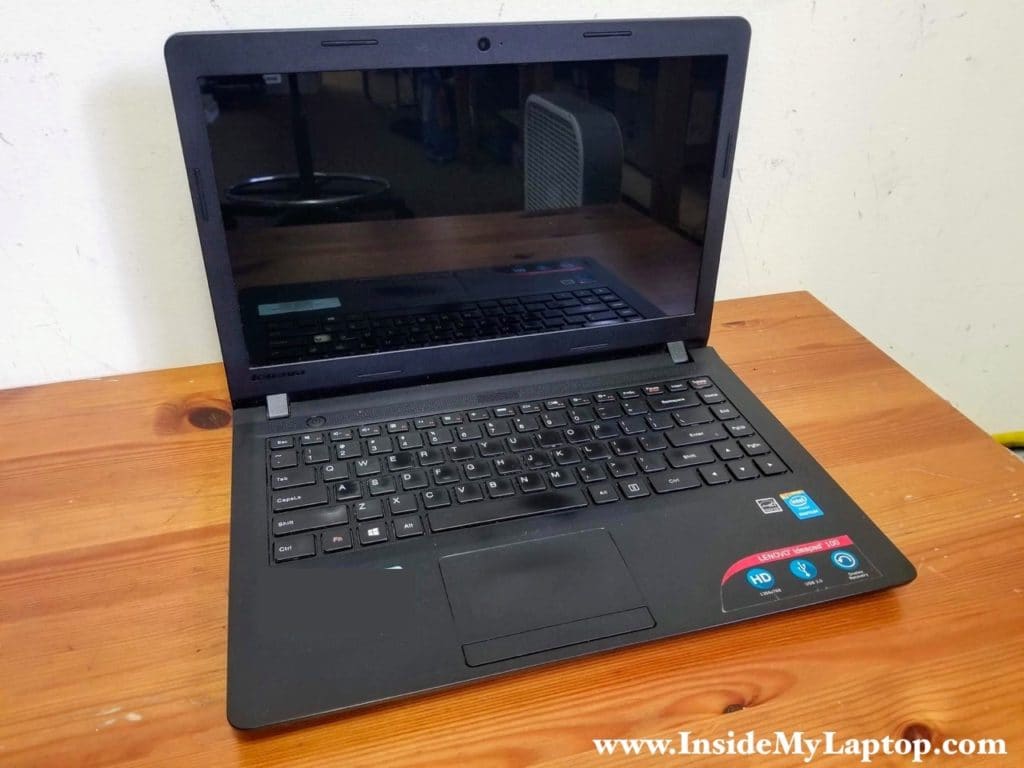
In this guide I explain how to disassemble a Lenovo ideapad 100-14IBY model 80MH laptop. Most likely you can use these instructions for taking apart other models in the Lenovo idepad 100-14 line.
The disassembly process starts with removing the keyboard and after this step is accomplished we’ll move to the internal components.
STEP 1.
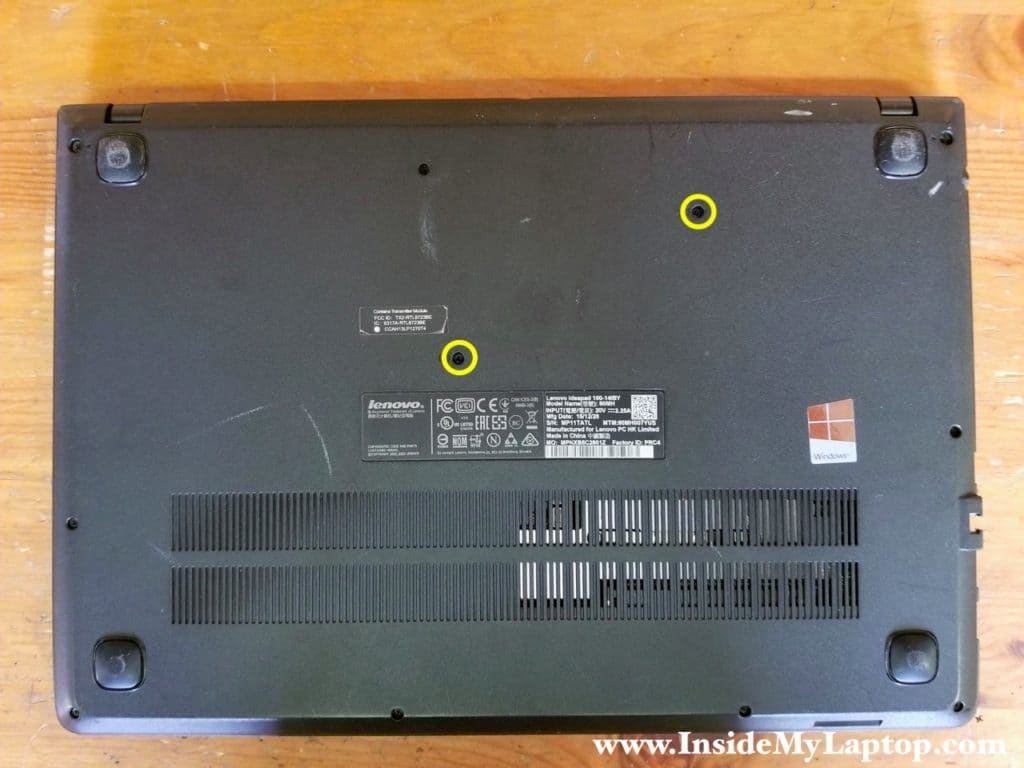
Remove two screws securing the keyboard on the bottom.
STEP 2.
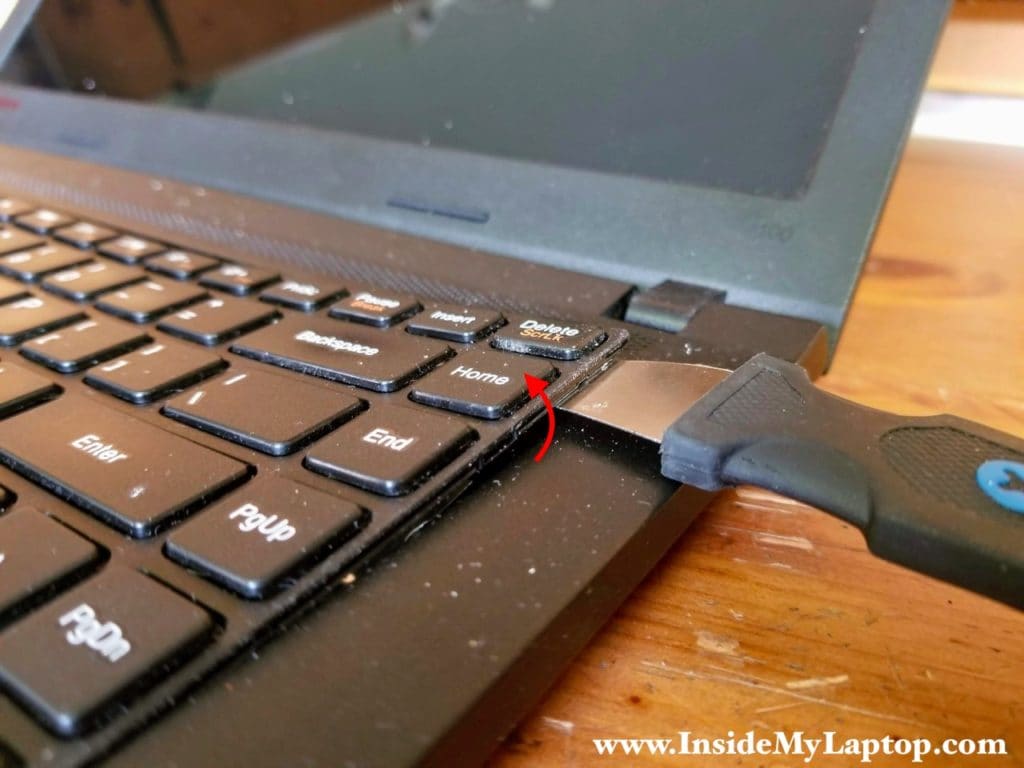
Insert a thin metal case opener tool between the keyboard and the palmrest assembly.
Pry up the keyboard to disengage hidden latches. There are many hidden latches securing the keyboard.
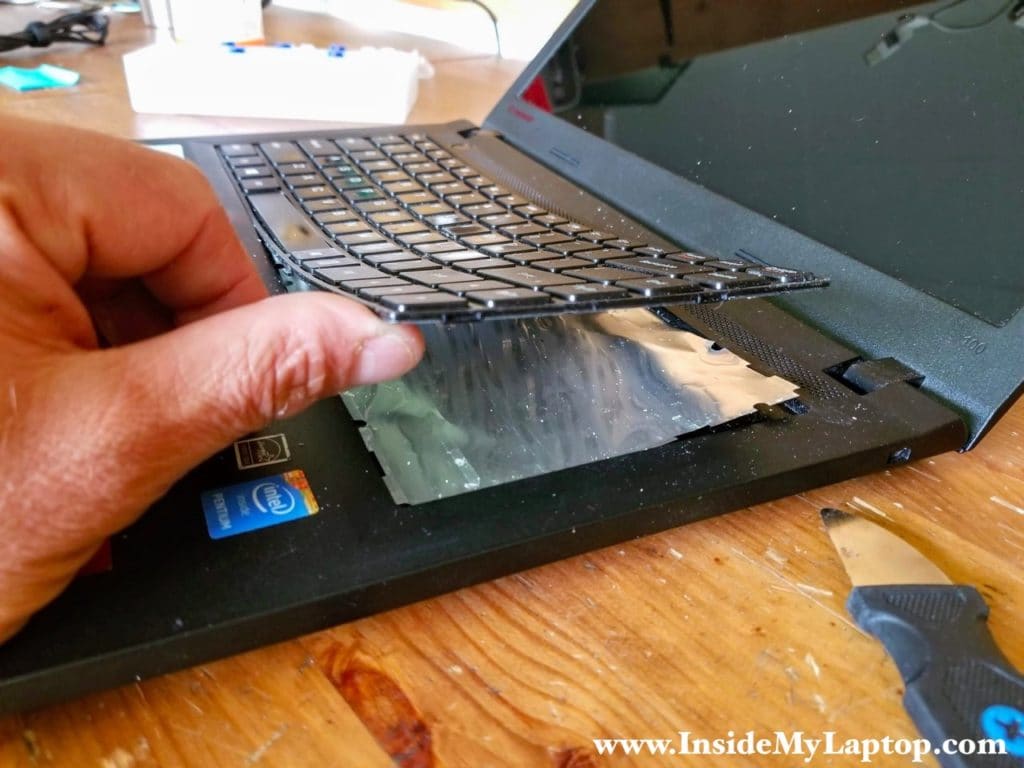
Continue removing the keyboard with your fingers while prying it up the with the case opener.
In Lenovo ideapad 100-14IBY the keyboard is glued to the palmrest. As you can see on the following picture, the aluminum foil separated from the back of the keyboard. I had to peel it off separately.
The aluminum foil is glued to the palmrest with some strong adhesive.
STEP 3.
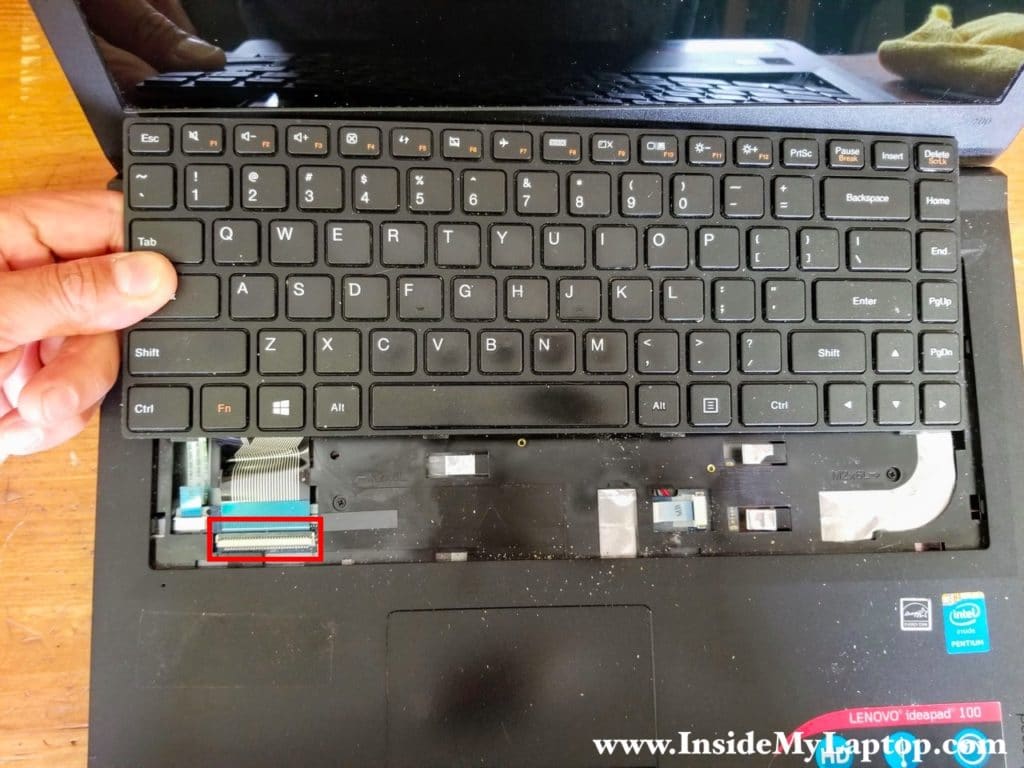
Lift up the keyboard and move it towards the display.
Now you can access the keyboard cable and disconnect it.
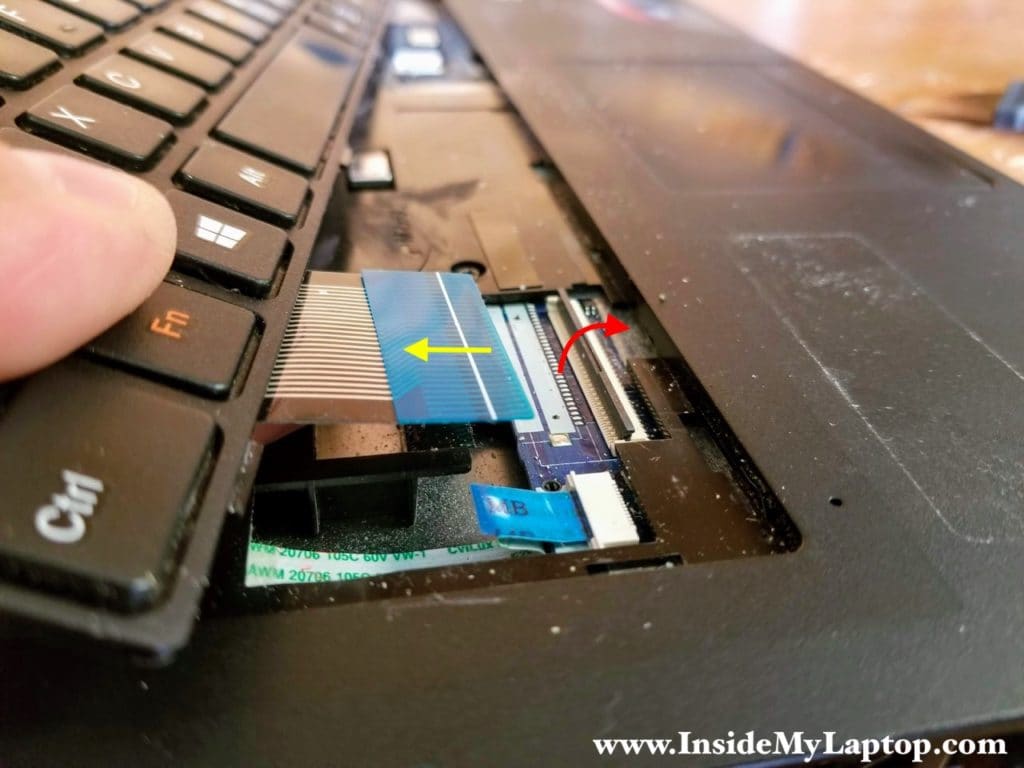
In order to unlock the connector it’s necessary to lift up the locking tab first (red arrow).
Only after the flat cable is released you can pull it out.
Remove the keyboard completely.
Keyboard model number: 9Z.NCMSN.001
STEP 4.
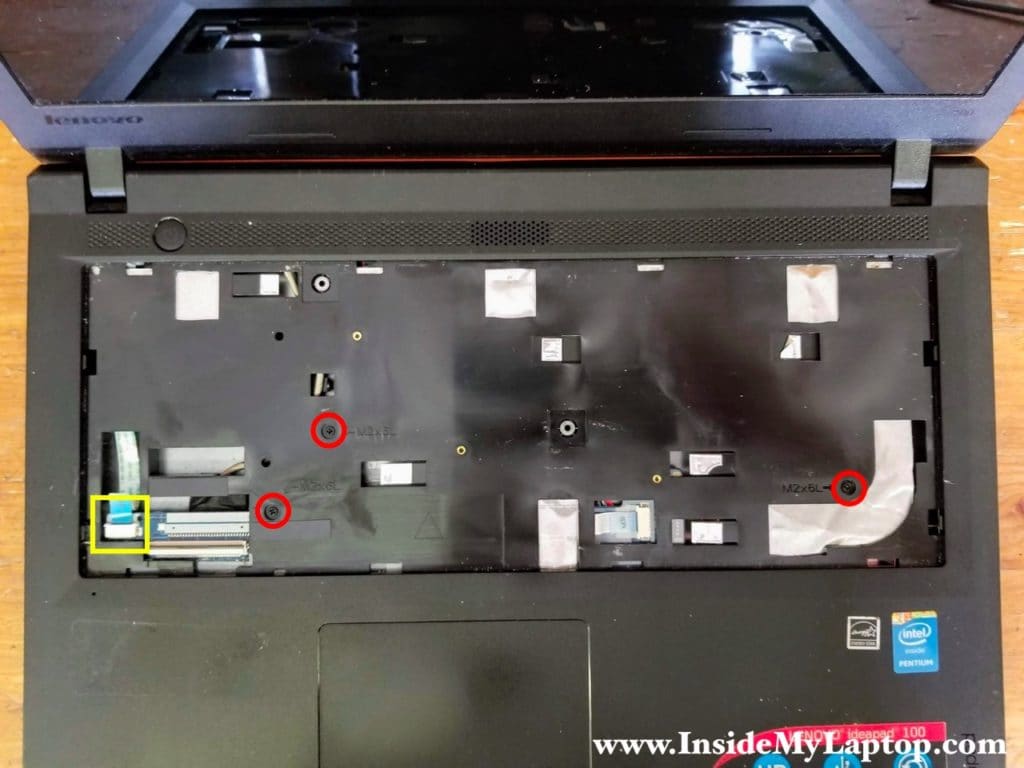
Remove three screws securing the palmrest assembly.
Disconnect the power button board cable from the motherboard.
I’m disconnecting this cable because I will be removing the power button board in the following steps. You can do it later if you want.
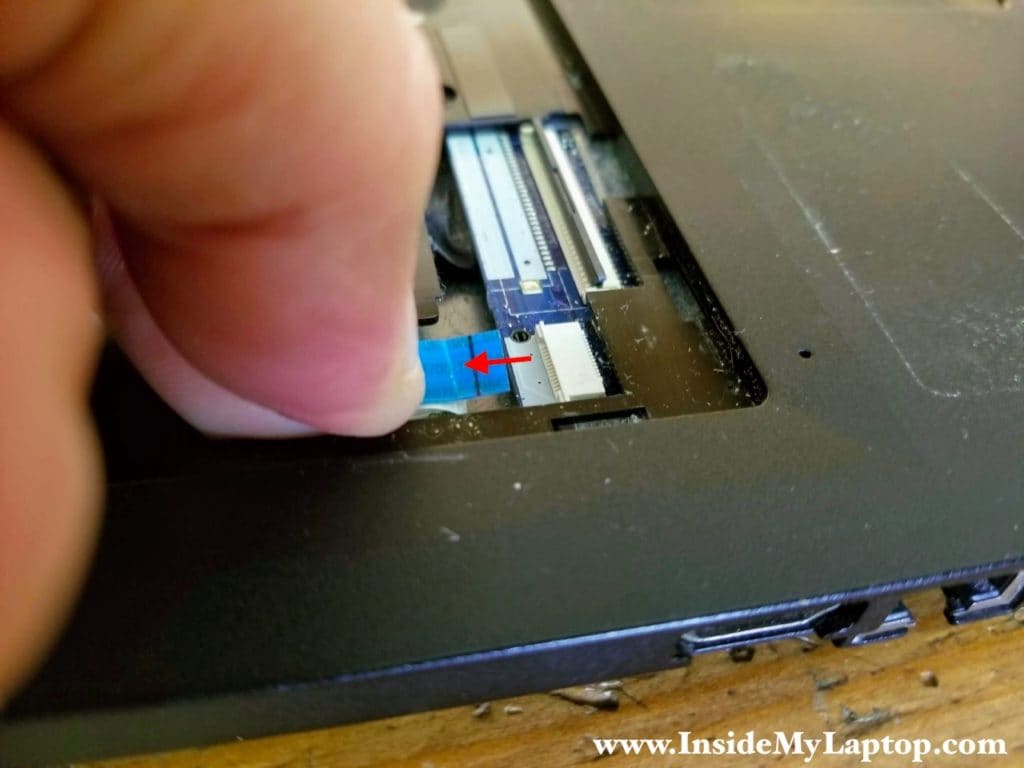
In order to disconnect the power button board cable simply pull it out of the connector. There is no locking tab on this type of connector.
STEP 5.
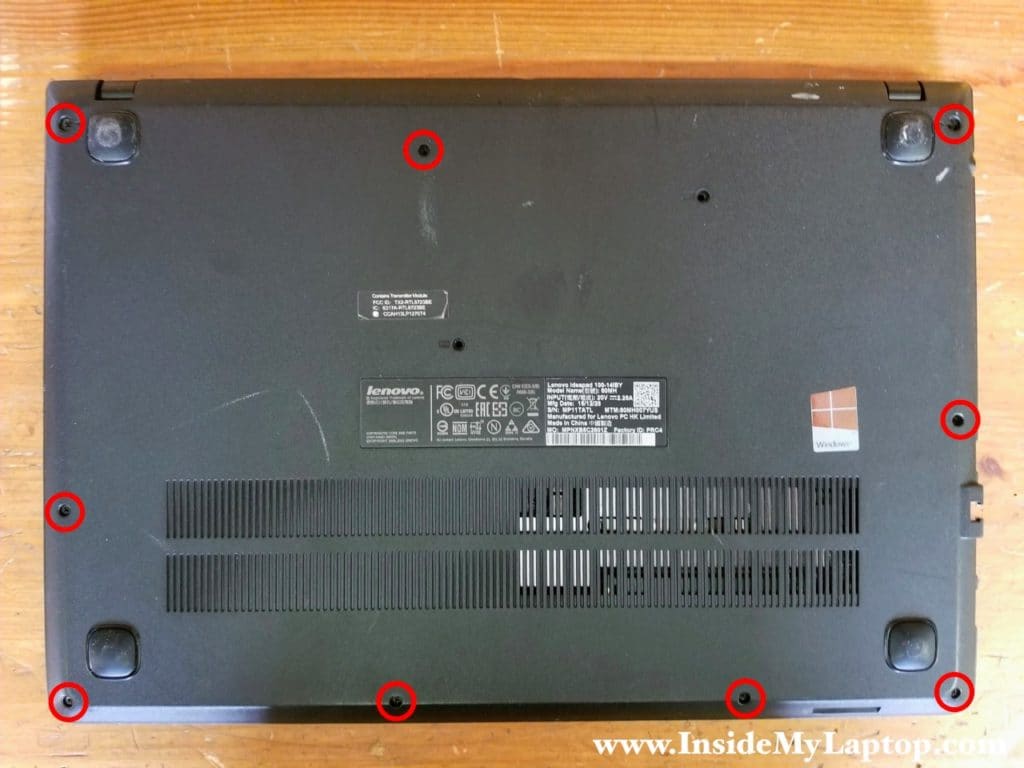
Remove nine screws from the bottom cover.
STEP 6.
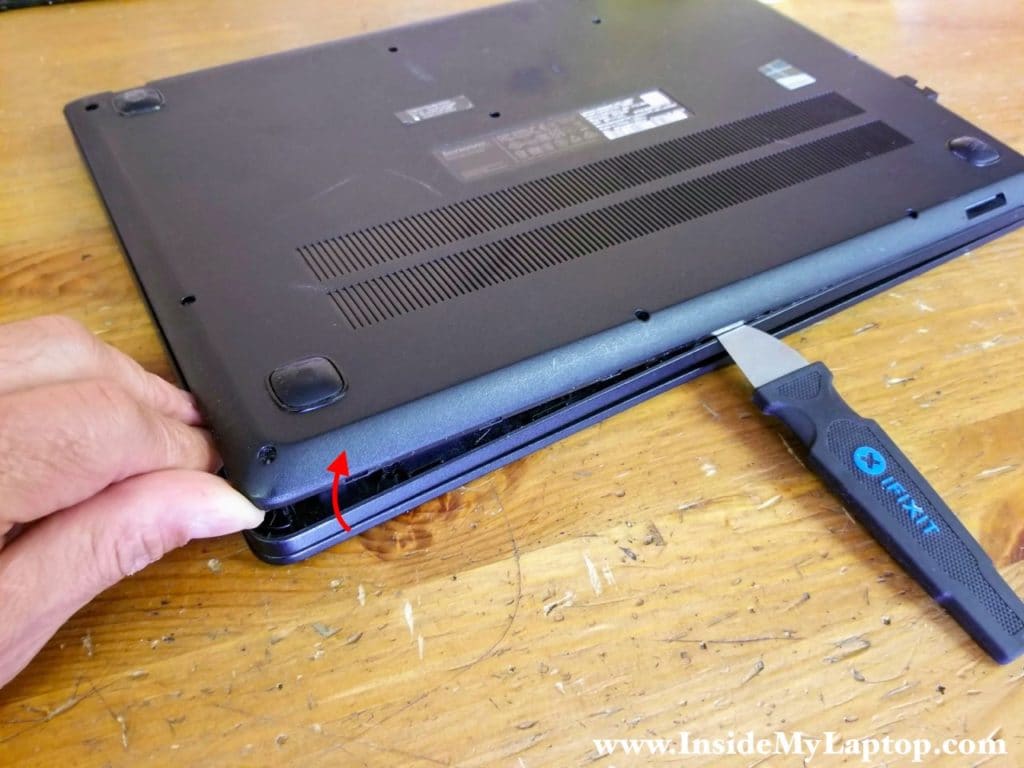
Start separating the bottom cover from the palmrest assembly using the case opener tool.
Move the case opener along the side and pry up the bottom cover while helping yourself with fingers.
STEP 7.
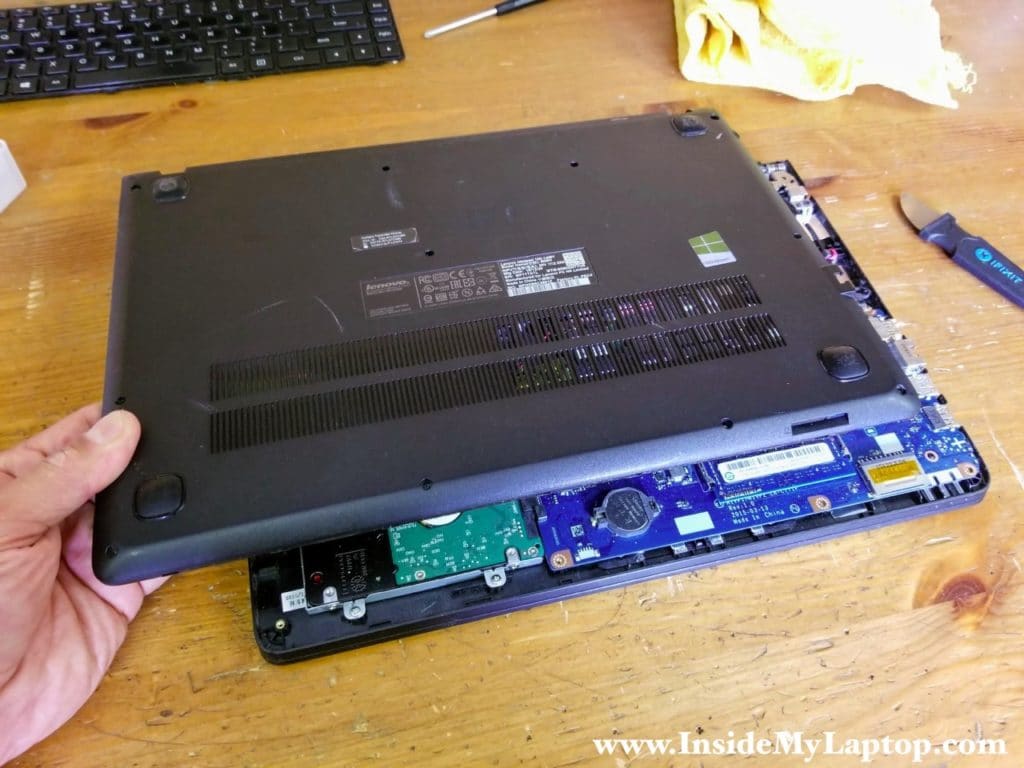
Remove the bottom cover.
STEP 8.
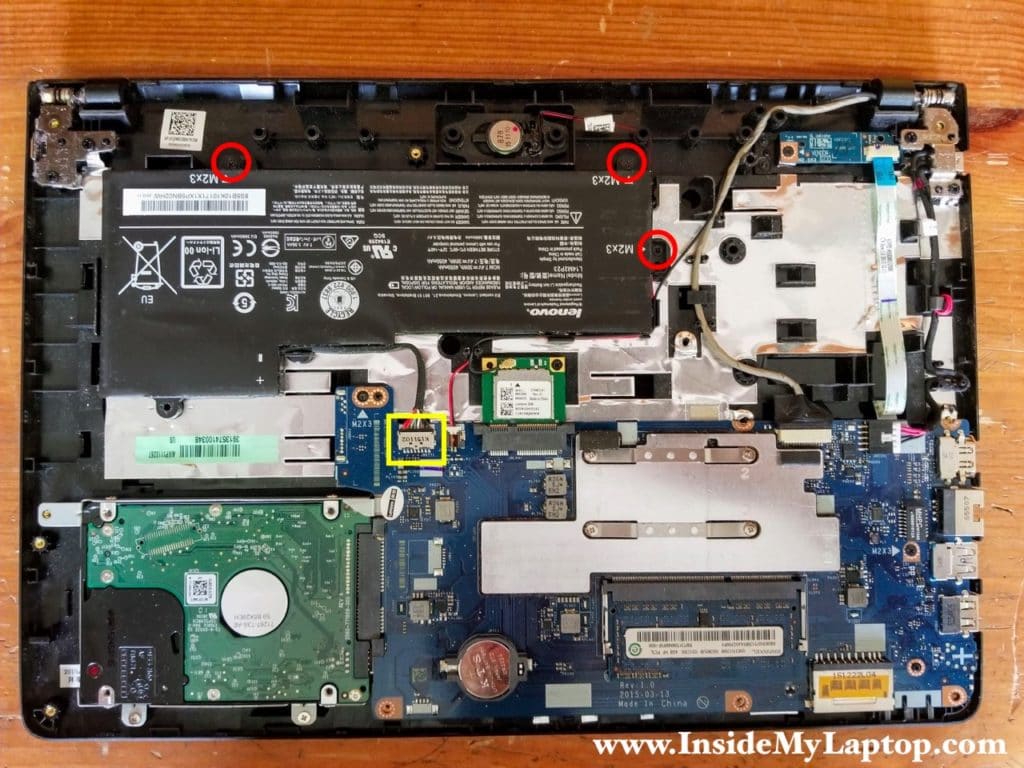
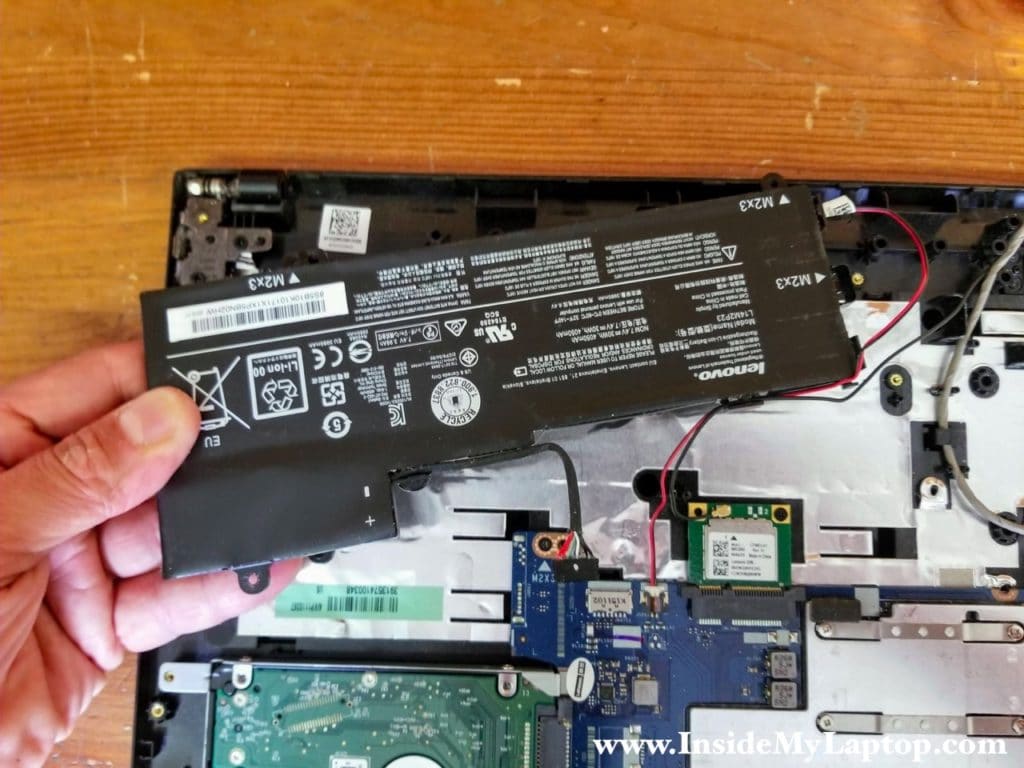
Remove three screws securing the laptop battery.
Disconnect the battery cable from the motherboard.
STEP 9.
Lift up the battery and unroute the speaker cable with the wireless antenna cable from the guided path on the right side.
Remove the battery. Replacement battery model L14M2P23.
STEP 10.
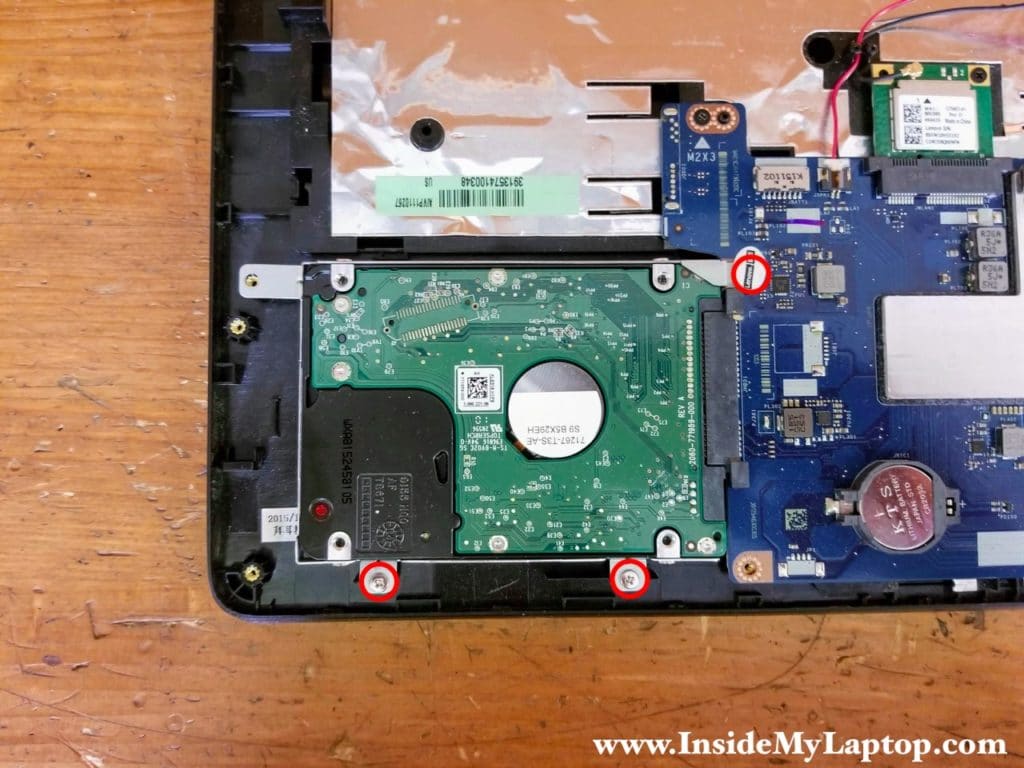
Remove three screws securing the hard drive bracket.
STEP 11.
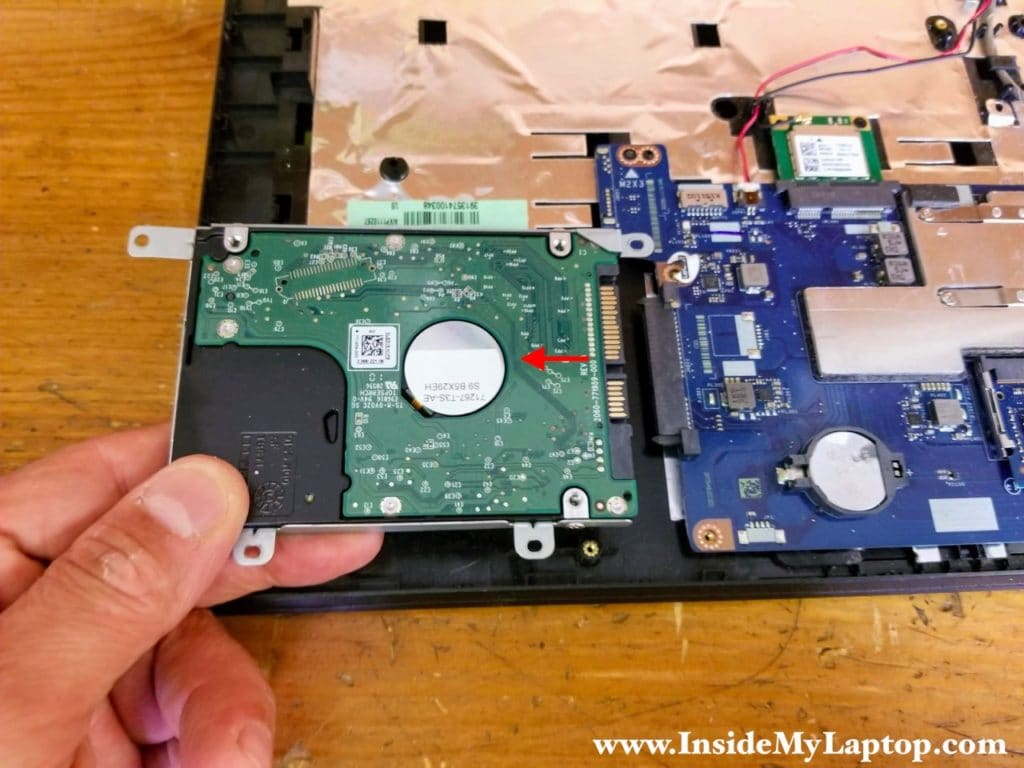
Slide the hard drive assembly to the left to disconnect it from the SATA port and remove it.
Upgrading this hard drive to a 2.5″ solid state drive will speed up the laptop significantly.
STEP 12.
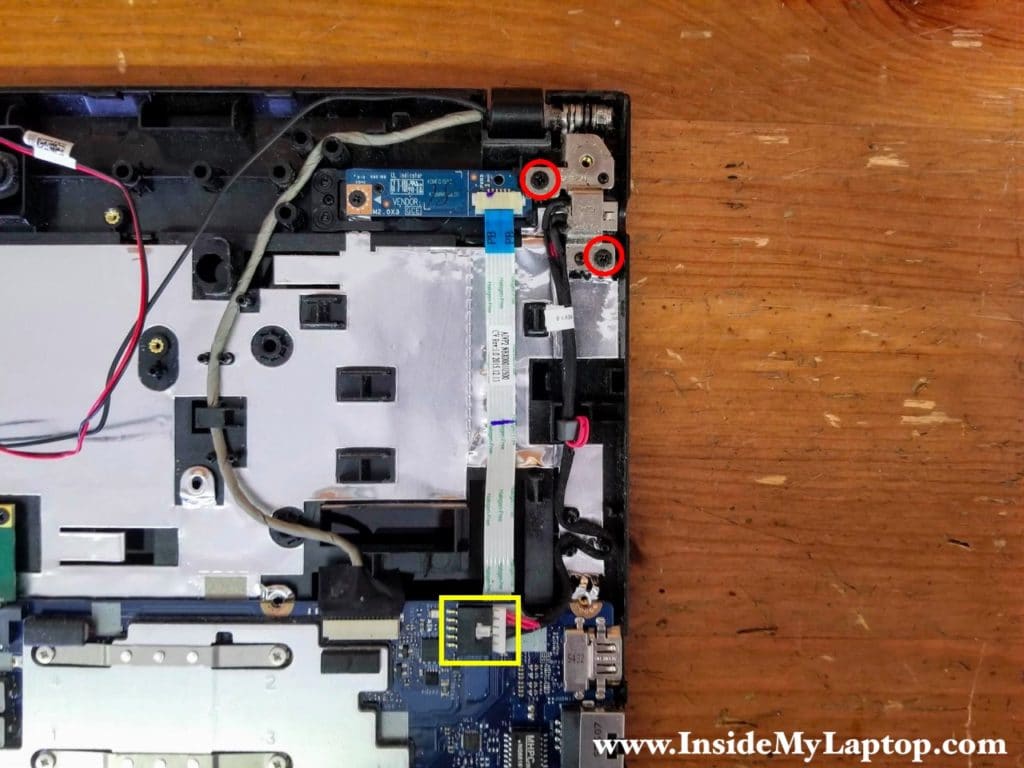
In Lenovo ideapad 100-14IBY laptop the DC power jack is mounted under the left display hinge.
Remove two screws securing the left display hinge. Unplug the DC jack cable from the motherboard.
STEP 13.
Open up the display hinge and remove the DC power jack harness.
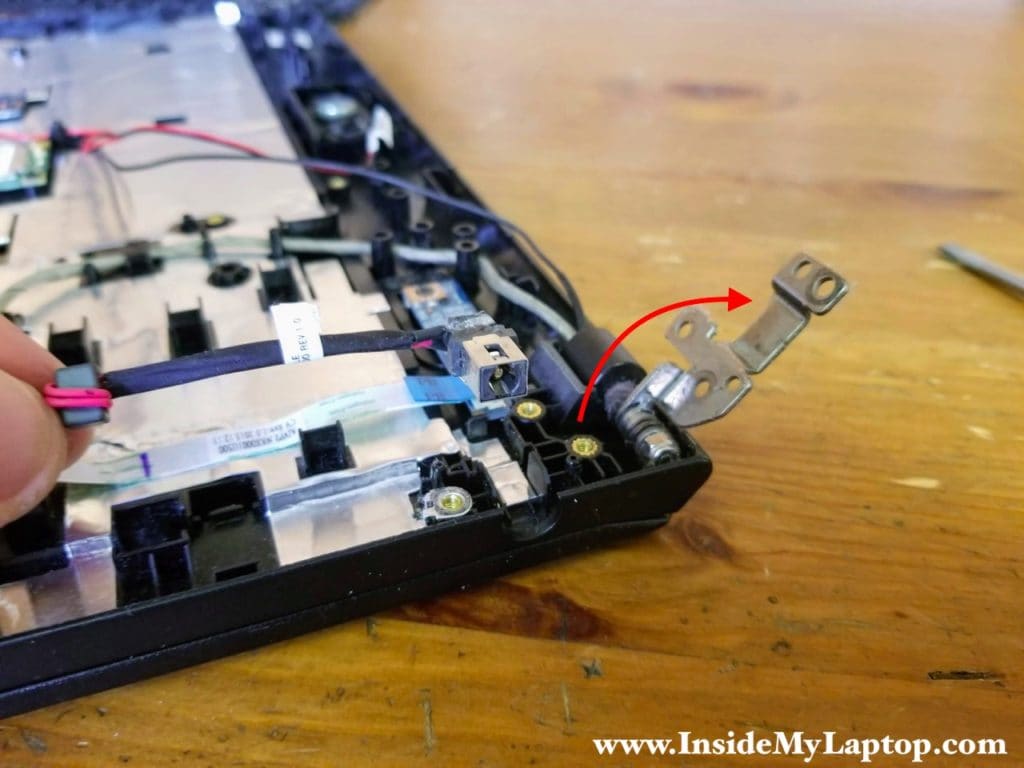
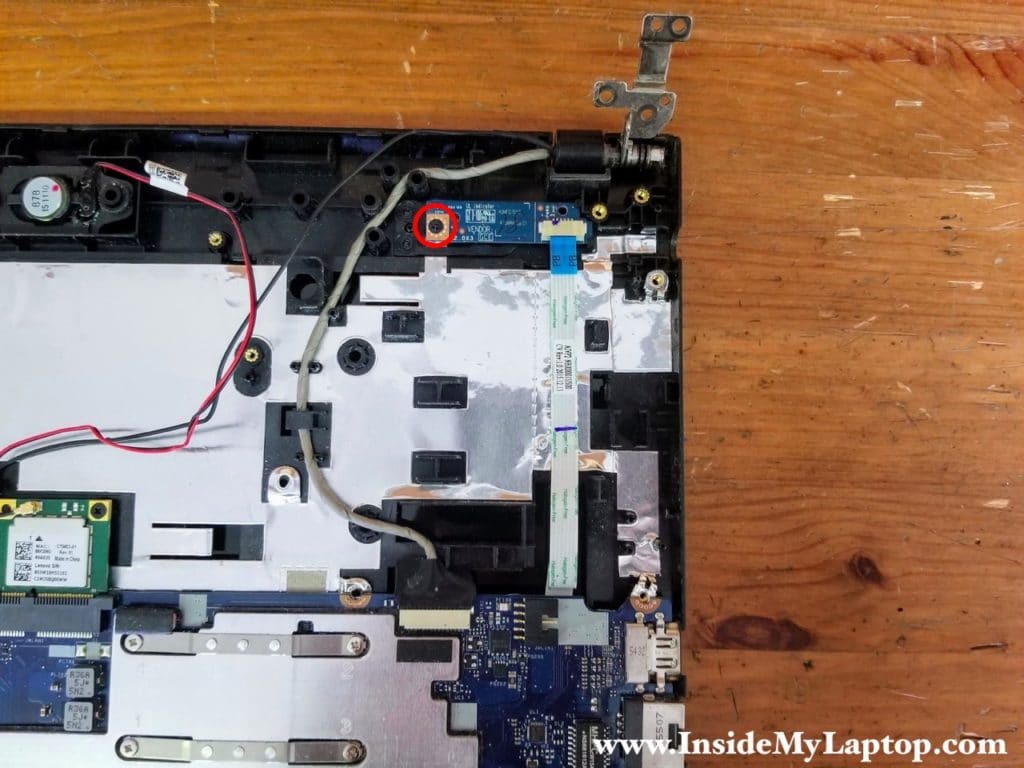
STEP 13.
Remove one screw securing the power button board. As you remember, I already disconnected the cable from the motherboard in the step 4.
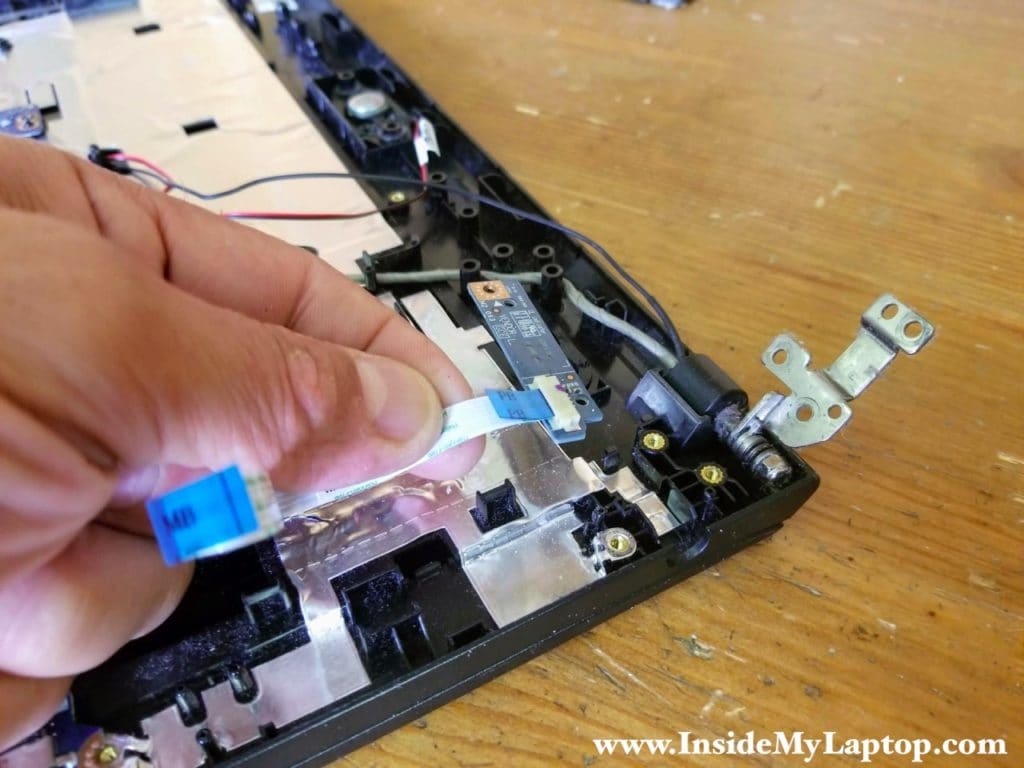
STEP 14.
Remove the power button board.
Removing the display assembly.
STEP 15.
Remove two screws securing the right display hinges. Lift up the left hinges the same way as the right hinge in the step 13.
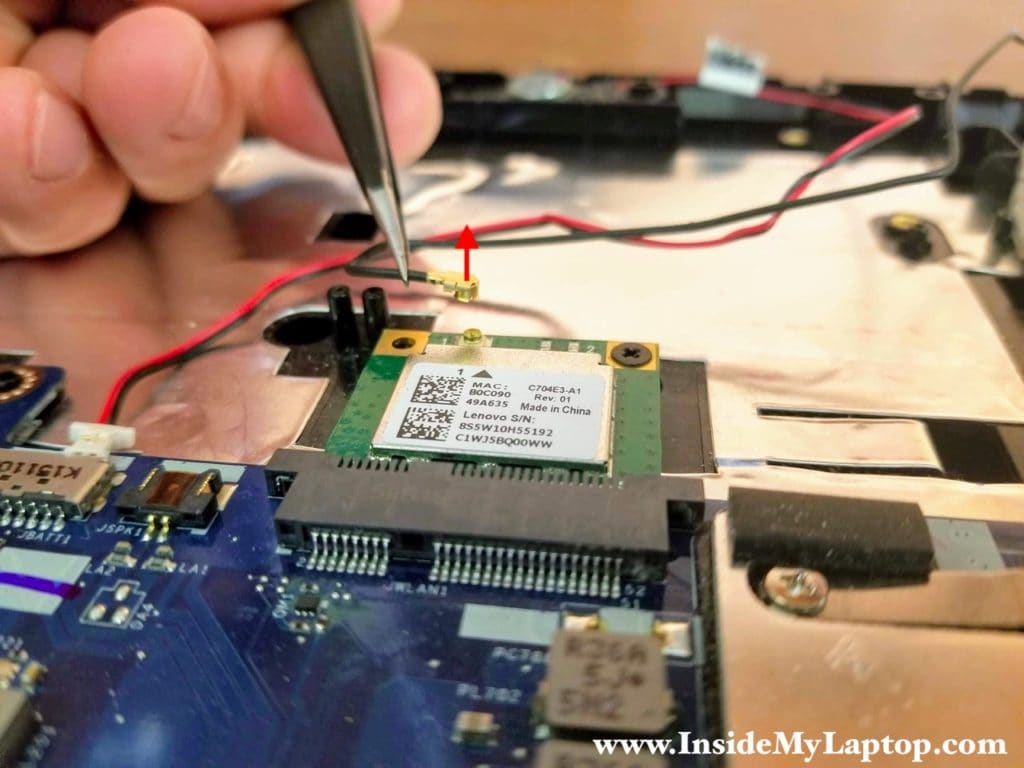
Disconnect one antenna cable from the wireless card. Unplug the display video cable from the motherboard.
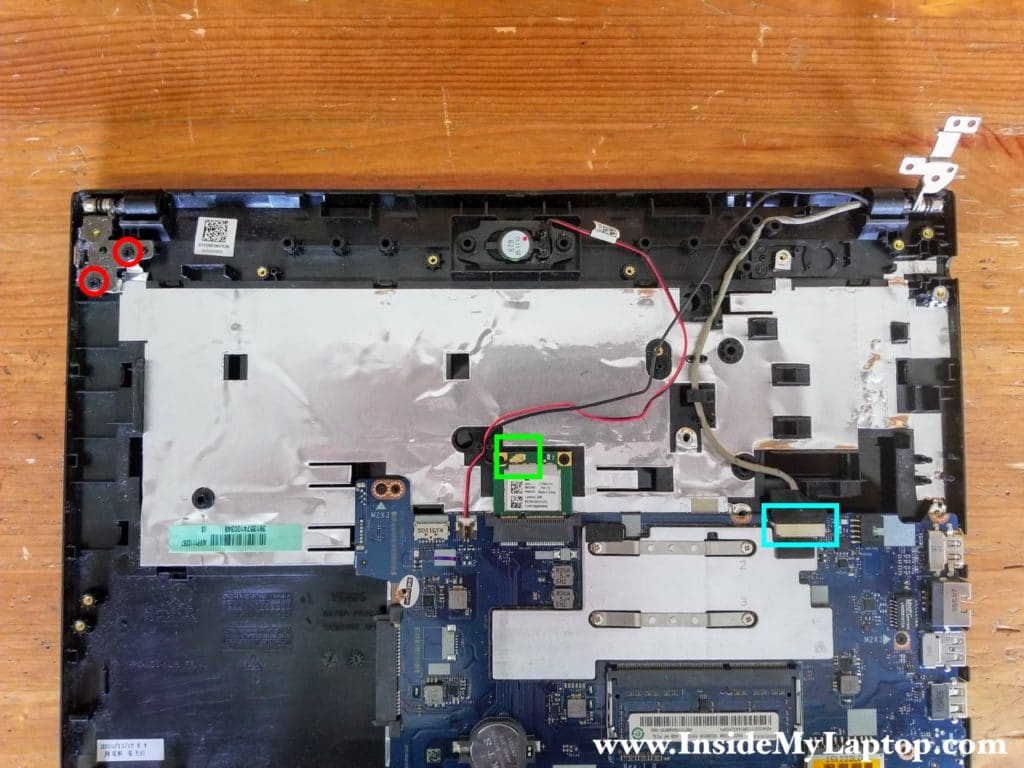
In order to unplug the wireless card antenna cable simply lift it up and unsnap from the connector on the card.
STEP 16.
Unroute the display video cable from the guided path on the palmrest.
Separate the display panel from the palmrest.
If you want to remove the LCD screen you can follow Lenovo ideapad 110-15ISK screen removal instructions. All steps should be very similar.
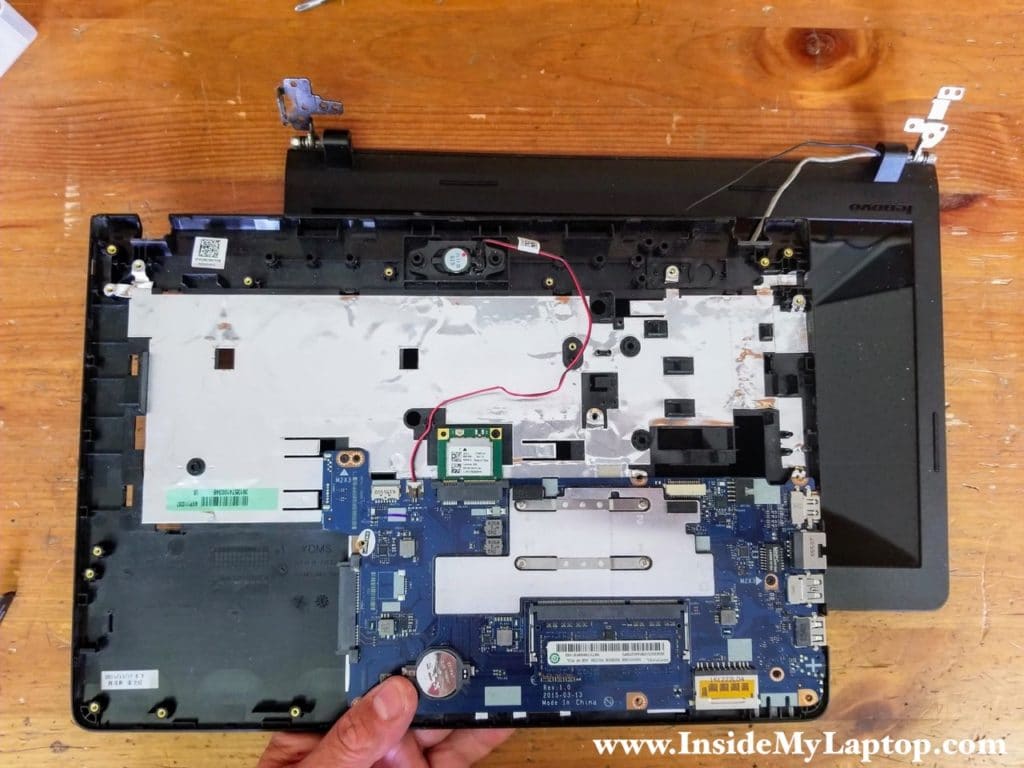
Lenovo ideapad 100-14IBY motherboard has only one memory slot.
The CMOS battery can be easily access and replaced if necessary.
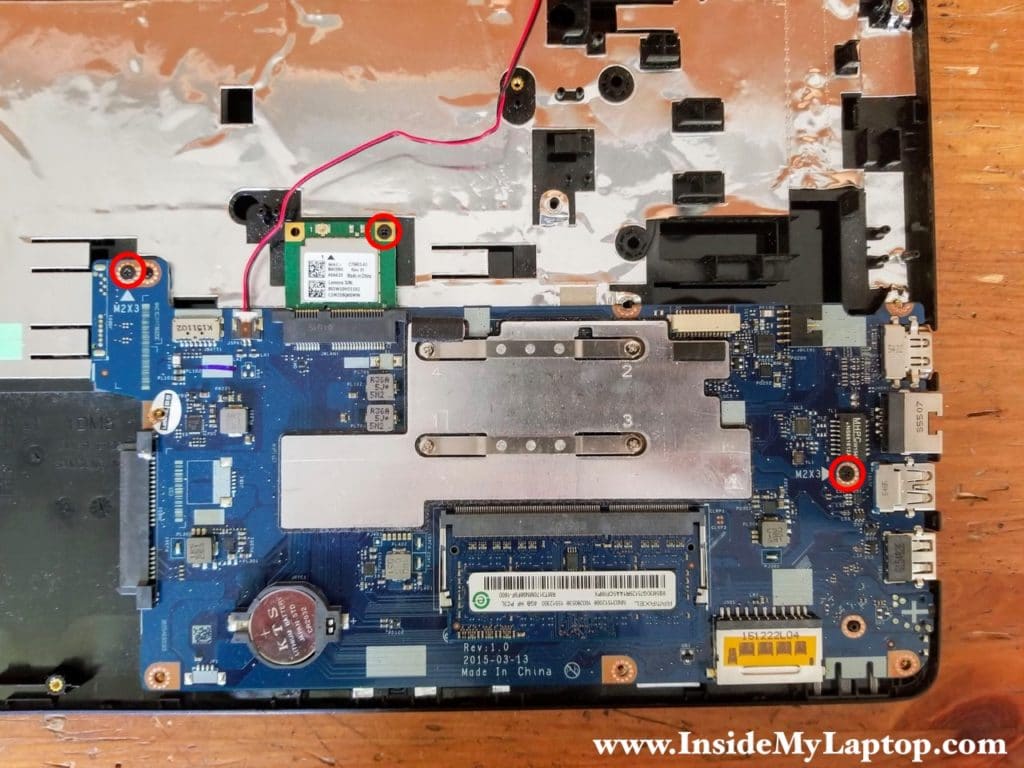
In order to remove the motherboard you’ll have to remove three screws and disconnect the speaker cable.
Andrew
I have a problem with my laptop. It works great but when I move the display it starts showing some vertical lines on the right side. As soon as I stop moving it the display works again.
IML Tech
Andrew, most likely you have failing LCD screen and it has to be replaced. I don’t have LCD removal instructions for this particular model but at the end of my disassembly guide I posted a link to a similar model. Hope it helps.
Rian
Google translation:
Good night, I have a Lenovo IdeaPad laptop 100-14IBY, WHEN I press the power button nothing appears on the screen, while the indicator light is on or on, where is my laptop’s problem?
The answer is really needed … thanks in advance …
Original comment.
Selamat malam,saya mempunyai laptop lenovo ideapad 100-14IBY,KETIKA SAYA menekan tombol power on gambarx gk ada yg muncul di layar,smntara lampu indikator on hidup atau menyala,dimana letak permasalahan laptop saya?
Jawabannya sangat di butuhkan..teruma kasih sebelumnya..
IML Tech
First, test the laptop with an external monitor connected via the HDMI port. If there is video on the external monitor but not on the laptop screen, it’s possible you have a bad screen.
Second, try replacing the memory module. It’s possible the memory module is bad.
Third, try disconnecting the main battery and the CMOS battery. Keep booth batteries unplugged for a few minutes. After that connect both batteries and try turning the laptop on again.
Also, try turning it on with the hard drive disconnected.
If nothing helps, most likely there is a problem with the motherboard.
Enrico
My problem is that my laptop does not start properly .. As soon as the sign comes from Lenovo, he does not do anything anymore
He just tries to restart over and over, and he beeps
(original comment in German). Mein Problem ist, dass mein Laptop nicht richtig startet.. Sobald das Zeichen von lenovo kommt, macht er nichts mehr
Er versucht nur immer wieder neu zu starten und dabei piept er auch
IML Tech
Enrico, the failure depends on the beep code. Check out this Lenovo page for error codes: https://support.lenovo.com/us/en/solutions/ht062270