
In this guide I show how to disassemble HP Pavilion x360 m3 Convertible PC.
This guide will work for the following HP Pavilion x360 m3 models: m3-u001dx, m3-u003dx, m3-u101dx, m3-u103dx, m3-u105dx and likely some others.
I will walk you through the following disassembly steps:
- Removing the top case with keyboard and accessing the trackpad.
- Removing the battery, hard drive, power button board and USB/Audio/Volume control board.
- Removing the logic board and accessing both memory modules and the wireless card
- Removing the cooling fan heatsink assembly and separating the display assembly from the top case
If your laptop looks different, check out my previous guide for the older HP Pavillion x360 13 model.
HP Pavilion x360 m3 disassembly process
STEP 1.
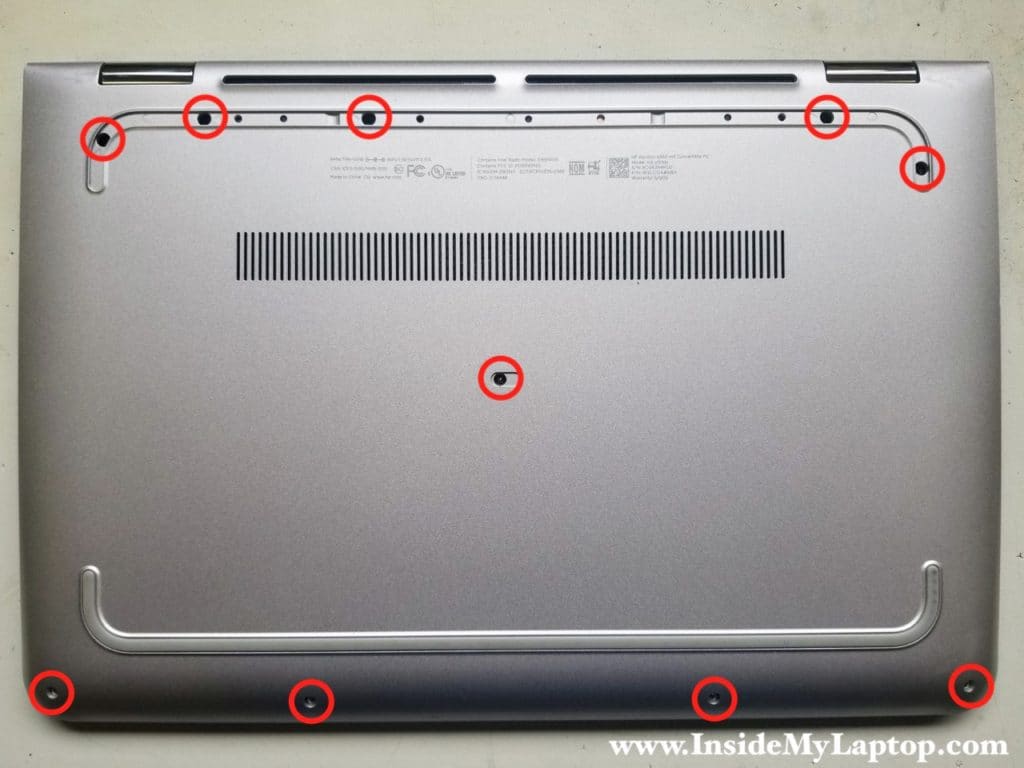
In this model all bottom case screws are hidden.
- There are five screws under the rubber foot located closer to the display hinges.
- One screw right in the middle under the oval seal.
- Four screw on the bottom under the rubber plugs.

Remove the bottom foot. It’s attached to the bottom case with adhesive tape.

Remove the oval seal which also attached with adhesive tape.
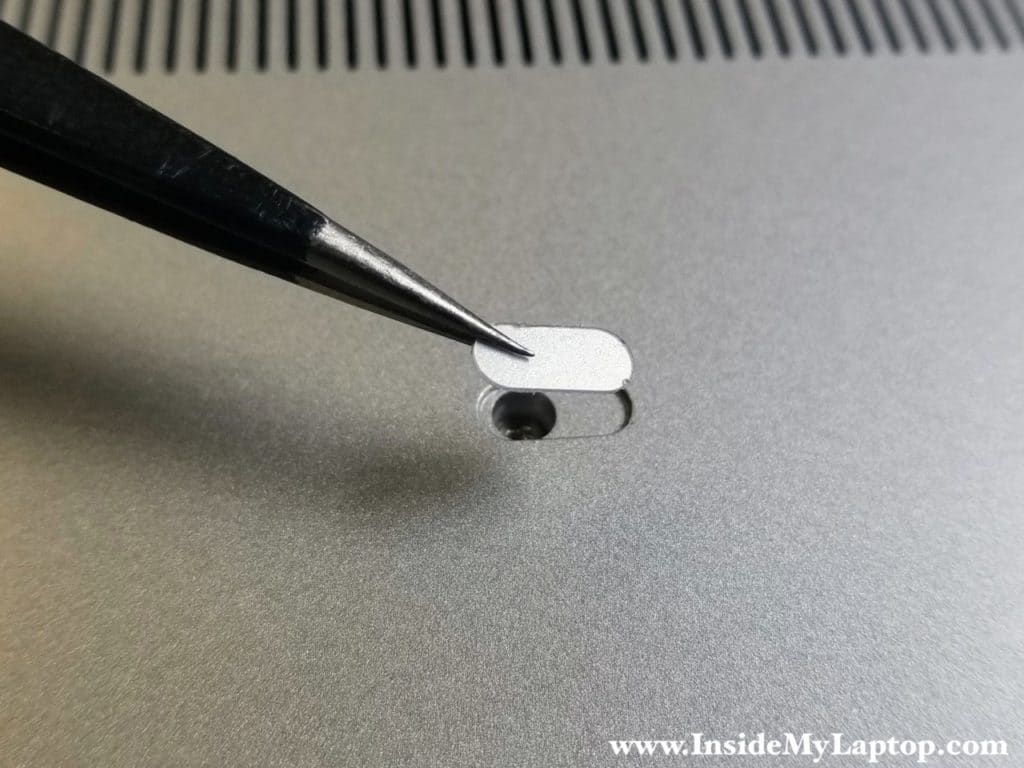
Remove four rubber plugs on the bottom. Two corner plugs are a little bit different from the plugs located in the middle, so keep track of them.

STEP 2.
Remove all screws from the bottom case cover.
STEP 3.
Start separating the top case assembly from the bottom case cover using a plastic case opening tool.

STEP 4.
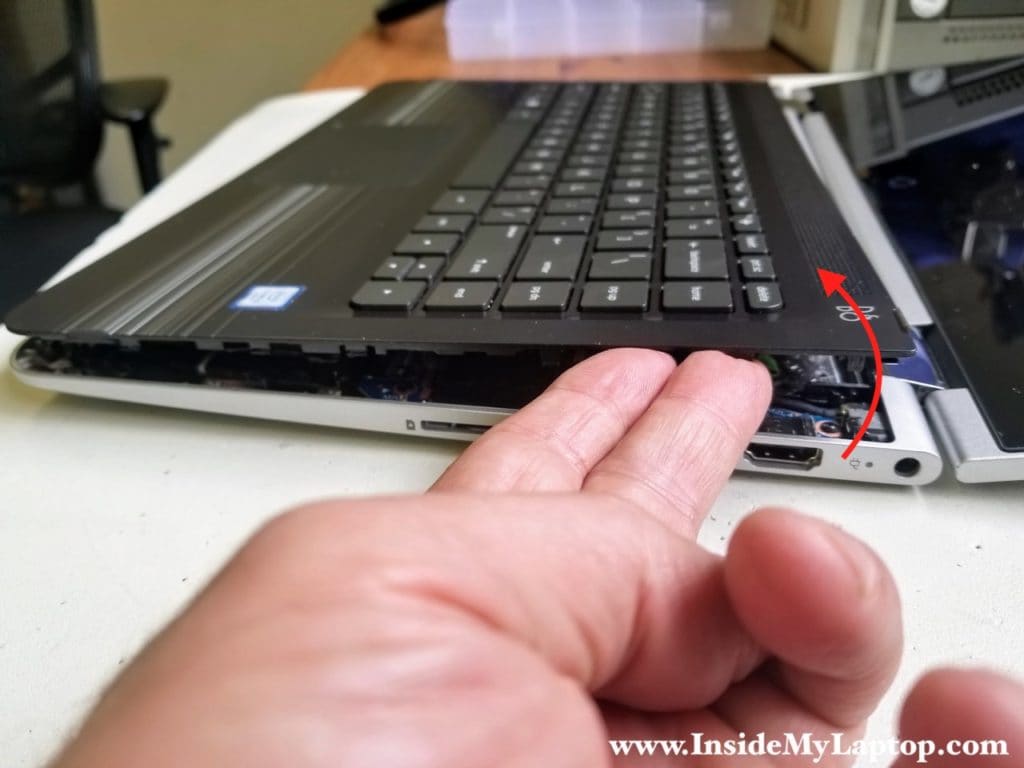
After a while trying to remove the top case, I found that it has to be lifted up by the side closer to the display.
STEP 5.
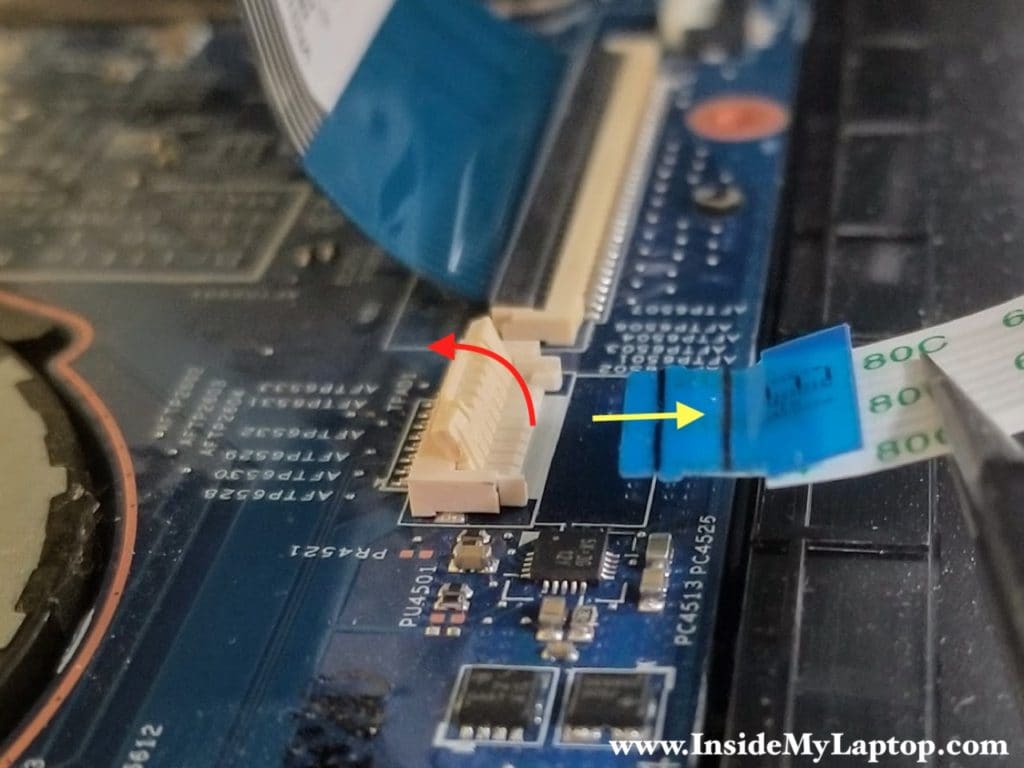
Be careful, the top case has two cables attached to the motherboard.
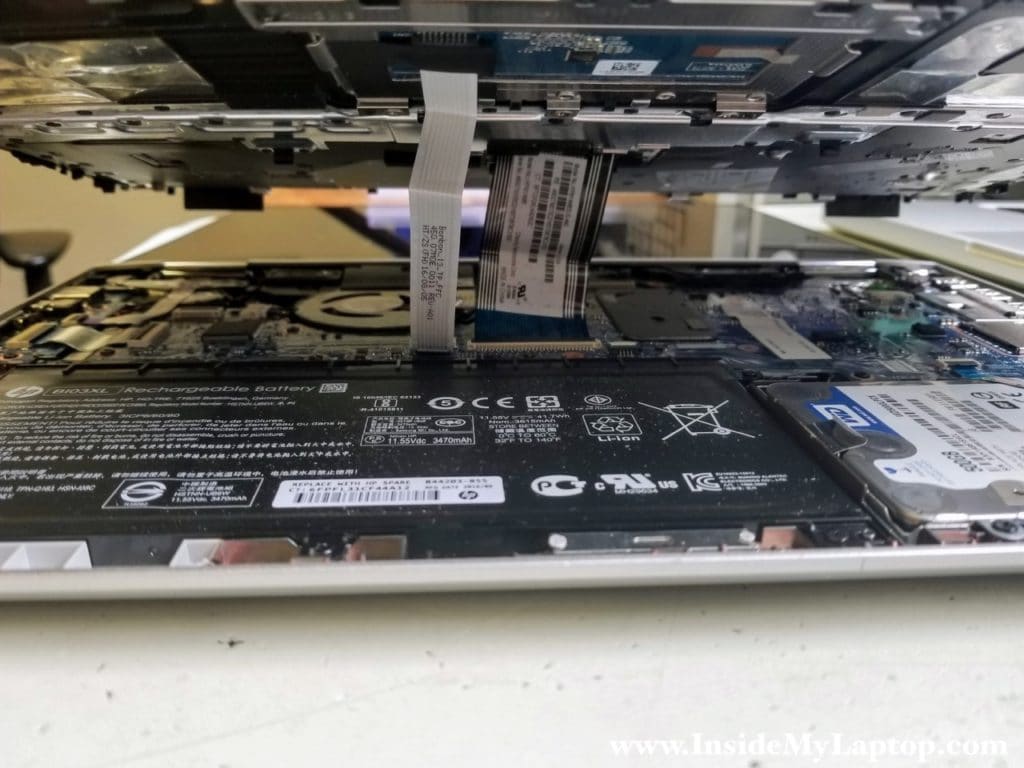
Here’s how to release the touchpad cable:
- Unlock the touchpad connector by lifting up the locking tab (red arrow).
- Pull the touchpad cable out of the connector (yellow arrow).
Release and remove the keyboard cable the same way.
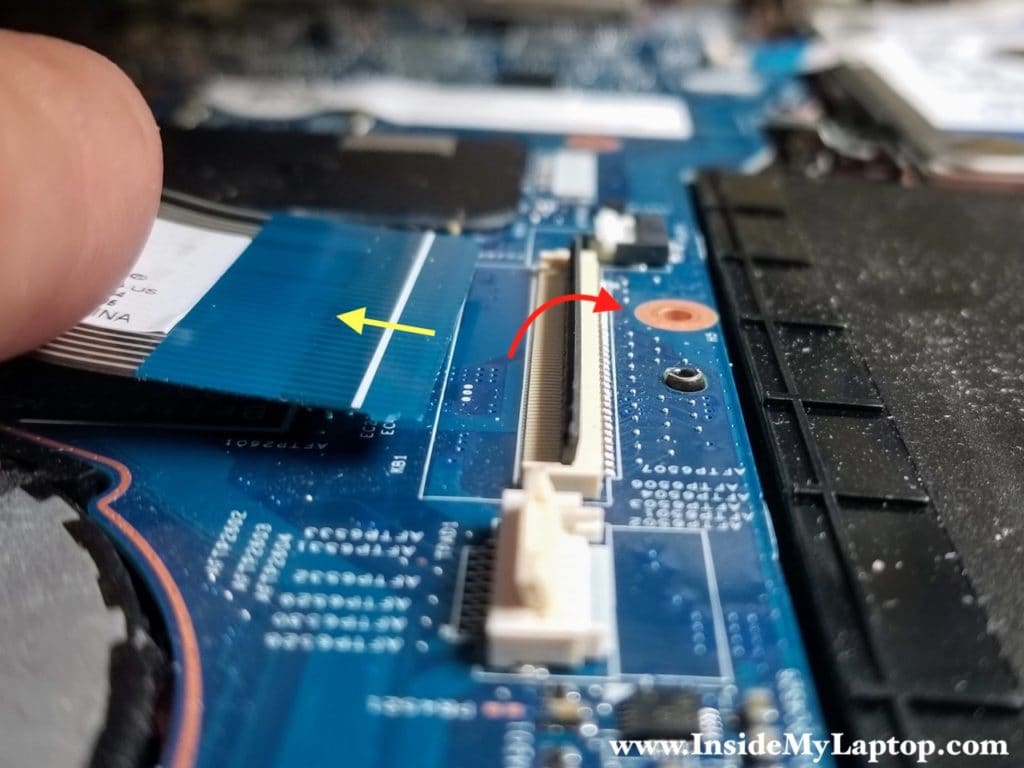
Now you can remove the top cover – keyboard assembly.
HP Pavilion x360 m3 has non-removable keyboard. The aluminum cover that secures the keyboard in place is permanently riveted to the top case.
The touchpad, on the other hand, can be easily removed. In order to remove the touchpad it’s necessary to remove four screws from the touchpad bracket (yellow circles) and three more screws from the touchpad itself (red circles).

STEP 6.
Remove six screws securing the battery.
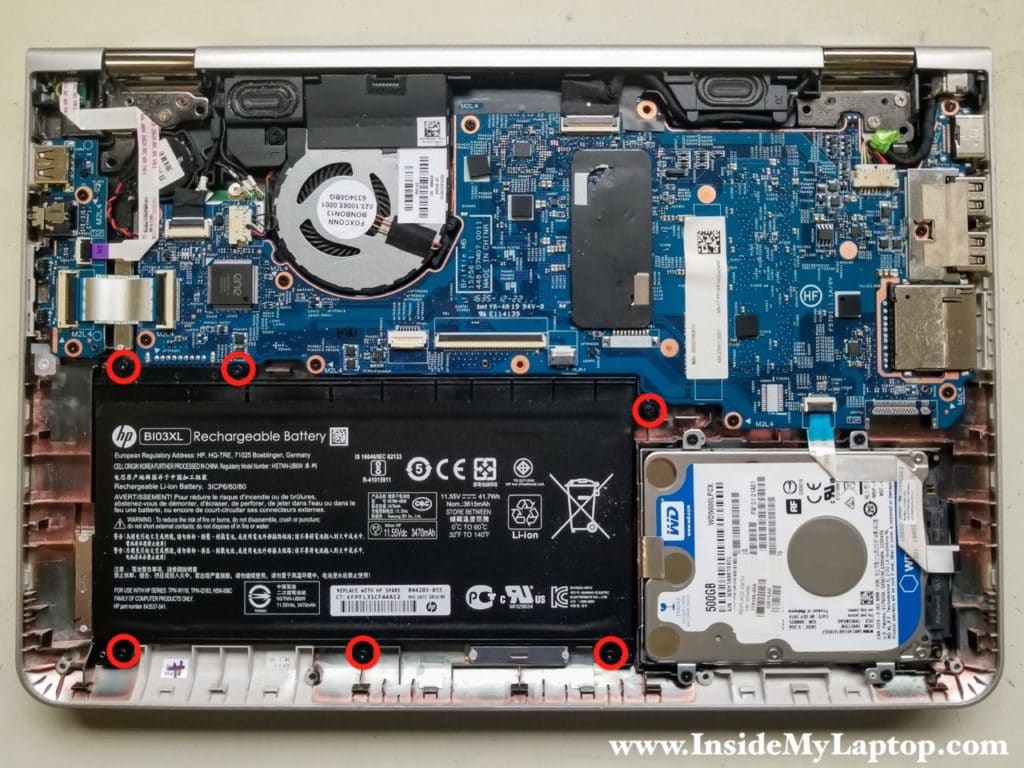
STEP 7.
Lift up the battery to disconnect it from the motherboard and remove it from the laptop.
This laptop has 11.55v-41.7Wh battery. HP part number: 844203-855. Battery type BI03XL.

STEP 8.
Remove four screws attaching the hard drive caddy to the bottom case.
Disconnect the hard drive cable from the motherboard.
Remove the hard drive assembly with the cable.

If you are replacing or upgrading the hard drive, you will have to transfer the cable and caddy to the new one. The caddy is attached to the drive by four screws on the sides.
Upgrading this regular hard drive to a 2.5″ SATA solid state drive will speed your laptop significantly.

STEP 9.
Disconnect the power button cable from the USB/Audio/Volume control board.
Remove one screw securing the power button.

STEP 10.
Remove the power button board with the cable.

STEP 11.
Disconnect the flat cable linking the USB/Audio/Volume control board to the motherboard.
Remove two screws securing the board.

STEP 12.
Remove the USB/Audio/Volume control board.

STEP 13.
Disconnect the following cables from the motherboard:
- Webcam and microphone cable (red rectangle)
- Speaker cable (orange rectangle)
- Display panel video cable (yellow rectangle)
- DC-IN power jack cable (green rectangle)
Also, disconnect both wireless antenna cables from the wireless card (red arrow).

Here’s how to release and disconnect the webcam/microphone cable and display panel video cable.

Un-snap both antenna cable connectors from the wireless card.
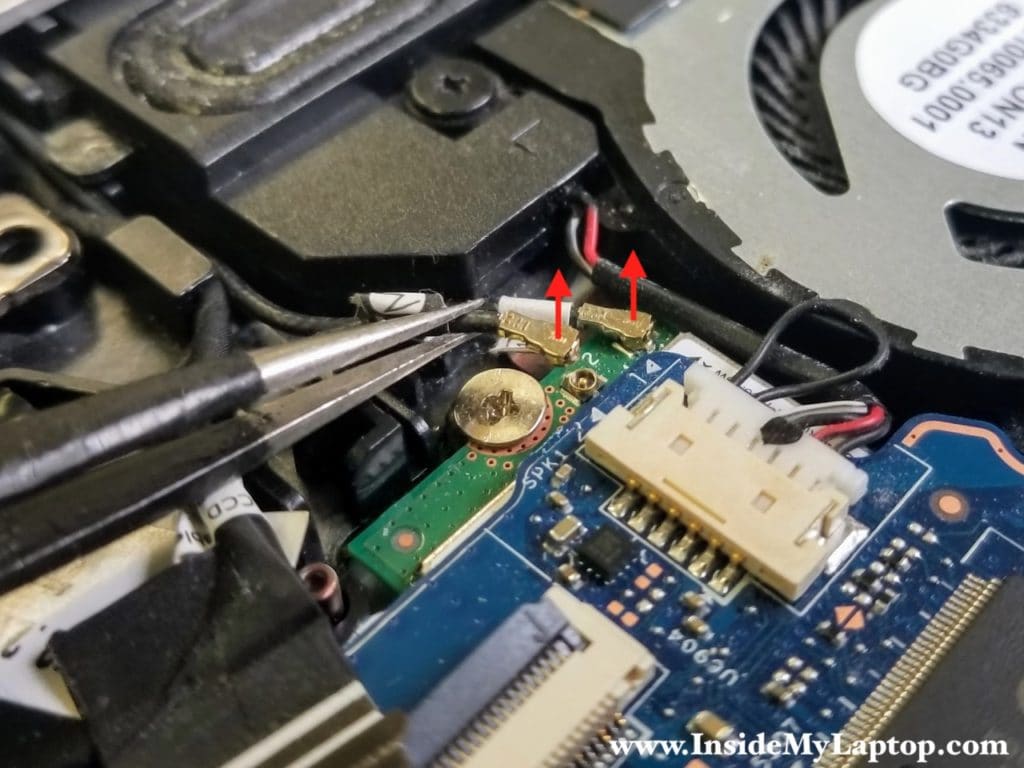
Here’s how to disconnect the speaker and DC-IN power jack cables.

STEP 14.
Remove nine screw (red circles) securing the motherboard.
Remove one screw (yellow circle) securing the wireless card.

STEP 15.
While removing the motherboard, unglue the RTC battery from the case. The battery attached to the case with adhesive tape.

STEP 16.
Remove the motherboard from the case.
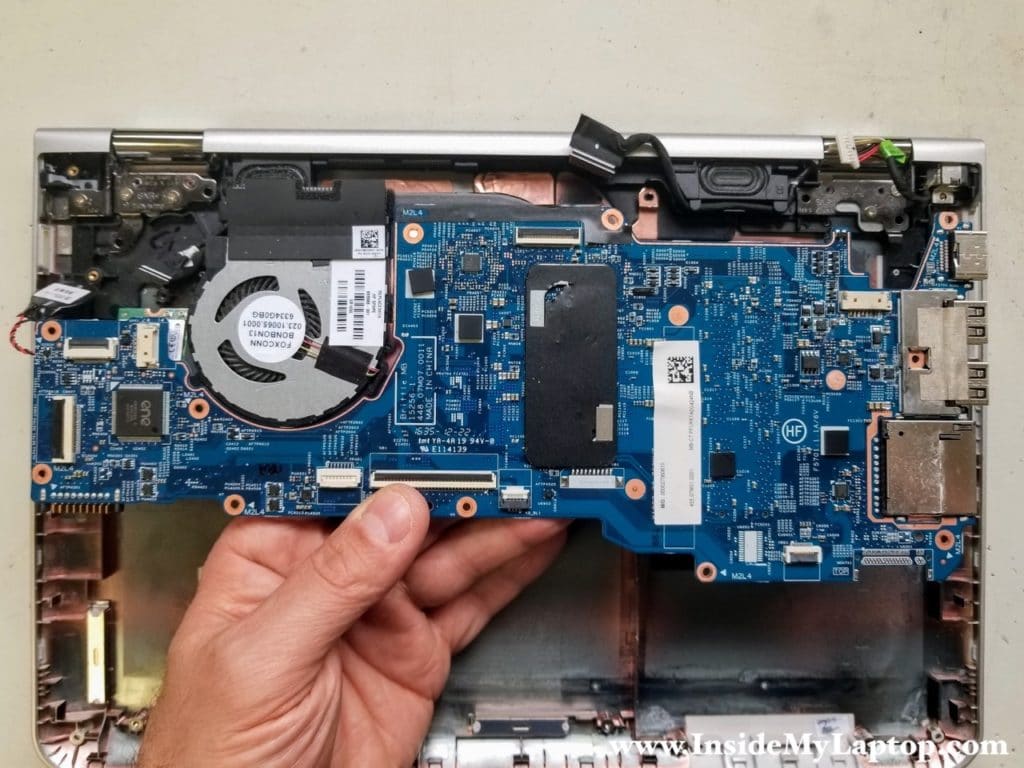
STEP 17.
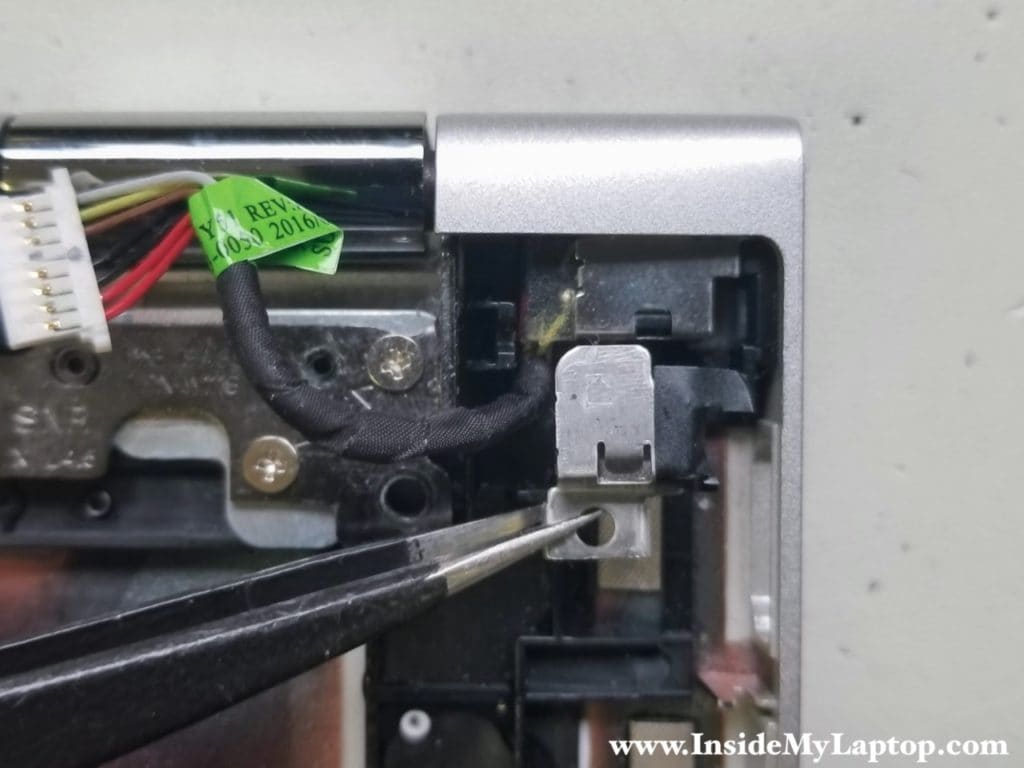
Now, when the motherboard is removed, you can access and remove the DC-IN power jack.
Remove the metal bracket from the jack.
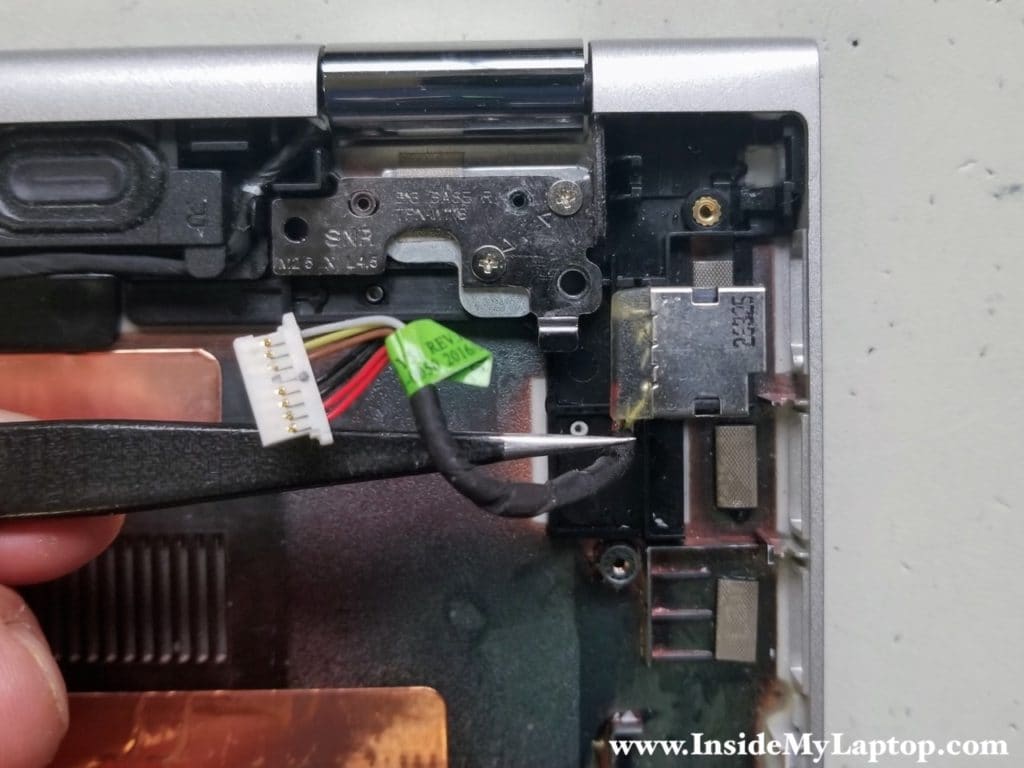
Pull the DC-IN jack out.
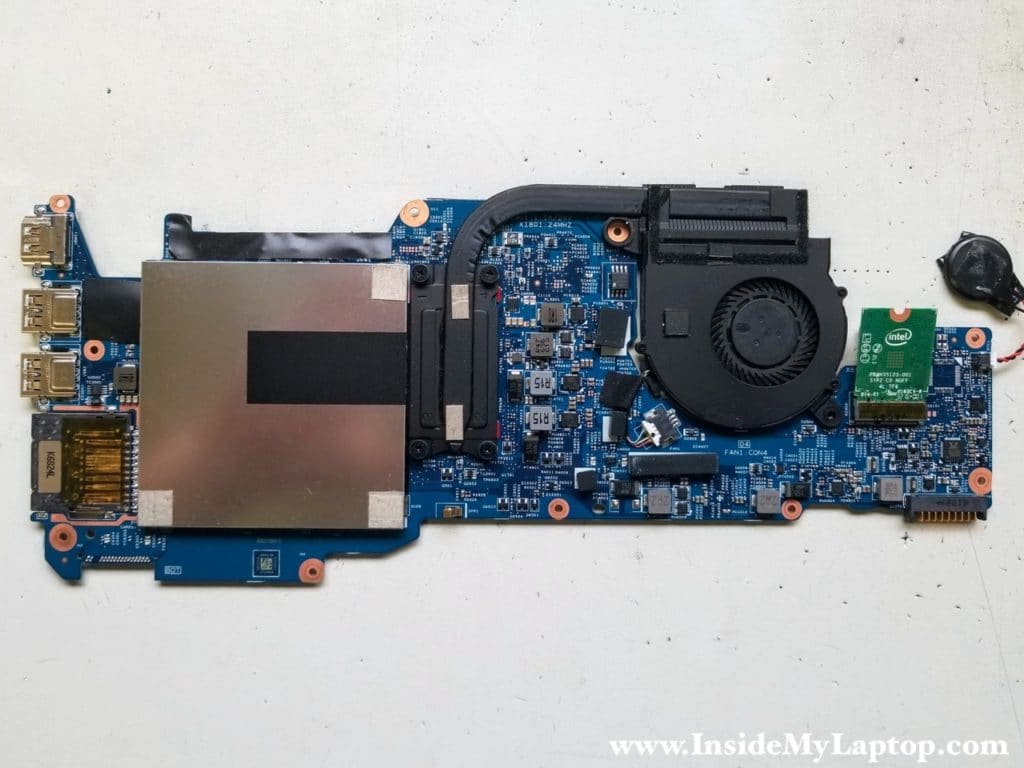
On the other side of the motherboard, you can access the wireless card, both memory modules and heatsink/fan assembly.
STEP 18.
Pull the wireless card out.

STEP 19.
Lift up and remove the metal cover hiding memory modules.
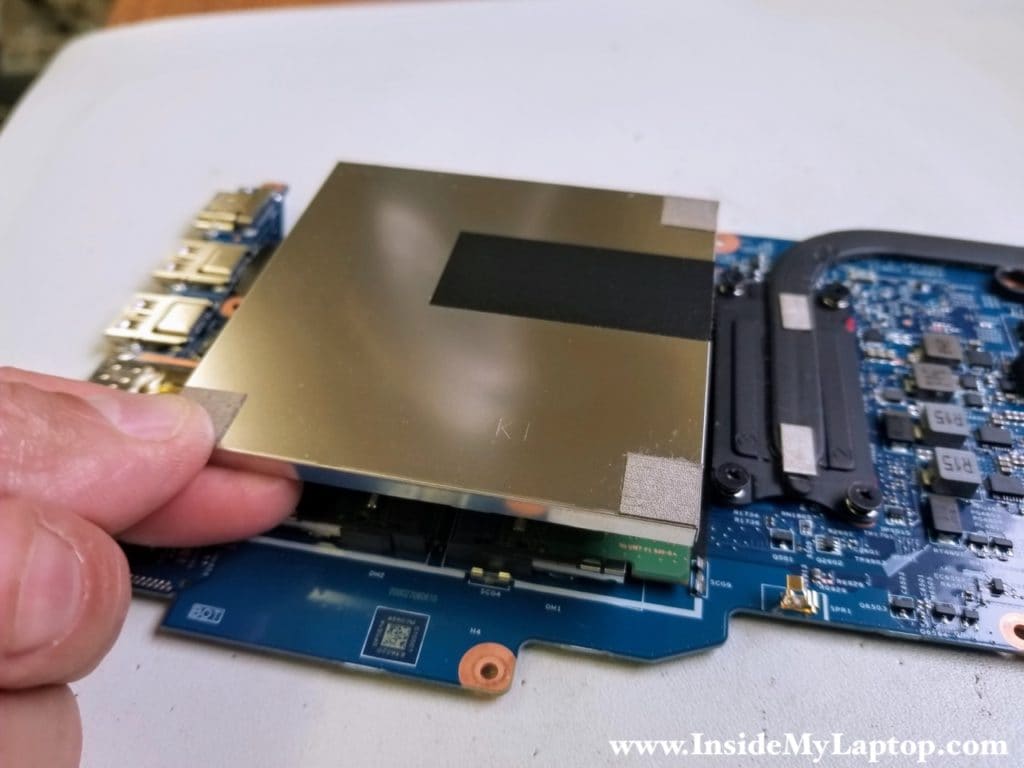
STEP 20.
HP Pavilion x360 m3 laptop has two removable memory modules. Unfortunately, in order to access them it’s necessary to remove the motherboard first.
Remove and replace memory modules if necessary.
You can install up to 16GB (2x8GB) DDR4 2400/2666/3200 SODIMM RAM modules.
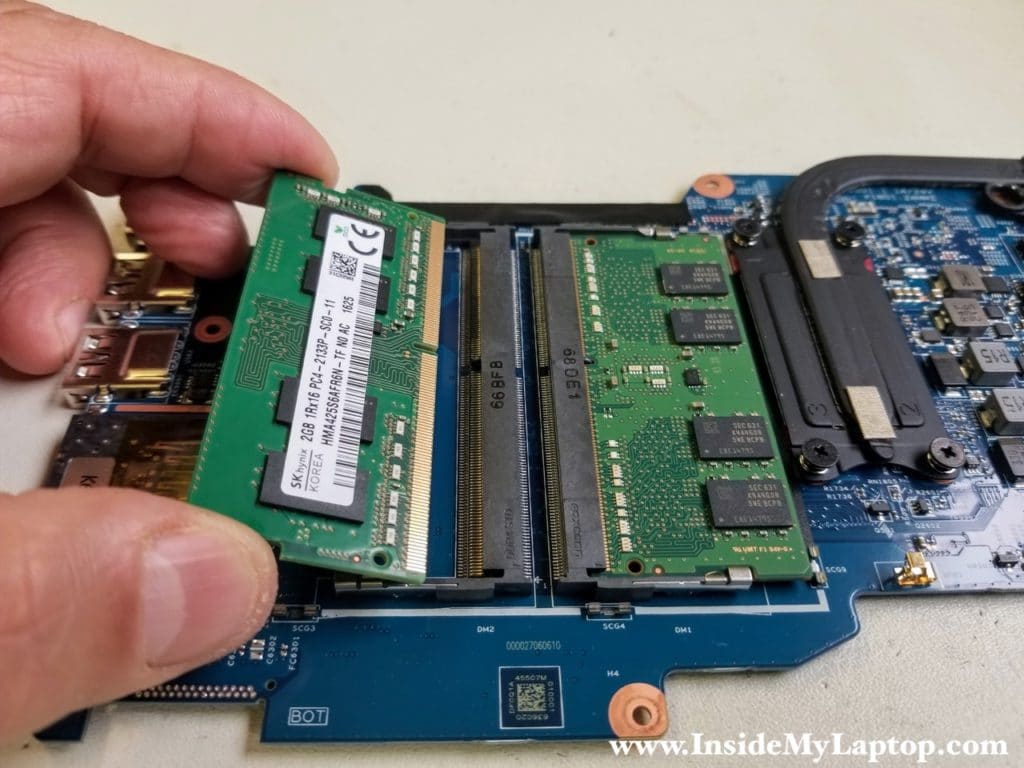
STEP 21.
Loosen four screws fastening the heatsink/cooling fan assembly to the motherboard.
Disconnect the cooling fan cable.

STEP 22.
Remove the heatsink/cooling fan assembly.
If thermal grease dried up, you will have to apply new thermal grease on the CPU before reinstalling the heatsink.
If thermal grease is soft and fresh, you can reuse it.
The cooling module HP part number is:Â 855966-001
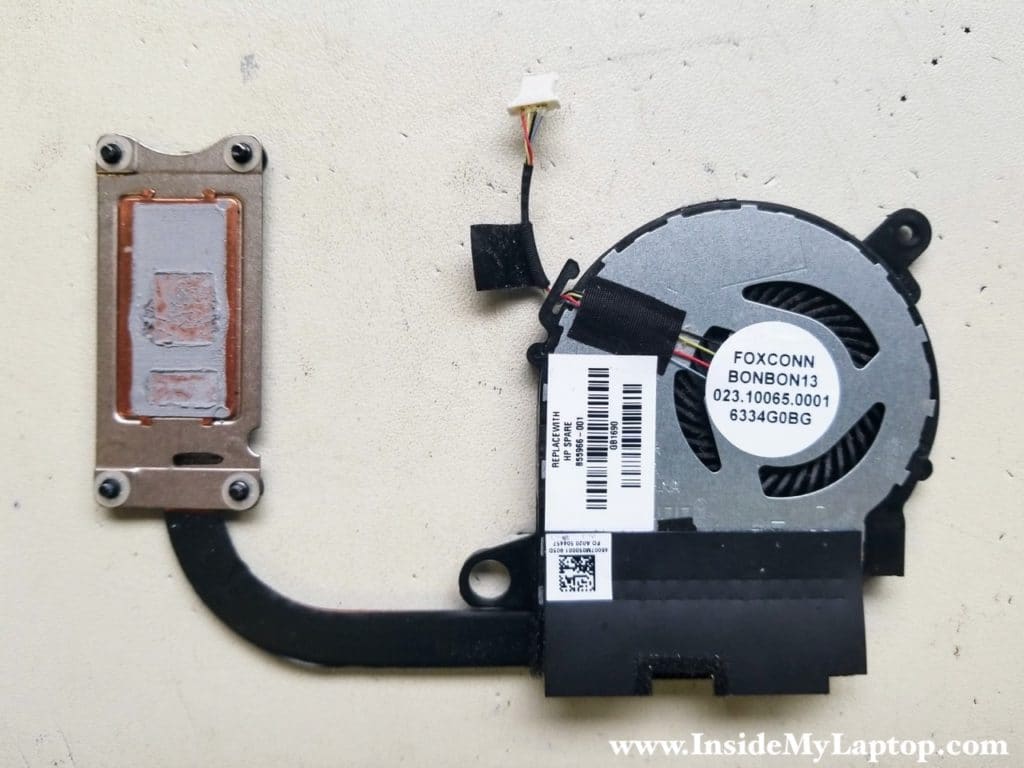
STEP 23.
It is possible to separate the cooling fan from the heatsink assembly.
Remove three screws securing the fan.

STEP 24.
Separate the cooling fan from the heatsink.

STEP 25.
There are five screws attaching the display panel to the bottom case.
Three screws on the left hinge and two screws on the right hinge.

After these screws are removed, you can separate the display panel from the bottom case.
