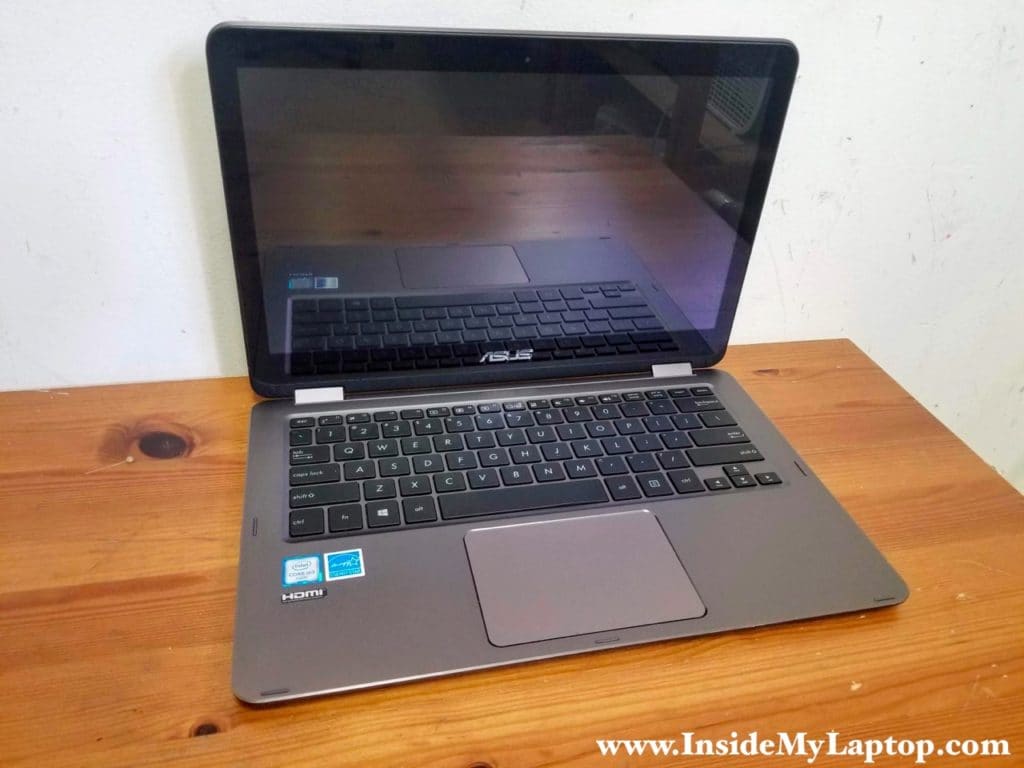
In this guide I explain how to disassemble an Asus ZenBook Flip UX360C laptop. This guide should also work for Asus UX360 and UX360CA models.
How is this laptop different from many other laptops? In an Asus ZenBook Flip UX360C two battery mounted under the motherboard and USB SD card reader board.
We’ll remove the battery not at the beginning of this laptop dismantle, as it down in most other disassembly guides, but at the very end.
STEP 1.
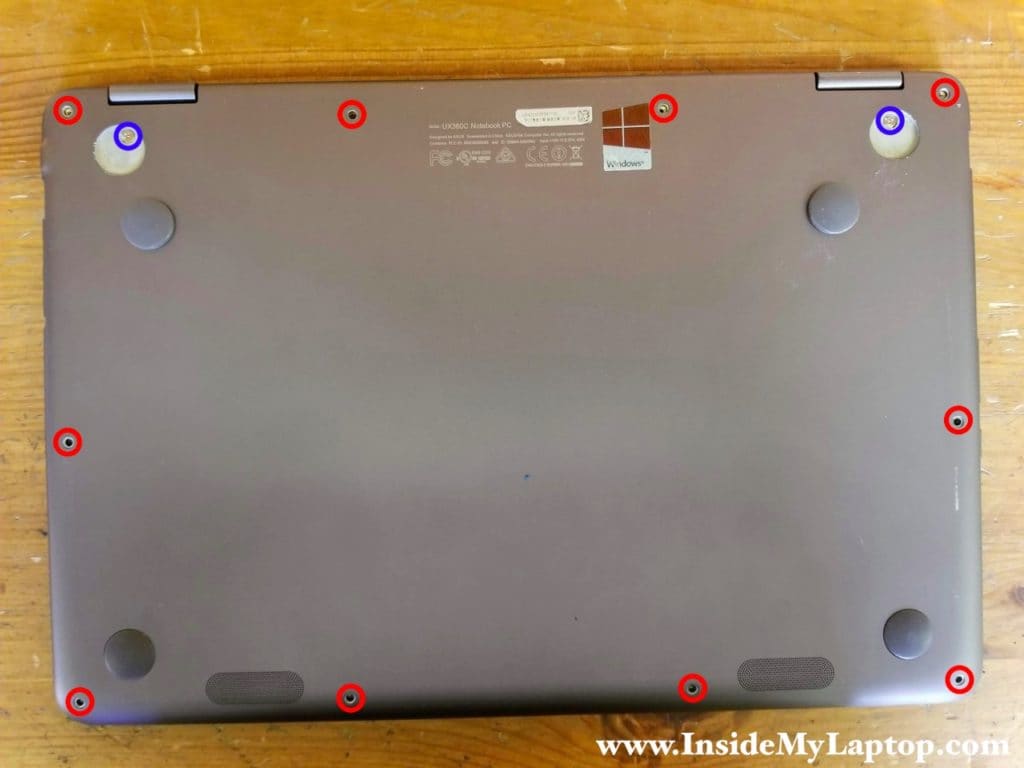
Remove twelve screws securing the laptop base assembly to the top case assembly.
Notice that two Phillips screws are hidden under the rubber feet.
STEP 2.
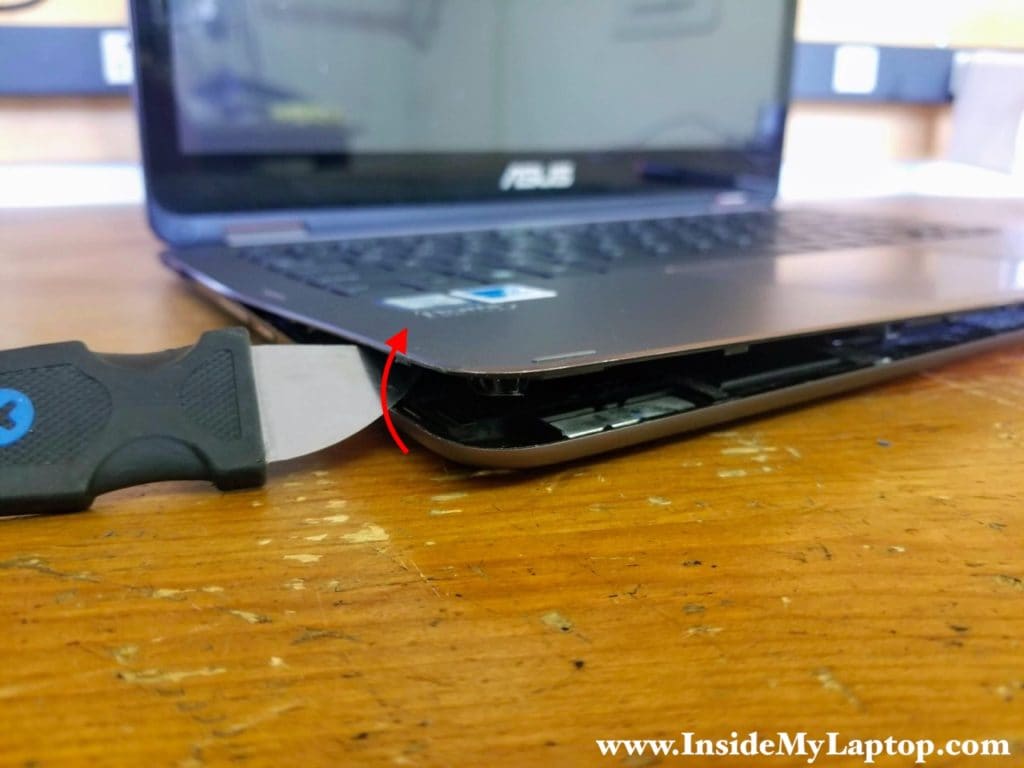
Using a thin case opener tool start separating the top case from the base.
You’ll have to move the case opener along the side of the top case and pry it up in order to unlock hidden latches.
STEP 3.
Lift up the top case assembly but pay attention to the touchpad and keyboard cables still connected to the motherboard and USB SD card reader board.
It’s necessary to disconnect these cables before you remove the top case assembly completely.
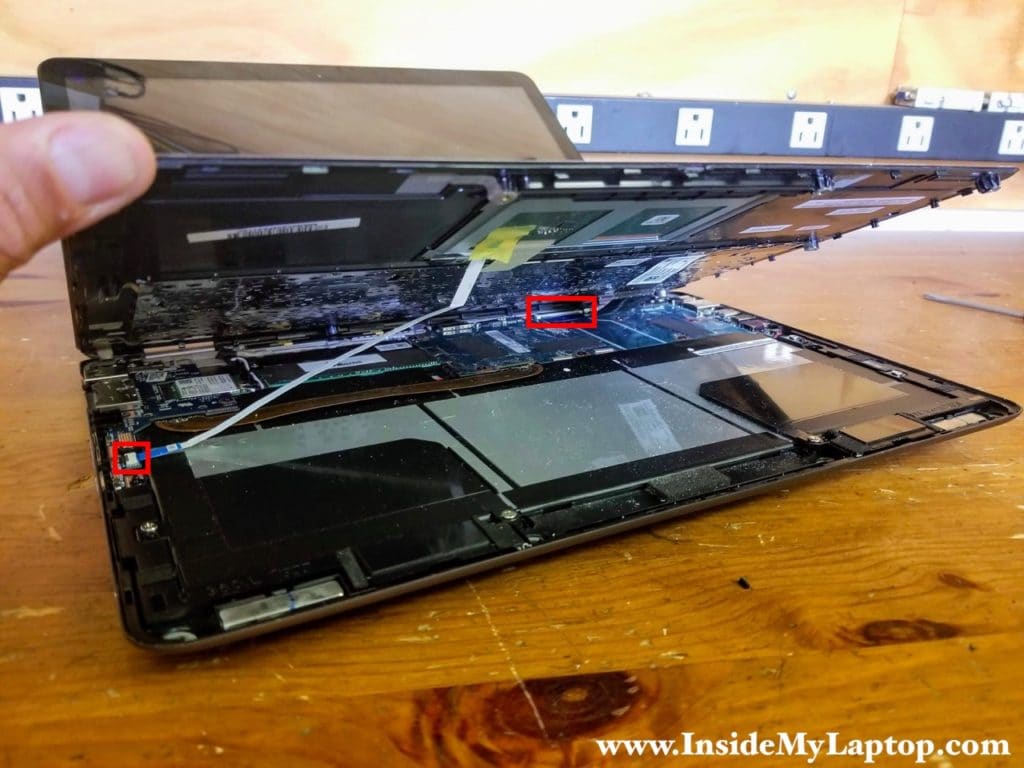
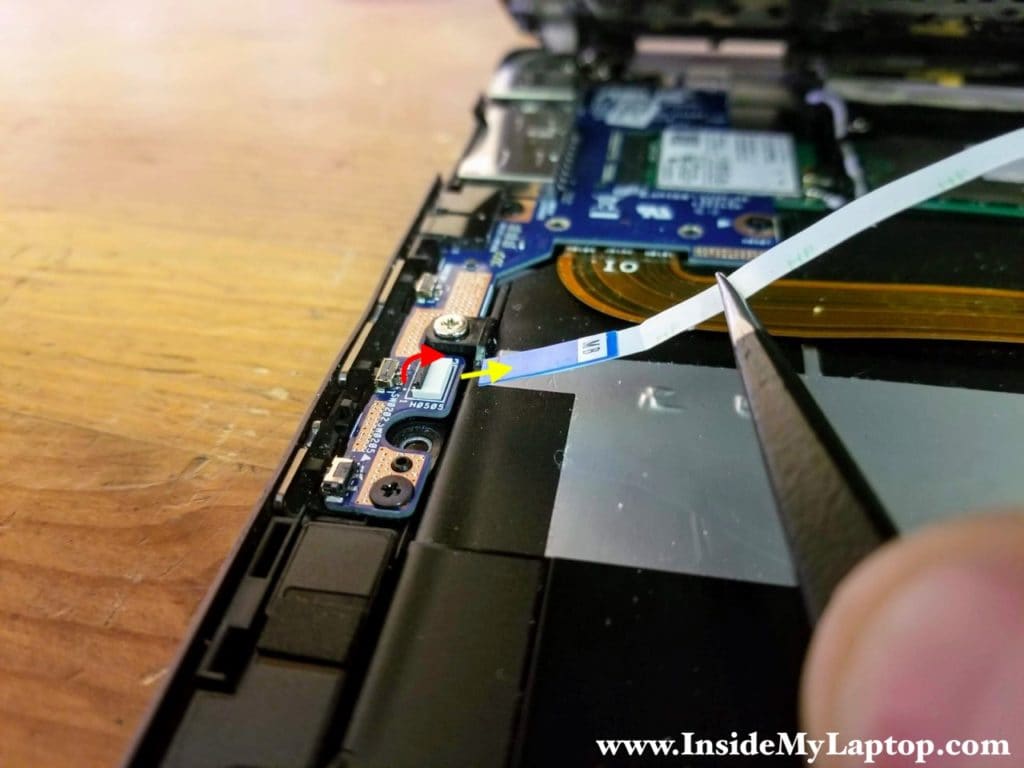
Here’s how to disconnect the touchpac cable from the I/O board (USB port, SD card reader and power button board).
1. Unlock the connector by lifting up the locking tab (red arrow).
2. Carefully pull the touchpad cable out (yellow arrow).
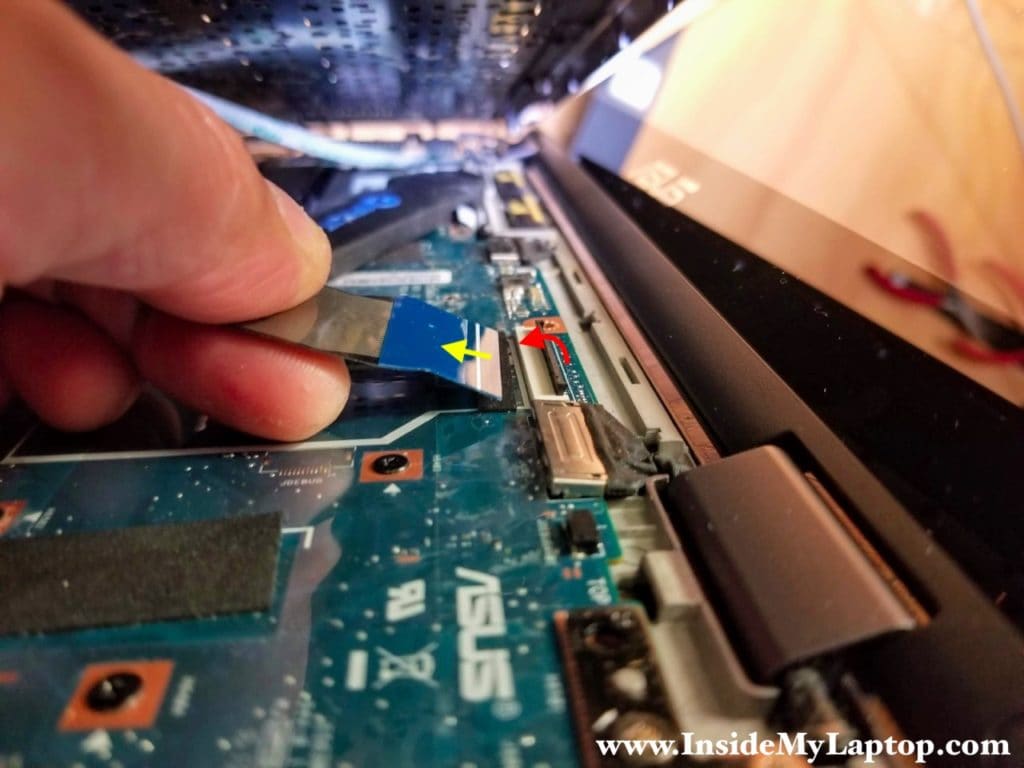
Disconnect the keyboard cable. Use the same technique to unlock the connector and release the cable.
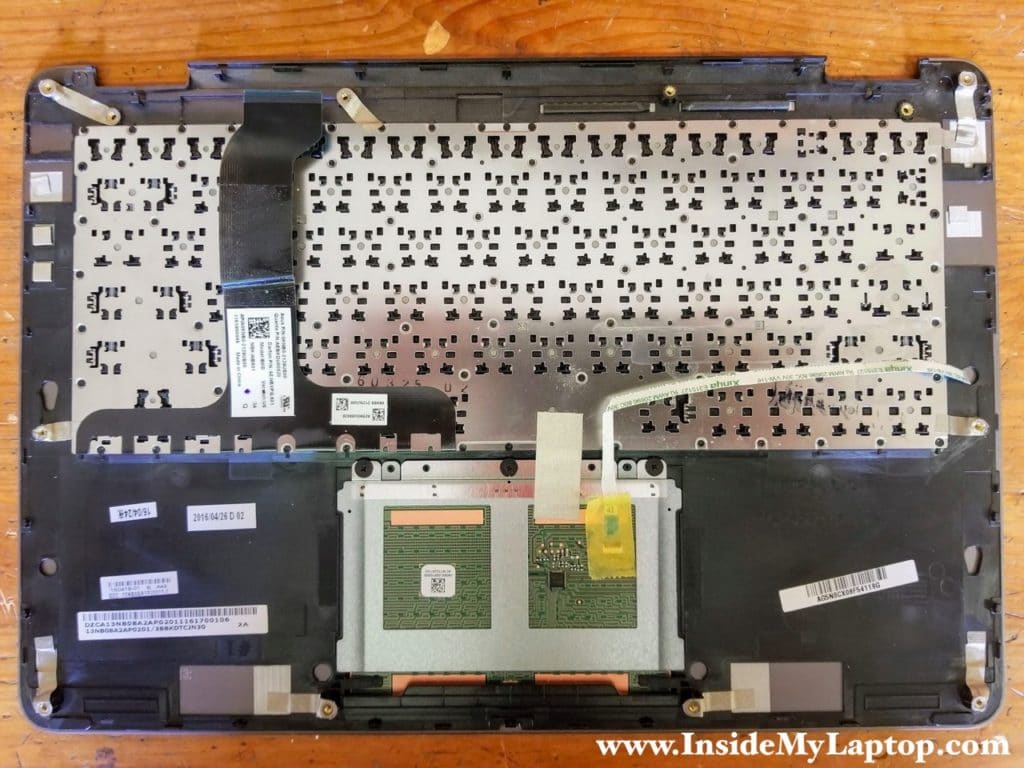
Here’s a photo of the bottom side of the top case (palmrest/keyboard/touchpad) assembly.
In an Asus ZenBook Flip UX360C laptop the keyboard is permanently riveted to the top case. The touchpad, on the other hand, can be easily removed and replaced if necessary.
STEP 4.
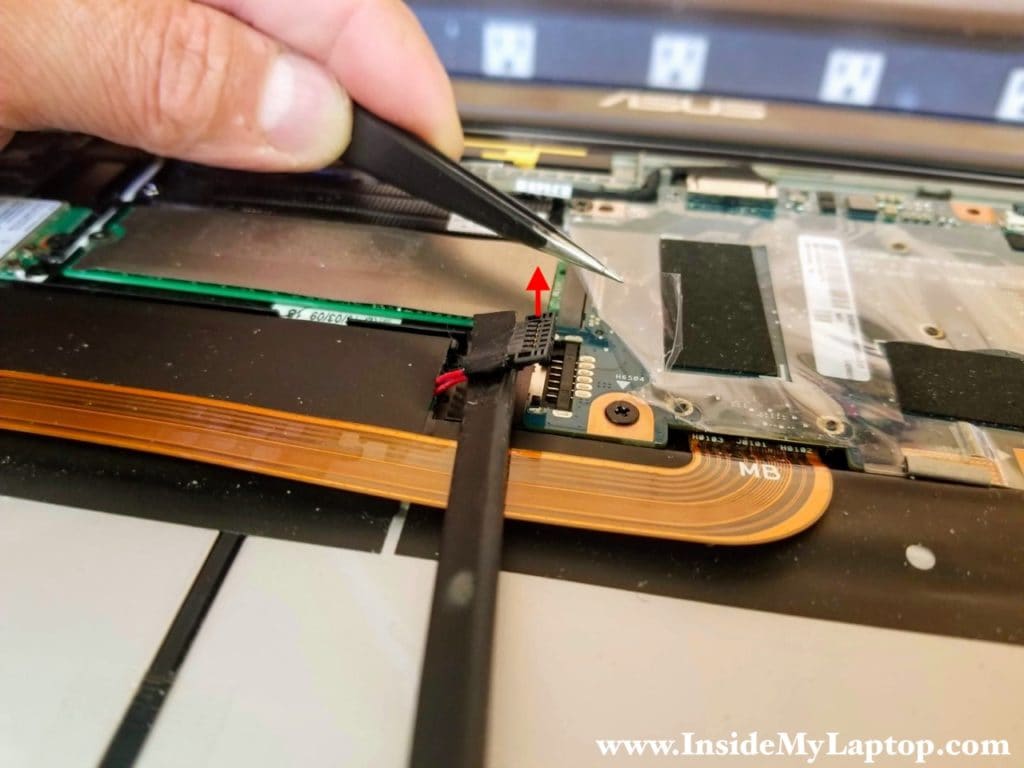
After the top case is removed we can disconnect the battery cable.
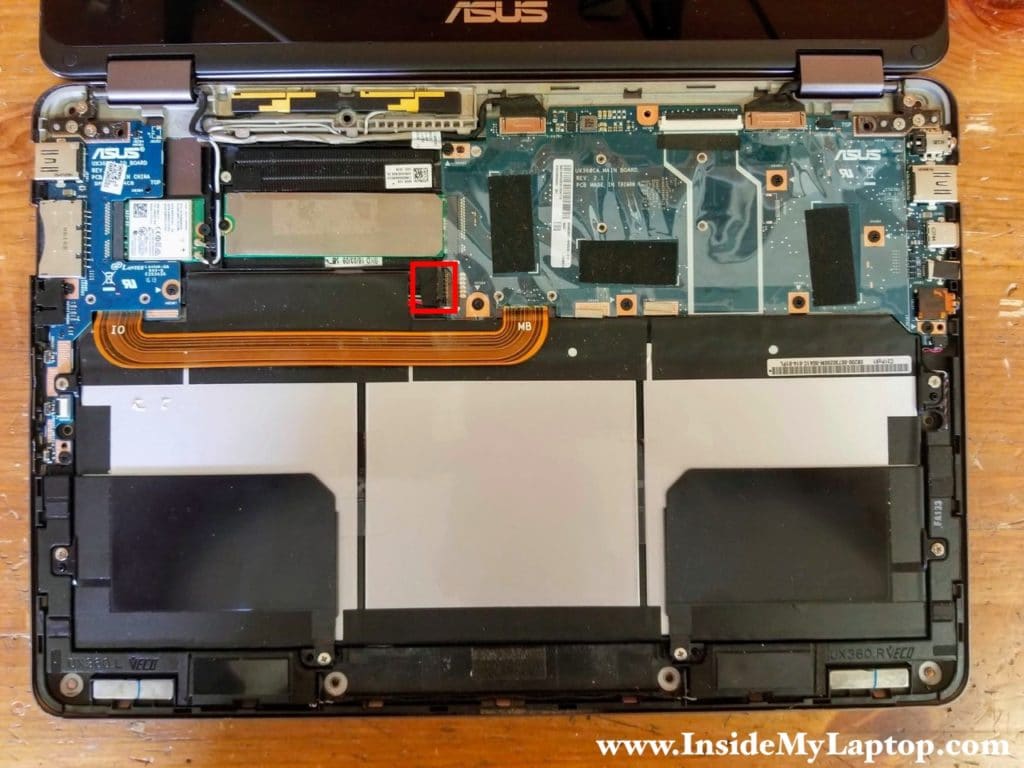
Lift up the battery cable connector to disconnect it from the motherboard.
Do not use a screwdriver or other metal tool for disconnecting the cable. You can accidentally short metal pins.
Use fingernails or a plastic stick for that.
STEP 5.
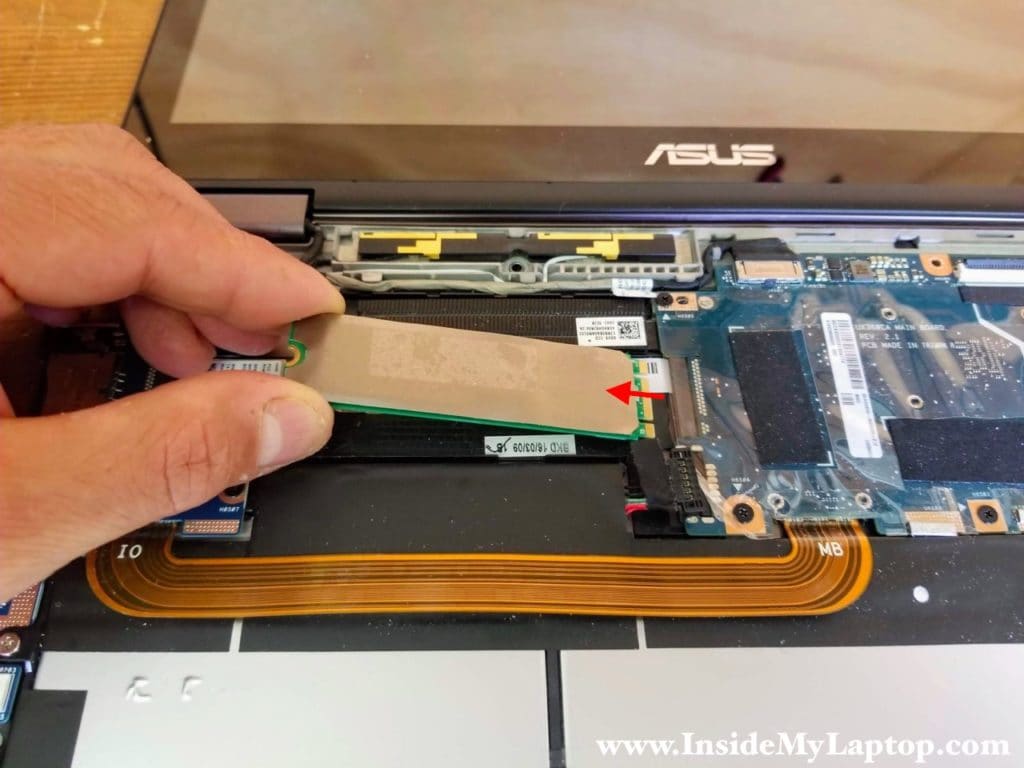
Remove one screw securing the solid state drive.
Pull the SSD out of the slot and remove it. This is m.2 SATA III solid state drive (type 2280).
STEP 6.
Remove six screws securing the display hinges to the base assembly.
Disconnect two display cables from the motherboard.
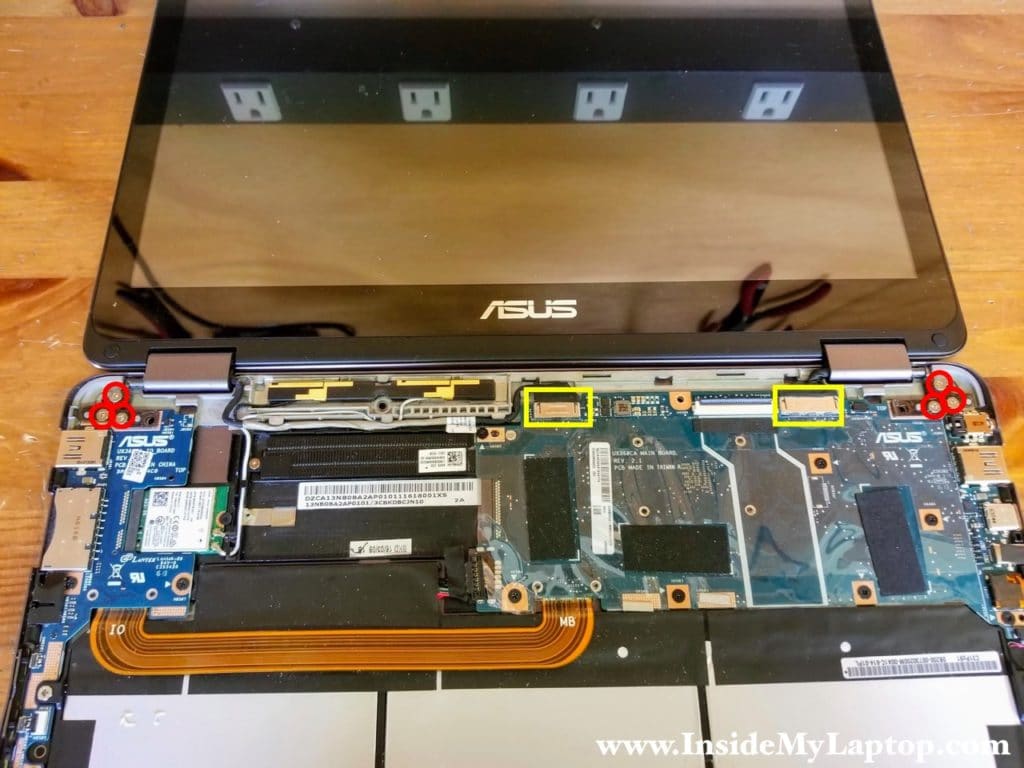
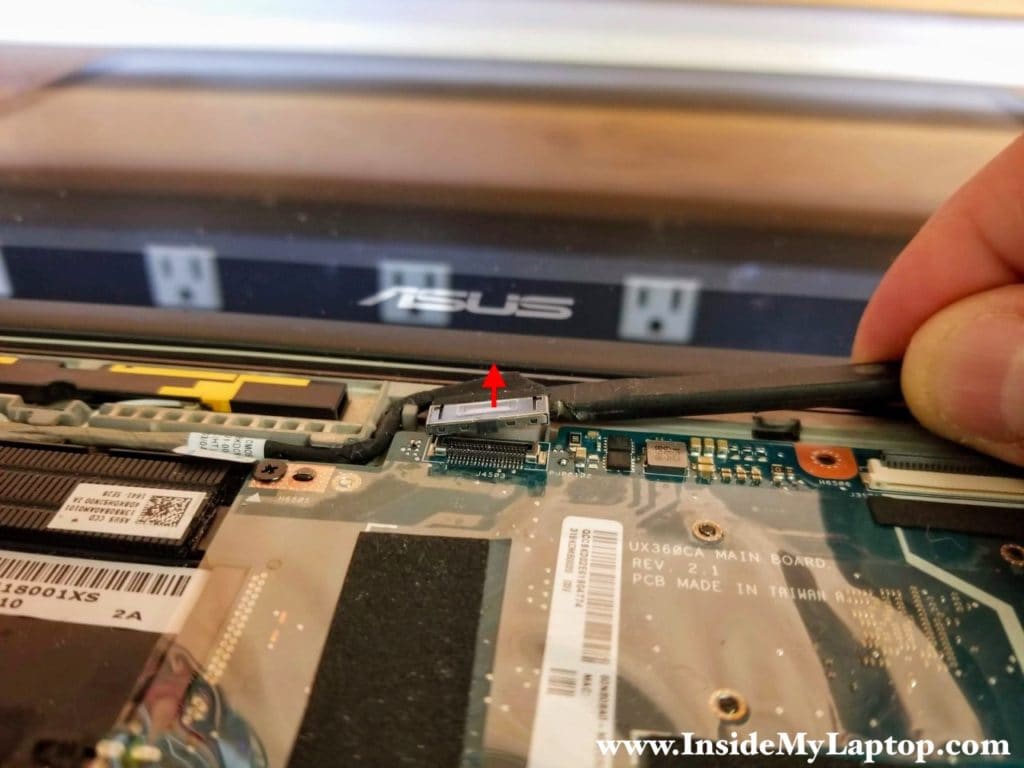
Here’s how to disconnect the display cables.
Insert a plastic stick under the cable connector and pry it up.
STEP 7.
Separate the display panel from the base assembly.
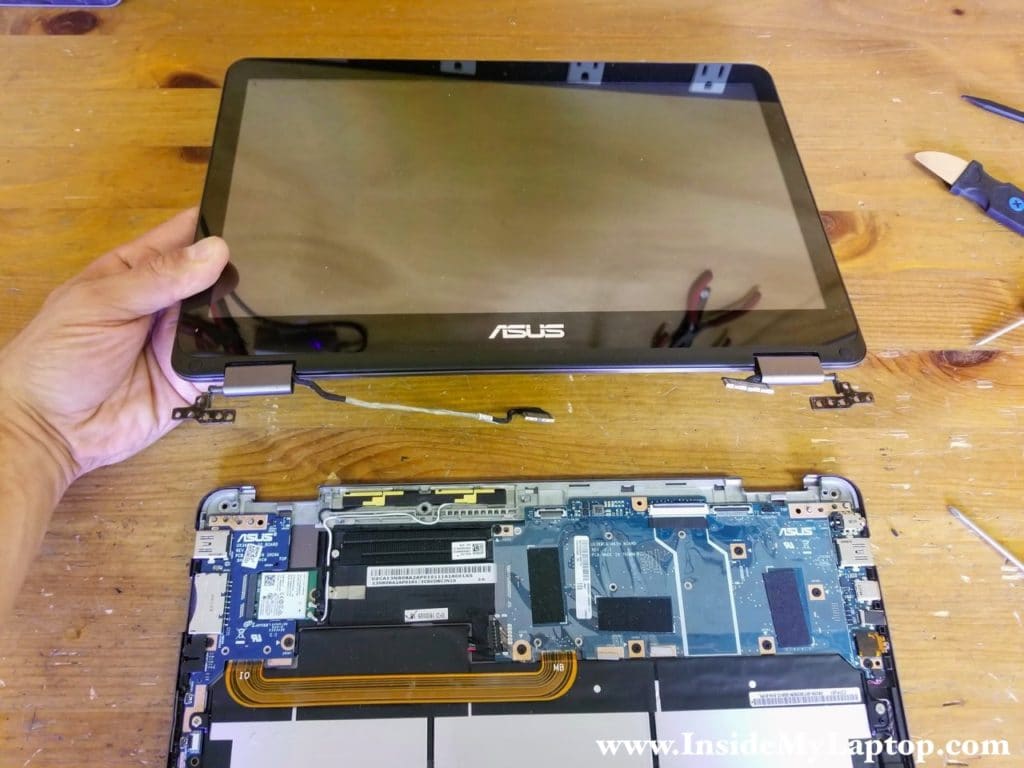
STEP 8.
Disconnect two antenna cables from the wireless card.
Remove one screw securing the wireless card.
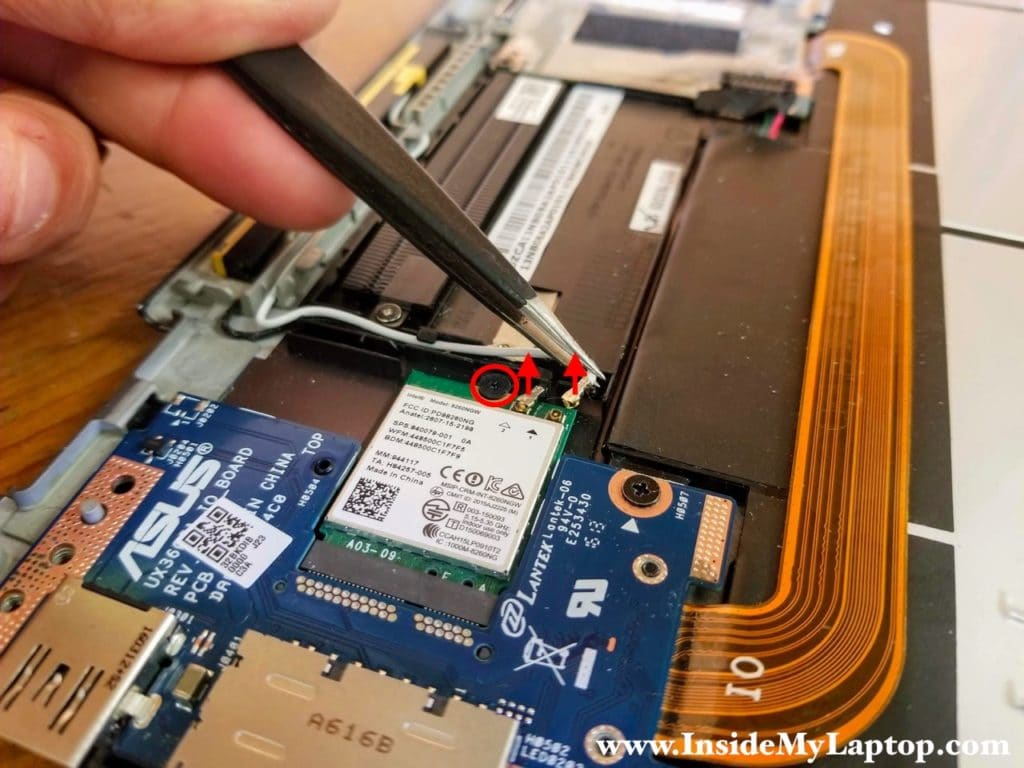
STEP 9.
Pull the wireless card out to remove it.
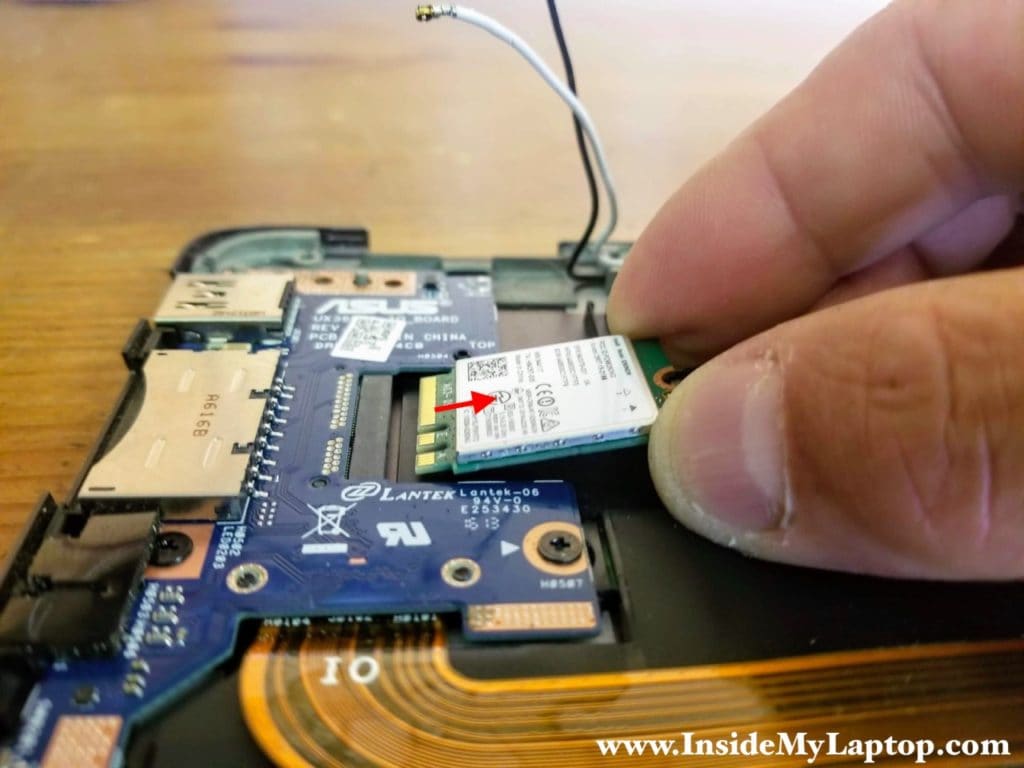
STEP 10.
Remove eight screws attaching the motherboard to the base assembly.
One screw on the heatsink (color coded in orange) is different from all other screws.
Disconnect the speaker cable from the motherboard.

The speaker cable is very small and has thin wires attached to it.
Be careful disconnecting this cable.
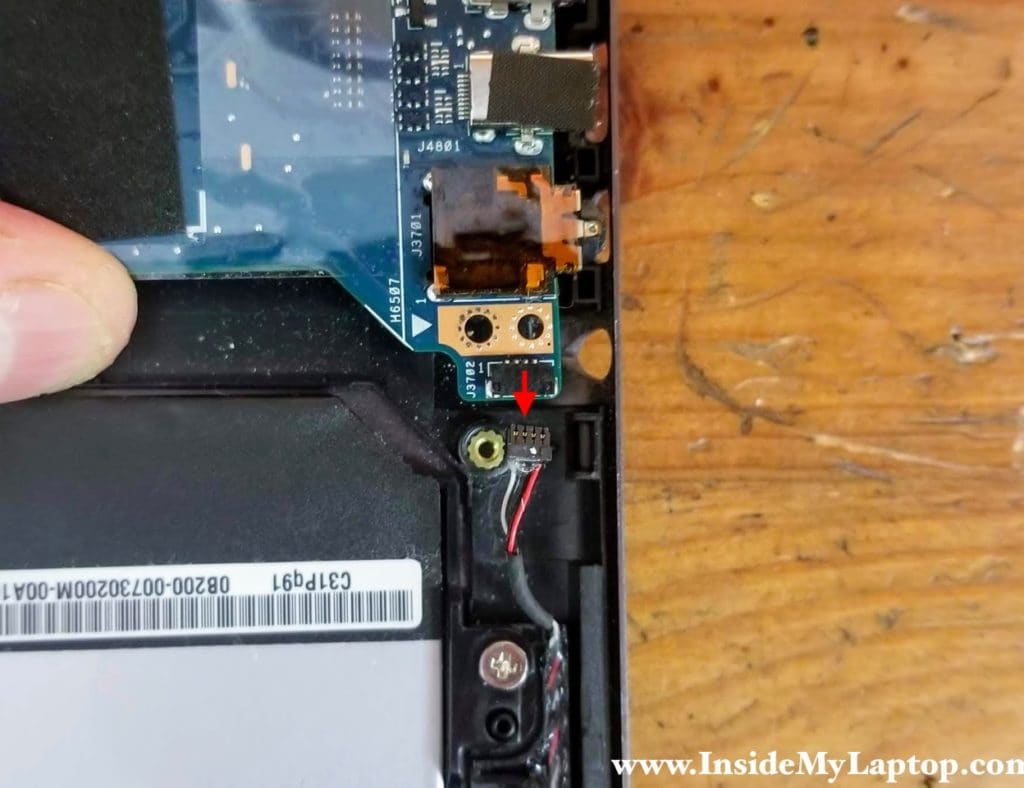
STEP 11.
Lift up the motherboard and place it upside down.
Before removing the motherboard it’s necessary to disconnect the I/O cable on the other side.
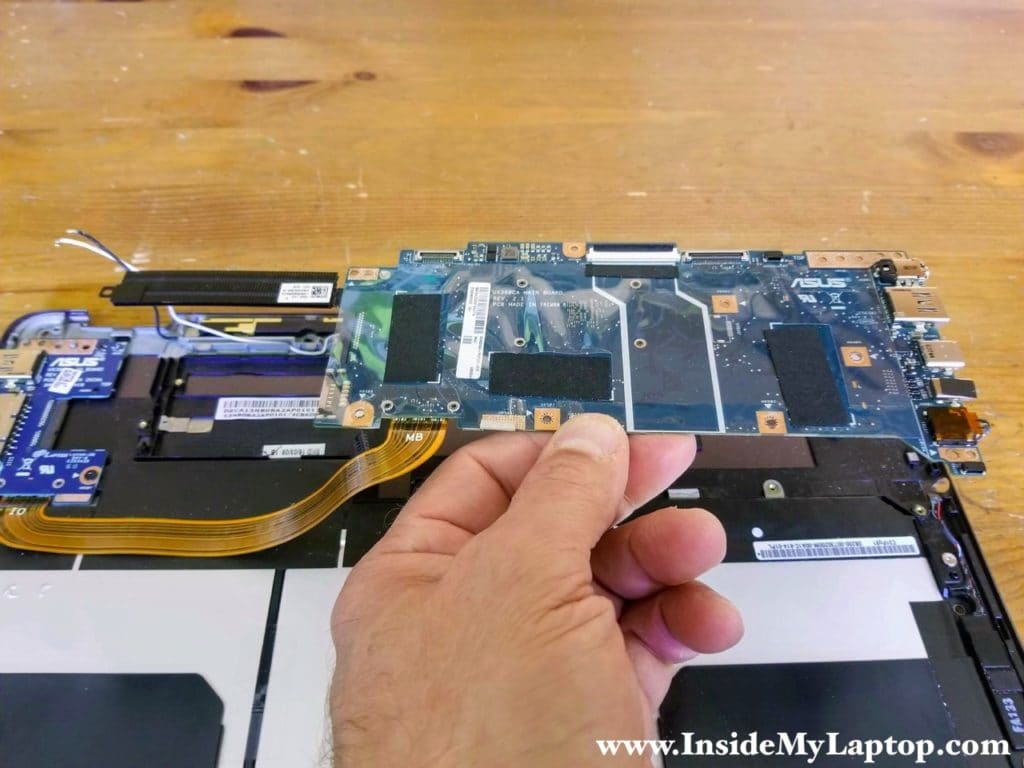
STEP 12.
Remove two screws securing the I/O cable connector and disconnect the cable.
Now you can remove the motherboard.
By the way, Asus ZenBook Flip UX360C motherboard has no memory slots. All memory is built into the motherboard. Memory cannot be removed and upgraded.
The DC jack is soldered to the motherboard and cannot be easily replaced.
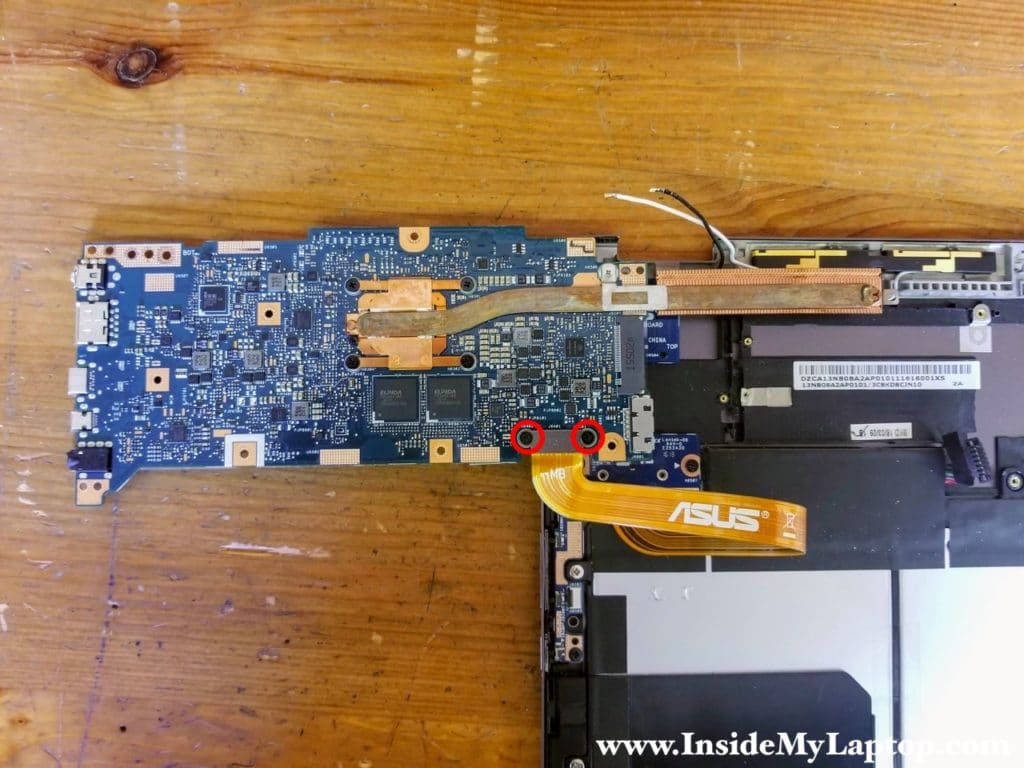
STEP 13.
Remove six screws from the battery (red) and one screw from the I/O board (yellow).
One of the battery mounts located under the board.
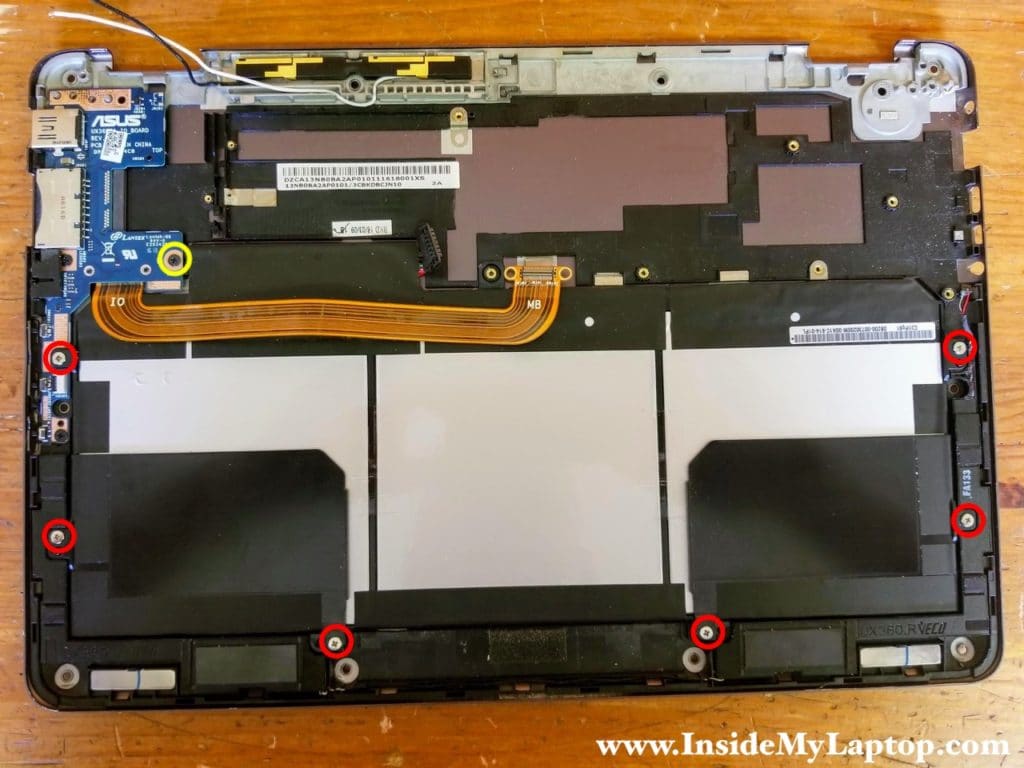
STEP 14.
Carefully lift up one side of the I/O board (yellow arrow) and slide the battery from under the board (red arrow).
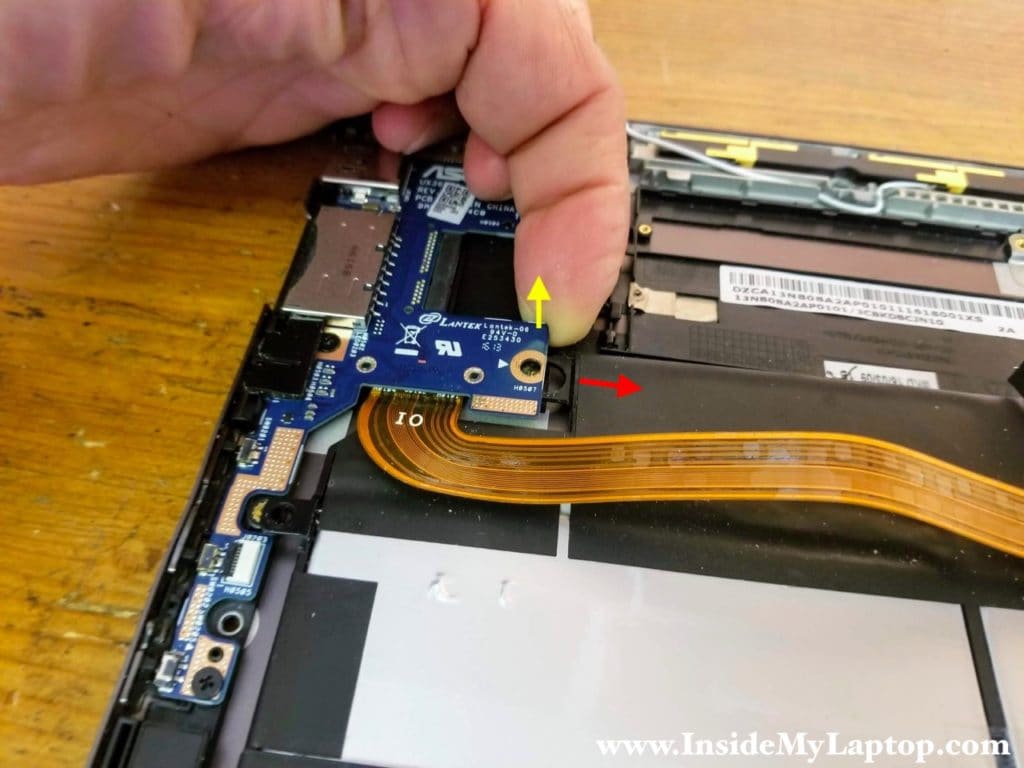
STEP 15.
Now you can remove the battery completely.
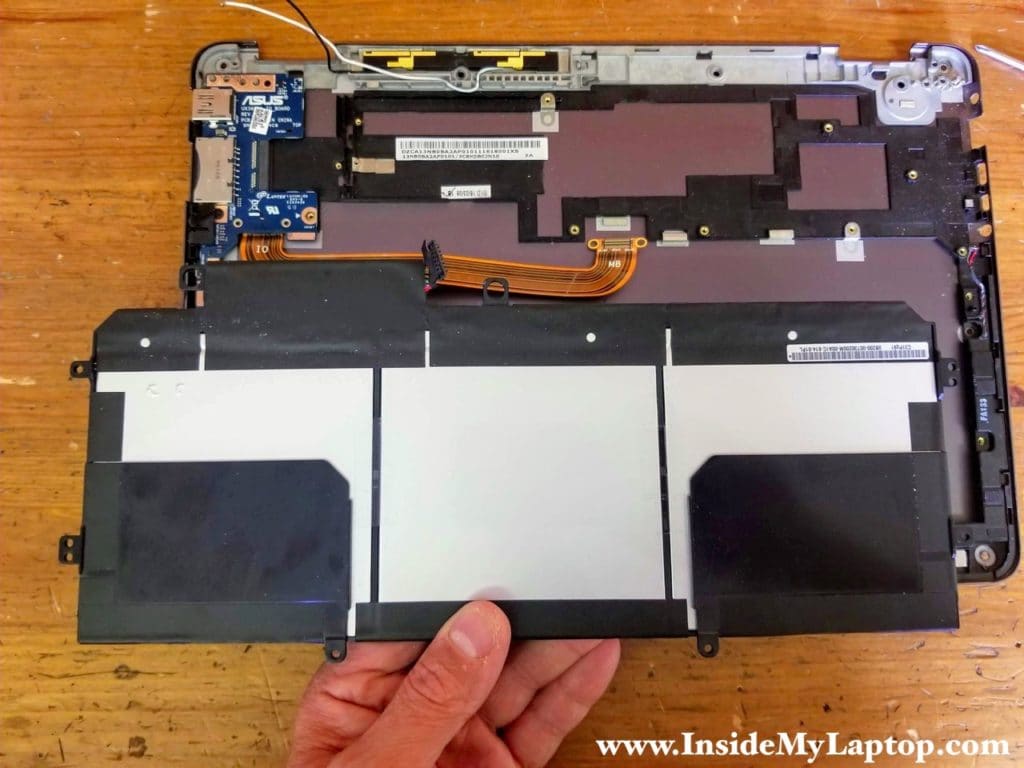
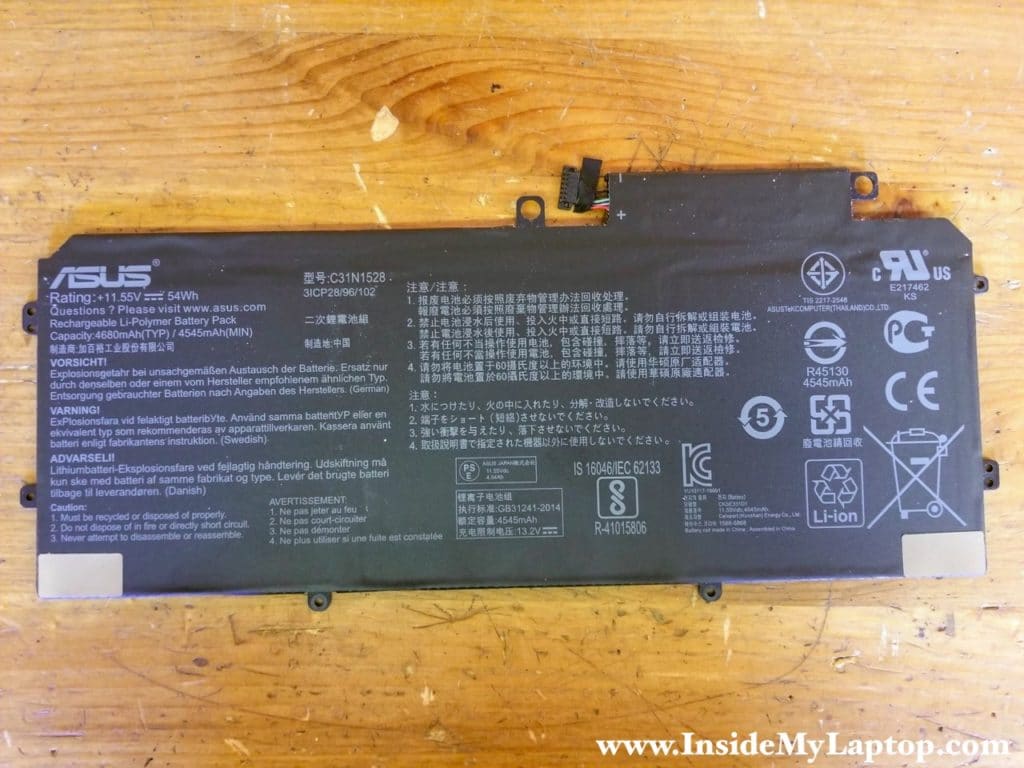
Here’s a photo of the other side of the battery.
Asus ZenBook Flip UX360C battery model: C31N1528. Same as for Asus UX360 and UX360CA.
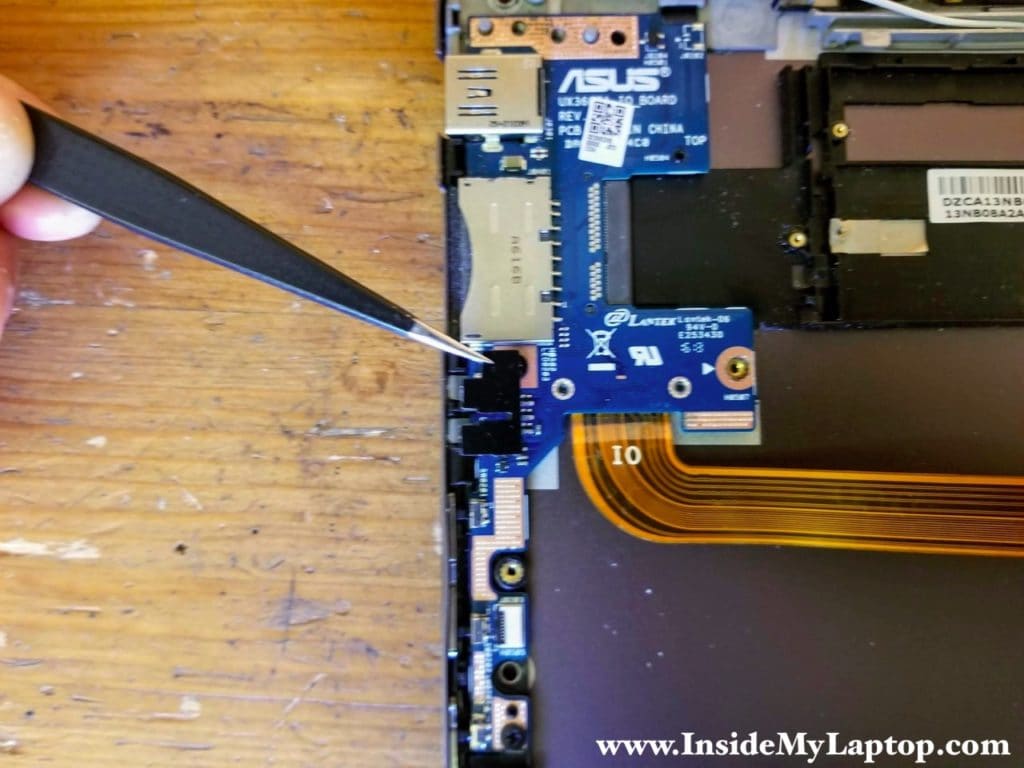
STEP 16.
Remove black cover from the I/O board.
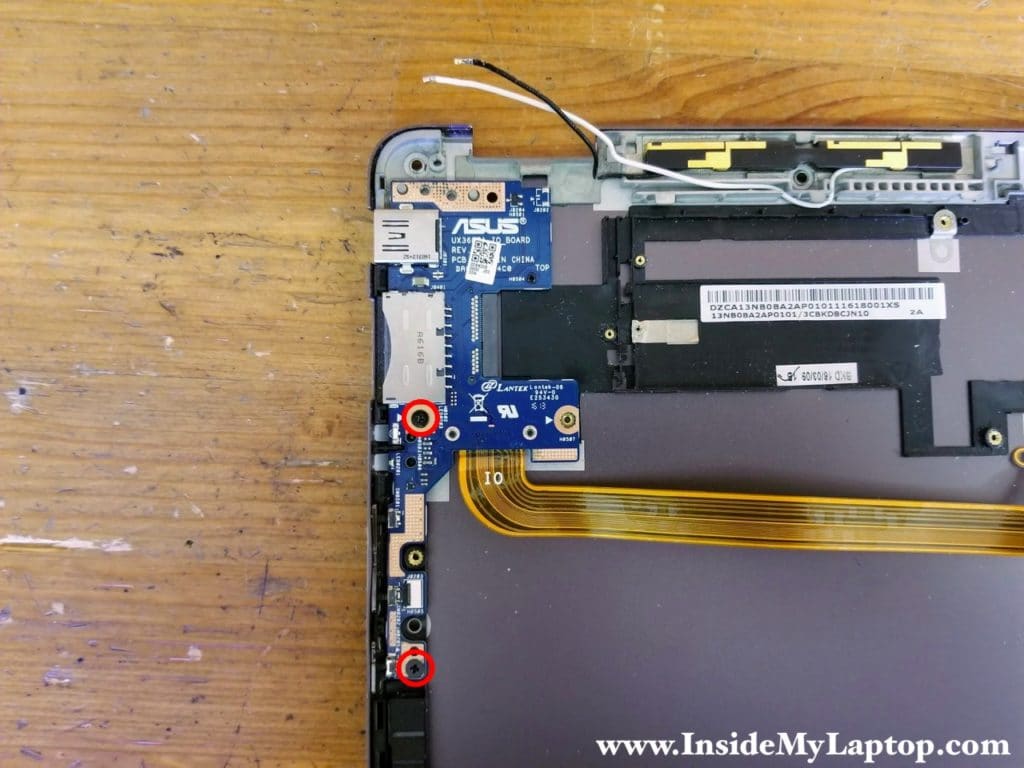
STEP 17.
Remove two screws securing the board to the base case.
STEP 18.
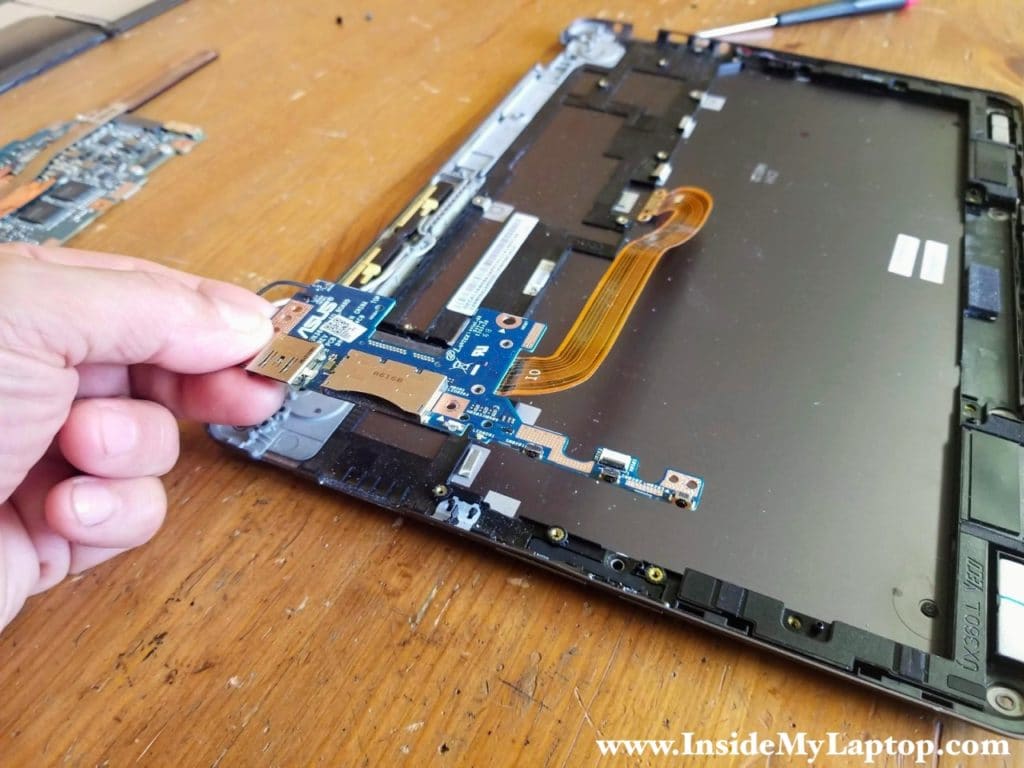
Remove the I/O board with the cable attached to it.
James
If I need to change the hinges, how do I disassemble the screen?
IML Tech
James, I don’t have display disassembly instructions for this particular unit (yet) but you can take a look at other models.
Here’s one for example: https://www.insidemylaptop.com/how-to-disassemble-asus-q553-q553u-q553ub/
It should give you an idea how to open up the display panel.
James
I have reassembled and my touch screen and track pad unresponsive
IML Tech
James, I’m not sure how far you disassembled the laptop but most likely this is connection related issue. Some cables are either disconnected or not connected properly.
1. For the track pad check out the connection shown in the step 3 (small red square). The track pad signal goes through this cable.
2. For the touchscreen check out both connections shown in the step 6. I’m not sure which one is responsible for the touchscreen operation.
James
I’ve checked both, and they both seem to be fastened properly. Is it possible that it may be a software issue? Driver etc.
All the touchpad settings have disappeared
IML Tech
If both worked before disassembly, it’s very unlikely to be a software issue. As I said, it most cases this is connection related issue. Did you check the track pad cable on both ends. Maybe you accidentally pulled the cable from the track pad.
James
I really appreciate the help so far
I’ve triple checked all the connectors and they are all secure. I checked the drivers in the device manager and the I2C HID Device driver has a yellow notification beside it. It gives a code 10 error saying the device cannot start and the request for the HID descriptor failed.
Is there anything I can do ?
IML Tech
James, I cannot troubleshoot this kind of failures remotely. Google for “I2C HID”. Looks like you are not the only one having this issue.
Mark
Hi, the touch pad ribbon connector came away from the circuit board. Do you know if this can be repaired?