This guide will help you to disassemble an Asus V550C Series laptop.
In my case, I am taking apart an Asus V550CA-DB71T model.
Make sure it’s turned off.
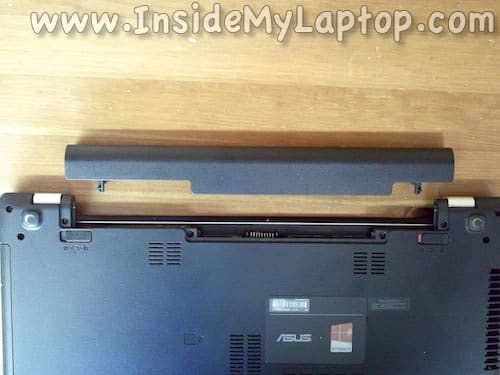
STEP 1.
Unlock and remove the battery.
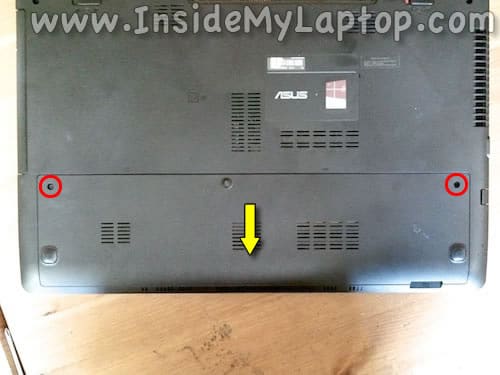
STEP 2.
Remove two screws securing the service cover.
Slide the cover to the shown direction.
Remove the cover.
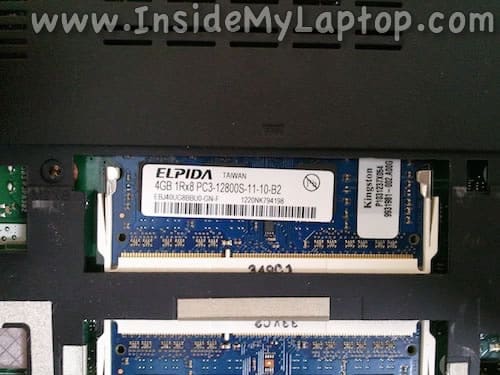
STEP 3.
Under the cover you will find the hard drive (regular SATA HDD) and two RAM (memory) modules.
This laptop can handle up to 8GB (2x4GB) DDR3-12800 SODIMM RAM modules.

Even though you can see both RAM modules, only one of the can be easily removed.
The upper module partially hidden by the laptop bottom cover.
In order to remove this module  it is necessary to remove the cover first.
It’s beyond my understanding why they designed it this way.
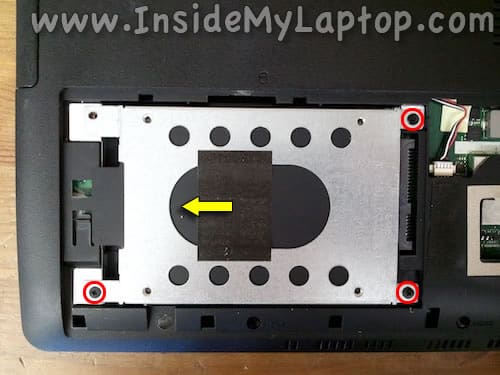
STEP 4.
Remove three screws securing the hard drive caddy.
Slide the hard drive to the left to disconnect it from the motherboard.
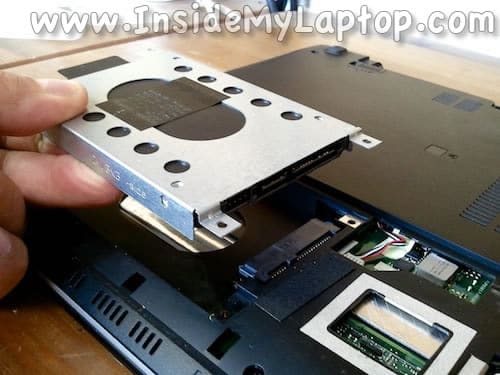
STEP 5.
Remove the hard drive assembly from the case.
Upgrading this regular 2.5″ hard drive to a 2.5″ solid state drive will speed up the laptop significantly.
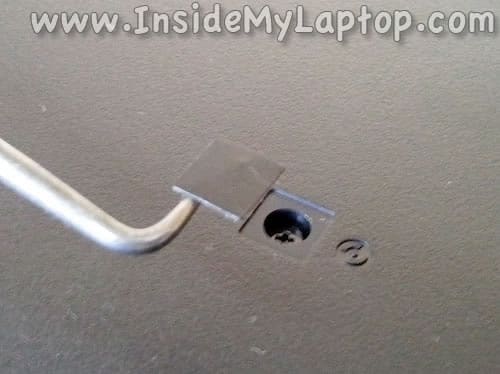
STEP 6.
Using a sharp object remove the screw cover hiding the screw for the optical drive.
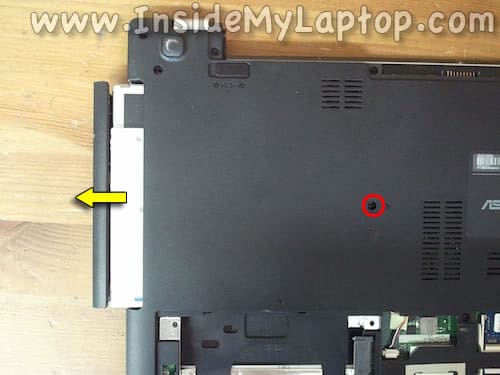
STEP 7.
Remove one screw securing the optical drive.
Pull the drive to the left and remove it from the case.
STEP 8.
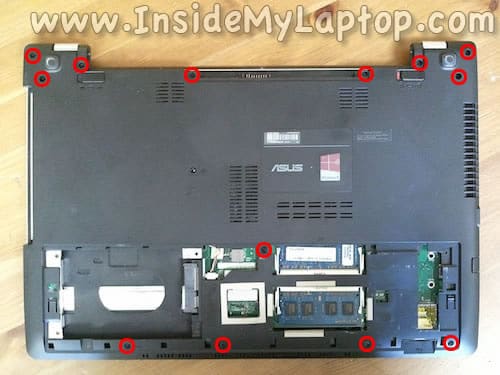
Remove all marked screws from the bottom.
You would suggest making notes or even draw a diagram for the removed screws locations.
There are different type of screws used to secure the bottom cover.
STEP 9.
Disconnect the speaker cable.
Do not pull by the wires. Unplug the white male connector by the edges.

STEP 10.
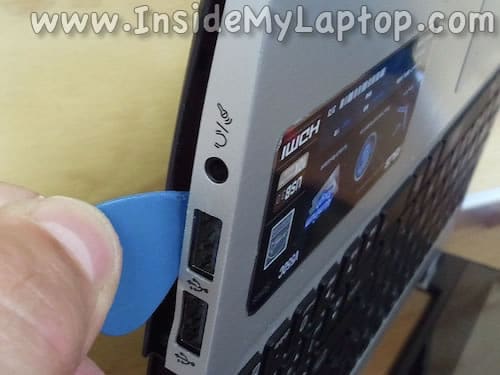
The bottom cover seated very tightly.
I had to use a guitar pick to separate the bottom cover from the palm rest/keyboard assembly.
STEP 11.
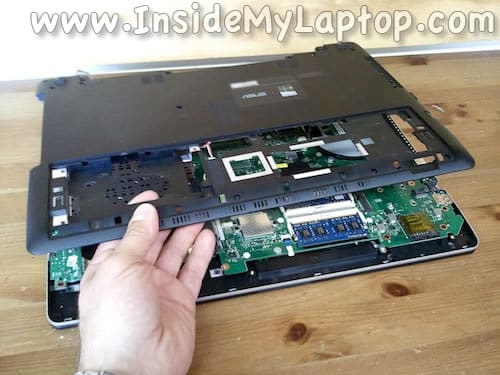
Remove the cover.
STEP 12.
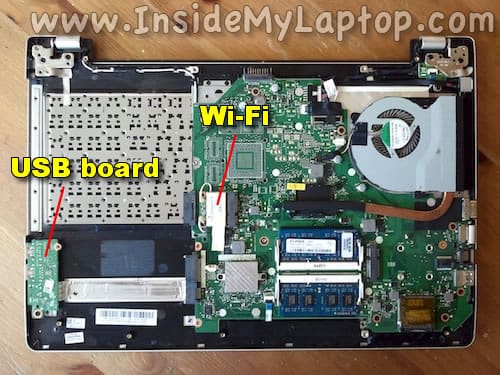
Both speakers mounted to the bottom cover.
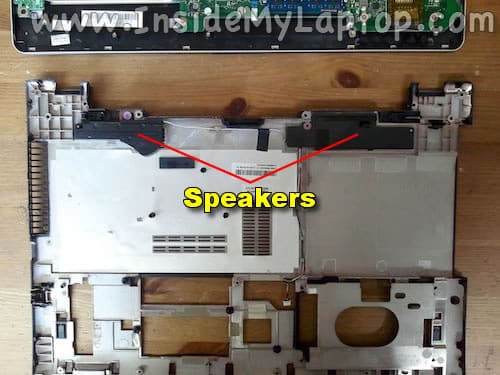
The USB board with audio jack is a separate board connected to the main board via flat cable.
The wireless card also can be easily accessed here.
When the bottom cover removed, you can remove the upper RAM module.
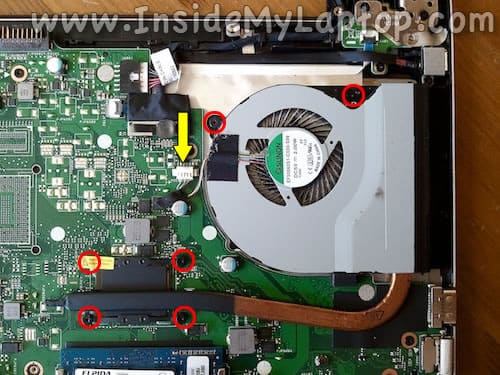
The cooling fan is part of the heat sink assembly.
In order to separate the heat sink assembly from the motherboard you’ll have to remove six screws and disconnect one cable.
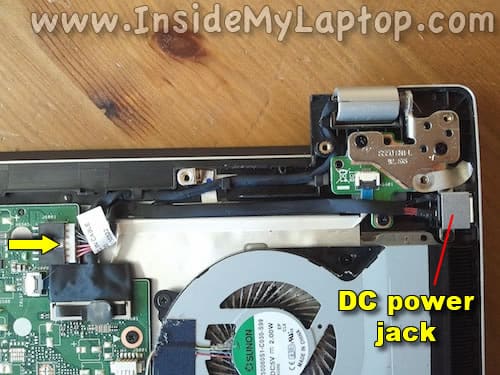
The DC power jack attached to a cable.
If the jack failed you simply unplug it from the motherboard and replace with a new one.
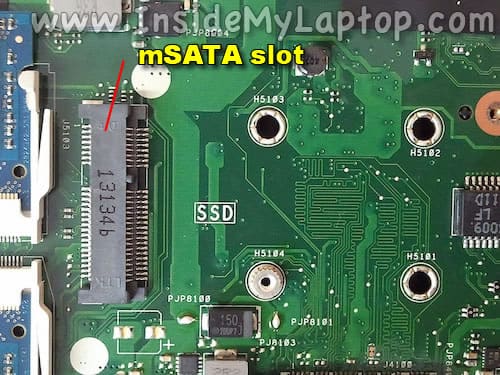
Asus V550CA-DB71T motherboard has a mSATA slot available for SSD upgrade.
Even though there is enough space for the full size mSATA SSD, the mounting stud locations suggest that you have to use mSATA Mini (half-size) SSD.
Thierry Schmitz
Very usefull guide. Many thanks