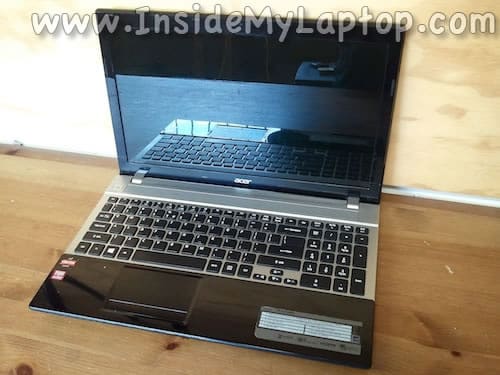
In the following guide I will disassemble an Acer Aspire V3-551-8469 laptop in order to remove the cooling fan.
The fan is mounted deep inside the case, under the motherboard.
STEP 1.
Turn off the laptop.
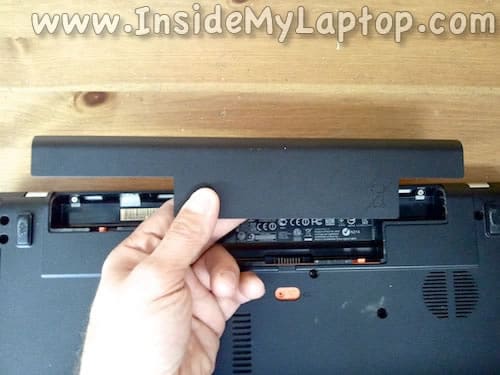
Unlock and remove the battery.
STEP 2.
Remove two screws securing the bottom cover.
Remove the cover.
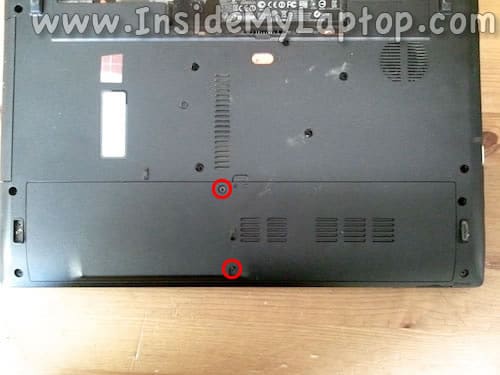
When the cover removed, you can access the hard drive, wireless card and both RAM slot.
I had only one 4GB RAM module installed.
This laptop can handle up to 8GB (2x4GB) DDR3-12800 SODIMM RAM modules.

STEP 3.
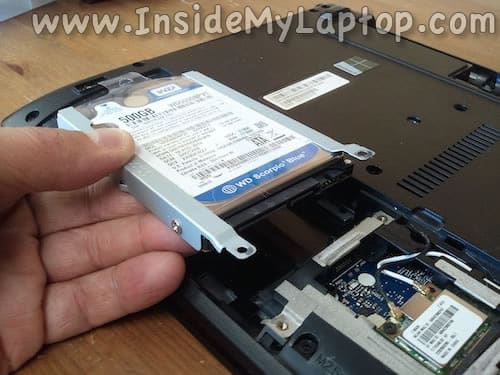
Slide the hard drive assembly to the left to disconnect it from the motherboard.
Lift up and remove the hard drive.
Upgrading this regular 2.5″ hard drive to a 2.5″ solid state drive will speed up the laptop significantly.
STEP 4.
Remove one screw securing the optical drive.
Pull the drive to the left and remove it from the case.

STEP 5.
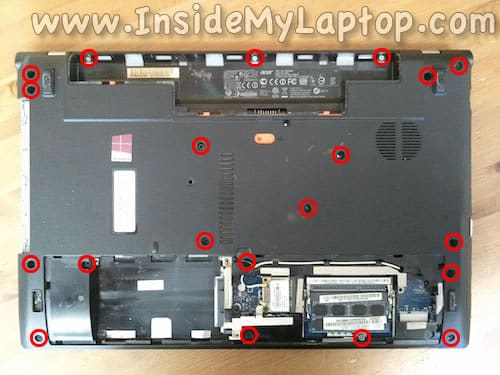
Remove all marked screws from the bottom.
All screws are similar, except three silver screws in the battery compartment and one silver screw below the memory module.
STEP 6.
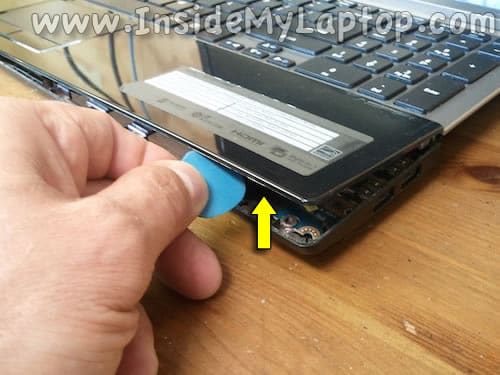
I’m using a guitar pick to separate the palm rest from the bottom case.
You can use a piece of plastic.
STEP 7.
Continue separating the palm rest with your fingers.

STEP 8.
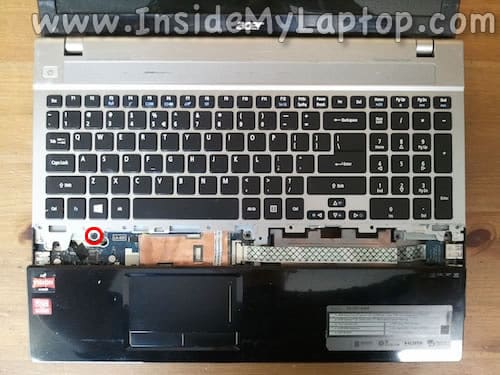
Move the palm rest assembly away from the keyboard. Be careful, it’s still connected to the motherboard.
Remove one screw securing the keyboard/top cover assembly.
STEP 9.
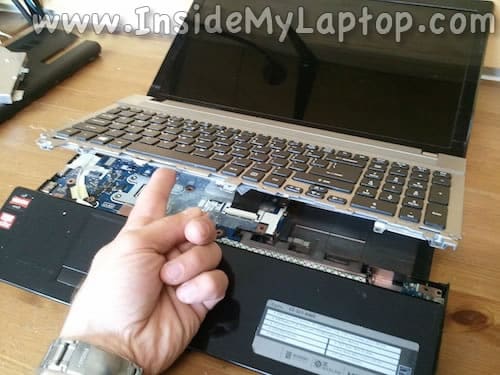
Lift up the keyboard assembly and move it towards the display.
STEP 10.
Now you can access and disconnect three cables (left to right):
– Power button cable.
– Touchpad cable.
– Keyboard cable.
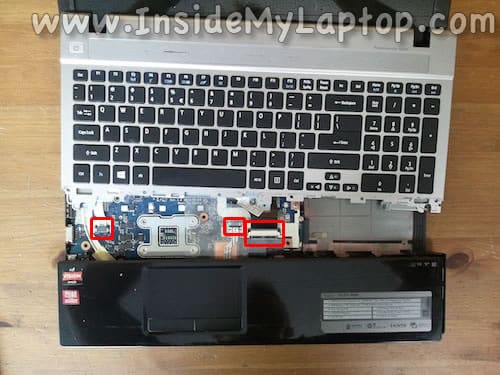
Here’s how to unlock all three connectors.
Slowly slide the cable retainer (dark brown piece in my picture) away from the connector base about 2 millimeters (two green arrows). This will unlock the connector.
Now you can pull the cable (yellow arrow).

STEP 11.
Remove the keyboard/top cover assembly.

STEP 12.
Remove the palm rest assembly.
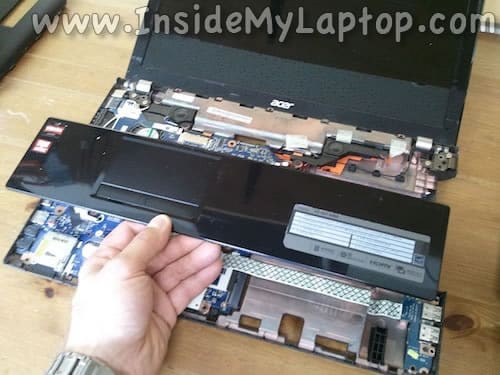
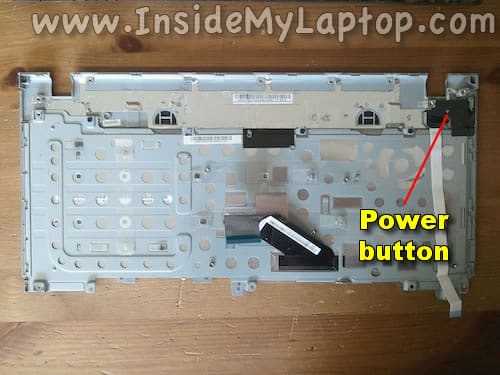
On the bottom side of the top cover you can access the power button board.
If you need to replace the keyboard, you’ll have to remove the metal shield.
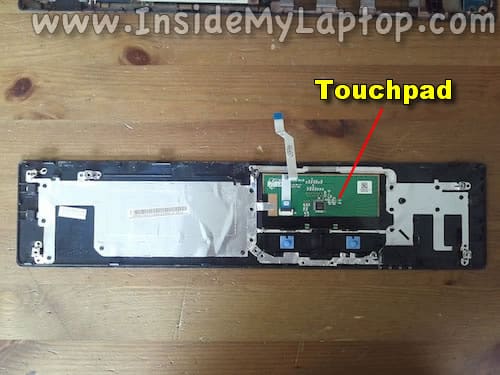
On the bottom side of the palm rest assembly you can access the touchpad.
STEP 13.
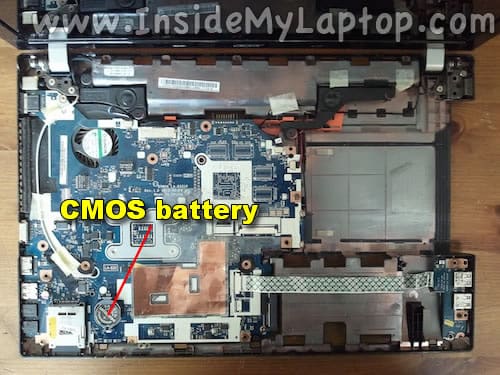
When the palm rest removed, you can access the CMOS battery.
STEP 14.
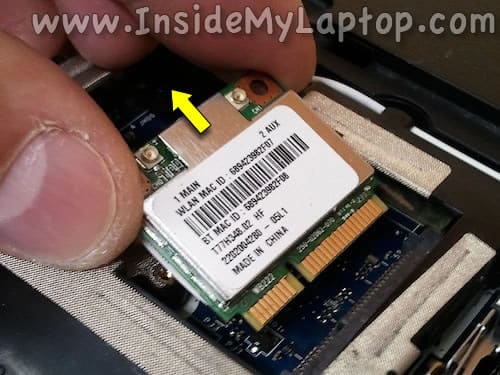
In order to remove the motherboard from the case it’s necessary to disconnect and remove the wireless card first.
Disconnect two antenna cables from the wireless card.

STEP 15.
Remove one screw securing the card to the case and pull it from the slot.
STEP 16.
Un-route both antenna cables from the bottom of the laptop case and pull them out though the openings in the case.

STEP 17.
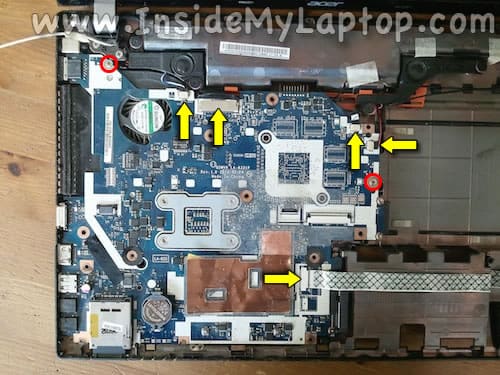
Remove two screws securing the motherboard.
Disconnect five cables.
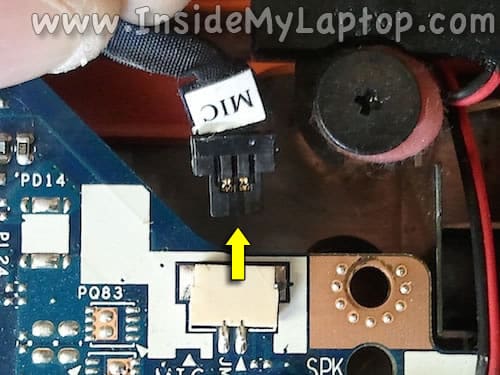
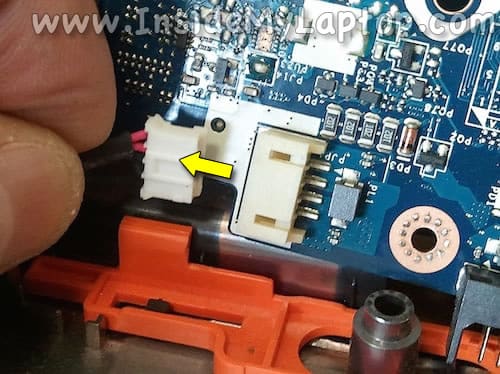
Here’s how to unplug smaller connectors.
Simply pull the male part out by the edges. Do not pull by the wires.
Here’s how to unplug the display (video) cable.
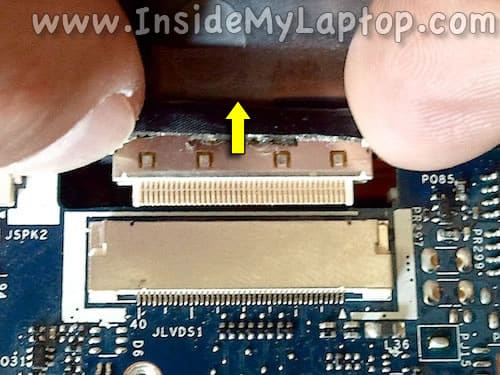
STEP 18.
Start removing the motherboard from the case.
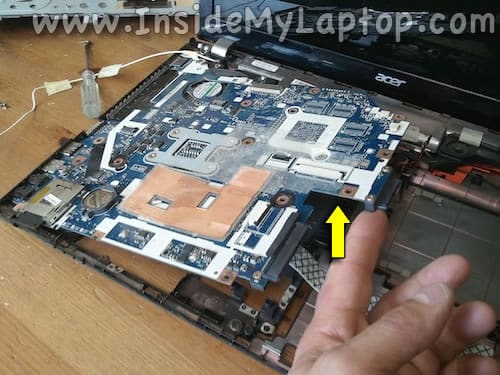
STEP 19.
Before you can remove it completely, it’s necessary to disconnect the DC jack cable on the other side.
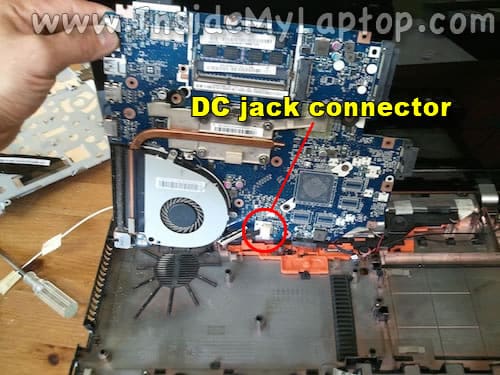
Unplug the DC jack cable from the connector.
STEP 20.
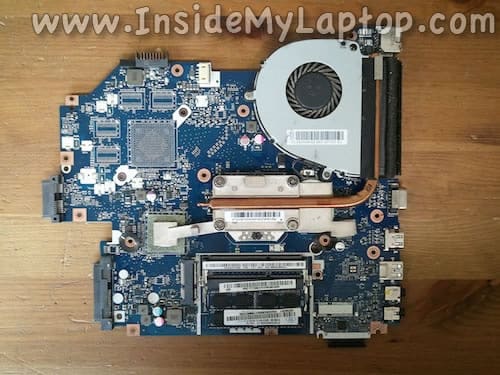
The motherboard has been removed.

The cooling fan mounted on the other side.
STEP 21.
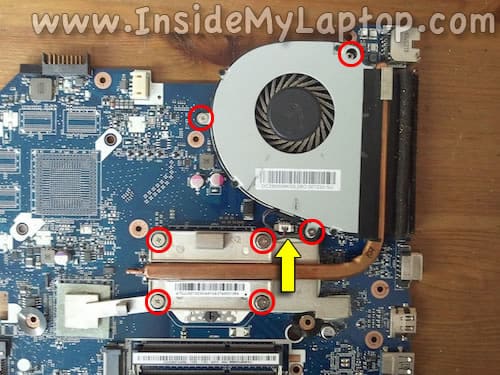
Remove seven screws securing fan and heat sink.
STEP 22.
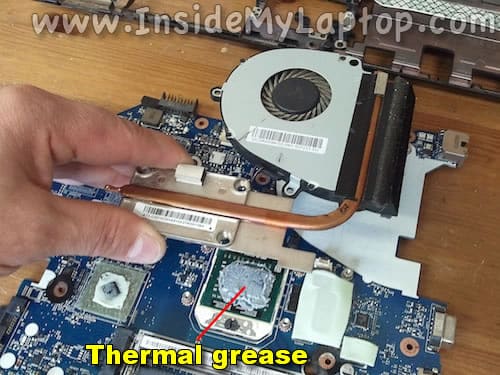
Carefully separate the fan assembly from the motherboard.
Now you can replace the fan if necessary or apply new thermal grease on the processor.
There are a few chips covered by thermal pads. Leave thermal pads in place.
Nestor
Hopefully the next person reads this comment before servicing. The 4 screws on the bottom of the laptop on the top 2 corners on Step 5 SHOULD NOT be removed. Removing them and forcing the display to open will rip through the plastic casing. The screen is still being held down by the bezel with more screws. Any of the other screws are fine to remove except the 4 mentioned. Good luck.
IML Tech
@ Nestor,
I don’t think this is correct. Without removing 4 screws shown in the step 5 you will not be able to remove the top cover.
The display hinges secured by 4 screws and you can see them in the step 13.
If you remove all screws shown in the step 5, the display SHOULD NOT fall.
Chris
After I disassemble and reassemble my Acer Aspire V3-551 I turn it on and the power light comes on and that’s it know else happen. Where did I went wrong. I went back and remove the CMOS battery and no luck… Please can someone help me.
IML Tech
@ Chris,
Check RAM modules. Maybe one of the modules not seated correctly. Try reconnecting them.
Chris
I just realized that my battery needed to charge.. Its up on running..
Chris
After it finish charge and I turn it on it is now saying boot failed HDD, bootnfailed DVDRAM Drive… I tried a windows 7 CD to see if it will boot from it and it didn’t boot failed
LM
I’m so glad I found this site, otherwise I would have given up already! I have this model and it will not boot. On attempt i hear a clicking sound 3 times where the fan is located i think. Then an error stating that it can’t find the MBR. I assume it is the fan but please help if you know of something else. Also,can the fan be ordered as a separate part or is it integrated into the motherboard? If not integrated, can you provide the part number?
IML Tech
@ LM,
Could be hard drive failure. Remove the hard drive and try turning on the laptop. Do you still here clicking sounds?
Steve
Hi guys, just wondering if the cpu can be replaced in this laptop? I want to go from the 4600M to the 5750M. both have the same specs except for the clock speed (5750 being ~200 MHz higher) and the graphics “chip” as one would call it (8650G on the 5750. Also, is this a good choice? I just want maximum graphics performance from this because i do CAD work on it and its falling below expectations now, although when i got it, it was amazing. for the money. :/
IML Tech
@ Steve,
Technically it’s possible to replace the CPU. It’s not soldered to the motherboard. Simply unlock the socket, remove the old CPU, installed a new one and lock it.
I’m not sure 100% but if both have same specs I think you can do that.