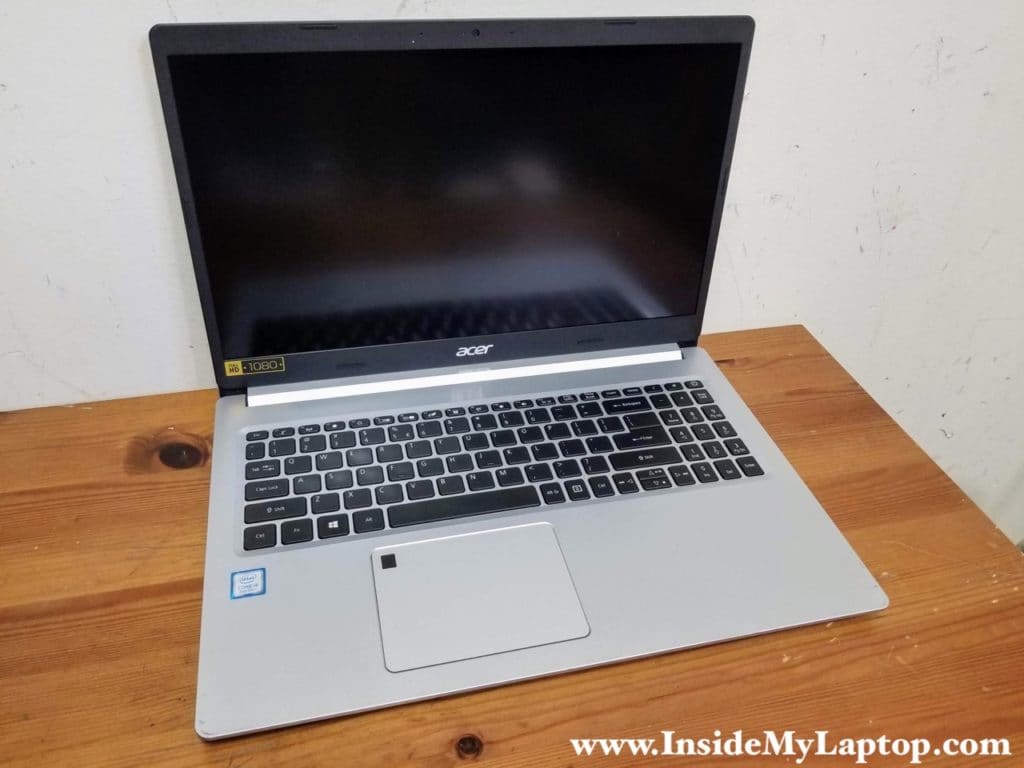
In this guide I show how to disassemble an Acer Aspire 5 A515-54 series laptop (model N18Q13). In this particular case I’m taking apart an Aspire A515-54-51DJ.
During the disassembly process I found some pros and cons of Acer Aspire 5 A515-54 design. Here they are:
Pros:
– Support for PCIe NVMe M.2 solid state drives.
– The cooling fan easily removable and replaceable.
– The battery can be easily accessed and replaced.
Cons:
– The motherboard has only one memory slot.
– The keyboard is permanently attached to the top case.
– The LCD screen is glued to the display cover.
Laptop disassembly steps
For this disassembly you will need only a few basic tools: Phillips #0 or #1 screwdriver, tweezers and thin case opener tool.
STEP 1.
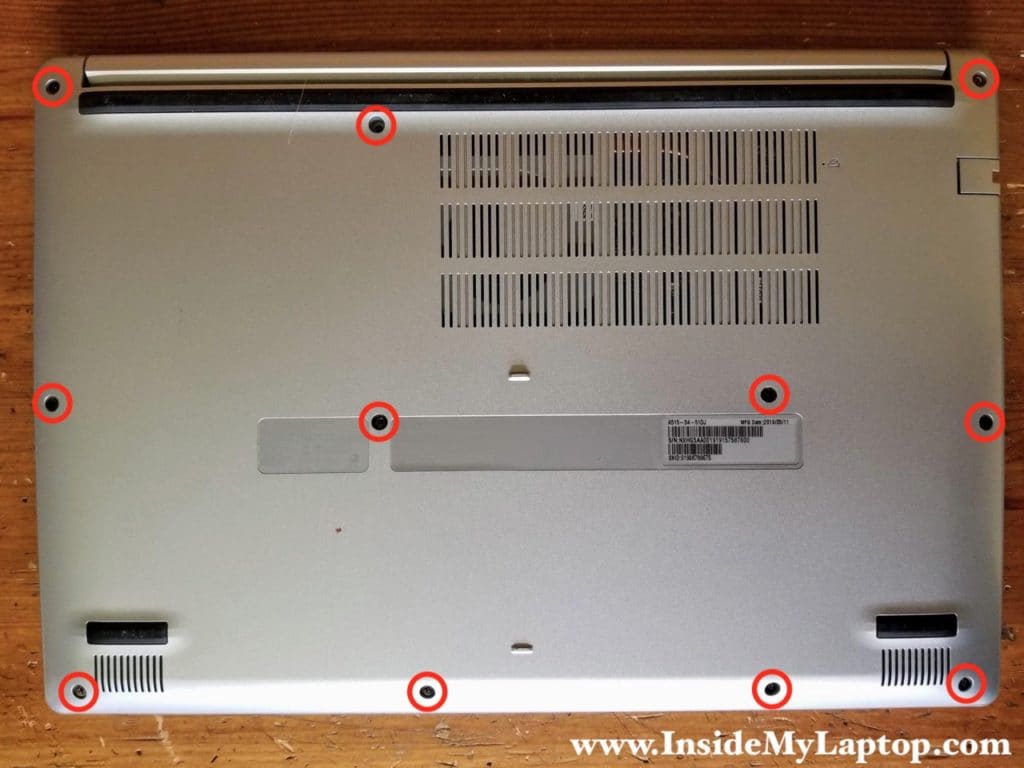
Remove eleven screws from the bottom.
STEP 2.
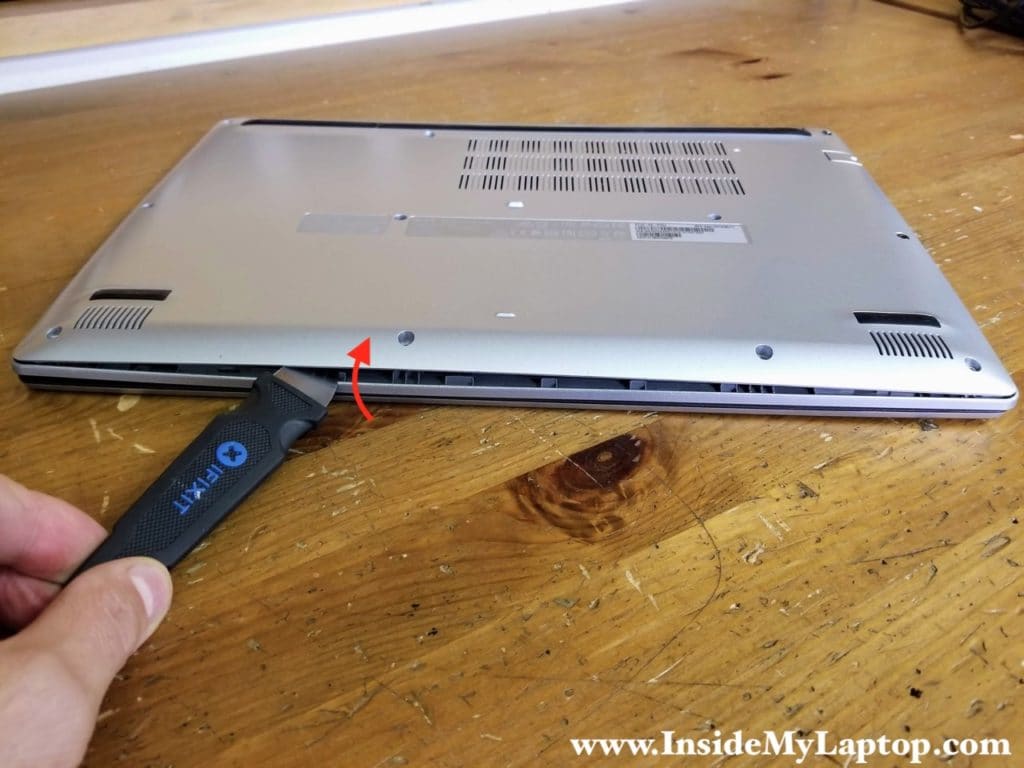
Start removing the base cover using a case opener tool. Pry up the cover to separate it from the top case assembly. There are many hidden latches securing the cover.
STEP 3.
With all latches released, you can lift up and remove the base cover. Lift up the cover from the headphone jack side.

STEP 4.
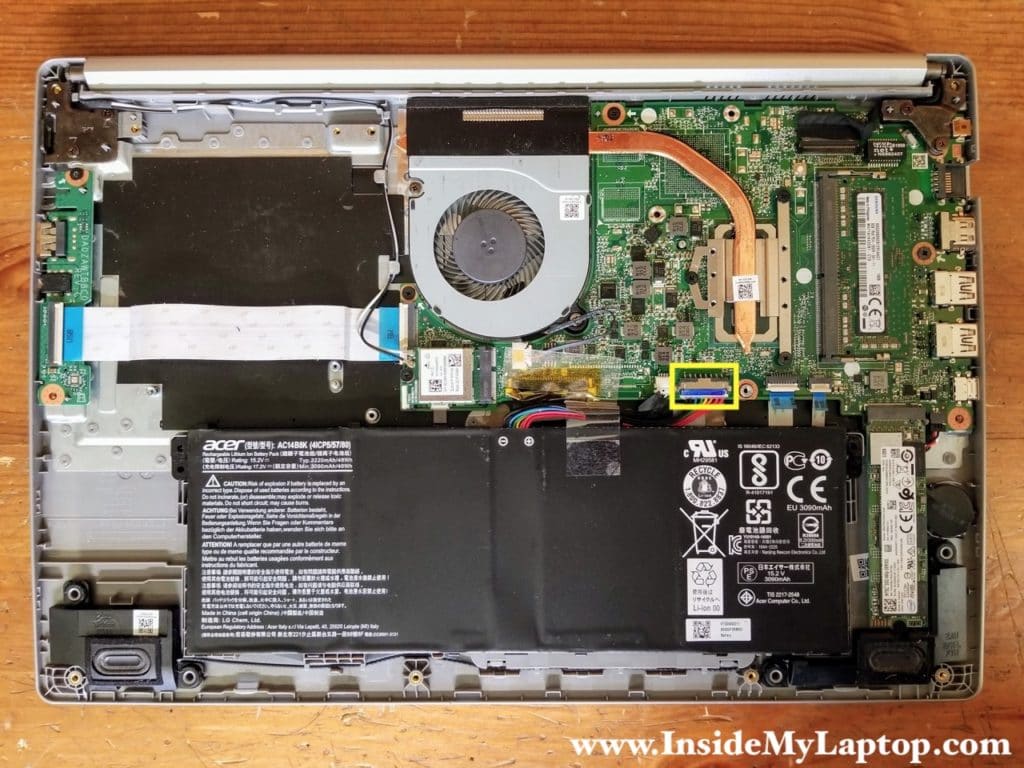
There are no screws securing the battery. Disconnect the battery cable from the motherboard.
STEP 5.
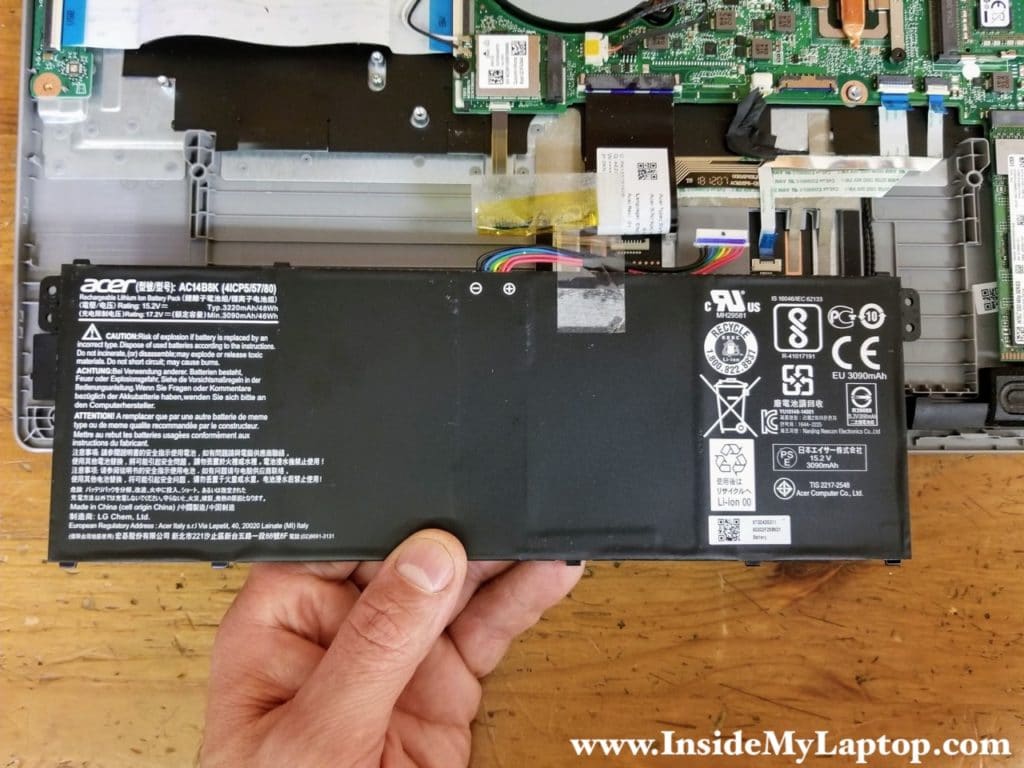
Peel off clear tape attaching the battery to the motherboard. Remove the battery.
Acer Aspire 5 A515-54 series battery model: AC14B8K
STEP 6.
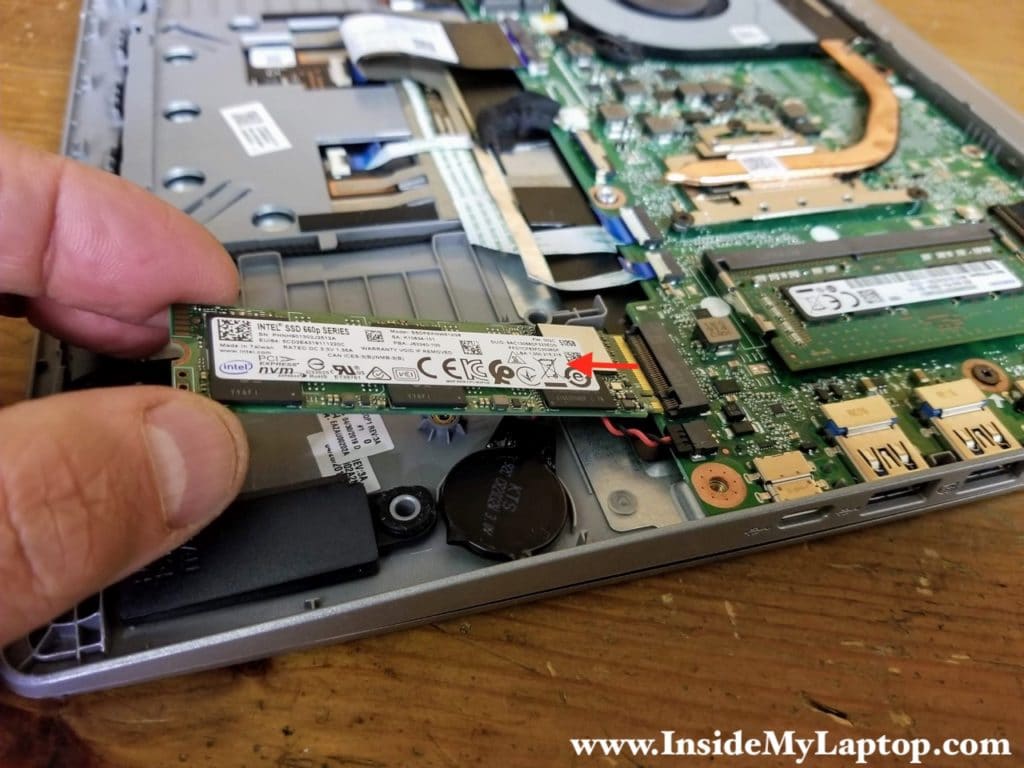
Remove one screw securing the PCIe NVMe M.2 solid state drive. Pull the SSD out.
STEP 7.
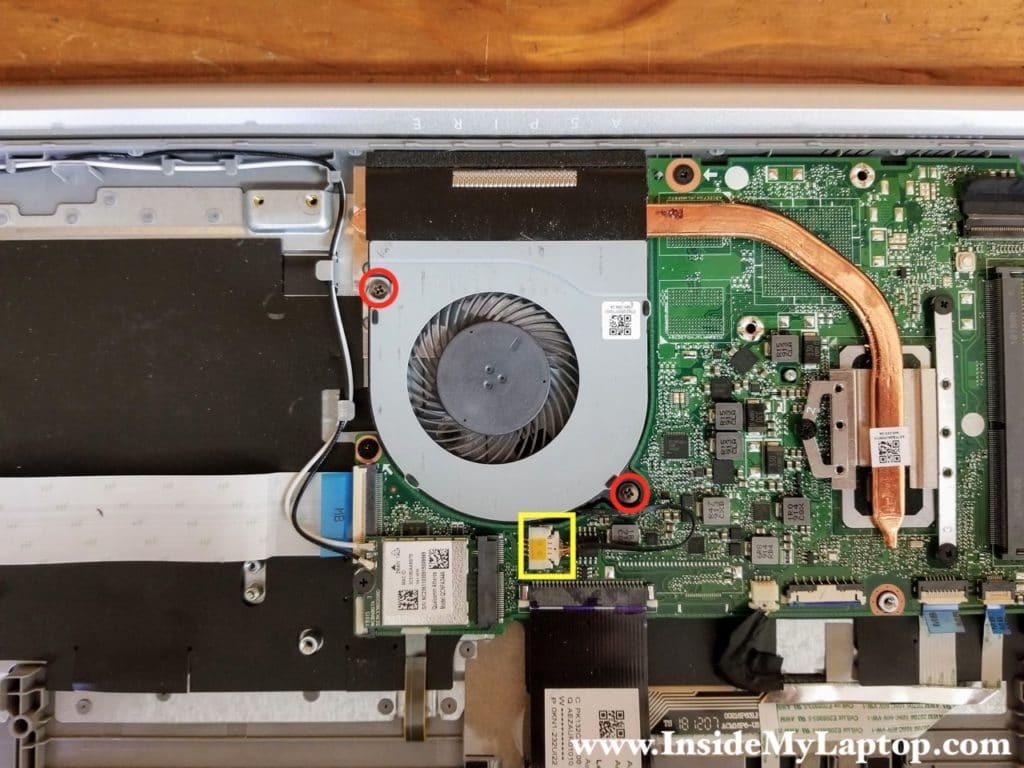
Remove two screws from the cooling fan. Disconnect the fan cable from the motherboard.
STEP 8.
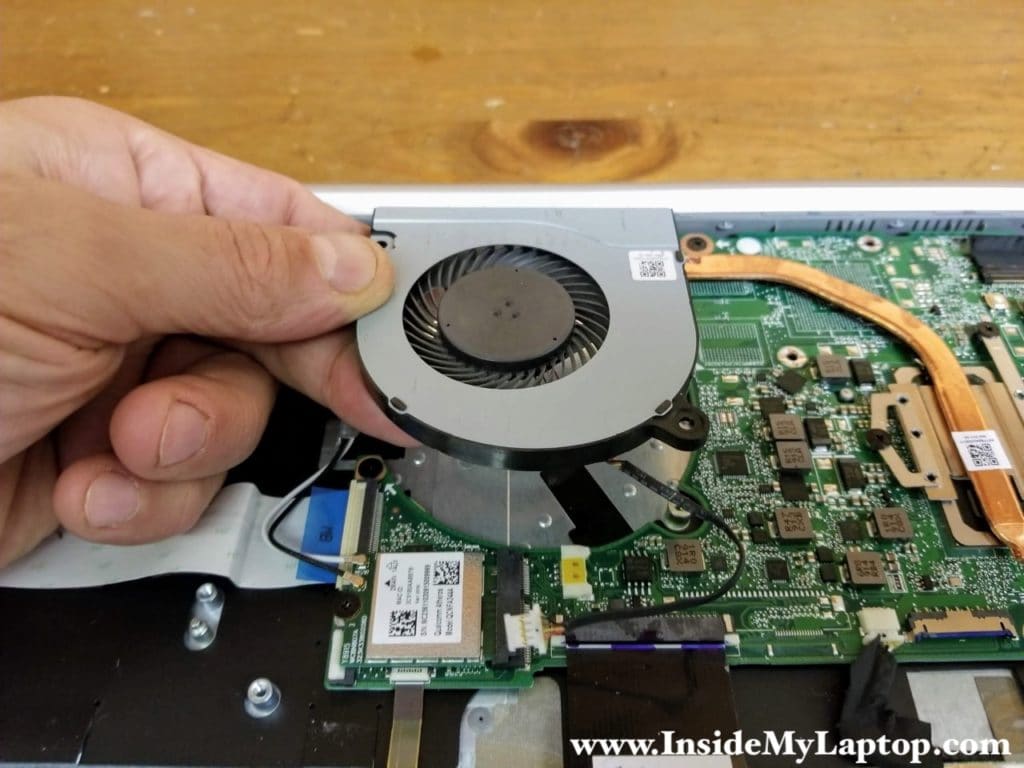
Lift up and remove the fan.
STEP 9.
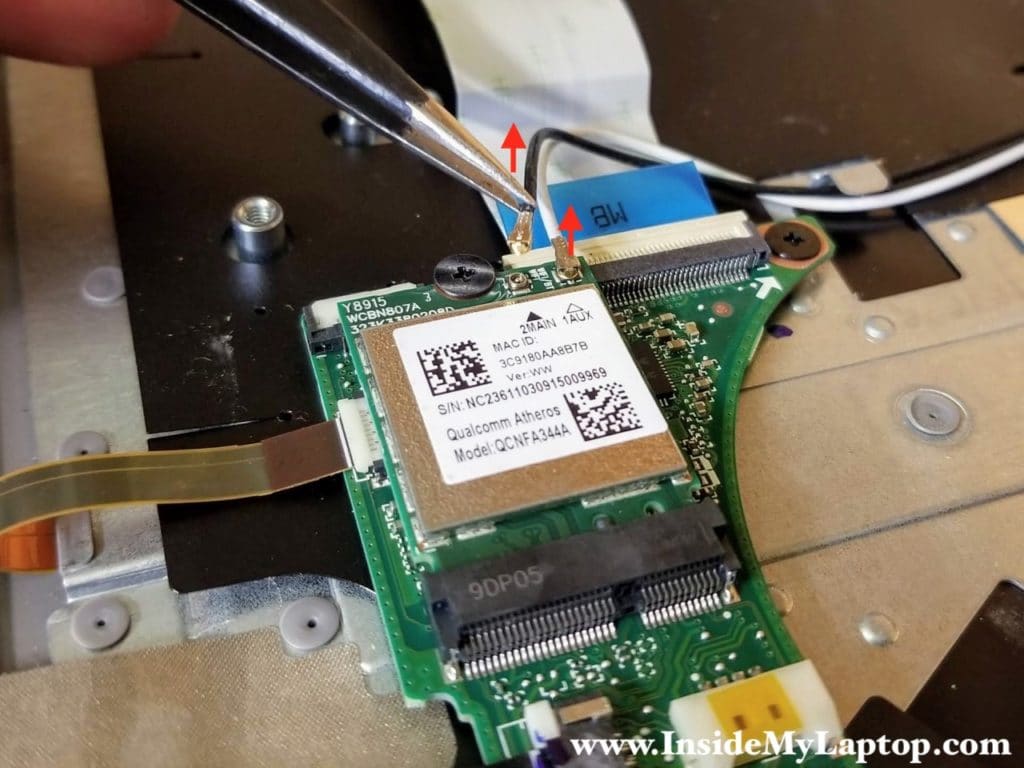
Using tweezers carefully disconnect both antenna cables from the wireless card. Grab the Wi-Fi cable close to the golden head and lift up. The cable will un-snap from the card.
STEP 10.
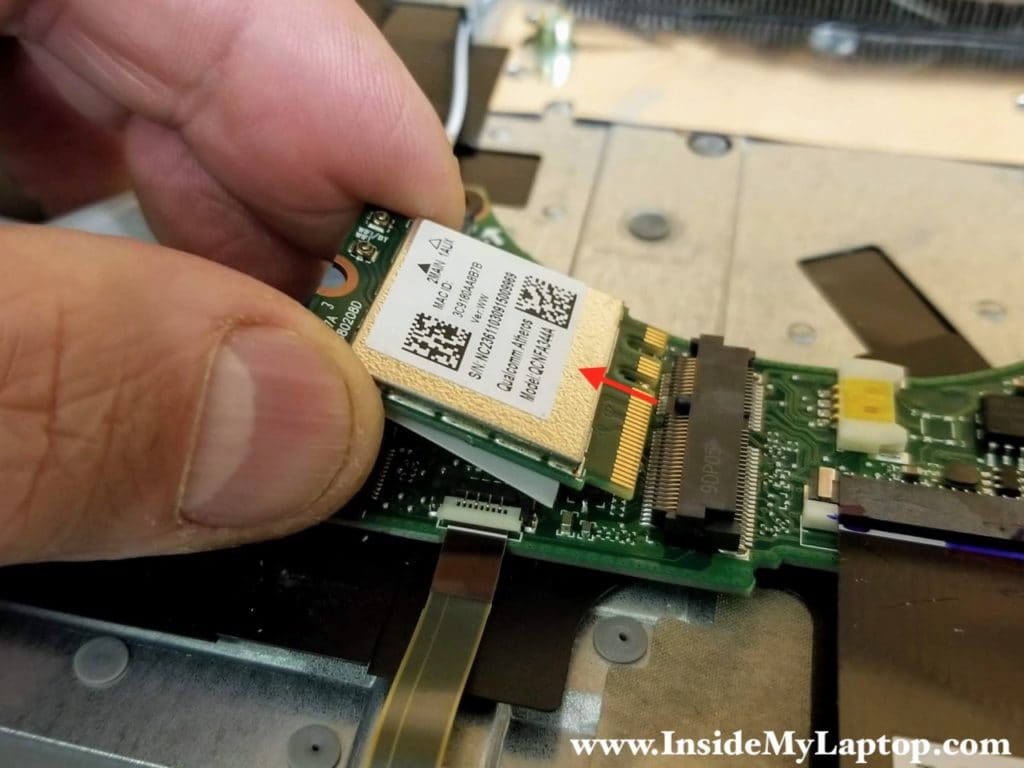
Remove one screw securing the wireless card. Pull the wireless card out of the slot.
STEP 11.
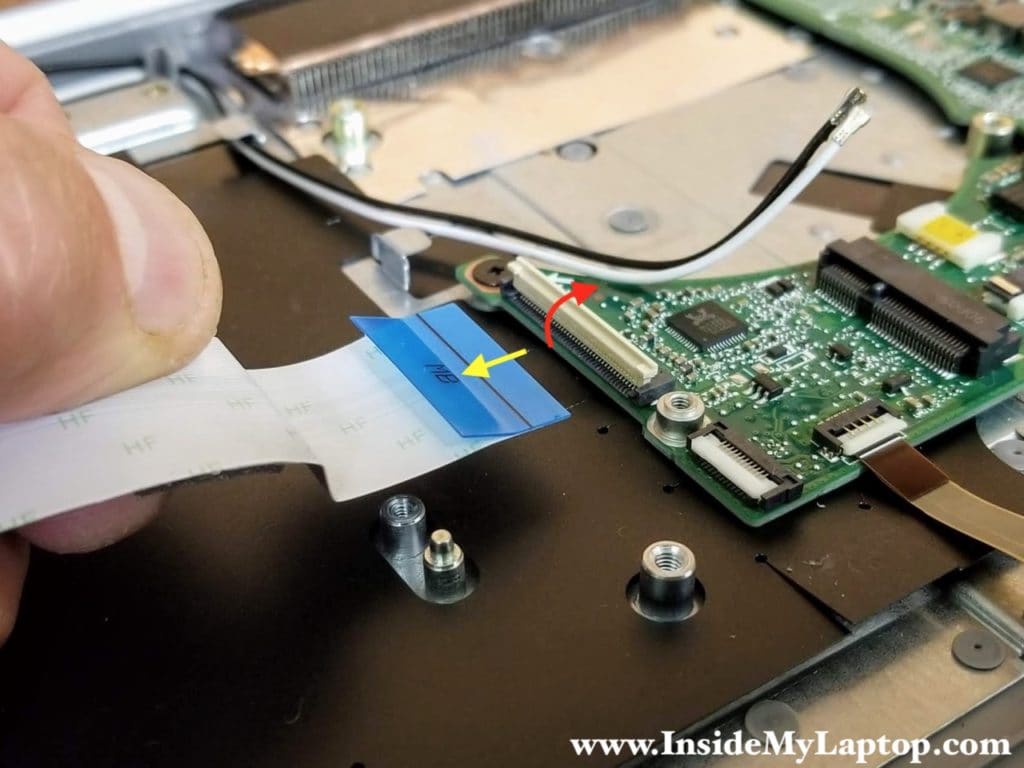
Remove one screw securing the USB audio jack board. Disconnect the I/O cable from the motherboard.

The connector has to be unlocked before removing the cable. Lift up the locking tab at a 90 degree angle (red arrow) and pull the cable out.
STEP 12.
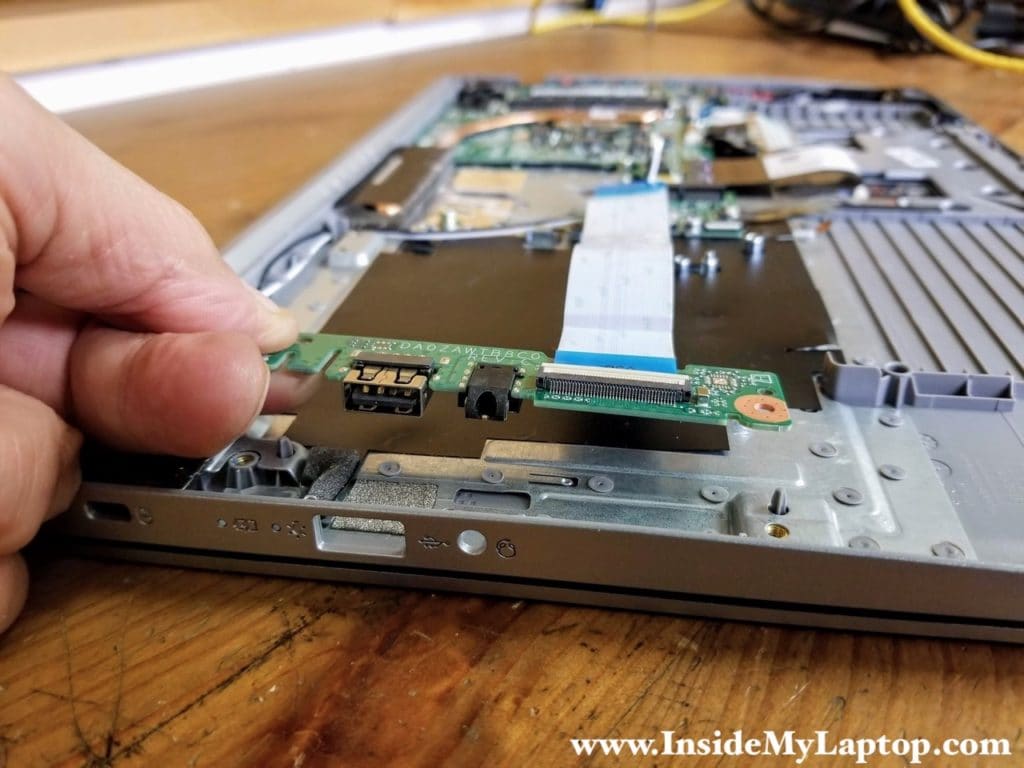
Lift up and remove the USB audio jack board.
Motherboard and display removal steps
The upper right corner of the motherboard is secured under the hinge. In order to remove the motherboard it’s necessary to remove the display panel first.
I will leave the memory module connected to the motherboard.
By the way, Acer Aspire 5 A515-54 series can support up to 20GB RAM total (16GB in the slot and 4GB non-removable built into the motherboard).
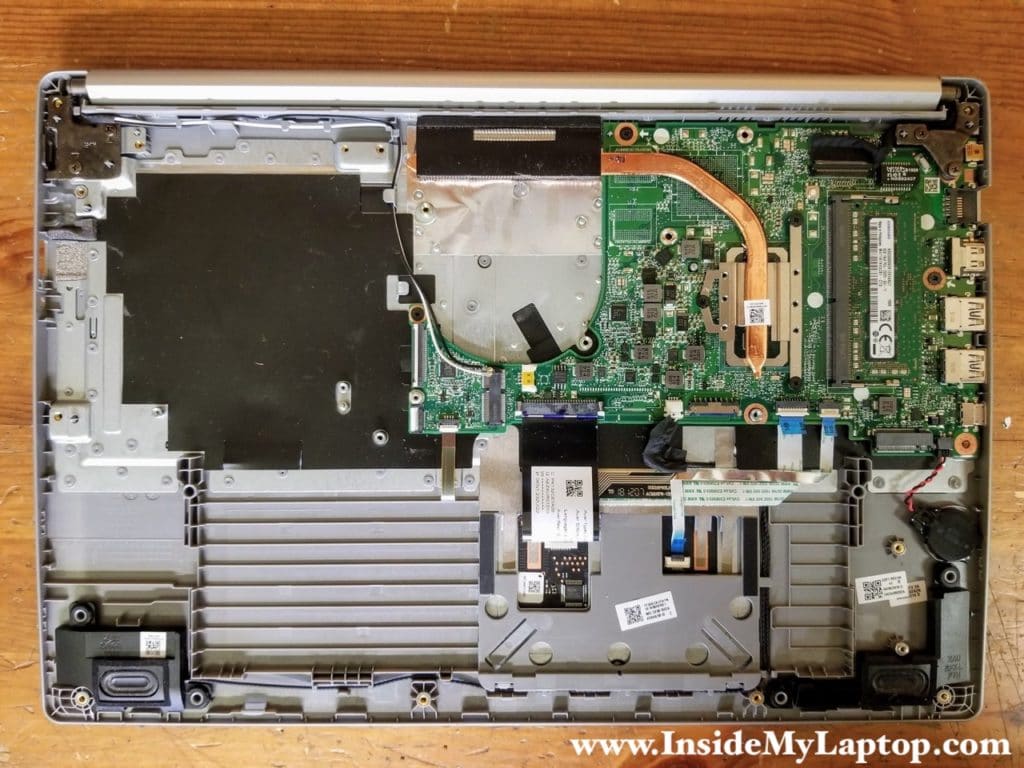
STEP 13.
Remove two screws from the right display hinge. Un-route the wireless antenna cables from the guided path on the top case.
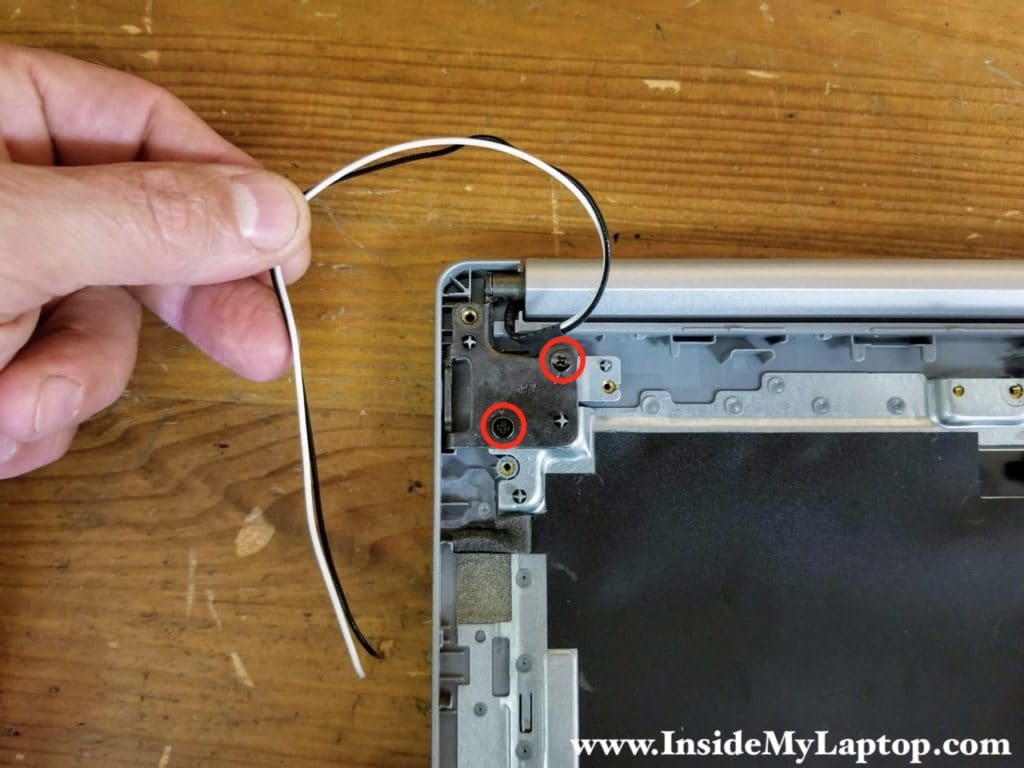
STEP 14.
Open up the right display hinge as it shown on the picture.
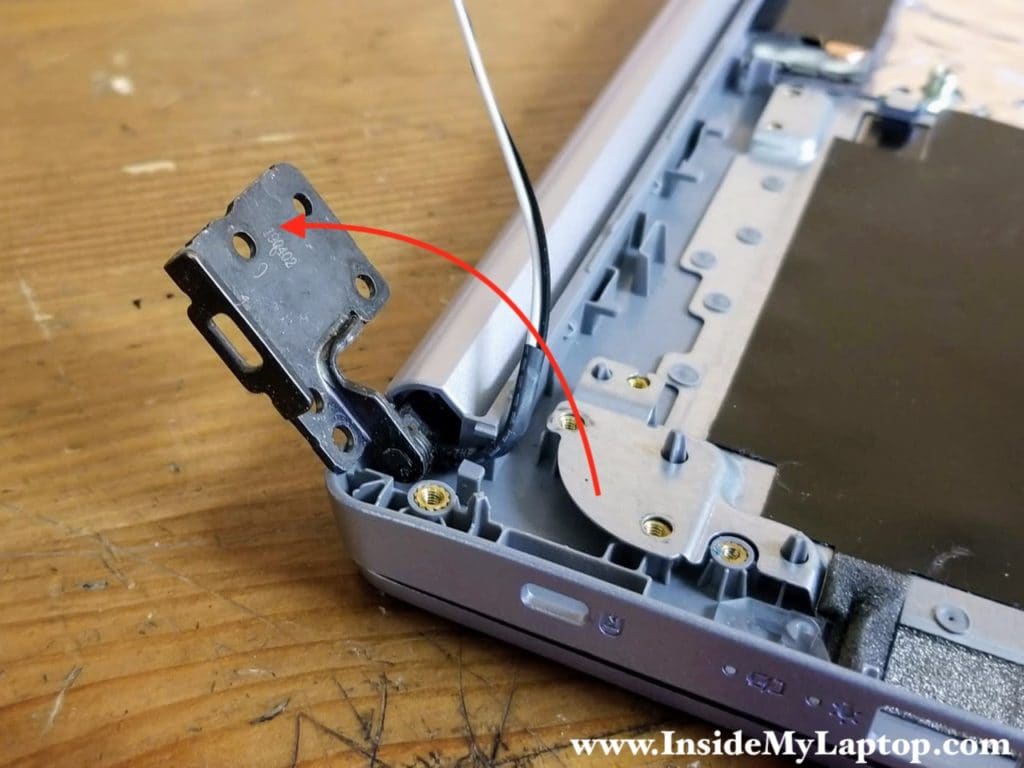
STEP 15.
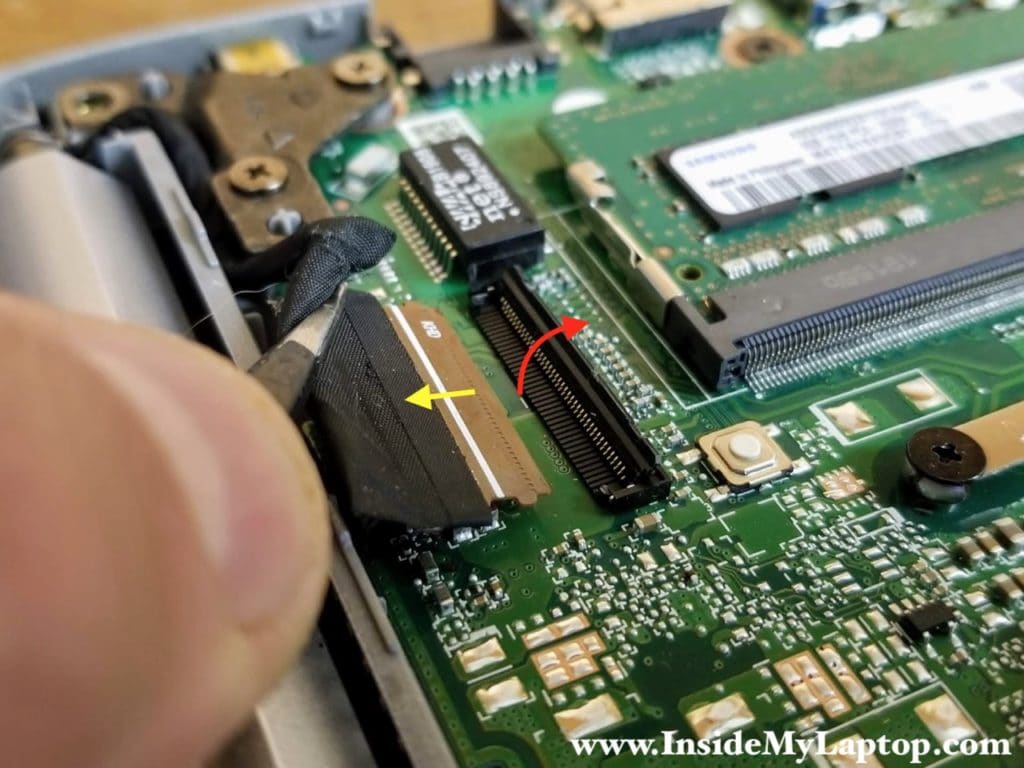
Remove two screws from the left display hinge. Disconnect the display cable from the motherboard.
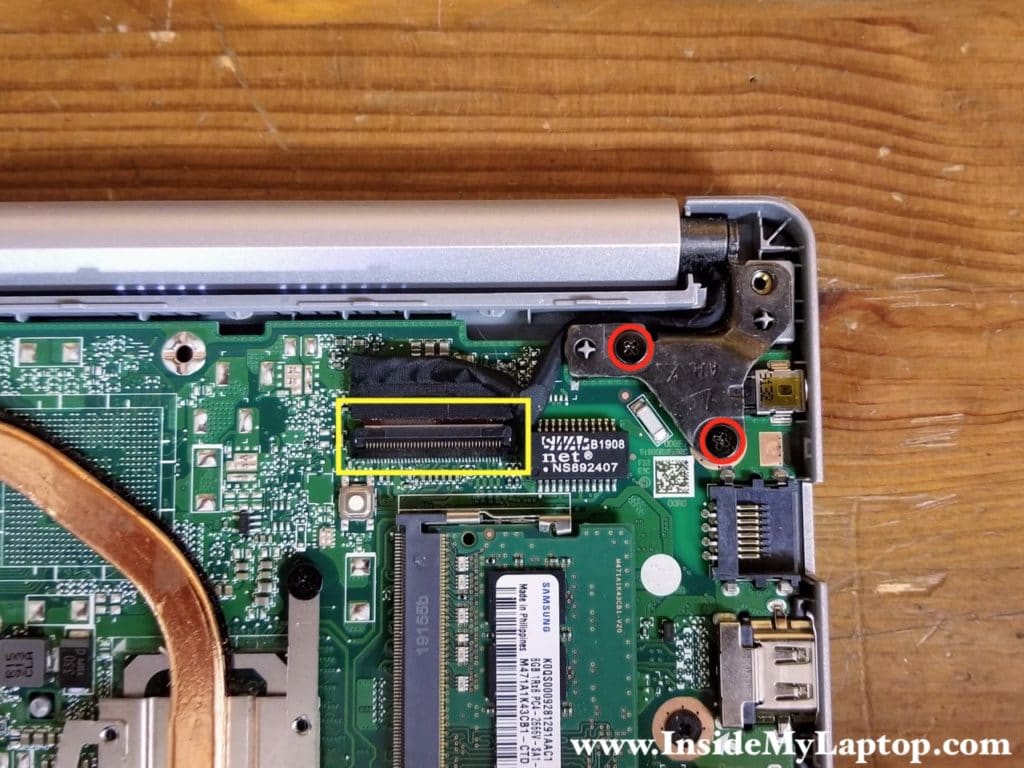
Unlock the connector. Lift up and remove the display cable.
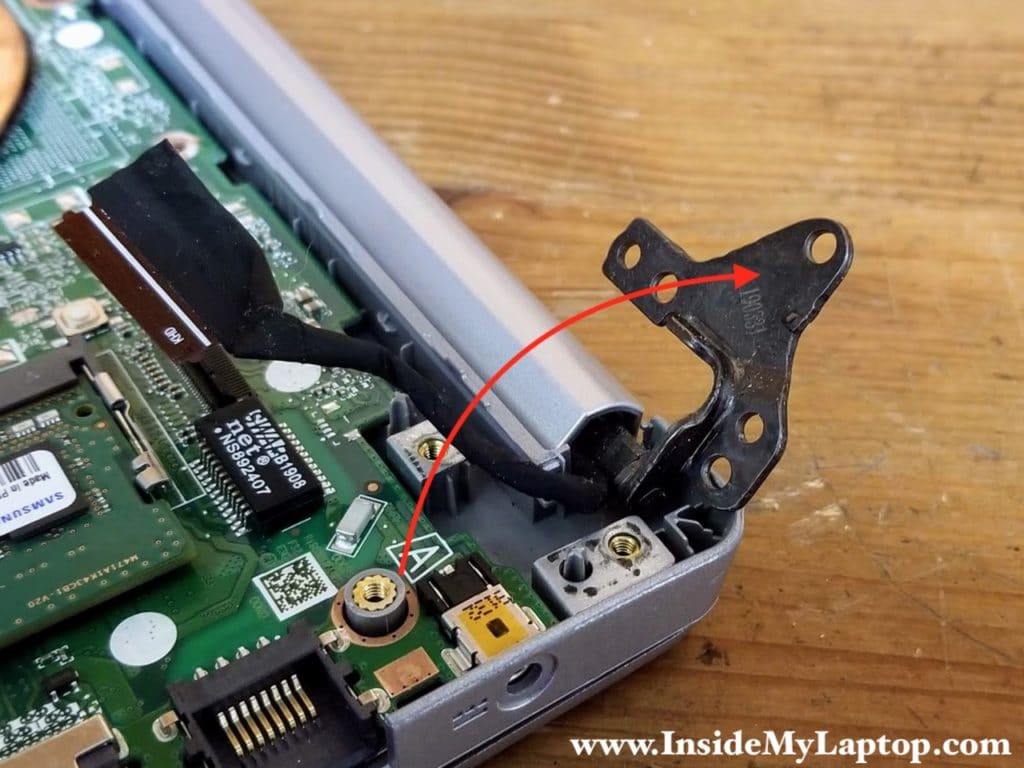
STEP 16.
Open up the left display hinge.
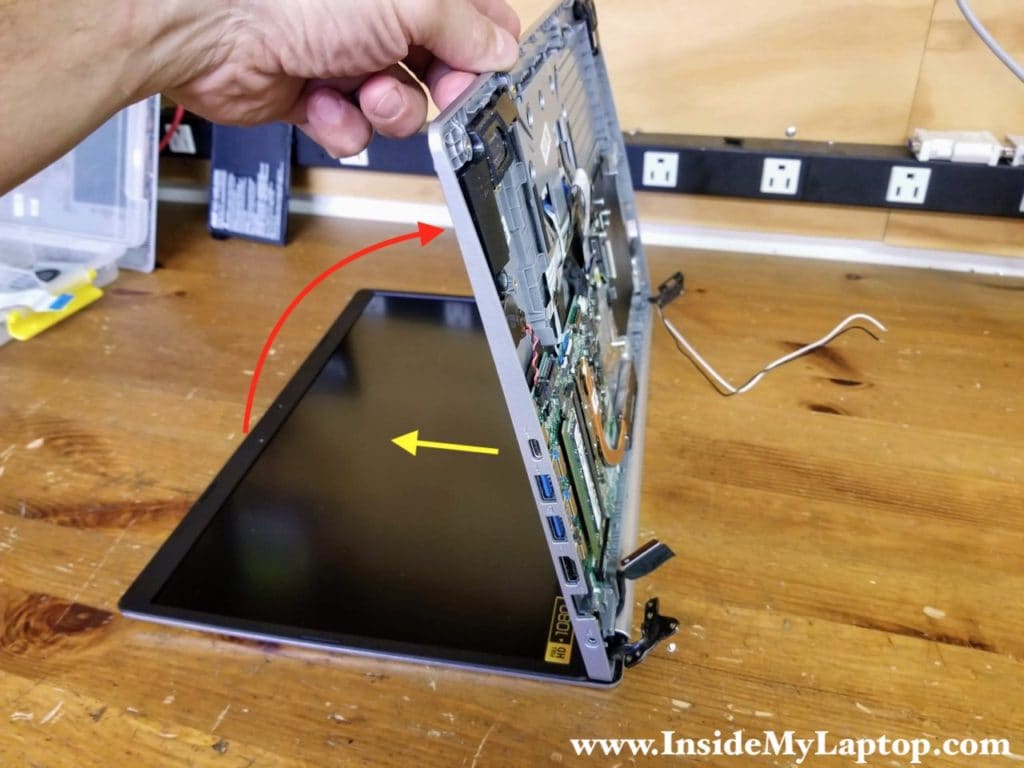
STEP 17.
Lift up one side of the top case assembly (red arrow) and slide it from under the display hinges (yellow arrow).
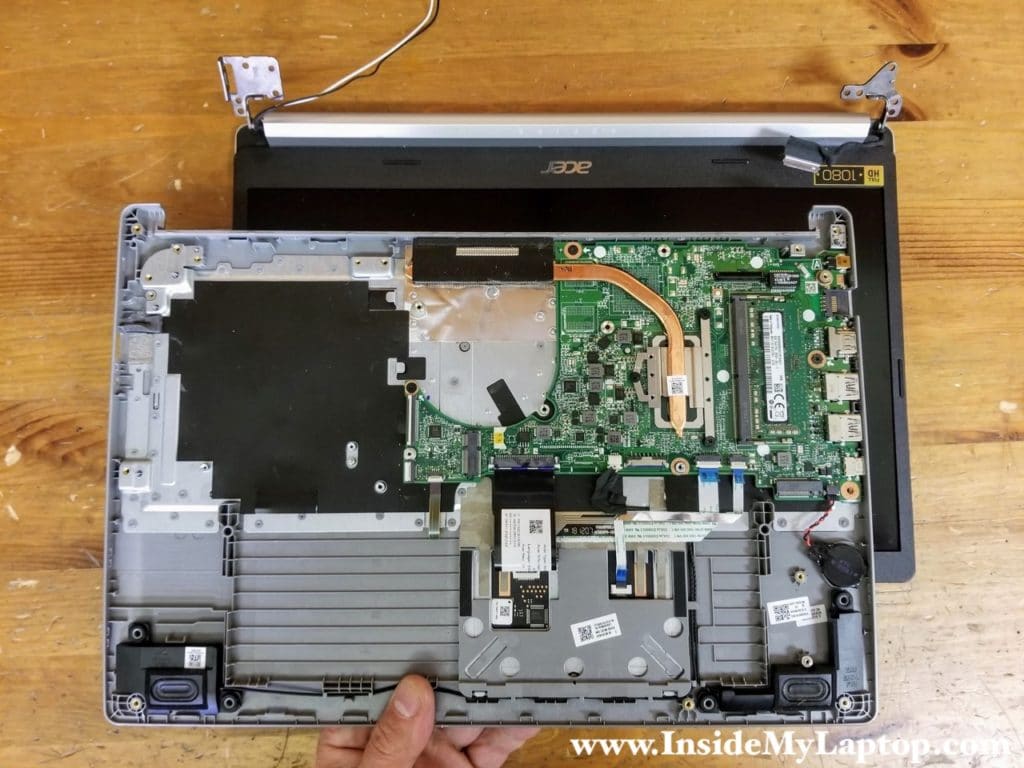
STEP 18.
Remove the top case assembly completely.
STEP 19.
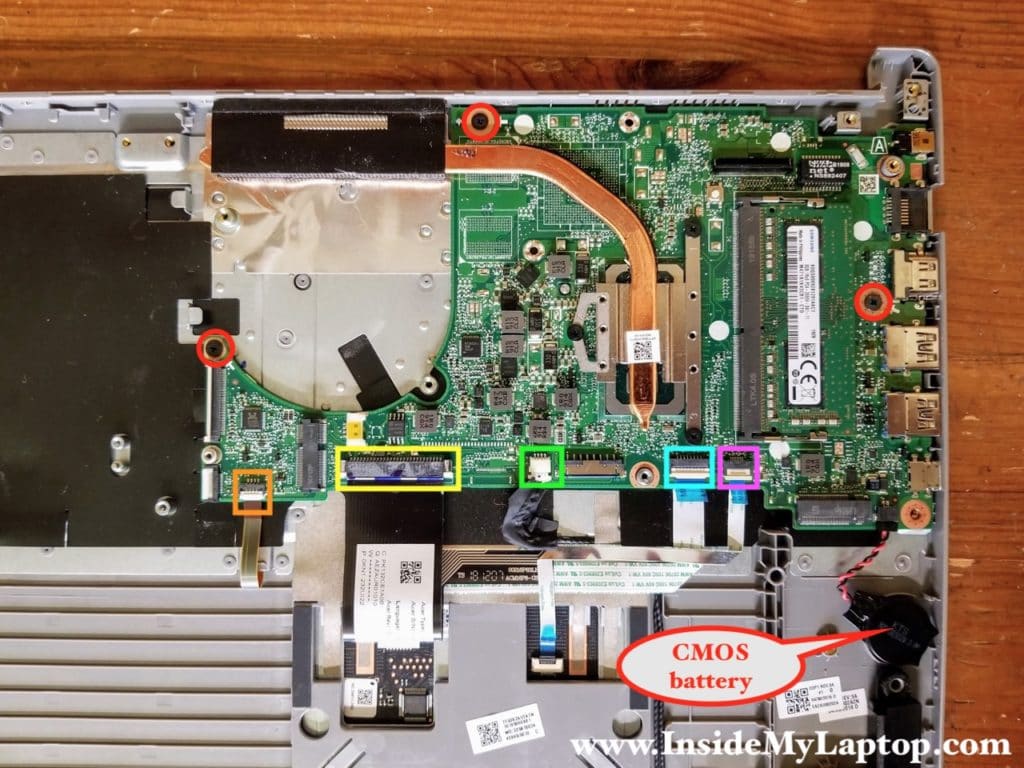
Remove three screws attaching the motherboard to the top case.
Disconnect the following color-coded cables:
– Keyboard backlight cable (orange).
– Keyboard cable (yellow).
– Speaker cable (green).
– Fingerprint reader (blue).
– Touchpad cable (pink).
I will leave the CMOS battery connected in order to save the BIOS settings.
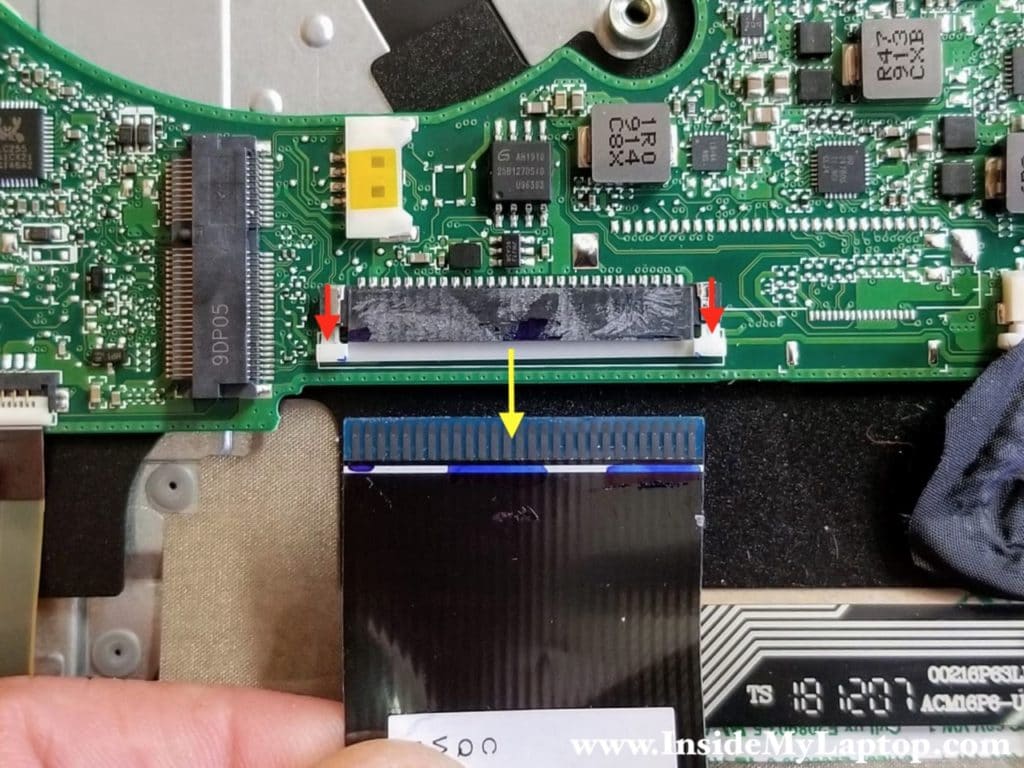
Here’s how to disconnect the keyboard cable.
1. Slide the white connector locking tab to the direction shown by the yellow arrow.
2. Pull the cable out.
STEP 20.
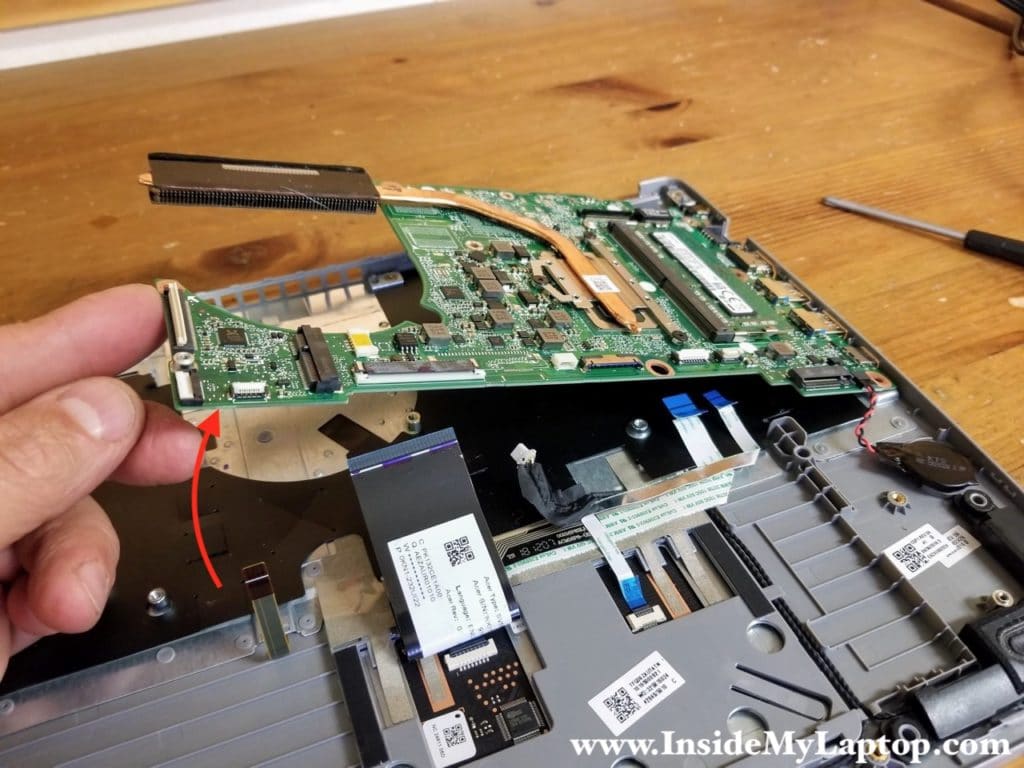
Lift up the left side of the motherboard and separate it from the top case. The CMOS battery attached to the top case with adhesive tape. Separate the battery from the case.
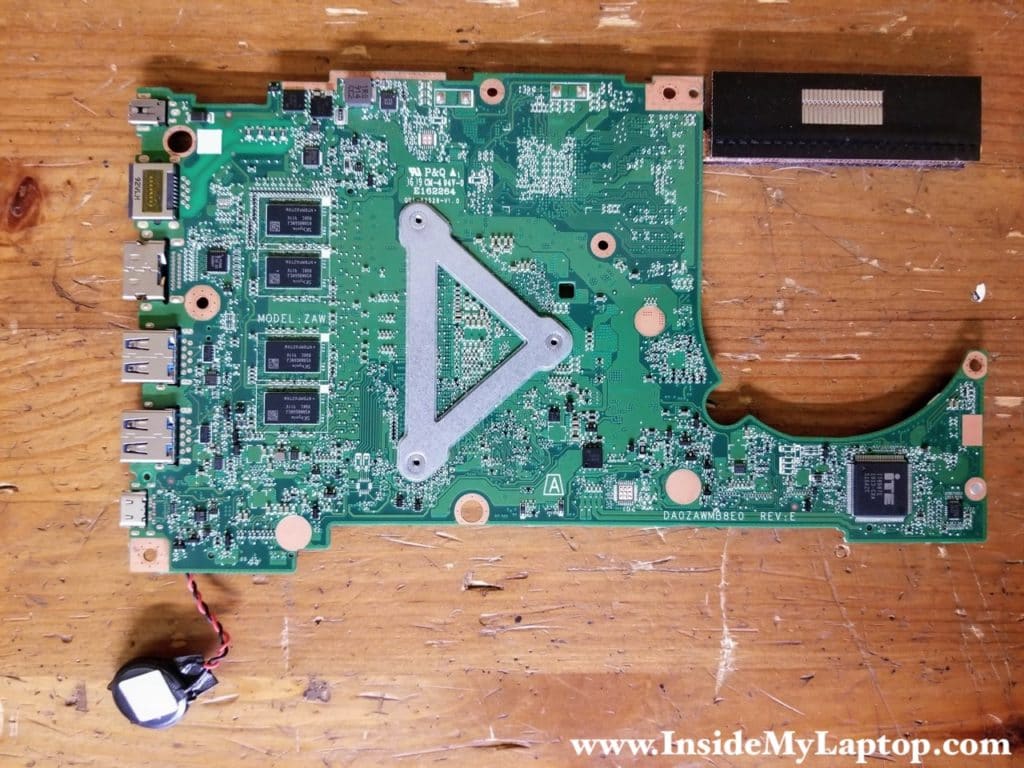
Here’s the other side of the Acer Aspire 5 A515-54 motherboard. The DC power connector is soldered to the motherboard. Here’s a guide for replacing the DC jack.
As I mentioned earlier, the keyboard is permanently riveted to the top case and cannot be removed and replaced. If the keyboard fails, it’s necessary to replace the entire top case assembly or try this keyboard repair.
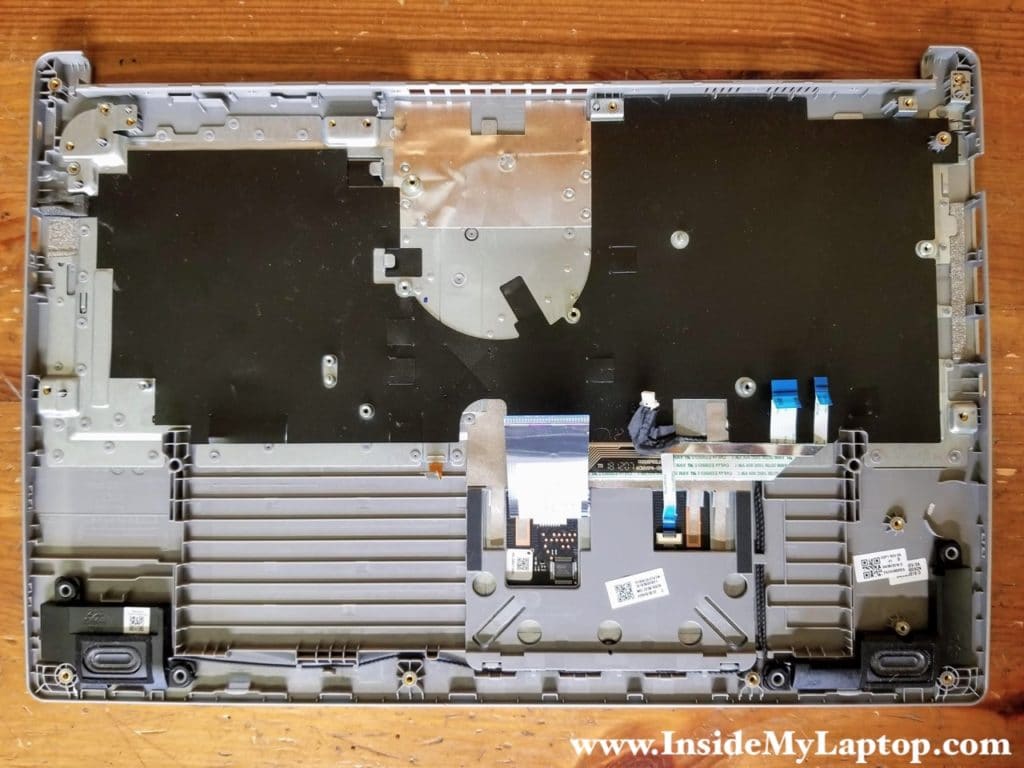
LCD screen removal
With the display panel separated from the base we can start taking it apart. You must remove the display in order to take it apart. Otherwise it’s not possible to remove the front bezel.
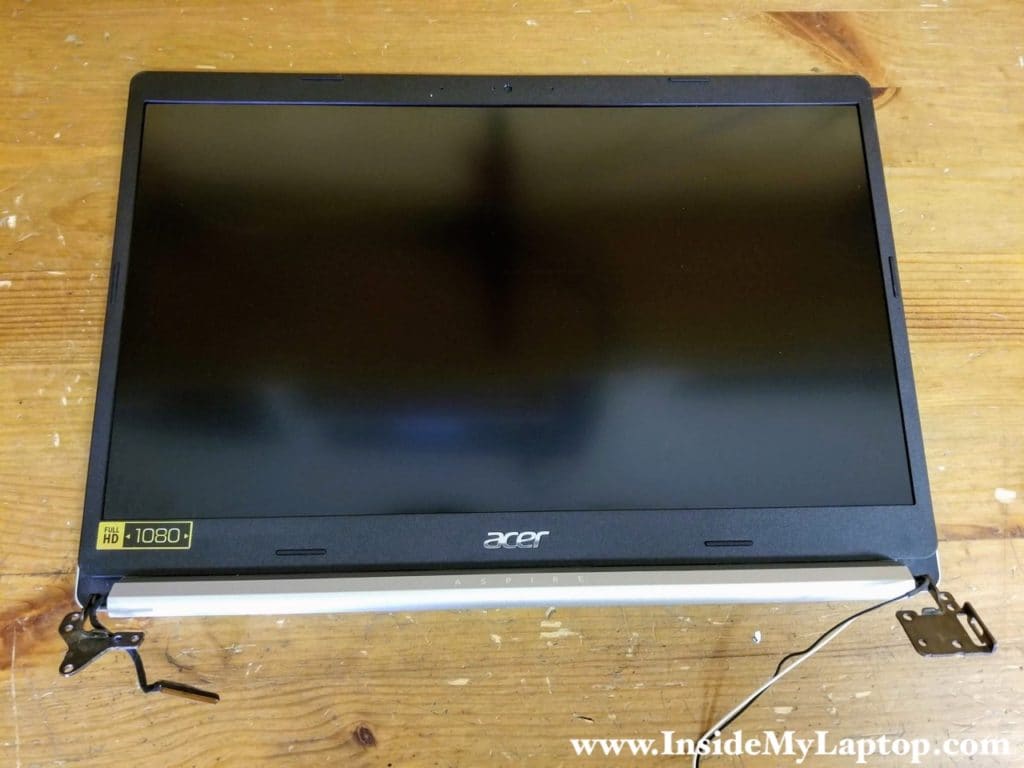
STEP 23.
Separate the screen bezel from the display cover. You’ll have to wiggle the bezel in order to release hidden latches.
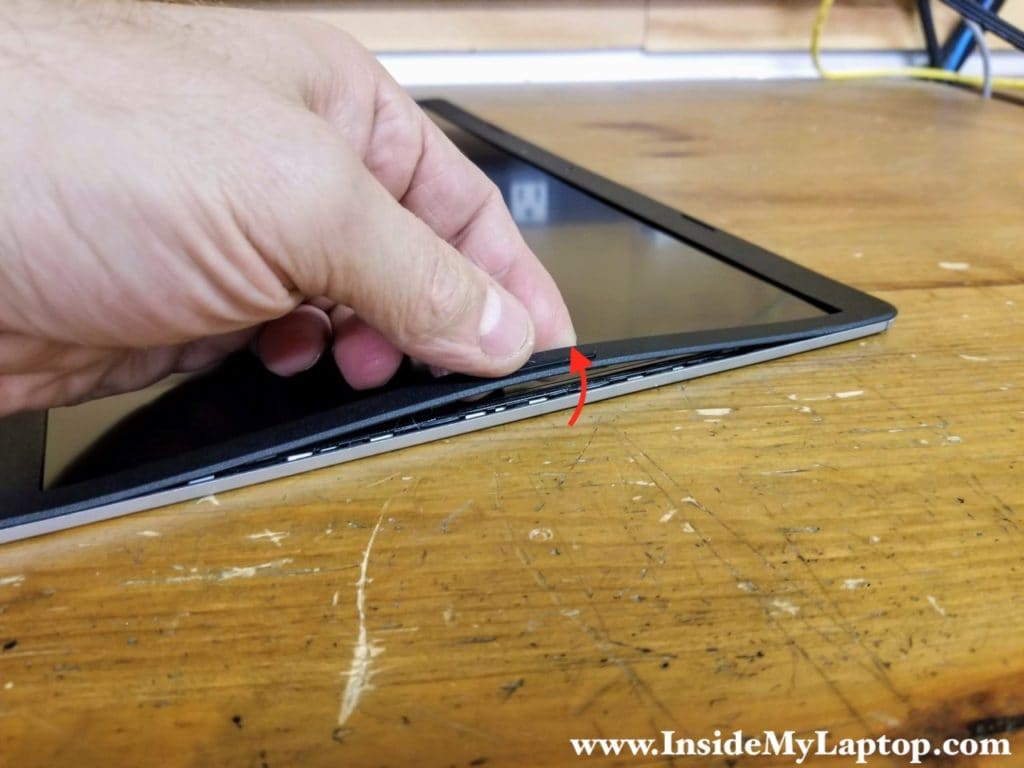
STEP 24.
Continue removing the bezel on the top side of the display.
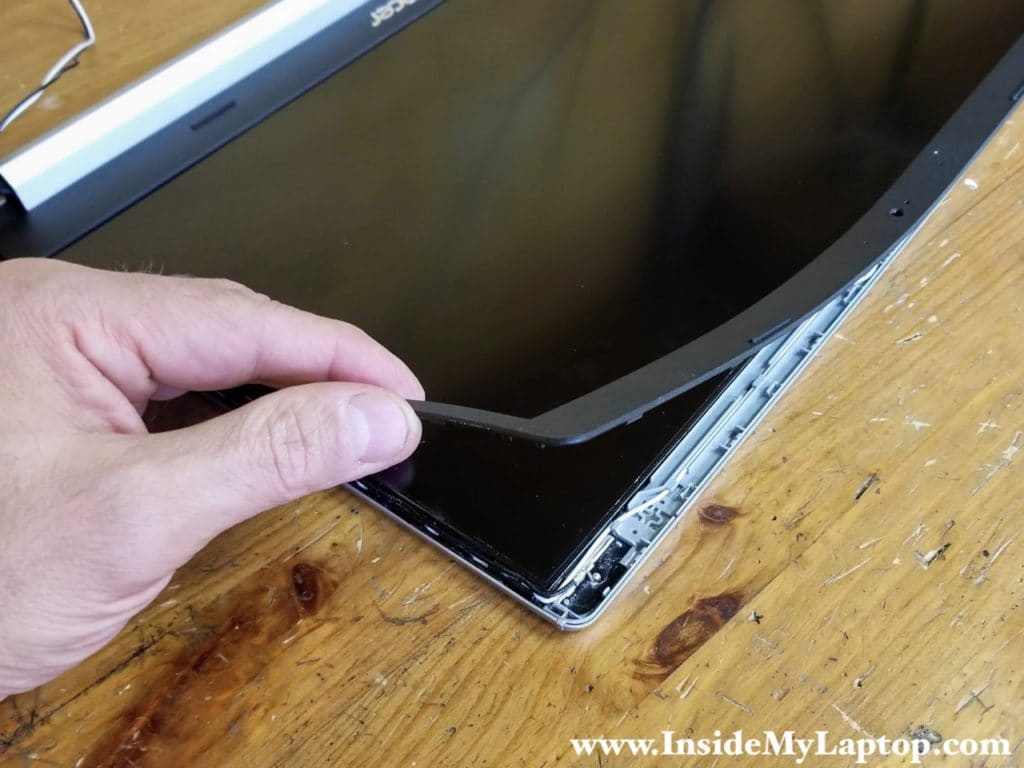
STEP 25.
After the bezel is removed on the top, you can move to the hinge area.
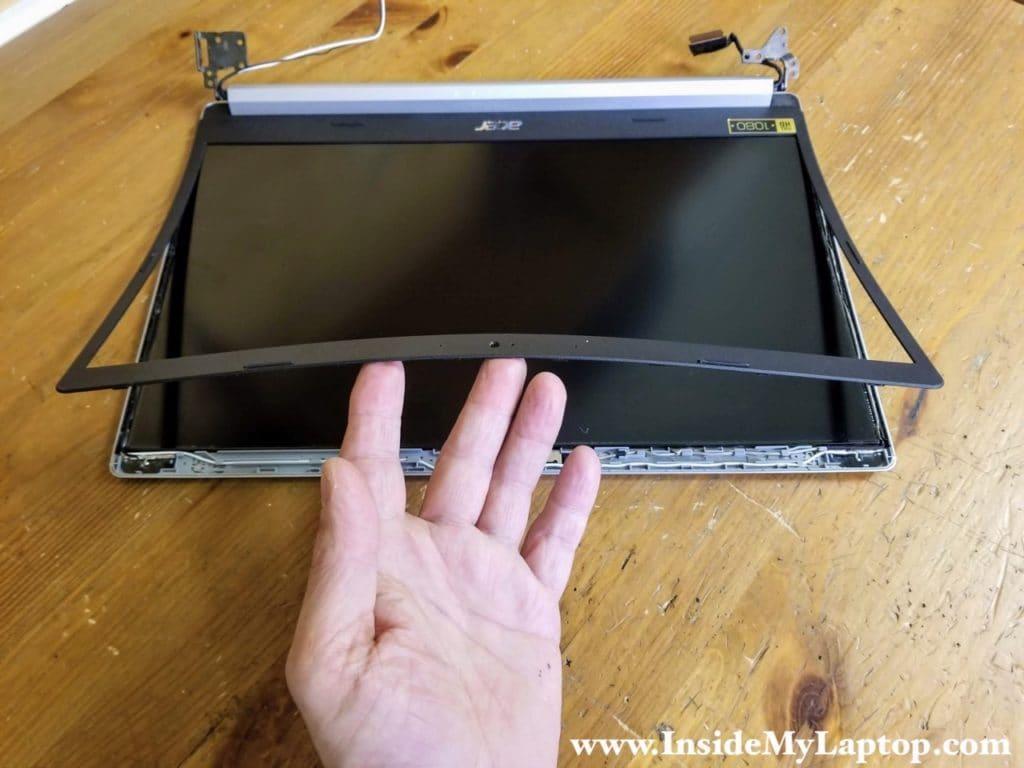
STEP 26.
Separate the hinge cover from the display. A case opener tool will be helpful here.
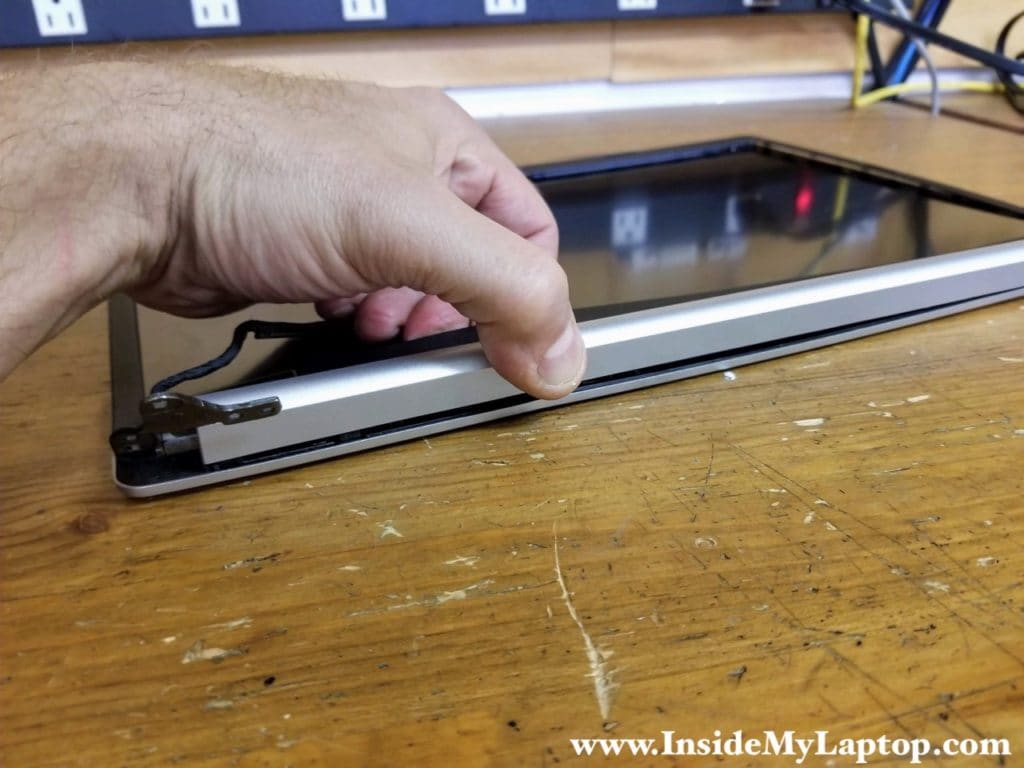
STEP 27.
Lift up one side of the screen bezel and separate it from the hinge. Pay attention to how the cables are routed.
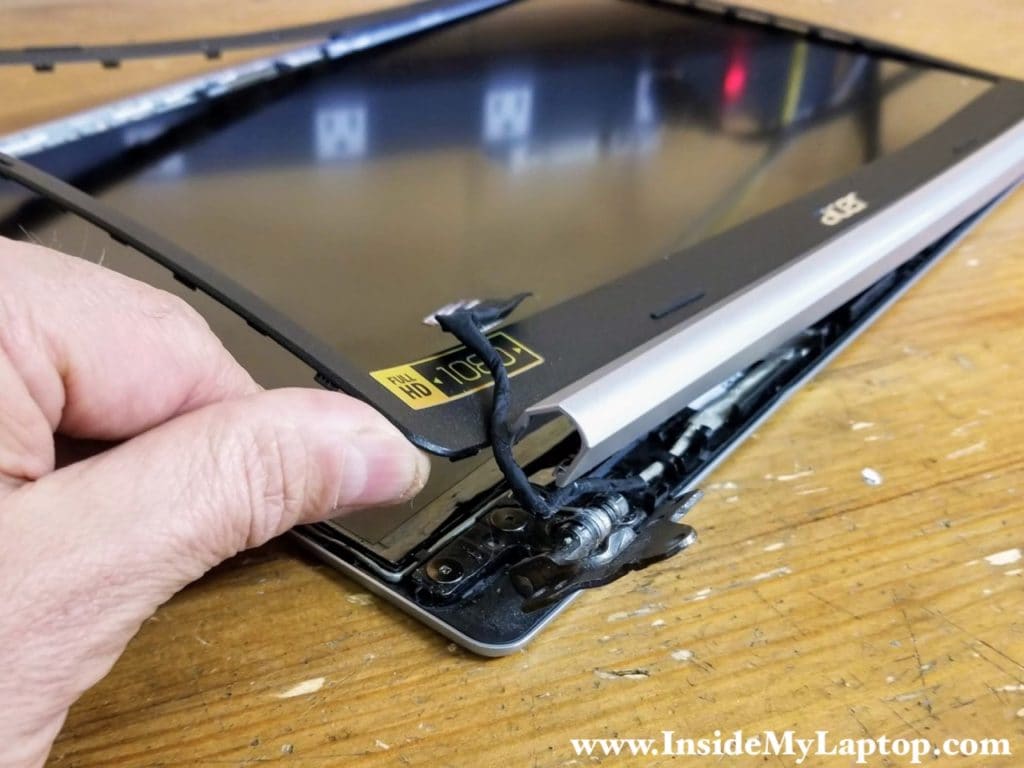
STEP 28.
Remove the screen bezel.
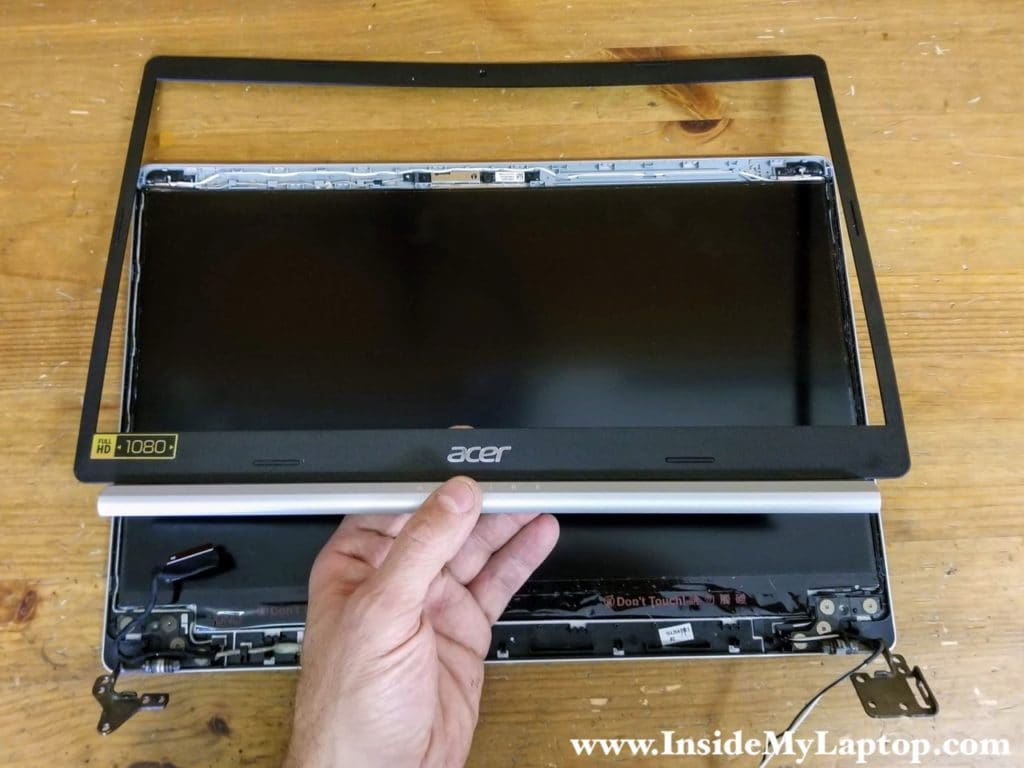
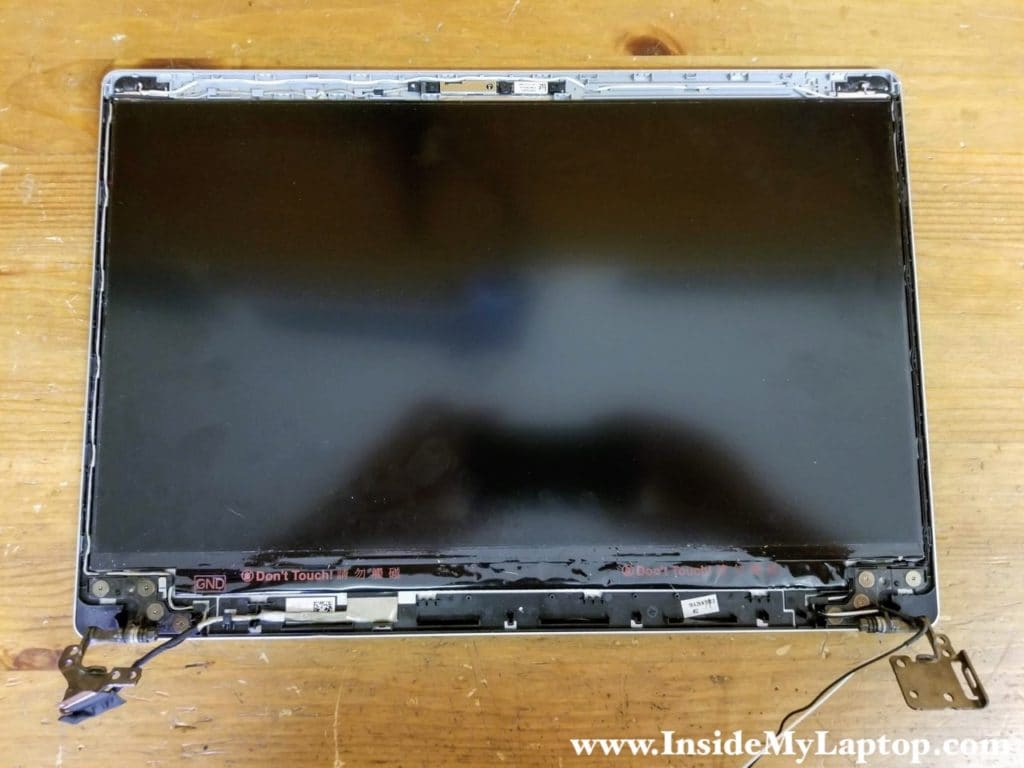
When the bezel was removed, I found that the LCD screen is glued to the display cover. There are no screws securing the screen.
I was afraid to proceed with the screen removal to avoid damaging it (I’m taking apart a perfectly working unit). In order to replace the screen it’s necessary to unglue it first.
Bert Darling
The speaker makes athe voices sound funny this has just started is there a repair orv can I replace it ???
IML Tech
Test your laptop with headphones. If headphones work properly, it’s possible there is a problem with the speakers. If you hear same sound distortion through headphones, it’s possible this is software related issue. Try reinstalling the audio driver.