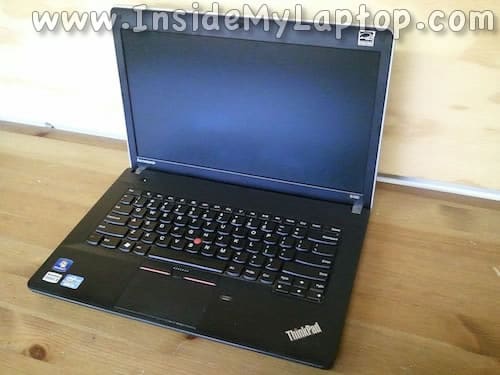
In this guide I’ll be taking apart a Lenovo ThinkPad Edge E430.
I’ll show how to access main internal components (steps 1-11 ) and remove the keyboard (steps 12-18).
As always, make sure the laptop is turned off before you start taking it apart.
STEP 1.
Unlock and remove the battery.

STEP 2.
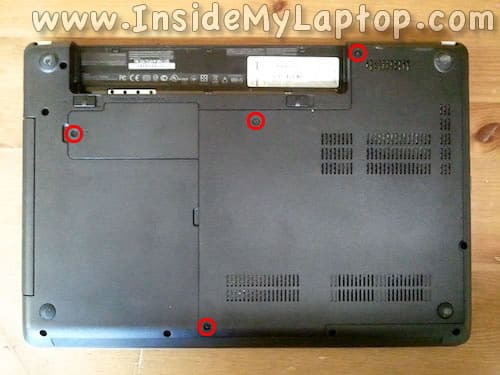
Loosen screws securing two service covers on the bottom and remove both covers.
STEP 3.
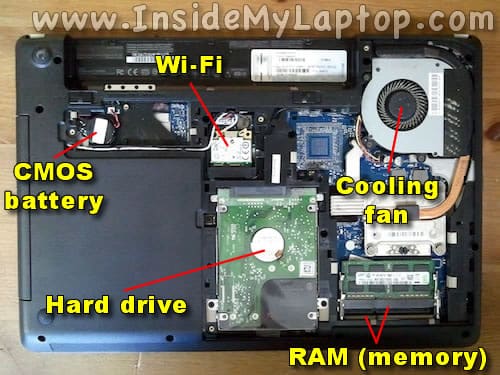
When both covers removed you can get access to the following internal laptop components:
– CMOS battery.
– Wireless card.
– Hard drive.
– Cooling fan.
– RAM (memory) modules.
This laptop can take up to 16GB (2x8GB) DDR3-12800 SODIMM memory modules.
STEP 4.
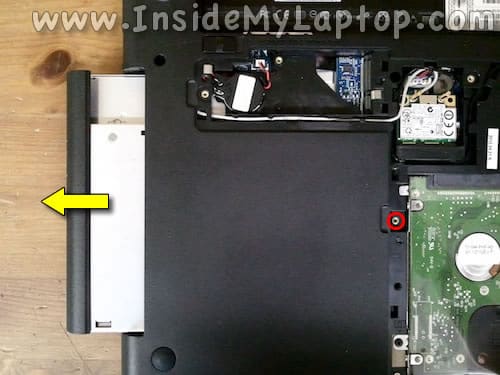
Remove one screw securing the optical drive.
Pull the optical drive to the left to disconnect it from the motherboard and remove it.
STEP 5.
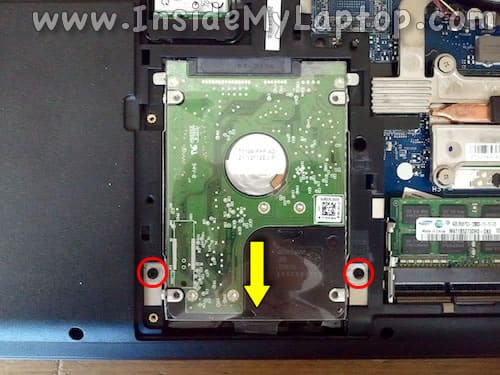
Remove two screws securing the hard drive assembly.
Slide the hard drive to the shown direction to disconnect it from the motherboard.
STEP 6.
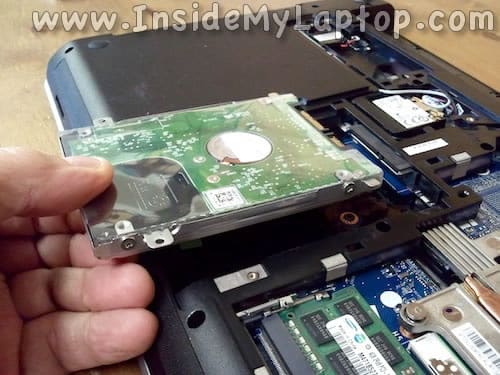
Lift up and remove the hard drive.
Lenovo ThinkPad Edge E430 has a regular 2.5″ SATA hard drive installed. It can be easily replaced with a 2.5″ SATA solid state drive to improve laptop performance.
STEP 7.
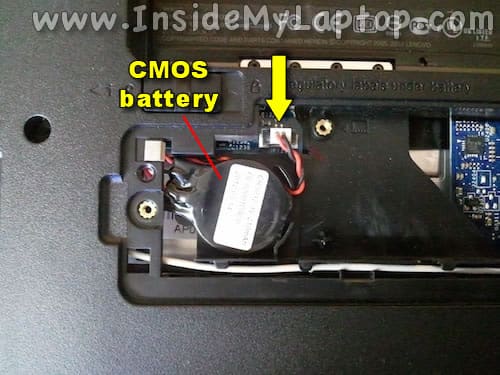
The CMOS battery can be easily disconnected and replaced.
STEP 8.
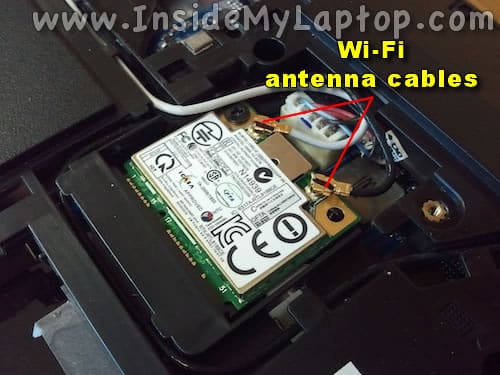
In order to remove the wireless card it’s necessary to disconnect two antenna cables.
Simply grab the gold connector on the end of the antenna cable and lift it up.
After both antenna cables disconnected you’ll have to remove one screw securing the wireless card and pull the card from the slot.
STEP 9.
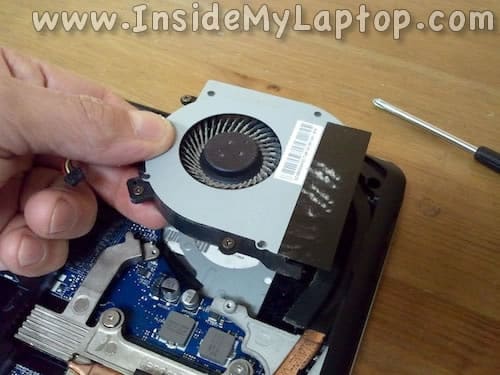
The cooling fan secured by three screws.
If you are replacing the fan you’ll have to remove these screws and unplug the fan cable from the motherboard.

STEP 10.
After that you can lift up and remove the fan.
STEP 11.
When the cooling fan removed, you can clean up the heatsink from dust.

STEP 12.
Now we are going to remove the keyboard.
It’s not necessary to go though steps 3-11 in order to remove the keyboard.
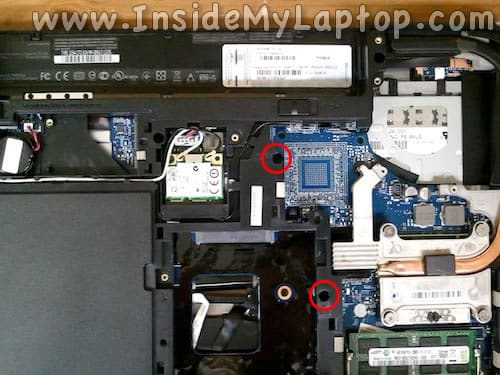
Remove two screws securing the keyboard on the bottom.
STEP 13.
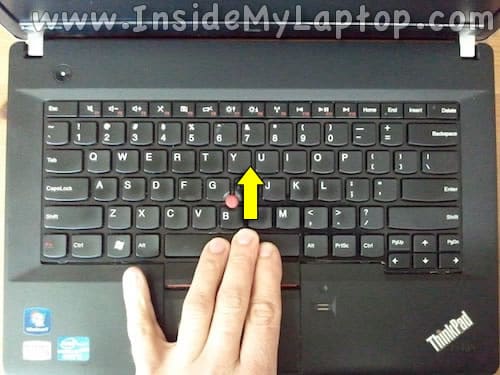
Slide the keyboard about 2-3 millimeters towards the display so there is a gap between the bottom side of the keyboard and palm rest assembly.
STEP 14.
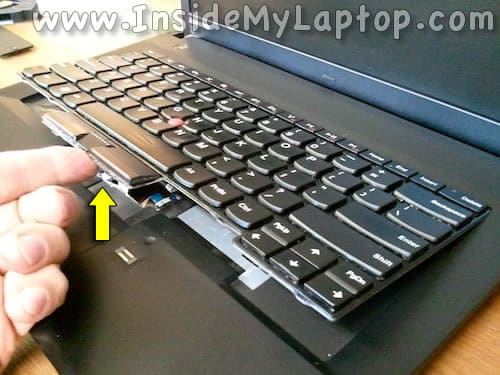
Start separating the keyboard from the top cover.
STEP 15.
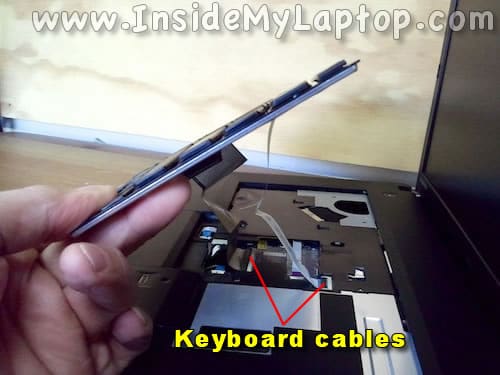
Be careful, the keyboard cables still connected to the motherboard.
You’ll have to disconnect both cable from the motherboard as it shown in steps 16-17.
STEP 16.
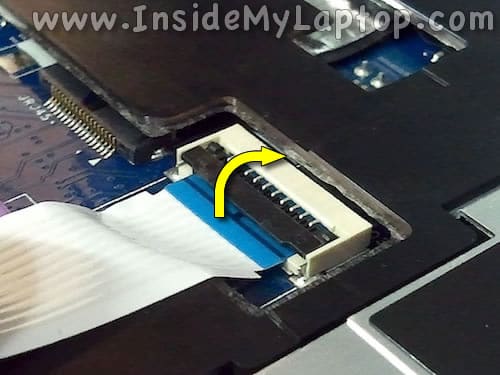
Here’s how to unlock the cable connector.
Carefully lift up the brown retainer using your fingernail. The cable retainer will open up at a 90 degree angle.
STEP 17.
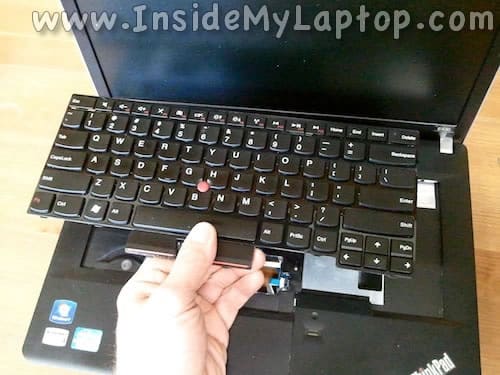
Now you can pull keyboard cable from the connector.

STEP 18.
Now you should be able to remove the keyboard completely.
Filipe Fernandes
Hello, please help me, left LCD hinge of mine is broked nad I need to change/repair it, but I dont find a way to acess it, can you tell me how do it please? Many thanks by your attention
joy
Please let me share some ideas about disassembling lenovo e49.which i have learned by myself.