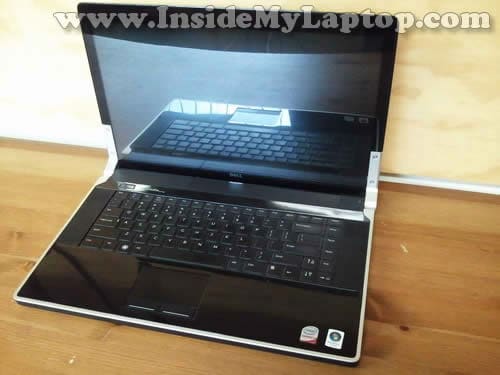
In this guide I show how to disassemble a Dell Studio XPS 1640/1645. I’m taking it apart in order to remove and replace the DVD drive.
Dell Studio XPS 1640/1645 laptop has a slot loading DVD drive which is mounted inside the case. In order to replace the DVD drive it’s necessary to remove the palmrest assembly.
Turn off the computer and remove the battery before you start taking it apart.
STEP 1.
Loosen ten screws securing the bottom cover.
Lift up and remove the cover.
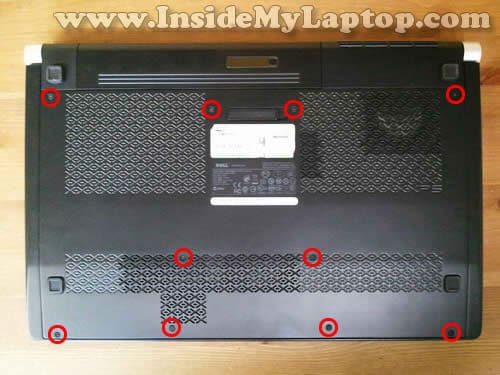
When the bottom cover removed you can access the following internal components:
– Both memory modules.
– CMOS battery.
– Cooling fan.
– Wireless card.
– Hard drive.
I’ll leave all these components connected to the motherboard because it’s not necessary to remove them for the purpose of my disassembly.

As I mentioned earlier the DVD drive is mounted INSIDE the case.

STEP 2.
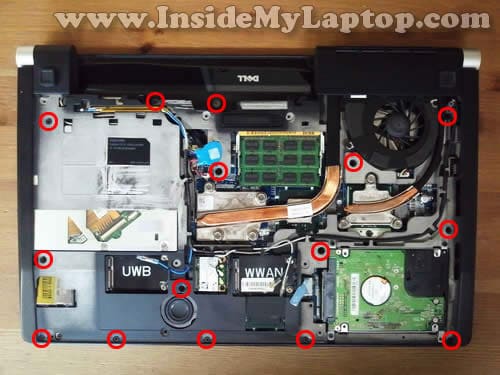
Remove all shown screws from the bottom of the laptop.
These screws securing the palmrest assembly and DVD drive.
STEP 3.
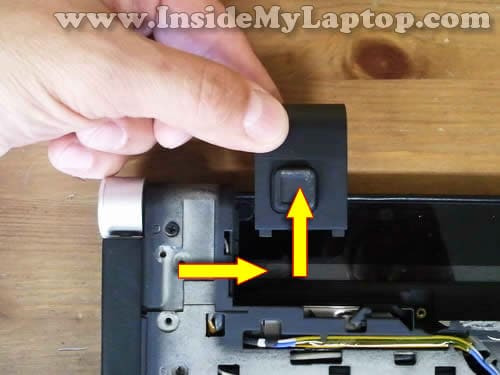
Remove the left rear cap.
First, slide it to the left and then up, away from the laptop.
By the way, you can remove the cooling fan only after this rear cap removed.
The cooling fan secured by two screw.

STEP 4.
Remove the right rear cap.
STEP 5.
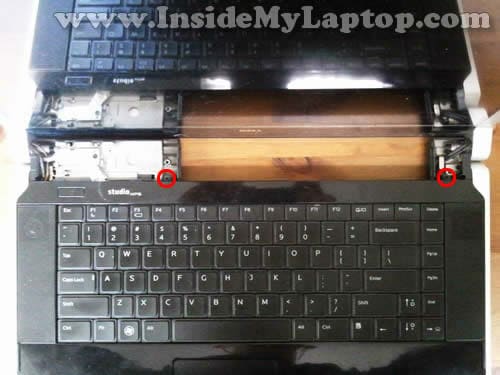
Remove two screws securing the palmrest assembly on the top.
STEP 6.
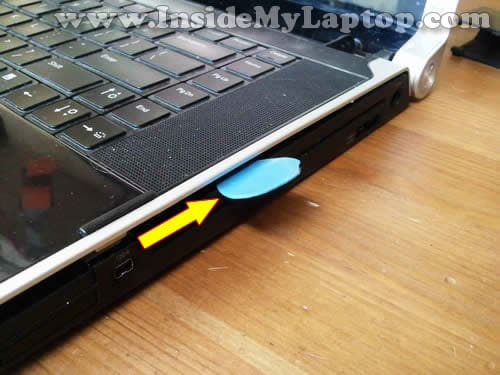
Start separating the palmrest assembly from the bottom cover with a piece of soft plastic. I’m using the guitar pick for that.
STEP 7.
Continue removing the palmrest assembly with your fingers.

STEP 8.
Be careful while lifting up the palmrest assembly. There are two cables connected to the motherboard.
On my picture I named them keyboard cables but actually they are the keyboard cable (left) and the touchpad cable (right).
In the following two steps I explain how to unlock cable connectors and release both cables.

STEP 9.
Both connectors has the cable retaining tab.
Carefully lift up the left side of the retaining tab with your fingernail. The retaining tab will open up at a 90 degree angle.

STEP 10.
On the following picture both connectors shown in the unlocked state.
Now you can pull the keyboard cable (left) and touchpad cable (right) from the connectors.

STEP 11.
Lift up and remove the palmrest assembly.
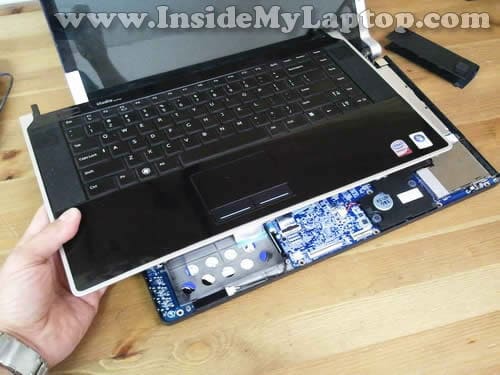
On the following picture you can see the bottom side of the palmrest assembly.
You can access the keyboard and touchpad from here.

STEP 12.
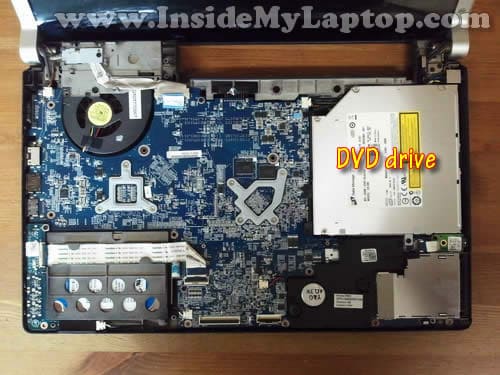
After the palmrest assembly removed you can access the DVD drive.
STEP 13.
Remove one screw securing the DVD drive mounting bracket.
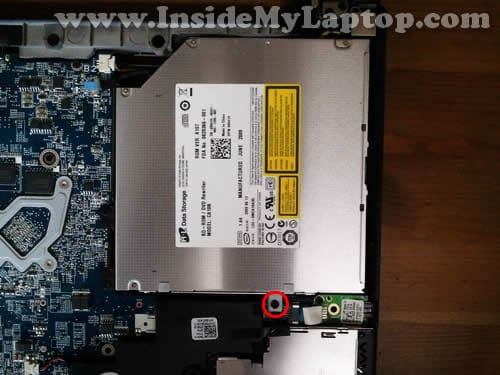
STEP 14.
Lift up the right side of the DVD drive and carefully pull it to the left to disconnect from the motherboard.

STEP 15.
Lift up and remove the DVD drive. It’s ready for the replacement.
Transfer the DVD drive mounting brackets to the new drive if needed.

Adrian
Hi,
I read your posting with interest after I replaced my dell keyboard. My new keyboard does not have a backlit display anymore and I am wondering if I didn’t install it right. There is an approx. one inch wide cable that you talked about unhooking to remove the palmrest. There is also a small 1/8 inch brown cable from the keyboard to mother board. do you know if that powers the backlighting display?
roland contreras
Can de empty DVD space be used for an SSD unit?
Cody
Does anyone still look at this that could tell me how to replace/repair dc jack?