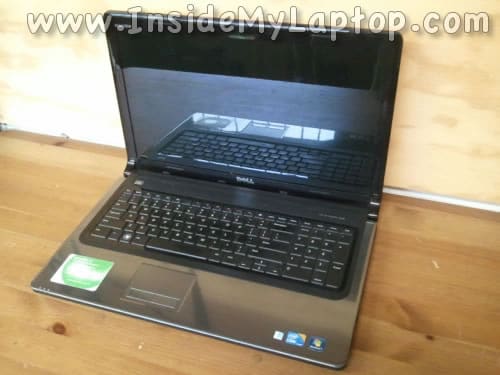
In this guide I show how to disassemble a Dell Inspiron 1764 laptop and access internal laptop components.
I’m taking it apart because it started overheating and the cooling fan started making rattling noise.
I will replace the processor cooling fan and clean up the heatsink.
As always, make sure the computer is turned off before you start taking it apart.
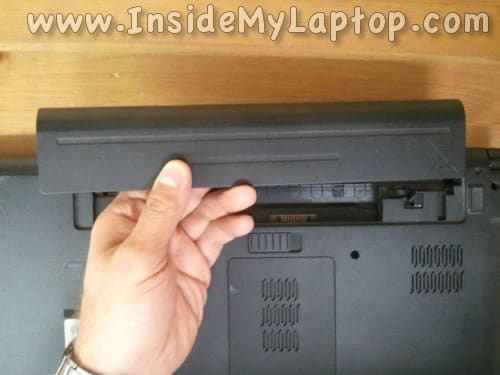
STEP 1.
Unlock and remove the battery.
STEP 2.
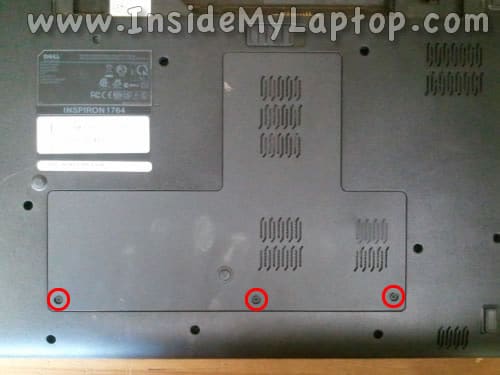
Unscrew three screws securing the service cover on the bottom.
Lift up and remove the service cover.
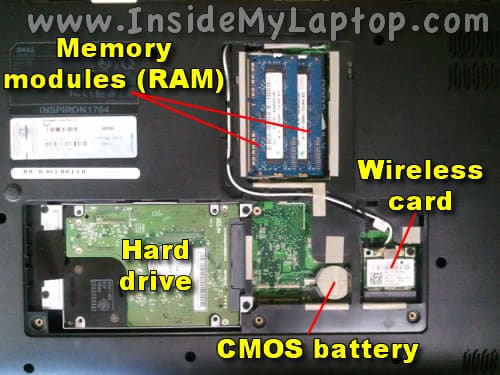
Under the service cover you can access the following internal components:
– Both memory modules.
– Hard drive.
– CMOS (RTC) battery.
– Wireless card.
This laptop can handle up to 8GB (2x4GB) DDR3-12800 SODIMM memory modules.
STEP 3.
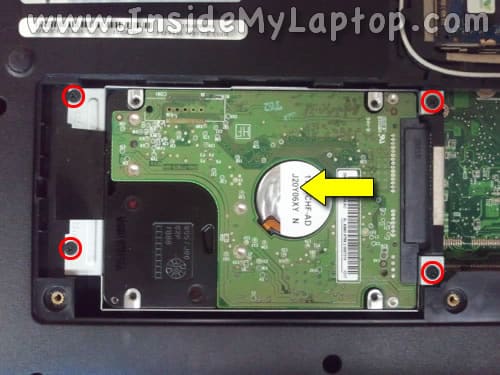
Remove four screws securing the hard drive.
Slide the hard drive to the left to disconnect it from the motherboard.
STEP 4.
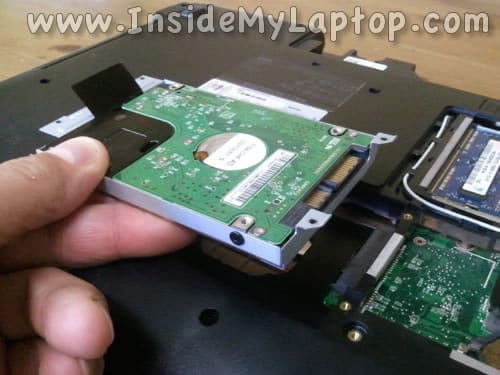
Lift up and remove the hard drive.
Upgrading this regular 2.5″ SATA hard drive to a 2.5″ SATA solid state drive will improve laptop performance significantly.
STEP 5.
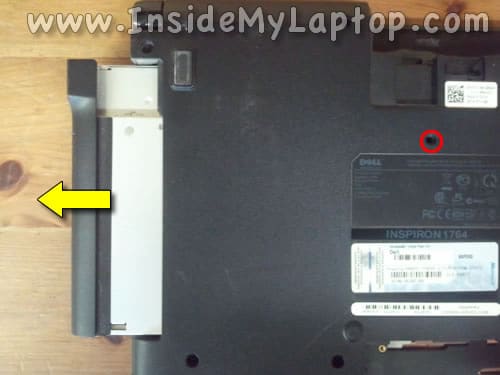
Remove one screw securing the optical drive.
Slid the optical drive to the left to disconnect it from the motherboard.
Pull the optical drive and remove it.
STEP 6.
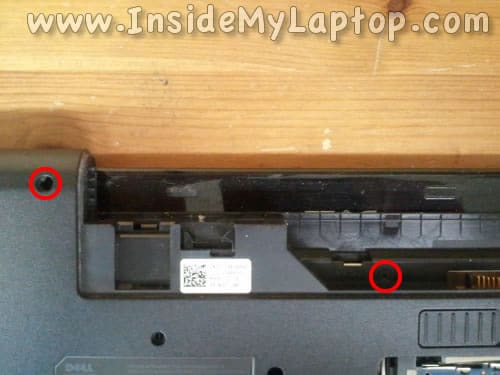
Remove two screw securing the keyboard bezel on the bottom.
STEP 7.
Start separating the keyboard bezel from the top cover.
You will have to wiggle the bezel to unlock hidden latches.
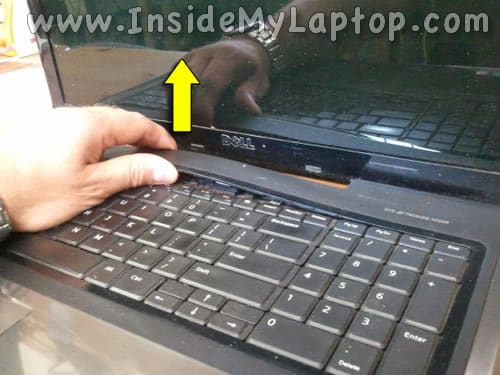
Be careful. The power button board attached to the keyboard bezel.
There is a cable connecting the power button board to the motherboard under the upper left corner of the bezel.
Lift up the bezel just enough to disconnect the cable from the motherboard.
In the following two steps I explain how to unlock the connector and release the cable.
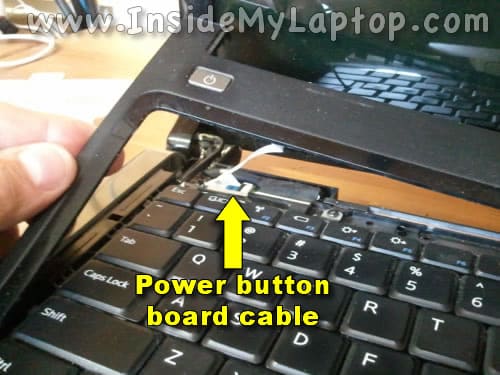
STEP 8.
Lift up the left side of the connector retainer (brown) with your fingernail.
The retainer will open up at a 90 degree angle.
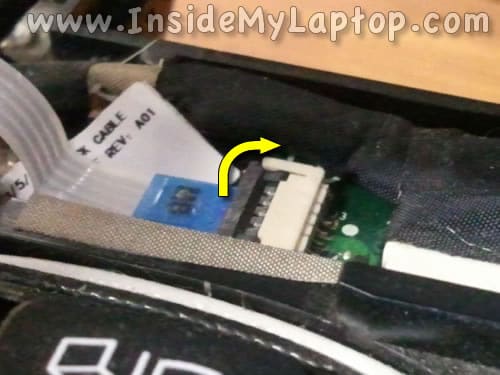
STEP 9.
On the following picture the same connector shown in the unlocked position.
Now you can pull the cable from the connector.
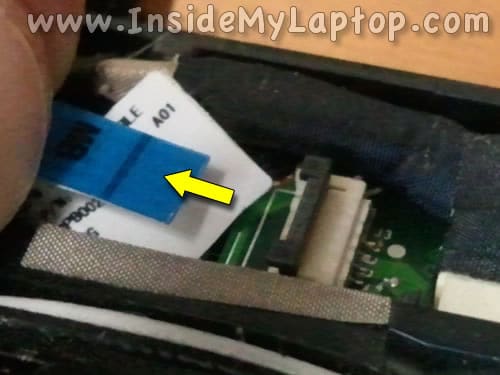
STEP 10.
Continue separating the keyboard bezel from the top cover.

You can use a guitar pick to separate the bezel.

STEP 11.
The keyboard bezel removed.
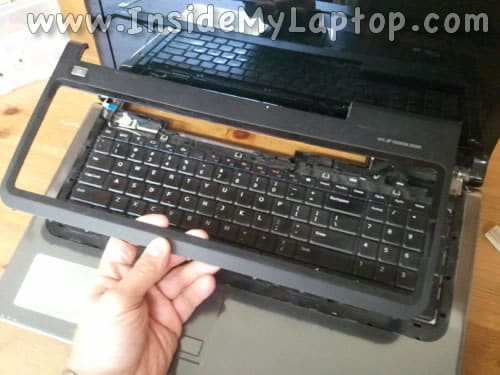
STEP 12.
Remove four screws securing the keyboard.

STEP 13.
Lift up the upper side of the keyboard.
Turn the keyboard upside down and place it on the palm rest.

Now you can access the keyboard cable connector.
It’s necessary to unlock the connector and release the cable before you remove the keyboard.
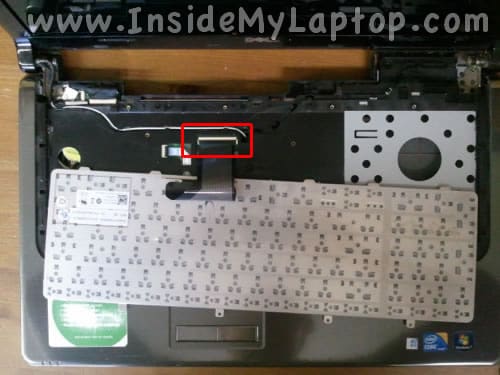
STEP 14.
Lift up the left side of the connector retainer with your fingernail.
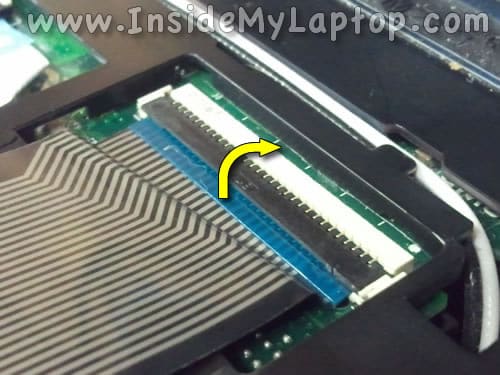
STEP 15.
Pull the cable from the connector.
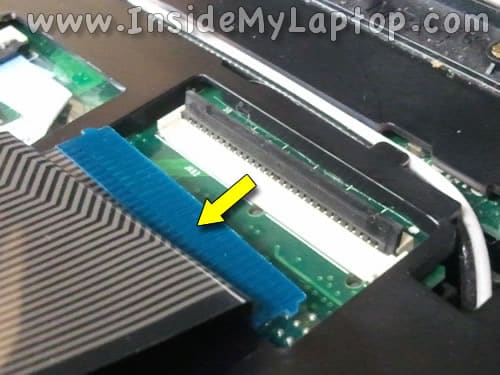
Now you can remove the keyboard.
STEP 16.
Remove all shown screws from the bottom.
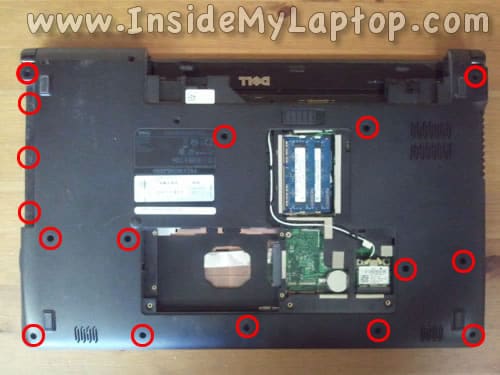
Also, it is necessary to disconnect the antenna cables from the wireless card.

STEP 17.
Disconnect both antenna cable from the wireless card.
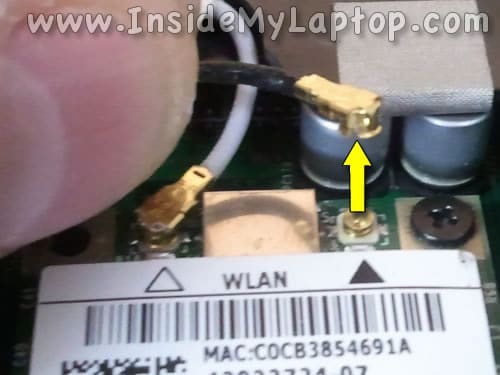
STEP 18.
Remove antenna cables from the guided path on the bottom case.

STEP 19.
Pull wireless antenna cables though the opening in the top cover.
Remove cables from the guided path on the top cover.

STEP 20.
Remove six screws securing the top cover.
Disconnect the trackpad cable from the motherboard.

STEP 21.
Start separating the top cover from the bottom case.

STEP 22.
Continue removing the top cover.
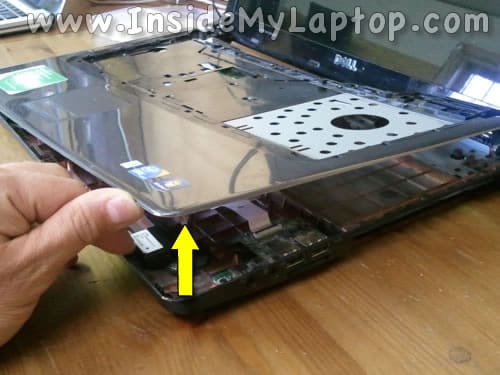
STEP 23.
The top cover has been removed.
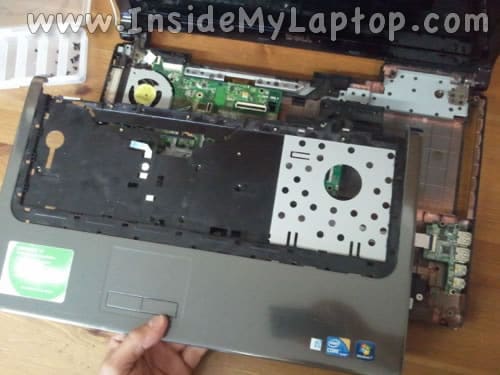
Here’s the bottom side of the top cover.
Here you can access the trackpad and trackpad button board.

STEP 24.
After the top cover removed, you can access the cooling fan.
In Dell Inspiron 1764 laptop the fan can be removed and replaced without removing the motherboard.

STEP 25.
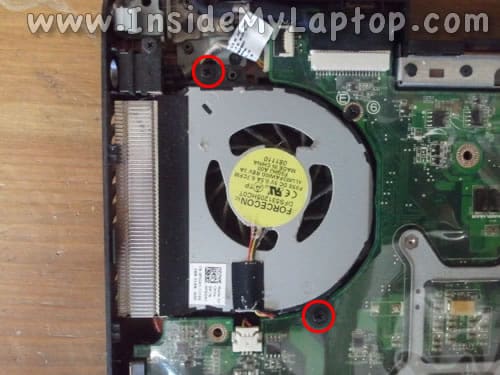
Remove two screws securing the processor cooling fan.
STEP 26.
Lift up the fan and disconnect the cable from the motherboard.
Now the failed cooling fan can be replaced with a new cooling fan.

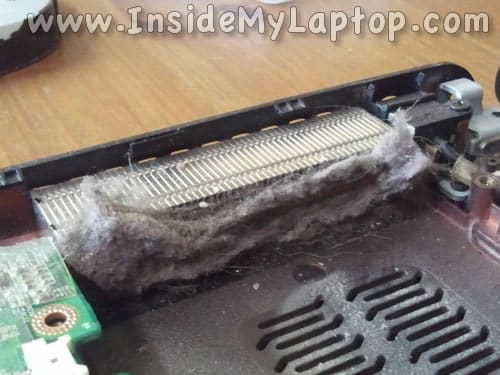
When the fan is removed you can clean up the heat sink.
Look how much dust got stuck between the fan and heatsink.
That’s why my Dell Inspiron 1764 was running so hot.
vinayak
very good guidance
Tony Psmythe
Hi,
Overall this is a great site. I noticed one problem on https://www.insidemylaptop.com/disassemble-dell-inspiron-1764-laptop/. On removing the top cover, you forgot to mention 2 screws that needed to be removed from the bottom. They are located at the top right/left corners. They are essential for the removal of the top cover.
Just wanted to let you know…
Keep up the good work!
😉
IML Tech
@ Tony Psmythe,
Thank you. Fixed.
aslanidis
FINE!!!!!!!!!!!!!!!!!!!!
Continue with other types of laptops
THESE lessons are so important and useful for every body
Onereaderwriter
Very glad to have found this info and appreciate the time the writer took to create this.
mkraai
Eeww! Same problem here. Lots of cat hair and dust.
Thanks for the step-by-step. I was on my way to figuring it out myself, then I got stuck. :^)
Martha
Hi,
After doing the cleaning, I decided to add new paste. I also noticed new thermal pads were in order. I unfortunately didn’t take a look at the type of pad I would need. Do you happen to know if I can use any or do specific ones need to be used? Thanks.
Fred Testerman
Great job, hoping this will help my 1764, it’s running hot and high cup after 3 – 4 hours.
Dirk
Thanks mate. My wife’s laptop was crashing with no explanation and the fan was running constantly, it was also running very slow. Followed you guide and now it runs like new.
Dale
Wow, Your guide is very well done. Awesome, What else can I say?
RP
What an incredibly through set of instructions! I am going to try this while on vacation and if it works your are definitely getting a PayPal donation from me! I already know how much a computer repair shop would charge for the labor!
Rory
Excellent tutorial, mine was running terribly, followed the instructions perfectly and its like new! Thanks so much!