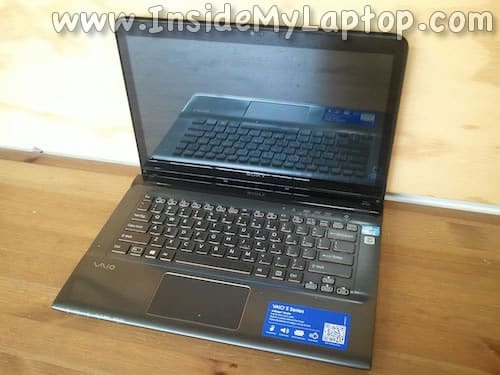
In this guide I will take apart a Sony VAIO E Series laptop.
Product name: SVE14A35CXH
MODEL: SVE14AJ16L

In this guide I will take apart a Sony VAIO E Series laptop.
Product name: SVE14A35CXH
MODEL: SVE14AJ16L

In this guide I explain how to disassemble a Sony Vaio VPCSA laptop.
In my case the full computer product name is: VPCSA4MFY. Model PCG-4121GL.

In this guide I’ll be taking apart a Sony Vaio VPCZ1.
I’ll show how to remove the keyboard/palmrest assembly in order to access the internal components.
You can use this guide for accessing the hard drive (which is mounted inside the case), memory modules, optical DVD drive and wireless card. Also, when you remove the palmrest assembly you can access the cooling fan and clean it up.
In this particular case I’m taking apart Sony Vaio VPCZ1290X model.

In this guide I will take apart a Sony Vaio VGN-CS215J laptop in order to replace failed DC jack. I think this guide will work for all other models in the Sony Vaio VGN-CS line.
During this disassembly process I’ll go though the following major steps:
STEP 1-5: Removing the hard drive, DVD drive. Accessing both memory modules.
STEP 6-12: Disconnecting and removing the keyboard.
STEP 13-16: Removing the bottom cover.
STEP 17-18: Disconnecting and removing the cooling fan assembly.
STEP 19-29: Disconnecting, removing and replacing the DC jack harness.
It’s hard to replace the DC jack on this model. If you have never fixed a laptop before, you don’t want to start with Sony Vaio VGN-CS. I think Sony engineers tried their best to make the DC jack cable replacement as difficult as possible. Well… they succeeded.

In this guide I will show how to disassemble a Sony Vaio VPCS111FM in order to fix broken power button.
Also, this laptop has another model number on the bottom: Model PCG-51211L.
Here’s what happened. The power button got pushed into the case and stopped working. It wasn’t possible to turn on the laptop at all.
In order to figure out what’s going on I had to disassemble the case and take a closer look at the power button.

Today I’ll be replacing broken screen on a Sony Vaio VPC-S111FM laptop.
It has another model number on the bottom: model PCG-51211L.
It’s possible the guide will fit some other Sony Vaio VPC-S series.

In this guide I explain how to disassemble a Sony Vaio VGN-NR series laptop.
I’ll be taking apart a Sony Vaio VGN-NR120E model but I believe you can use same instructions for all other models in VGN-NR line.
The main goal of my repair is removing and replacing the failed hard drive which is mounted inside the case.
While accessing the hard drive, I’ll explain how to remove some other main components.

In this guide I show how to disassemble a Sony Vaio VGN-FW170J laptop.
Most likely this guide will work for the entire Sony Vaio VGN-FW line.

In this guide I show how to remove and replace LCD screen on a Sony Vaio VGN-NW series laptop.
I’m fixing a Sony Vaio VGN-NW235F model. It also says model PCG-7184L on the bottom.

In the following guide I’ll be taking apart a Sony Vaio VPCF1 laptop. I’m doing that in order to replace the damaged screen.
The full model name is Sony Vaio VPC-F11KFX/B.
Also, there is another model number listed on the bottom: Model PCG-F1114L.