
In this guide I will go through a complete Asus F402B laptop disassembly. Model F402BA-EB94.
If you are here for the LCD screen replacement instructions, the display removal and disassembly shown at the end of this guide.
In order to remove and replace the LCD screen in an Asus F402BA-EB94 it’s necessary to remove the display first because you will not be able to remove the hinge cover otherwise.
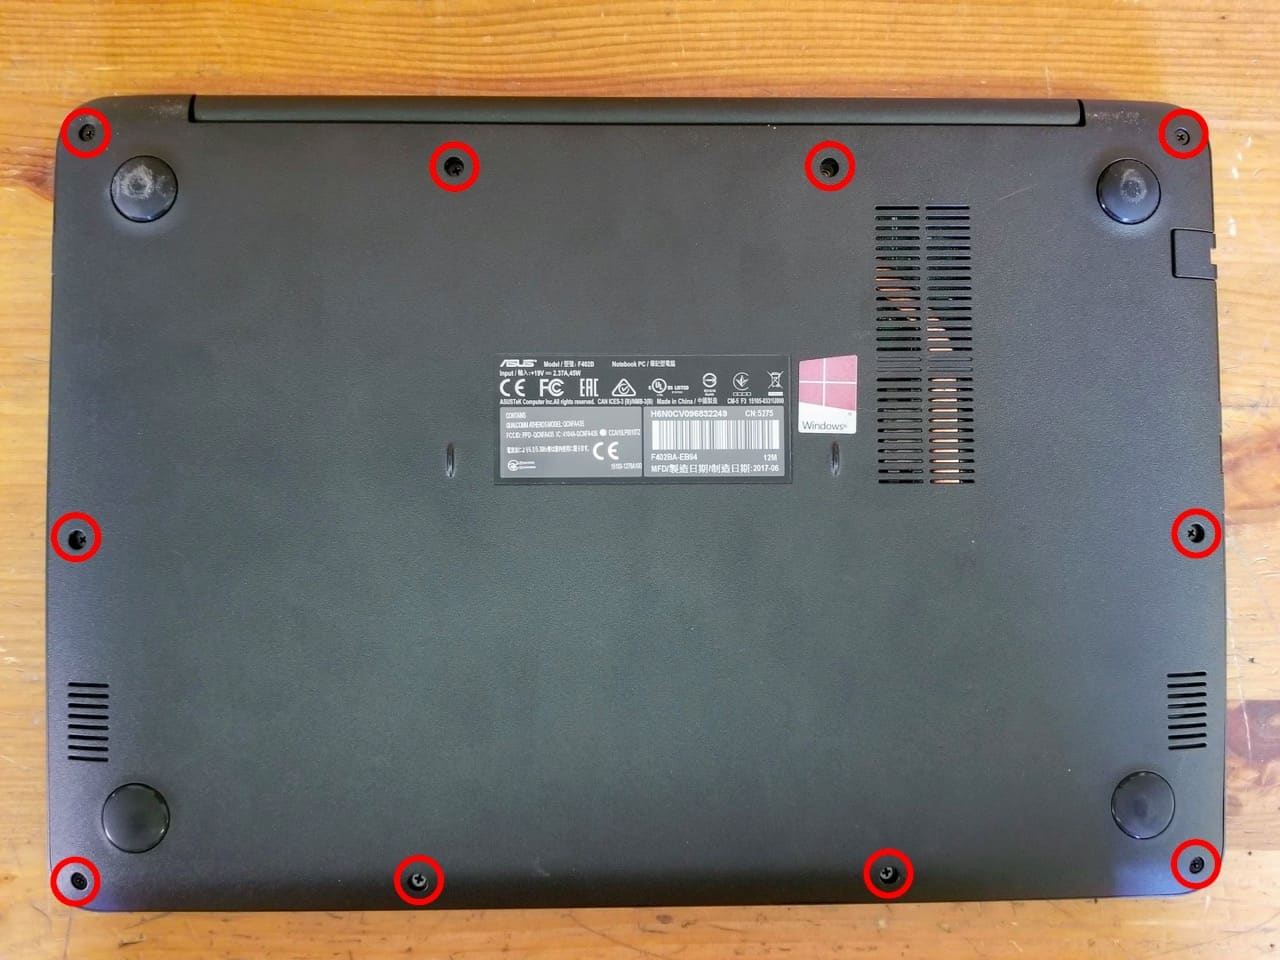
STEP 1.
Remove all screws from the bottom cover.
STEP 2.
Start separating the bottom cover from the rest of the laptop using a thin case opener tool.
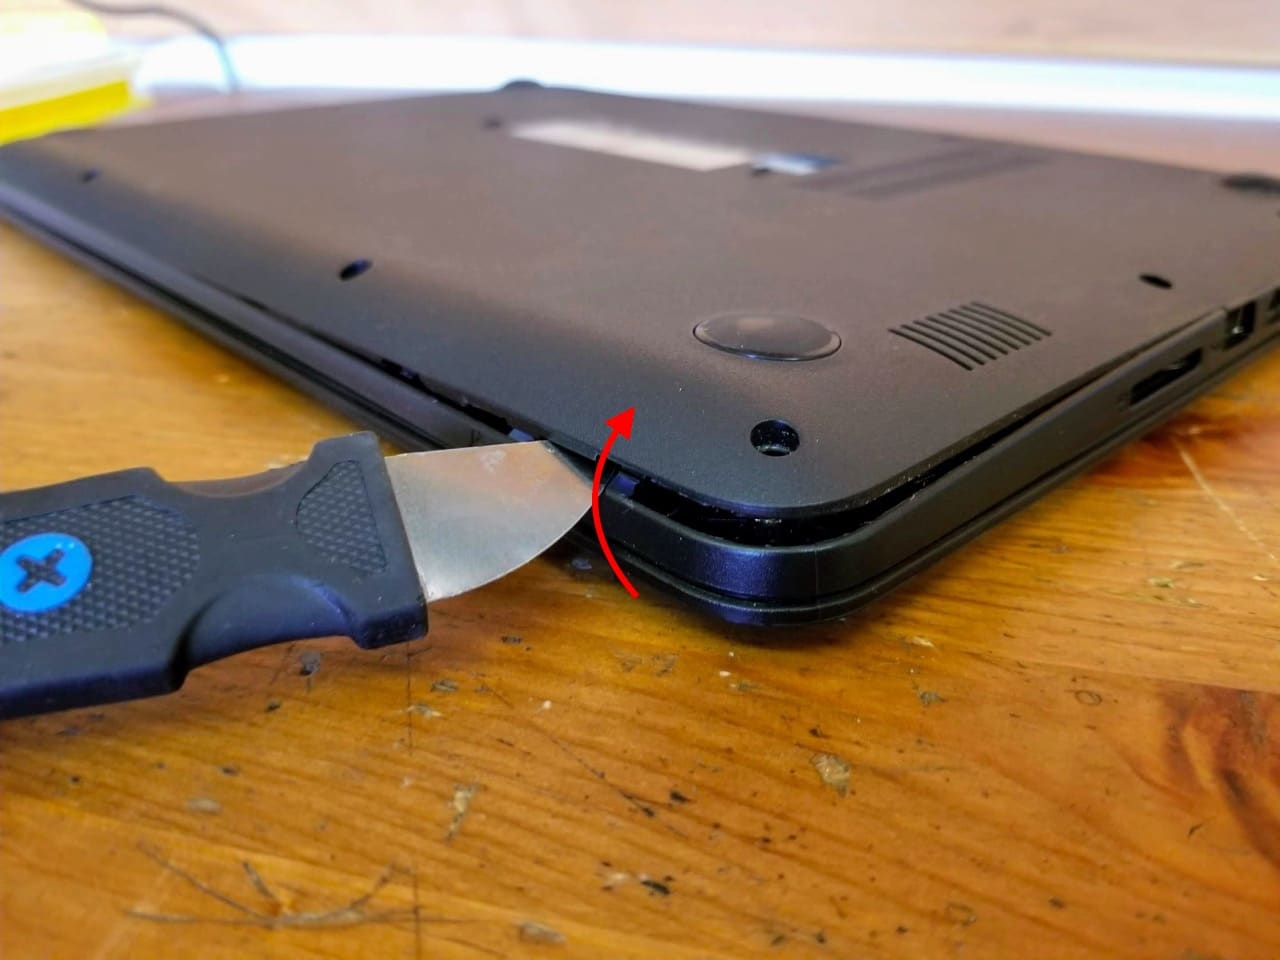
The bottom cover fitted very tightly. Continue lifting up one side of the bottom cover while prying up the other side.

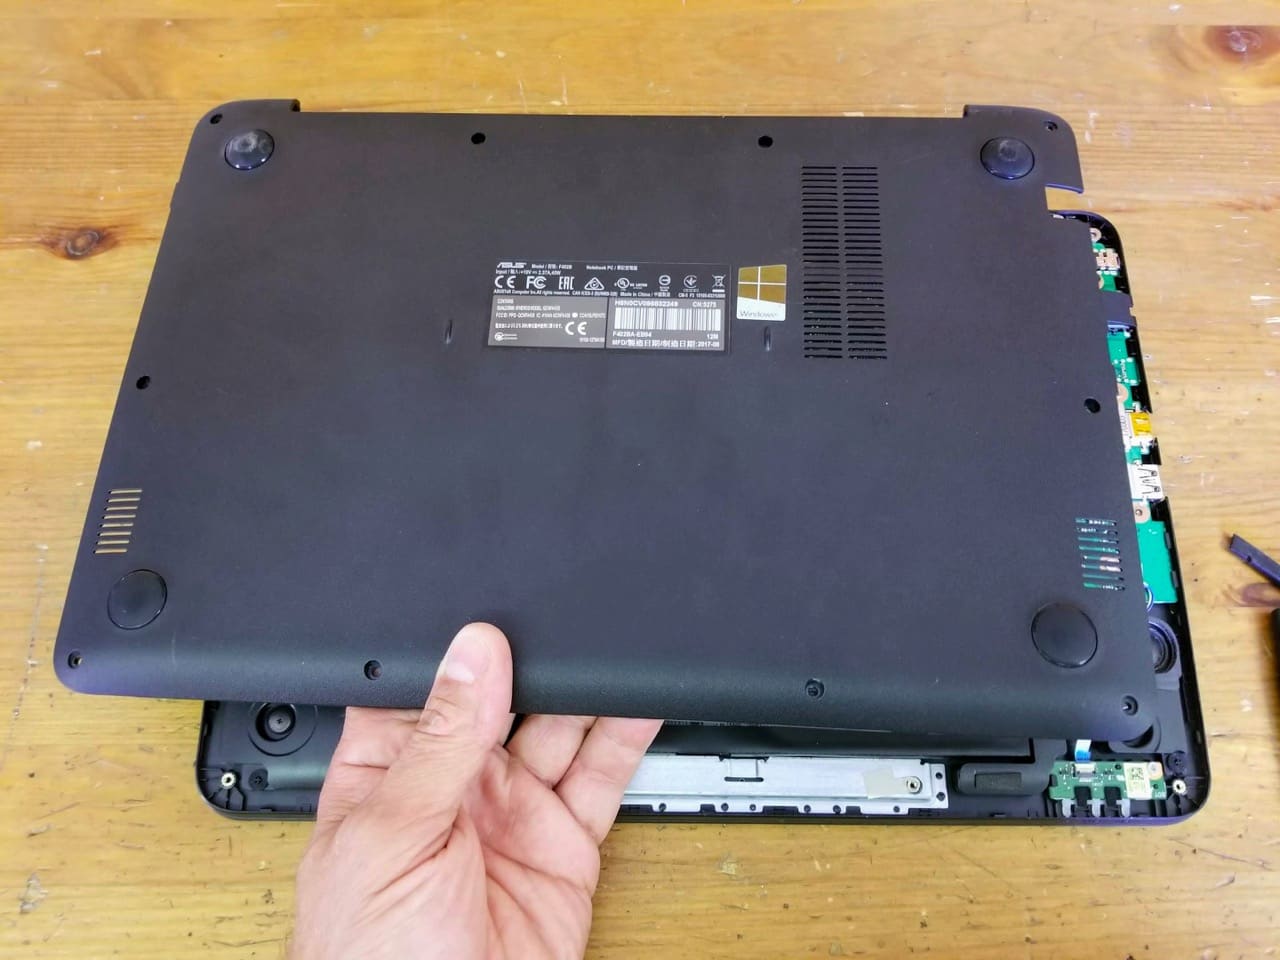
STEP 3.
Remove the bottom cover completely.
STEP 4.
Remove two screws securing the battery.
Disconnect the battery cable from the motherboard.

In order to disconnect the battery cable you’ll have to unlock the connector first.
Unlock the connector by moving the metal bracket away from the battery (red arrow).
Only after it is unlocked you can disconnect the cable by lifting up the white connector (green arrow).

STEP 5.
Remove the battery completely.
Replacement batteries model: C21N1618

STEP 6.
Remove four screws securing the hard drive assembly. In my Asus F402B I had a 2.5″ solid state drive installed.

STEP 7.
Slide the hard drive assembly away from the SATA connector and remove it.

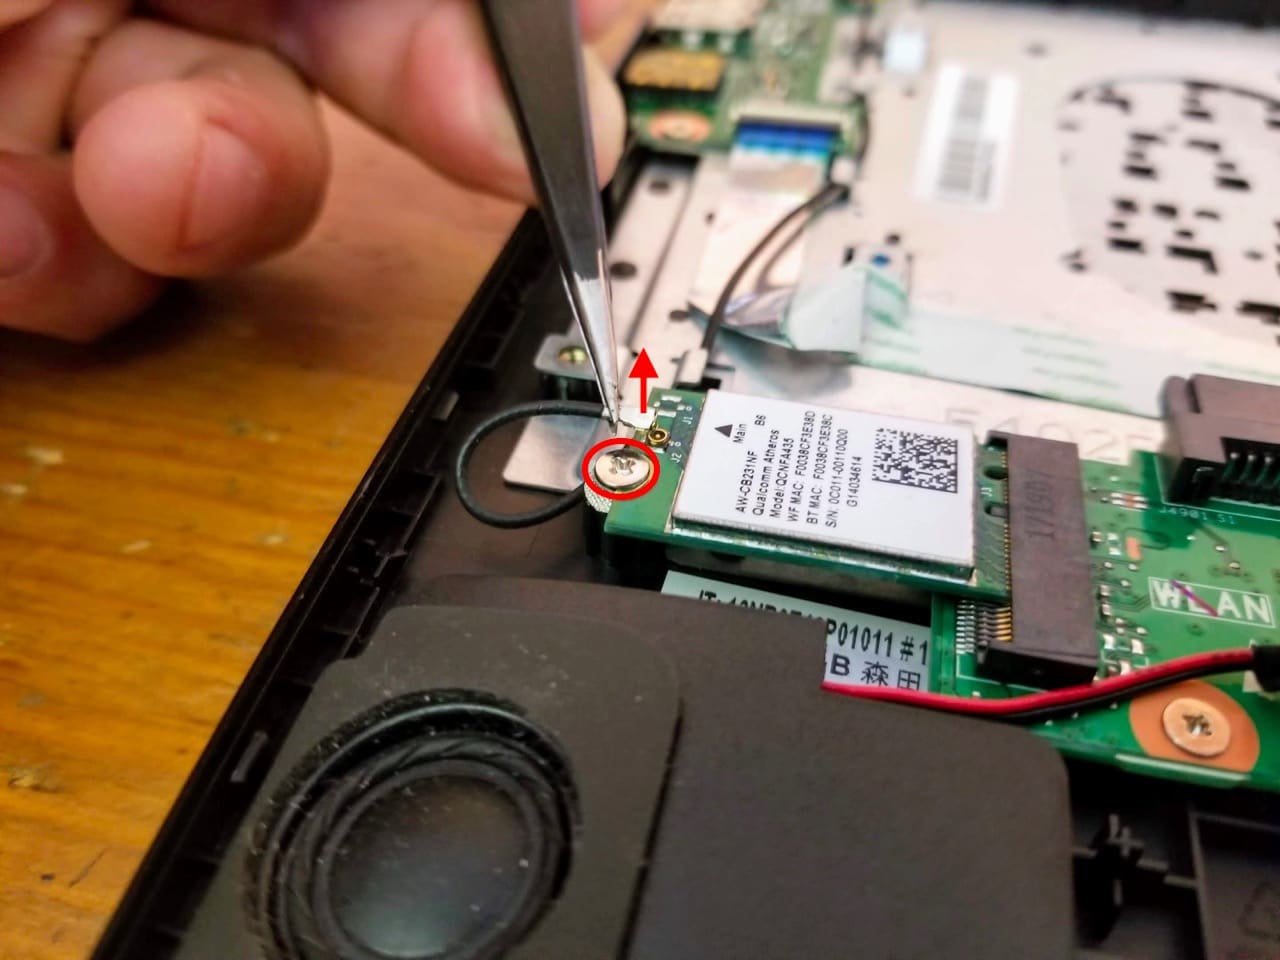
STEP 8.
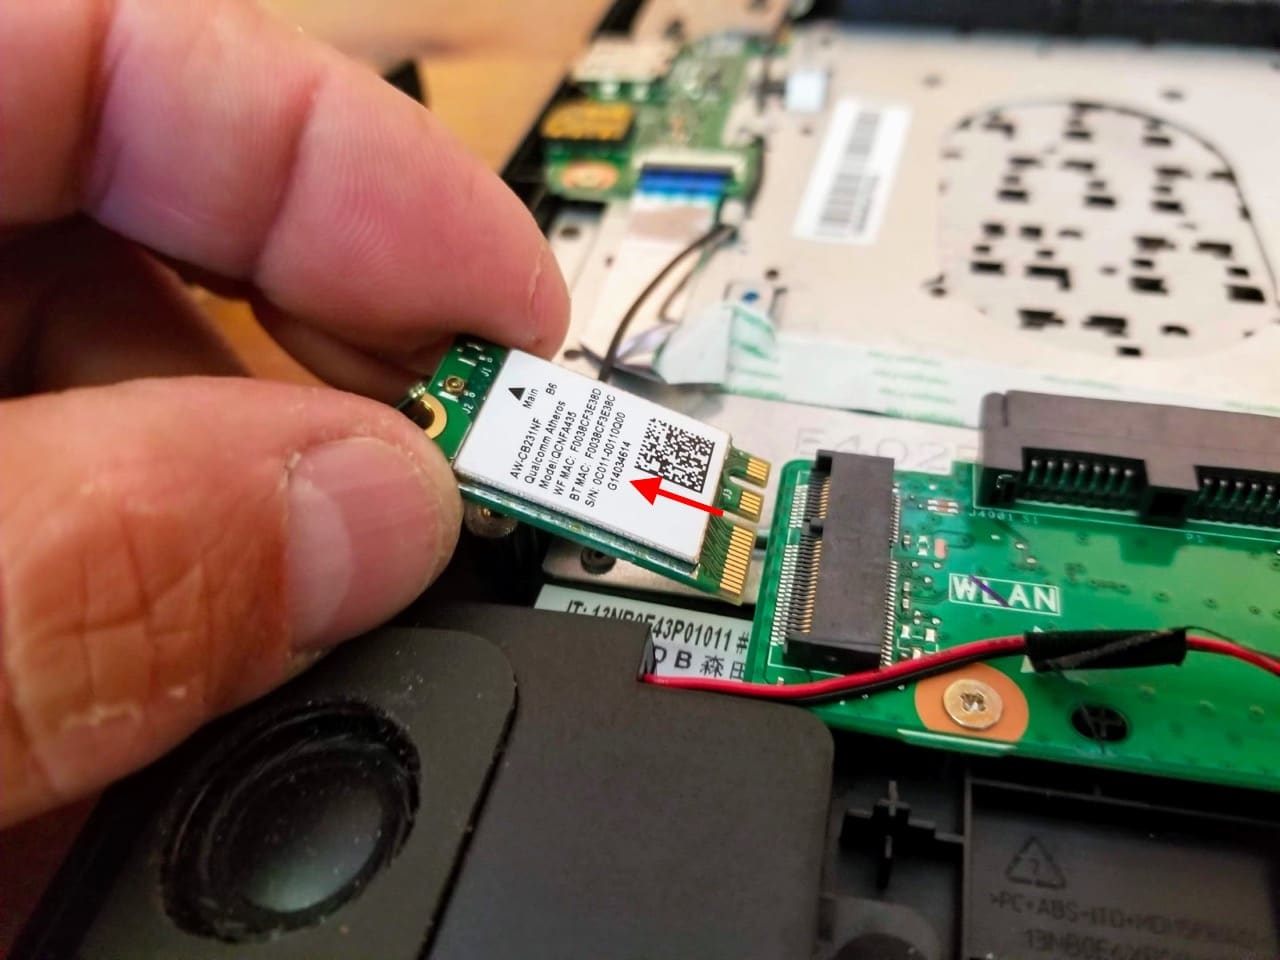
Disconnect the wireless card antenna cable. Carefully lift up the golden connector and unsnap it from the card.
Remove one screw securing the wireless card.
STEP 9.
Pull the wireless card out.
STEP 10.
The USB audio board mounted under the right display hinge.
Remove two screws from the hinge and one screw from the board.
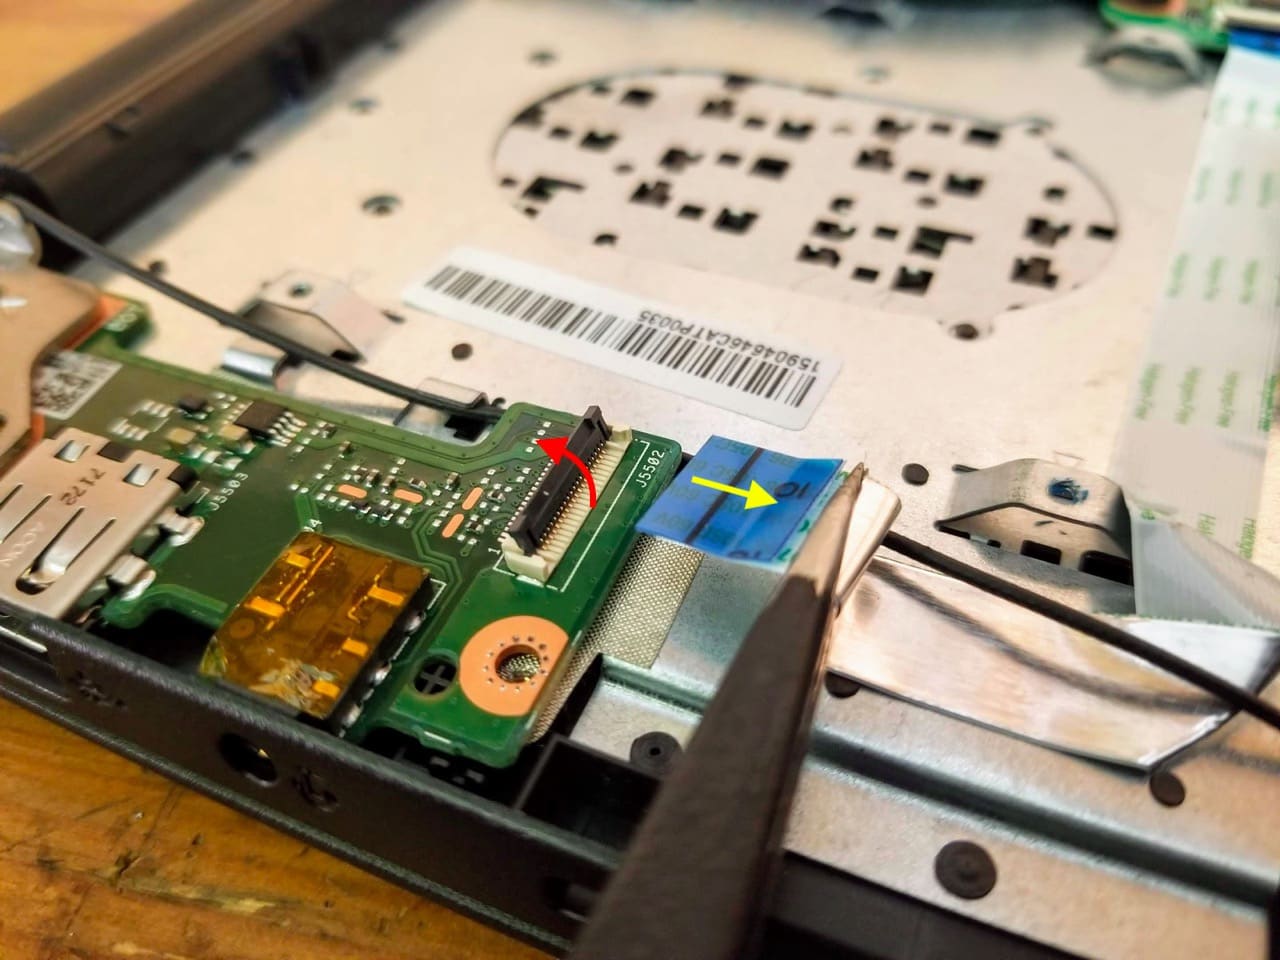
Disconnect the USB audio board cable.
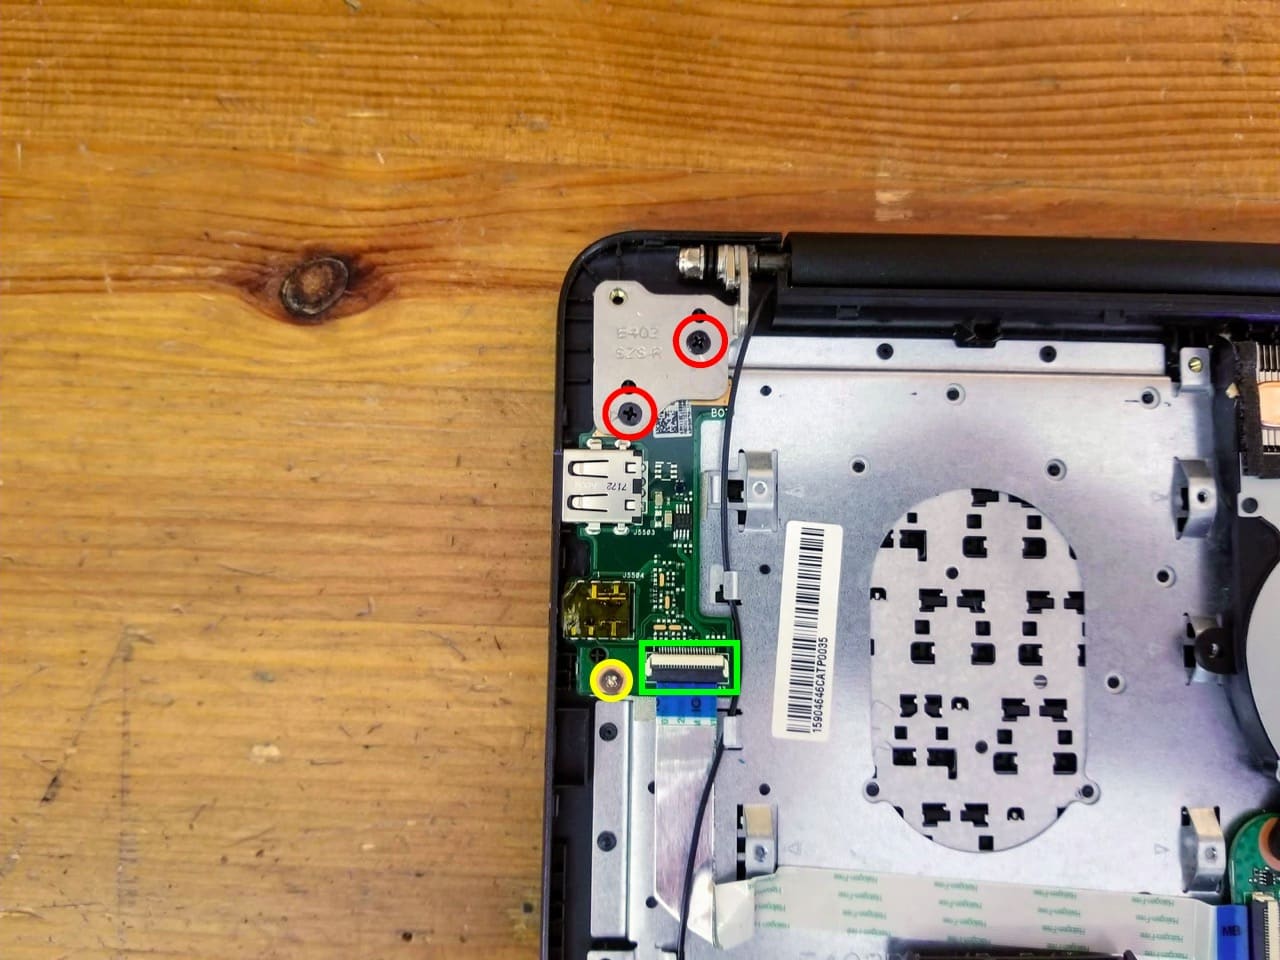
Unlock the connector by lifting up the locking tab (red arrow) and pull the cable out.
STEP 11.
Open up the display hinge and remove the USB audio board.

STEP 12.
Disconnect the display video cable from the motherboard.
Remove two screws securing the left display hinge.

STEP 13.
Open up the display hinge.

STEP 14.
With both display hinges opened up you can separate the laptop base from the display.

STEP 15.
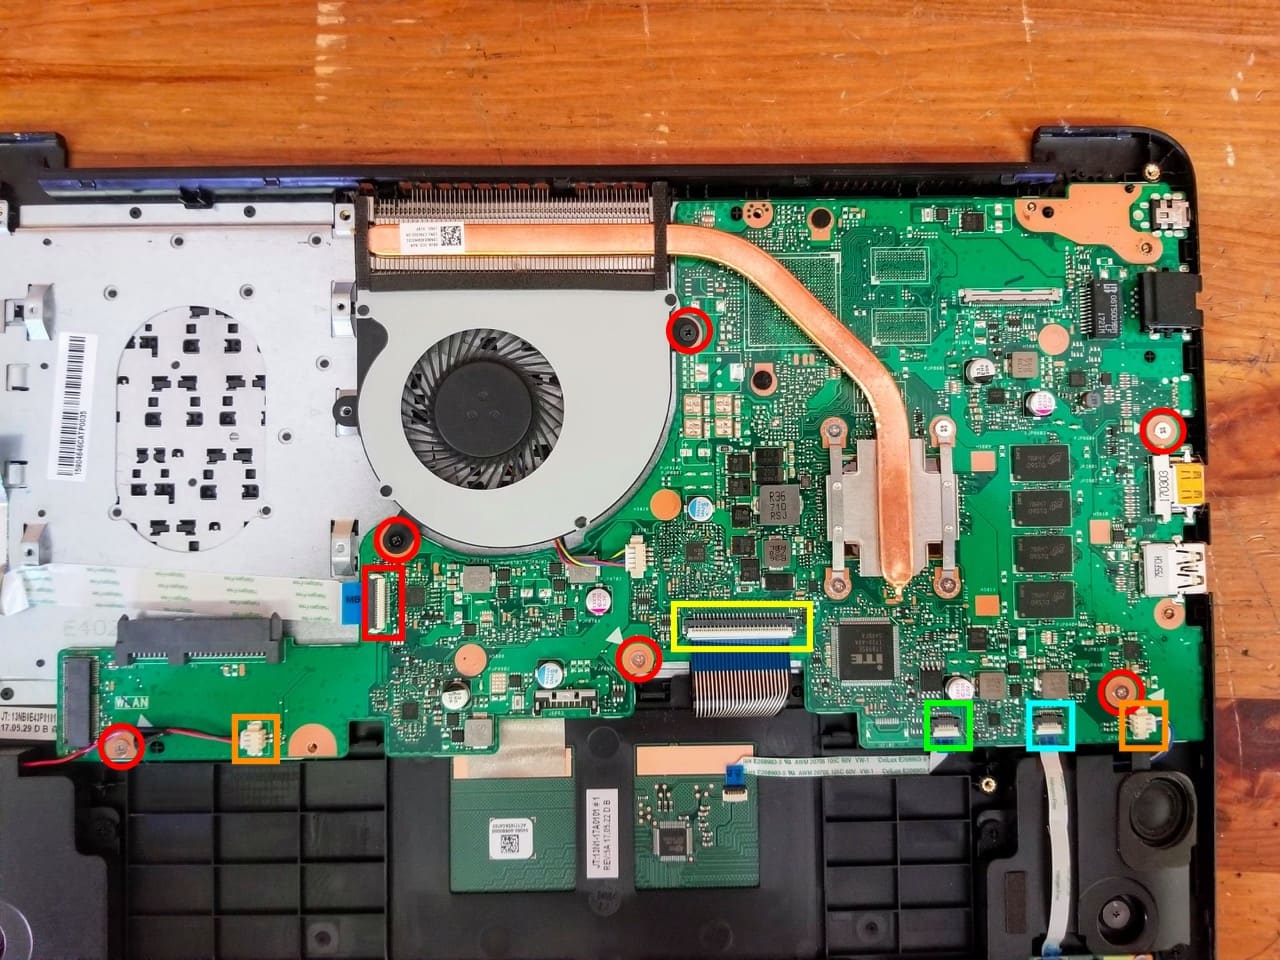
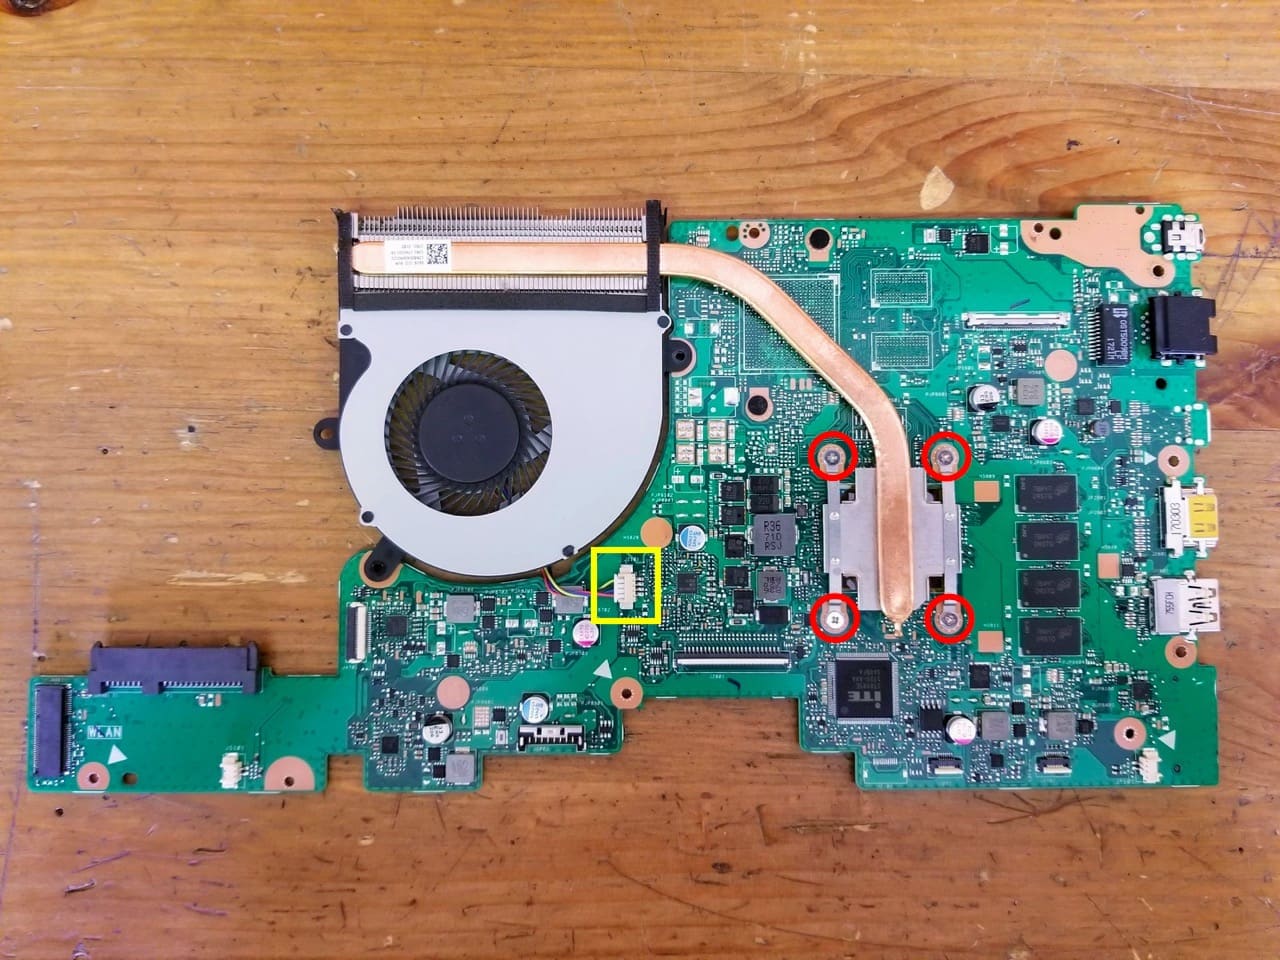
Remove two screws securing the cooling fan and four screws securing the motherboard.
Disconnect the following color-coded cables:
– USB audio board cable (red)
– Two speaker cables (orange)
– Keyboard cable (yellow)
– Touchpad cable (green)
– Front LED board cable (orange)
STEP 16.
Separate the motherboard from the palrmest assembly and remove it.

The cooling fan is a part of the heatsink.
In order to remove the cooling fan assembly you’ll have to remove four screws from the heatsink and disconnect the cable.
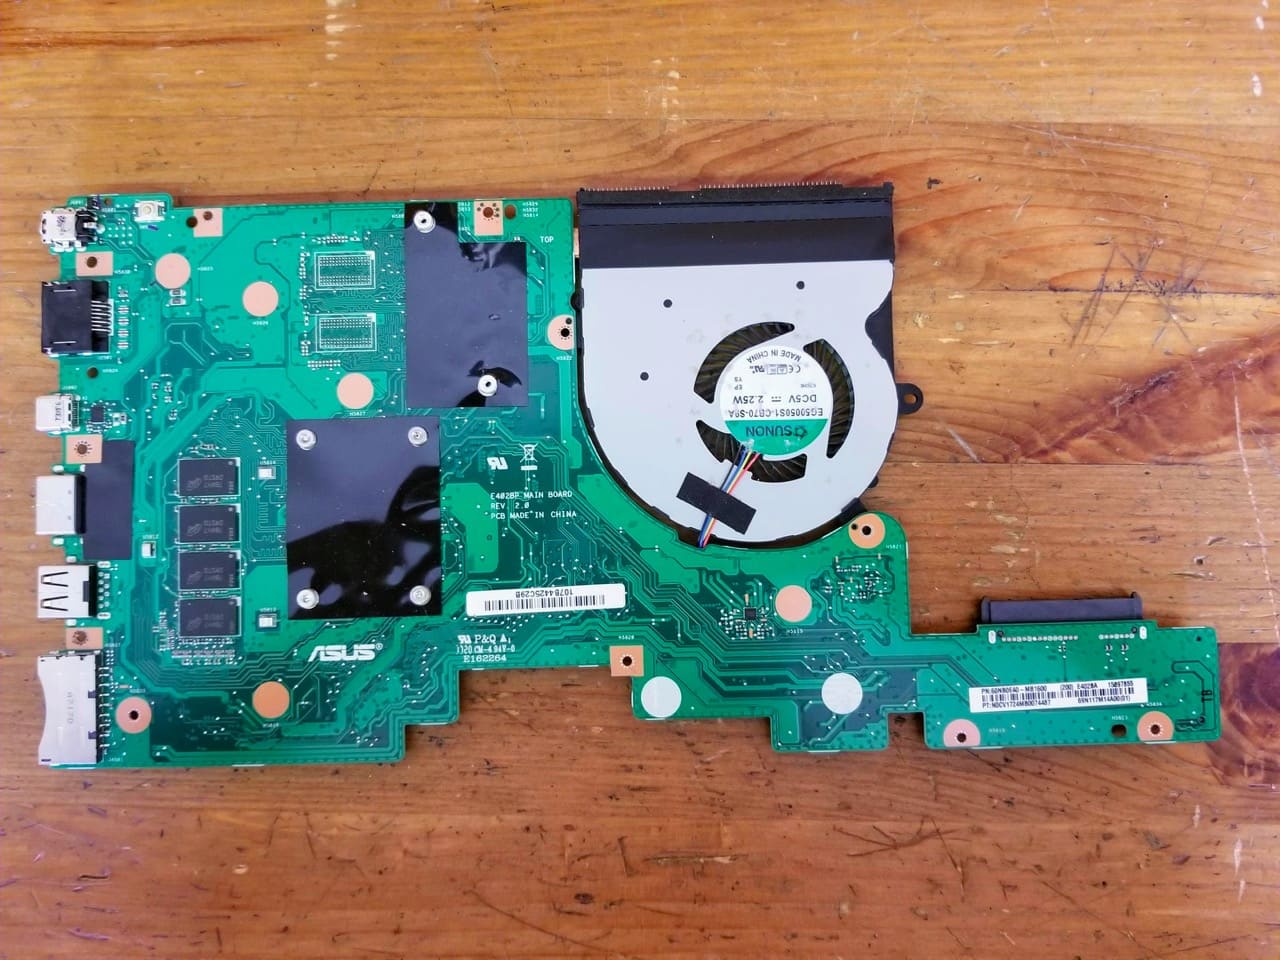
Here’s the other side of the motherboard. The DC power connector is permanently attached to the motherboard. Here’s how to remove the DC jack.
The keyboard is permanently attached to the palmrest but the touchpad can be removed and replaced.

Asus F402BA-EB94 display disassembly
STEP 17.
Remove two screws from the lower right and left corners.
These screws are hidden under two plastic covers.

STEP 18.
Start separating the LCD bezel from the back cover.
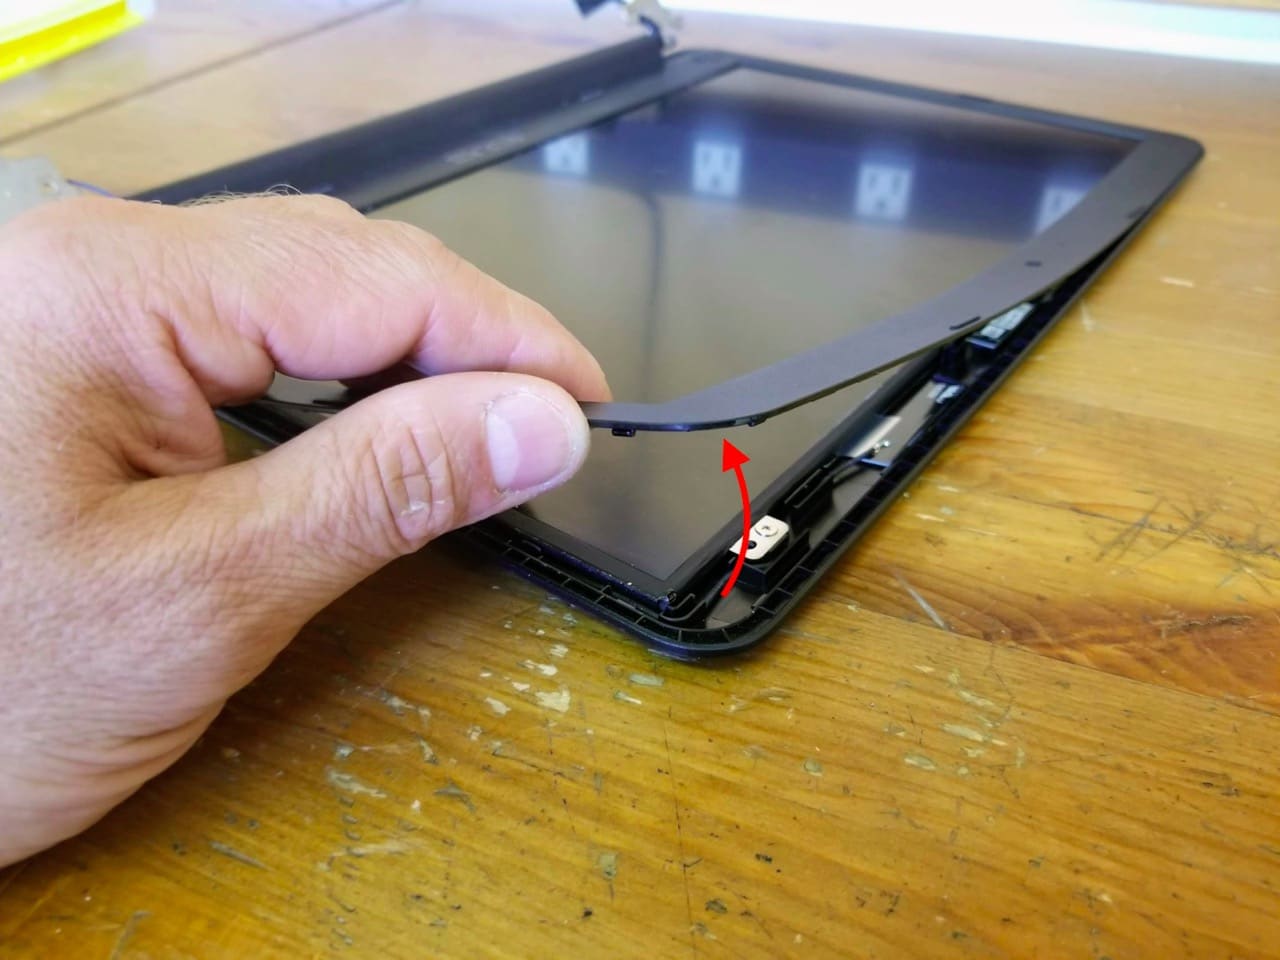
STEP 19.
Before you can remove the LCD bezel completely it’s necessary to remove the hinge cover.
Slide the hinge cover to the right and lift it up.

STEP 20.
Remove the LCD bezel.

STEP 21.
The LCD screen secured to the display back cover by four screws.
Remove all screws, separate the LCD screen from the back cover and disconnect the video cable on the back.
