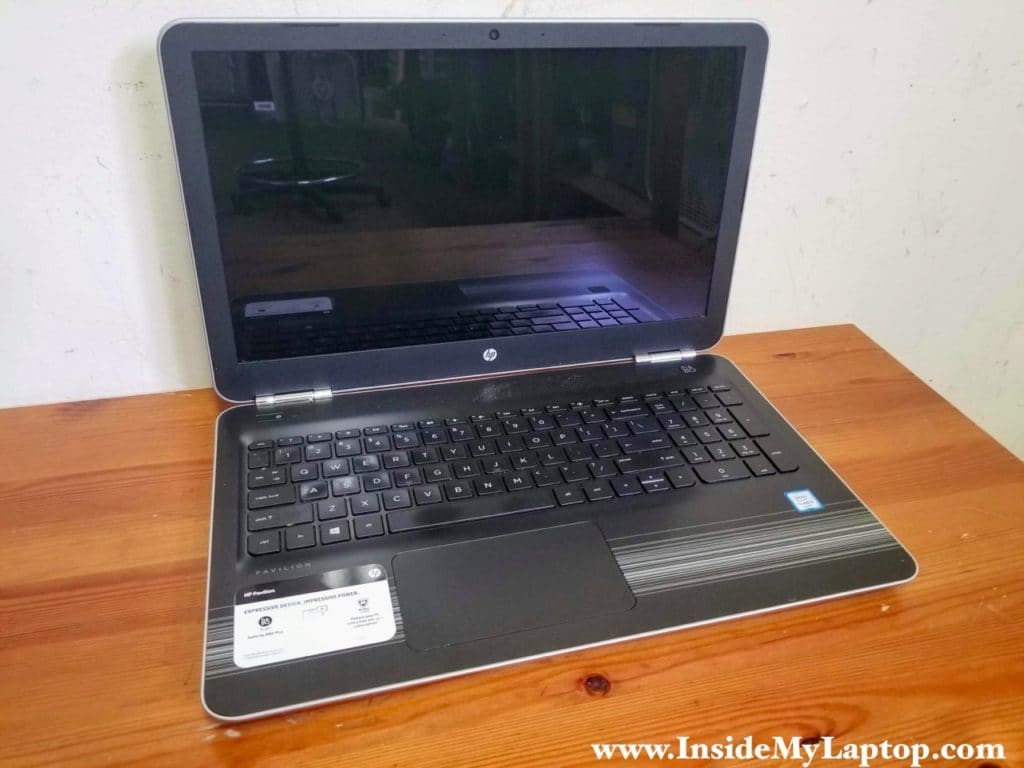
This HP Pavilion 15 complete disassembly guide will help you to access and remove all main internal components. In the steps 1-22 I’ll be taking apart the base assembly. For the LCD screen removal instructions proceed to the steps 23-27.
The disassembly guide should fit many different HP Pavilion 15 configurations.
Here are some of them:
15-au003tx, 15-au004tx, 15-au006tx, 15-au007tx, 15-au008tx
15-au010wm, 15-au08wm
15-au020wm, 15-au020tx, 15-au023cl, 15-au07cl
15-au030wm, 15-au030nr
15-au043ca, 15-au043tx, 15-au045ng, 15-au046ng
15-au050tx, 15-au053tx, 15-au057tx, 15-au057cl, 15-au058tx
15-au061tx, 15-au062nr, 15-au063nr, 15-au063cl, 15-au067cl, 15-au068sa
15-au070sa, 15-au071na, 15-au071sa, 15-au072na, 15-au072sa, 15-au076sa, 15-au077sa, 15-au078sa
15-au080na, 15-au082sa, 15-au083sa, 15-au084tx, 15-au086nisa, 15-au087nia, 15-au087cl, 15-au087nia
15-au091nr, 15-au091tx, 15-au097cl
15-au102tx, 15-au123cl, 15-au147cl, 15-au158nr
15-au501tx, 15-au502tx, 15-au505tx, 15-au507tx, 15-au520tx
15-au620tx, 15-au621tx, 15-au623tx, 15-au624tx, 15-au627tx, 15-au628tx
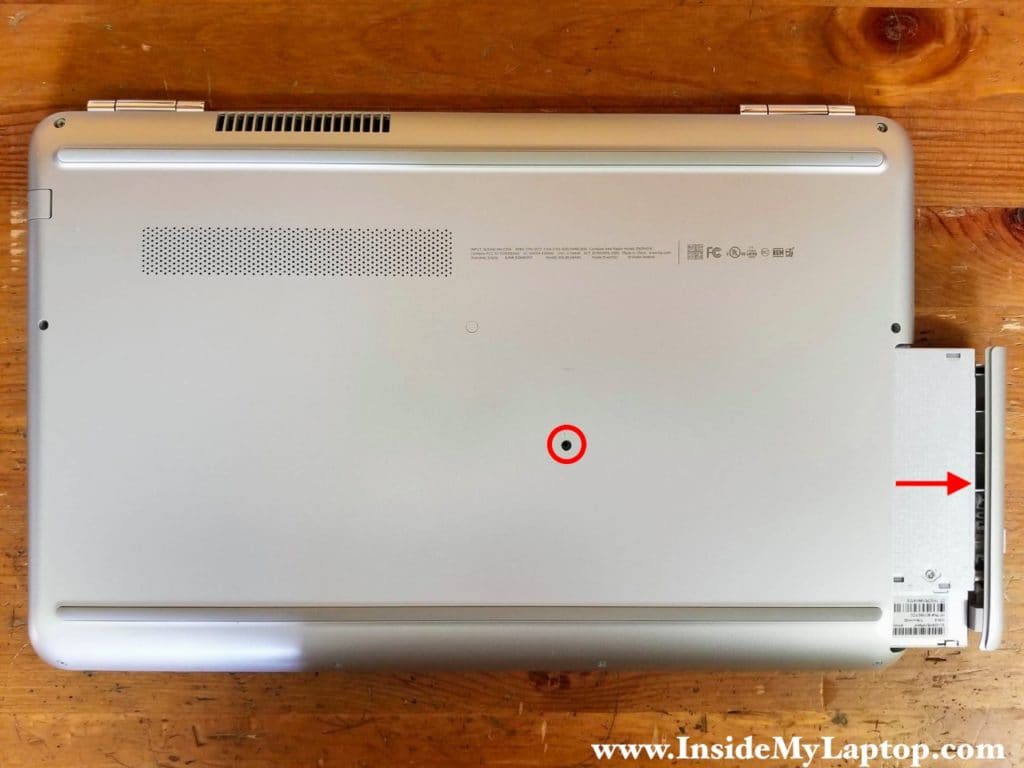
STEP 1.
Remove one screw securing the DVD optical drive and pull the drive out.
STEP 2.
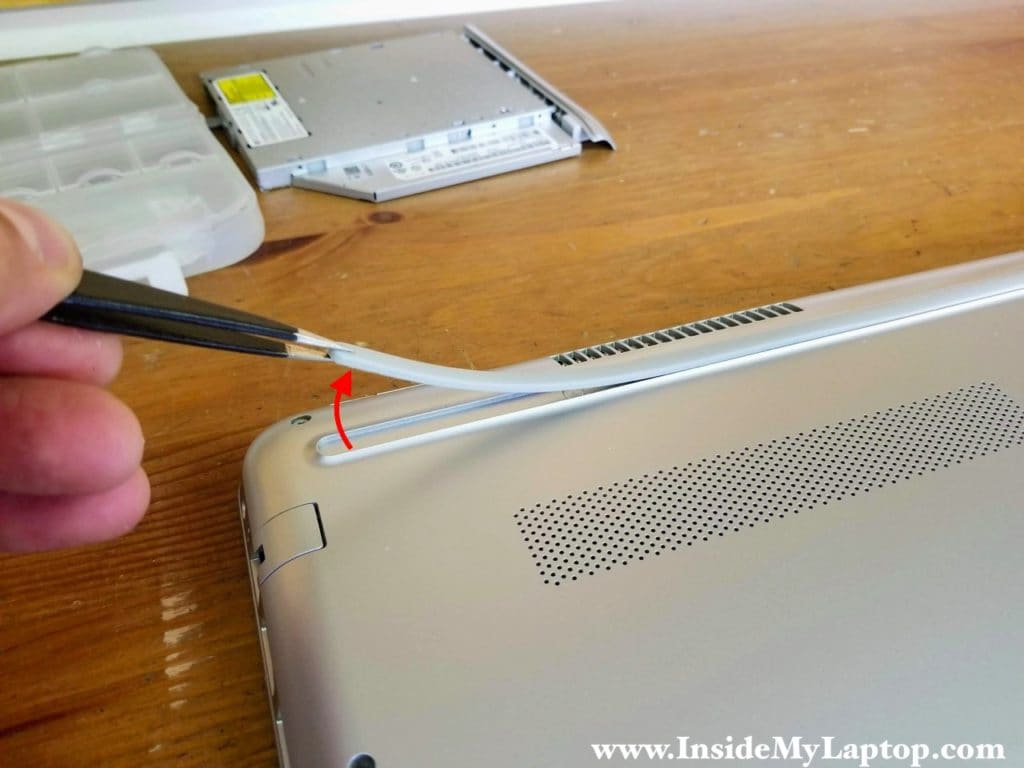
Peel off the rubber foot located closer to the display hinges.
There is a hidden screw under the foot.
STEP 3.
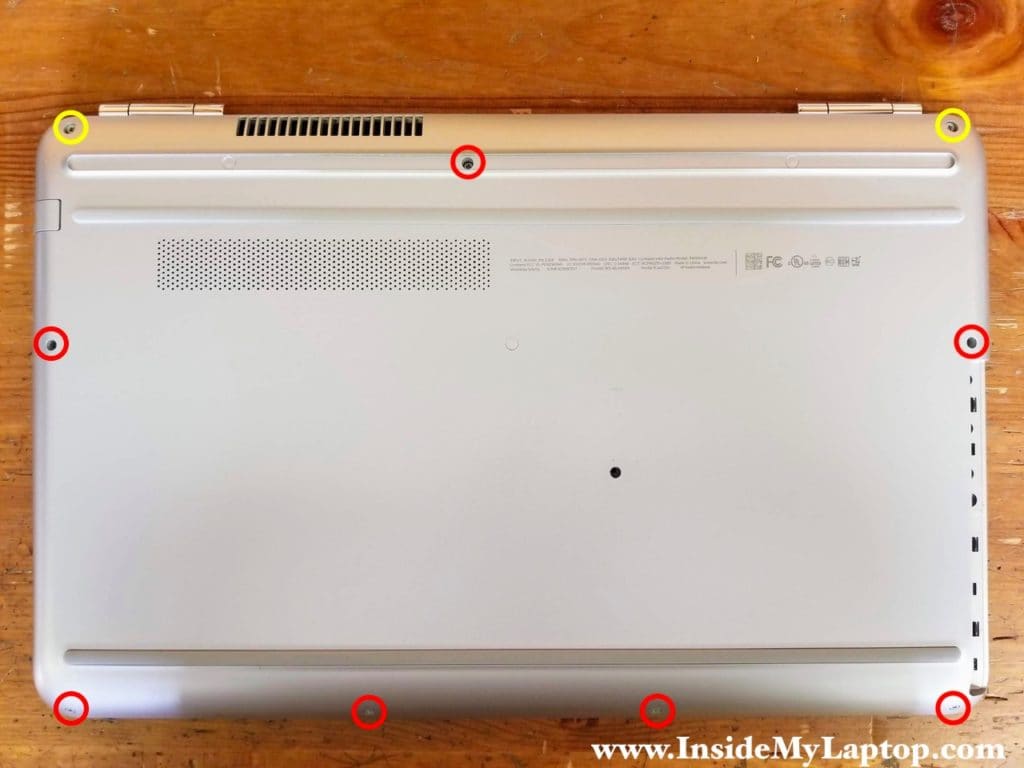
Remove all screws securing the base cover.
Two screws color-coded in yellow are larger than all other screws.
STEP 4.
Start separating the base cover from the top case.
Insert the case opener tool under the top case and pry it up. Move the case opener along the side to disengage hidden latches.
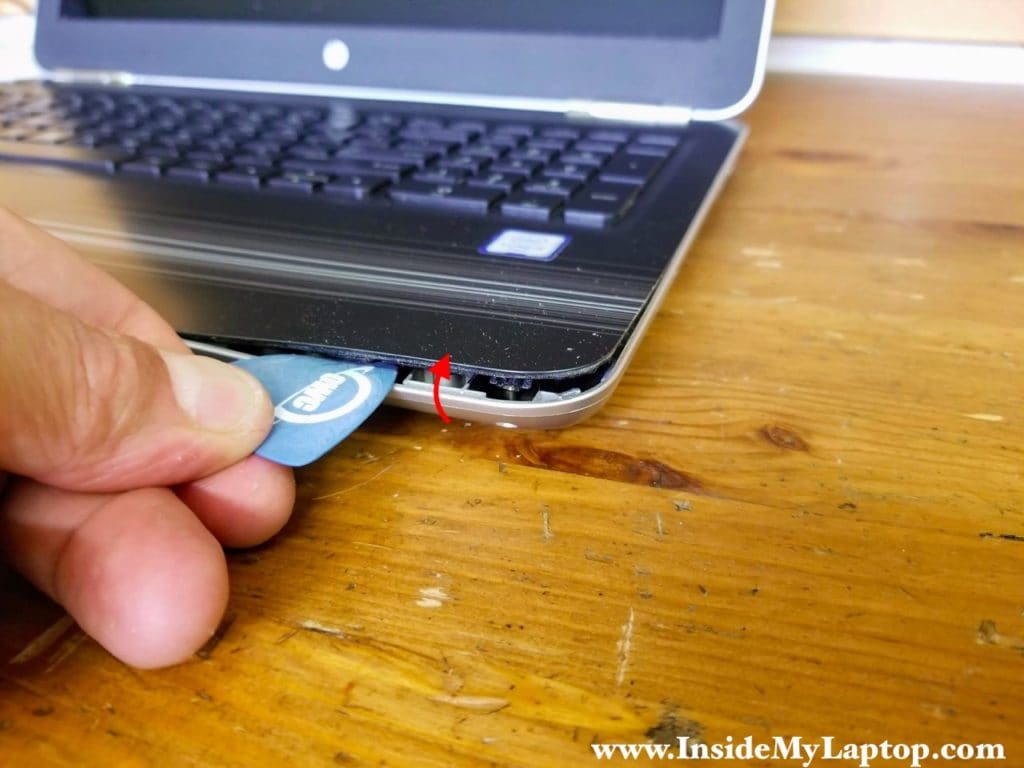
Continue separating the top case with your fingers while helping with the case opener.
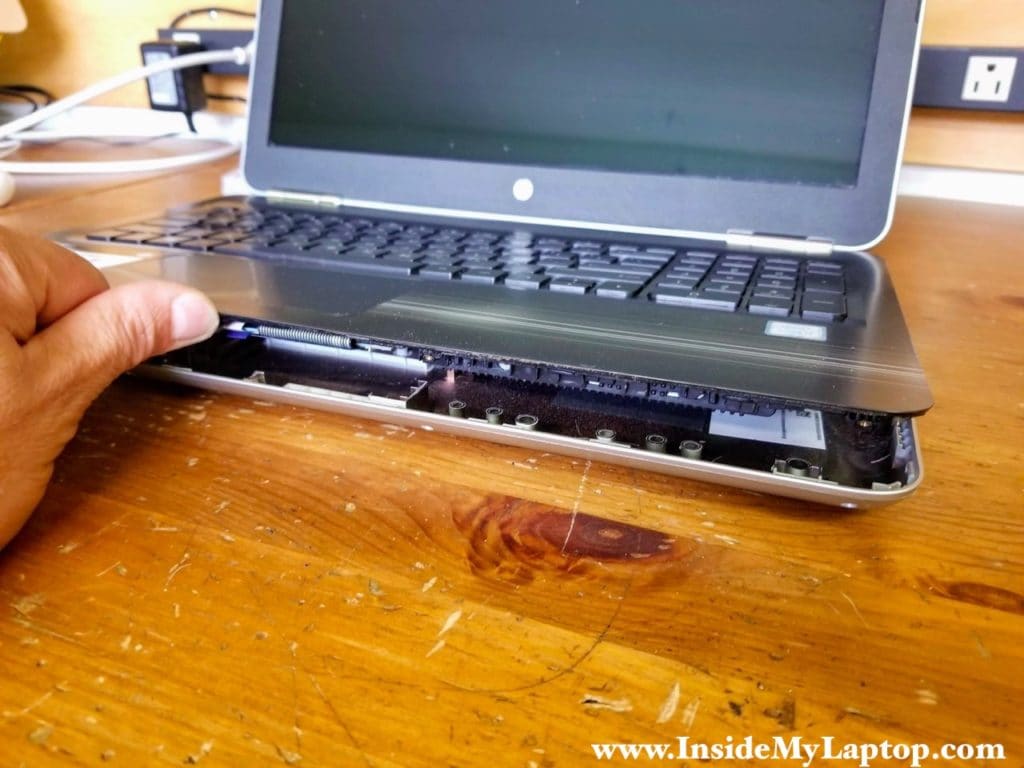
STEP 5.
Turn the laptop upside down and remove the base cover.
In HP Pavilion 15 notebook all internal components mounted to the top case.
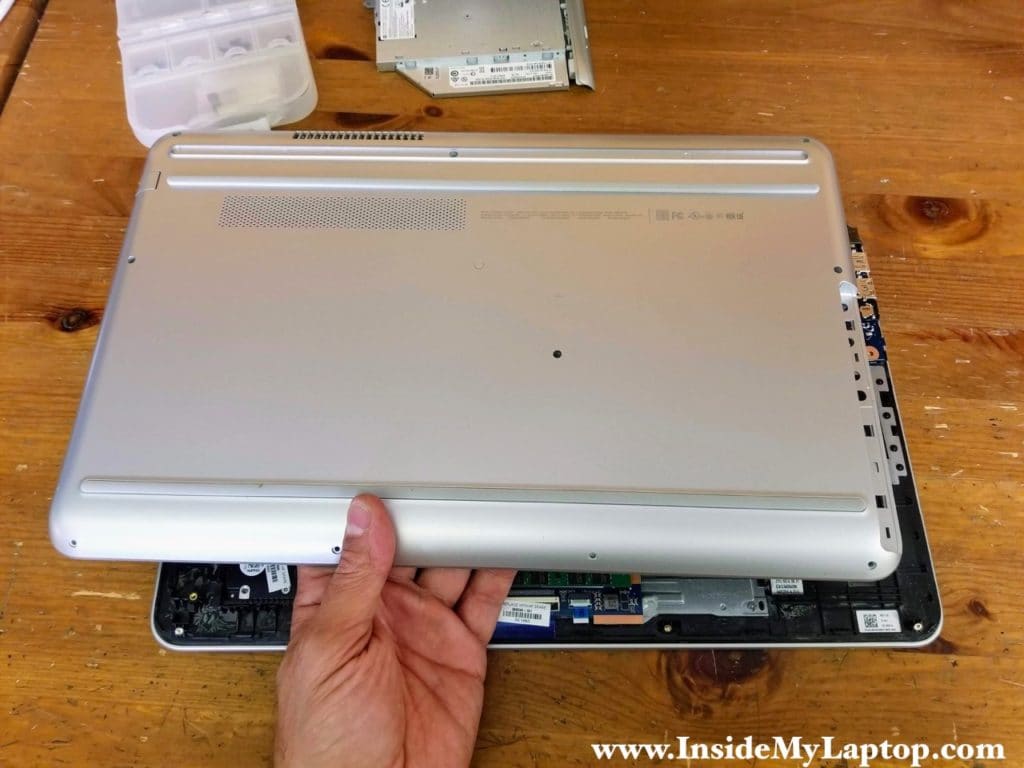
Both memory slots are accessible under this cover. This laptop can handle up to 16GB (2x8GB) DDR4 2400/2666/3200 SODIMM RAM modules.
STEP 6.
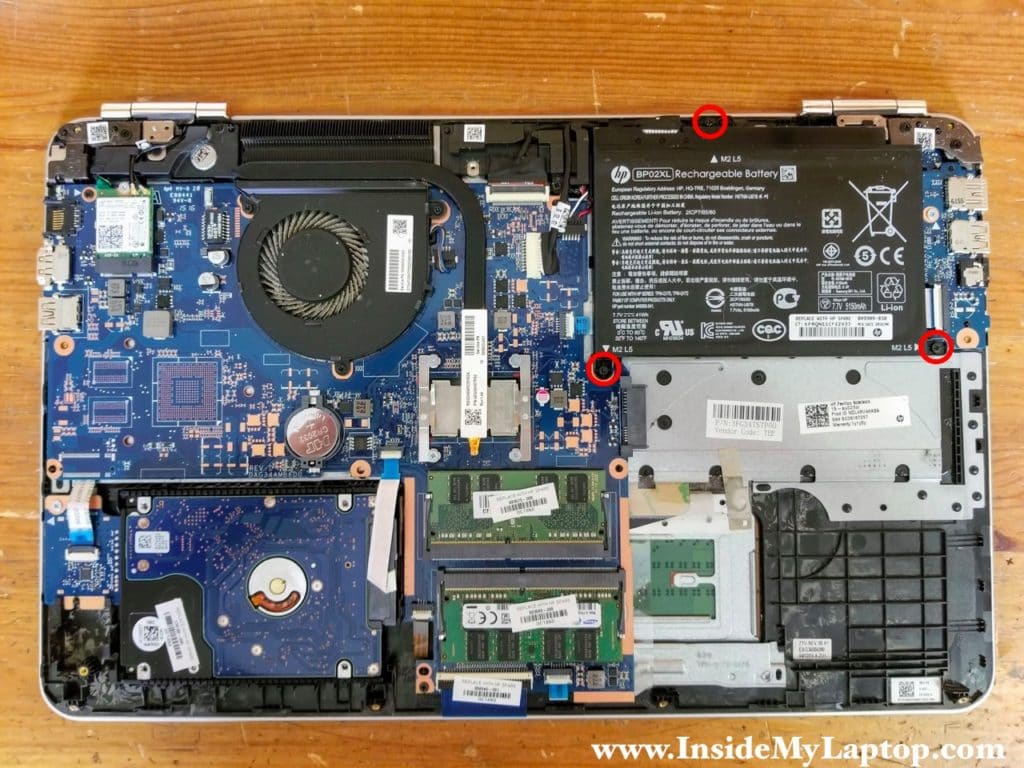
Remove three screws securing the battery.
STEP 7.
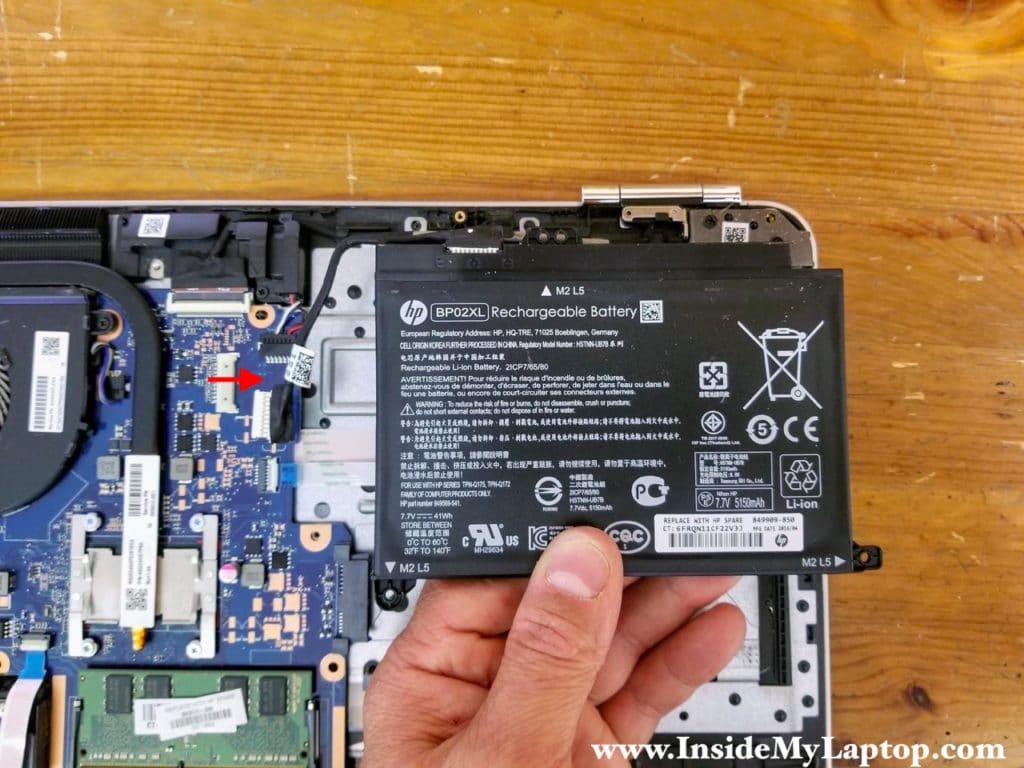
Lift up the battery and disconnect it from the motherboard.
If you want to replace the battery, make sure to buy a genuine HP replacement part.
This HP Pavilion 15 battery model: BP02XL. HP spare part number: 849909-850.
STEP 8.
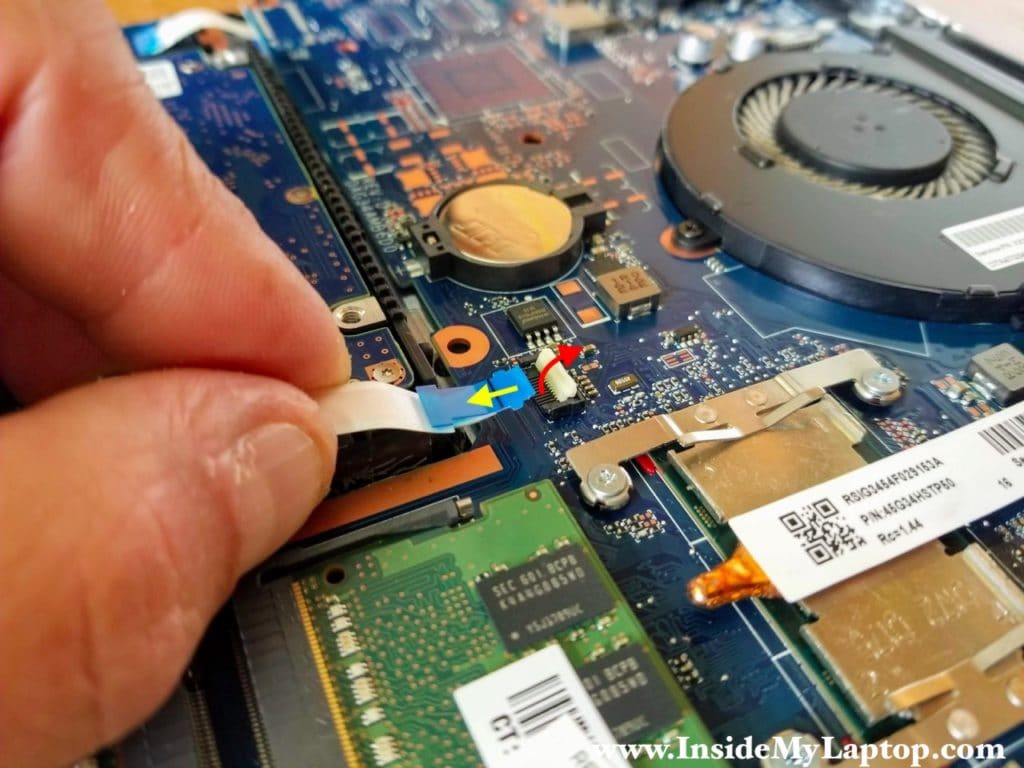
Disconnect the 2.5″ hard drive SATA cable from the motherboard.
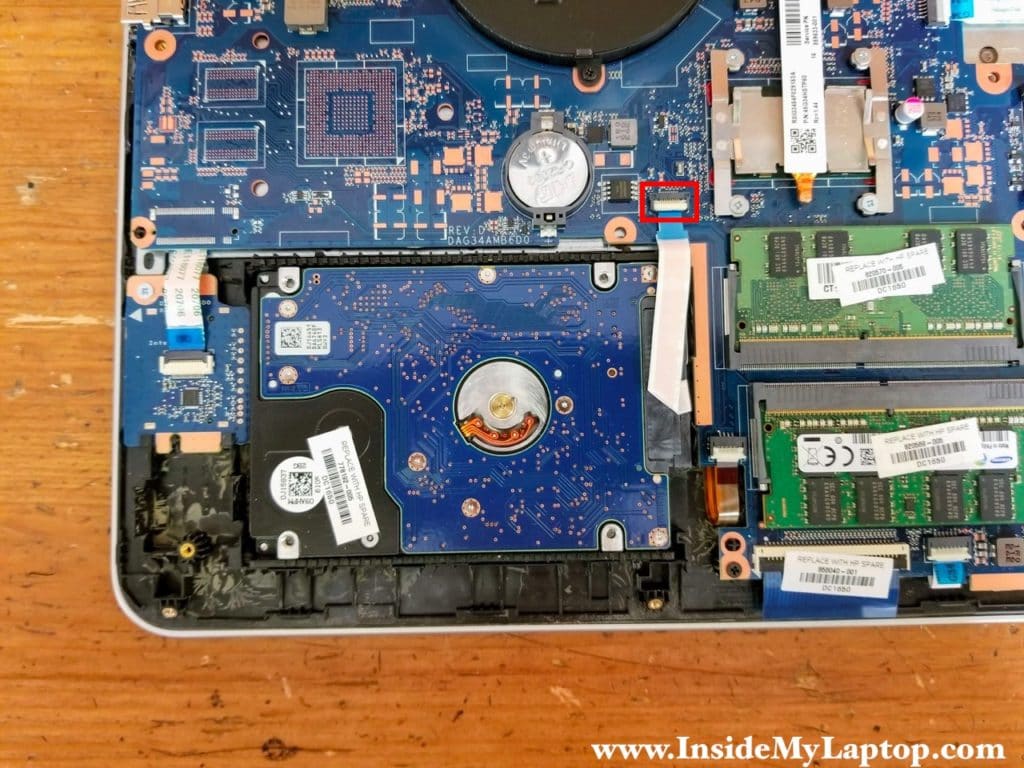
Unlock the connector first (red arrow) and pull the SATA cable out (yellow arrow).
STEP 9.
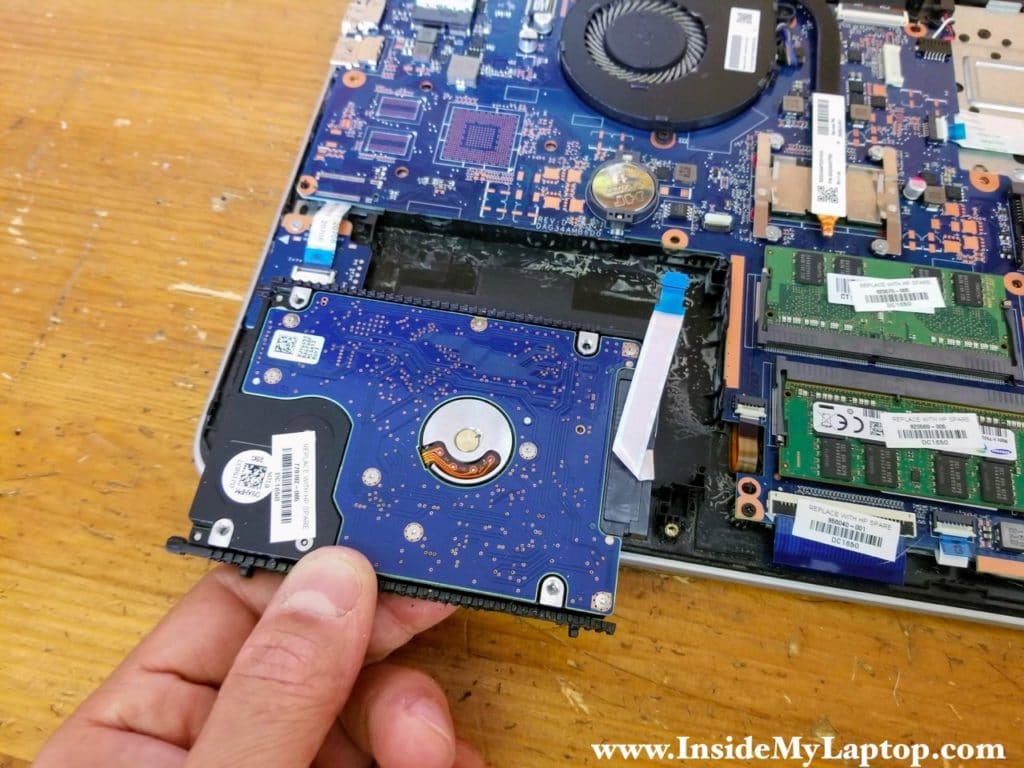
Remove the hard drive assembly with the SATA cable attached to it.
Replacing this regular hard drive with a 2.5 SATA solid state drive will speed up the system significantly.
STEP 10.
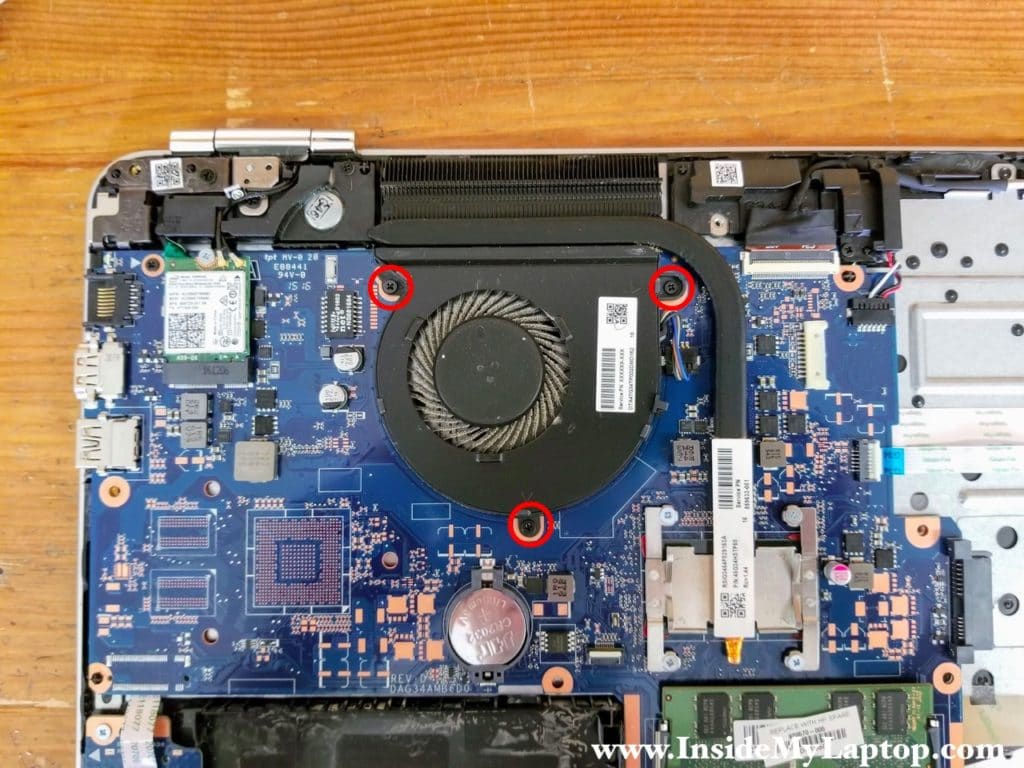
Remove three screws securing the cooling fan.
STEP 11.
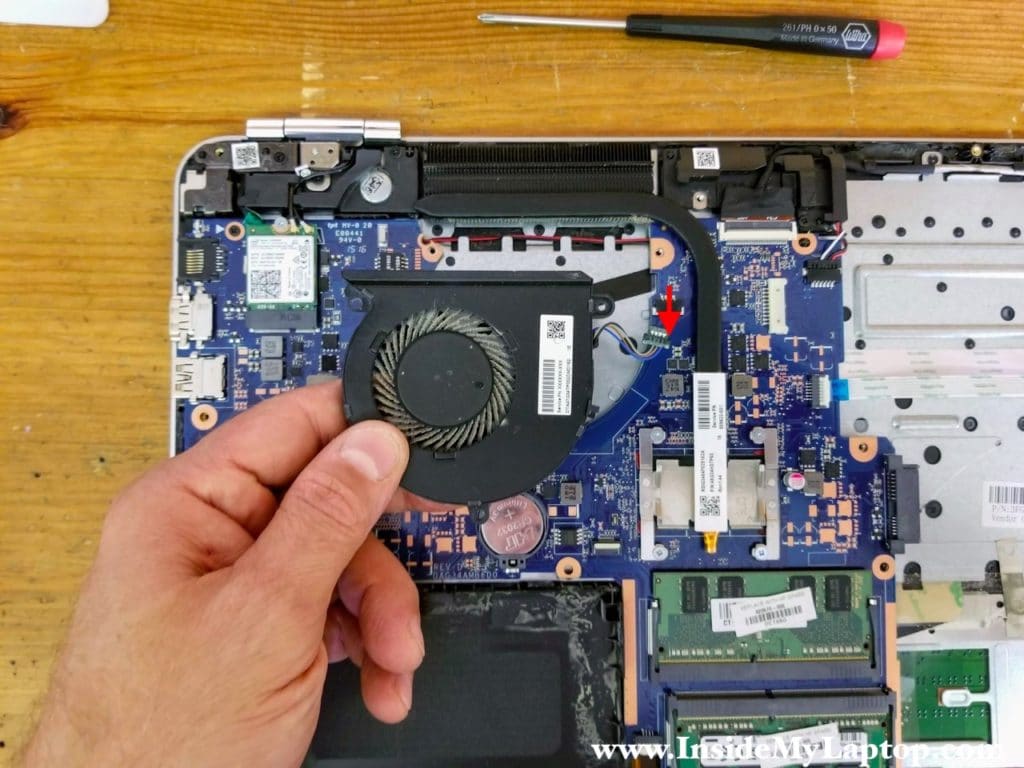
Lift up the fan and disconnect it from the motherboard.
STEP 12.
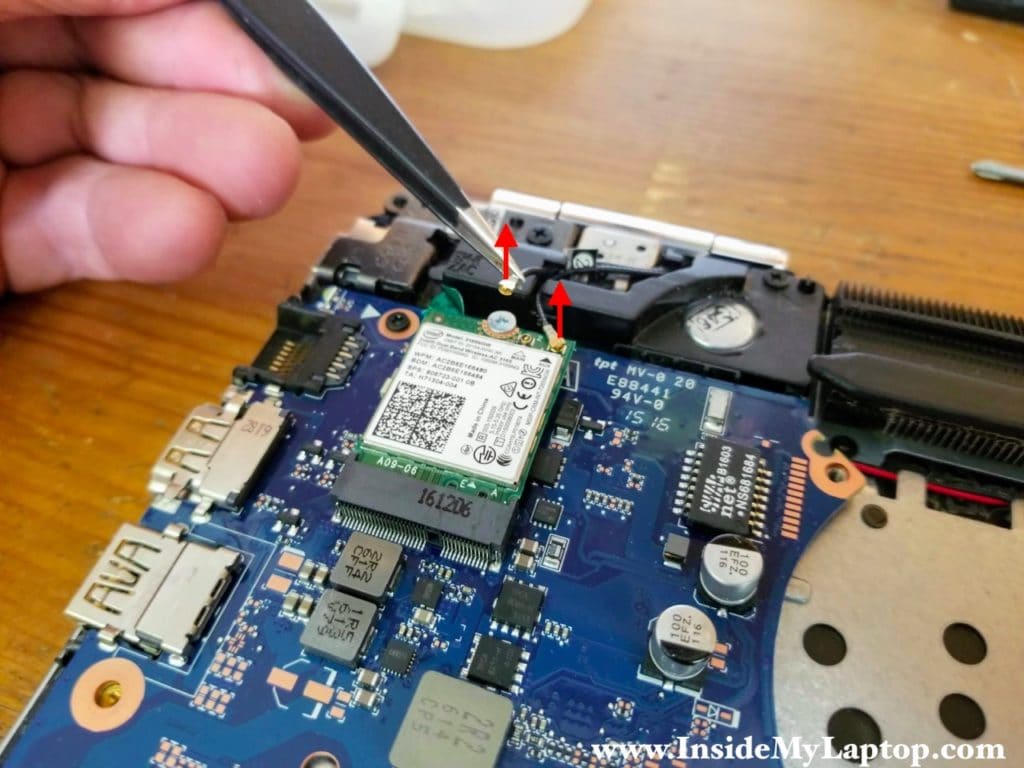
Unplug both antenna cables from the wireless card.
Remove one screw securing the wireless card to the motherboard.
STEP 13.
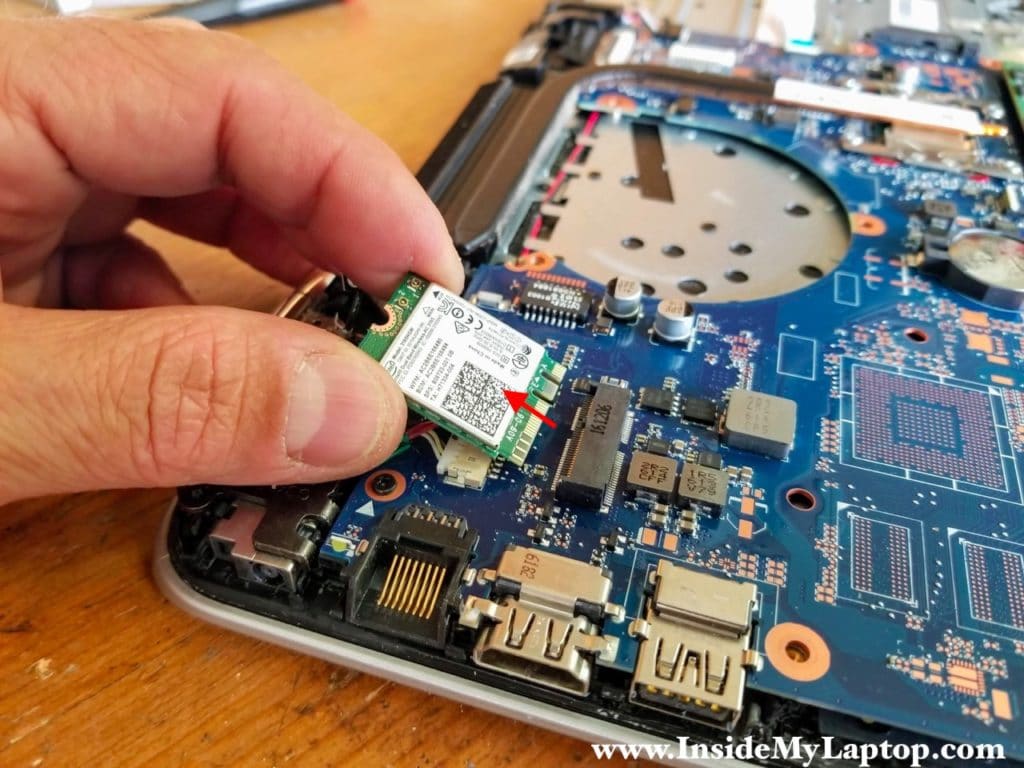
Pull the wireless card out of the slot and remove it.
STEP 14.
Remove one screw from the USB audio board and disconnect the cable.
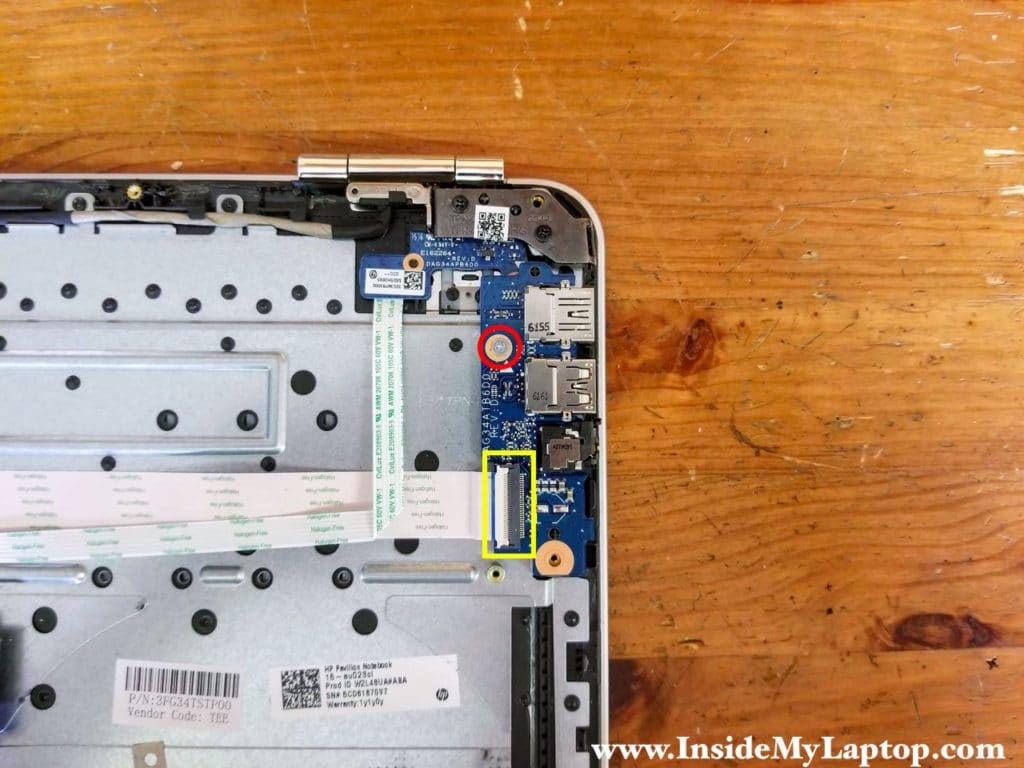
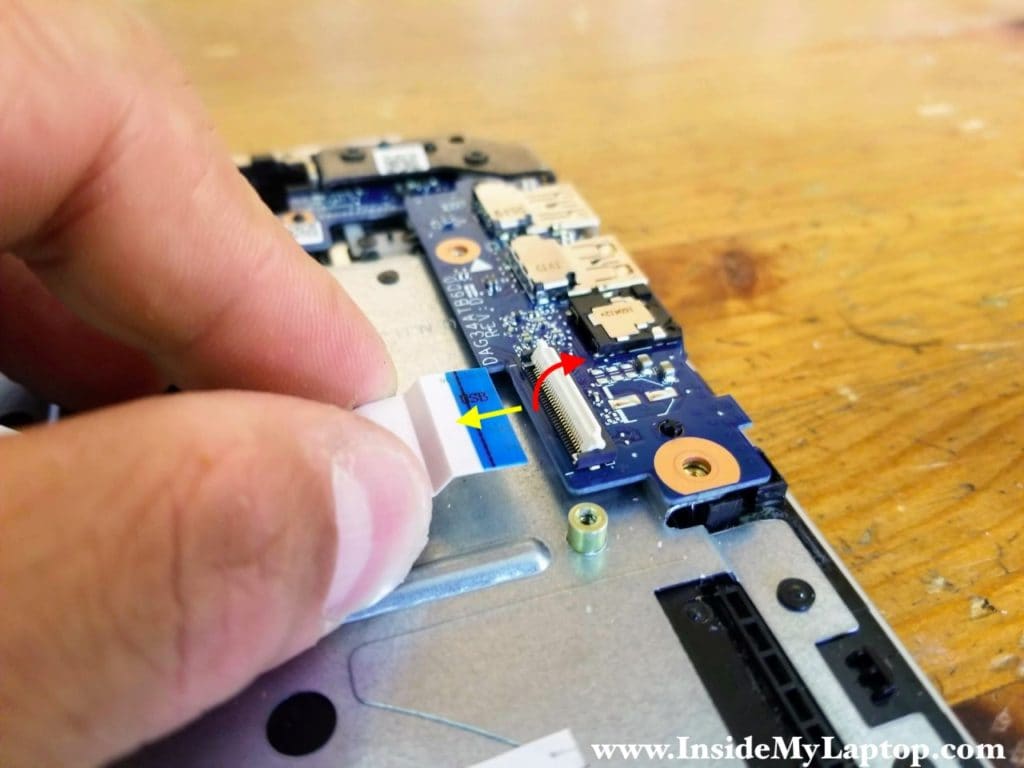
Again, in order to release the cable you have to unlock the connector first.
STEP 15.
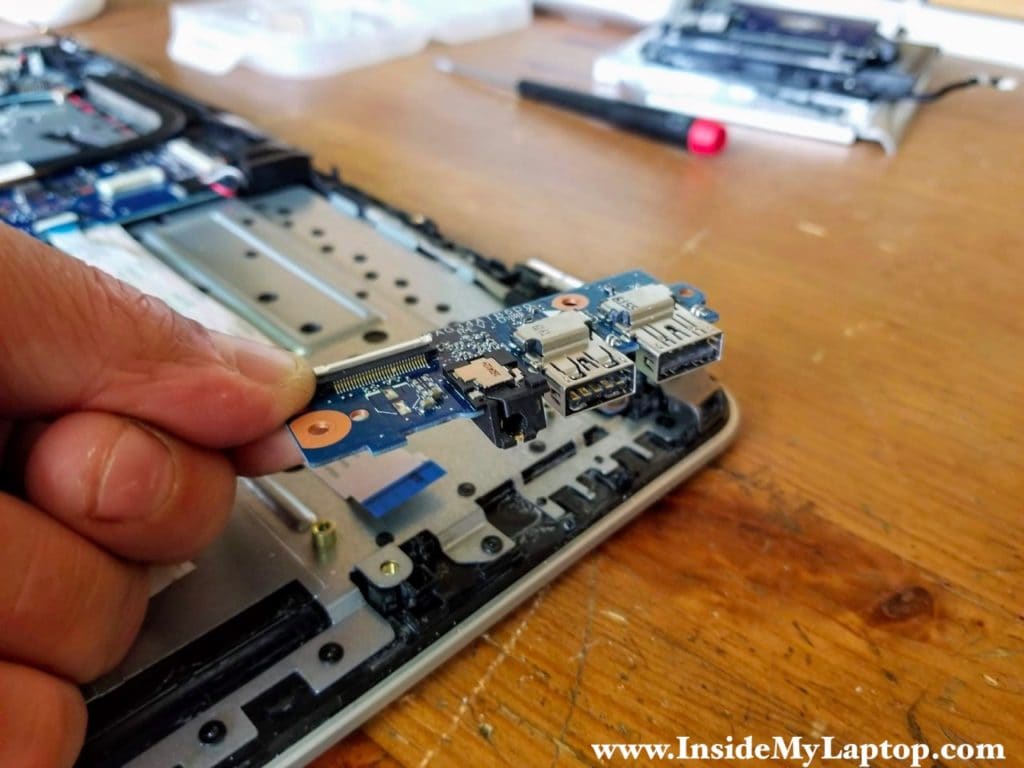
Remove the USB audio board.
STEP 16.
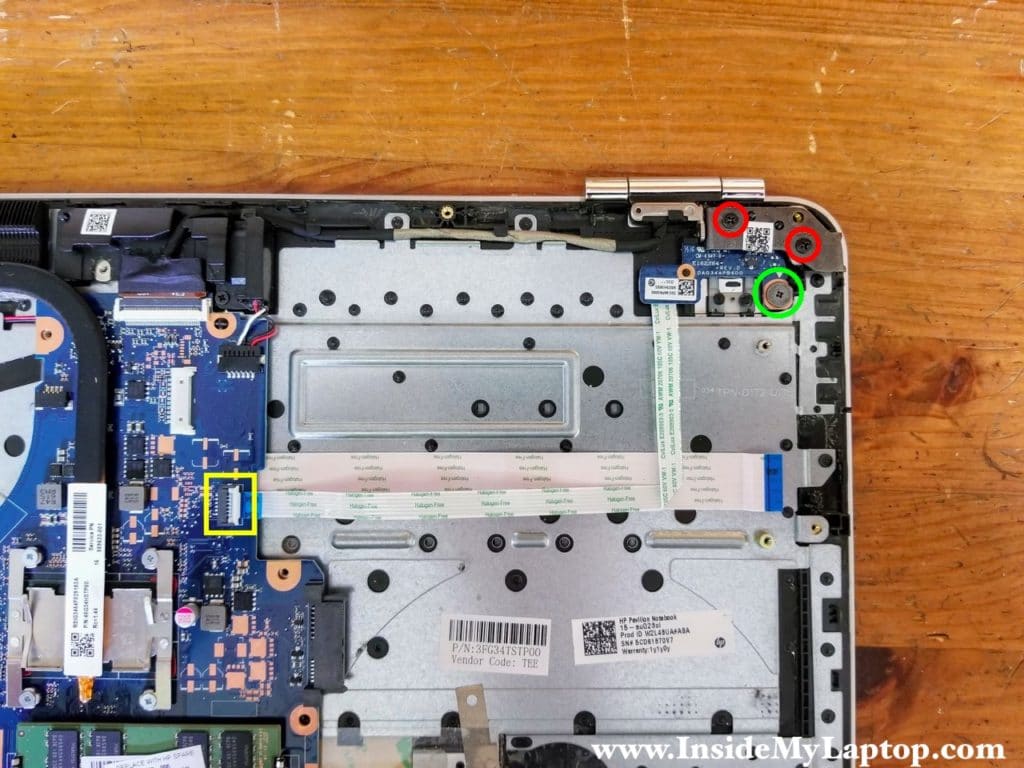
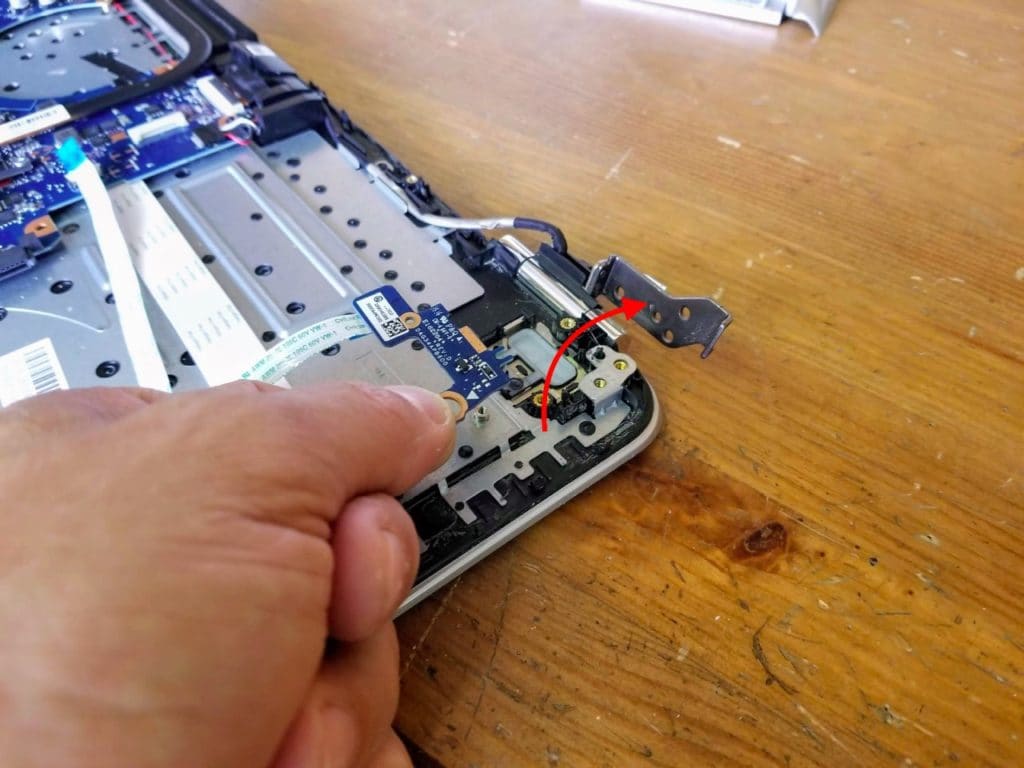
In HP Pavilion 15 notebook the power button board mounted under the left display hinge.
Remove two screws from the hinge (red) and one screws from the board (green).
Disconnect the power button board cable from the motherboard.
STEP 16.
Open the left display hinge as it shown on the following picture. You’ll have to apply some force to do that.
Remove the power button board with the cable.
STEP 17.
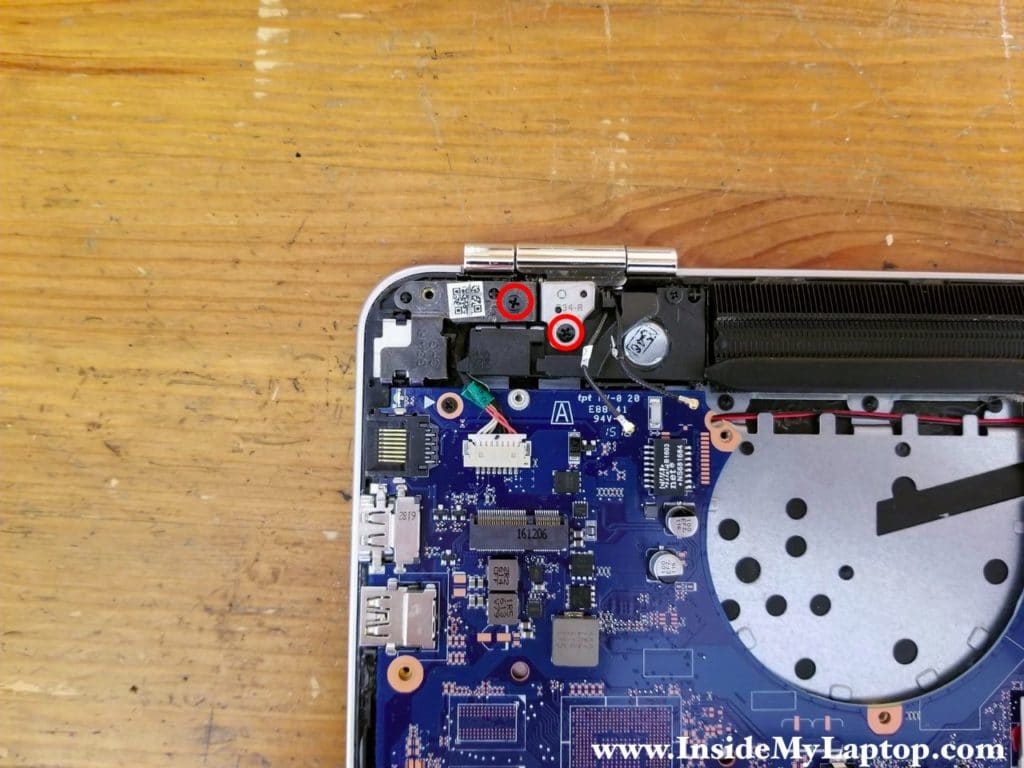
The DC power jack mounted under the right display hinge.
Remove two screws from the hinge.
STEP 18.
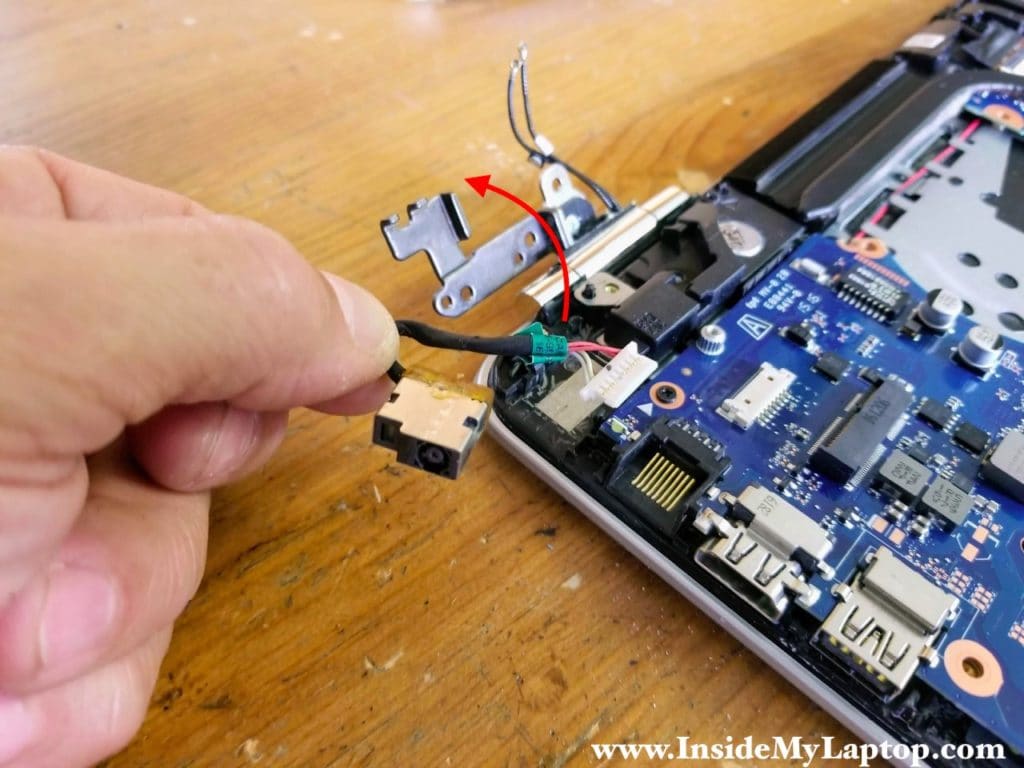
Open the right display hinge.
Disconnect the DC power jack harness from the motherboard and remove it.
STEP 19.
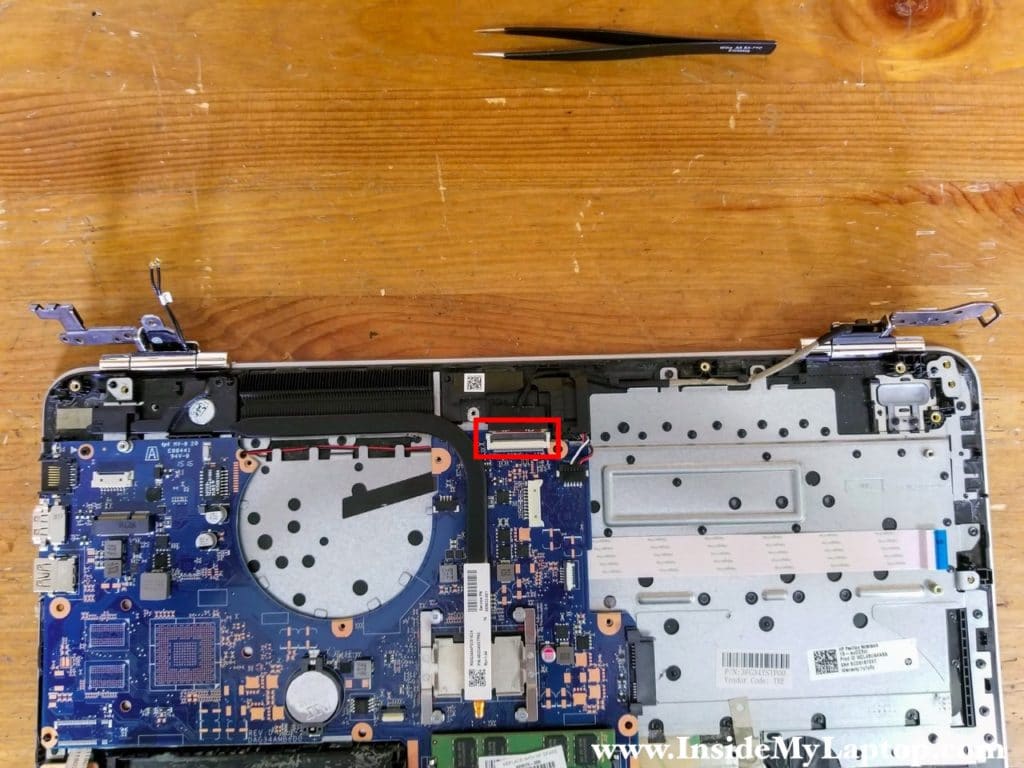
Disconnect the display video cable from the motherboard.
Unroute the display cable from a guided path on the top case.
STEP 20.
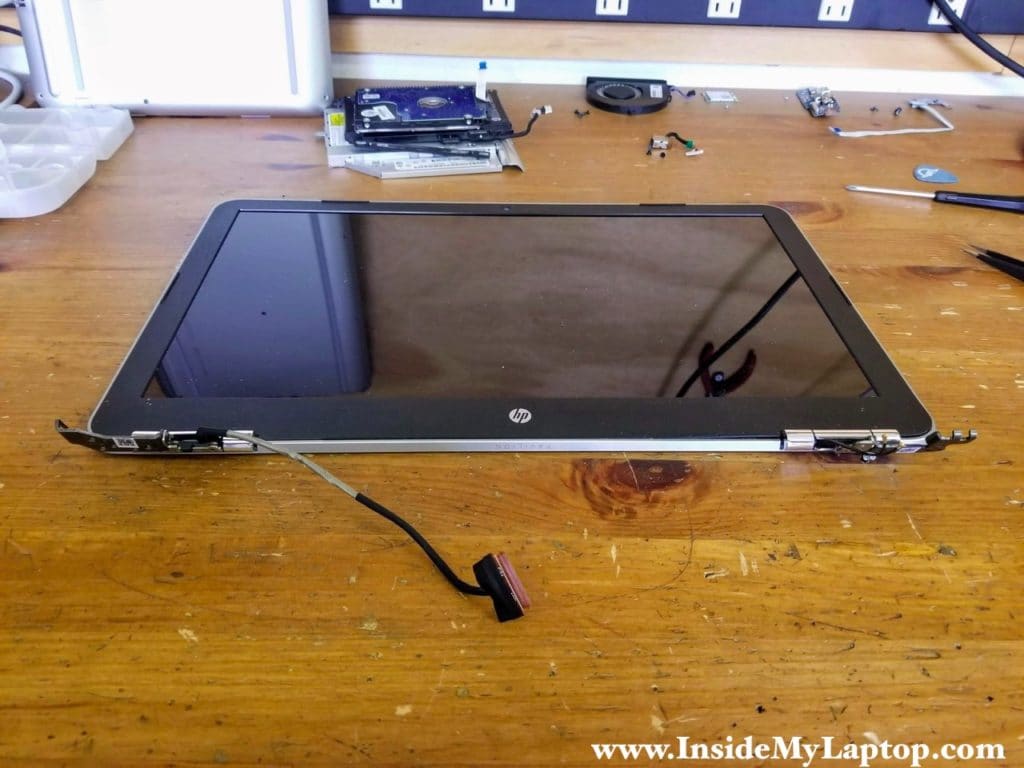
Separate the top case assembly from the display assembly.
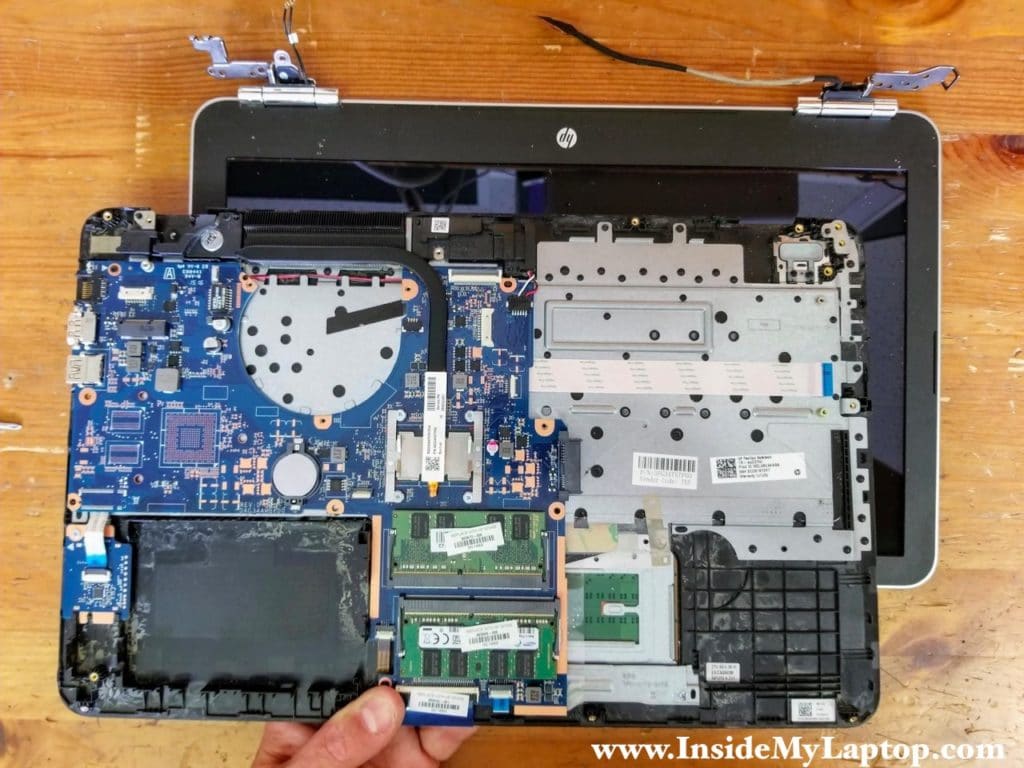
As I mentioned at the beginning of this guide, I’ll be removing the LCD screen in the steps 23-27.
By the way, the LCD screen can be removed when the display panel is still attached to the notebook base.
STEP 21.
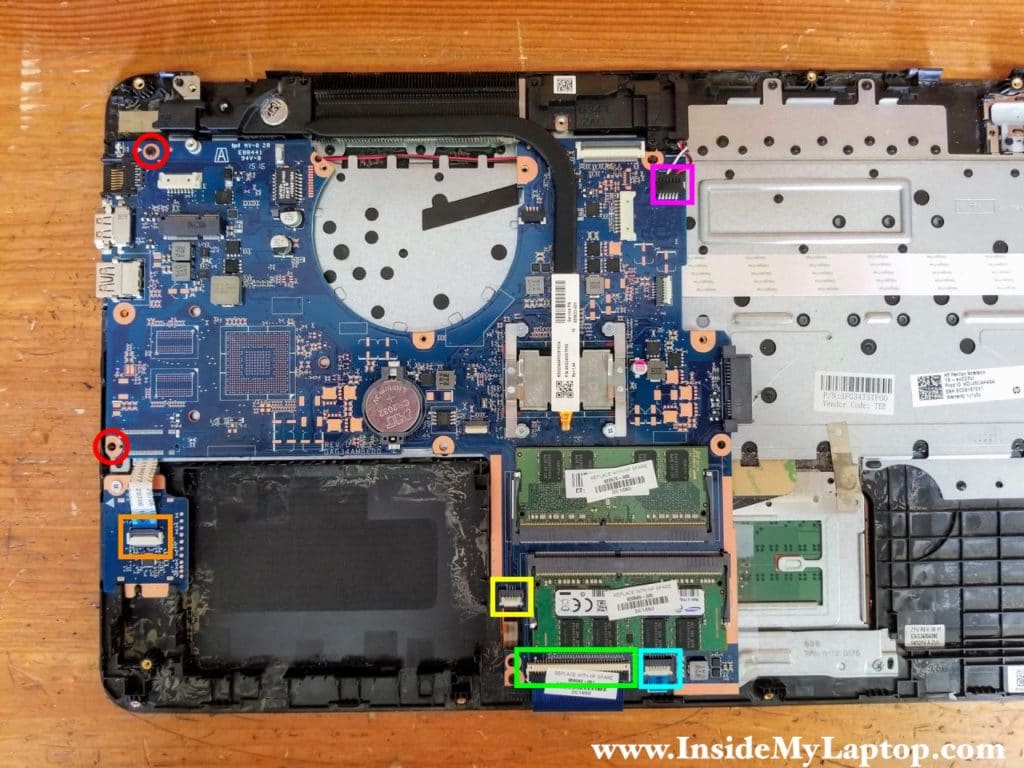
Remove two screws securing the motherboard.
Disconnect the following color-coded cables:
– SD card reader cable (orange).
– Keyboard backlight cable (yellow).
– Keyboard cable (green).
– Touchpad cable (blue).
– Speaker cable (pink).
STEP 22.
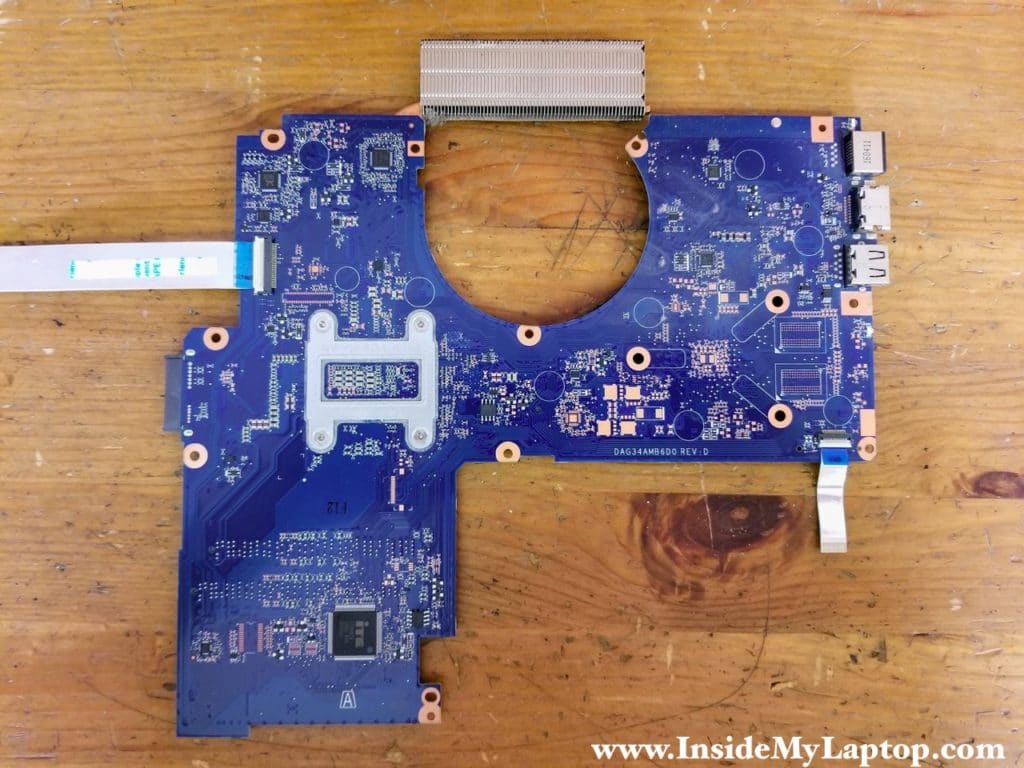
Now you can remove the motherboard.
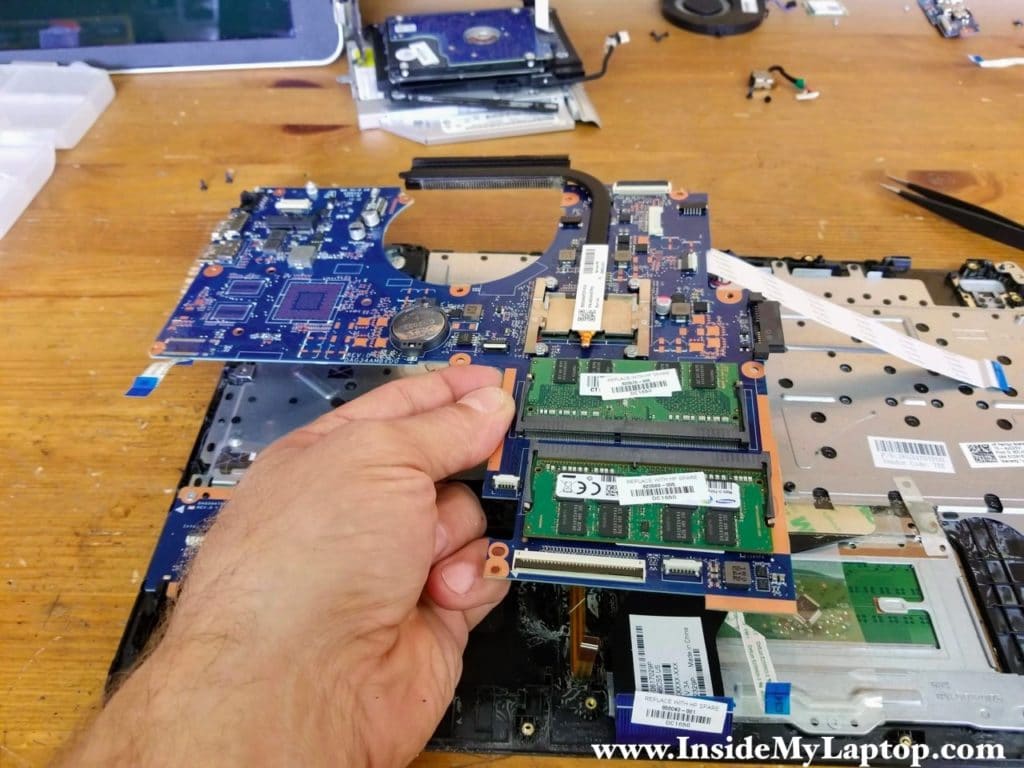
Here’s the other side.
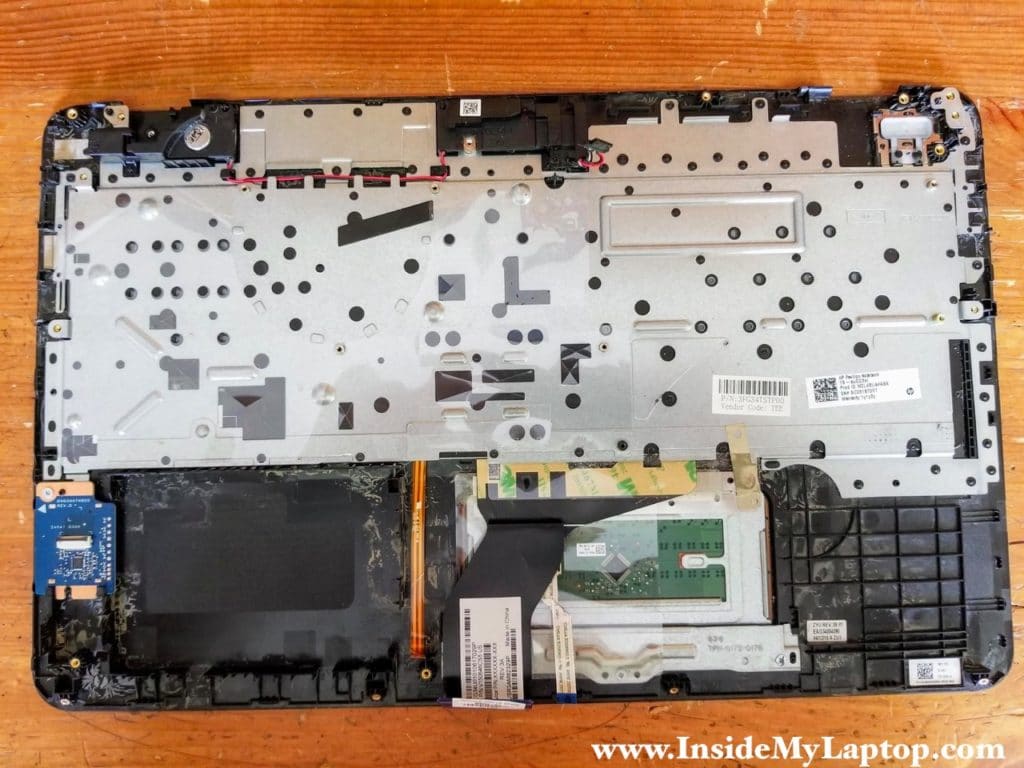
In HP Pavilion 15 notebook the keyboard permanently attached to the top case and replacing it is not easy. The touchpad can be removed and replaced.
HP 15 Pavilion LCD screen removal steps
As you noticed, the display panel in my example is still attached to the notebook base. You don’t have to disassemble the entire notebook in order to remove and replace the LCD screen.
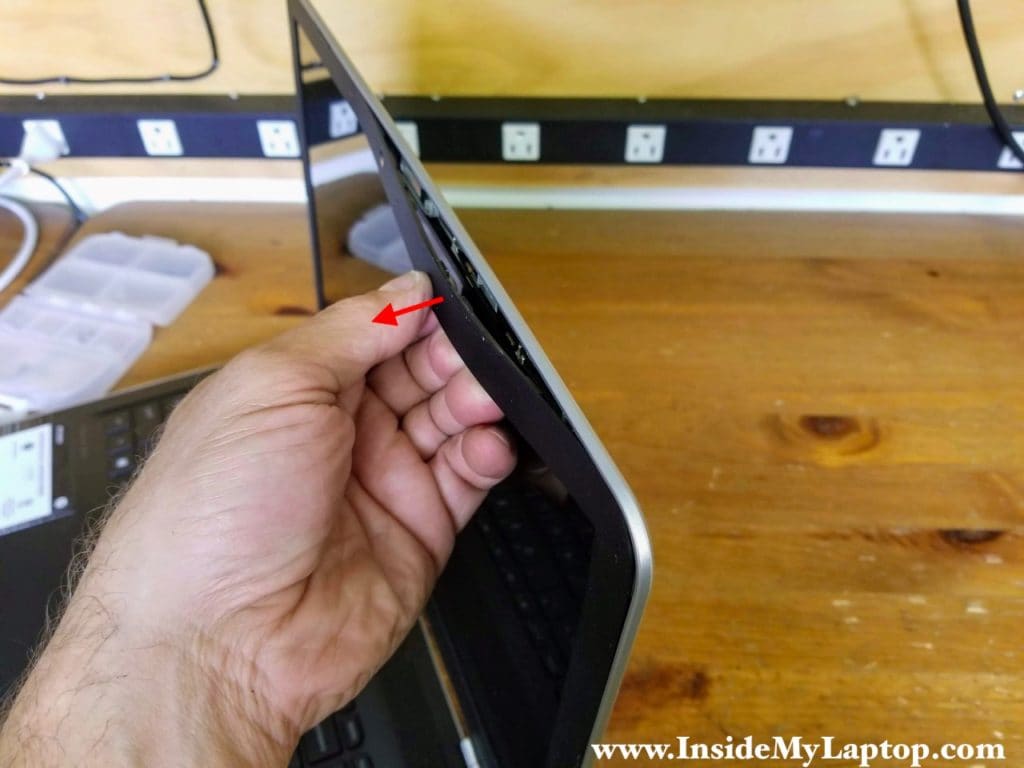
STEP 23.
Insert your fingers between the screen bezel and and the screen.
Wiggle the bezel to disengage hidden latches.
STEP 23.
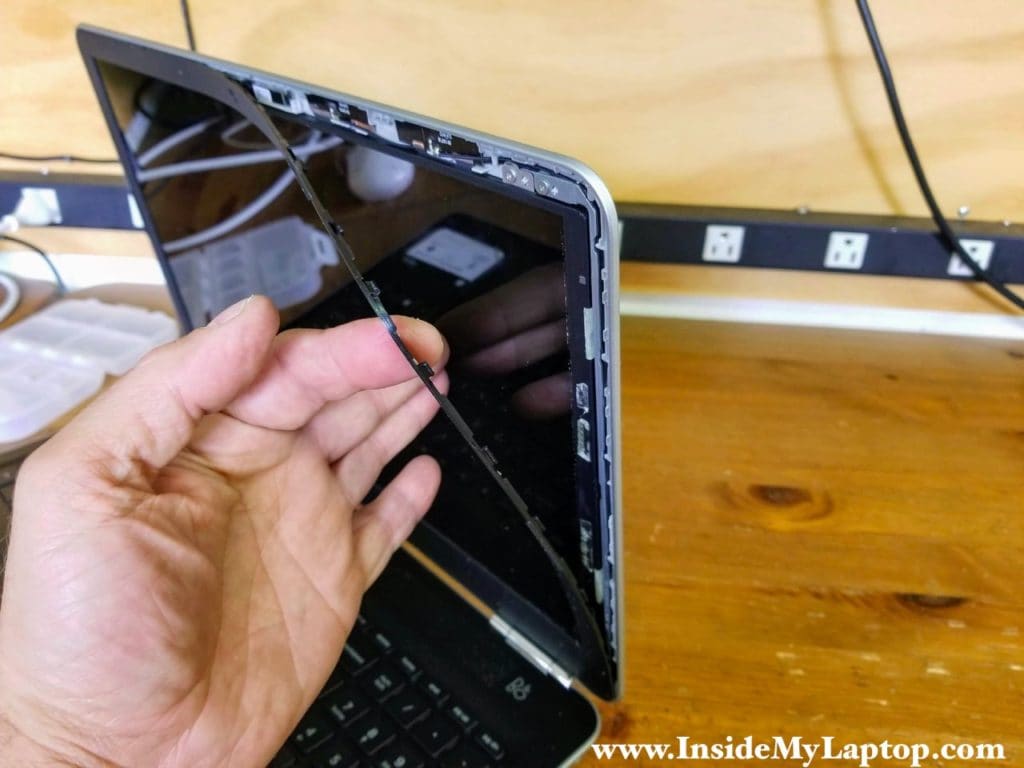
Continue removing the bezel. There is some adhesive tape securing the bezel to the screen.
STEP 24.
Remove the screen bezel.
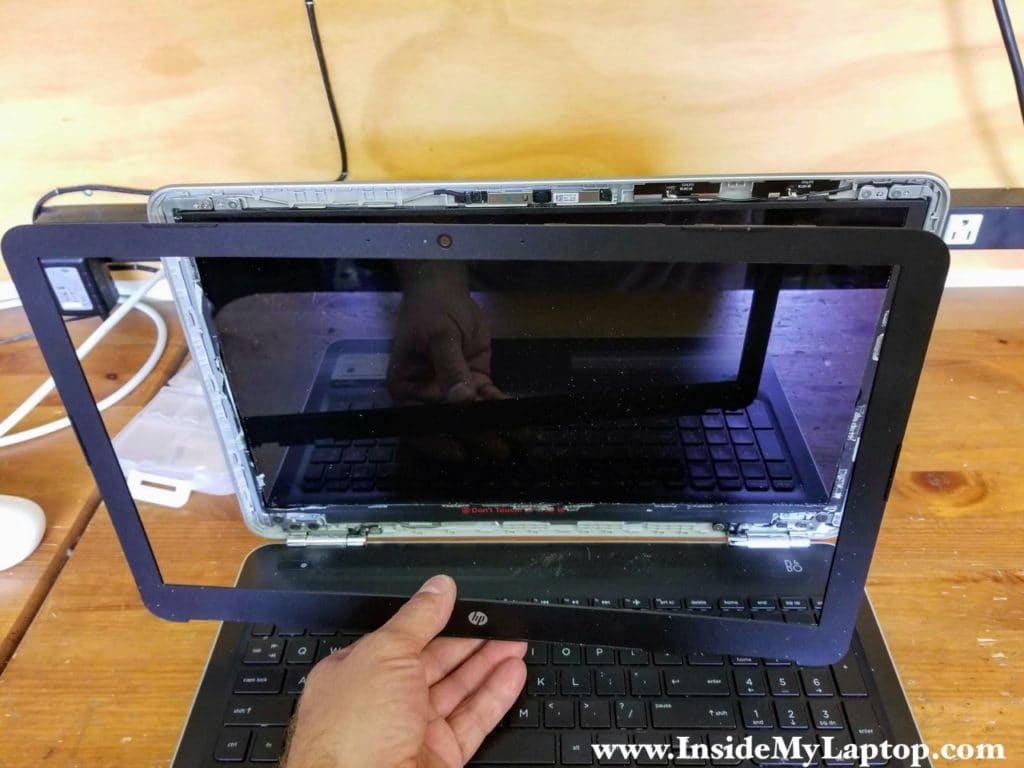
STEP 25.
Remove four screw securing the screen bracket to the back cover.
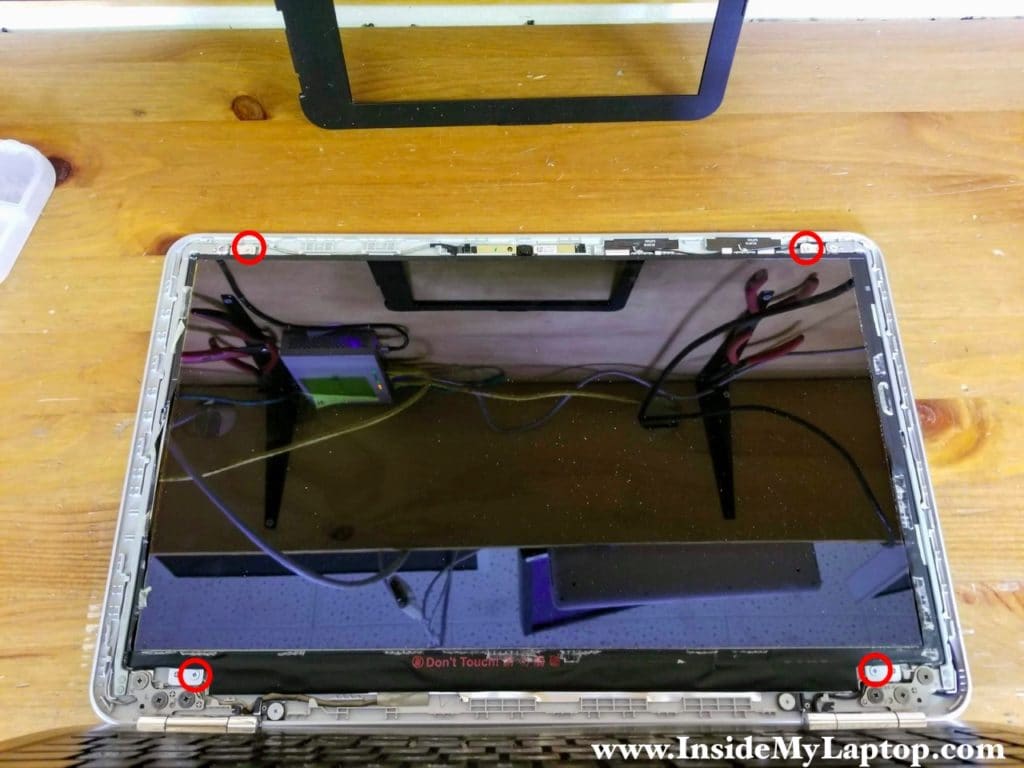
STEP 26.
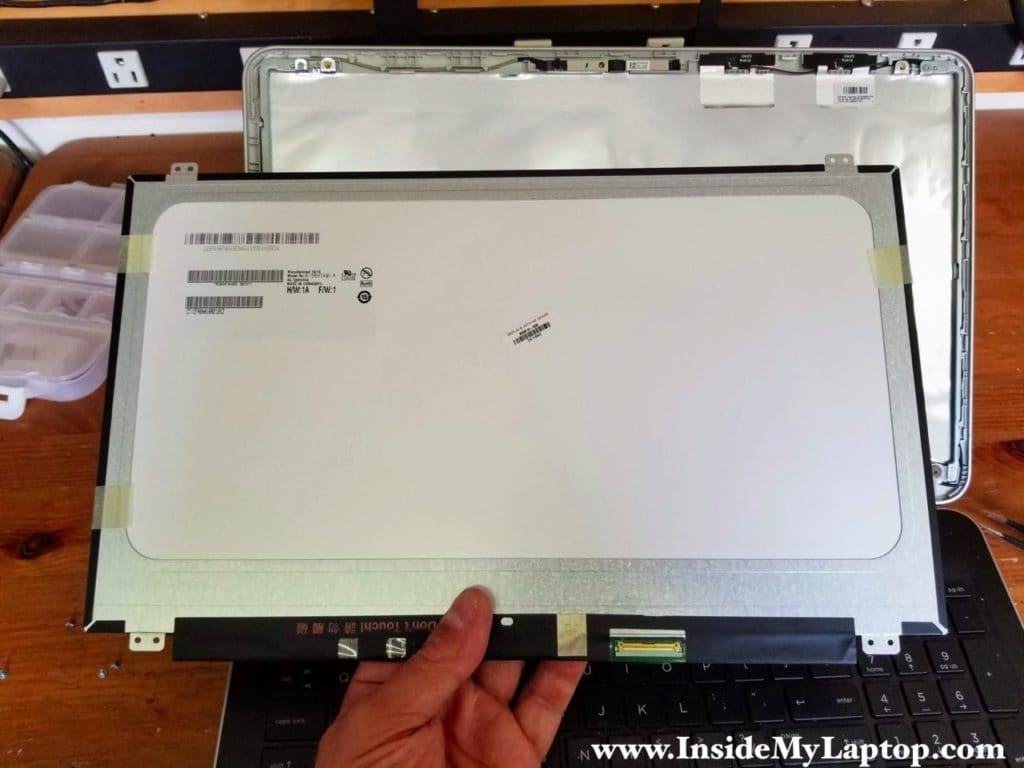
Carefully separate the LCD screen from the back cover to access the display cable connector on the back.
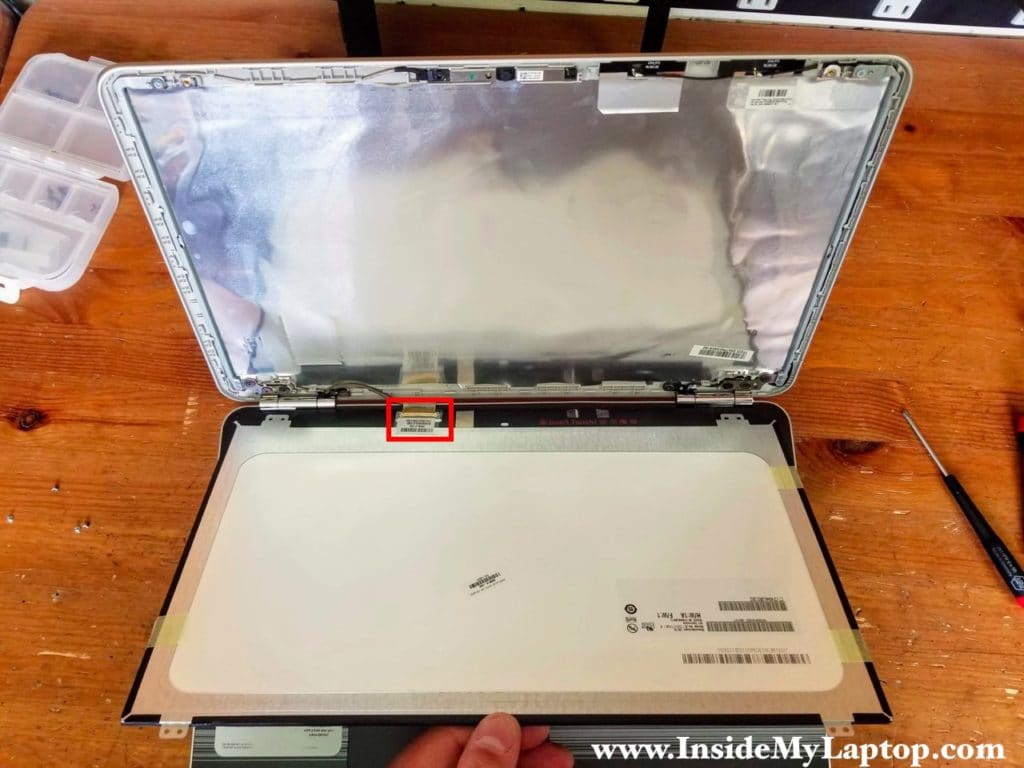
STEP 27.
Peel off sticky tape securing the connection and unplug the display cable from the LCD screen.
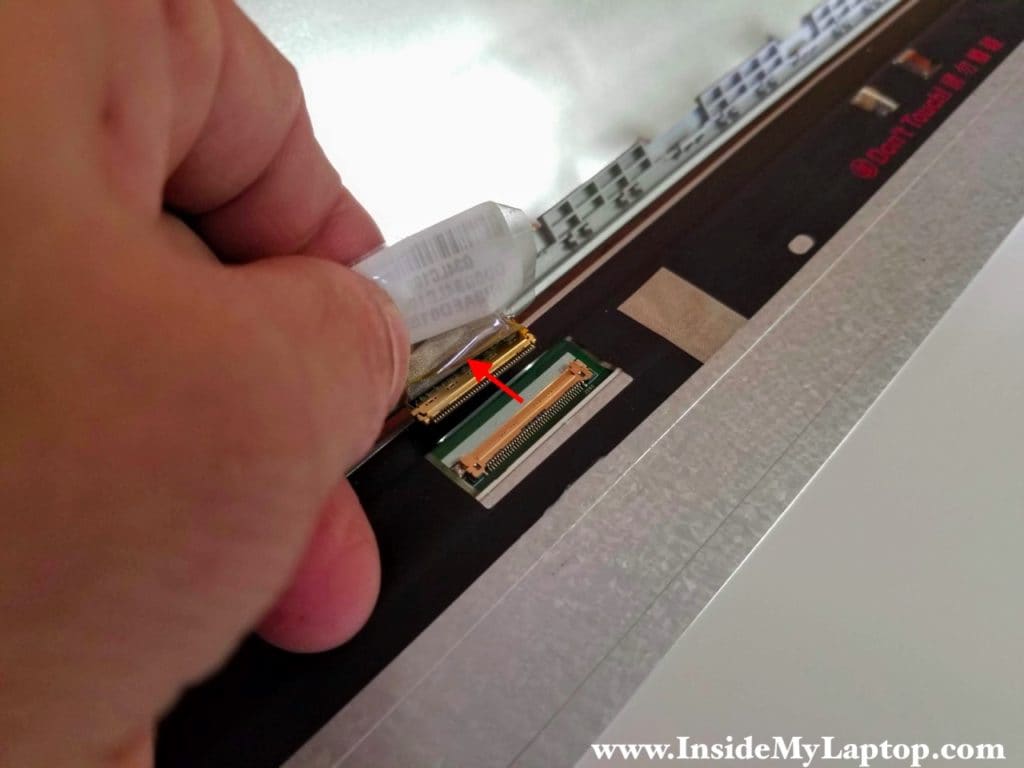
Now you can replace the screen if necessary.
Find a replacement using the model number from the original screen.
My HP 15 Pavilion notebook had a screen with model number: B156XTK01.0
HP spare part number: 809612-009
Related posts: Disassembly guides for HP 15-cs series and HP 15-bs series.
Innophleg
Do u pls have a video on the dismantle of the Hp pavilion 15-au091nr
IML Tech
I don’t do disassembly videos. There is a disassembly video for HP Pavilion 15-au018wm on Youtube. It should be similar to 15-au091nr.
shiv
Please mention the size of screw colour coded as yellow and red.
IML Tech
At the end of the guide I posted a link to the service manual. You can find all screw sizes in there.
jenish
where is ssd port in this series.
please help
IML Tech
jenish, are you asking about a PCIe M.2 SATA slot? In the laptop shown in this example there is no PCIe M.2 slot available. It’s just not soldered to the motherboard.
More expensive models might have this slot available.
Where it’s located? Take a look at the first picture shown in the step 8. If you have the PCIe M.2 slot available, it will be located on the left side from the 2.5″ hard drive, just above the cable.
Daniel
Hi! Thank you so much for this guide. I’m having troubles with the inbuilt speakers, they stopped working and there’s a ticking sound coming from the inside. However, they will work again if I move the laptop in the air a little OR if I apply some pressure on the upper right corner of the keybord, just wher the B&o logo is. But after 2 seconds they will go dead again. This makes me think that there is some faulse contact there.
Do you happen to have some information about this laptop’s speakers?
Thank you again for this great guide.
Dan
“Do you happen to have some information about this laptop’s speakers?”
Hi, yes
There are two of them. They are wired. They don’t sound very good.
Hope that helps.