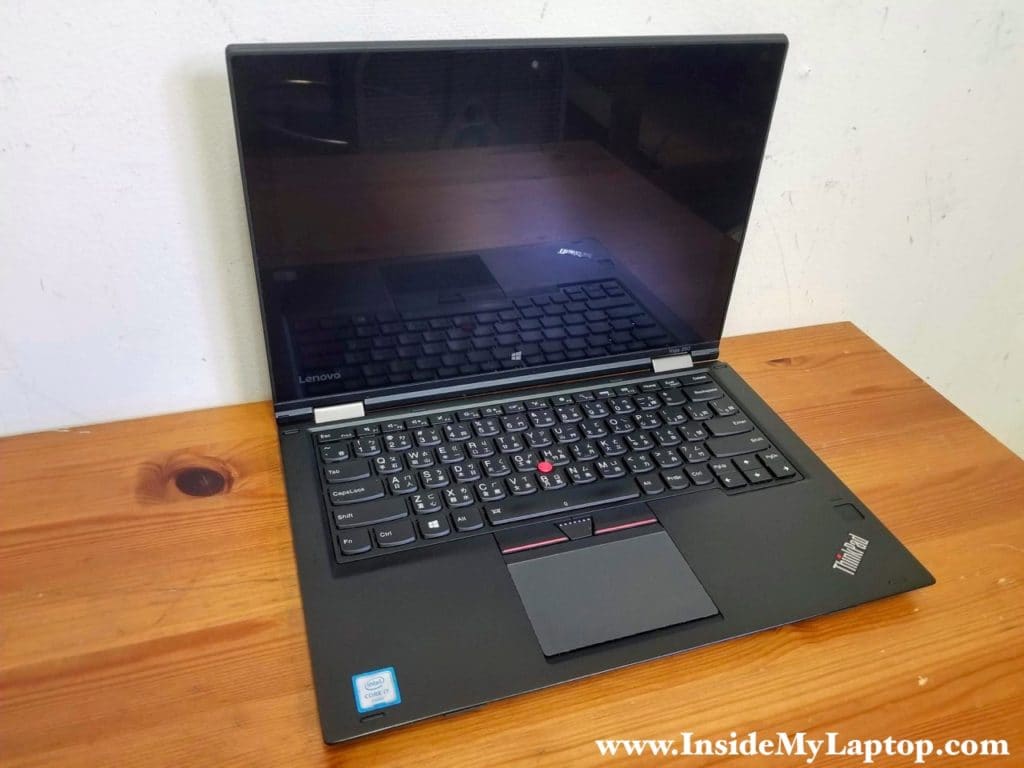
Today I’m taking apart a Lenovo ThinkPad Yoga 260 laptop. In this guide you will find step-by-step instructions for removing the motherboard, display panel and accessing the keyboard and touchpad.
For your convenience I will attach a link to the official service manual at the end of this guide.
STEP 1.
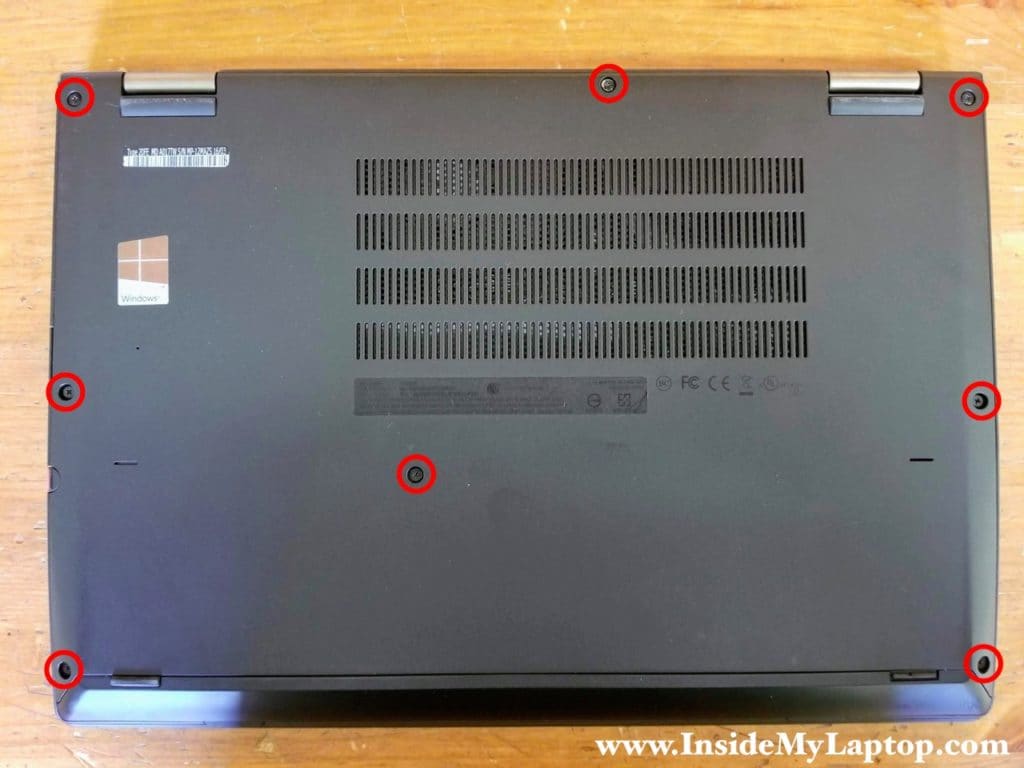
Loosen eight screws on the base cover. These screws will stay attached to the cover so don’t try to remove them.
STEP 2.
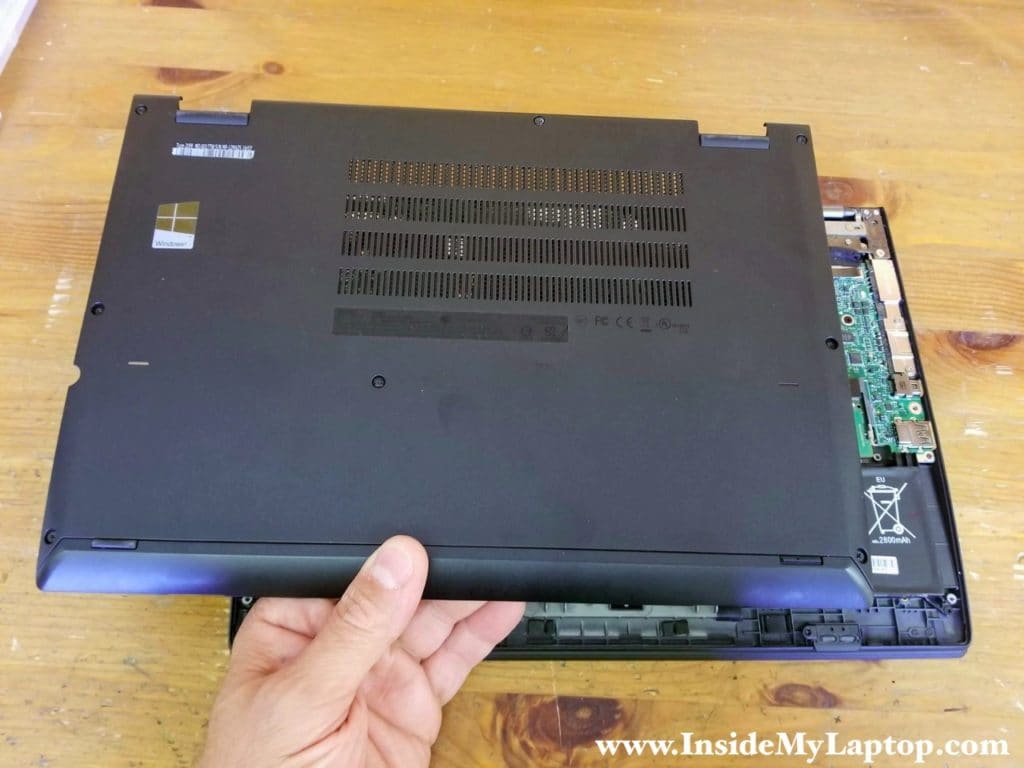
Start separating the base cover from the palmrest.
Pry up the base cover in order to disengage hidden latches securing the cover.

STEP 3.
Remove the base cover. As I mentioned earlier, the bottom screws are still attached to it.
STEP 4.
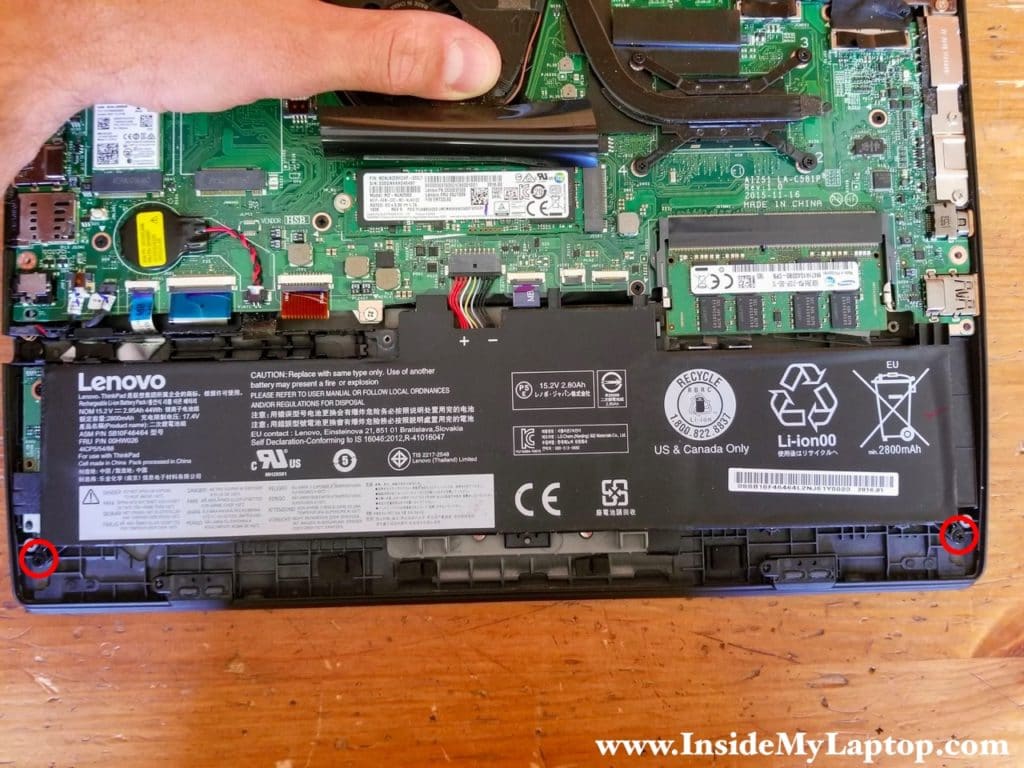
Remove two screws attaching the main battery to the palmrest.
STEP 5.
Lift up the battery and unplug the cable from the motherboard.
Remove the battery.
Battery part number: 01AV432.

STEP 6.
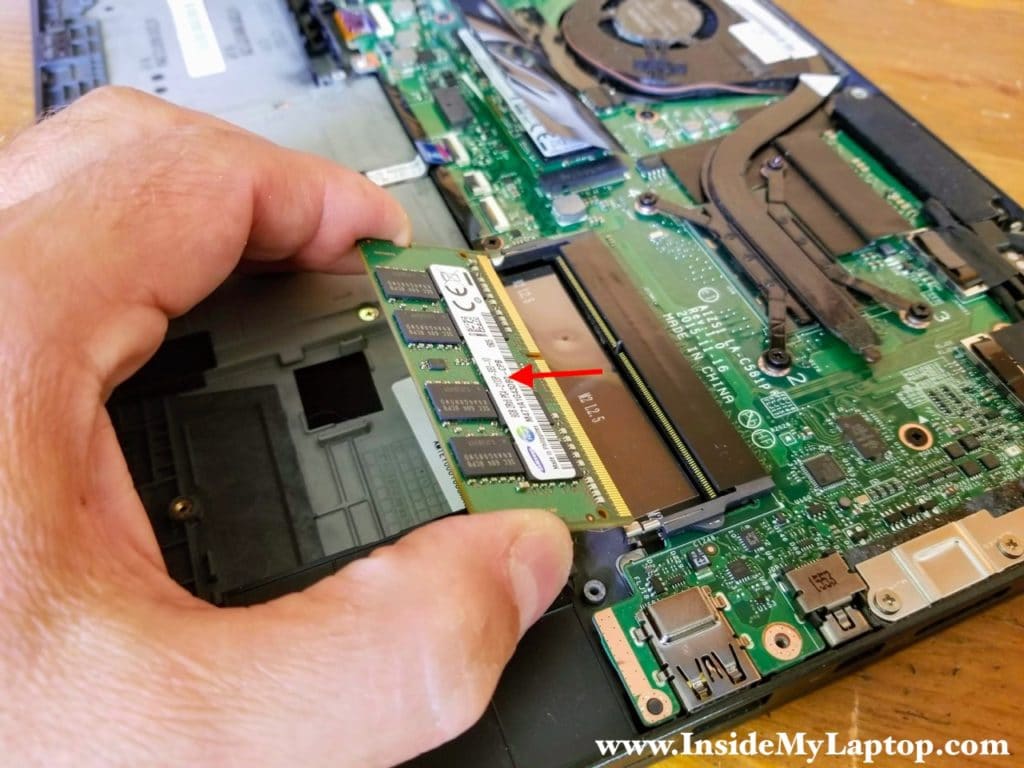
Lenovo ThinkPad Yoga 260 motherboard has only one removable memory module.
Memory module supported up to 16GB DDR4 2400/2666/3200 SODIMM RAM.
Spread latches on both sides of the memory module until it pops up at a 30 degree angle.
Pull the memory memory module out.
STEP 7.
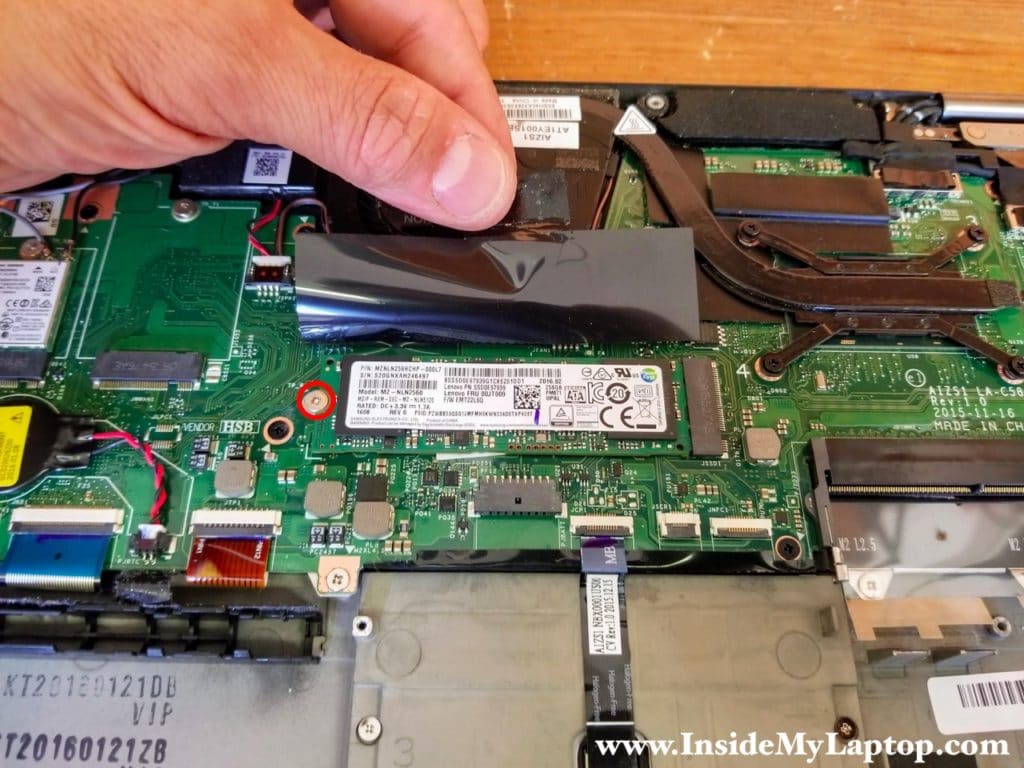
The solid state drive is mounted under the mylar sheet.
Remove one screw securing the solid state drive to the motherboard.
STEP 8.
Pull the solid state drive out of the slot.
This is m.2 SATA III solid state drive (type 2280).

STEP 9.
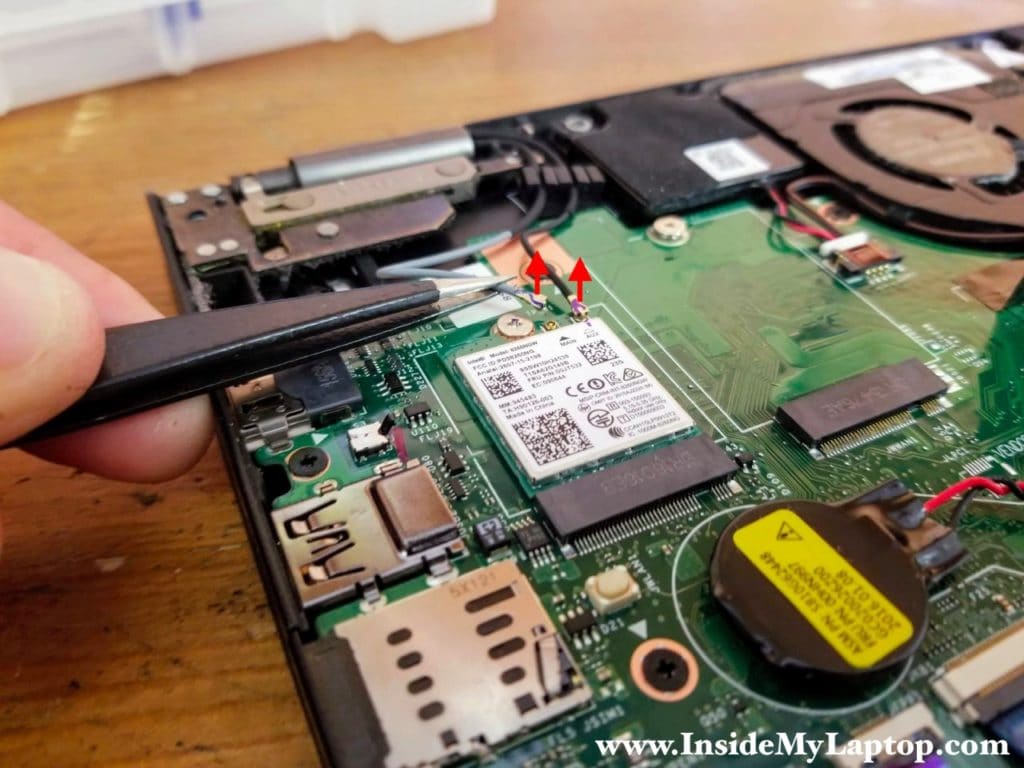
Carefully disconnect both antenna cables from the wireless card.
Remove one screw securing the card to the motherboard.
STEP 10.
Pull the wireless card out.

STEP 11.
Unplug both display cables from the motherboard.
Pull them up by the black belt on top.

STEP 12.
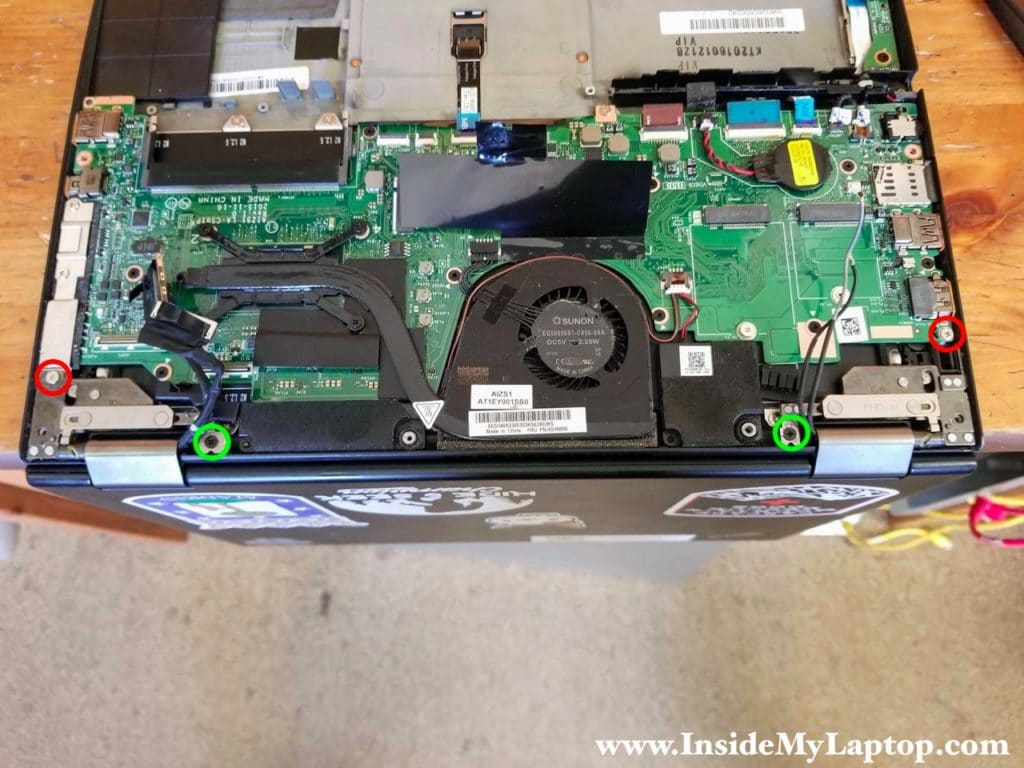
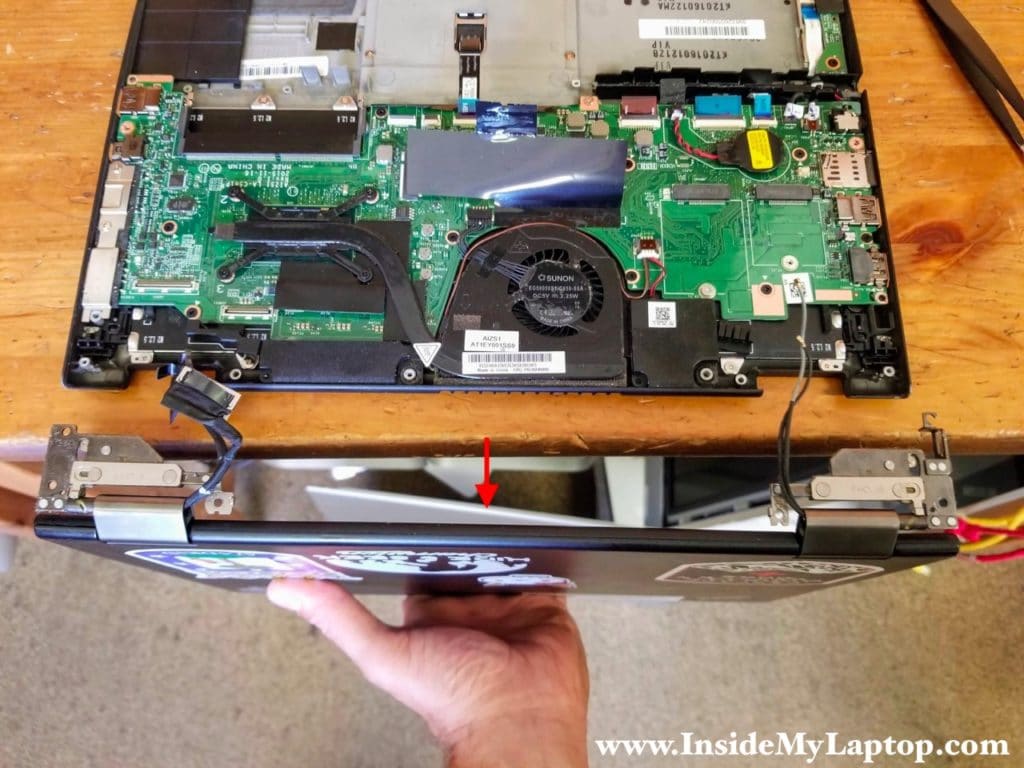
Now we are going to remove the display panel. Open the display and place the laptop upside down on the edge of your desk.
Remove two screw from each display hinge. I color-coded similar screws with the same color. Silver screws located further from the display.
Make sure both display cables and wireless antenna cables unrouted from the rubber guides.
STEP 13.
With all screws removed and cables unrouted you can separate the display panel from the palmrest assembly.
A part of the right hinge seated under the motherboard so pay attention while removing the display.
In my next guide you will find instructions for removing the touchscreen from Lenovo ThinkPad Yoga 260.
STEP 14.
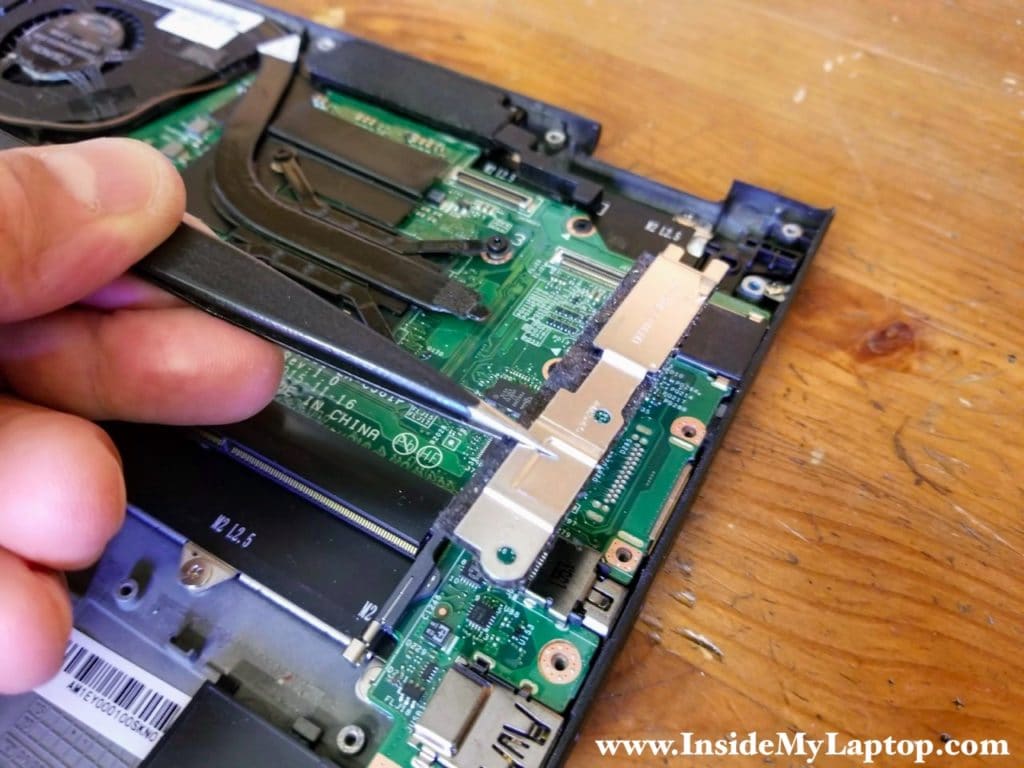
Remove two screws from the metal bracket.

STEP 15.
Lift up and remove the metal bracket.
STEP 16.
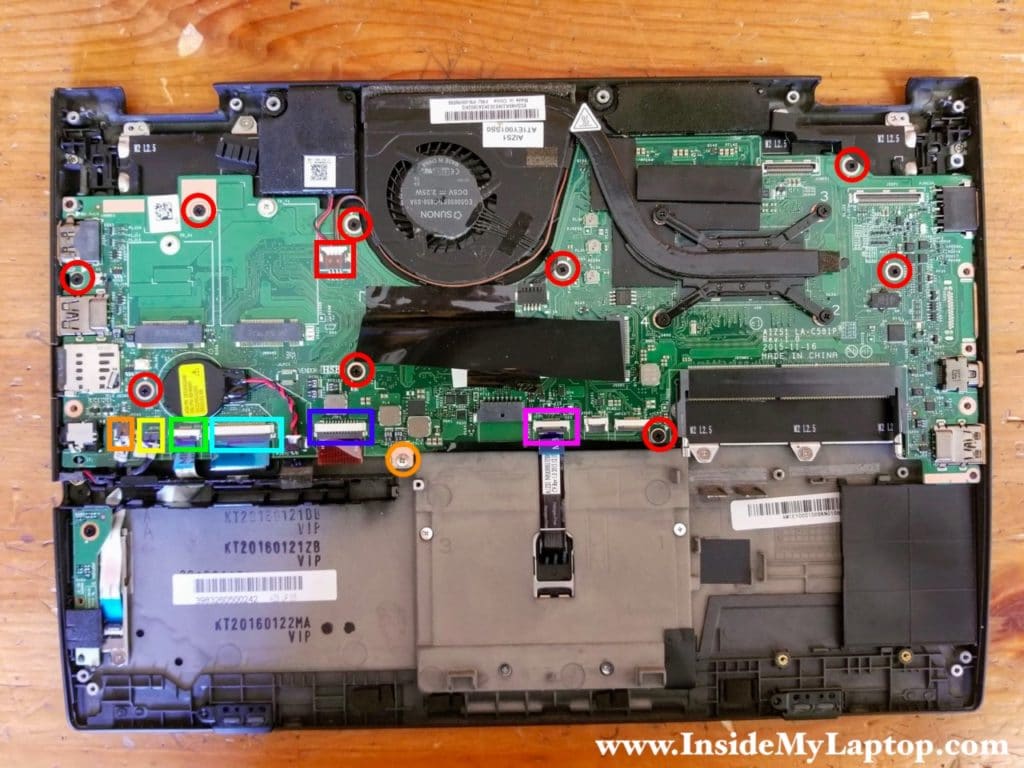
Remove ten screws attaching the motherboard to the palmrest assembly.
Nine screws (red circles) have the same size but the silver one (orange circle) is longer.
Disconnect all following color-coded cables:
– Touch pen cable (orange)
– Power button board cable (yellow)
– Finger print reader cable (green)
– Keyboard cables (light blue and dark blue)
– Touchpad cable (pink)
– Speaker cable (red)
If you have a card reader installed in your Lenovo ThinkPad Yoga 260 you’ll have to disconnect more cables not shown in my photo.
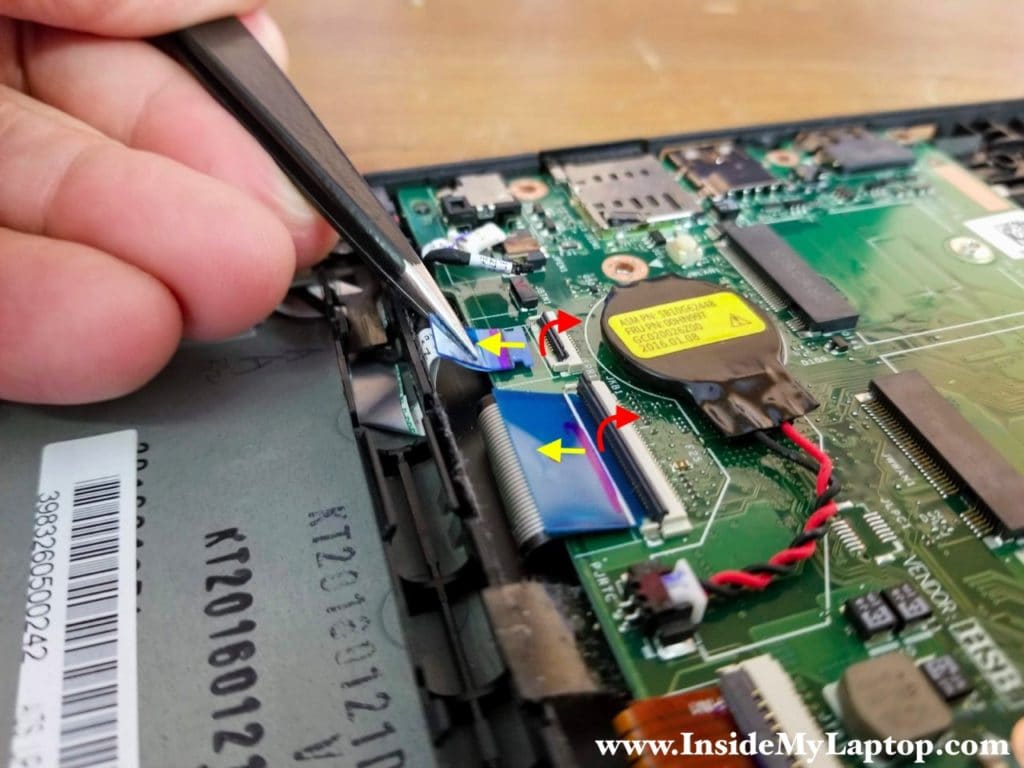
In order to disconnect the touch pen, power button board and speaker cables you simply unplug them from the motherboard.

Flat cable connectors must be unlocked first by lifting up the locking tab (red arrow).
After the cable is released you can pull it out.
STEP 17.
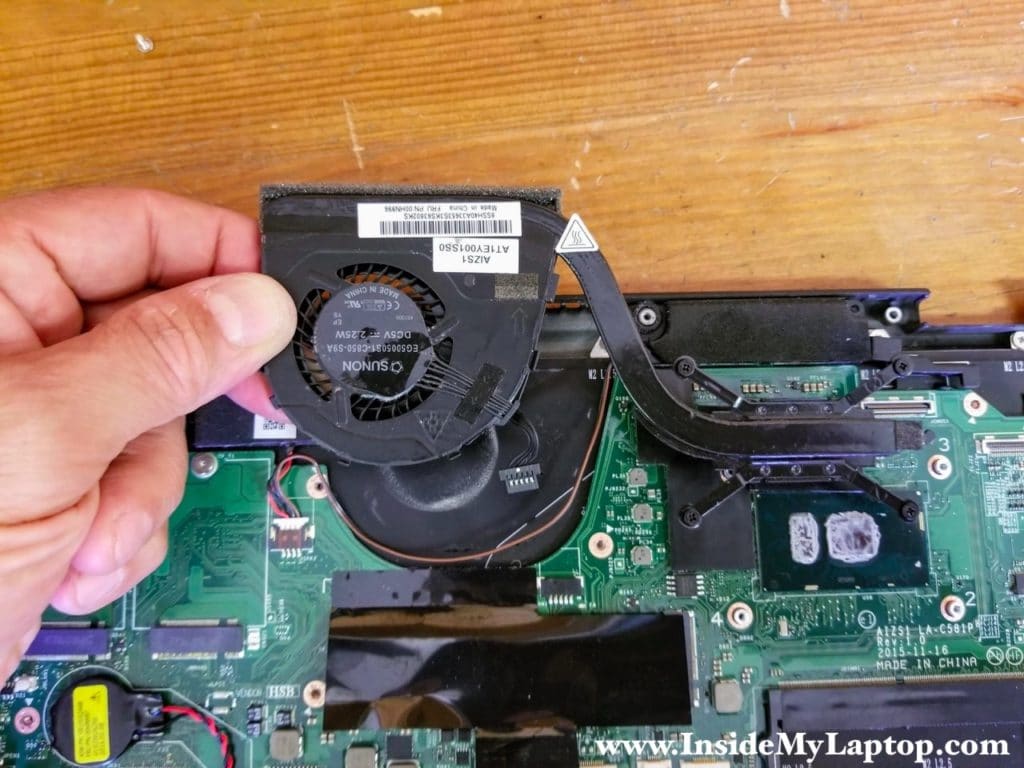
Loosen four screws attaching the heatsink.
Unplug the cooling fan cable from the motherboard.

STEP 18.
Unroute the speaker cable from the guided path on the side of the fan.
Remove the heatsink cooling fan assembly.
STEP 19.
Carefully separate the motherboard from the top case and remove it.

STEP 20.
Remove both speakers.

STEP 21.
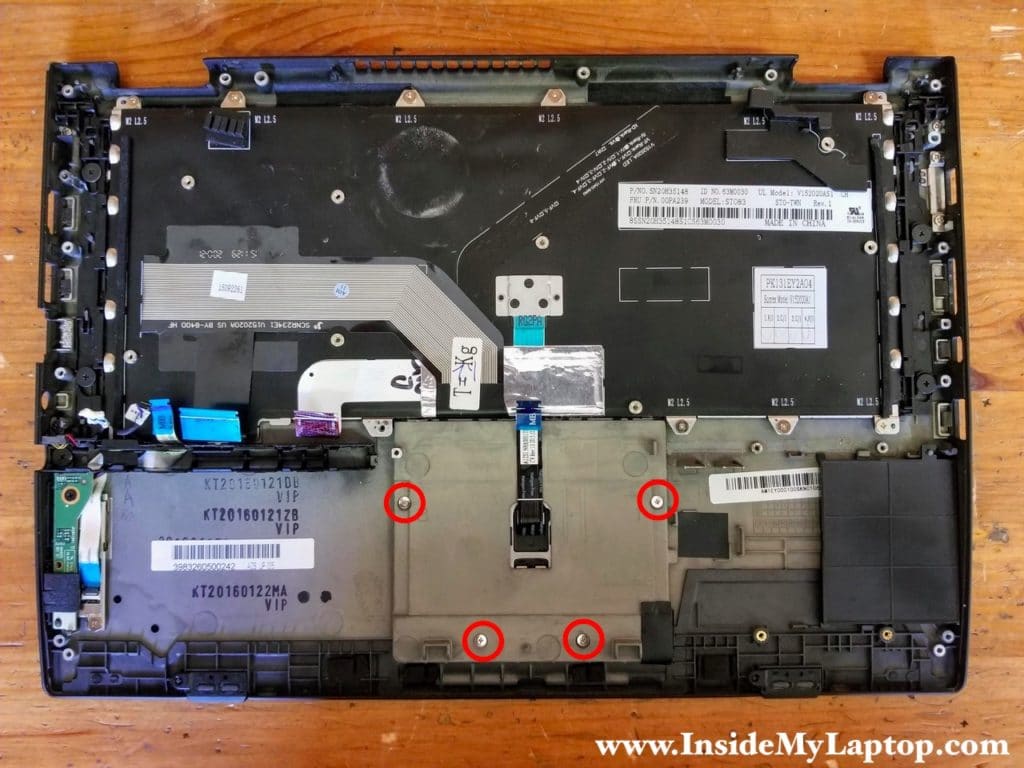
The touchpad secured by four screws. Remove them.
Carefully separate the touchpad cable from the frame. It’s secured by adhesive tape.
STEP 22.
Remove the touchpad.
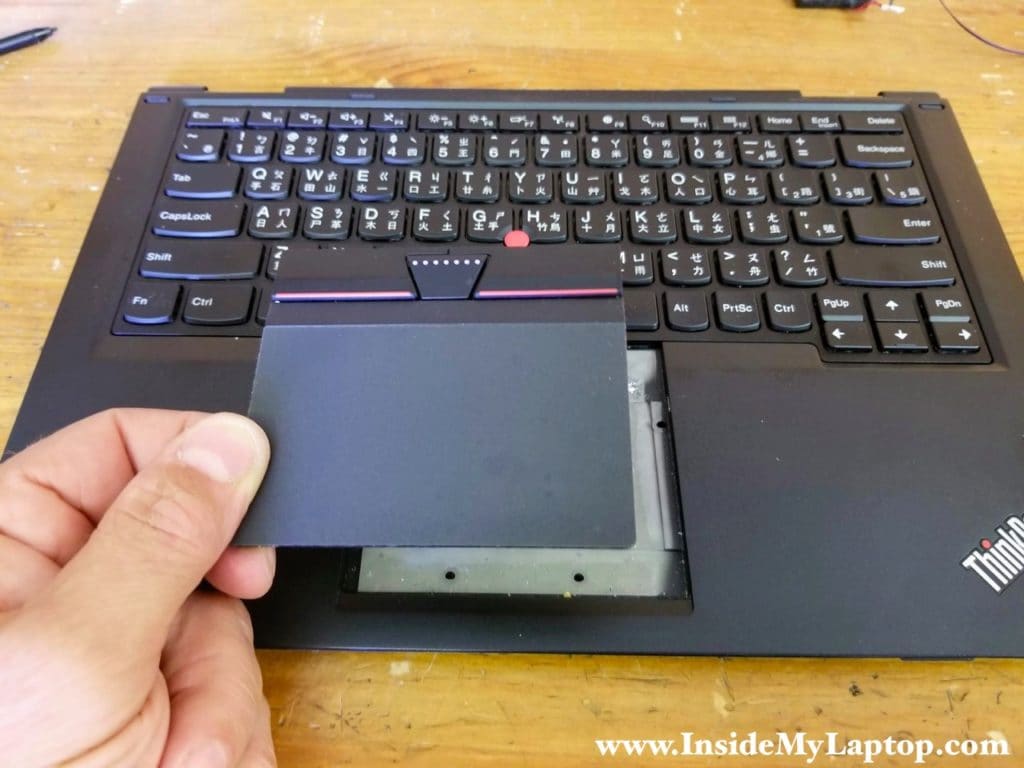
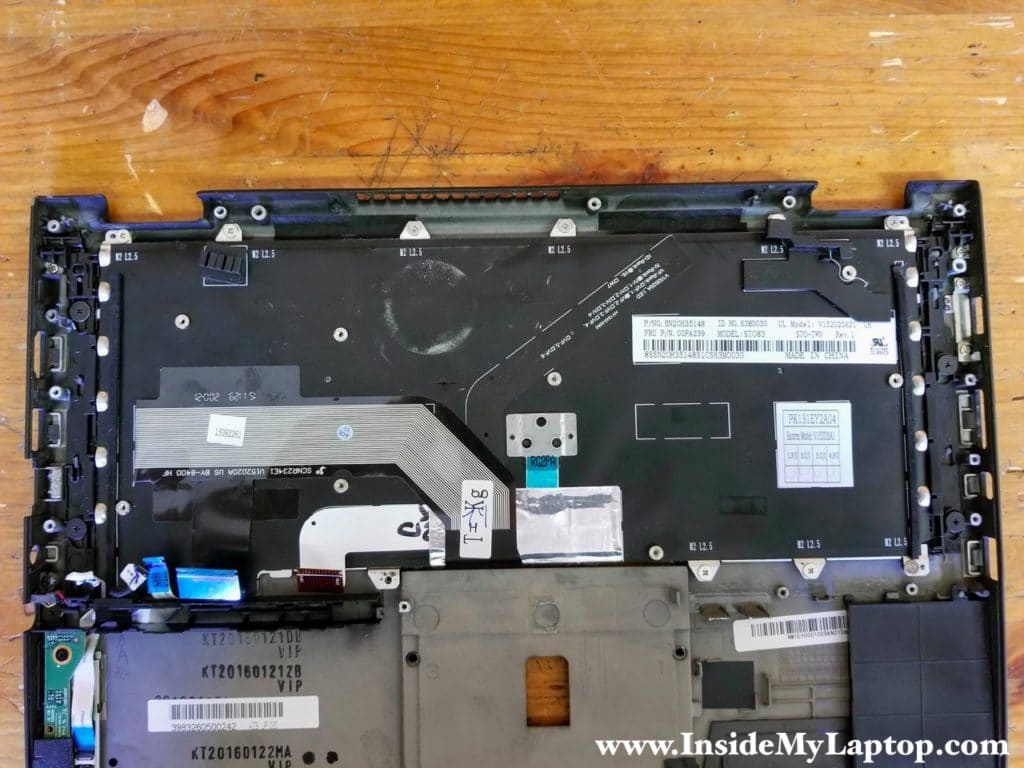
Lenovo ThinkPad Yoga 260 has removable keyboard.
I’m not going though the removal procedure in this guide but it shouldn’t be difficult.
There are a few screws securing the keyboard on the top and bottom.
Erik
Question. Do you happen to know what that empty port/connector is on the board to the right of the WiFi card?