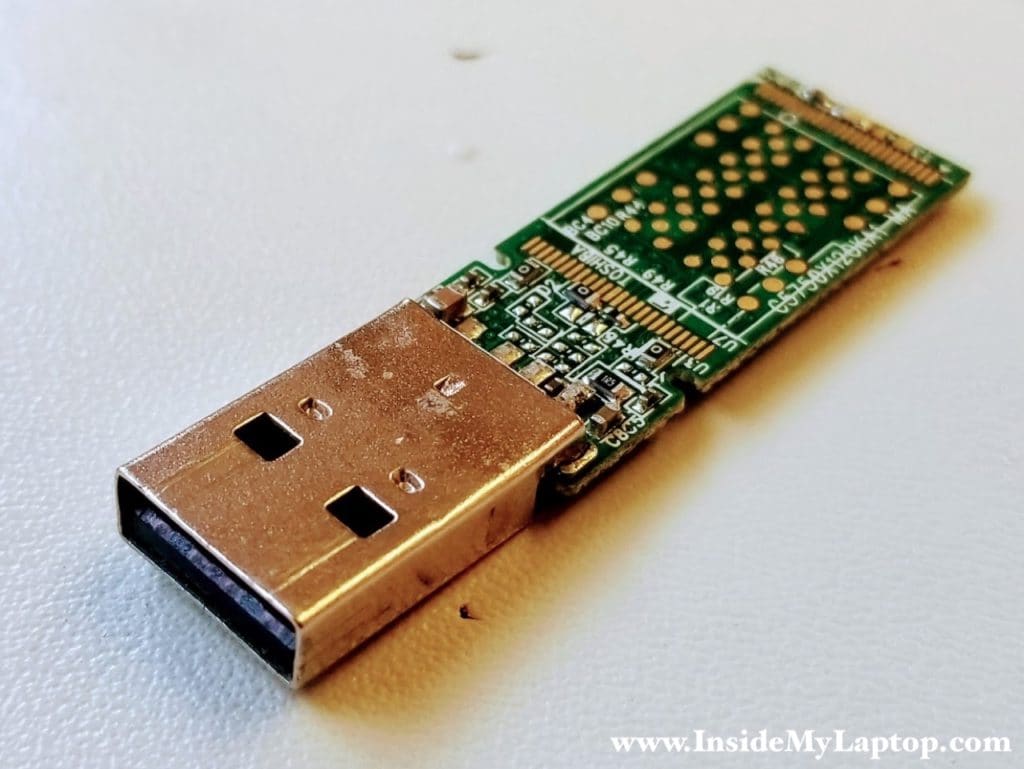
Today I show how I fix flash drives with damaged USB ports in order to recover the data. I show a few different damage scenarios and my way of fixing it.
If you have very important files on a damaged USB drive, you should use professional data recovery service instead of trying to fix it yourself. Just had to mention that.
Tools and supplies I used for this repair:
- Hakko FX-951 soldering station with T15-J02 tip
- Kester .40mm (.015″) rosin core solder
- Amtech NC-559-V2-TF flux
- AmScope 10X-20X microscope
- Needle nose tweezers
- Thin wire
Flash drive has a bent USB port
Someone bumped into this USB flash drive while it was plugged in. Right after the accident the flash drive stopped being detected by any computer. That is a cheap drive but the data on it is priceless.
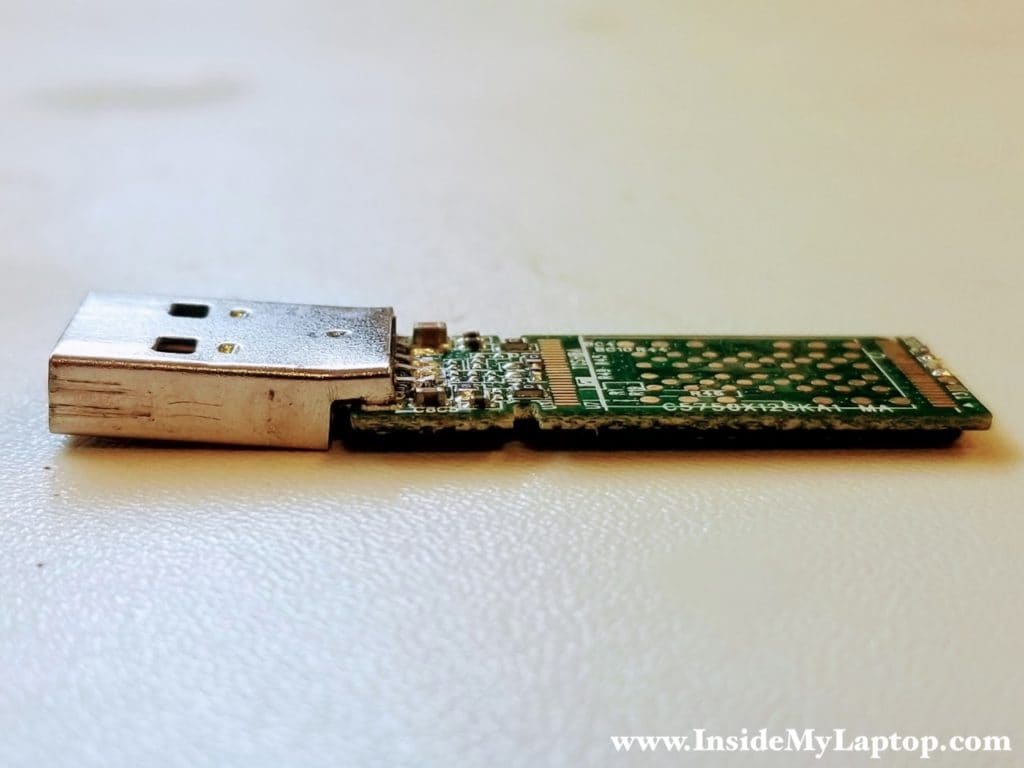
If you look at the drive from the side you can clearly see the USB port not being straight and bent upwards.
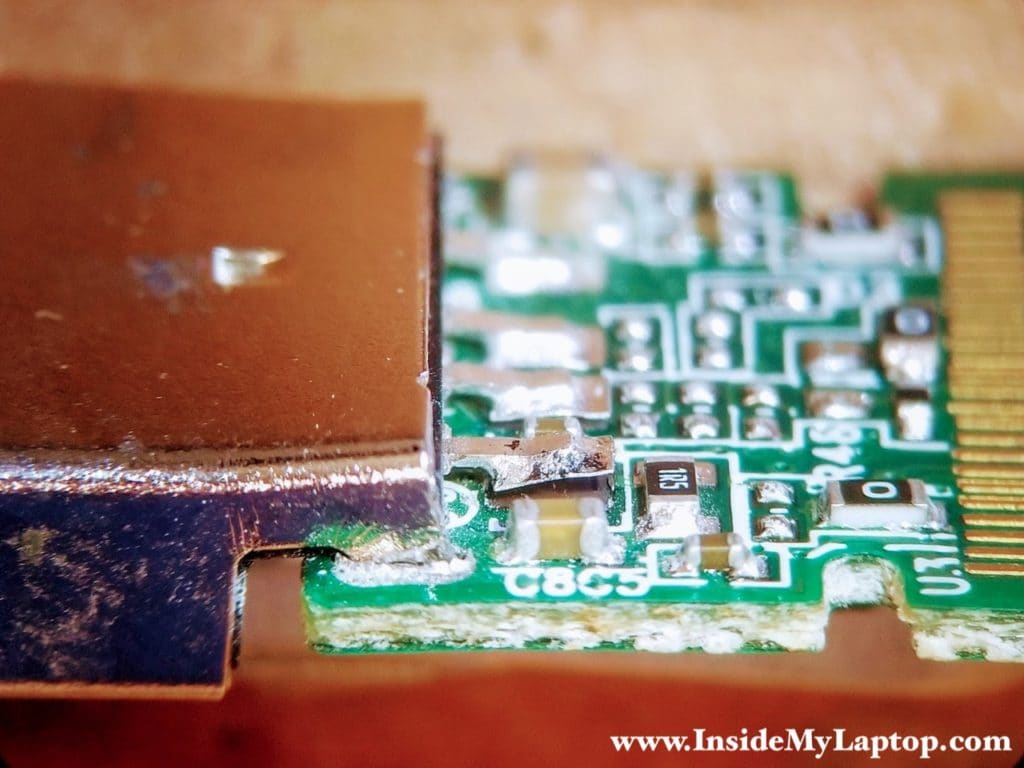
With naked eyes you cannot see what is wrong but if you look under a microscope, you can see the problem right away.
One of the soldering pads got lifted off of the circuit board and the trace between the pad and the circuit board got cracked. One of the pins on the USB port doesn’t make contact with the circuit board anymore. Can you see a gap between the first USB pin and the circuit board? Thats’s the problem!
This is USB VCC pin which supplies +5 volts DC to the circuit board.
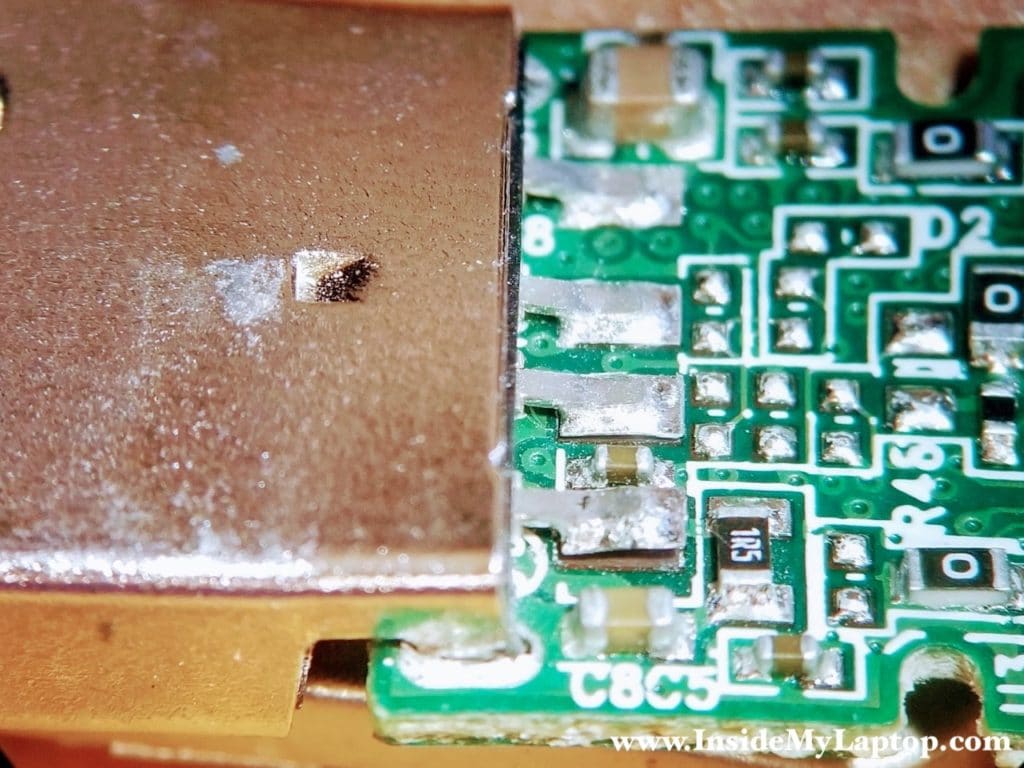
After I looked at the drive at a different angle, I noticed that the second pad (Data -) also got separated from the circuit board.
The third (Data +) and forth (Ground) pads looked normal but just in case I checked continuity with a multimeter. Both tested fine.
I was able to fix this USB flash drive in four steps. It was a temporary repair, just enough to make it work and recover the data off the USB drive.
STEP 1.
Using a soldering stating I unsoldered two damaged pads from the USB port pins.
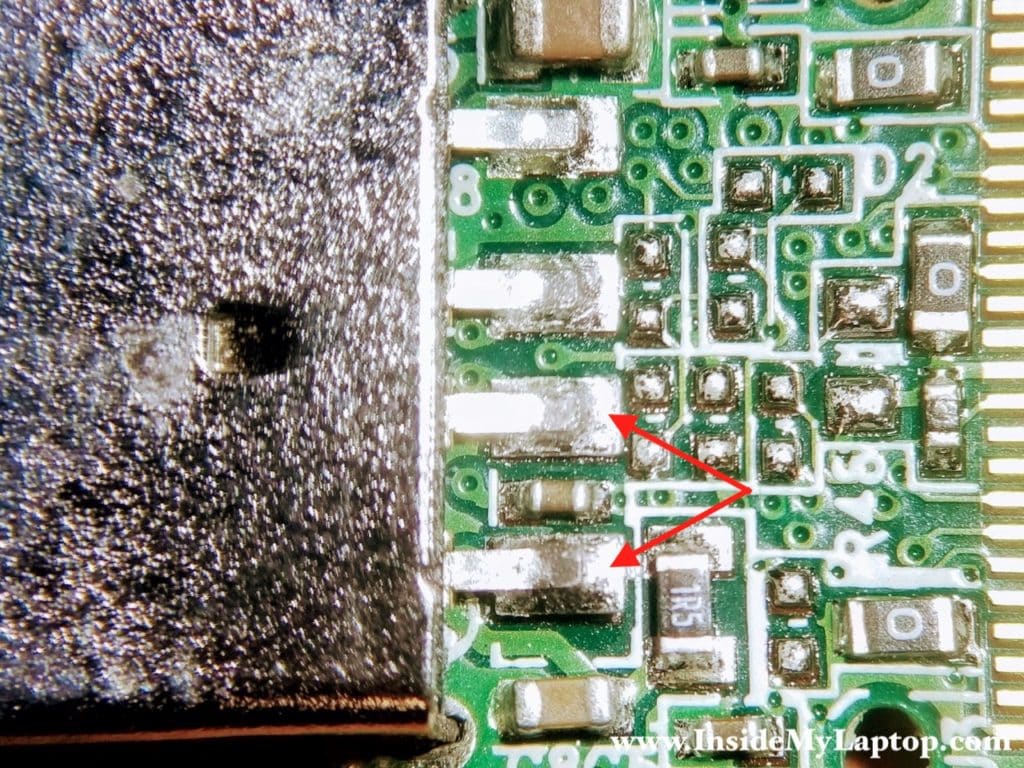
STEP 2.
With the pads removed I got a clear view on the circuit board. I was able to trace where these pads should be connected on the board.
- The first pad (+5V VCC) was connected to the resistor marked 1R5 (lower arrow).
- The second pad (Data -) was connected to the round pad just above the pin (upper arrow).
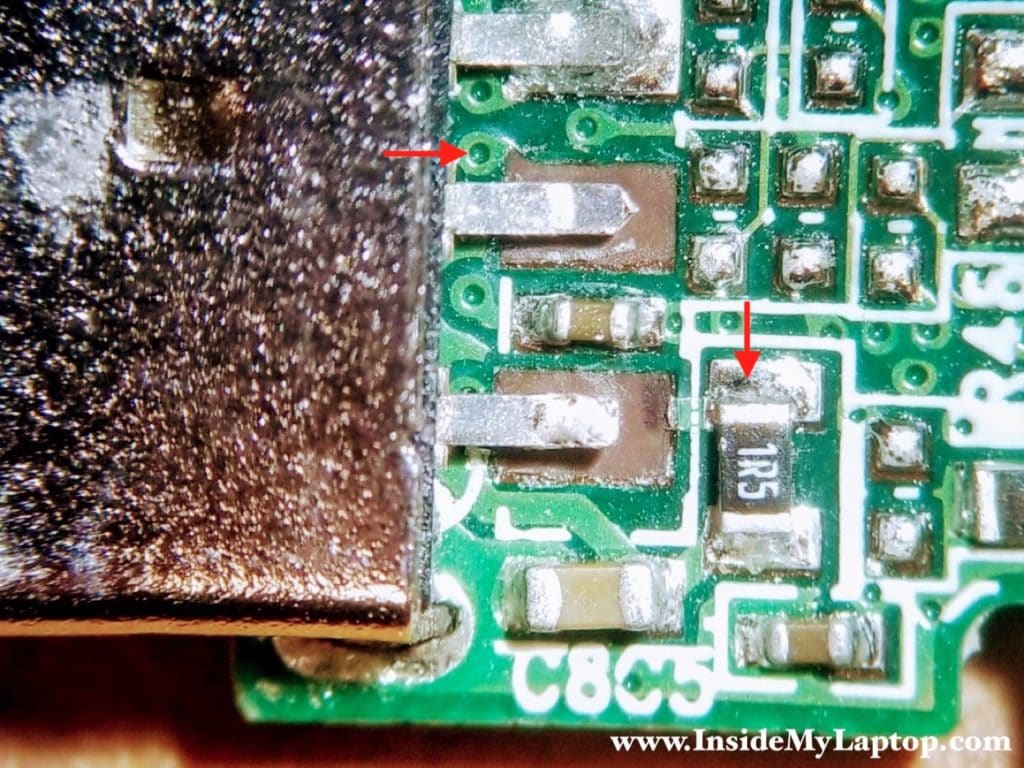
STEP 3.
I scraped off the protective coating from the round pad using a sharp needle nose tweezers. After the copper surface got exposed, I applied some fresh solder on the pad and two USB port pins.
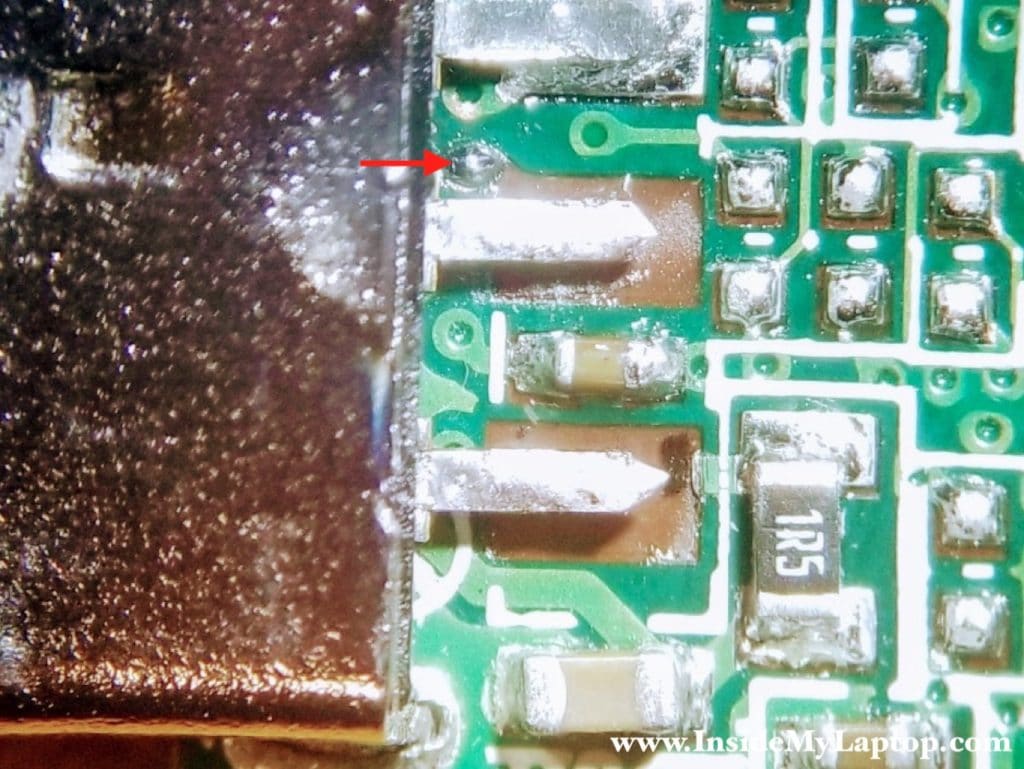
STEP 4.
Finally, using a very thin wire I ran jumpers from both USB pins to the circuit board.
You definitely need a microscope, a good micro soldering station and steady hands for this kind of repair.
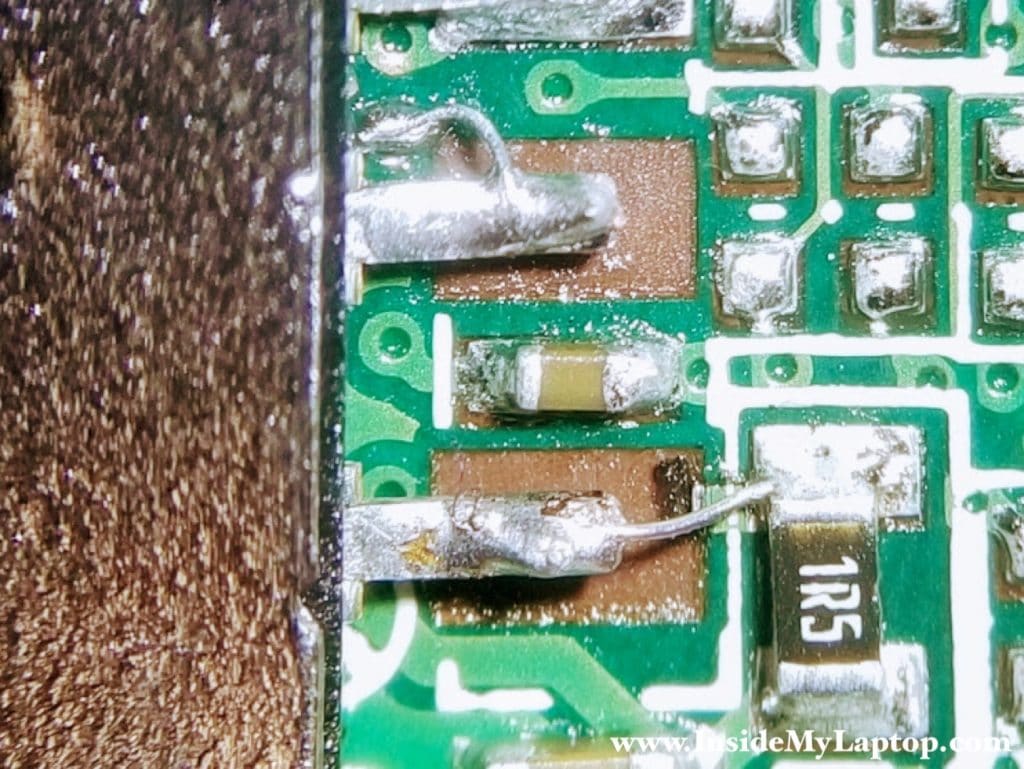
After the repair I plugged the USB drive into my computer and… Bingo!!! The blue LED turned on and started flashing. The USB drive mounted as normal and I was able to recover all valuable data off the drive.
That was just a temporary repair but enough to get access to the files.
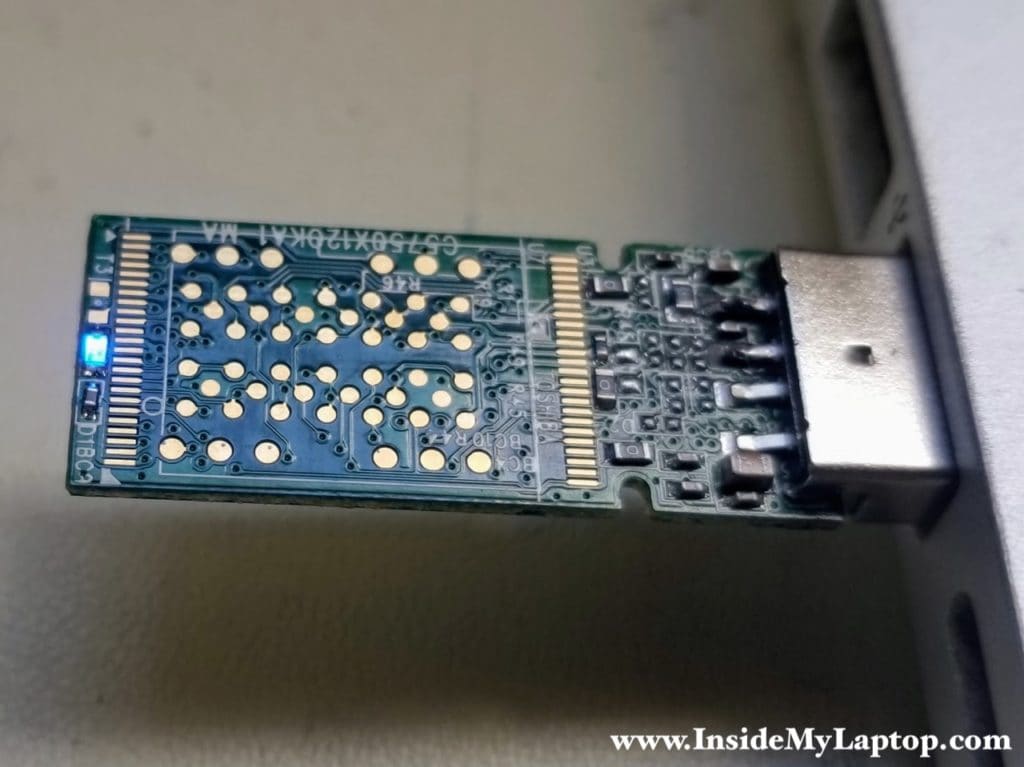
Flash drive USB port ripped off of the board
In this example I have a flash drive with the USB port ripped off completely. When a damage like that occurs, usually some traces on the circuit board are damaged too.
In this particular case only one soldering pad (+5V VCC) was missing and three other pads were intact.
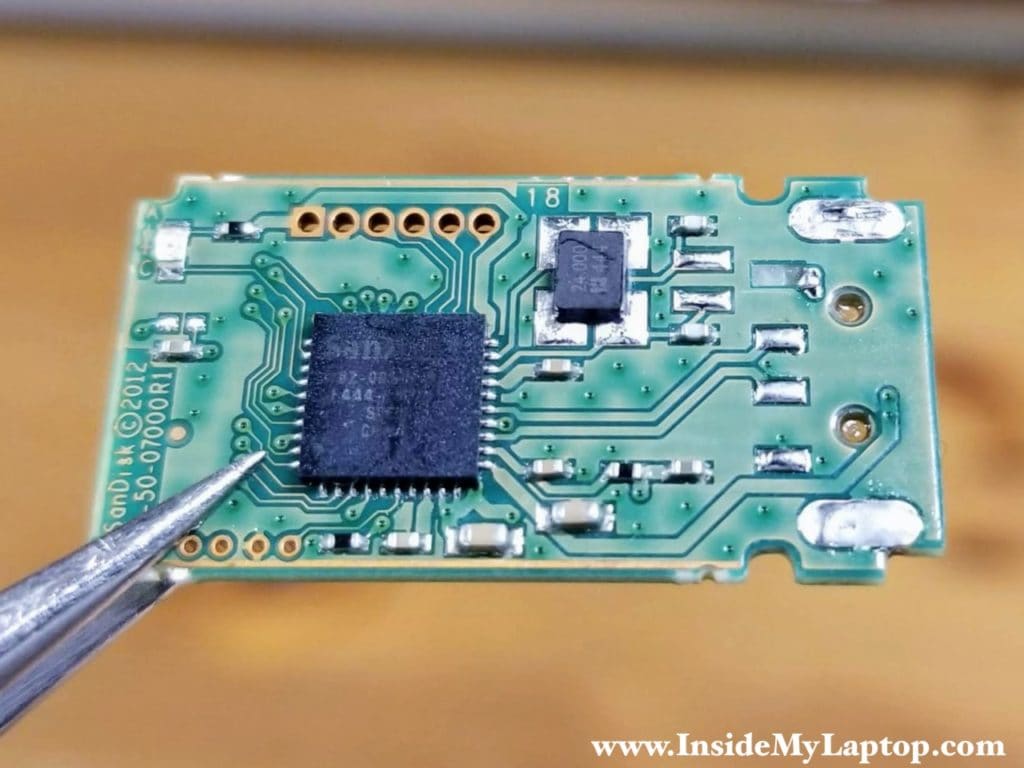
In this similar example there are three soldering pads missing.
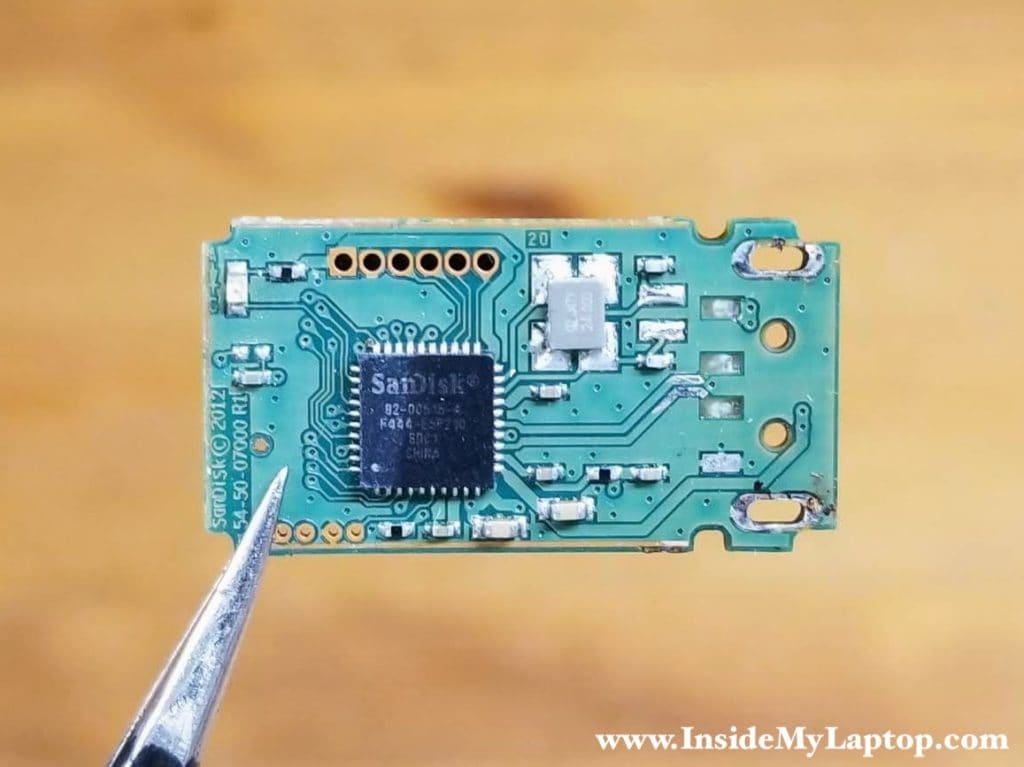
In order to fix a flash drive like that, I solder a new USB port (borrowed from another drive) and run jumpers to the damaged traces. For attaching a new USB port I use the same technique as for soldering a DC power jack.
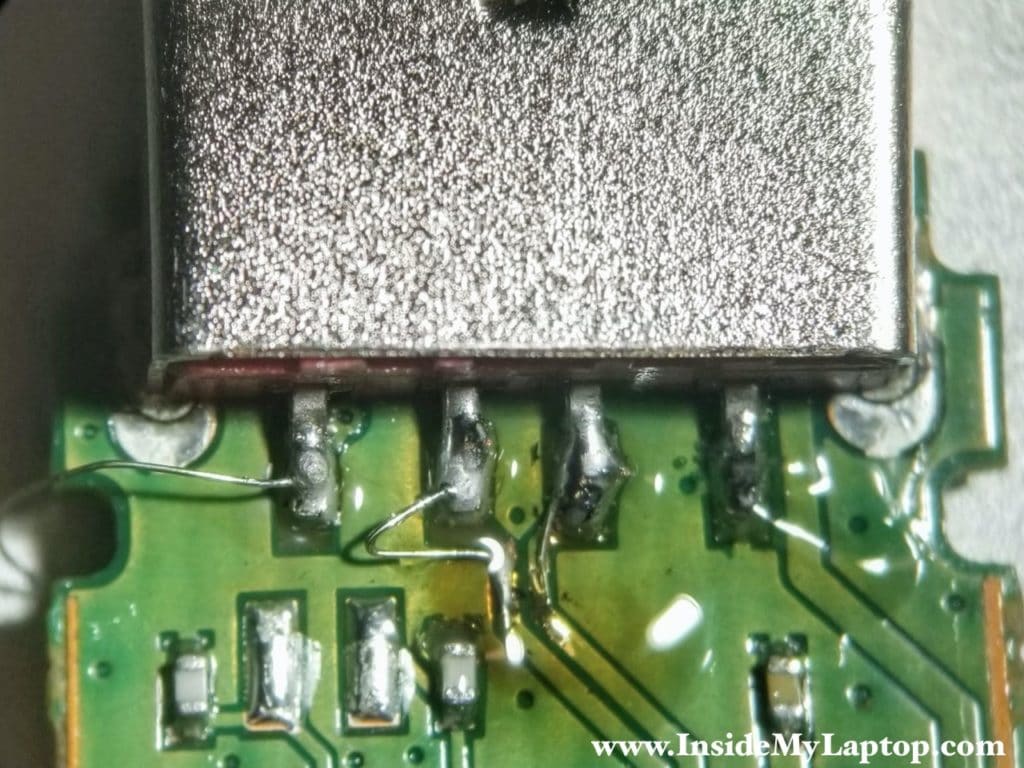
Flash drive broken in half
Here’s a nightmare scenario for data recovery – a USB flash drive broken in half. Here’s one I just got on my bench. As you see the USB port ripped off completely, traces are damaged and… the logic board is broken in half.
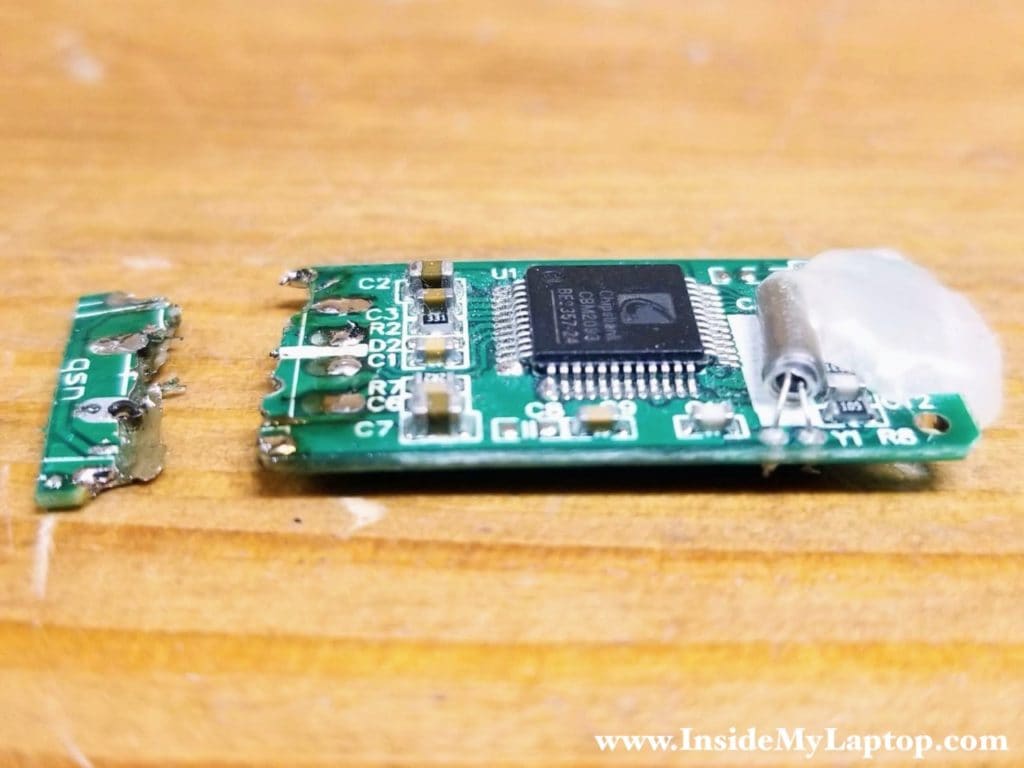
It’s very difficult to recover data from a drive like that but in this particular case I got lucky.
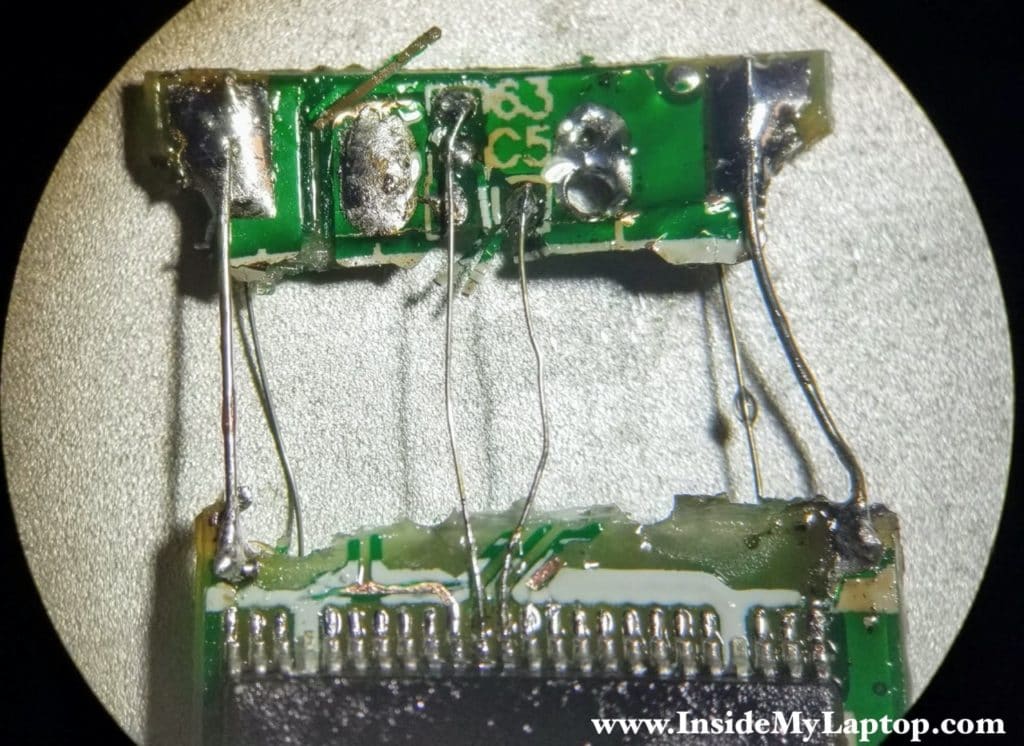
Using a 10x microscope I was able to figure out where the damage occurred and solder jumpers from one piece of the board to another.
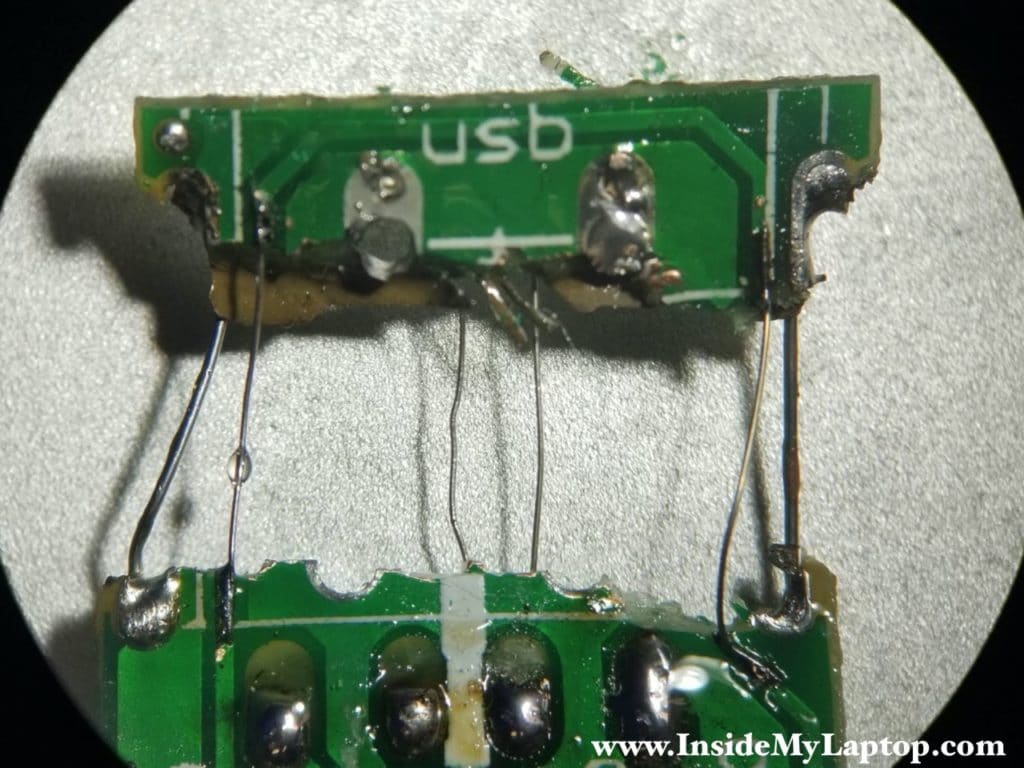
I did the same on the other side of the board.
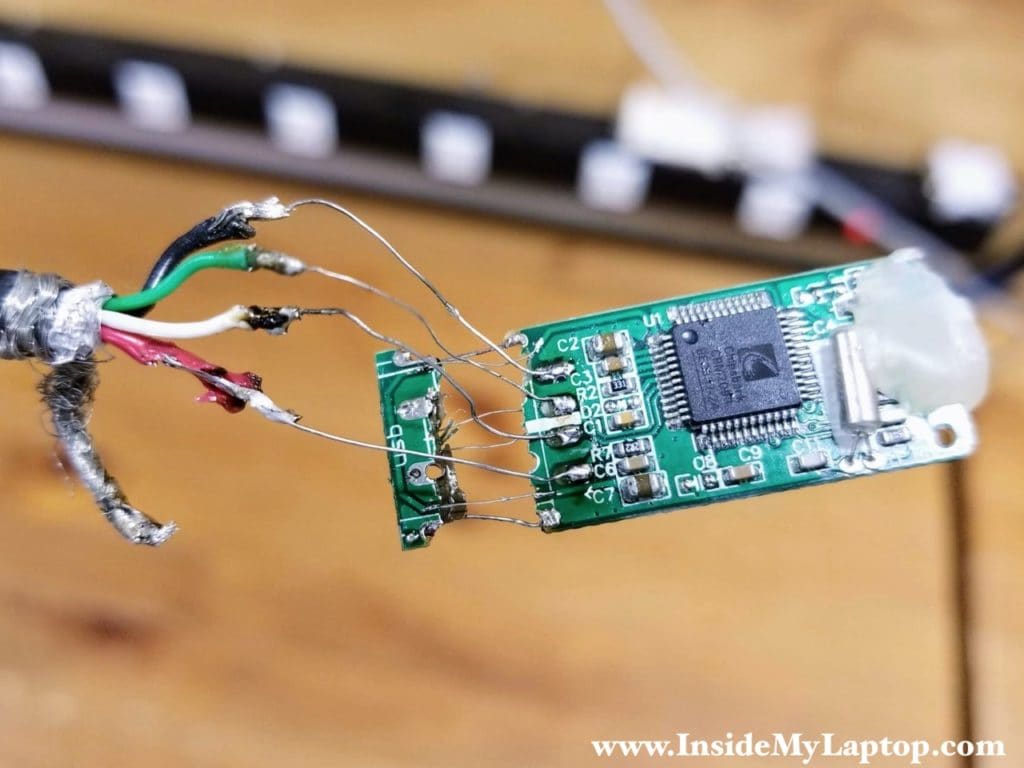
Finally, I soldered a USB cable to the pads and successfully recovered all the data.
Monica Hong
Do you think you can repair my bent USB? At a cost of course. I am pretty desperate!
IML Tech
@ Monica Hong,
I can definitely take a look at your bent USB drive. Can I repair it? It’s hard to tell without evaluating the damage. It would be great if you can send me the drive model. A photo of the damage also would be useful.
I’ll email you back privately. I’m in Seattle by the way.
Manuel Ortiz
I have a bent 128 gb sandisk cruzer glide. I left my files transferring from my computer to my flash drive so my family and I can watch stuff together. While making breakfast, I heard my kids running round the room. I went back to my computer and the transfers had been interrupted and my usb stem was bent. Please help me
Kyle Smith
My USB is bent to the right side, would i fix it the same way?
IML Tech
Kyle, it’s hard to tell without seeing the drive. If USB pins separated from the logic board, soldering them back should help.