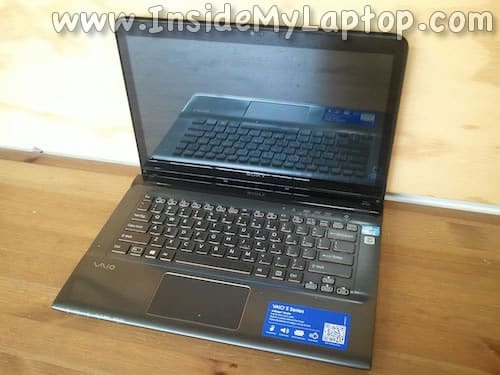
In this guide I will take apart a Sony VAIO E Series laptop.
Product name: SVE14A35CXH
MODEL: SVE14AJ16L
Make sure the laptop is turned off before you start taking it apart.
STEP 1.
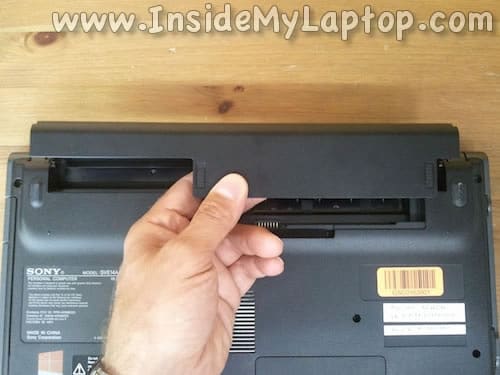
Unlock and remove and replace the battery if necessary.
STEP 2.
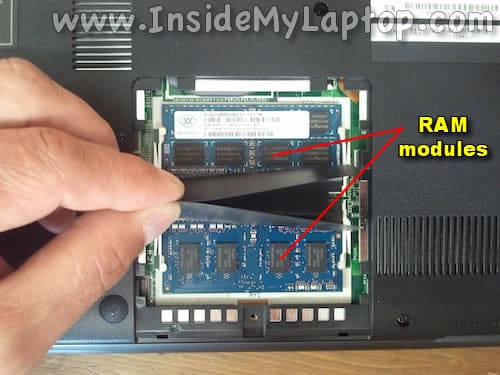
Remove one screw securing the RAM cover.
Lift up the cover and remove it.

Under the cover you can access both RAM modules.
Sony VAIO E series supports up to 16GB (2x8GB) DDR3-12800 SODIMM RAM modules.
STEP 3.
Remove the hard drive cover.
Remove two screws securing the hard drive assembly.
Slide the hard drive to the left to disconnect it from the motherboard.

STEP 4.
Lift up and remove the hard drive.
I recommend replacing this regular 2.5″ SATA hard drive to a 2.5″ SATA solid state drive. Doing so will improve the laptop performance significantly.

STEP 5.
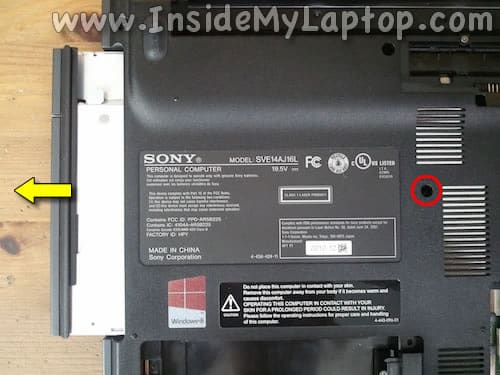
Remove one screw securing the optical drive.
Slide the optical drive to the left and pull it out.
STEP 6.
Remove all screws from the bottom cover.
Two hinge screws (green) are larger than other screws.
Two screws located in the battery compartment (yellow) are smaller.
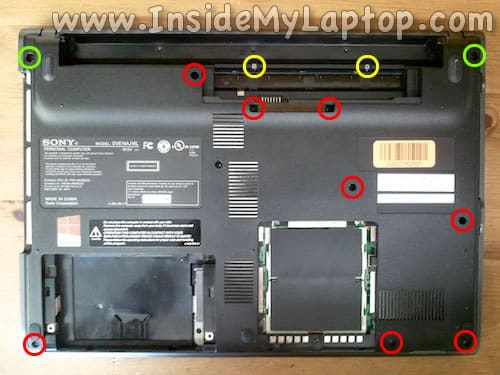
STEP 7.
Start separating the bottom cover from the rest of the laptop.
You can use a guitar pick to split the case.

STEP 8.
Remove the bottom cover.
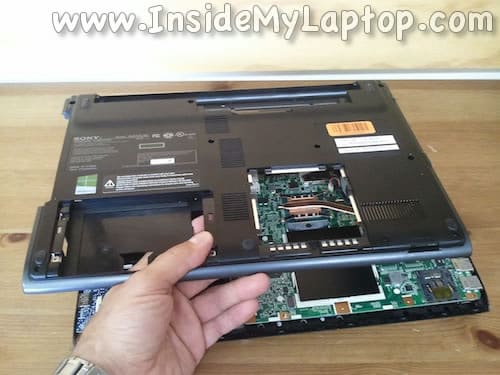
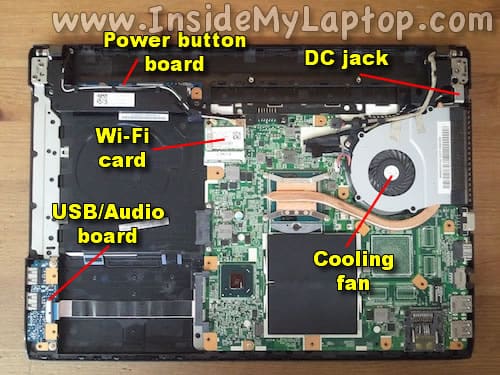
Under the cover you can easily access the following internal components:
– Power button board.
– DC power connector.
– Cooling fan assembly.
– Wi-Fi card.
– USB/Audio board.
STEP 9.
The microphone, headphone and two USB ports located on a separate board.
If one of the audio jack or USB ports is damaged, simply replace the entire board.
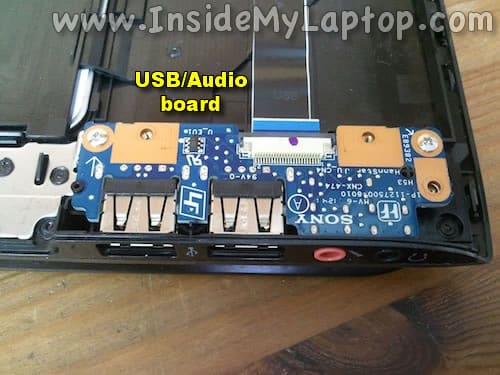
STEP 10.
In order to remove the cooling fan assembly you’ll have to remove a few screws securing the heat sink and unplug the fan cable.

STEP 11.
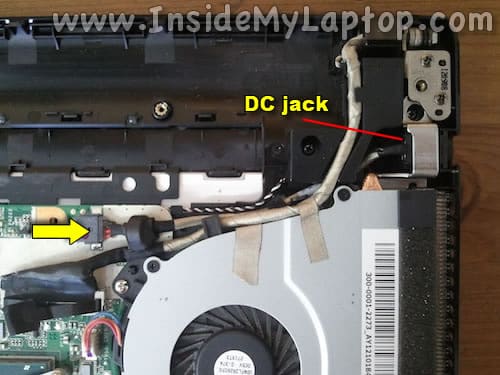
The DC power connector is NOT soldered to the motherboard. It can be easily replaced after you unplug the cable.
The DC connector secured to the case by a metal bracket. In order to remove the bracket you’ll have to remove the fan assembly first.
STEP 12.
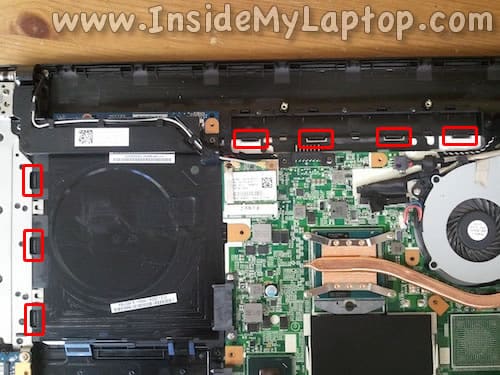
There are a few latches securing the keyboard to the case.
In order to remove the keyboard you’ll have to unlock these latches.
STEP 13.
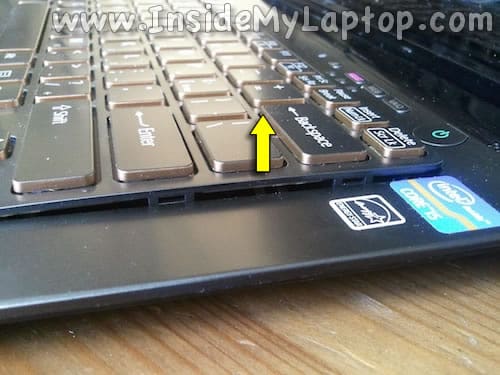
Push on a latch until it disengages from the case.

STEP 14.
When the latch is disengaged, the keyboard will lift up a little bit.
Continue separating the keyboard from the case with your fingers and at the same time unlock remaining latches on the other side.
STEP 15.
Separate the keyboard from the case and place it upside down on the palm rest.

STEP 16.
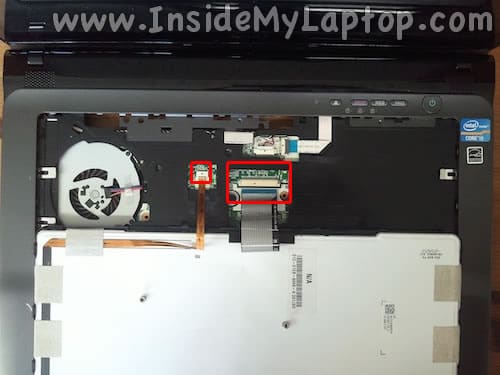
There are two cables connecting the keyboard to the motherboard.
– The backlight cable (narrow).
– The data cable (wide).
STEP 17.
The backlight cable connector doesn’t have a locking mechanism.
Simply pull the cable from the connector.

STEP 18.
The data cable connector, on the other hand, has to be unlocked first.
Carefully slide the locking tab about 2 millimeters away from the connector.
The tab must remain attached to the connector.
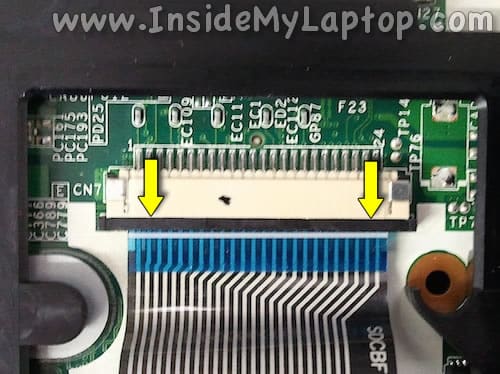
STEP 19.
Now you can pull the data cable from the connector (it goes under the locking tab).

STEP 20.
Remove the keyboard completely.
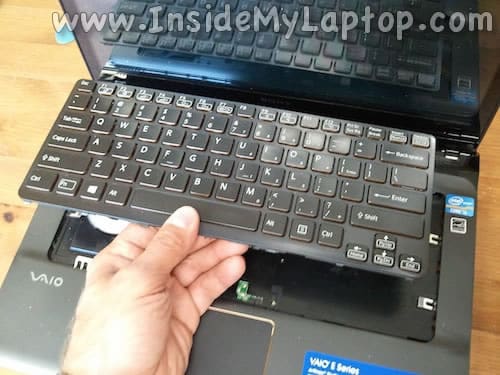
STEP 21.
The power button board cable can be accessed when the keyboard removed.
The board itself secured to the other side by one screw.

STEP 22.
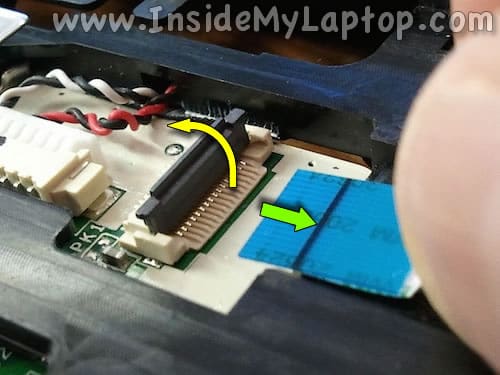
Here’s how to remove the cable.
First, lift up one side of the locking tab until it opens up at a 90 degree angle (yellow arrow).
Second, pull the cable from the connector.
Now you can easily remove the power button board if necessary.
Renny
Hi. I am trying to contact the author of this site to ask permission to use a link to this site in a book I am writing. Is there any chance of contacting me by email? Sorry to use this method but can’t find any other contact details. Renny 🙂
IML Tech
@ Ranny,
If your book is related to the content of my site, you can link to it. I don’t see any problem with that.
pranjal patowary
can you please help me out? i m trying to disassemble my vaio e series laptop. which size screwdrivers will be best for opening it up?
Charlie
Do you know how to remove or get under the touchpad? I believe there’s something caught under there that’s making the left side lift up a bit.
Rui
goodnight need help. have a sony vaio sve that has no backlight. how can I solve
El_Diablo
my man is there a way to upgrade the e series to usb 3.0?
milan
hello
I m using Sony Vaio I3
model name : SVE151L11W
my laptop could not start , the laptop is charging by charger but it will not start so it have problem inside motherboard may be short the Intel chip so tell me how would I repair all the thing ?
ChrisP
Great writeup.
I have a 17″ E-series that appears to have a graphics card/connector issue. The HDMI output works fine, but the laptop screen seems to always have green turned on (actual screen behaviour is inconsistent… sometimes only green works, other times everything works but there seems to be extra green artifacts). How do you get to the screen connector for an E-series?
Thanks,
Chris
newguy
Help me out here I m trying to find CMOS battery location on VAIO vpceb44en. I removed keyboard from front but did not find anything. From behind i opened all the screws to get to motherboard not there. Where exactly is CMOS battery. Plz help me
VcdeChagn
Nice write up. I think yours is the only one on the internet for this particular model.
Dr. Martin Aguilar
I have a Sony Vaio SVE14A190X and I was upgrading to Win 10 (i have Win 7 64 bit) and suddenly and all by 9iitself the Pc tells me that the Hard drive is full or errors and need to reset and restore all the drives,when it finises I have a password screen which was not placed by anyone and now I find I am lock out and in Germany can you help pls, I do not know where is the CMOS battery could not find it, took apart the PC but no luck please help and also how to reset back the BIOS thank a million
sk
I have Sony vaio sve14a15fn model, my laptop bezel is broken on one side, when the lid is open the lcd cover comes out from the unit separately. Give me suggestions and please help me