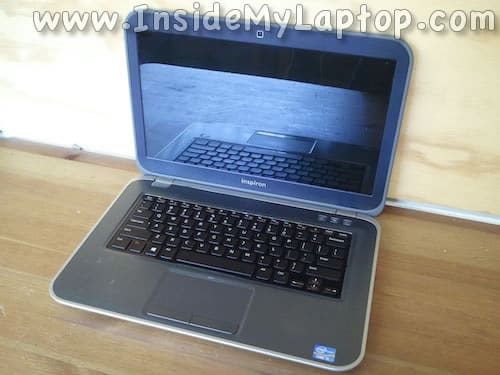
In this guide I explain how to disassemble a Dell Inspiron 14z-5423.
Make sure the laptop is turned off.
STEP 1.
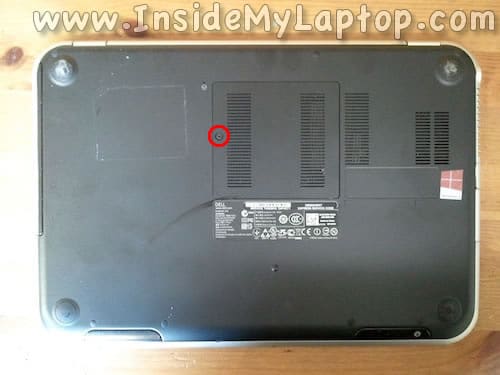
Remove the RAM cover which is secured by one screw.
STEP 2.
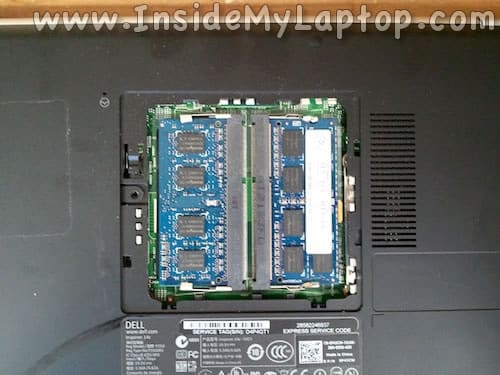
Under the cover you will find two RAM modules.
This laptop supports up to 8GB (2x4GB) DDR3-12800 SODIMM RAM modules.
Remove the right module.
STEP 3.
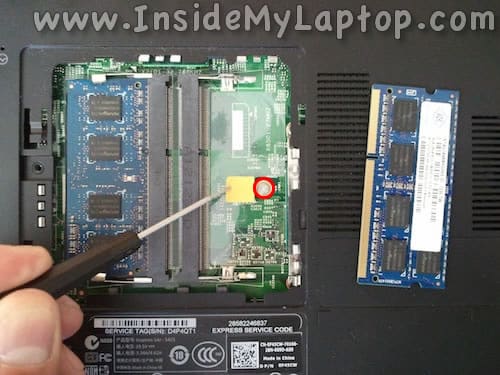
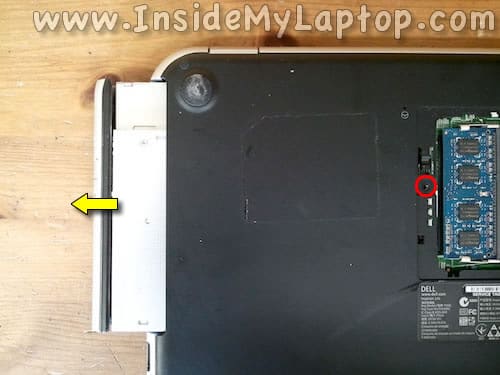
Under the right RAM module there is one screw securing the keyboard.
Remove this screw.
STEP 4.
Remove one screw securing the optical drive.
Pull the optical drive to the left and remove it from the laptop.
STEP 5.
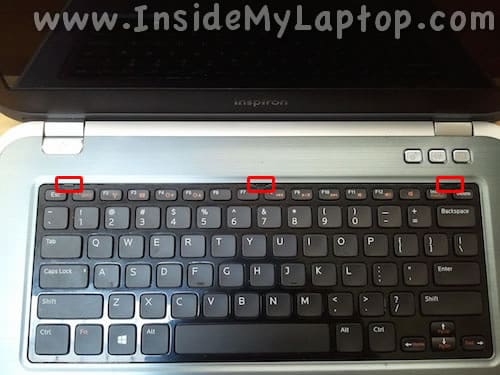
There are three latches securing the keyboard to the top cover (palm rest assembly).
STEP 6.
Push on the latch with a small screwdriver. When the latch pushed in, the keyboard will lift up a little bit.
In order to separate the keyboard from the top cover it’s necessary to unlock all three latches.

STEP 7.
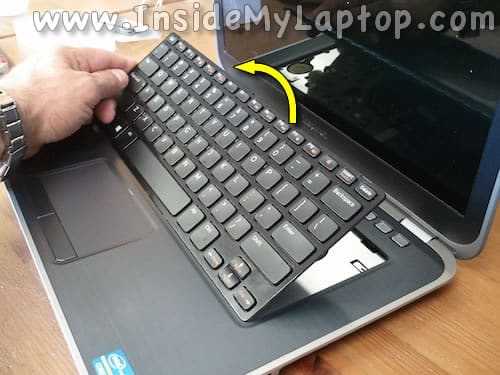
Separate the keyboard from the top cover, turn it upside down and place on the palm rest.
STEP 8.
Now you can access the keyboard cable connector.

STEP 9.
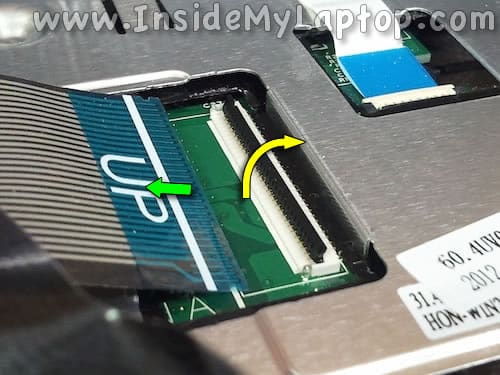
Unlock the connector by lifting up the left side of the cable retainer. The retainer opens up at a 90 degree angle.
Pull the cable from the connector.
Remove the keyboard completely.
STEP 10.
Remove all screws from the bottom case.
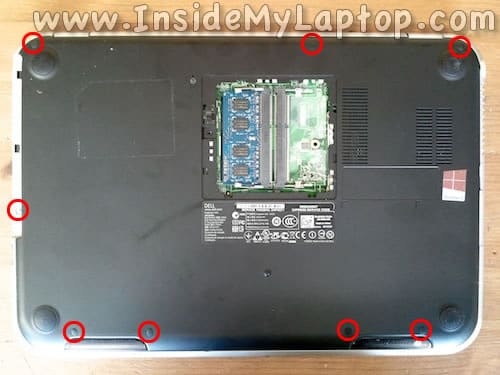
Bottom screws hidden under the rubber plugs.

STEP 11.
Remove four screws securing the top cover assembly.
Disconnect four cables:
– Hot key board cable.
– Trackpad cables.
– Status light board cable.
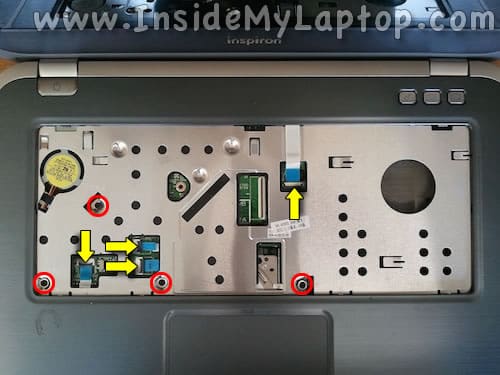
Here’s how to unlock these connectors.
Lift up the cable retainer and pull the cable from the connector.

STEP 12.
Start separating the top cover assembly from the bottom case.
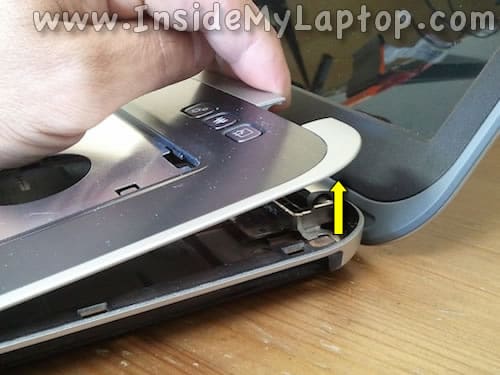
I’m using a guitar pick to separate these parts one from the other.
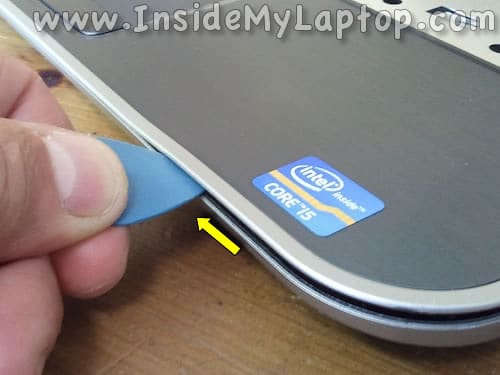
STEP 13.
Remove the top cover.
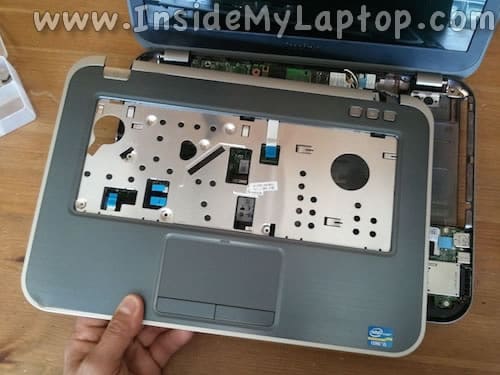
The following components attached to the bottom side of the top cover:
– Hot key board.
– Trackpad.
– Status light board.

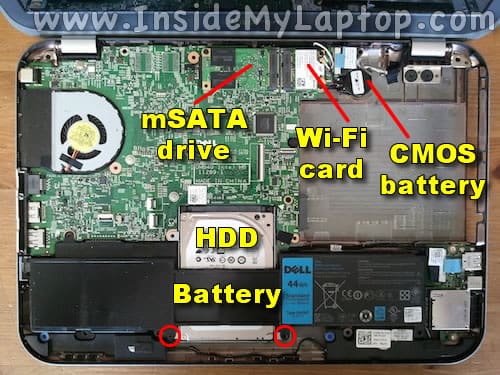
When the top cover removed, you can access the mSATAÂ drive, Wi-Fi card, CMOS battery, hard drive and battery.
Remove two screws securing the battery.
STEP 14.
Lift up the battery to disconnect it from the motherboard.
Remove the battery.

STEP 15.
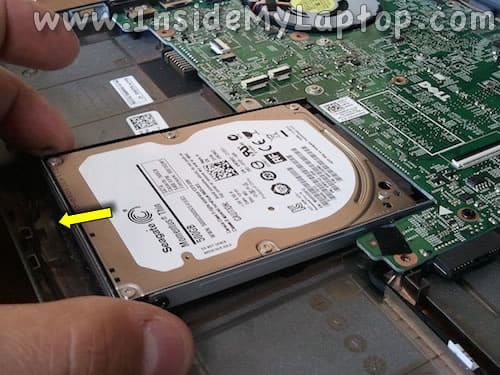
Lift up the back side of the hard drive and carefully pull it to the shown direction to disconnect from the motherboard.
STEP 16.
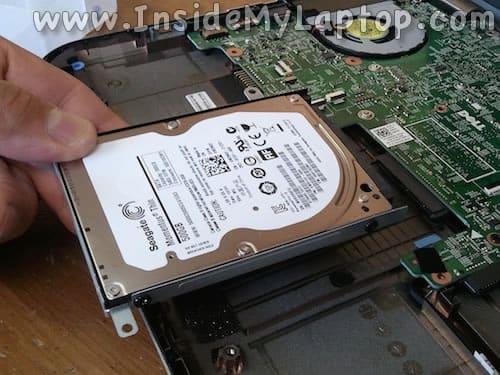
Remove the hard drive.
I recommend replacing this regular 2.5″ SATA hard drive to a 2.5″ SATA solid state drive. Doing so will improve the laptop performance significantly.
STEP 17.
Disconnect the display cable from the motherboard.
Disconnect both antenna cables from the wireless card.
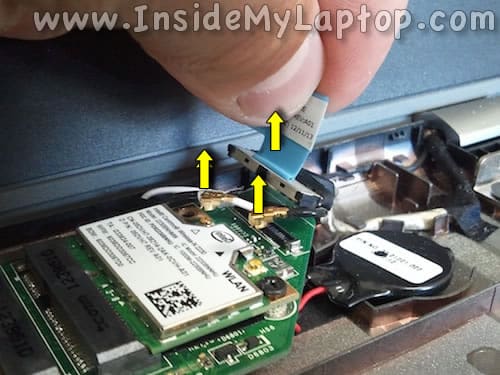
STEP 18.
Disconnect one cable from the SD card reader board.
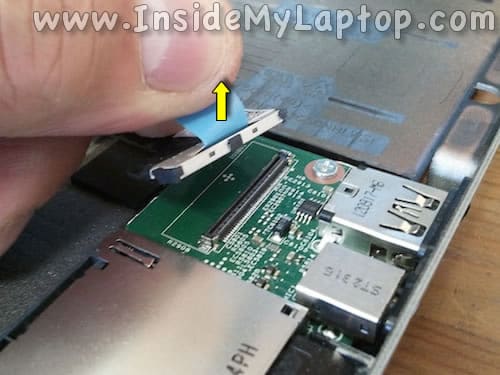
STEP 19.
Remove one screw securing the motherboard.

STEP 20.
Lift up the motherboard from the bottom case.

STEP 21.
Remove the motherboard.
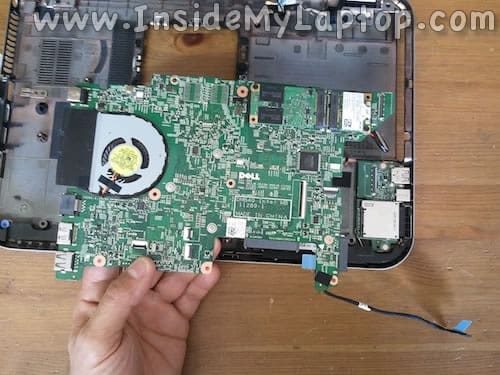
On the bottom side of the motherboard you can access the cooling module.
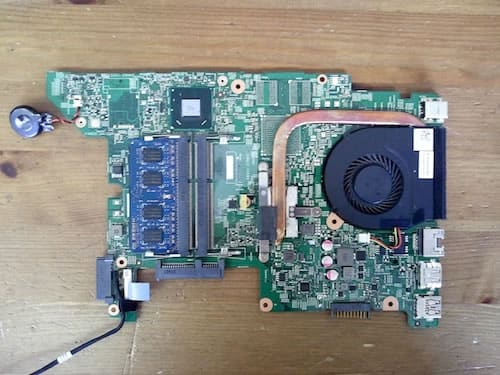
You can separate the cooling module from the motherboard if you remove three screws and unplug the fan cable.

In Dell Inspiron 14z-5423 laptop the power connector (DC jack) soldered to the motherboard.

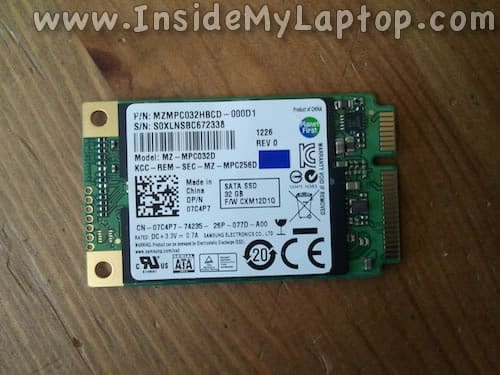
Dell Inspiron 14Z-5423 has a full size mSATA card installed.
AR
Great! thanks a lot 🙂
Edmon
many many thanks bro…………..
Andy
Great guide. But NB. Underneath the optical drive is a large headed silver screw fixing the palm rest to the case and this needs to be removed before the palm rest can be taken off.
venkata reddy
I have a problem in Dell inspiring 14z , that CD drive not working frequently. Screen also disturbing when working. My technician told that it may be due to some loose connections in connectors. Plz advise for resolve the problem.
Prince King
Nice details sir. Thank You. God bless You.
Azli
Where can i get rubber cover for top casing lcd?