
In this guide I will disassemble an Asus K55N-DS81.
Make sure the laptop is turned off before you start taking it apart.
STEP 1.
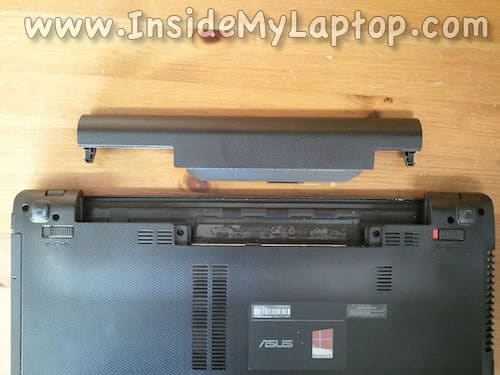
Unlock the battery and push on the release latch.
Remove the battery.
STEP 2.
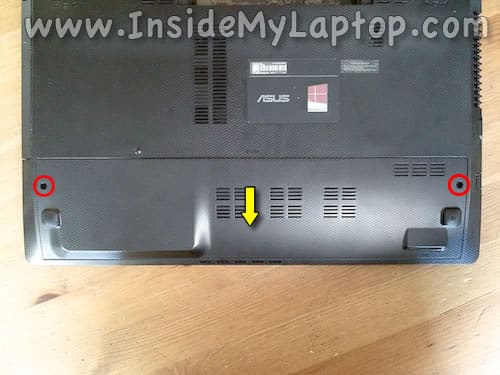
Remove two screws securing the bottom cover.
Slide the cover to the shown direction and remove it.
STEP 3.
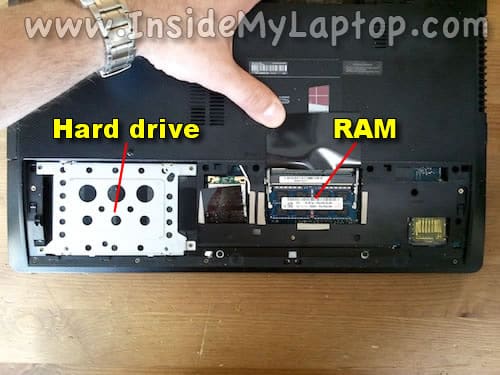
Under the cover you can access the hard drive and both RAM slots.
In my laptop I had only one RAM module installed.
This laptop can handle up to 16GB (2x8GB) DDR3-12800 SODIMM RAM modules.
STEP 4.
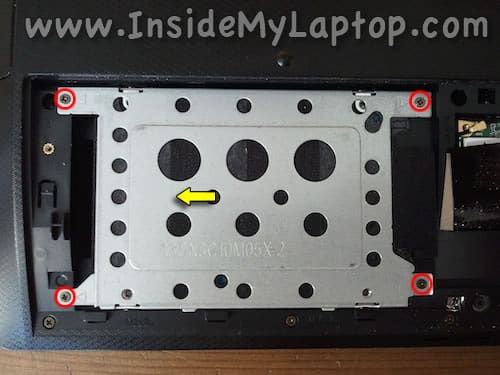
Remove four screws securing the hard drive assembly to the case.
Slide the hard drive assembly to the left to disconnect it from the motherboard.
STEP 5.
Remove the hard drive.
Upgrading this regular 2.5″ hard drive to a 2.5″ solid state drive will speed up the laptop significantly.

STEP 6.
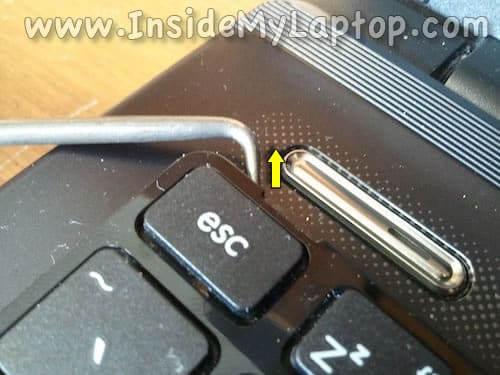
There are five retainers securing the keyboard on the top.
Push on the retainer with a flathead screwdriver.

STEP 7.
While the retainer pushed in, insert a sharp object under the keyboard and lift it up.
Unlock remaining four retainers.
STEP 8.
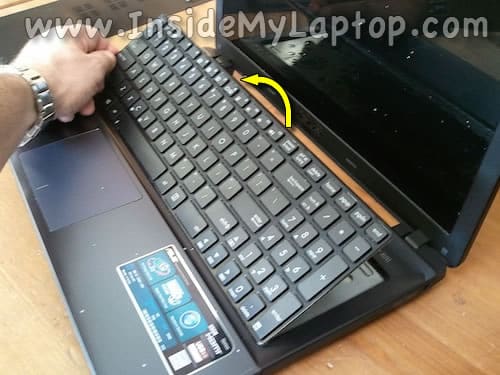
Lift up the keyboard and turn it upside down on the palm rest.
STEP 9.
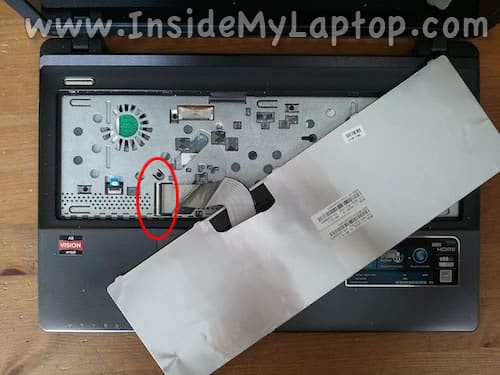
Now you can access and unlock the keyboard cable.
STEP 10.
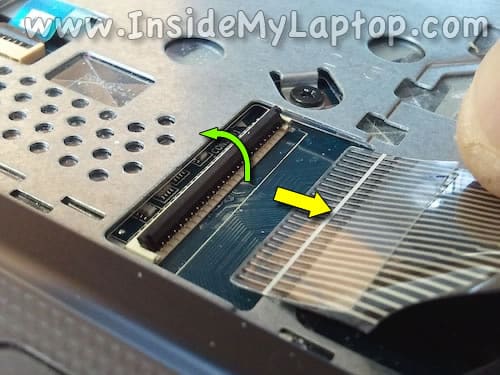
In order to unlock the connector you’ll have to lift up the right side of the retainer clip with your fingernail.
After that pull the cable from the connector.
STEP 11.
Remove the keyboard.

STEP 12.
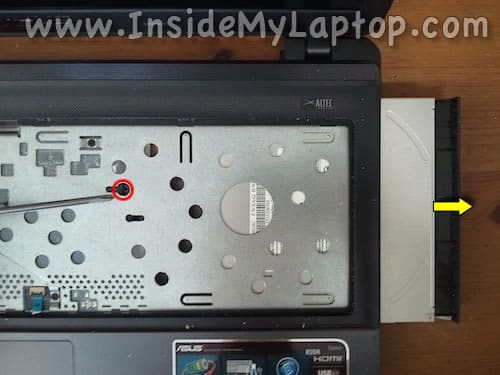
The optical drive is secured by one screw located under the keyboard.
Remove the screw and pull the optical drive out of the case.
Remove the drive.
STEP 13.
Remove all shown screws from the bottom of the laptop.
I suggest making notes from where you removed the screws.
There are three different types of screws used on the bottom.

STEP 14.
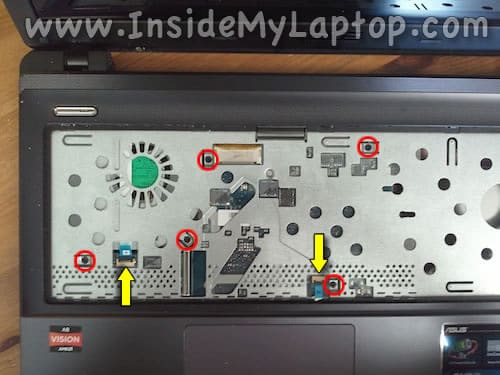
Remove five screws securing the top cover/palm rest assembly.
Disconnect the power button cable and touchpad cable.
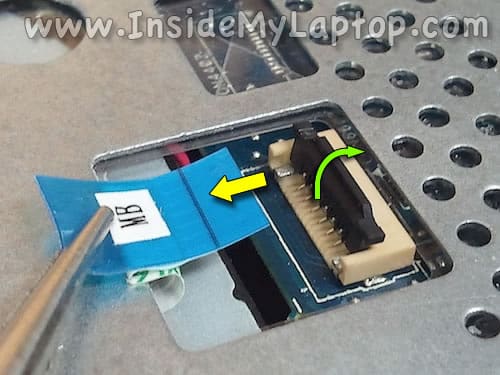
Here’s how to disconnect these cables.
Lift up the retainer and pull the cable out of the connector.
STEP 15.
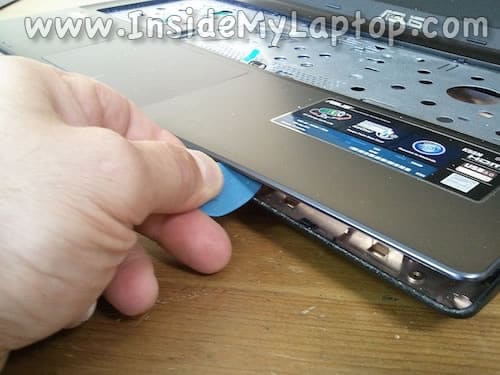
Start separating the palm rest assembly from the bottom case.
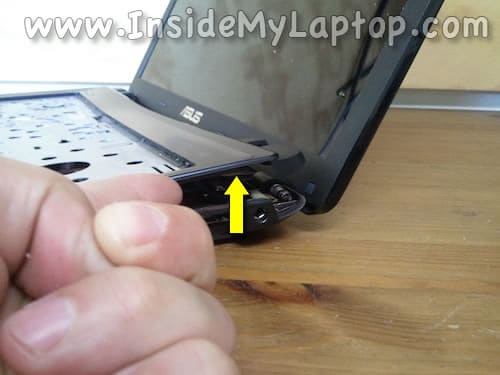
I am using a guitar pick to separate two parts from each other.
STEP 16.
Remove the palm rest assembly.
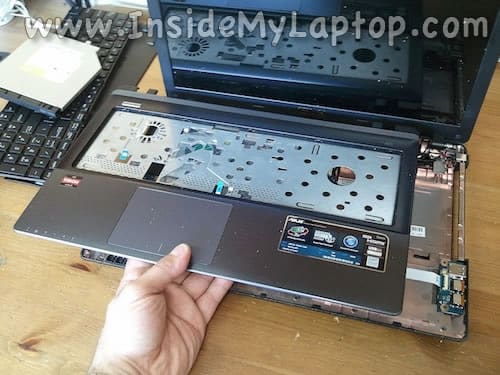
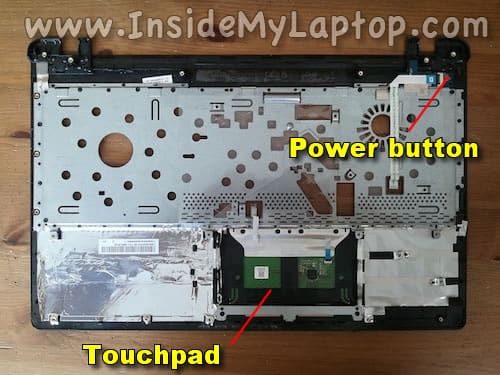
On the other side of the assembly you can access the power button board and touchpad.
STEP 17.
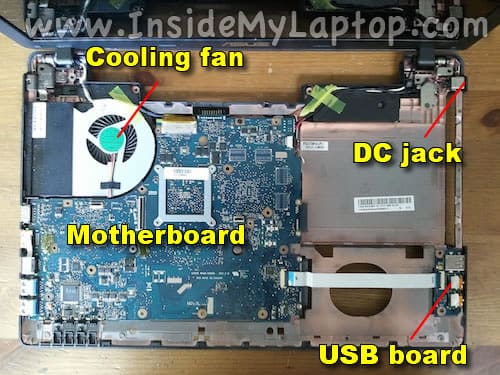
When the top cover removed, you can access the cooling fan, DC jack, USB board and motherboard.
In order to remove the cooling fan it’s necessary to remove the motherboard first.
STEP 18.
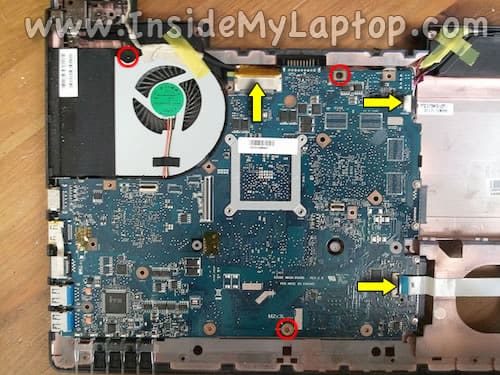
Remove three screws securing the motherboard assembly.
Disconnect the display cable, speaker cable and USB board cable.
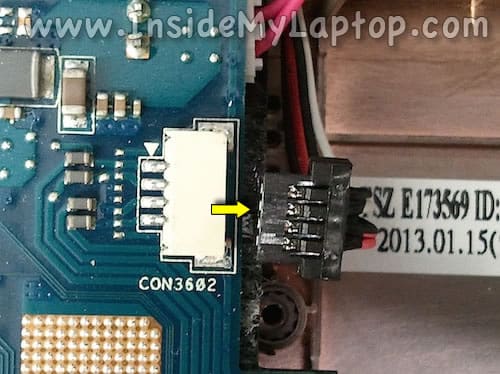
Here’s how to disconnect the speaker cable. Simply unplug the black male connector from the female connector.
Do not pull by the wires. Unplug it by the connector edges.
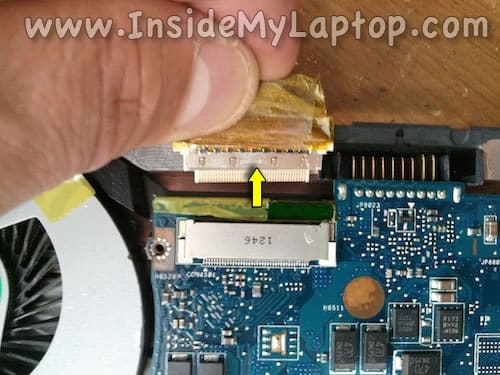
Here’s how to disconnect the display cable.
Lift up sticky tape securing the connection and unplug the cable.
STEP 19.
Disconnect two antenna cables from the wireless card.

STEP 20.
Un-glue the display cable from the fan.

STEP 21.
There is a small plastic retainer securing the motherboard to the case.
Push on the retainer to release the motherboard.

STEP 22.
Lift up the motherboard a little bit so you can get access to the power jack cable.
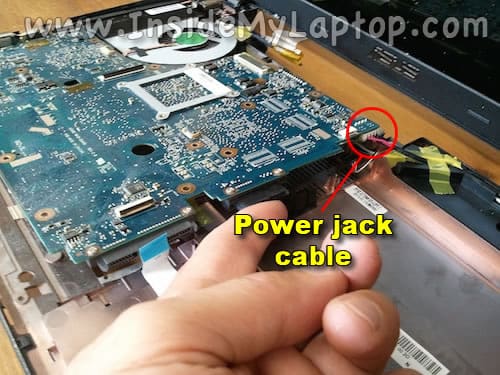
STEP 23.
Disconnect the power jack cable from the motherboard.
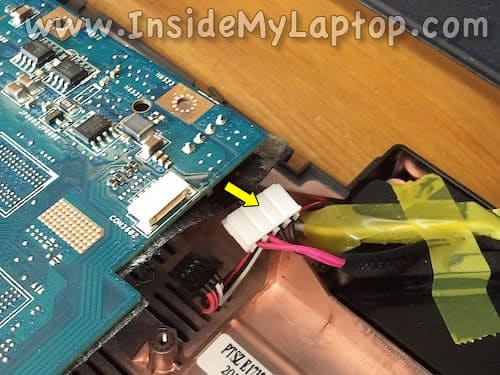
STEP 24.
Now you can remove the motherboard completely.
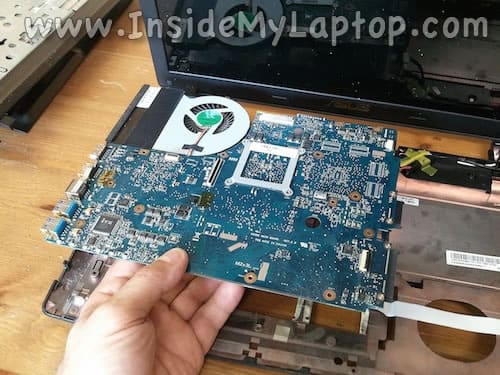
STEP 25.
The cooling fan is a part of the heat sink assembly.
The heat sink secured to the motherboard by four screws.

Asus K55N DC jack is attached to a cable. If the jack failed, it can be easily replaced with a new one.

This disassembly guide should work for all Asus K55N series models.
Cory
Can you possibly email pics of the rear part of the heat sink assembly? I would like to try figuring out some possible cooling mods on this model and I do not want to go at it with a half cocked plan. I prefer to draw up some ideas, measure and work on utilizing whatever specialty parts I can to produce better cooling without really damaging the casing. Maybe with airflow crossing the board to cool that heat pipe from the CPU to the exhaust area. If that carries heat the entire width of the mobo, it is allowing heat to just sit there as it transfers to the designated area. Some of that heat must get lost and is soaked into the rest of the components.
Anyway, I am open to ideas as well. So if you have any suggestions feel free to email me and give me some pointers. Thank you
suzie
Was going to clean my keyboard out. Went to flip it over gently to rest on the palm rest and the black tab you have to flip to separate just slid off, as if it wasnt connected at all. Ive done this a million times on other laptops but this was my first try on this one. Seems the piece was never assembled correctly in factory. Its out of warranty so how do i go about confronting the company about this?
IML Tech
@ suzie,
I doubt you can confront the company.
Try installing the black tab back in place and secure it with sticky tape. Maybe this will work.
Arudis
I have a question regarding the cable that connects the screen to the motherboard. What type of connector is it? eDP, LVDS?
NH
Excellent walkthrough. Thanks!
PC Bob
This is an excellent post! THANK YOU! I need to replace the DC power socket on mine and this shows how easy (?) it is. Obviously I don’t need to remove the entire motherboard. The only daunting part is all those screws holding the case together. I will make a map to show which screws go where. Should I ever NEED to replace the MB this will make it simple. Again, THANK YOU for taking the time to do this right. Excellent photos, too, by the way.
Tyler
Thanks man! Helped me out repairing the hinge for my screen.
Darrell
Hey thank you for the walkthrough, i was wondering if you could do a breakdown of the k55a model. I’d greatly appreciate it.
Ralphie
Hi everyone,
I open this model recently and I found 2 black plastic caps but I do not know where it come.
Can somebody help me?
Thanks a lot!