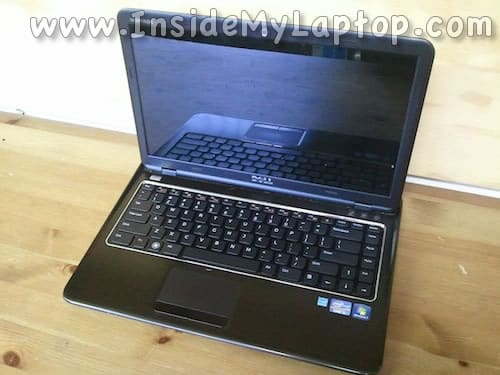
In the following guide I show how to disassemble a Dell Inspiron 14z-N411z laptop.
You can use this guide for the following procedures:
– Accessing and removing the hard drive, RAM (memory) modules, optical drive.
– Disconnecting and removing/replacing the keyboard.
– Accessing the trackpad and power button board.
– Removing or cleaning the cooling fan.
Before you start the disassembly process make sure it’s turned off.
STEP 1.
Unlock and remove the battery.

STEP 2.
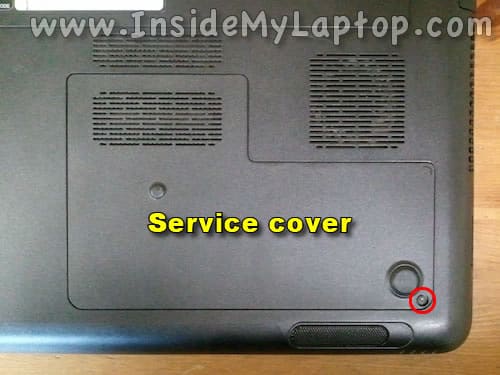
Remove one screw securing the service cover on the bottom.
Remove the service cover.
STEP 3.
Under the service cover you can access:
– RAM (memory) module 1. Second memory module located under the keyboard and we’ll access in in the step 15.
– CMOS battery.
– Hard drive.
This laptop can take up to 8GB (2x4GB) DDR3-12800 SODIMM RAM modules.
I will leave the memory module and CMOS battery connected to the motherboard but show how to remove the hard drive.
Remove four screws securing the hard drive mounting bracket. Slide the hard drive to the right to disconnect from the motherboard.

STEP 4.
Lift up and remove the hard drive.
Upgrading this 2.5″ hard drive to a 2.5″ SATA solid state drive will improve laptop performance significantly.

STEP 5.
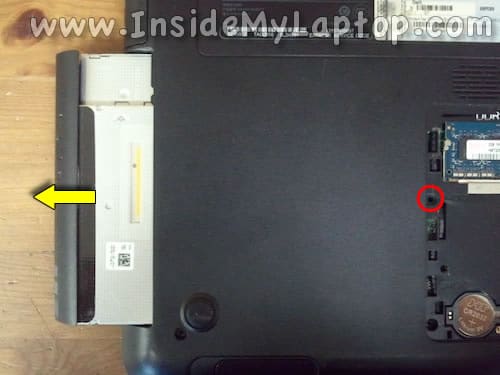
Remove one screw securing the optical drive.
Slide the optical drive to the left and remove it.
STEP 6.
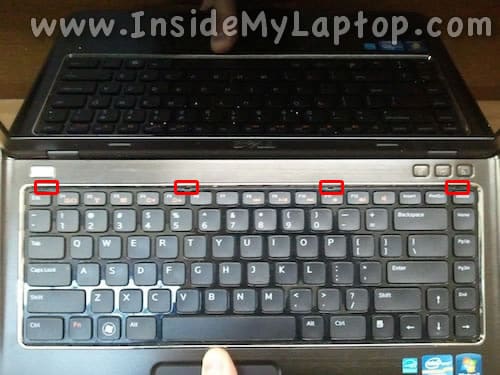
The keyboard secured to the top cover by four plastic knobs.
STEP 7.
In order to separate the keyboard from the top cover insert a small flat head screwdriver (or knife blade) between the keyboard and top cover.
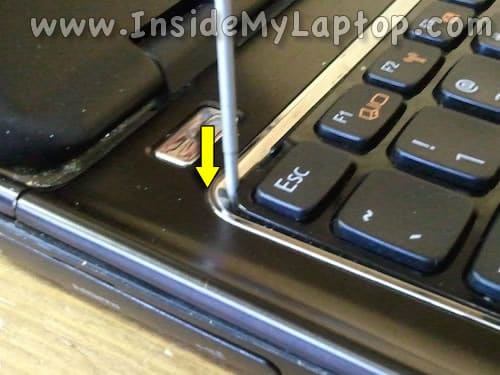
STEP 8.
Carefully lift up the keyboard and push it though the first knob.

STEP 9.
Continue separating the keyboard with your fingers.
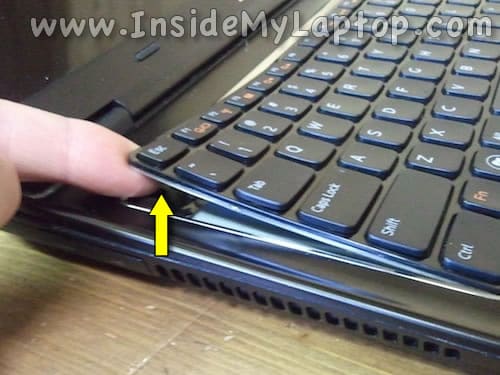
STEP 10.
Lift up the top side of the keyboard.
Turn the keyboard upside down and place it on the palm rest.
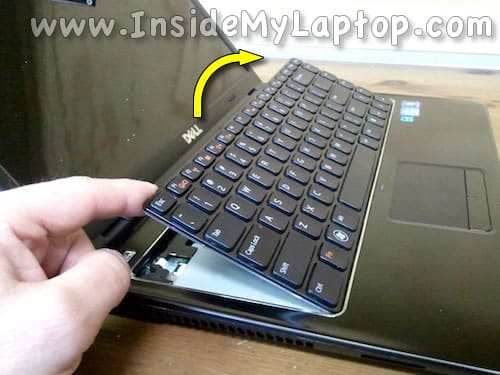
STEP 11.
Now you can access the keyboard cable connector.
By the way, when you install the keyboard back into the laptop make sure the cable positioned correctly. There is “UP” sign on the cable.
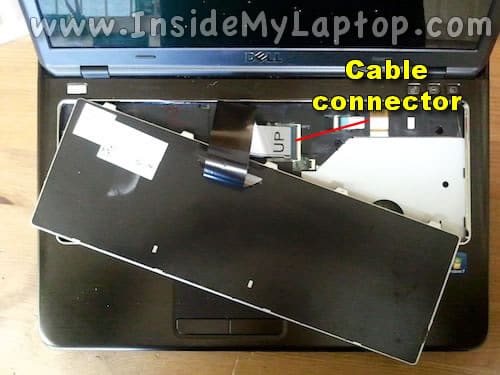
STEP 12.
Unlock the connector by lifting up the left side of the retainer.
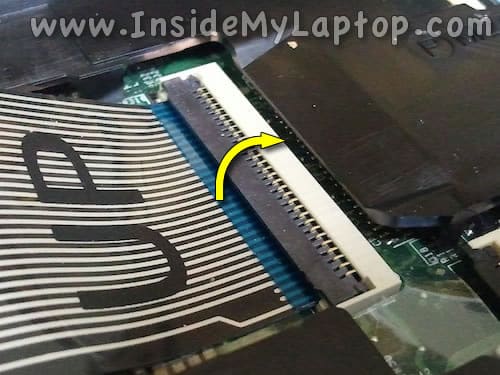
STEP 13.
After the connector is unlocked, remove the cable from the connector.
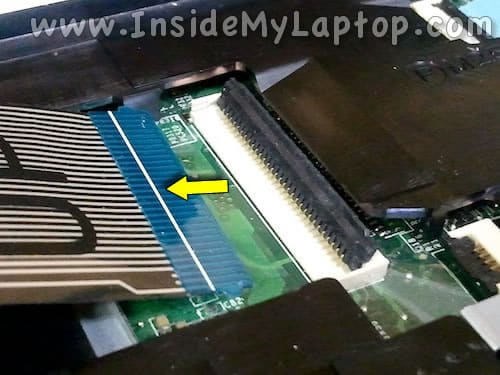
STEP 14.
Remove the keyboard. Replace it with a new one if necessary.
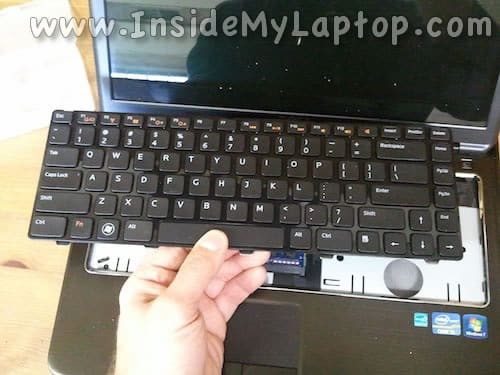
STEP 15.
The second memory module located under the keyboard.
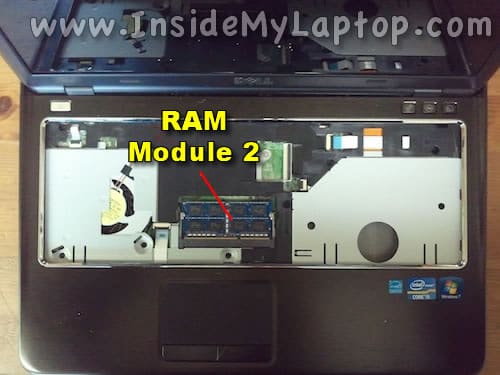
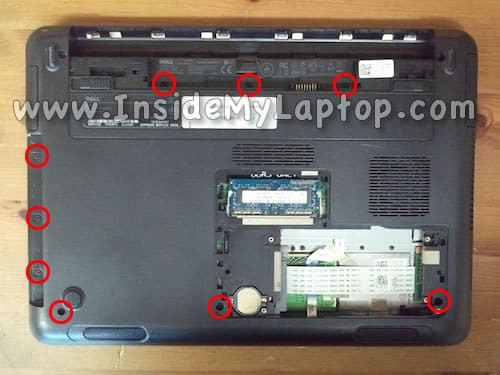
STEP 16.
Remove screws from the bottom.
STEP 17.
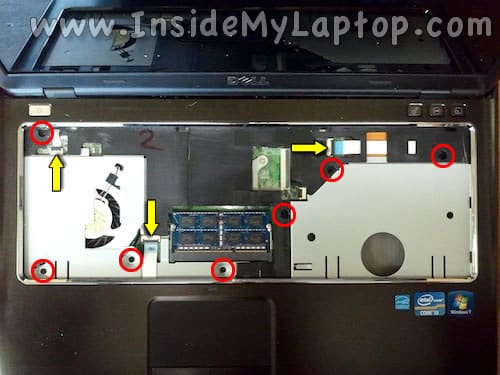
Remove screws securing the top cover assembly.
Disconnect the following cables (left to right):
– Power button board cable.
– Trackpad cable.
– Hot key board cable.
Use same technique as for disconnecting the keyboard cable.
STEP 18.
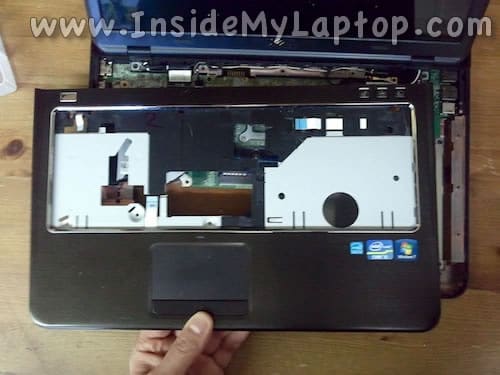
Start separating the top cover assembly from the bottom cover. I’m using a guitar pick for that.

STEP 19.
Remove the top cover assembly.
STEP 20.
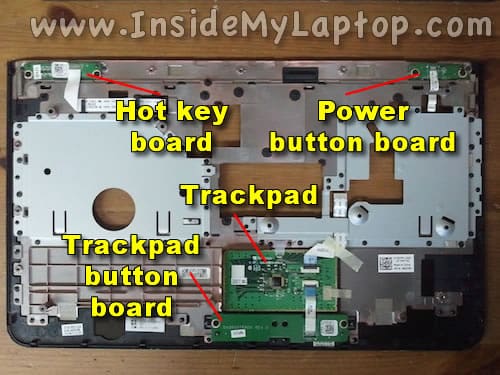
On the bottom side of the top cover you can access:
– Hot key board.
– Power button board.
– Trackpad.
– Trackpad button board.
STEP 21.
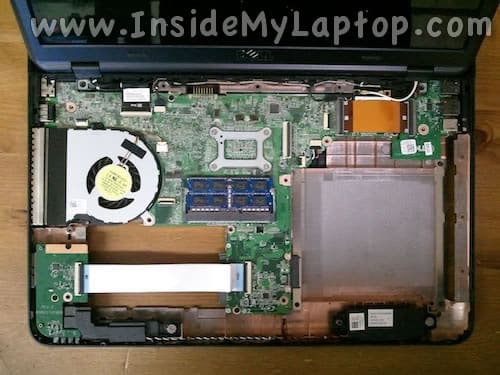
After the top cover removed you can access the cooling fan.
STEP 22.
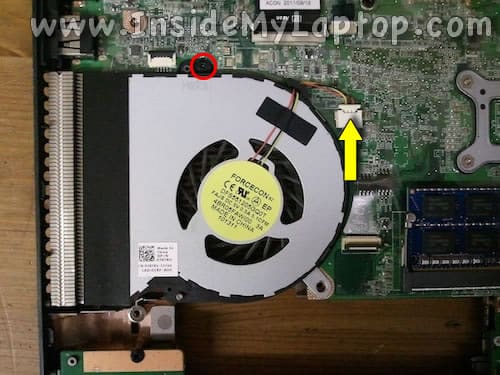
Remove one screw securing the cooling fan.
Unplug fan cable from the motherboard.
STEP 23.
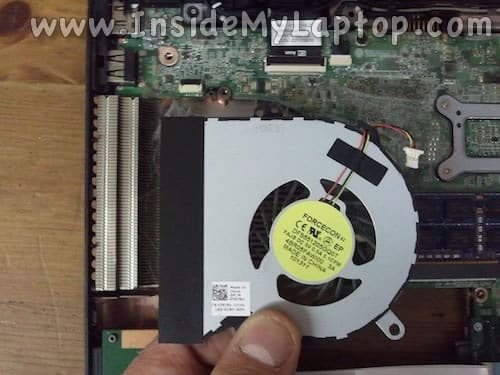
Remove the cooling fan.
Now you can replace the fan or clean up the heat sink.
tory
I want to install SSD but not sure about the model. Are they different? I don’t have discs how I install Windows?
IML Tech
@ tory,
This laptop has a regular 2.5″ HDD installed. You have to find a 2.5″ SSD and it should work just fine.
Just recently I purchased a 500GB Samsung Electronics 840 and like it so far. Not cheap though.
I’m not sure but I think you can buy recovery discs from Dell.
If on on the old HDD is good you can clone it to SSD. There is a good piece of software for that call EaseUS Disk Copy Home.
john brennan
I would like to replace the right hinge on my my N411Z,Service company had it apart to repair something under warranty and think left screws loose , so thought I might try myself, I have not been able to find anywhere a procedure for doing it any idea where I might Thanks.
IML Tech
@ john brennan,
In order to replace the hinge you will have to separate the display panel from the laptop base.
It’s necessary to remove the top cover first as it shown in the step 19. After that you remove the display panel, take apart, remove the screen and finally replace the hinge.
You can find complete disassembly instructions in this service manual.
The display disassembly instructions start on the page 45.
edd
Hi there.
Your guide was immensely helpful. My request for assistance is two fold….
As I needed to replace the daughter board, due to faulty usb ports, I ordered a replacement, stripped the wee beastie and replaced the part…alas, during the process, the wee black clip that secures the power ribbon to the motherboard, popped off. Seems on of the locking toggles gave in.
Is there anyway to resolve this issue without replacing the motherboard? As not being able to power my laptop equals a rather ungainly paperweight.
Secondly, I noticed that the right mounting bracket for the screen has stripped itself free of the chassis….not a crisis, the screen stays open..
Any advice you could offer would be appreciated
IML Tech
@ edd,
Do you still have the broken clip? Here’s what you can try.
Insert the power cable back into the connector. Place the broken clip back in place. Secure it with a tape. This should be enough for the cable to make connection with the contacts.
From your description it’s not clear which part is damaged. Is it a stripped thread on the hinge or damaged bottom case?
If the bottom case is damaged, you can get a new one on ebay for about $20-25.
If the hinge is damaged, you can find them for $10.
Alternatively, you can drill a larger hole, make new thread and use a larger screw. Again, it’s hard to give a good advice without seeing the damage.
Richard Stanley
The bracket/hinge that holds my display is broken or loose.
Can you show how to replace that component ?
Thanks
Cwbyatud
I am in the process of replacing my broken screen. I won’t say how, suffice it to say it must be replaced. Down at the bottom right corner after the screen has been removed, there two wires, one black and one white. Being the do-it-yourselfer I am I no longer remember which goes wear. Other than that it’s a pretty fix, right?
Thank You
Carl Maes
Thank you so much for posting these instructions and your help!