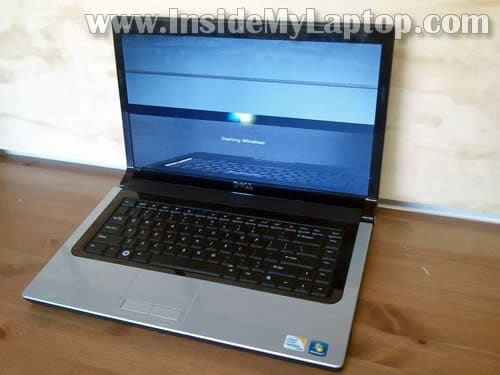
In this post I explain how to replace LCD screen in a Dell Studio 1555 laptop.
This guide should be identical for Dell Studio 1558.
In my case the screen started showing horizontal lines.
Before you start, make sure the computer is turned off and battery removed.
STEP 1.
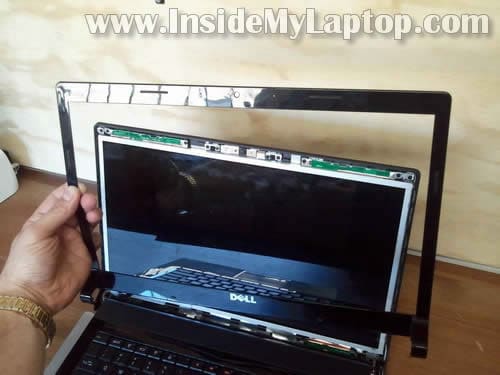
There are no screws securing the display bezel to the back cover. It’s secured by hidden plastic latches.
Insert a piece of soft plastic (I’m using a guitar pick) between the bezel and display cover and wiggle it to release hidden latches.
Separate the bezel from the cover.
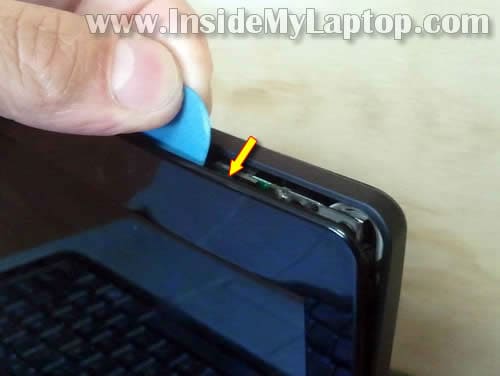
STEP 2
Continue removing the bezel with your fingers.
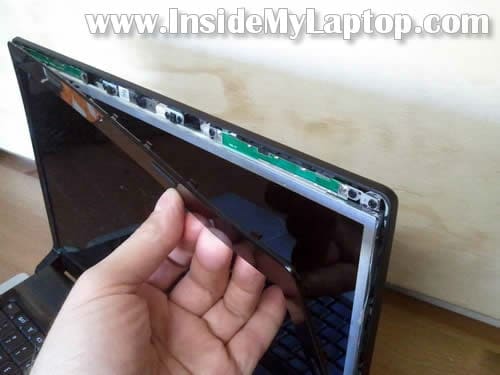
STEP 3.
Separate bezel from the cover on the bottom of the display assembly.
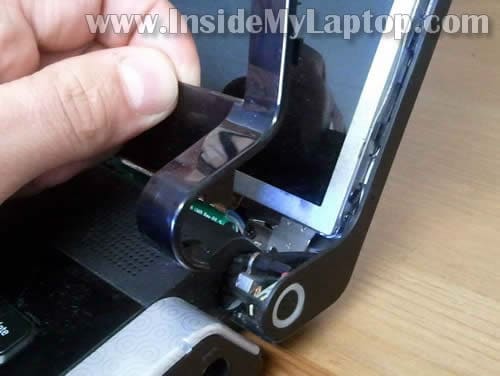
STEP 4.
Remove the bezel.
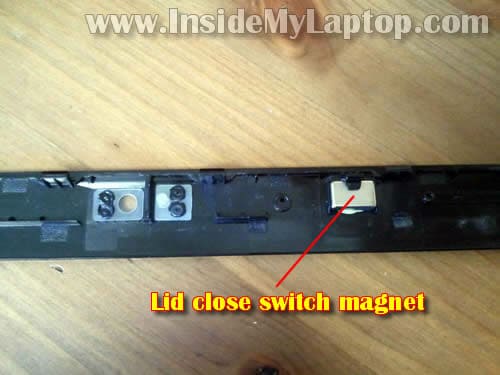
You’ll find a small magnet attached to the back side of the bezel. This magnet activates lid close switch when the display is closed.
Do not lose the magnet or the lid close switch will not work.
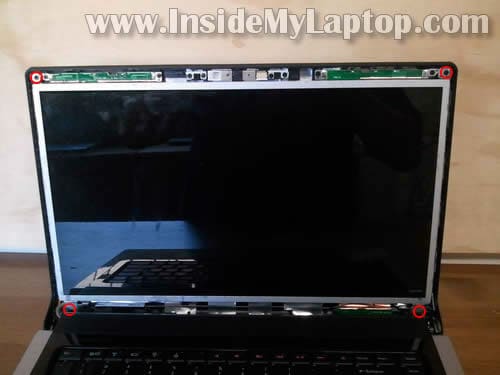
STEP 5.
Remove four screws securing the LCD.
STEP 5.
Separate the LCD assembly from the display cover so you can access the webcam cable.
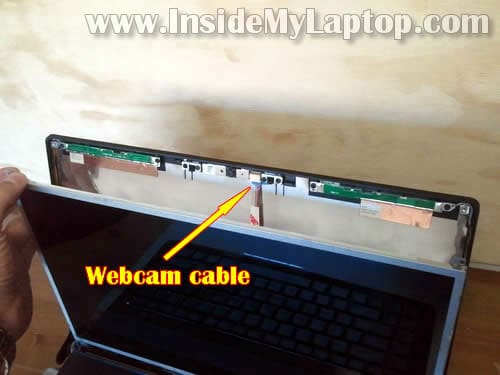
STEP 6.
Unplug the cable from the webcam module.
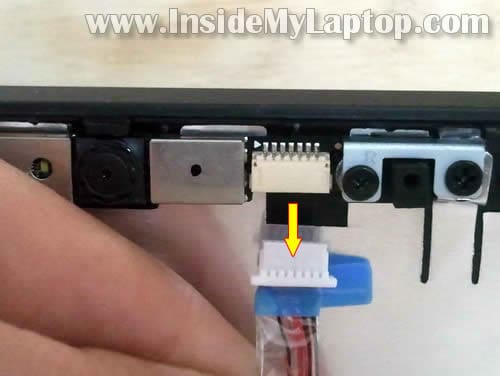
STEP 7.
Place the LCD face down on the top cover.
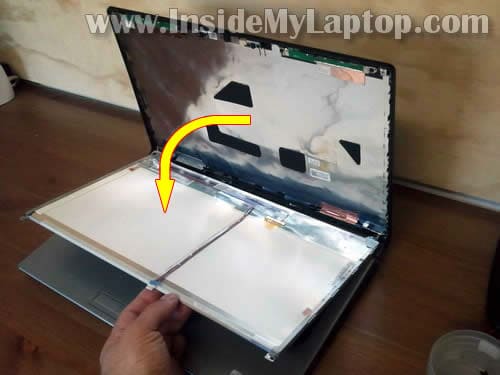
STEP 8.
Remove sticky tape securing the video cable connector.
Unplug video cable from the screen.
NOTE: if you have an older LCD with CCFL backlight, you’ll have to disconnect one more cable from the inverter board.
My Dell Studio 1555 laptop came with a LED-backlit LCD which doesn’t require the inverter board.
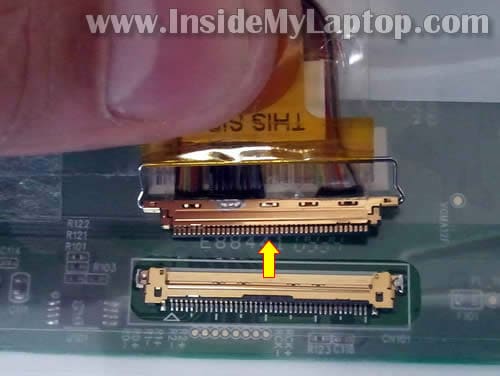
STEP 9.
Remove the LCD from the laptop.
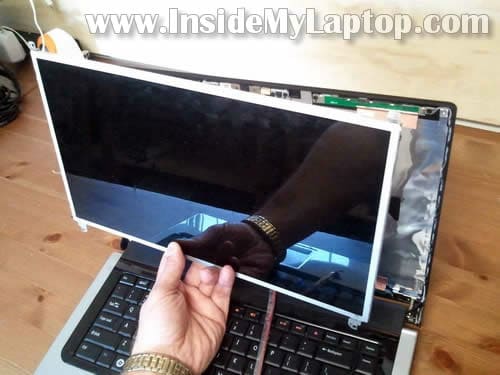
STEP 10.
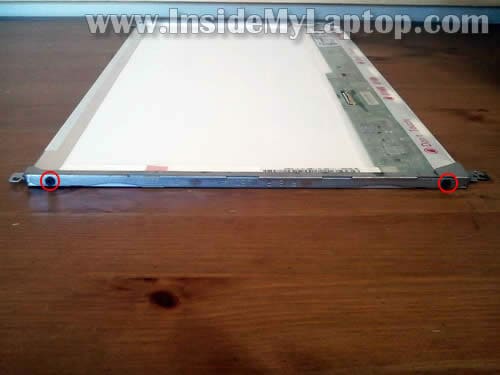
You’ll have to transfer mounting brackets to the new screen.
Each mounting bracket secured by two screws on the each side.
STEP 11.
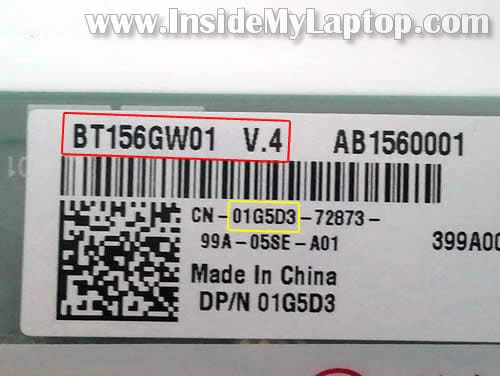
You can search for a new replacement screen using the model number or Dell part number from the original one.
In my laptop the LCD model number is BT156GW01 V.4 and Dell part number is 01G5D3.
Dell Studio 1555 laptop comes with a few different types of screens:
1. 15.6” WXGA (1366X768) HD with CCFL backlight.
2. 15.6″ WXGA (1366X768) HD LED-backlit LCD.
3. 15.6″ WXGA++ (1600×900) HD+ LED-backlit LCD.
4. 15.6″ WUXGA (1920×1080) Full HD LED-backlit LCD.
Make sure to find the correct one for your laptop.
Here’s how to disassemble the entire laptop.
Joseph Kenny
Great post, thanks for the info. Love the blog keep it up
Alan Alvarez
Hi, is very interesting your website.
Thanks for your help from Chile
IML Tech
The same guide will work fork for a Dell Studio 1558 laptop. You might need a different LCD screen but all disassembly steps will be very similar.
Fluxed Computers
Ive owned this Laptop for 3 years now and the screen is one of the easiest things to take off. Mine comes off all by itself. Its a great laptop though. The resolution is amazing!
Dan Romero
Thank you, on the step by step procedure on how to replace a key board on a dell inspiron 1525. It was very simple to follow. I also purchased the key board from your tip.
Thanks again Dan
peterl
thanks a lot.
tod
Perfect play by play. You rock. Thanks man.
chris
Awesome – thanks so much for your guides!! Without them I am sure my blood pressure would be 10 times as high!!
SAMSON
WHERE DID YOU GET YOUR REPLACMENT SCREEN?
IML Tech
@ SAMSON,
I got it on eBay.
Rocky
how much is the cost of display of dell studio 1555! can someone send me the website or address where can i get It, i live in Iceland! Thanks
IML Tech
@ Rocky,
I see it’s selling for 50-60 EUR on eBay Iceland.
nima
hi.its very good.thanks