In this guide I show how to remove and replace the screen on HP G62 or Compaq Presario CQ62 laptops.
Also, you can use this guide for replacing failed video cable or replacing damaged hinges.
The display panel has to be separated from the laptop base. You can follow steps 1-21 in this HP G62 or Compaq Presario CQ62 disassembly guide.
STEP 1.
There are only two screws securing the display bezel to the display cover.
These screws hidden under two screw seals in lower left and right corners of the display panel.
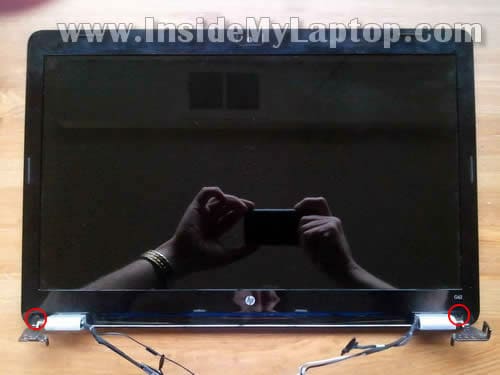
STEP 2.
Remove both screw seals with a sharp object. Glue them somewhere on the bezel so you don’t lose them.
Remove both screws.
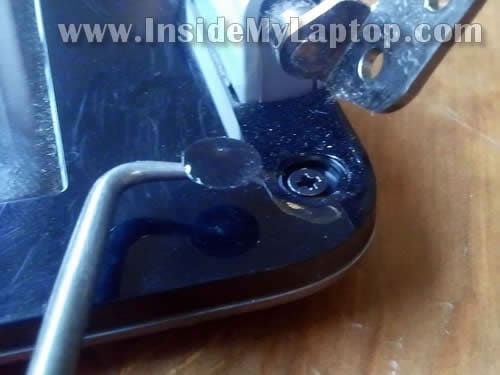
STEP 3.
Start separating the bezel from the display cover.
I’m using the guitar pick as a case cracker. You can use any other piece of plastic.
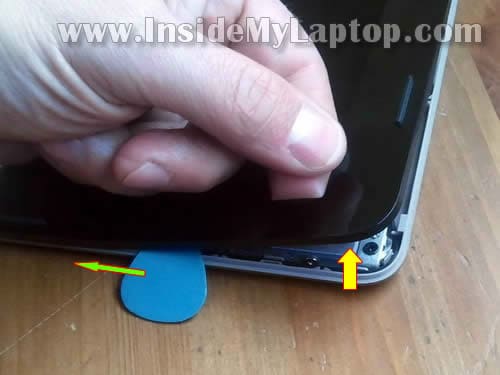
STEP 4.
Continue separating the bezel on the top of the assembly.
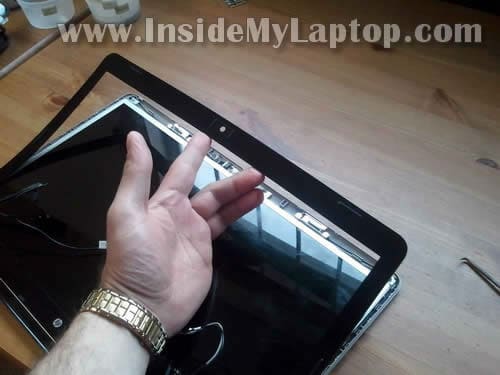
STEP 5.
Now separate the bezel on the bottom part of the display assembly.
The bezel might be glued to the screen. Work slowly and carefully.
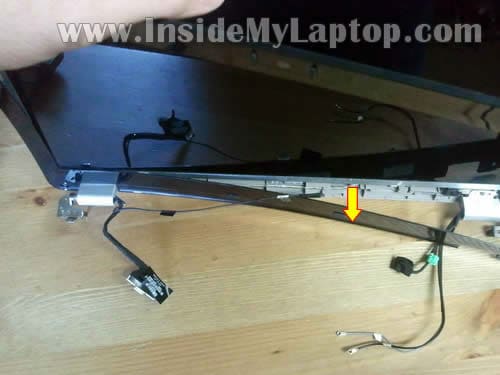
STEP 6.
Remove the bezel from the display assembly.
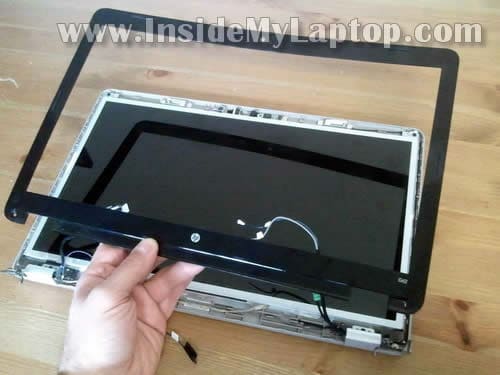
STEP 7.
Remove two screws securing hinge covers.
Lift up and remove both hinge covers.
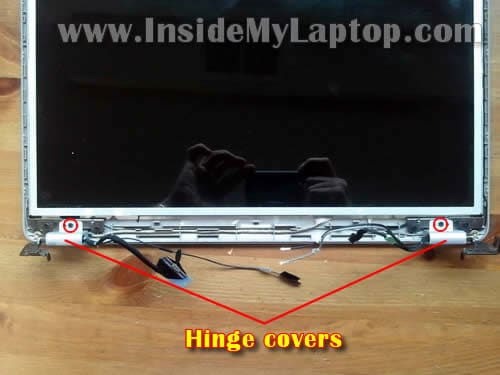
STEP 8.
Remove eight screws securing the LCD screen to the display cover.

STEP 9.
Carefully lift up the LCD assembly, separate it from the cover and place face down on the desk.
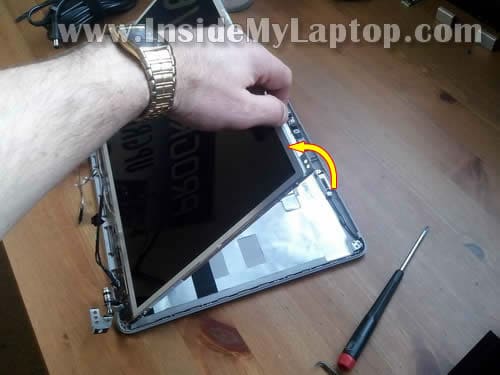
STEP 10.
Now you can access the video cable connector on the back side.
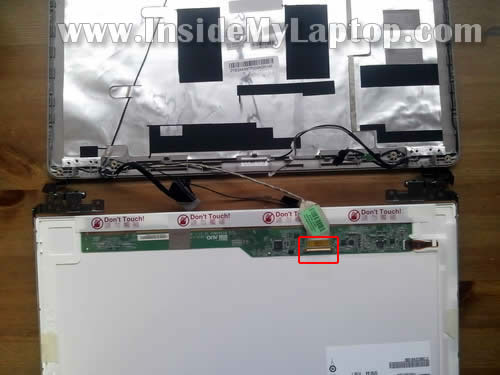
STEP 11.
Unplug/disconnect video cable.
Remove the screen from the display assembly.
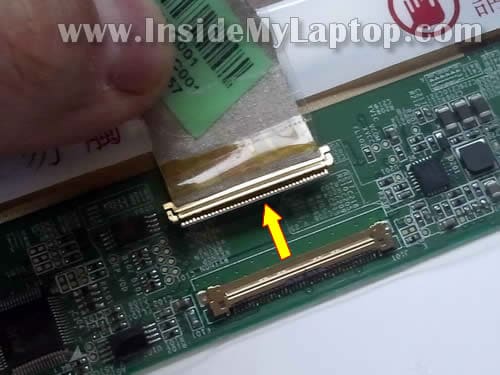
STEP 12.
Finally, remove two screws from the right hinge bracket. Remove the hinge and transfer it to the new screen.
Do the same with the left hinge.

Assemble display panel following backwards from step 12 to step 1.
N.S.Devagiri
I was interested in converting Laptop to digital photo frame. But I was facing trouble in dismentling the laptop. this article will help me very much. I am very much thankfull to you.
Nick
Can you tell me how to take the hinges off so I get get to the screws on the bottom of the bezel please, cheers.
IML Tech
@ Nick,
I don’t understand your question. I though I explained everything in the guide.
Just on case, here’s laptop base disassembly guide: https://www.insidemylaptop.com/hp-g62-compaq-presario-cq62-disassembly/
marlies
This is a very big help. My screen is broken, so I need a new screen. I only don’t get the screws, but i’ll try on. Maybe you can tell me what sharp object you used?
Thank you very much!
Coby
I did all of the steps and did not lose a screw, however, when i hit the power button, my computer wont go on. The blue light where it is charging is on, but the computer itself will not turn on. Please answer me, I use this laptop for school work and everyday some more work piles up. I will be extremely grateful if you answer this.
Thank you,
Coby
Coby
Disregard my last question. turns out i messed up with one of the wires. I am so grateful to you for writing this guide, it really saved me. Amazing guide. If i had a credit card, (im 14) i would send $10 thru paypal. I actually feel bad i cant repay. thank you SOOOOO much!
WeWe
thank you for helping me with taking apart Dell Inspiron Mini 10…. now i am asking you to help me with something more difficult inside hp g62 screen like what you see in this pic
http://up.haridy.org/storage/%D8%B5%D8%AB3%D9%82%D8%B3%D9%8A%D8%A8.jpg
the small part inside the circle is unattached to the chip could you explain to me how to fix it
i hope you can understand my English
Ambora
Hi WeWe, I just disassembled my G62, that circled part in question in your picture will need a soldering iron to get it attached, if you’ve never tried this tool before i would suggest you take the screen to a electronic repair guy (could also be your nextdoor hobby techie) and ask this part to be resoldered. Needs a thin soldering iron/gun and has to be done with a bit of care..easy job if you’ve attempted this kind of job earlier, will not take more than a minute..!!
WeWe
sorry i haven’t seen your comment until now. i will try to do it and i will tell you if it works
Sherry
Thank you so much for this tutorial. I successfully replaced my broken screen. Very clear and well written.
Pedro Velasco
Very complete your information about how to change the screen, thanks for the information