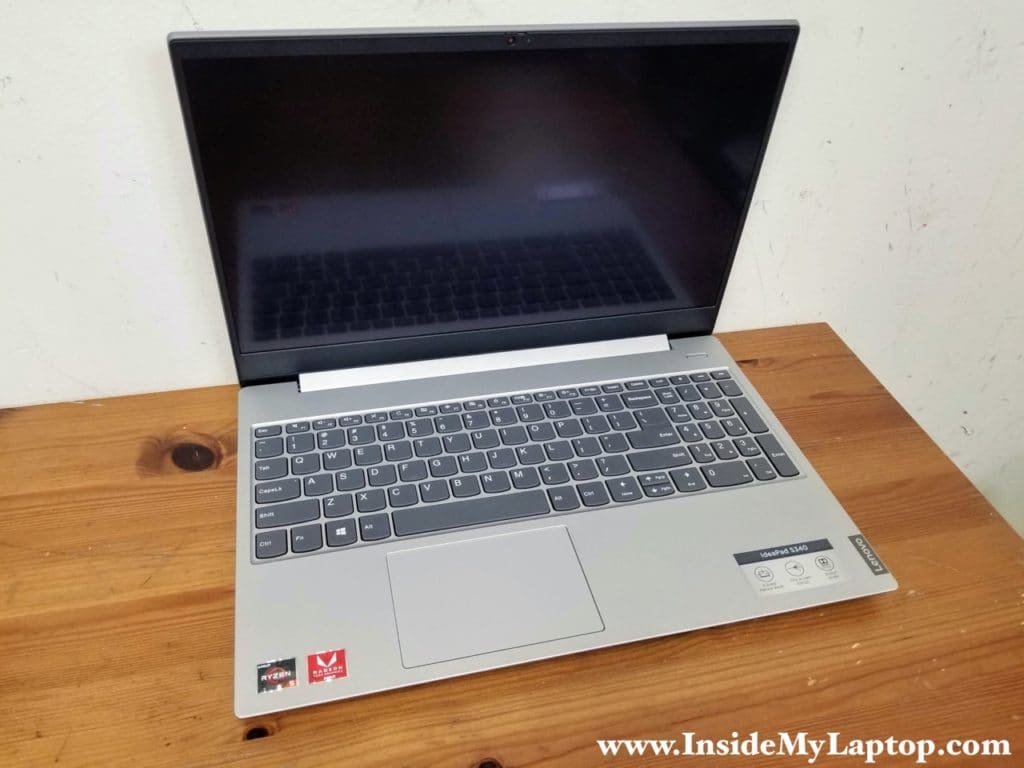
In this tutorial I explain how to disassemble a Lenovo IdeaPad S340-15API Touch laptop (model name 81QG).
You can use these instructions for taking apart many other models in the Lenovo IdeaPad S340 computer line. All disassembly steps should be very similar for 15″ and 14″ models 81N8, 81QF, 81N7, 81NC, 81NB.
You will need only basic repair tools for this disassembly: Philips screwdriver #0 or #1, tweezers and case opening tool. For your convenience at the end of this guide I published a link to the official service manual.
Base cover and battery removal
STEP 1.
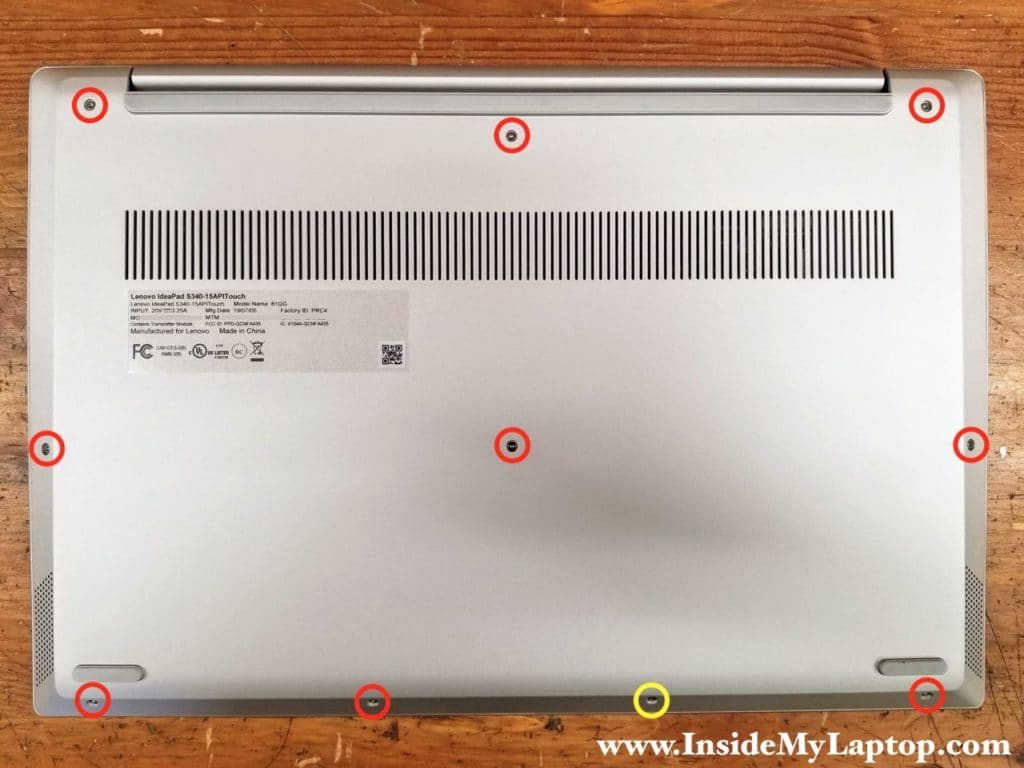
Remove nine regular screws and loosen one captive screw located on the base cover. In some models there is no captive screw installed.
STEP 2.
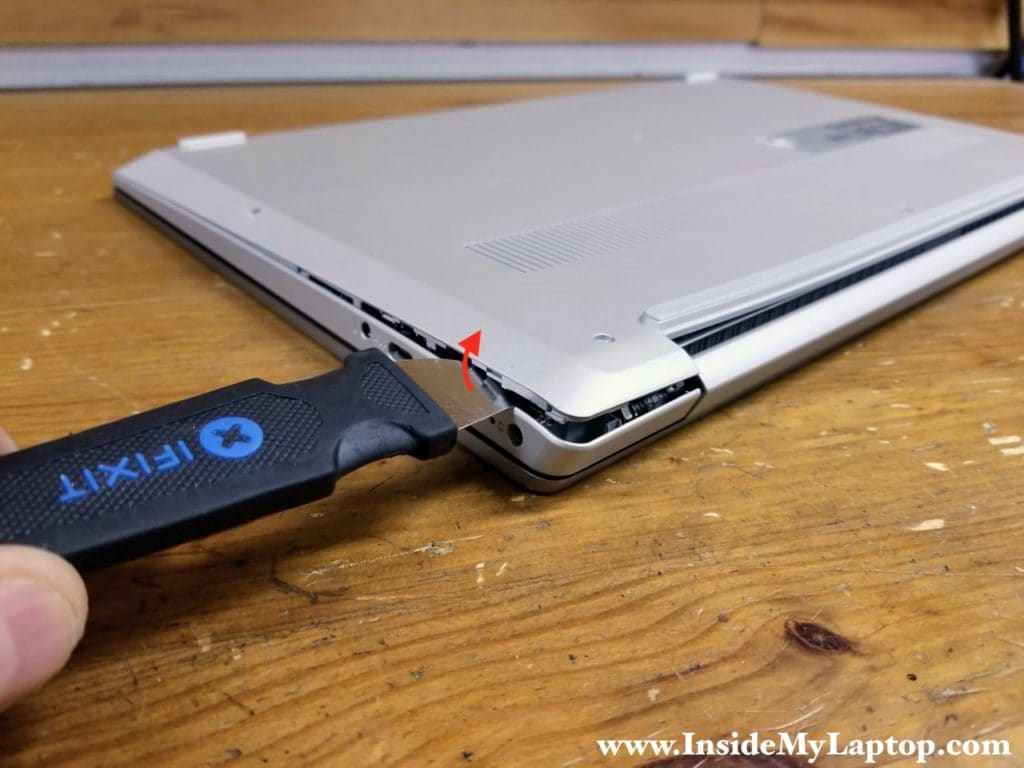
Insert the case opening tool between the base cover and the top case assembly. Pry up the base cover and start separating it from the top case.
STEP 3.
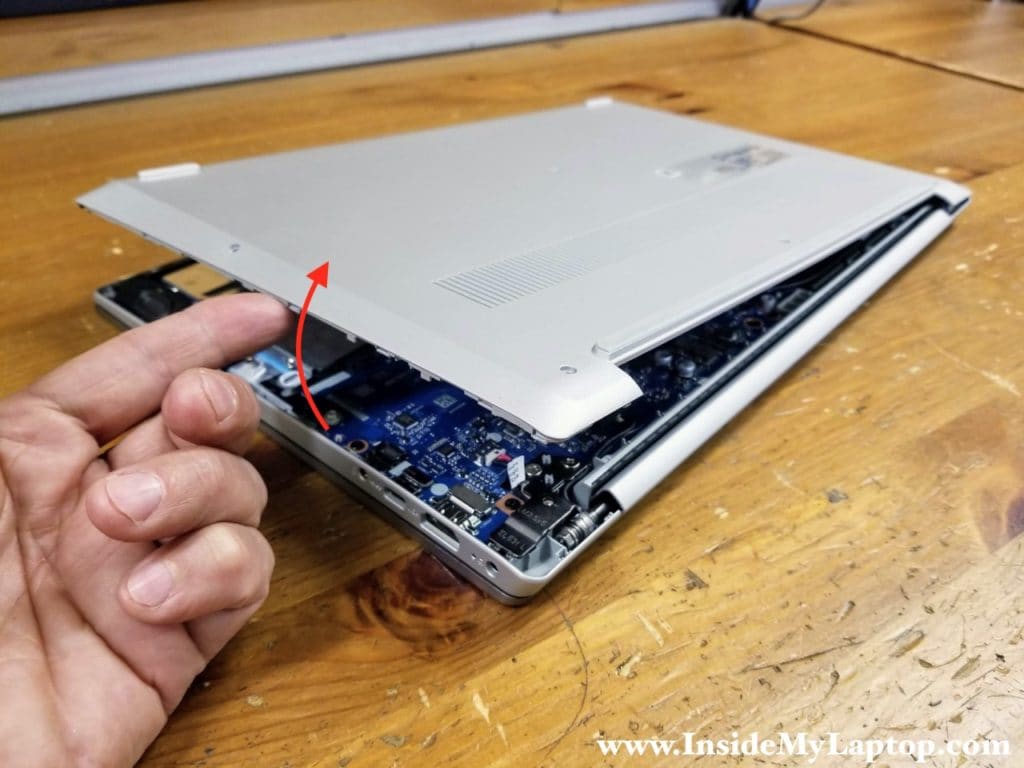
Continue removing the base cover with your hands.
STEP 4.
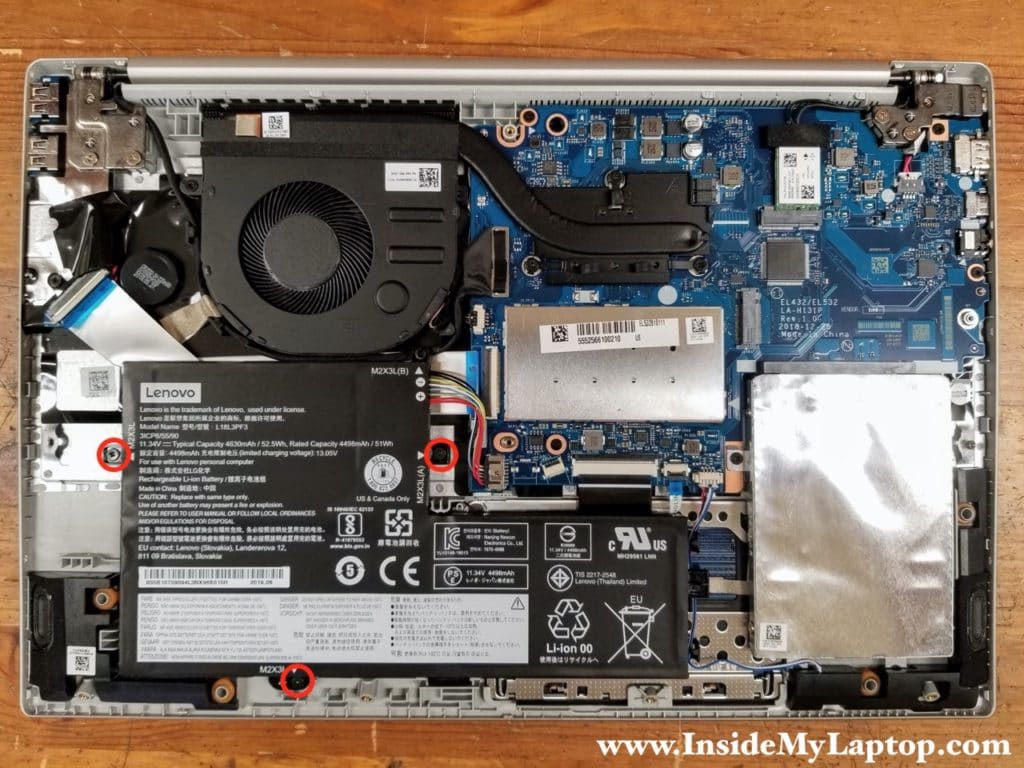
Remove three screws attaching the battery to the case.
STEP 5.
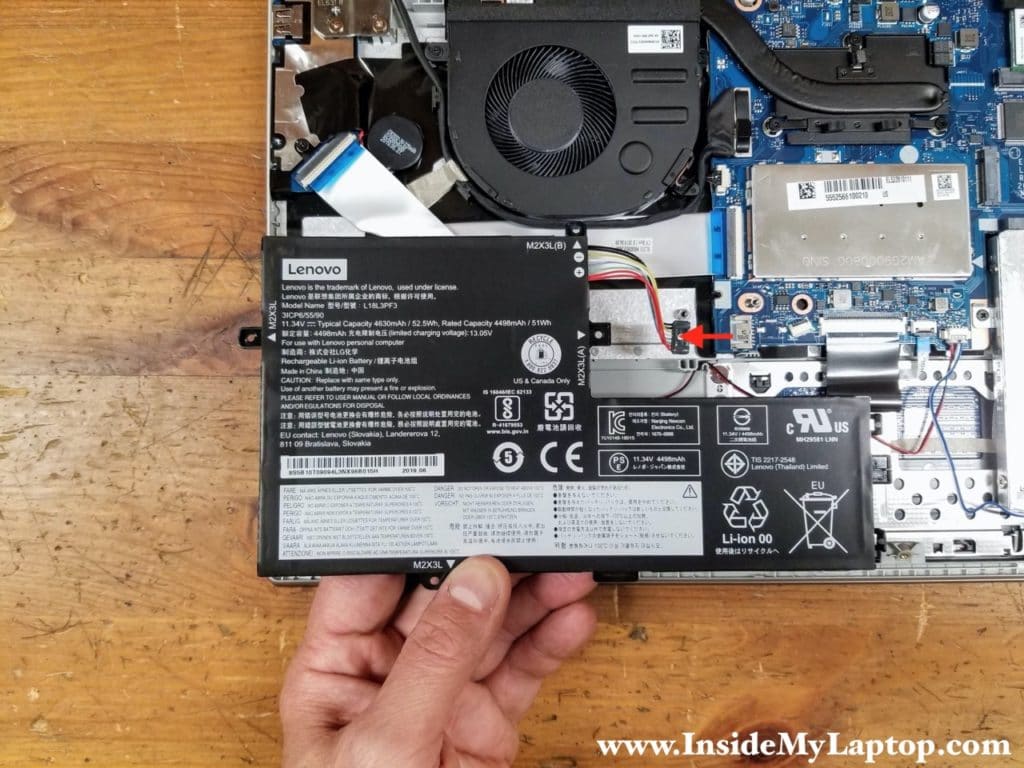
Lift up the battery and disconnect the cable from the motherboard.
Lenovo IdeaPad S340-15API Touch laptop battery model name: L18L3PF3.
Hard drive and memory removal
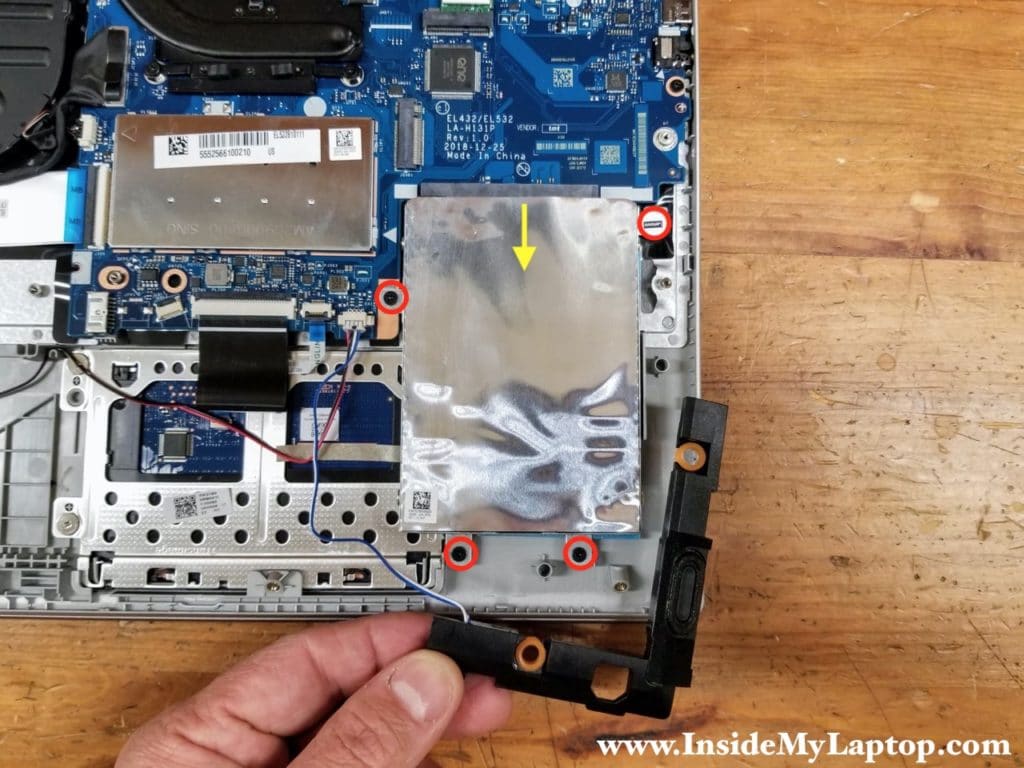
Lenovo IdeaPad S340-15API has two storage drive interfaces: SATA (for 2.5″ hard drives) and M.2 PCIe (for PCIe NVMe solid state drives). In this particular laptop I had a regular 2.5″ hard drive installed. You can see an empty PCIe M.2 slot located just above the 2.5″ drive.
STEP 6.
Remove four screws securing the hard drive bracket. Slide the hard drive assembly away from the motherboard to disconnect it from the SATA port.
I’m not going to remove the drive because there is a warranty seal on one of the screws and the laptop is still under warranty.
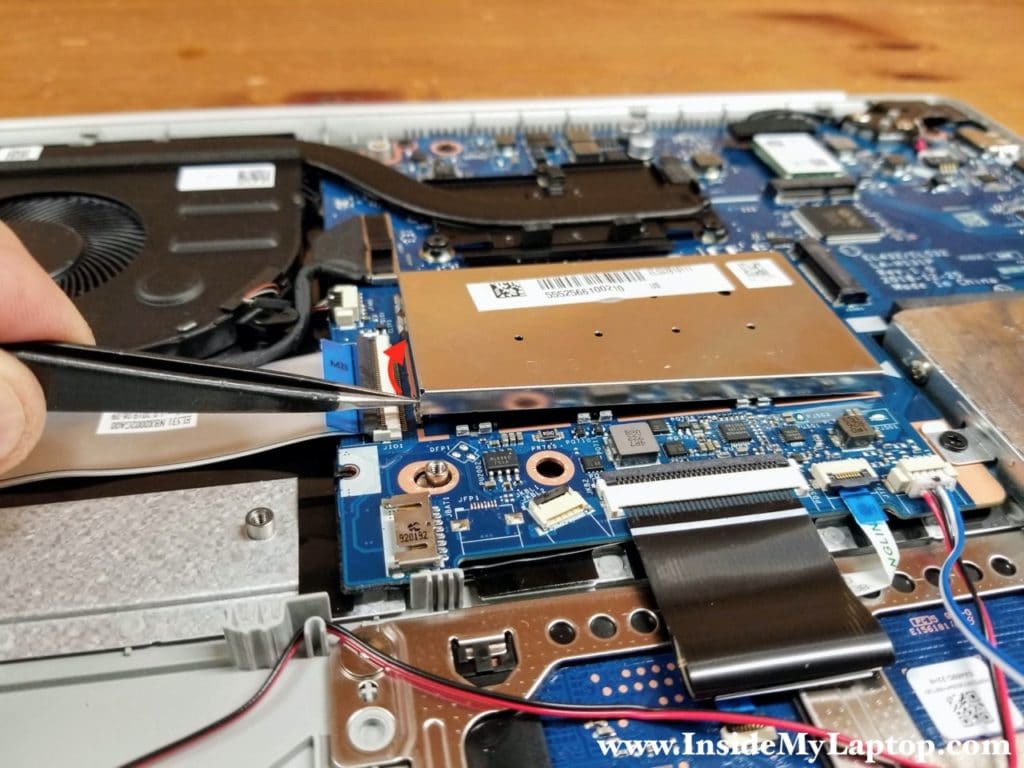
The memory module located under the metal cover. There are a few clamps attaching the cover to the motherboard.
STEP 7.
Carefully start separating the memory cover. I’m using tweezers for that.
STEP 8.
Lift up and remove the memory cover.
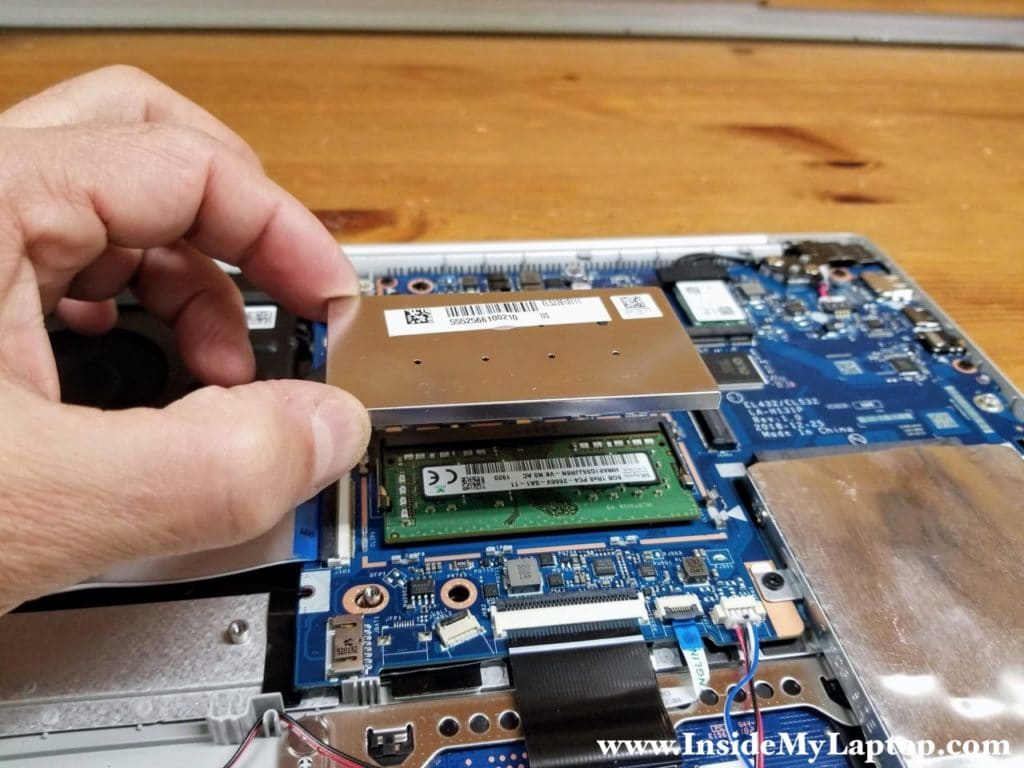
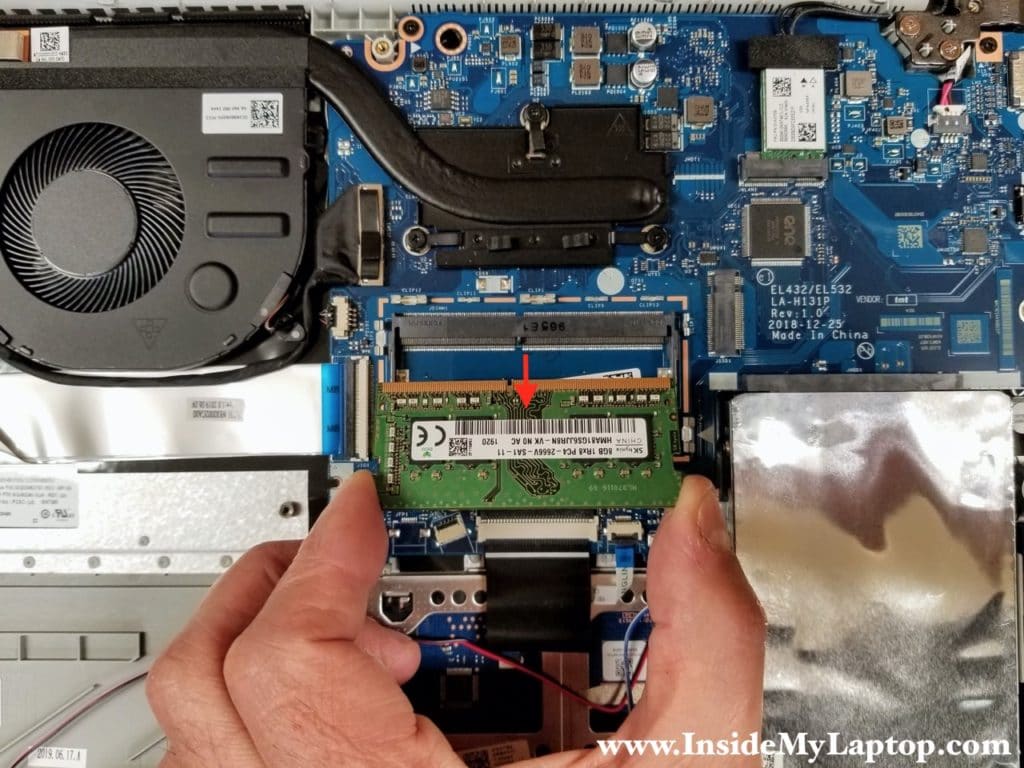
Lenovo IdeaPad S340-15API has 4GB soldered RAM and one memory slot available for upgrades. This laptop can take up to 16GB DDR4 memory module in the expansion slot.
Total RAM for this model is 20GB (4GB soldered + 16GB removable).
STEP 9.
Remove the memory module.
Fan removal
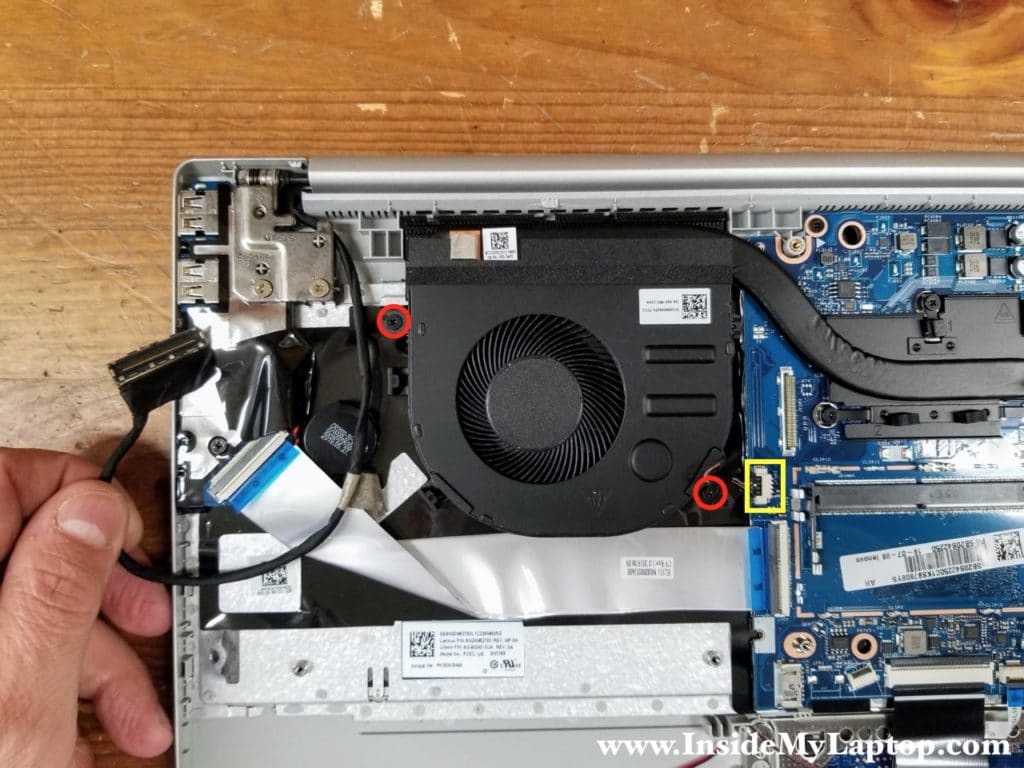
The display cable is routed in the guided path on the fan side. The display cable has to be separated from the fan before it can be removed.
STEP 10.
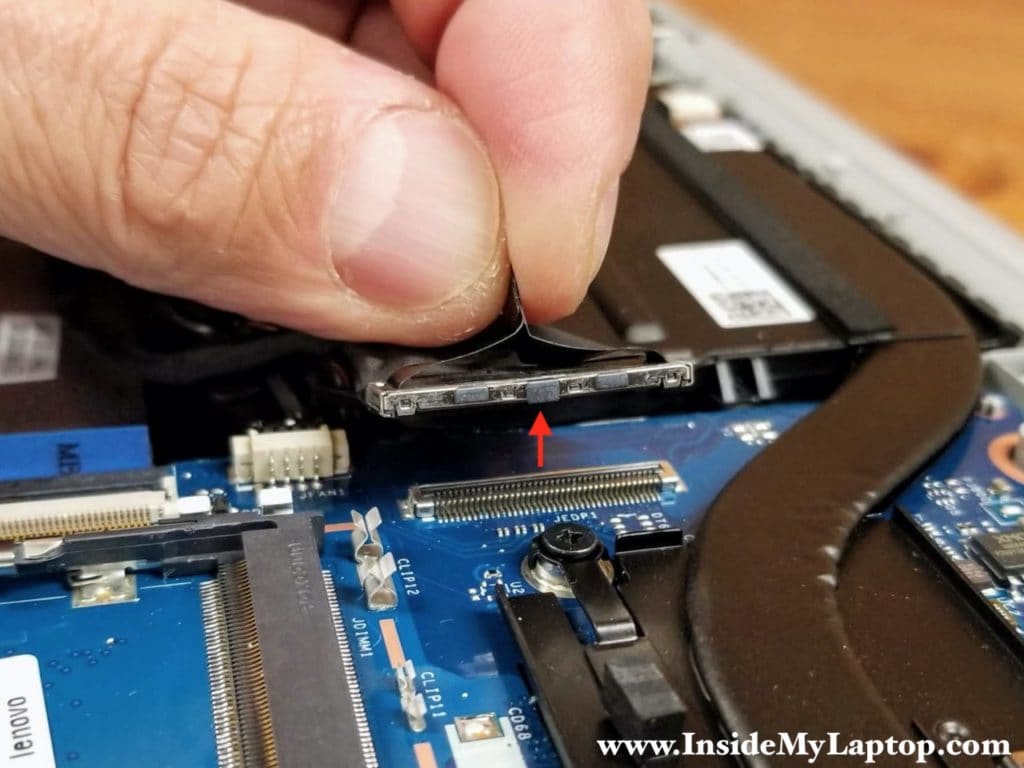
Unplug the display cable connector from the motherboard.
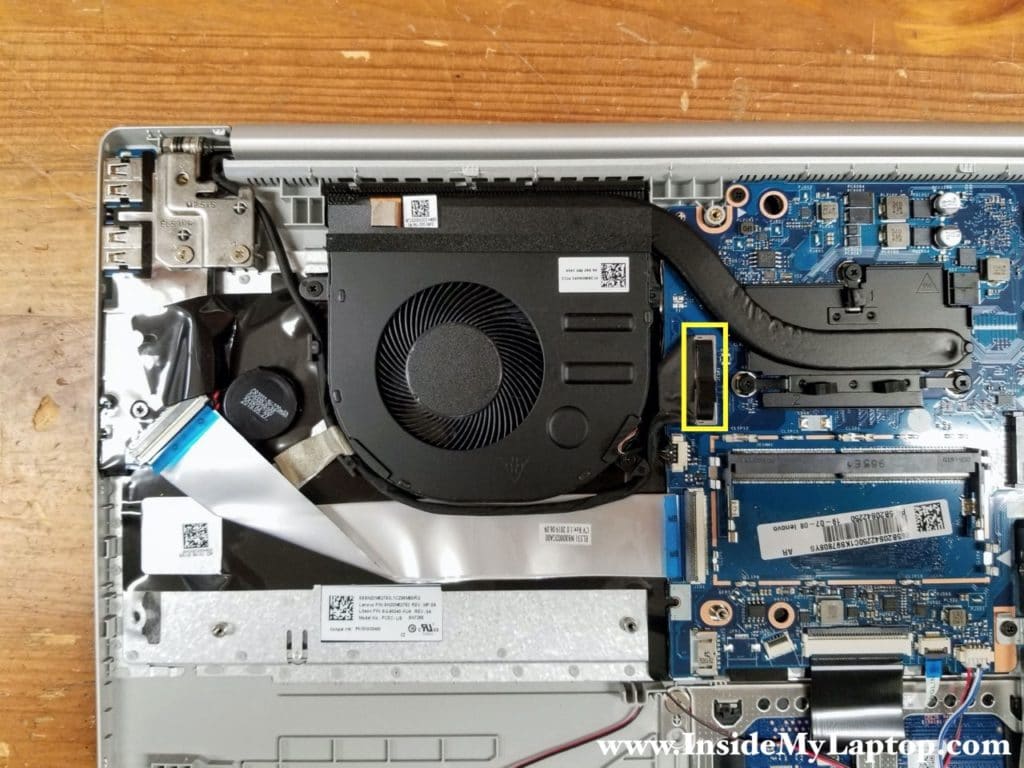
There is a back tab on the top of the connector. Pull the connector up to disconnect it from the motherboard.
STEP 11.
Separate the display cable from the fan. Remove two screws attaching the fan to the case. Disconnect the fan cable from the motherboard.
STEP 12.
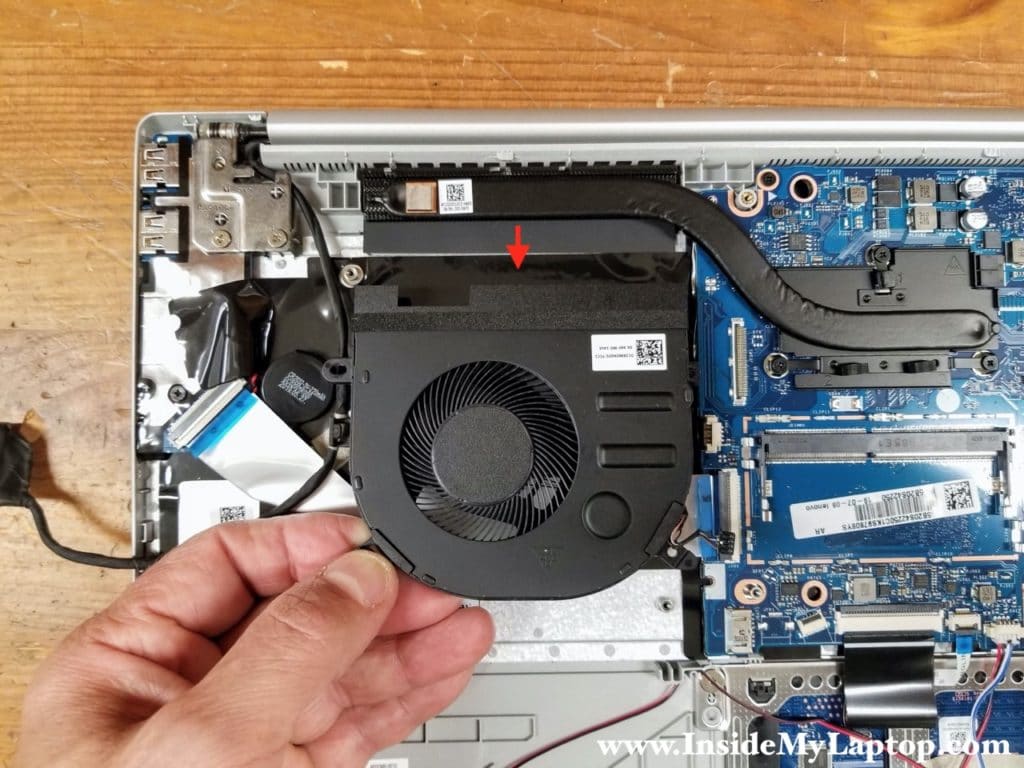
Remove the fan.
Display panel removal
STEP 13.
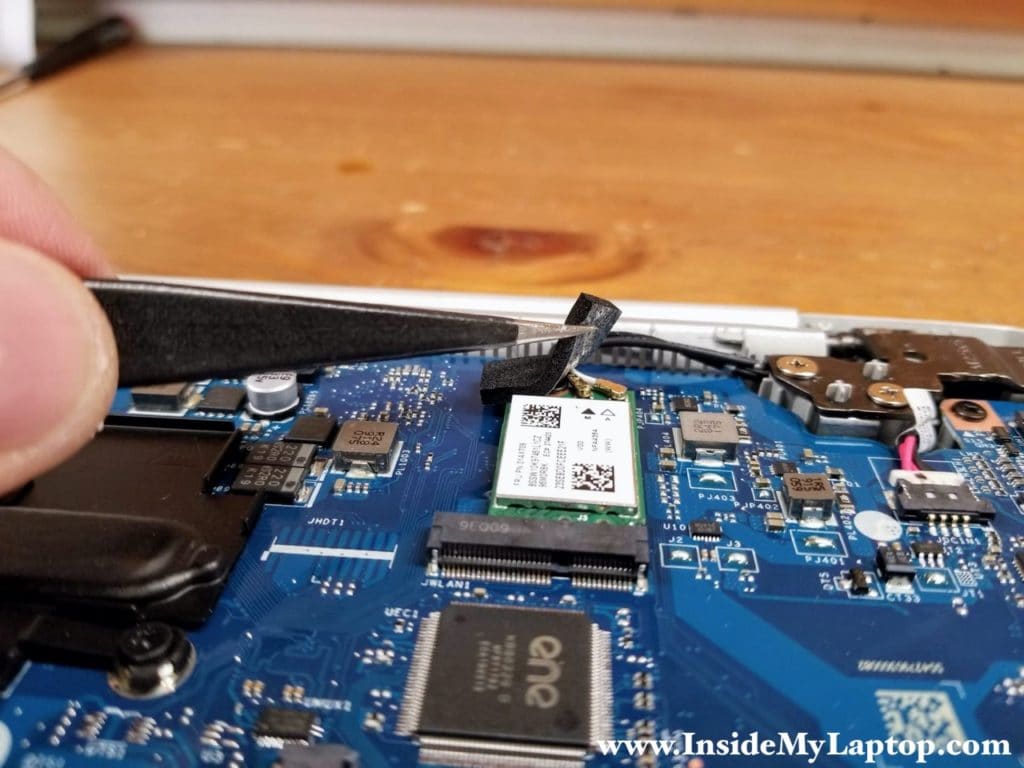
Separate self-adhesive sponge covering the wireless card antenna cables.
STEP 14.
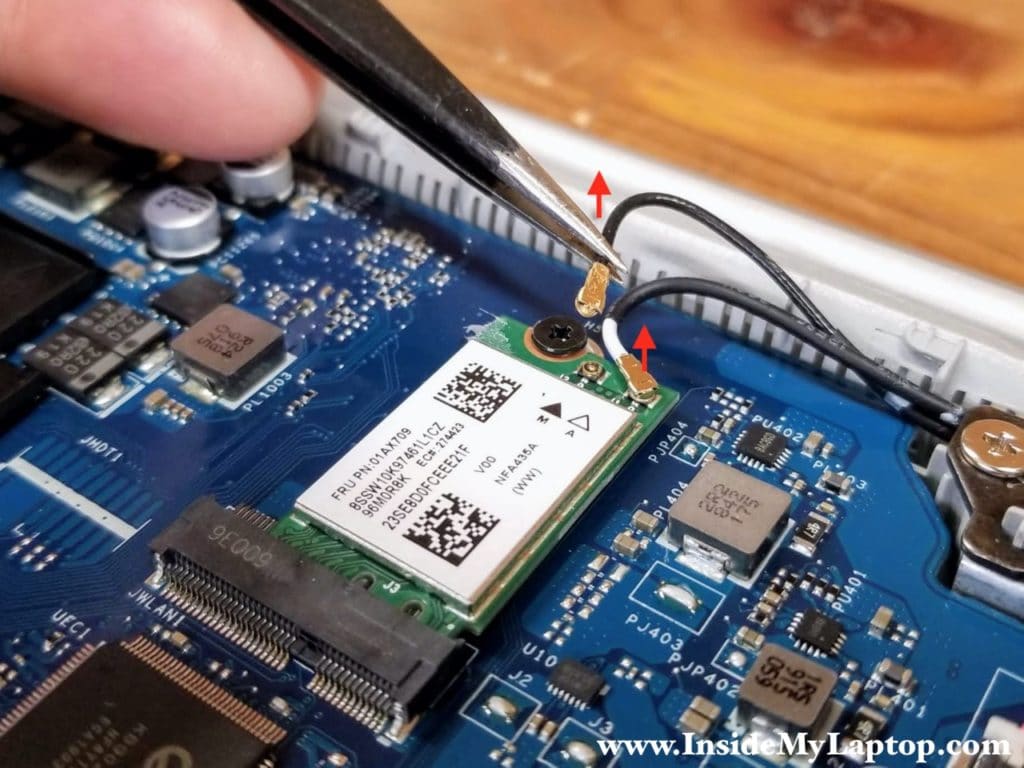
Disconnect both antenna cables from the wireless card.
STEP 15.
Open the display 90 degrees and place the laptop upside down on the edge of your desk as it shown on the following picture. Remove four screws securing the display hinges to the top case assembly.
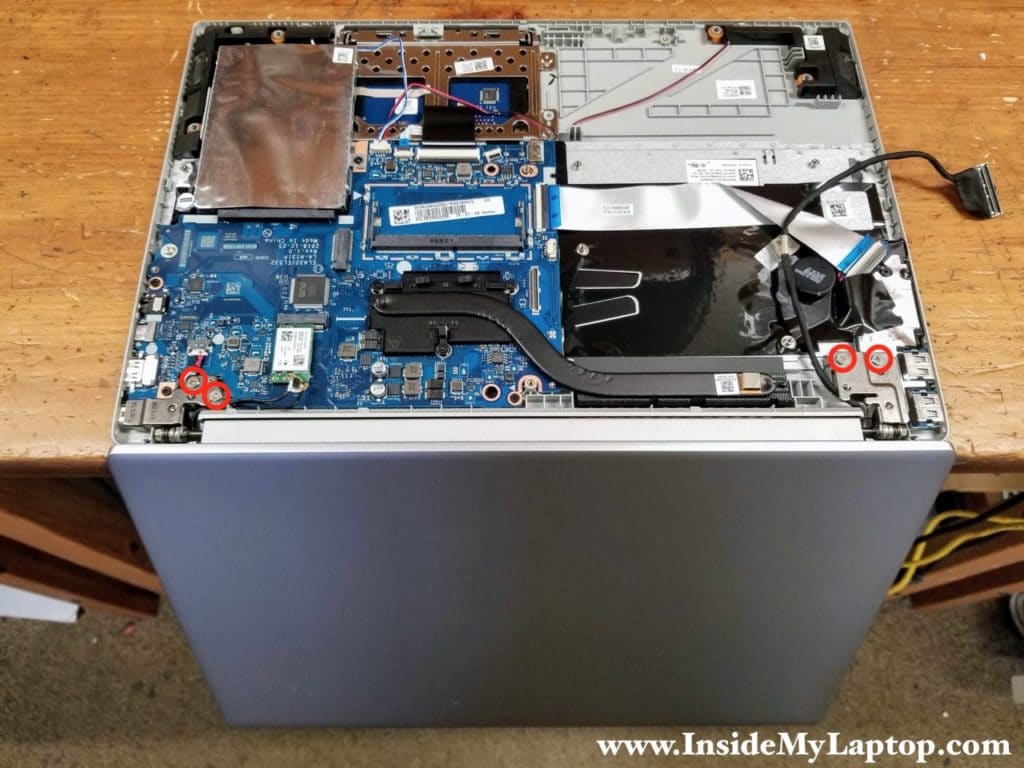
STEP 16.
Now you can separate the top case and remove the display panel.
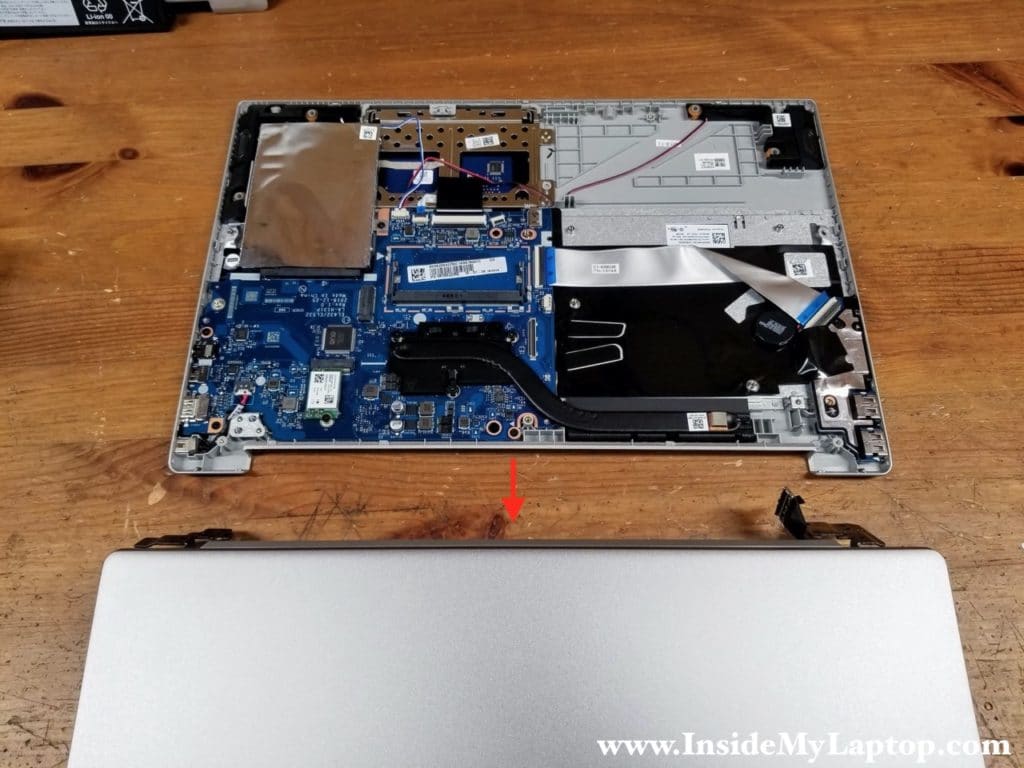
DC jack, I/O board and motherboard removal
The DC power jack mounted under the left display hinge. By the way, it is not necessary to remove the display panel completely in order to access and remove the DC jack. You can simply remove two screws from the hinge and lift it up just enough to remove the DC jack.
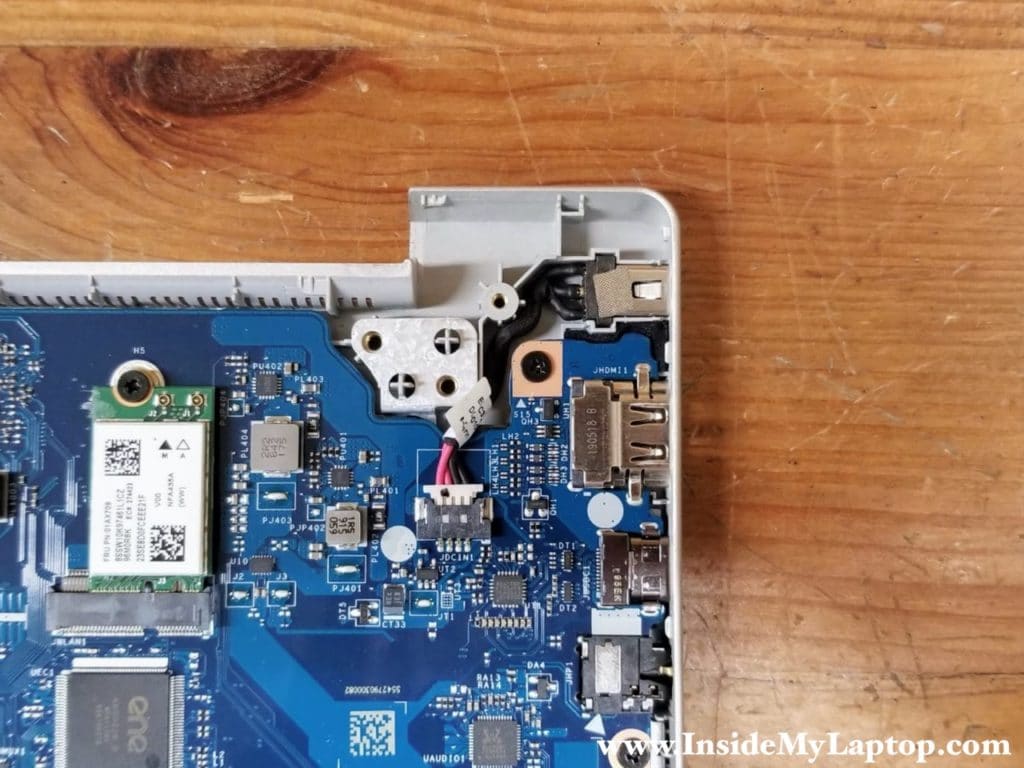
STEP 17.
Unplug the DC jack cable from the motherboard and remove it.
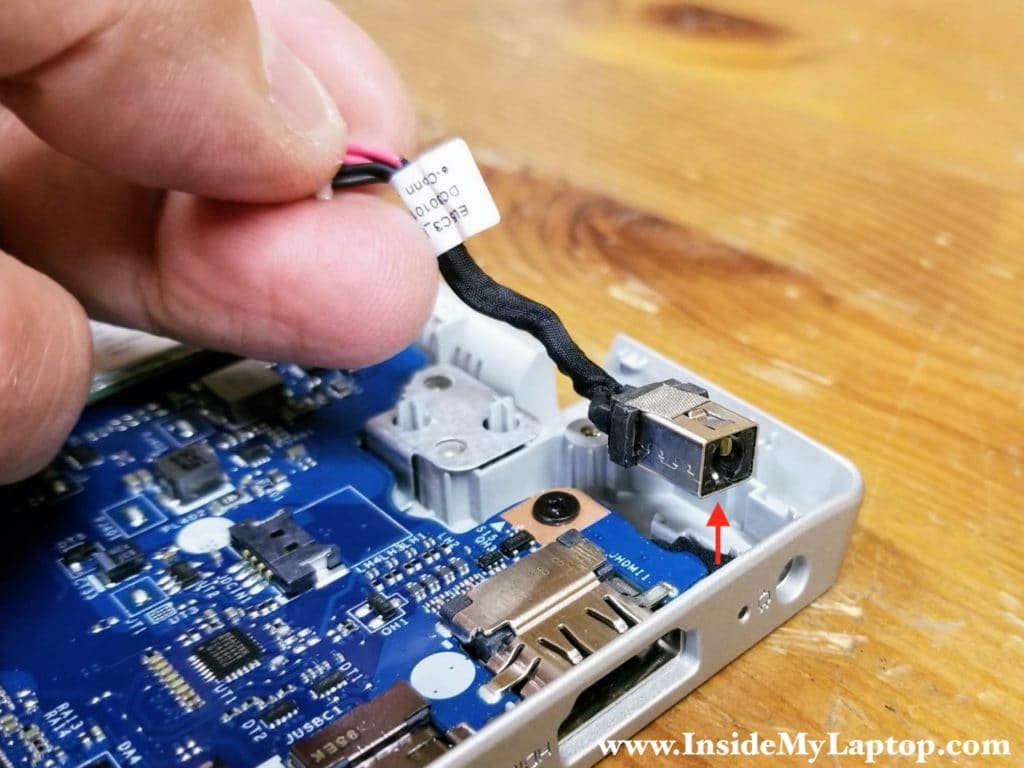
STEP 18.
Remove one screw securing the I/O board which has the power button, USB ports and media card reader. The CMOS battery also connected to the I/O board.
Peel off black mylar tape attaching the I/O board to the case.
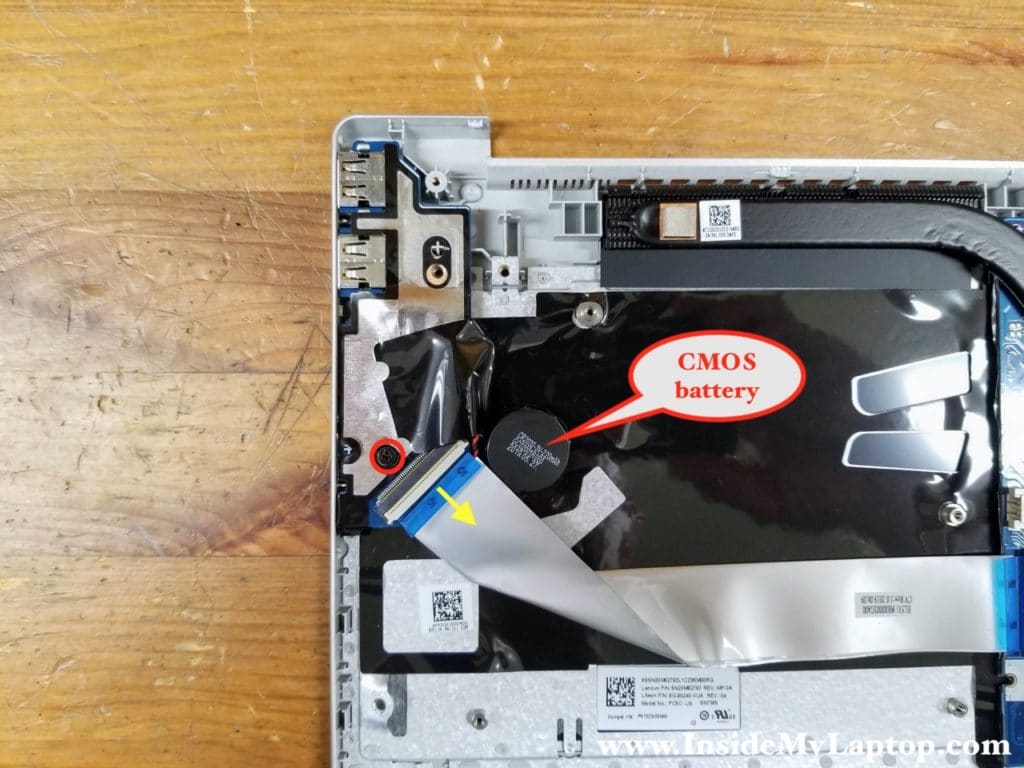
STEP 19.
Lift up and remove the I/O board.
The power button is soldered to the I/O board.
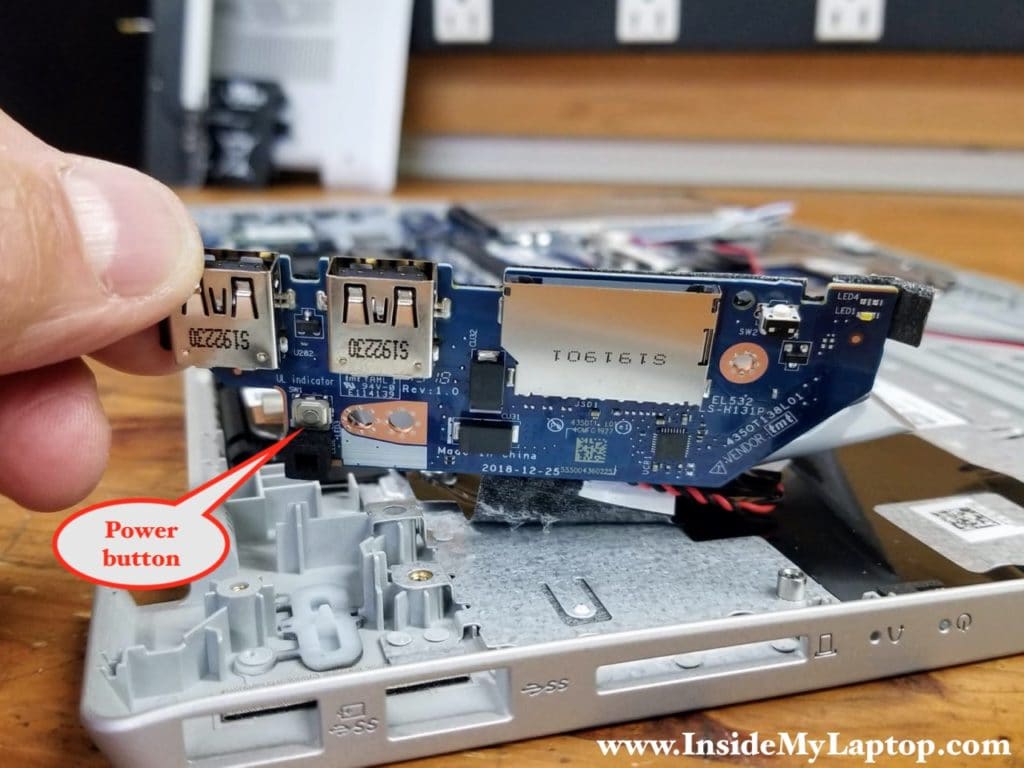
STEP 20.
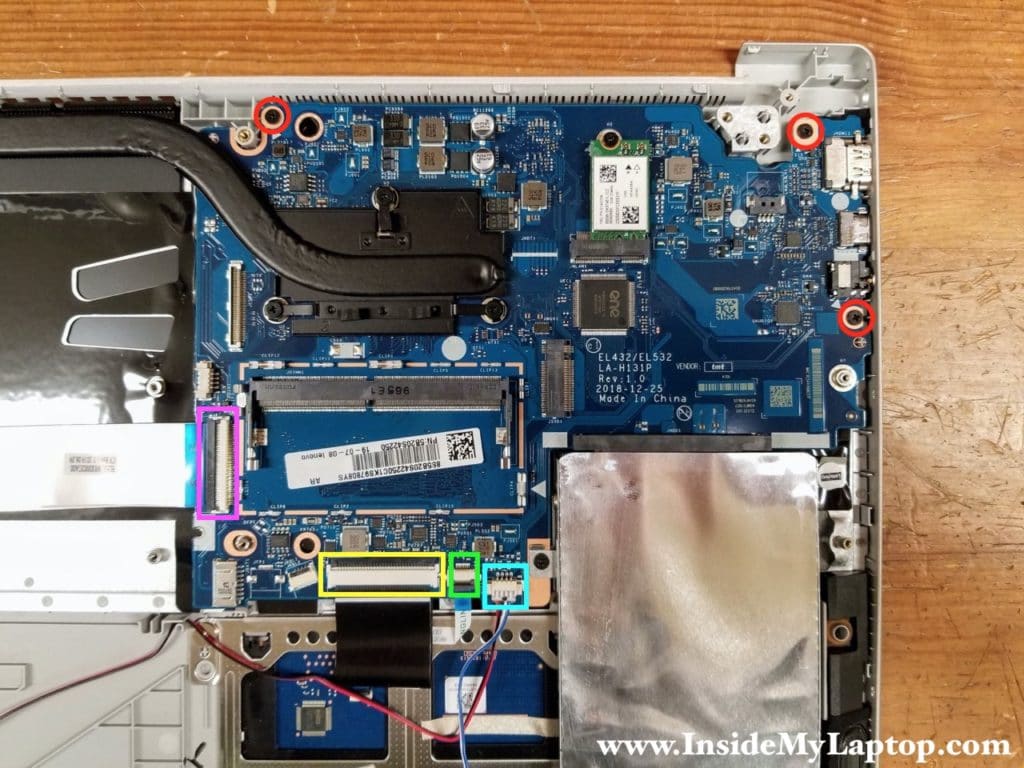
Remove three screws securing the motherboard. Disconnect the following color-coded cables:
– I/O board cable (pink).
– Keyboard cable (yellow).
– Touchpad cable (green).
– Speaker cable (blue).
After that you can separate the motherboard from the top case and remove it.
NOTE: on the following picture the hard drive is still connected (for warranty purposes) but it must be removed in order to remove the motherboard.
Lenovo IdeaPad S340-15API keyboard is permanently attached to the top case and cannot be easily removed unless you want to try this keyboard removal hack.
Kashif
your site has been very helpful.
recently i need to work on Ideapad S340-81QF0005US
Documentation:
https://psref.lenovo.com/Product/IdeaPad/ideapad_S34015IWL?MT=81qfKeyboard
I am unable to remove keyboard cable and the orange cable next to it.
I followed your instructions as well as Lenovo Video.
Video:
https://support.lenovo.com/us/en/solutions/HT508538
In the video they used the same tool i am using to remove the cables but i am unable to remove it.
Your help will be greatly appreciated.if you get my message kindly reply.
Regards,
Kashif
IML Tech
Kashif, at what step are you stuck? I’m not sure which yellow and orange cables you are referring to.
Kashif
Check this VIDEO. The person quickly remove the keyboard cable but i can not replicate the same step. also in this video there is no cable attach to the connector i notice in your picture as well. maybe if i can send you the picture it will help. my email is kash.qa@gmail.com
https://download.lenovo.com/lts/RCNW1870/FOF/RCNW1870-Ideapad-S340_REM_FRU_09_MainBoard.mp4
Kashif
GOT IT. FINALLY. I was not applying enough force to lift up the NOTCH for keyboard cable.
now last cable left next to keyboard cable.
Kashif
ALL DONE.
Now going to follow your keyboard replacement HACK
IML Tech
Good luck! That’s a fun one. 🙂
Teddy
Hi.
Happy new Year. 2023
You making a Good job.
The story is I must make replacmend kaybord connector on motherboard the Yellow connector and I cant find place wher I Can buy this white connector maybe You Can be so gently and give me advice.
Best Regards from Poland
IML Tech
I don’t know how damaged you connector is but probably you can find a not working motherboard on eBay and borrow connector from there.
Kashif
BEST BUY told me this laptop can’t be fixed and charged me to tell me all that.
I spilled the SODA on it. Hard drive was not detected by BIOS. so let see what happen at the end of the day. I have been able to run ubuntu and windos to go from the usb so far.
Regards,
Kashif