
In this post I explain how to take apart a Lenovo ThinkPad Edge laptop.
I’ll show how to:
1. Access the memory, hard drive, fan assembly.
2. Remove the palmrest/touchpad assembly.
3. Disconnect and remove the keyboard.
4. Access the wireless card and CMOS battery.
Before you start, make sure the computer is turned off.
STEP 1.
Remove the battery.
Loosen five screws securing the bottom cover. Under the bottom cover you’ll find the memory modules, hard drive, fan assembly.

STEP 2.
Remove the bottom cover.
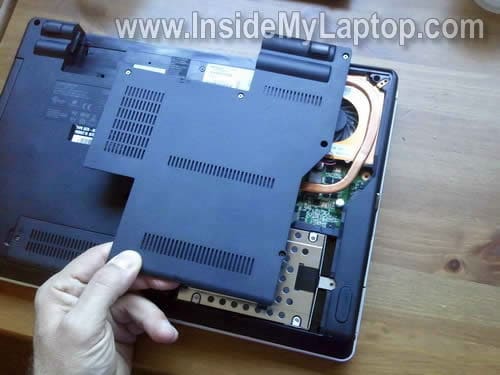
The cover removed.
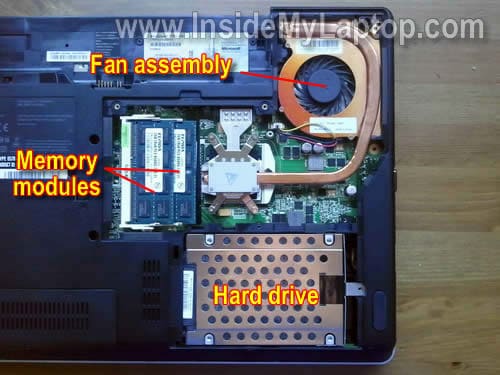
STEP 3.
In order to remove the hard drive, slide it to the right and disconnect from the motherboard.
After that you can lift up and remove the hard drive assembly.
If you are replacing or upgrading the HDD, you’ll have to transfer the mounting bracket to the drive.
Lenovo ThinkPad Edge uses a regular 2.5″ SATA HDD.

STEP 4.
The fan is a part of the heatsink assembly.
In order to remove the fan assembly, you’ll have to loosen four screw securing the heatsink and disconnect fan cable from the motherboard.
After that you should be able to lift up and remove the fan assembly. If you find lots of dust inside, blow it off with compressed air.
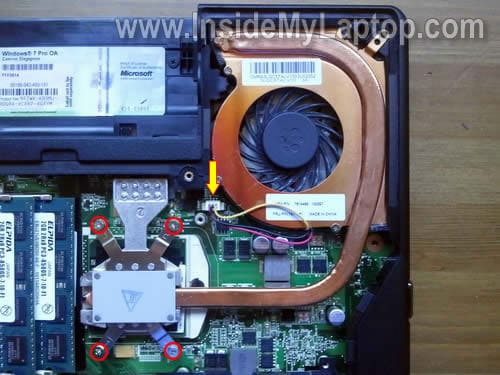
STEP 5.
Remove one screw securing the DVD drive.
Slide DVD drive to the left and remove it.
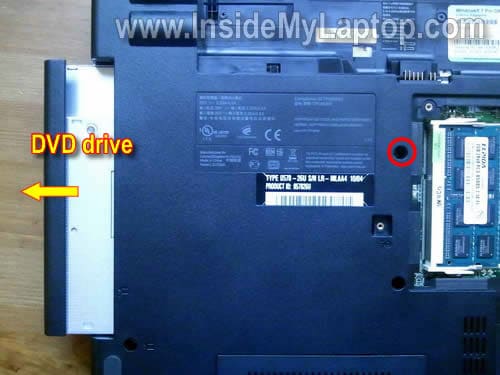
STEP 6.
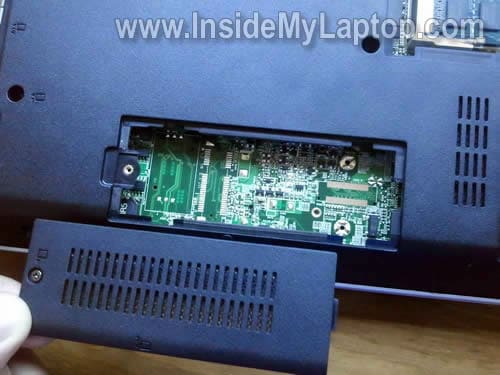
I also removed a small cover located in the lower left corner of the bottom base but… I didn’t find anything under this cover.
I think, in some different ThinkPad Edge models there is a WWAN card installed here.
STEP 7.
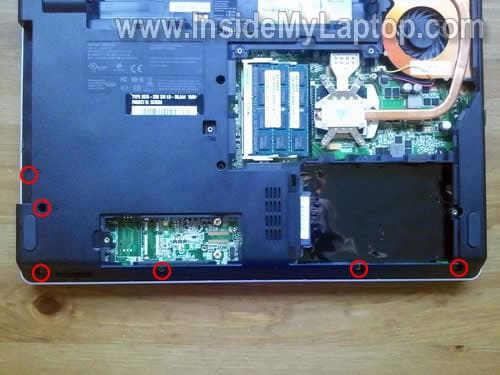
There are four rubber plugs located on the bottom.
These plugs hide screws securing the palmrest/touchpad assembly.

You can remove all four plugs with a sharp object.

STEP 8.
Remove six screws securing the palmrest/touchpad assembly.
STEP 9.
You can separate the palmrest assembly from the base with a guitar pick.
Insert the guitar pick between the palmrest and base and slowly move along the side.

STEP 10.
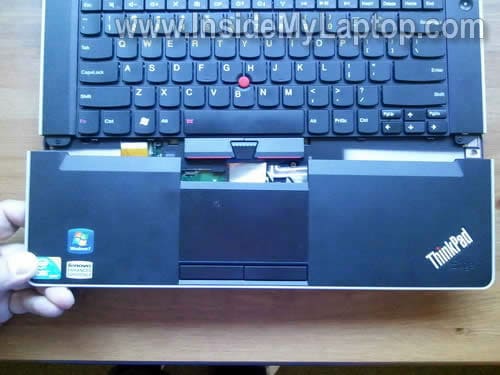
Carefully lift up the palmrest/touchpad assembly and place it upside down on the table.
STEP 11.
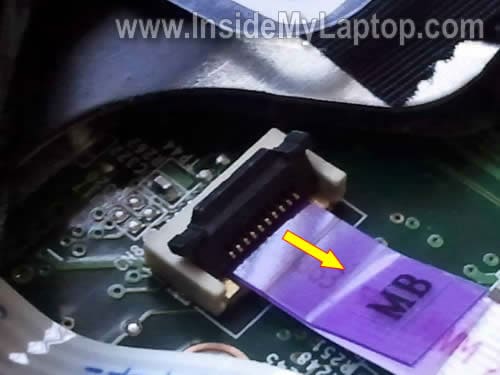
Now you can access the touchpad cable which is connected to the motherboard.
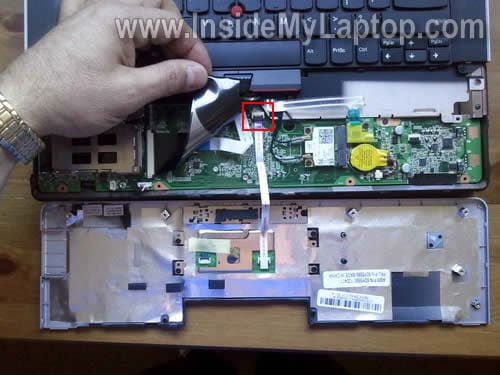
In order to unlock the touchpad connector, lift up the brown clip in the direction shown on the following picture.

The connector clip opens up at a 90 degree angle.
Now you can pull the touchpad cable from the connector.
STEP 12.
Remove the palmrest/touchpad assembly.
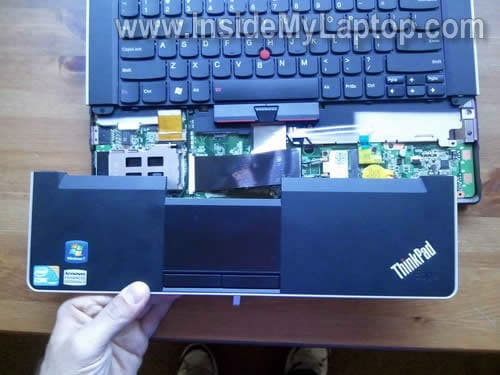
In the following steps I show how to disconnect and remove the laptop keyboard.
STEP 13.
Remove two screws securing the keyboard on the bottom.

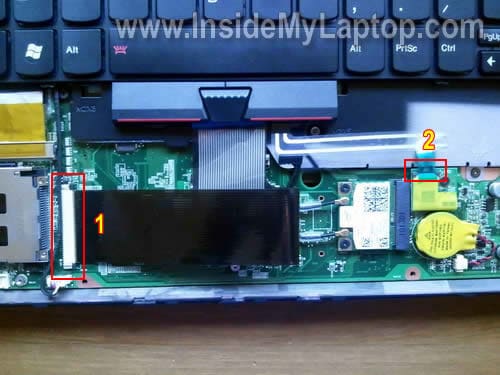
There are three cables connecting the keyboard to the motherboard.
Two connectors are shown on the picture below.
The third connector hidden under the black ribbon cable.
Let’s disconnect all three cables one by one.
STEP 14.
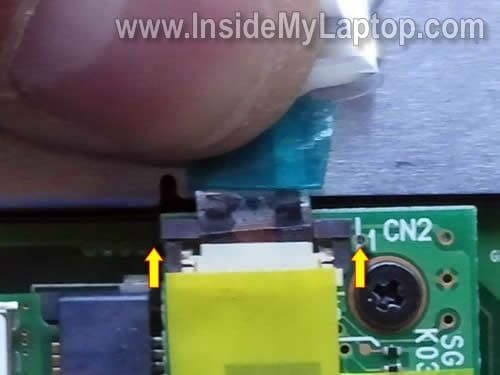
In order to unlock the first connector you’ll have to move the black clip about 2 millimeters to the direction shown by two arrows.
Do not separate the black clip from the white base. On the following picture the connector is shown in the UNLOCKED position. Do not move the black clip any further.
After the connector is unlocked, you can pull the ribbon cable.

STEP 15.
Unlock the second connector same way you unlocked the first one.
Release the second cable.
STEP 16.
As I mentioned earlier, the third keyboard connector located under the black ribbon cable.
Let’s disconnect the third connector.
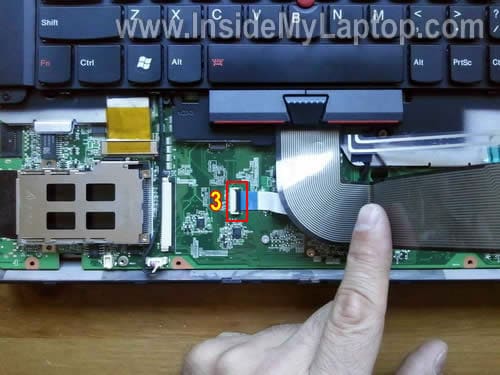
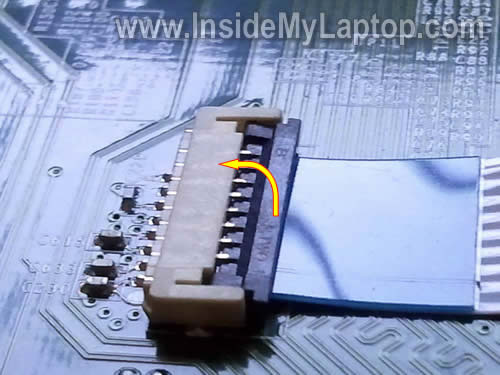
Move the brown clip in the direction shown by the yellow arrow.
It will open up at a 90 degree angle.
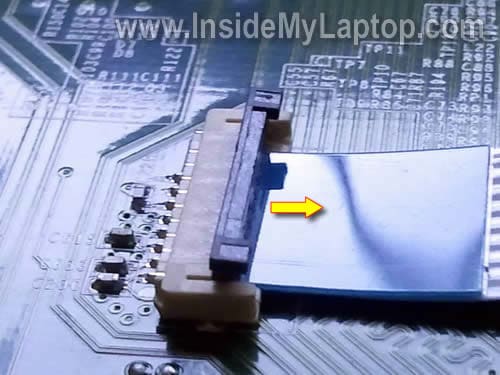
After the connector is unlocked, you can pull the cable.
STEP 17.
After all three connectors unlocked and cables released, you can remove the keyboard.

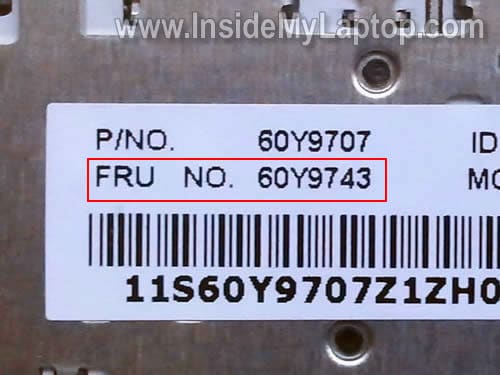
The Lenovo keyboard part number printed on a sticker.
It’s FRU number: 60Y9743
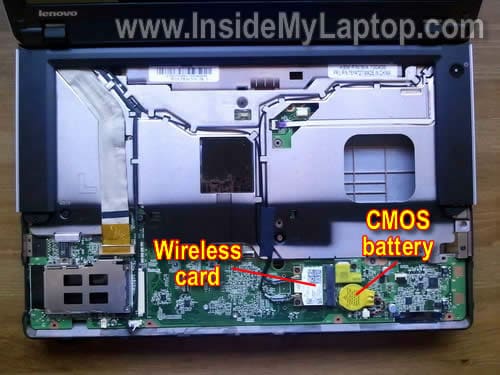
The wireless card and CMOS battery locations shown on the following picture.
It’s not necessary to remove the keyboard in order to access the wireless card and CMOS battery.
monkegoist
First of all, I want to thank you for this manual. It’ll be very helpful 🙂
Nick
Thanks a bunch. Needed to reset the bios, and could not for the life of me find what screws do what on my own.
john
why would the keyboard and trackpad quit working on this new machine? I could see if it was all one cable and that came loose, but that seems like a slim chance. any thoughts?
IML Tech
@ john,
Restart the laptop and try using one of the F* function keys. Try F1, F2, F10, F12, etc… one of them should take you to the BIOS setup. Can you use the keyboard in BIOS?
joe
I’m looking for information on how to replace a single key on my thinkpad edge 14. My down arrow key has gotten smushed in and lost its springy feel. Is there a way to replace the rubber spring under the keycap for just one key without buying a whole new keyboard?
will
What is the motherboard model? I am curious due to the fact that I would like to know what I can upgrade the RAM, and the HDD and potentially when I get the money the CPU. I would also like any other upgrade advice that you have.
lc
do you need to remove the palmrest in order to remove the keyboard or was that just the order in which you did it?:
IML Tech
@ lc,
I think it’s necessary to remove the palmrest first. Otherwise you will not be able to slide and remove the keyboard.
In the service manual (page 101) the keyboard removal shown after the palmrest removal.
Vanessa
Thank you, this is very helpful.
However, I think you circled the wrong thing in the CD drive removal. It is actual the center screw (that is the easiest to take out and most obvious when you flip over the computer). I struggled with this for 30 mins so I figured I would post here. Maybe it’s common knowledge to remove a CD drive but I never have before!
Also, I found it hard to navigate to this page because the Lenovo site is terrible so here is a link: http://support.lenovo.com/en_US/detail.page?LegacyDocID=MIGR-75145 whcih contain the keyboard service parts for the Lenovo Edge 14 laptop. What I did is take the FRU No and search Ebay to get the part I needed. I will post if I have any trouble replacing the keyboard when it comes in the mail (I just replaced my touchpad/palm rest).
Patty
I wanted to find the “video card” Where is it? and can it be replaced? I had a sticky key for a while after leaving the computer on the lanai.. and the rain blew sideways.. and sprinkled on it.. turned it upside down and it was working for bit but a few keys when phycho.. then some got stuck on… and I had to bypass it through bio’s just to start it up.. I just used virtual keyboard to put in my password, but I think somehow the sticky key burned out the video card.. now I just turn on the computer and it has vertical lines.. but you can still hear that key beeping for a while.. still stuck. I bought a new keyboard and will use this guide to change it out.. but I think I need to ffigure out if its even fixable.. I heard that its possible that a sticky key will just wear it out.. or maybe its just jarred loose or something. Please help .. I just don’t want to buy another one.
Florian
hy, i´ve seen your website and i think you doing a good job while showing people how to dissassamble your pc/notebook right.
but i´ve got a question. i need a motherboard for a lenovo 1143-A18, do you know where to get one of these? i allready asked lenovo, but they don´t give me any answers. im outta the guarantee so i have to do it my way anyways.
so do you have a good contact for notebook parts of ibm or lenovo?
i would be happy to hear from you.
best regards.
Florian
abbas
Hi,
I have the same laptop as above it died while updating the bios, where can I find the bios on the motherboard as I minght need to replace it or reprogram it.
by the way if you have experienced that issue and you have any idea please do share them with me please. the laptop is totaly dead the LED comes on and the fan but nothing else screen totaly blank.
Thanks and Regards,
IML Tech
@ abbas,
I don’t know any easy way to fix it.
If the BIOS got corrupted while updating there is not much you can do besides replacing the motherboard.
Sue
Great guide – thanks for this. Just a curious note – I just replace a keyboard with a OEM part on the Edge 15. The new keyboard only has 2 connections. It’s completely missing the one on the right – the clear cable. It’s pretty well hard wired into the old keyboard, so I couldn’t see any way of moving it to the new.
So I ended up going ahead without that cable, and everything seems to work. Any idea what that cable was for? Lenovo’s service manual did not show that cable either.
Mostafa
Thank you very useful.