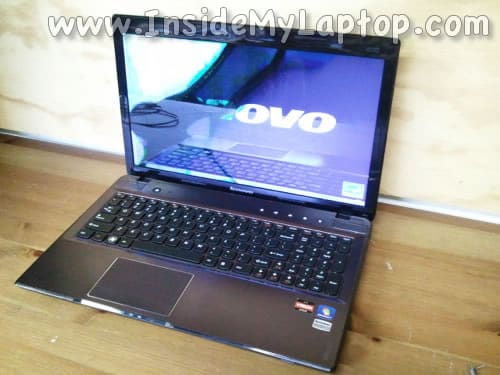
In this guide I explain how to remove and replace the LCD screen on a Lenovo IdeaPad Z575.
In my case the laptop was dropped and the LCD got cracked.
Most likely this guide will work not just IdeaPad Z575 model but for some other IdeaPad models too.
If this disassembly guide works for another model please mention the model number in the comments area after the guide.
Before you start make sure the computer is turned off and battery removed.
STEP 1.
Using a sharp object remove the screw cover from the lower left corner of the display bezel.

STEP 2.
Remove one more screw cover from the lower right corner.
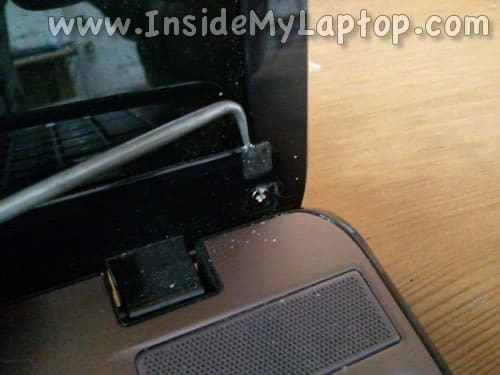
STEP 3.
Remove screws found under those covers. You’ll have to use a small Phillips screwdriver for that.

STEP 4.
Insert your fingers under the display bezel and start separating it from the back cover.
Wiggle the bezel in order to unlock hidden latches.
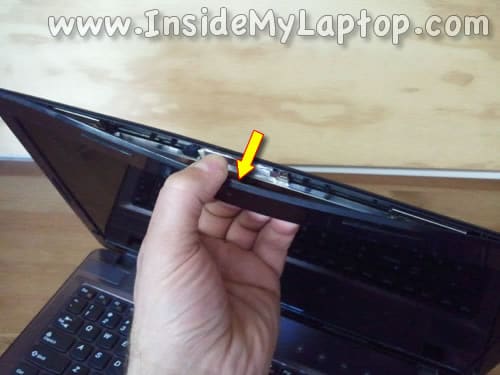
STEP 5.
Continue separating the bezel on left and right sides for the display assembly.
After that move to the lower part.

STEP 6.
Remove the bezel from the display assembly.

STEP 7.
Remove two screws securing the LCD assembly to the top side of the display cover.

STEP 8.
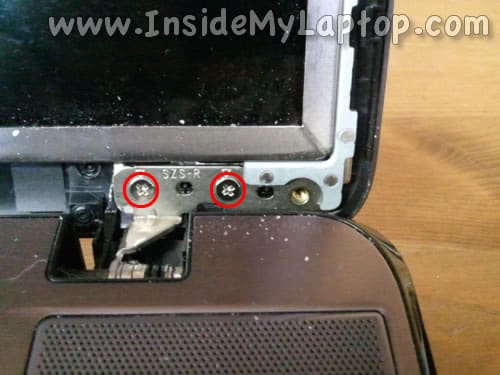
Loosen (do not remove completely) two screws securing the left display hinge.
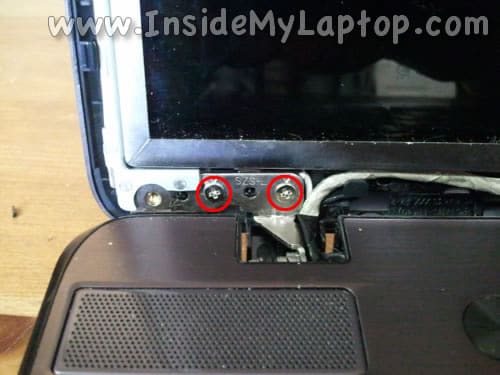
STEP 9.
Loosen two more screws securing the right display hinge.
Before you separate the LCD assembly from the display cover you’ll have to unplug the cable from the web camera module which is mounted on the top.
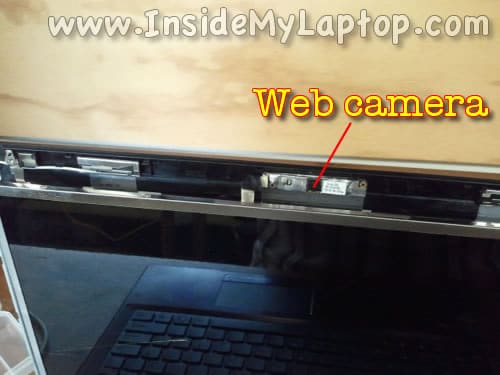
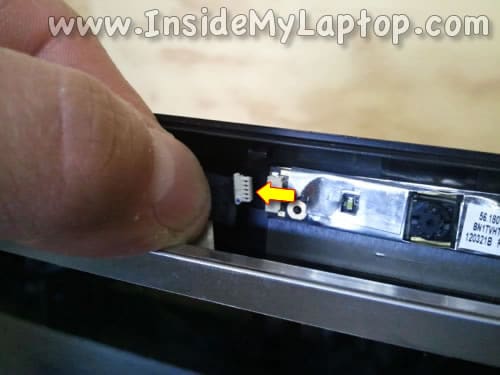
STEP 10.
Carefully unplug the cable from the web camera module.
STEP 11.
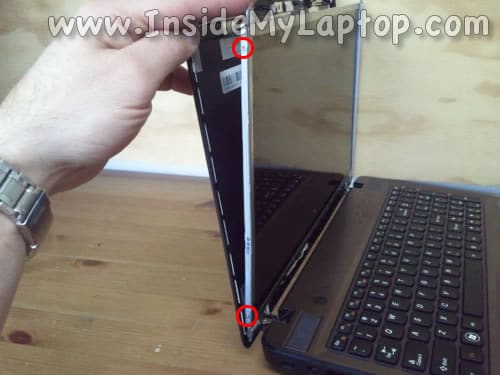
Separate the LCD assembly from the display cover just enough to access screws on the side.
Remove two screws from the right mounting bracket.

STEP 12.
Remove two more screws from the left mounting bracket.
STEP 13.
Now you can separate the LCD assembly from the display cover and place it the front side down on the keyboard.
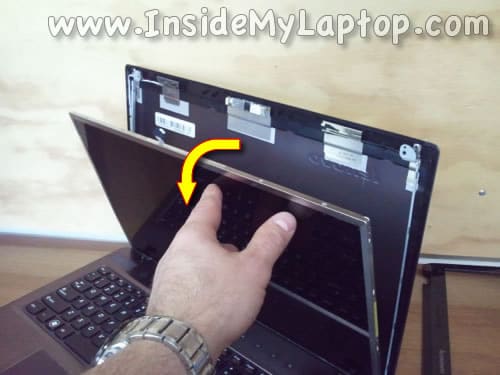
STEP 14.
On the back side you can access the web camera cable and video cable. They are bundled into one video harness.
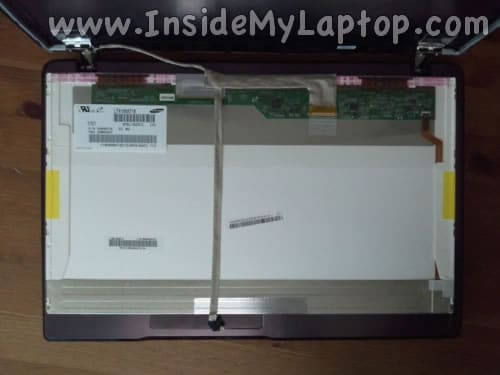
STEP 15.
Carefully unglue the web camera cable.
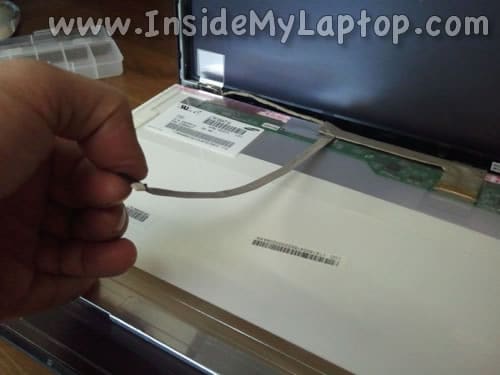
STEP 16.
Remove sticky tape securing the video cable connector.
Unplug the video cable.

STEP 17.
Now you can remove and replace the cracked LCD screen and replace it with a new one.

Assemble the display following all disassembly steps in the reverse direction.
Vict
Hi, thanks for the help.
I was using my compaq presario CQ61 when it suddenly went off. With the manner in which it went off, i thought it was a battery drain. But when subsequent attempts to power the laptop failed after making sure the charger was properly fixed to the power source, i thought the charger had gone bad. I replaced the charger but there was still no response from the computer. No lights at all.
So i took off the battery, plugged the charger and tried to power the laptop. The laptop still didnt respond only i noticed that the small charging light at the point where i insert the charger comes up and then goes off after a few seconds (this happens only when the battery is out).
Any suggestions as to what could be problem? Anyway i can further troubleshoot? I would appreciate your help.
Thanks.
Best regards.
kels.
Mugsy
I just replaced the LCD in my Thinkpad. When I turn it on, I get the IBM logo for about three seconds before the screen goes black. The computer still starts, but no backlight so I can’t see anything.
Is it possible to connect the LCD properly but not the backlight? Might it just be the inverter? (It worked fine with the old broken LCD.) It is possible to have “connected it wrong” to where it goes out after 3 seconds?
Thanks.
IML Tech
@ Mugsy,
It’s possible the replacement LCD screen has defective backlight lamp.
You can try installing the old broken screen back in place and see if the backlight still works. If it does work, the new screen has defective backlight.
If you have the same problem with the old cracked screen it’s possible the inverter failed.