In this guide I explain how to disassemble an HP Pavilion 15-cs series laptop. There are many different configurations in the HP Pavilion 15-cs computer line and this disassembly guide should work for most of them. In this particular case I’m taking apart an HP 15-cs0064cl model.
Here are just a few of the many other models supported:
- 15-cs0025cl, 15-cs0051cl, 15-cs0051wm, 15-cs0052cl, 15-cs0053cl, 15-cs0057od, 15-cs0063cl, 15-cs0064st, 15-cs0065cl, 15-cs0067nr, 15-cs0072wm, 15-cs0073cl, 15-cs0075wm, 15-cs0082cl
- 15-cs1053od, 15-cs1063cl, 15-cs1065cl, 15-cs1067nr
- 15-cs2021cl, 15-cs2051od, 15-cs2062st, 15-cs2064st, 15-cs2073cl, 15-cs2079nr, 15-cs2082tx
- 15-cs3063cl, 15-cs3065cl, 15-cs3071nr, 15-cs3073cl, 15-cs3075cl, 15-cs3076nr, 15-cs3078nr
During the disassembly process I found the following advantages of this model:
– The motherboard has two memory slots available for RAM upgrade.
– The laptop supports a regular 2.5″ SATA hard drive and a PCIe M.2 SSD.
– Both cooling fans are easily removable.
– The DC power jack is not soldered to the motherboard.
For this disassembly you need just a few basic tools: Phillips screwdriver #1 or #0, case opener tool and tweezers. At the end of this guide you will find a link to the official HP 15-cs series laptop service manual.
Base cover and battery removal
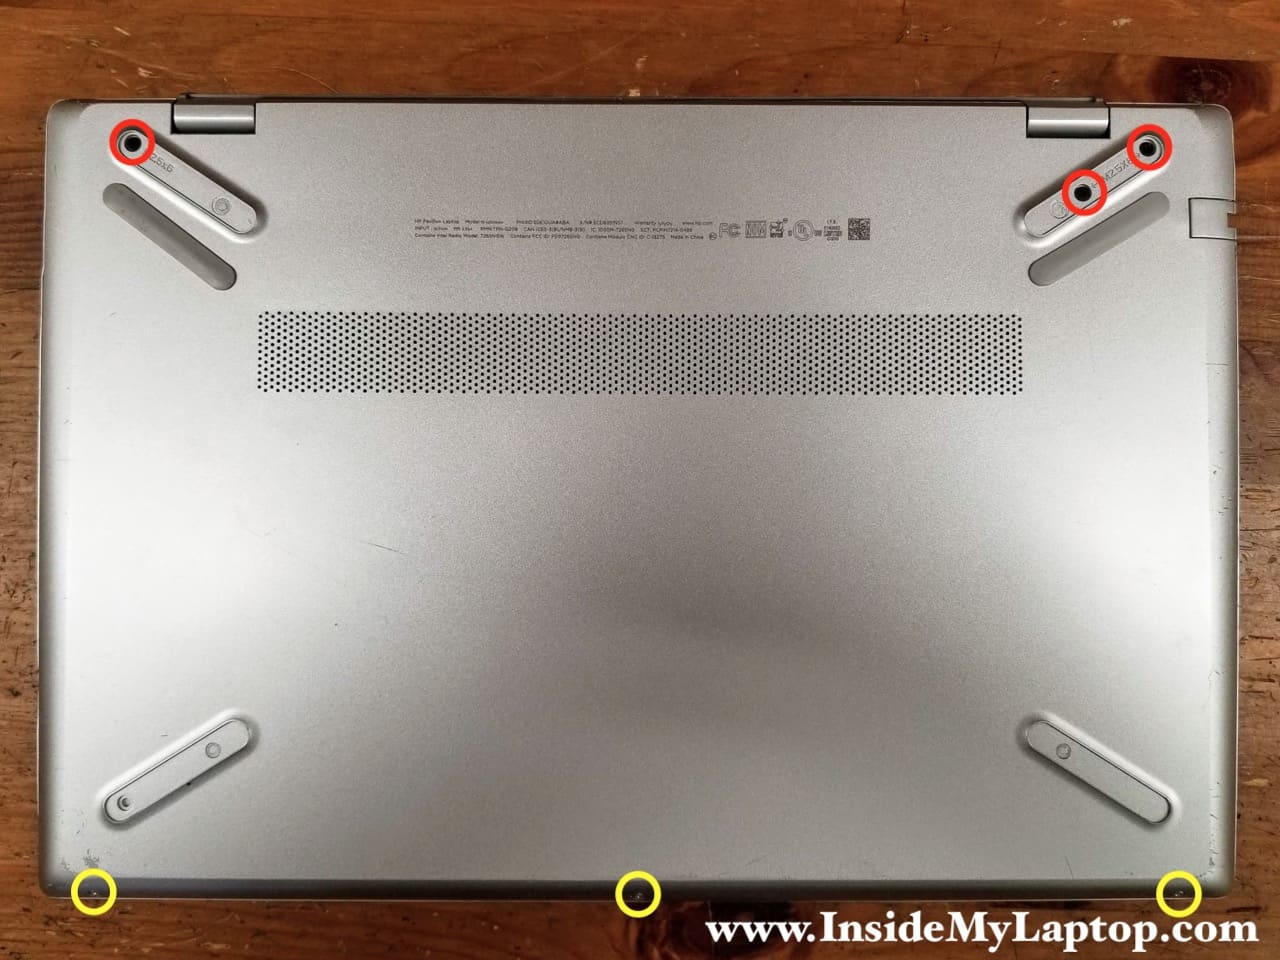
There are three screws hidden under the rear bottom feet. These feet are self-adhesive and can be easily removed.
STEP 1.
Remove six screws securing the base cover.
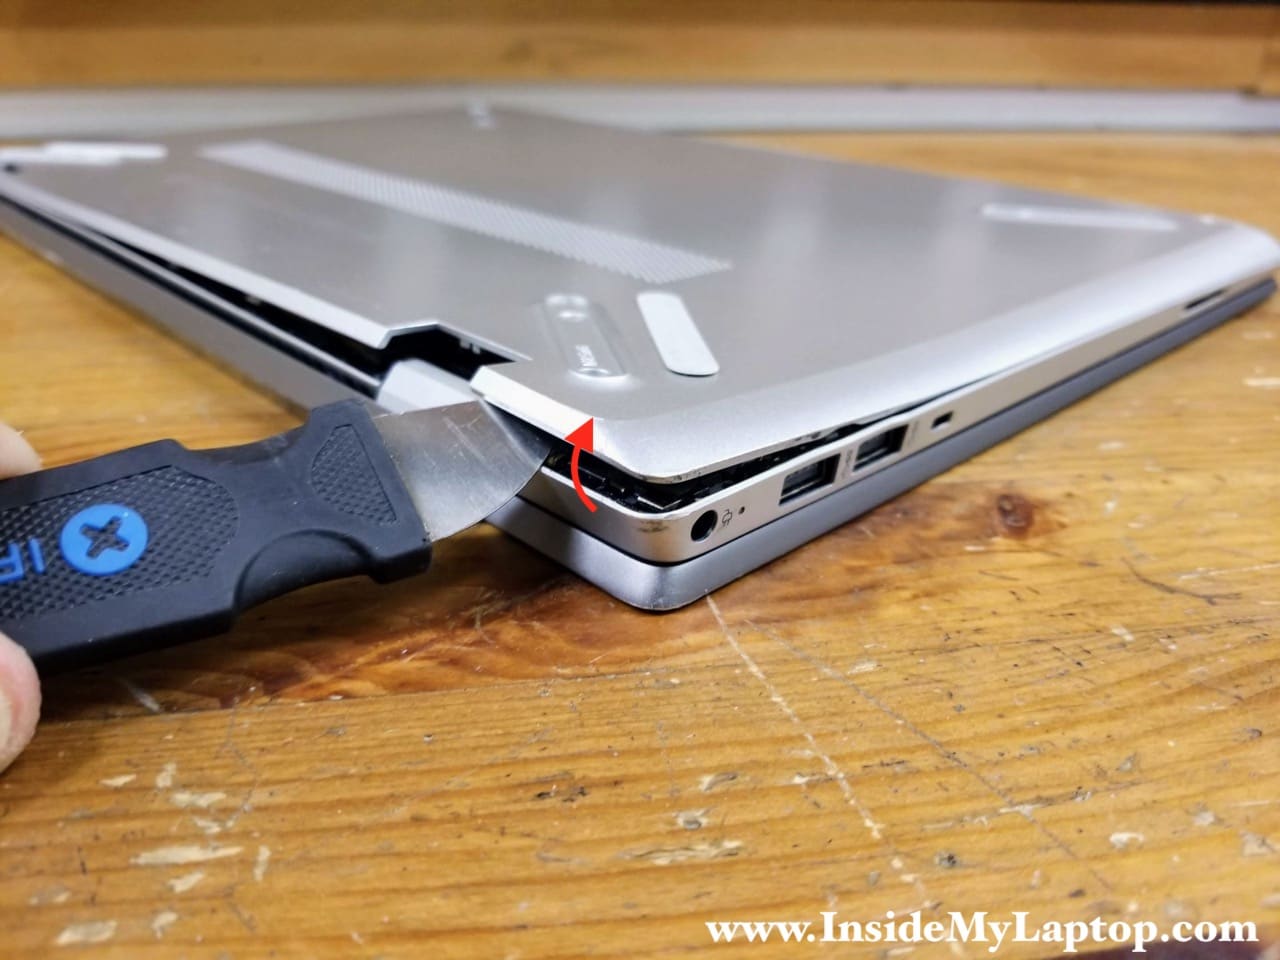
STEP 2.
Start separating the base cover from the top case assembly. I found it’s easier to remove the base cover if you start somewhere around the display hinges area.
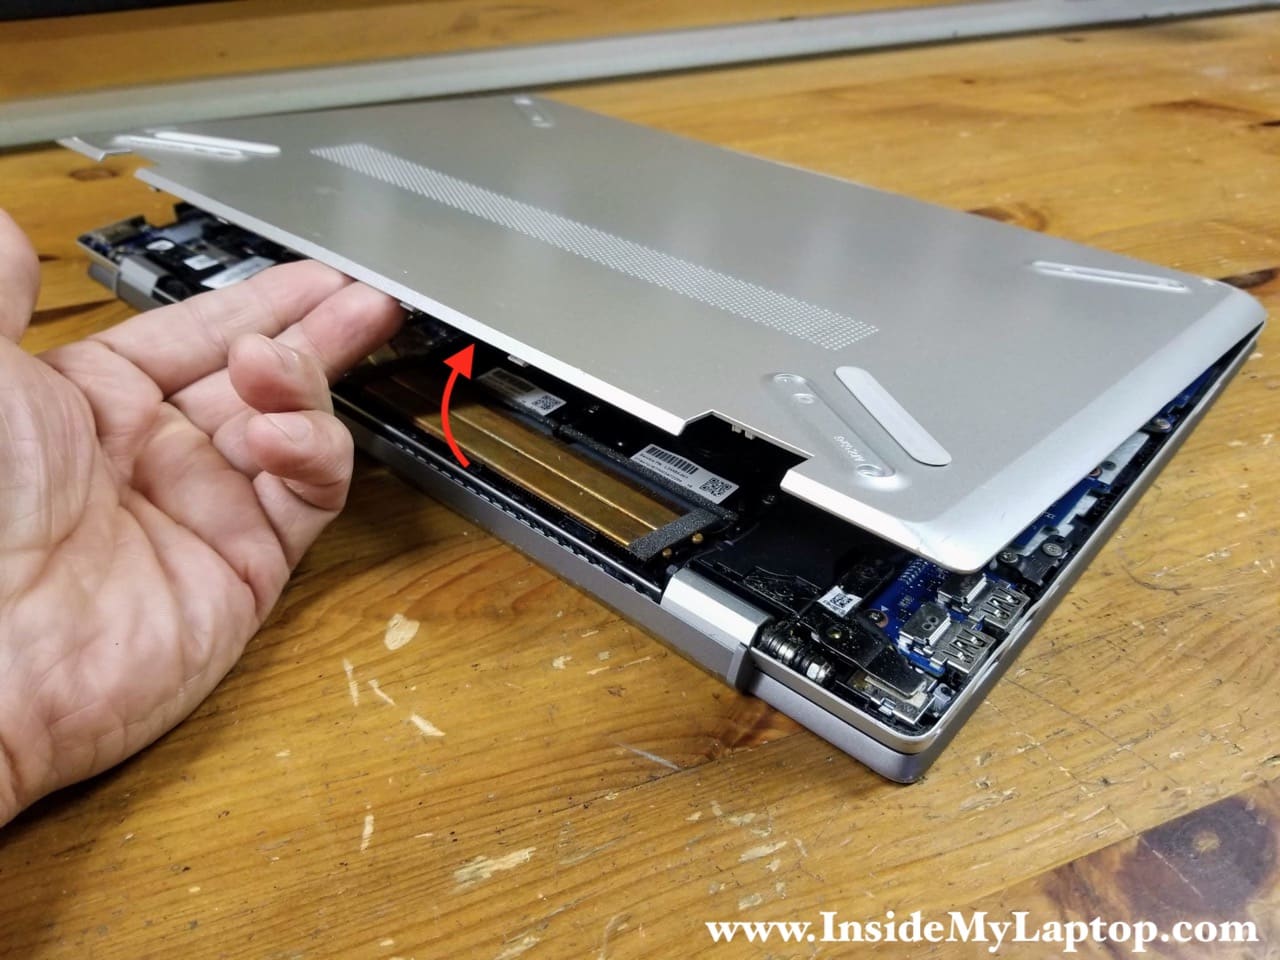
STEP 3.
Continue lifting up the base cover with your hands and remove it completely. You’ll have to apply some reasonable force to release multiple hidden latches securing the cover.
STEP 4.
Remove four screws attaching the battery to the case.
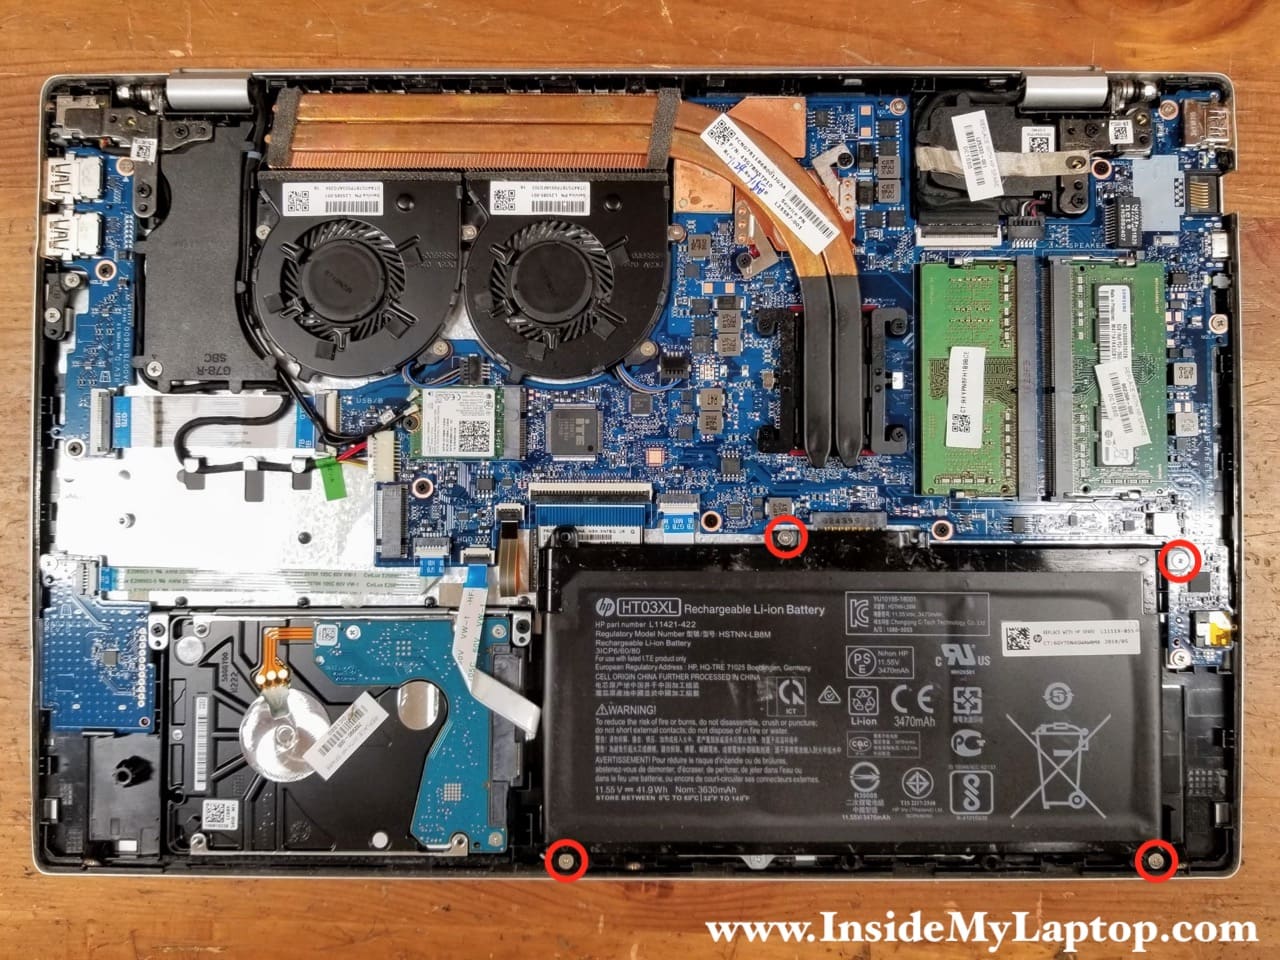
STEP 5.
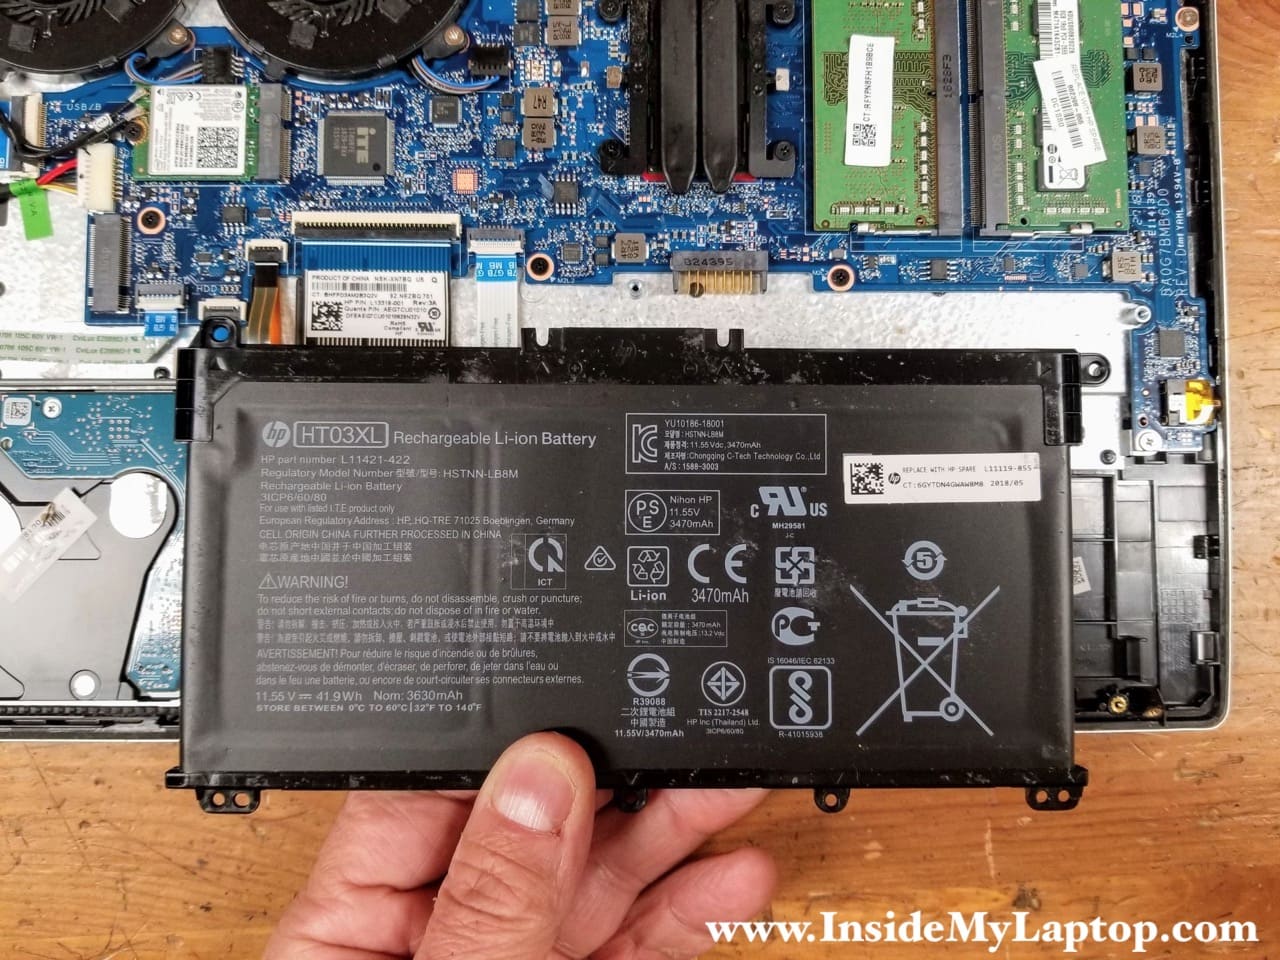
Lift up and remove the battery. There is no battery cable, it’s plugged in directly into the motherboard.
HP Pavilion 15-cs laptop battery model: HT03XL.
Memory and hard drive removal
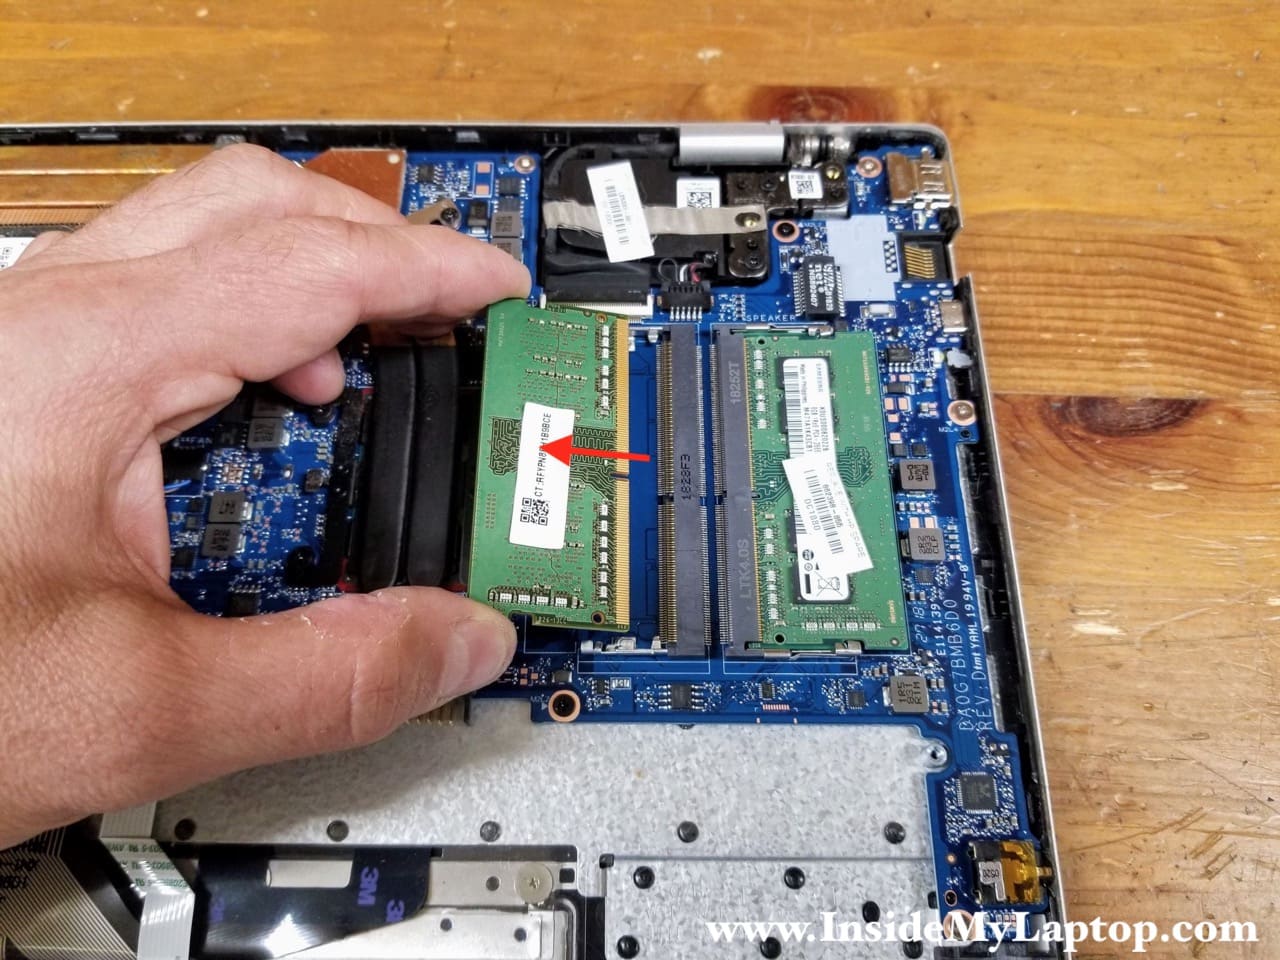
STEP 6.
Remove both memory modules if you want to replace or upgrade them.
STEP 7.
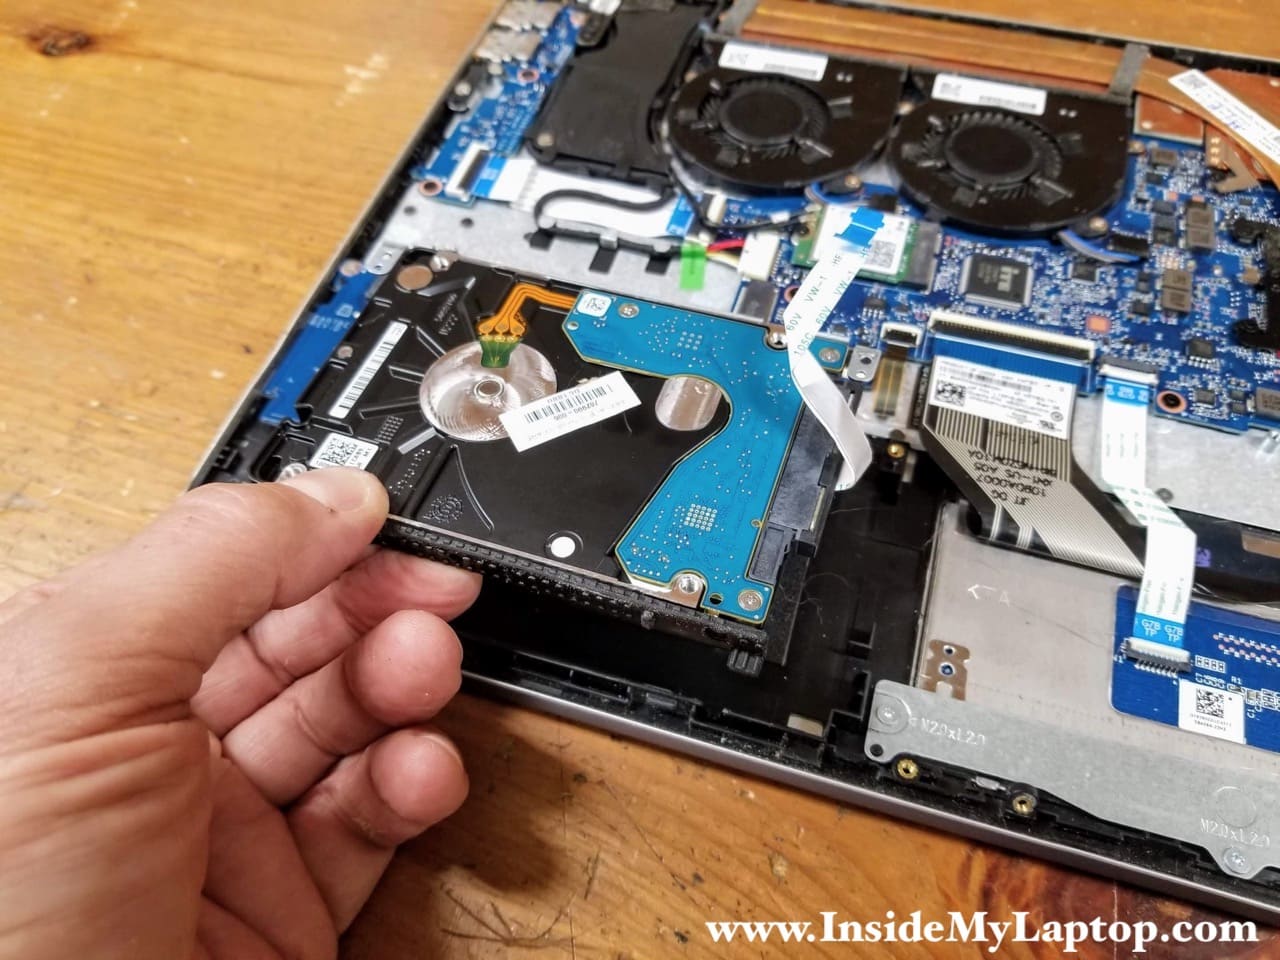
Remove two screws securing the 2.5″ HDD bracket and disconnect the hard drive cable from the motherboard.
The PCIe M.2 slot located just above the 2.5″ hard drive. PCIe solid state drives are faster than regular 2.5″ SSDs.
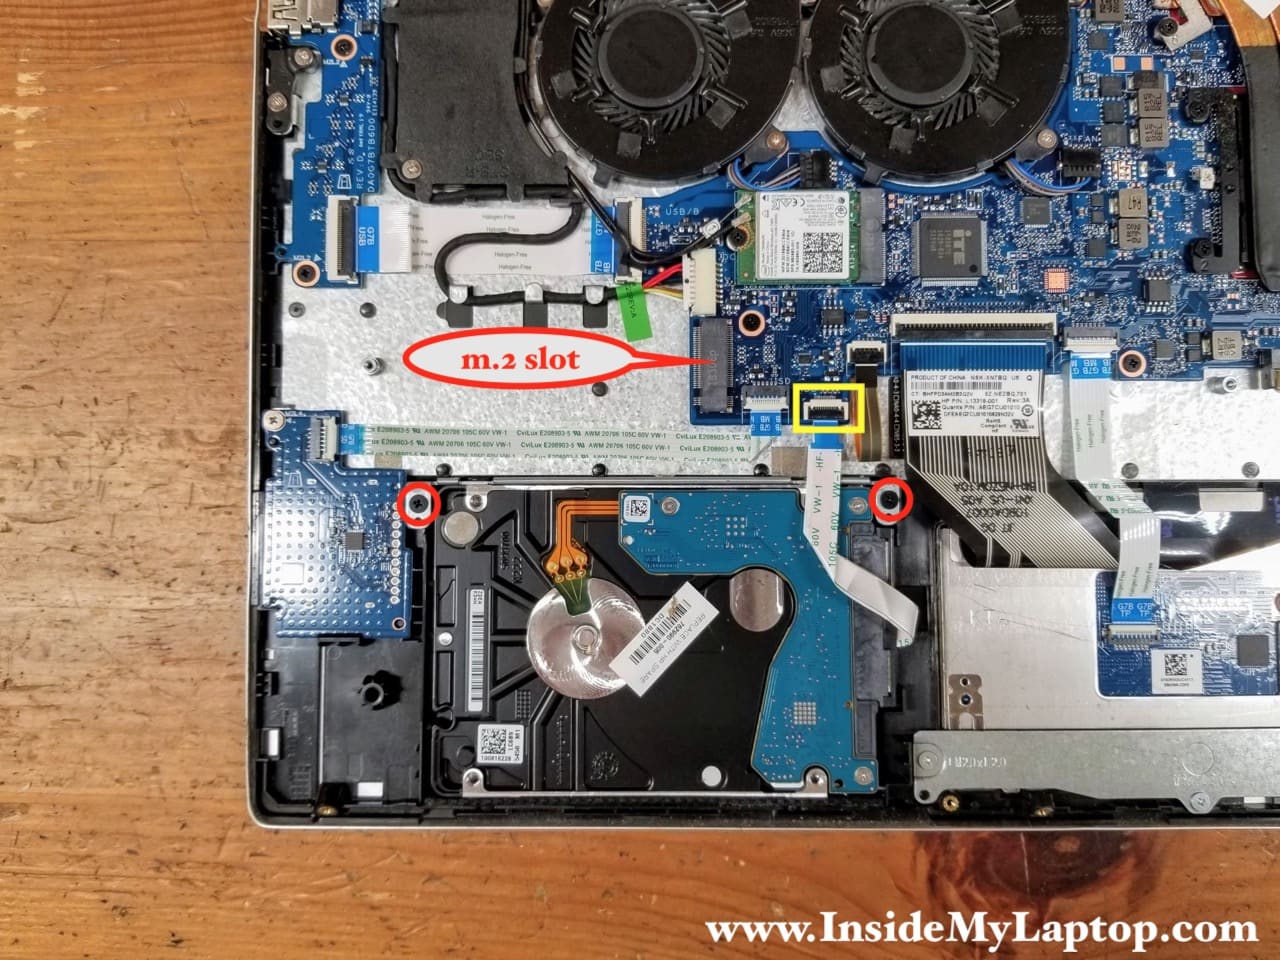
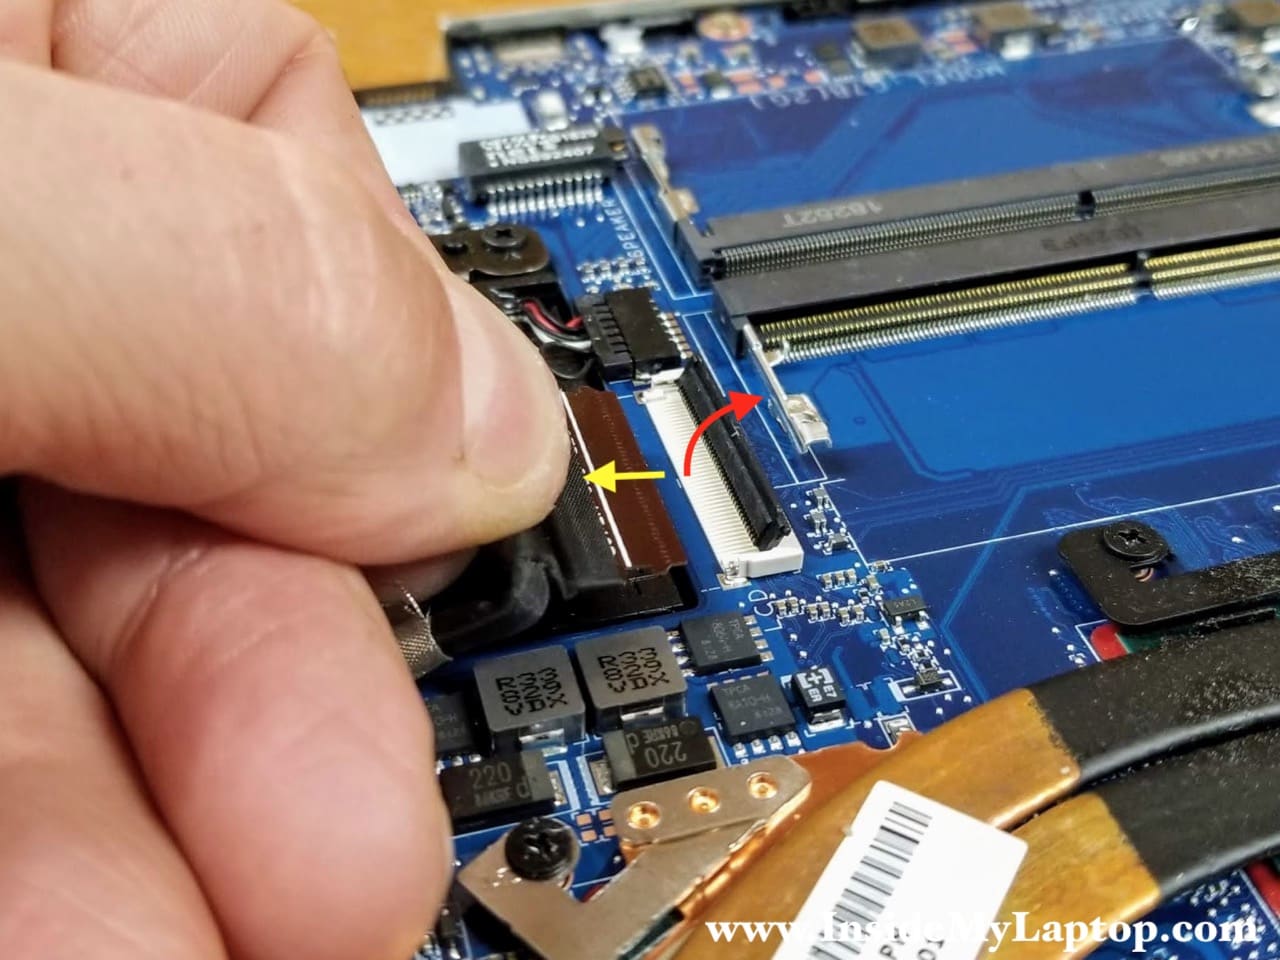
Here’s how to release the hard drive cable.
Lift up the locking tab to unlock the connector. Pull the cable out.

STEP 8.
Lift up and remove the 2.5″ hard drive with the cable attached to it. Replacing this drive with a 2.5″ SSD will speed up your laptop significantly.
Cooling fans and Wi-Fi card removal
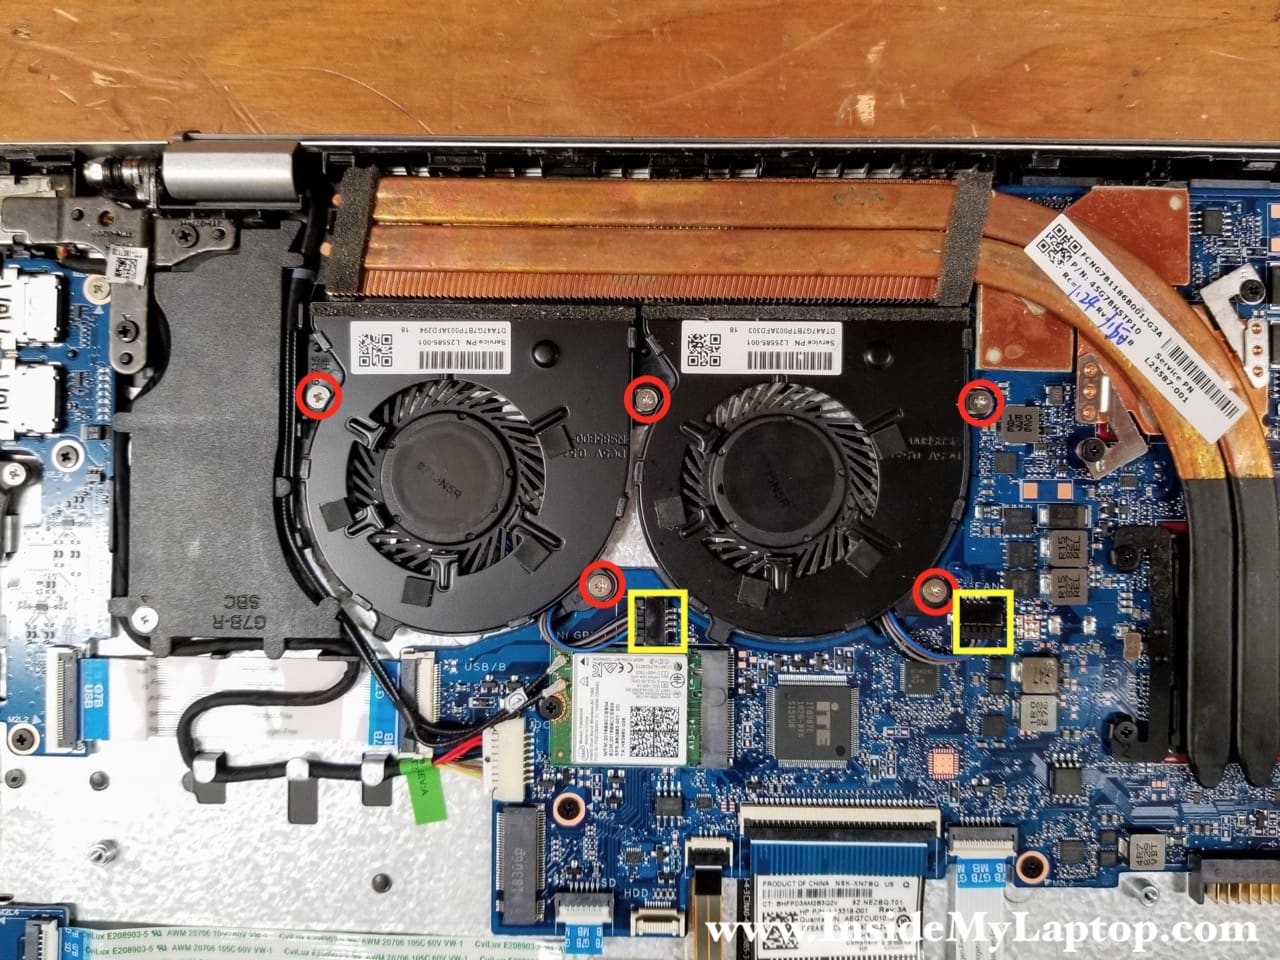
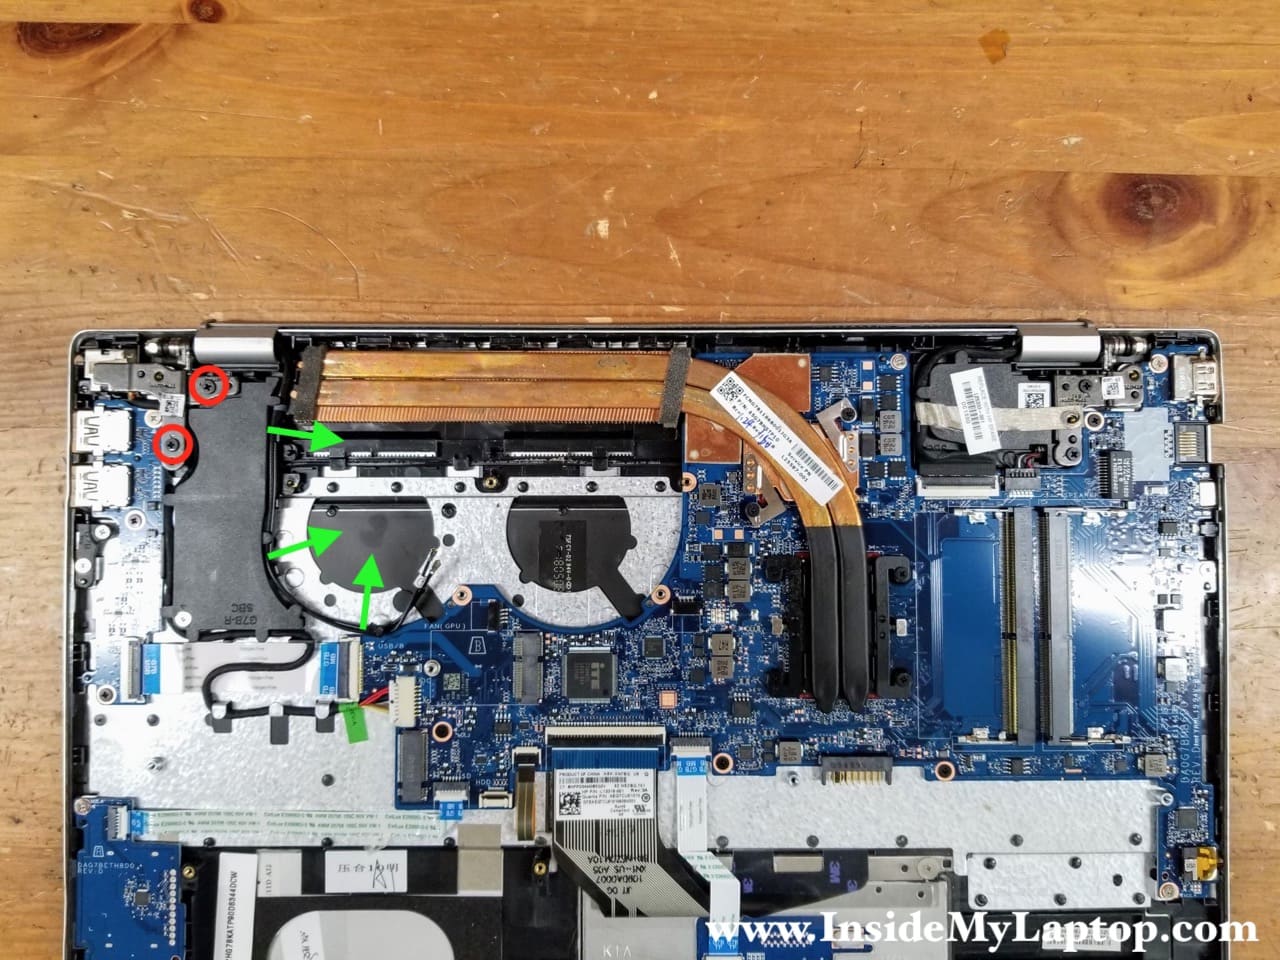
STEP 9.
Remove five screws securing two cooling fans. Disconnect both fan cables from the motherboard. Both fans are identical and have the same service part number: L25585-001.
STEP 10.
Lift up and remove the first cooling fan.
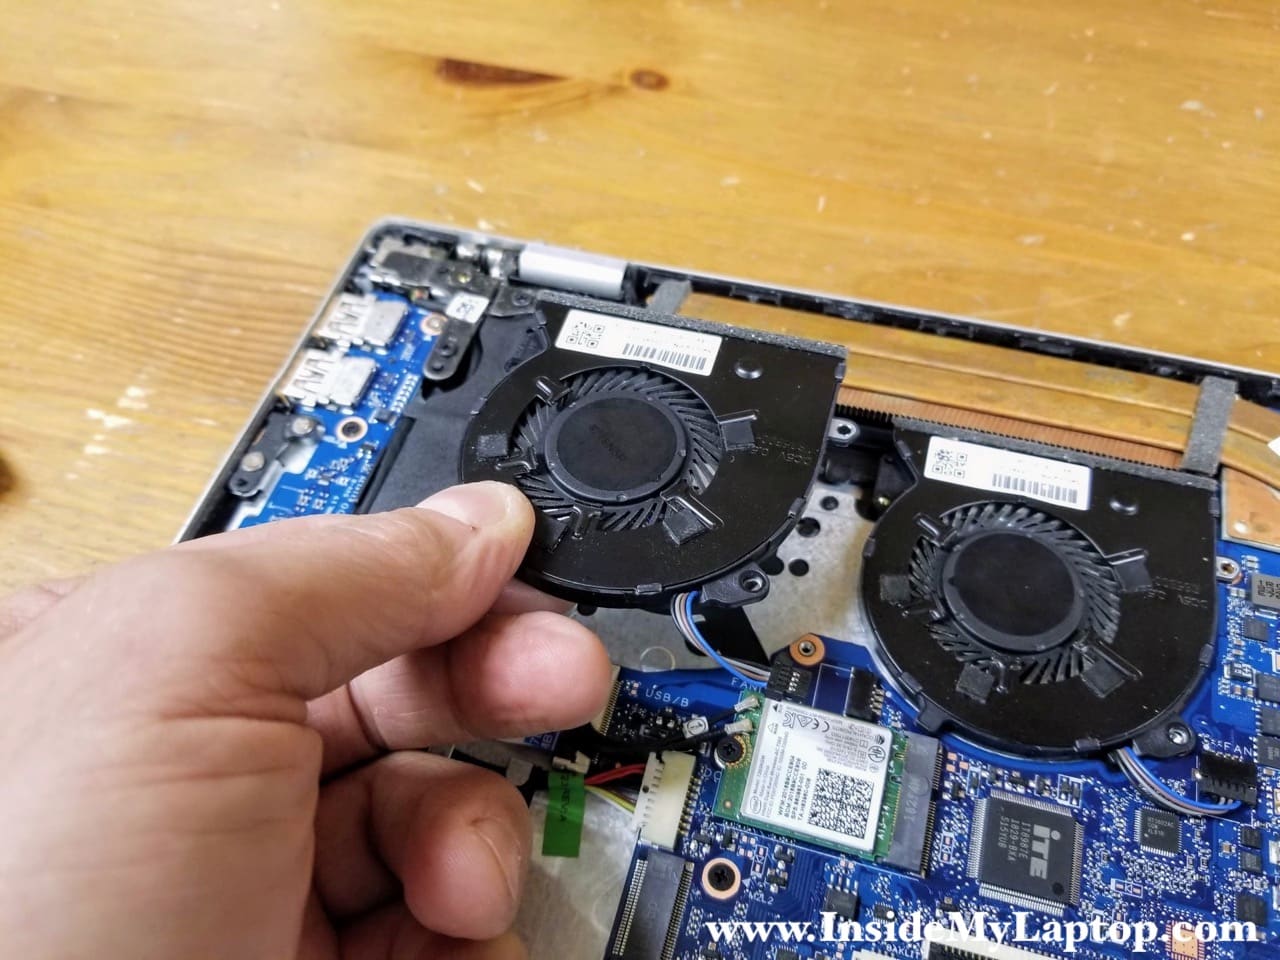
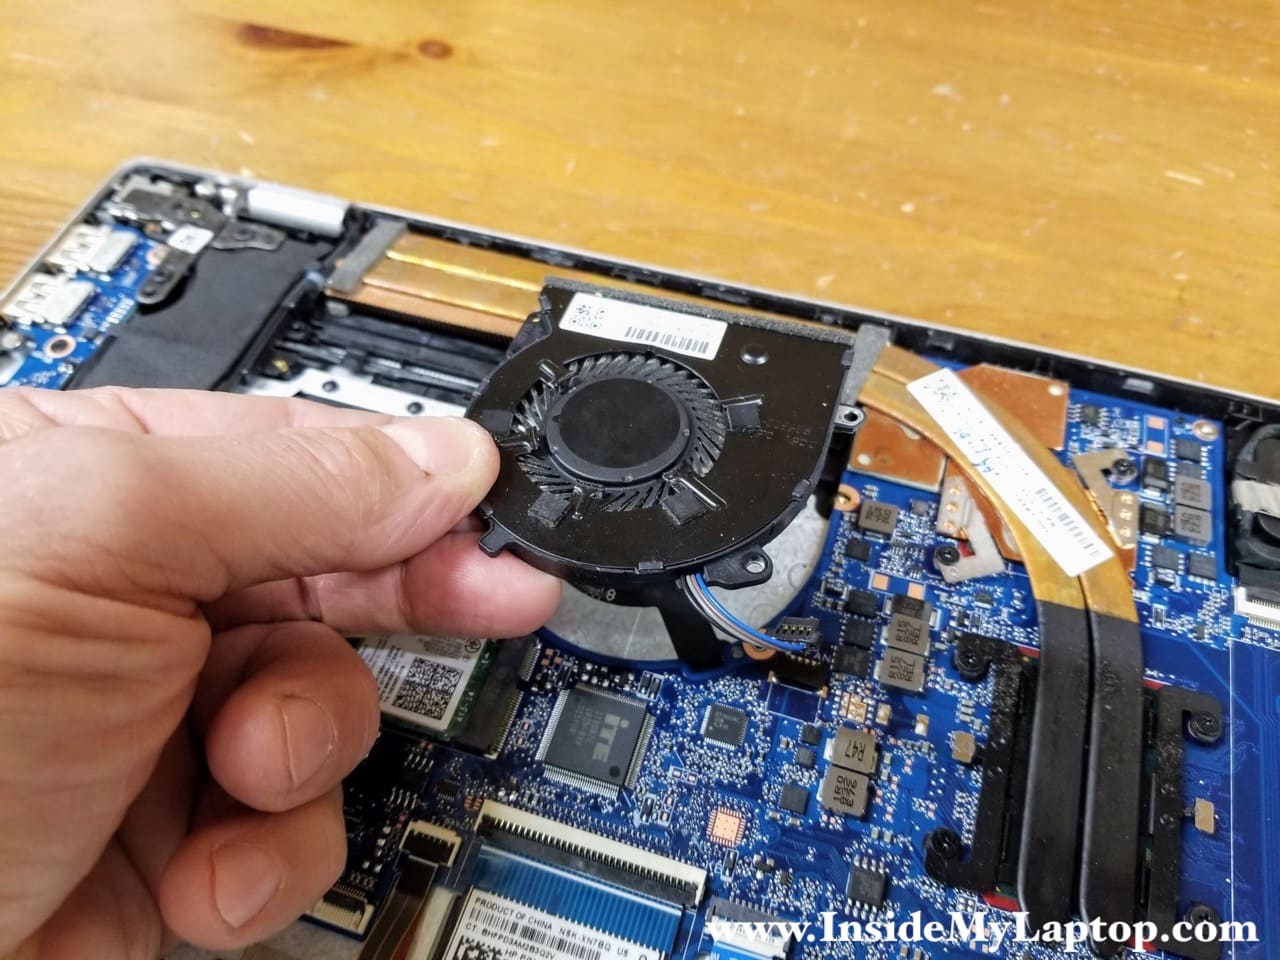
STEP 11.
Lift up and remove the second cooling fan.
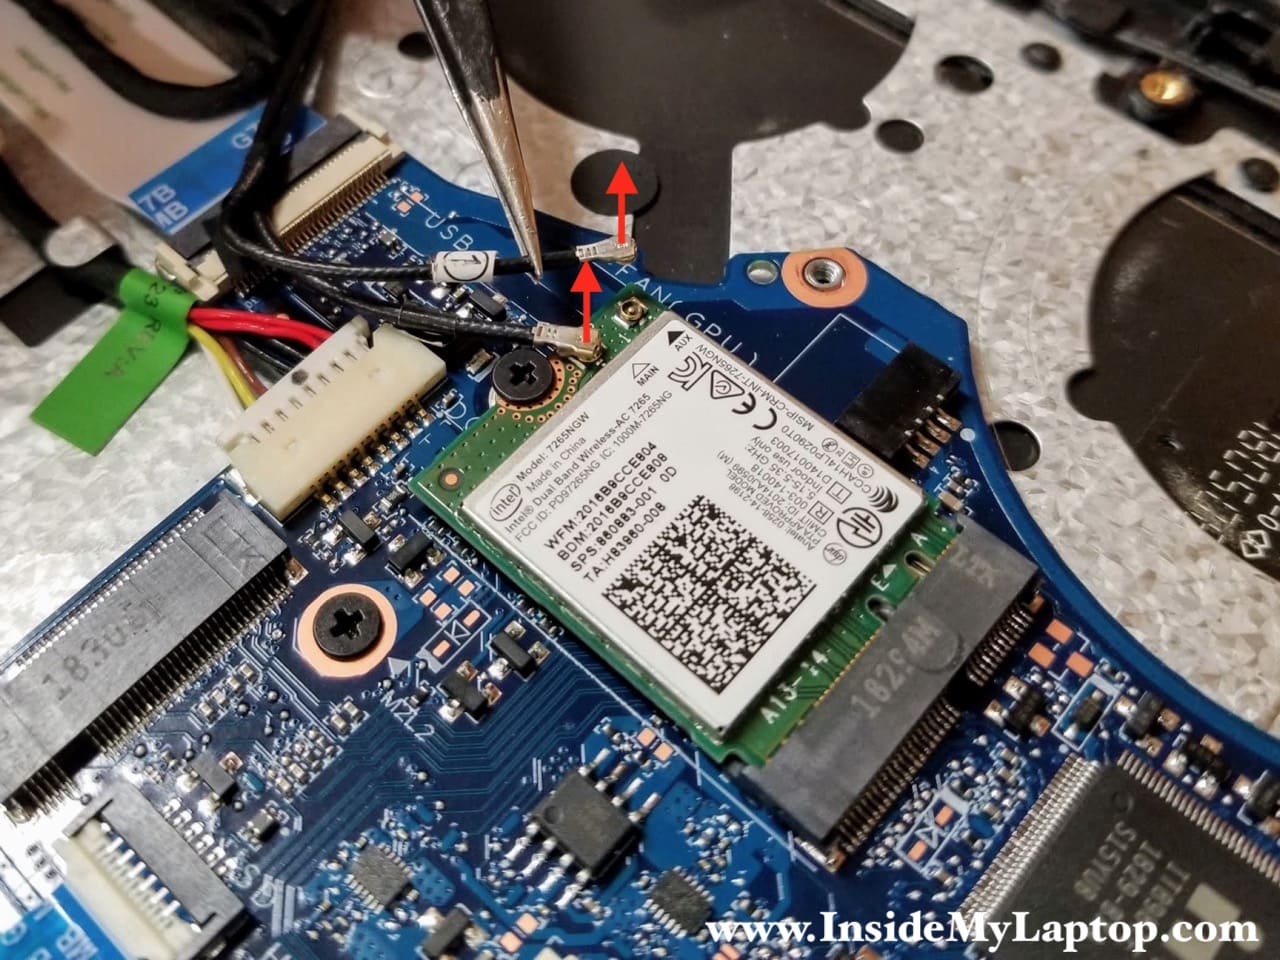
STEP 12.
Disconnect two antenna cables from the wireless card.
Carefully pull the antenna head up to un-snap it from the connector on the wireless card.
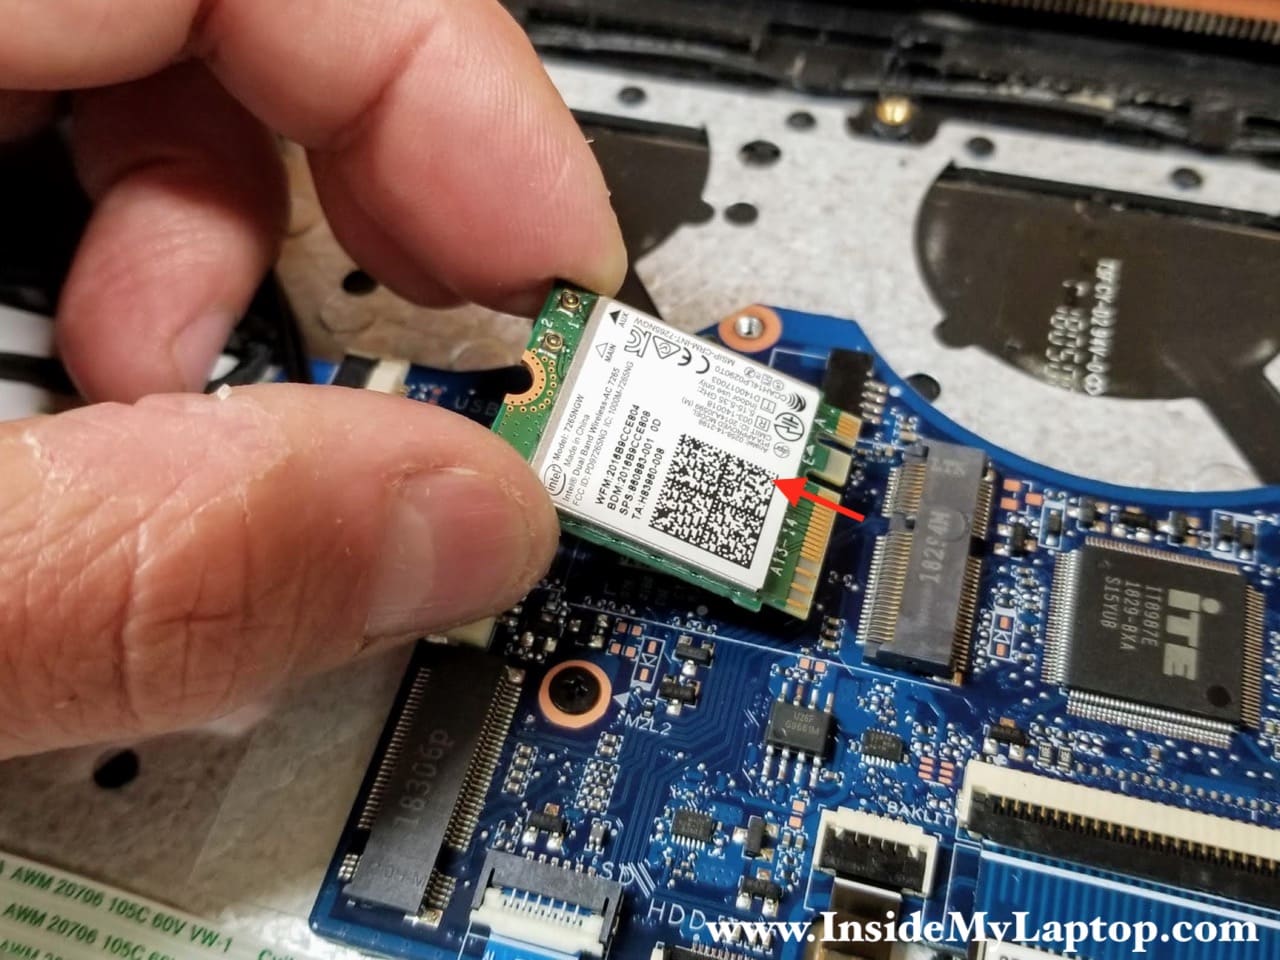
STEP 13.
Remove one screw securing the wireless card and remove it from the motherboard.
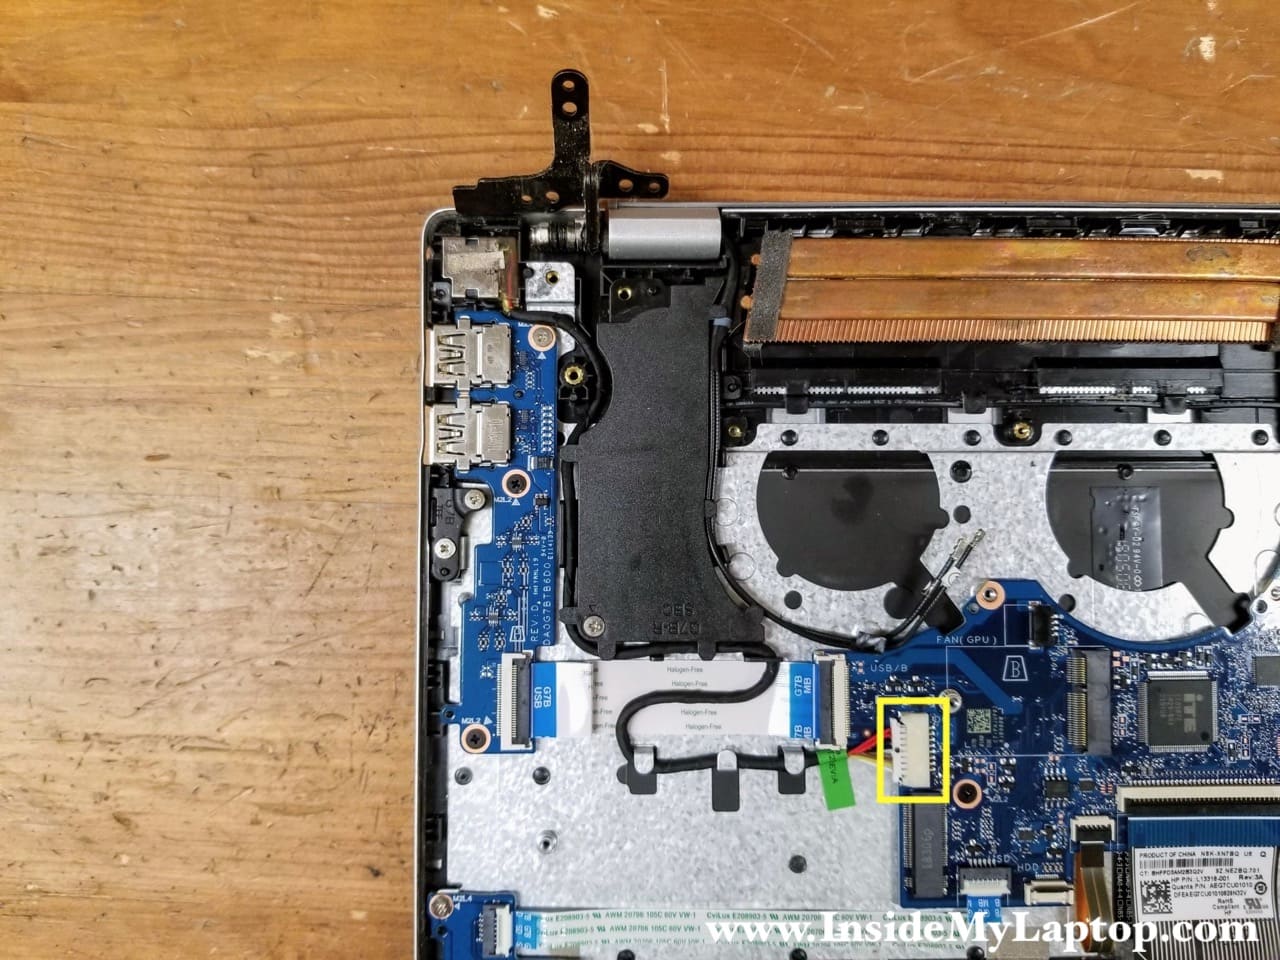
DC jack and display panel removal
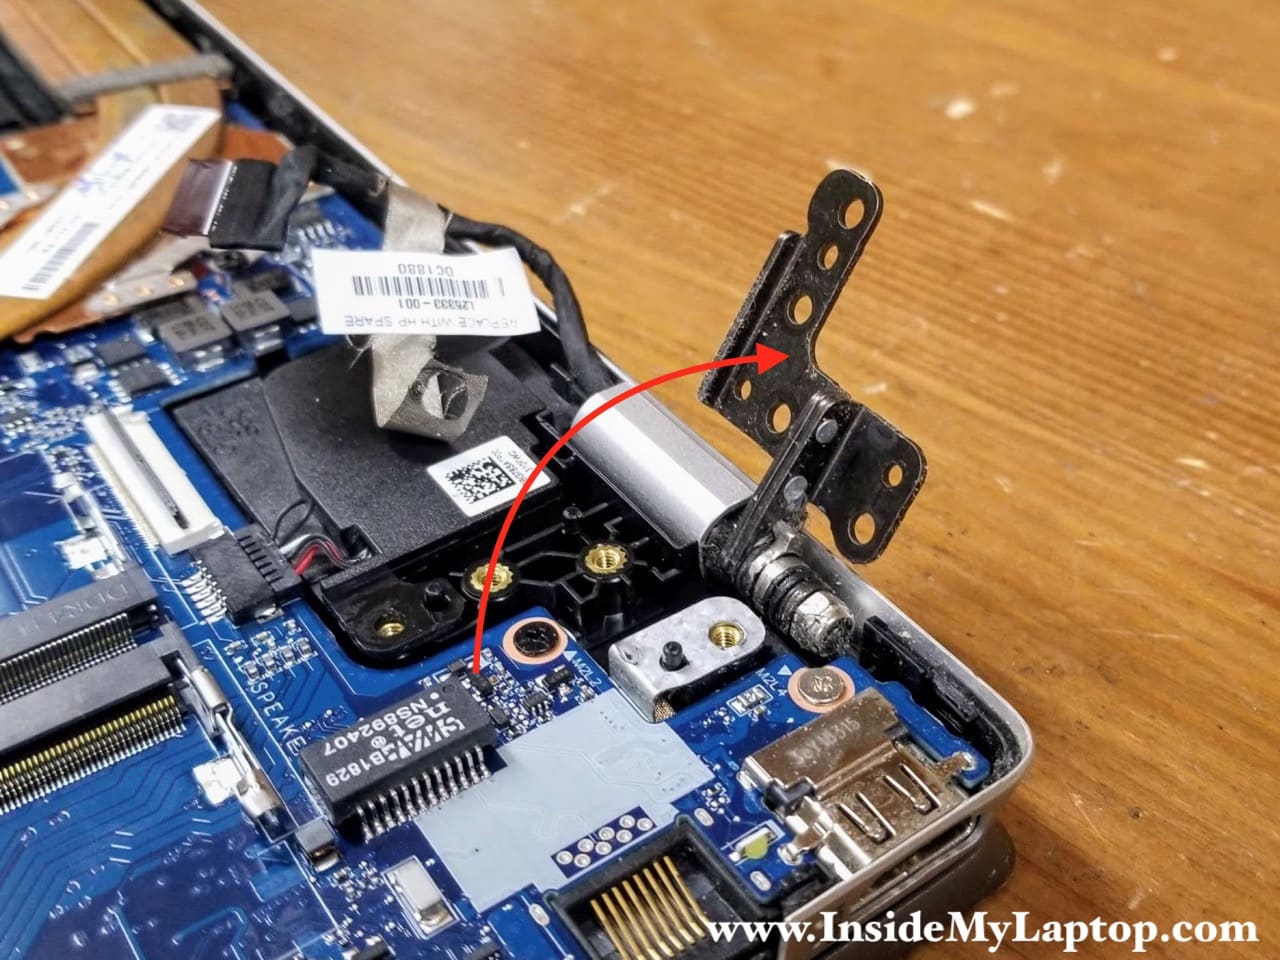
The DC power jack mounted under the right display hinge. Let’s remove it first.
STEP 14.
Remove two screws securing the right display hinge. Un-route wireless card antenna cables from the guided path on the side of the speaker.
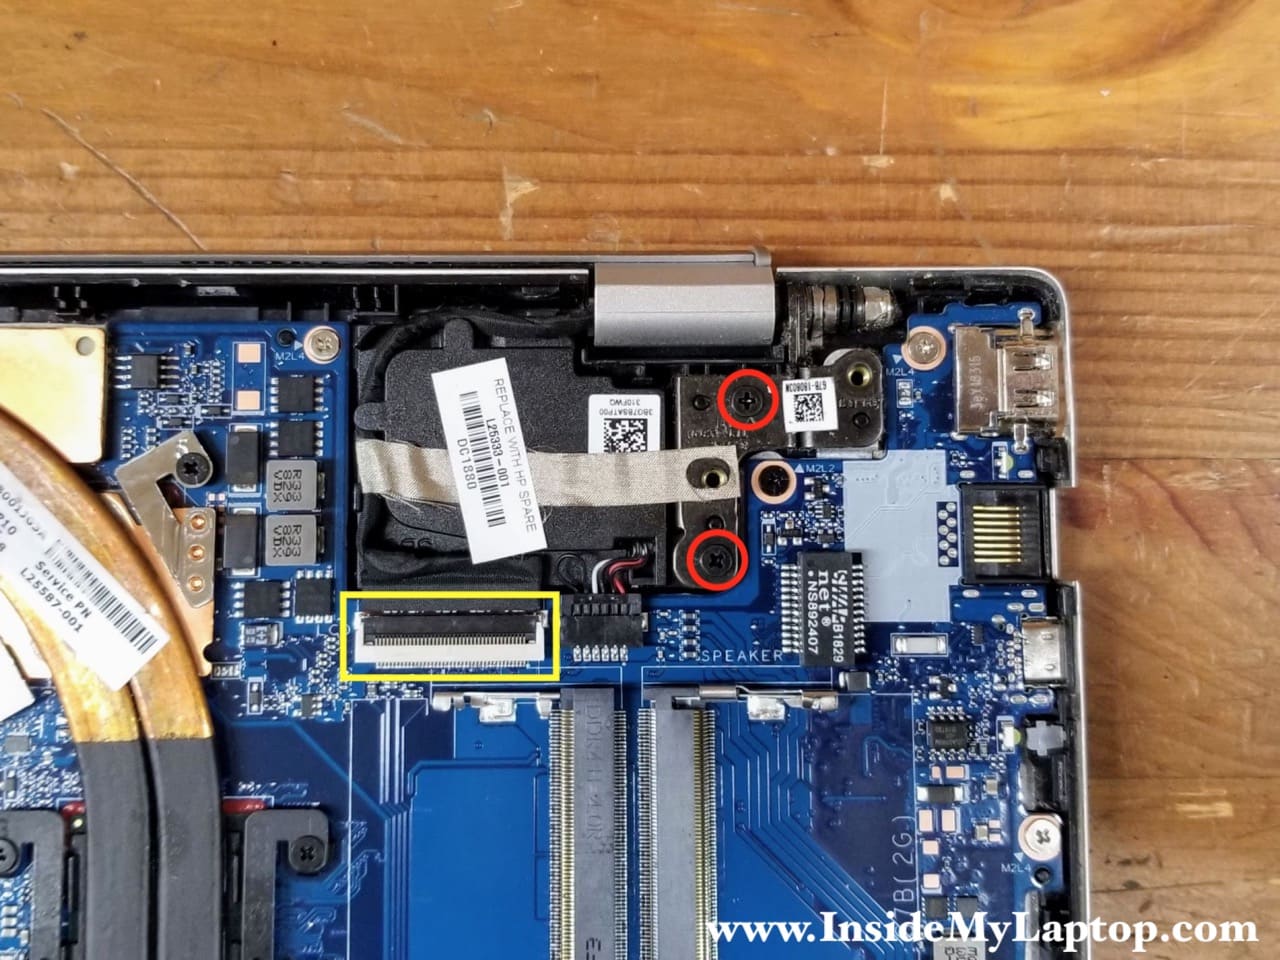
STEP 15.
Lift up the right display hinge. Now we can access the DC power jack.
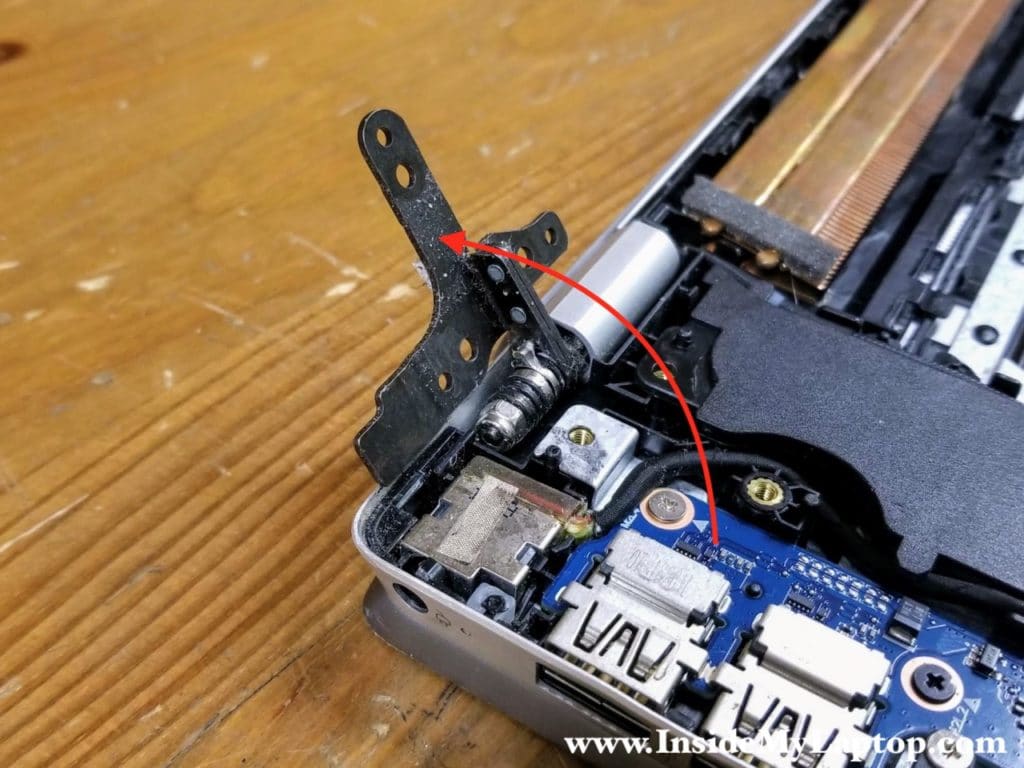
STEP 16.
Unplug the DC jack cable from the motherboard. Un-route the cable from the guided path on the top case and the side of the speaker.
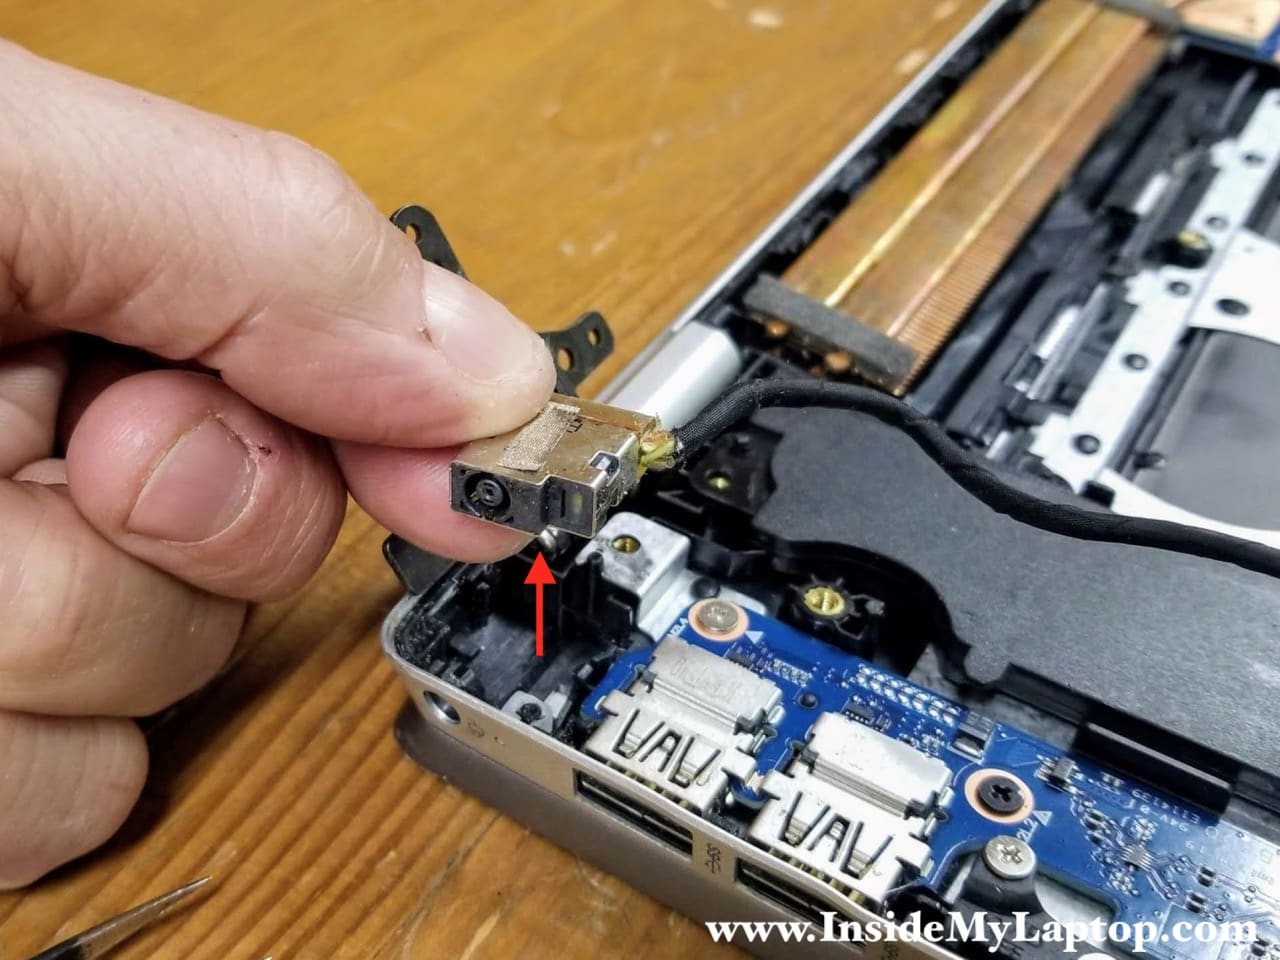
STEP 17.
Lift up the DC jack from the case and remove it.
STEP 18.
Remove two screws from the left display hinge. Disconnect the display cable from the motherboard.
The display cable can be removed after the connector is unlocked.
STEP 19.
Lift up the left display hinge.
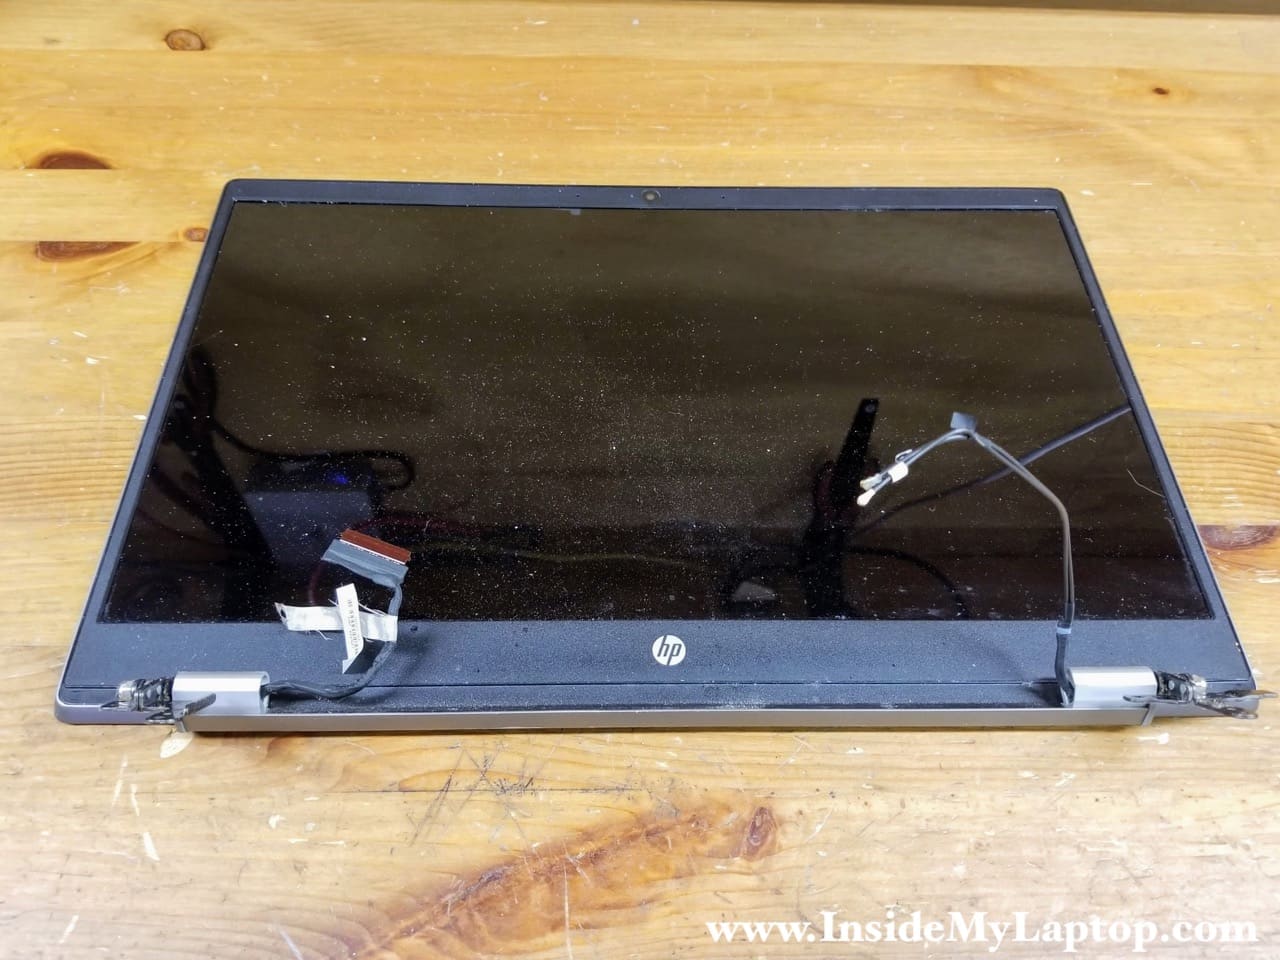
STEP 20.
Lift up the top case assembly and remove it from under the hinges.

The display panel has been removed.
USB board and motherboard removal
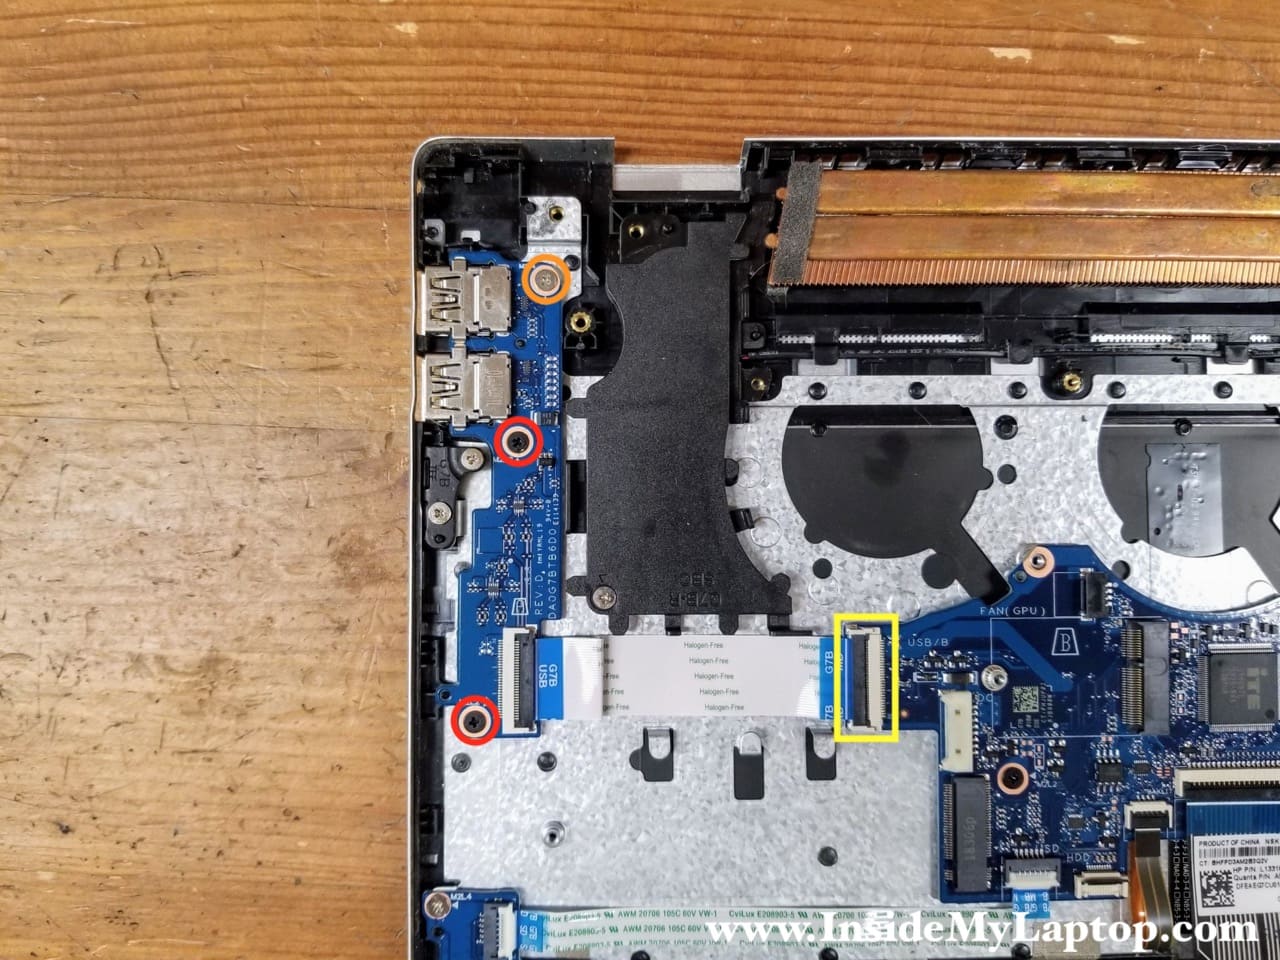
STEP 21.
Remove three screws securing the USB board and disconnect the I/O cable from the motherboard.
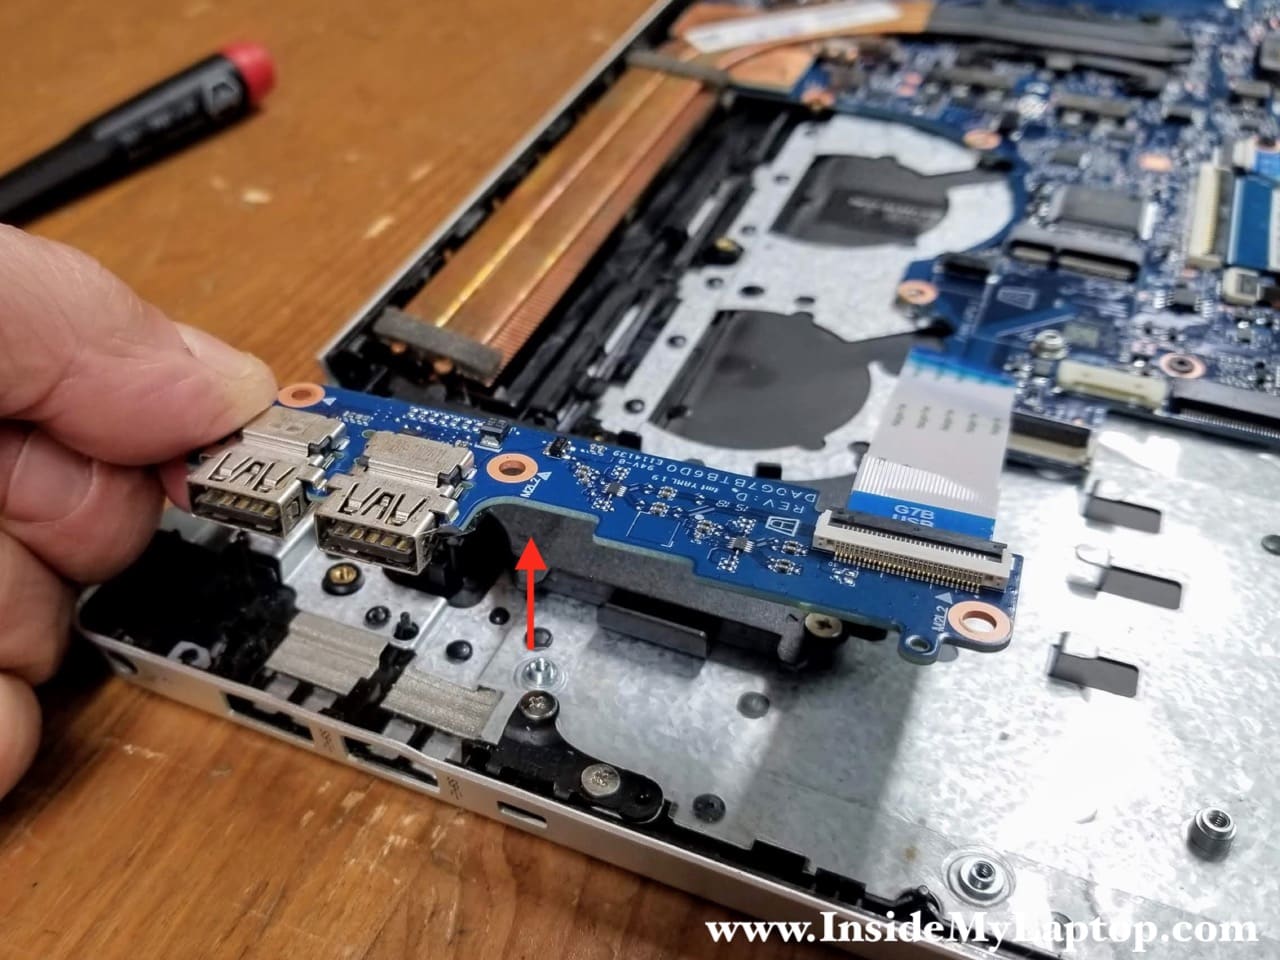
STEP 22.
Remove the USB board.
STEP 23.
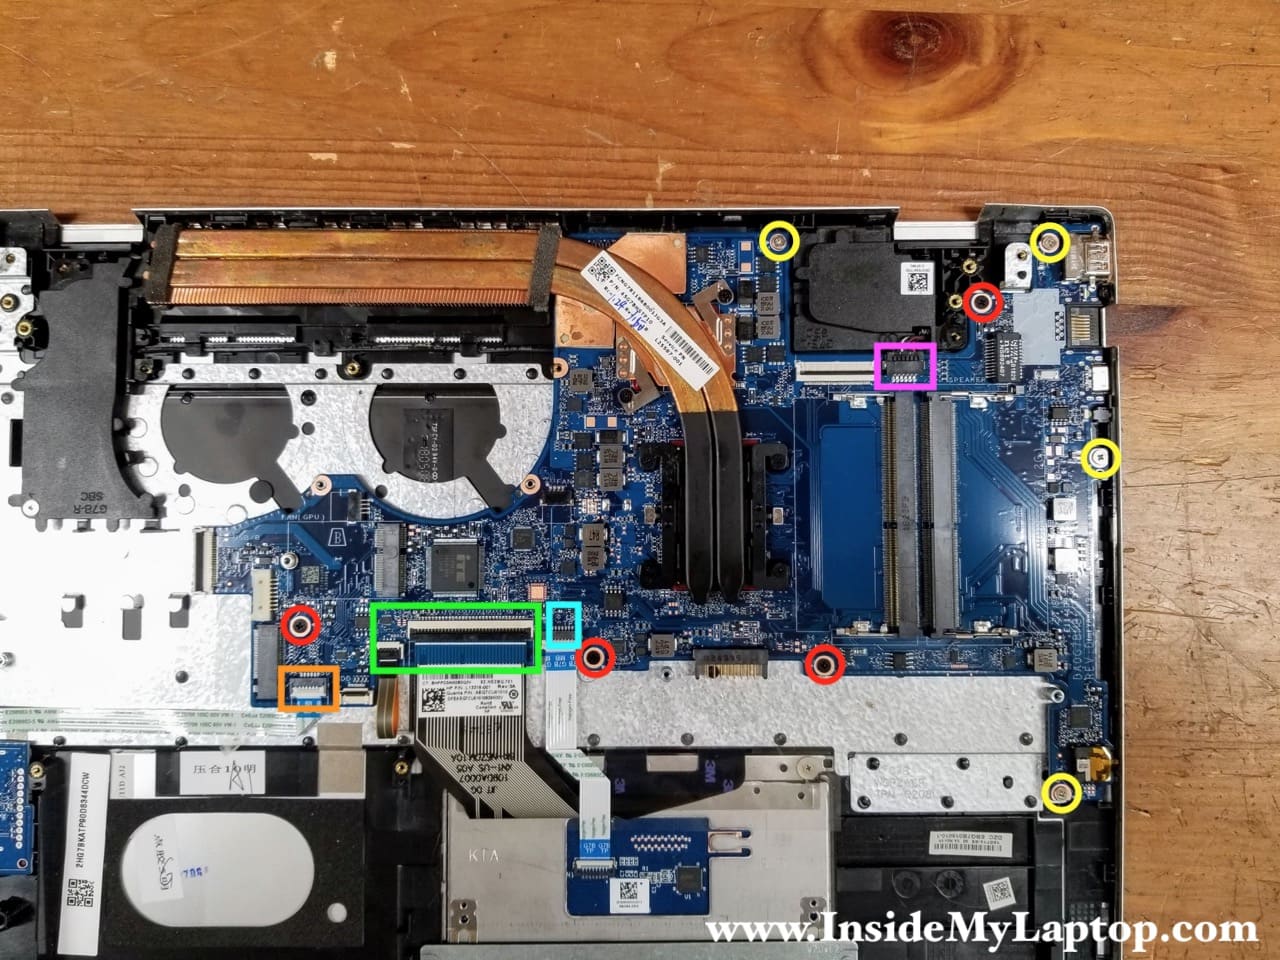
Remove eight screws attaching the motherboard to the top case.
Disconnect the following color-coded cables:
– Media card reader cable (orange).
– Keyboard and keyboard backlight cables (green).
– Touchpad cable (blue).
– Speaker cable (pink).
Four screws color-coded in red are different from four screws color-coded in yellow.
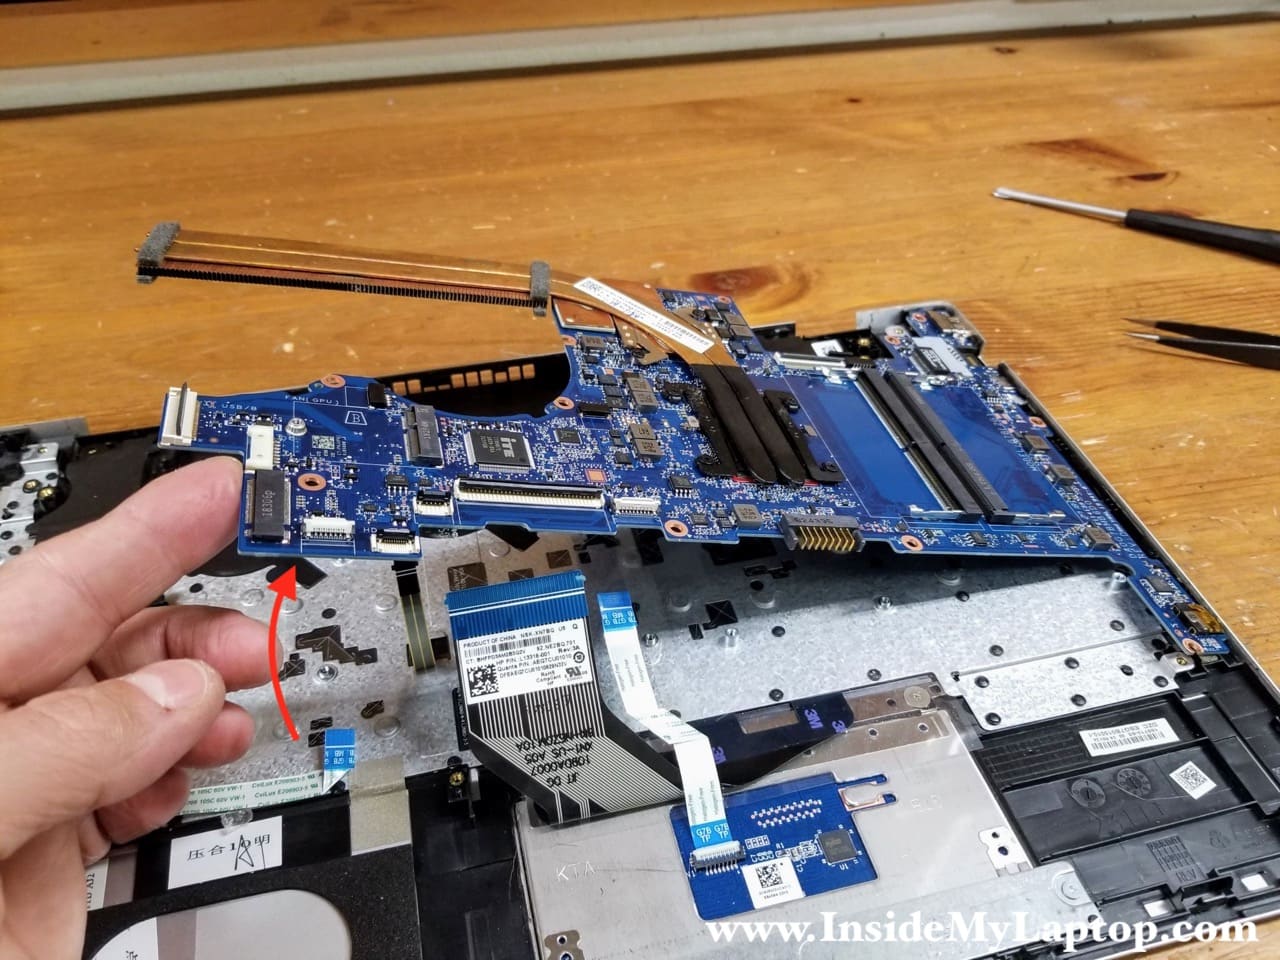
STEP 24.
Lift up and remove the motherboard from the top case.
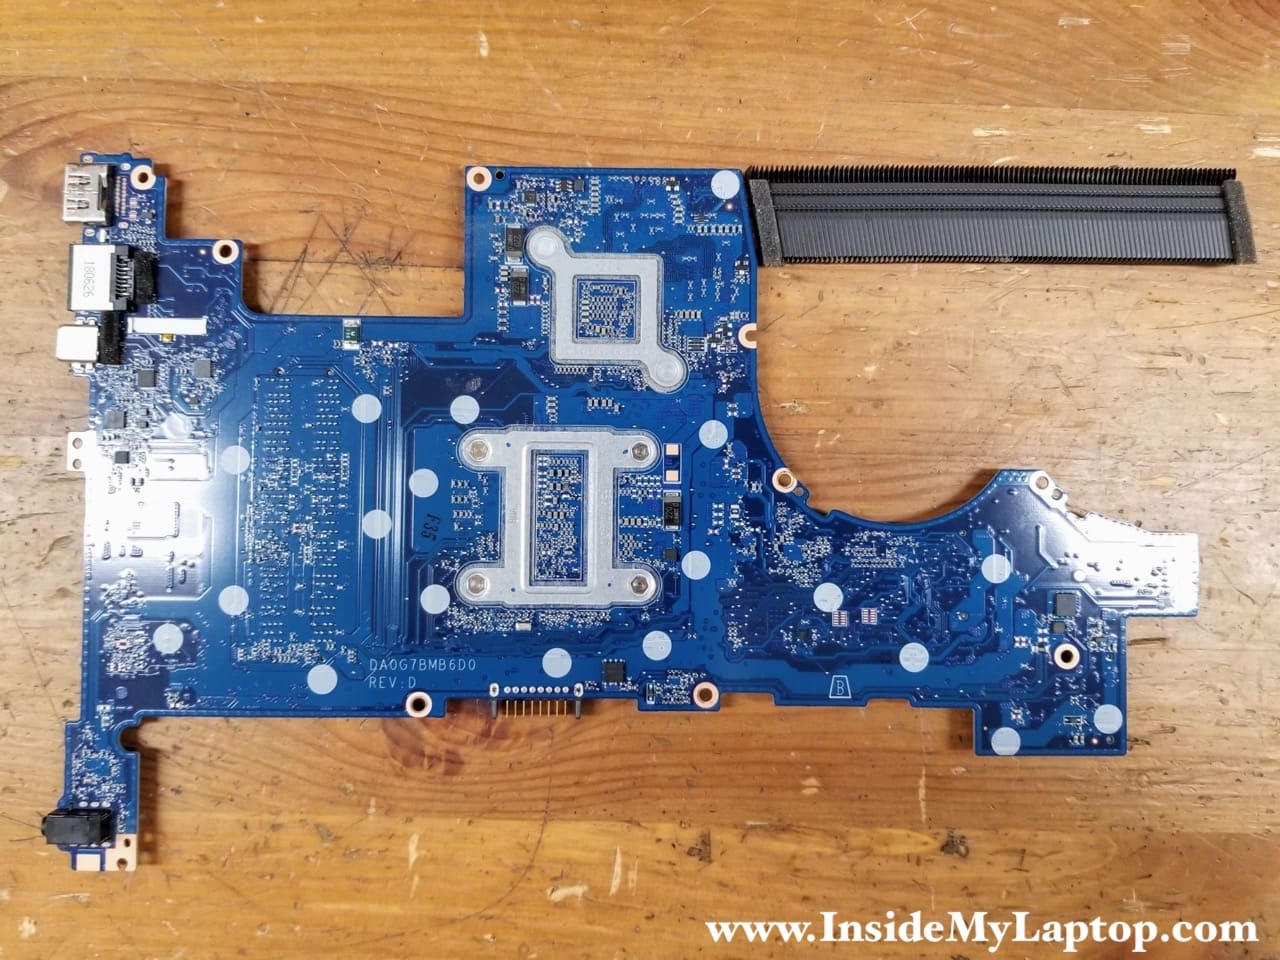
Here’s the other side of the motherboard.
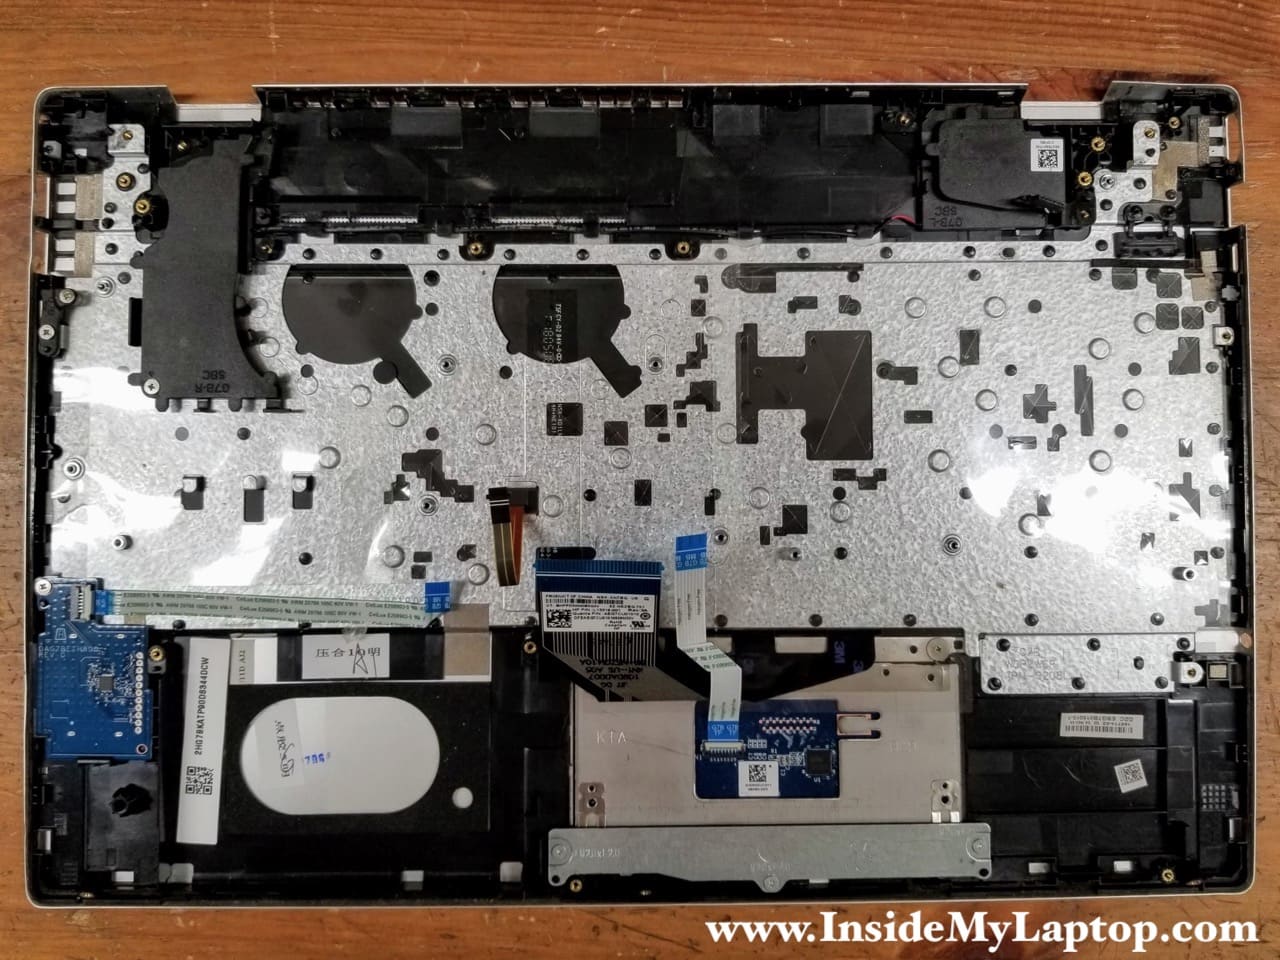
HP Pavilion 15-cs series laptop has a “non-removable” keyboard which is permanently attached to the top case. There is a way to separate the keyboard from the top case but it’s not easy. If the keyboard failed, it’s easier to replace the entire top case.
The touchpad, on the other hand, is easily removable.
Related posts: Disassembly guides for HP 15-au series and HP 15-bs series.
MO
Thank you for this tear down! My wife just broke her display and I’ve been looking for a video on YT for this tear down. Nothing specific for the 15-cs3073cl.
Great tutorial!
Andres
Thanks a lot
Mike Li
I have been looking for a replacement of a HP Pavilion Laptop model 15-cs2064st for quite sometimes, I will appreciate if you can help
Luis Vargas
Hey do you know if this HP pavilion series has cmos battery? Specially the cs3073cl one ?
I appreciate your answer!
IML Tech
I don’t think so. I looked at cs3073cl motherboards for sale on eBay and I didn’t find any CMOS battery on it.
art
Very handy and detailed descriptions. I found it very helpful. I’m curious, what or the curved metal bars that look like boomerangs on the motherboard. My laptop only has one, but otherwise it’s identical. Is it a heat sink?
Thanks.
IML Tech
I guess you are talking about the heatsink (copper colored bars).
Bill
I need to replace the part to which one mounts the hinges. My hinge broke off the attachment screw hole at the base of the case.
Thanks in advance
IML Tech
Sounds like you need to replace the palmrest assembly shown on the last picture in this guide. It means you’ll have to go through complete laptop disassembly.
Glenn
I need to replace the keyboard on my HP 15-cs3073cl and when you lift the keyboard you will find a sheet of plastic that fits between the keyboard and the metal tray that goes over the fan and motherboard, but what is the plastic sheeting and what is it called.
IML Tech
I would replace the entire palmrest assembly (with keyboard). It will be much easier than replacing just the keyboard, this is “not removable”.
You can find a new palmrest assembly with keyboard on eBay. Just search for 15-cs3073cl palmrest. It’s about $60-$65 or a brand new part.