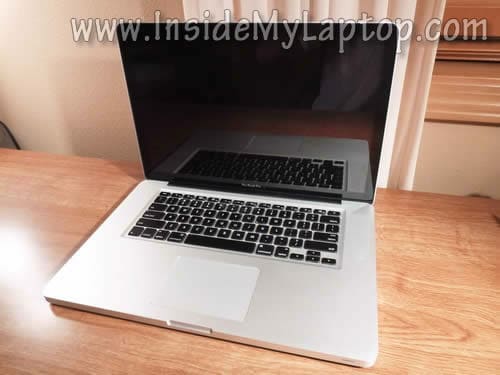
In the following guide I explain how to disassemble a MacBook Pro 15″ (Mid 2010) in order to remove and replace the keyboard.
In my case something sticky was spilled on the keyboard and it stopped working completely. In fact, the laptop didn’t even start with the damaged keyboard connected to the motherboard.
I confirmed that this is just a failed keyboard by turning it on using the power-on pads.
The keyboard is attached to the internal side of the top cover assembly. In order to remove and replace the keyboard the entire MacBook Pro (MBP) has to be disassembled.
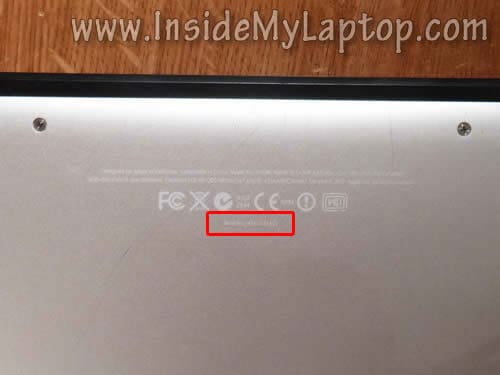
You can find the year of your MBP by running the serial number on Apple website.
The serial number can be located on the bottom case or memory slot.
For this repair you’ll need the following tools:
– T-6 torx screwdriver.
– PH000 Phillips screwdriver.
– 1.5 mm slotted screwdriver ( I used it for removing battery screws).
MBP has a very small screws. I recommend using only high quality precision screwdrivers. I prefer Wiha screwdrivers.
Before you start the disassembly process make sure the computer is turned off.
Also, keep track of all screws (they are all different). Make notes, pictures, etc… This will make your life much easier during the reassembly process.
STEP 1.
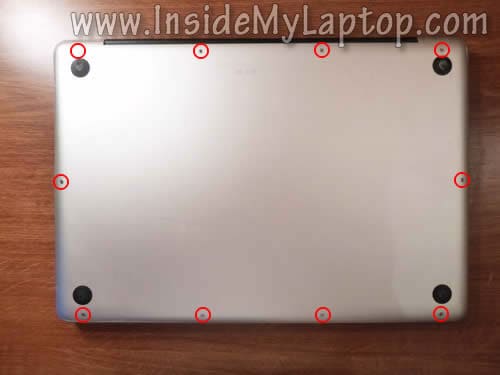
Remove ten screws securing the bottom cover.
STEP 2.
Separate the bottom cover and remove it.
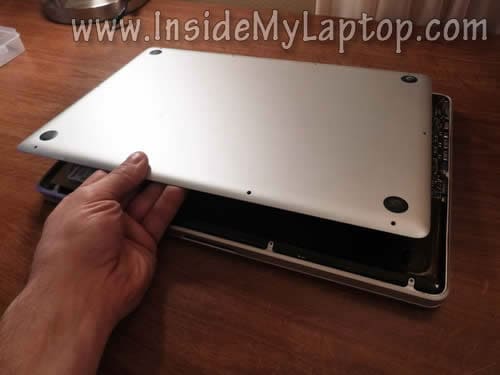
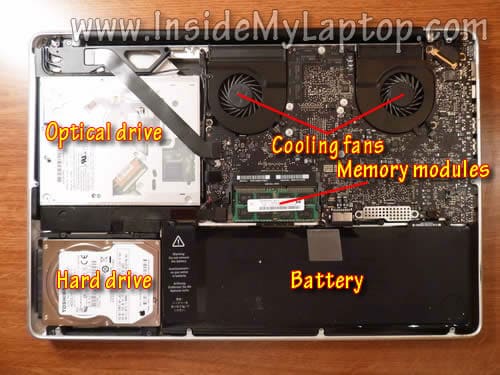
Under the bottom cover you can access the following internal MBP components:
– Memory modules.
– Optical drive.
– Cooling fans.
– Hard drive.
– Notebook battery.
– Motherboard aka logic board.
STEP 3.
The battery is secured by three special screws (tri-wing screws). I was able to remove them using a small 1.5mm slotted screwdriver without any problem.
Be careful, using a wrong screwdriver can easily strip the screw.

STEP 4.
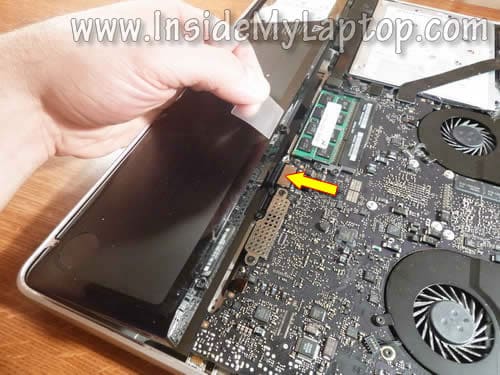
Lift up the battery and unplug the battery cable from the motherboard.
Remove the battery.
STEP 5.
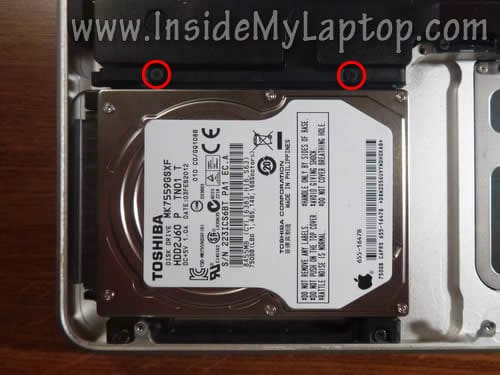
Unscrew two screws securing the hard drive mounting bracket.
STEP 6.
Lift up and remove the hard drive bracket.
STEP 7.
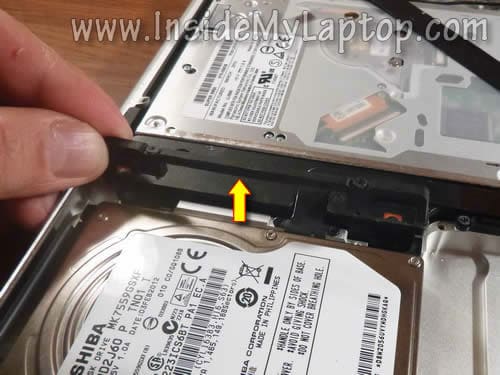
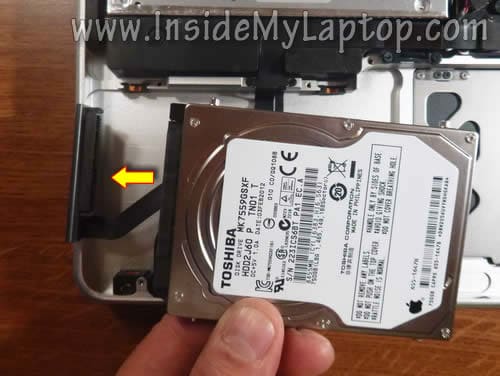
Carefully lift up the hard drive and disconnect the hard drive cable.
Remove the hard drive.
Upgrading this regular 2.5″ SATA hard drive to a 2.5″ SATA solid state drive will improve laptop performance significantly.
STEP 8.
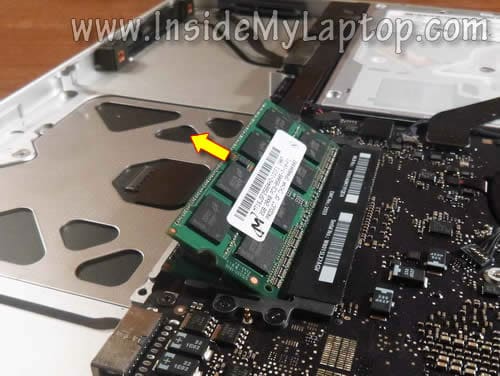
Remove both memory modules.
Spread latches on both sides of the memory slot. The top memory module with pop up at a 30 degree angle. Pull the top memory module from the slot.
After that pull the bottom memory module.
This laptop can handle up to 8GB (2x4GB) DDR3-1066 SODIMM memory modules.
STEP 9.
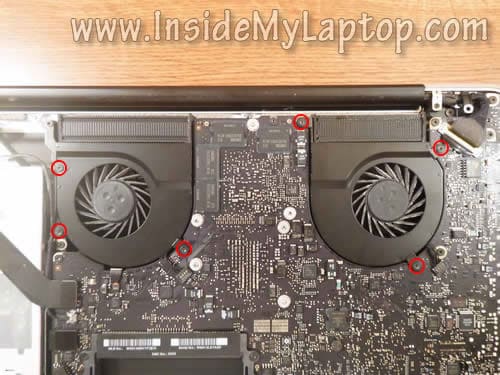
Remove six screws securing the cooling fans (three screws per one fan).
STEP 10.
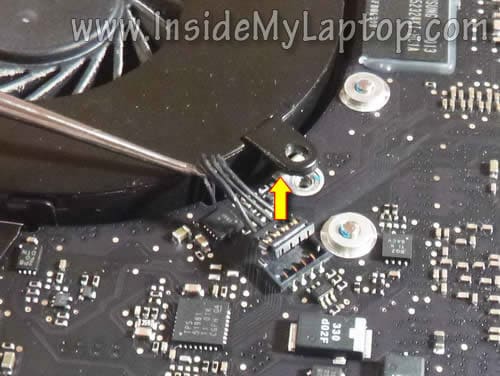
Disconnect both fan cables from the motherboard.
STEP 11.
Remove both cooling fans.
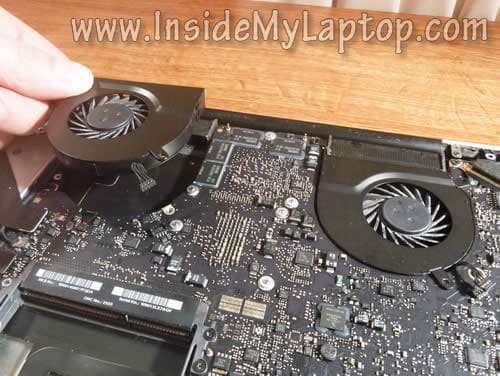
STEP 12.
Remove two screws securing the keyboard and trackpad connectors shield.
Remove the shield.
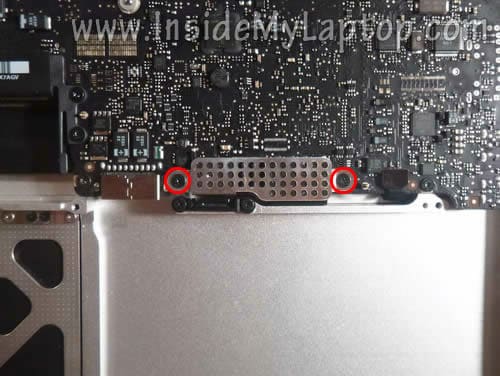
STEP 13.
Disconnect 10 cables from the motherboard.
Be very careful with connectors 6 and 8. I’ll explain how to unlock different types of connectors in the following pictures.
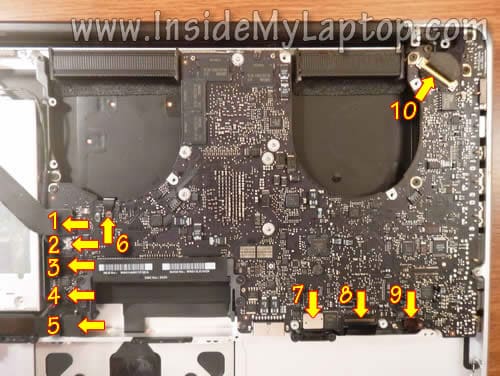
Unplug the video cable (connector 10).
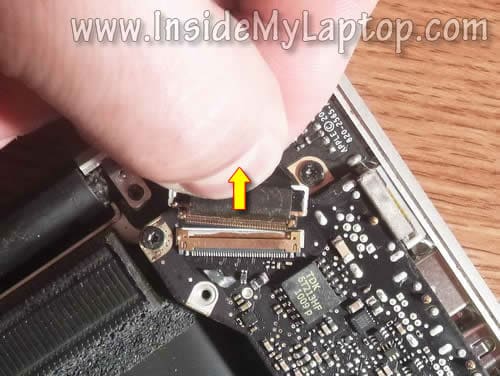
Here’s how to disconnect the keyboard backlight cable (connector 6).
Carefully lift up the left side of the connector retainer with a small screwdriver.
The retainer will open up at a 90 degree angle.
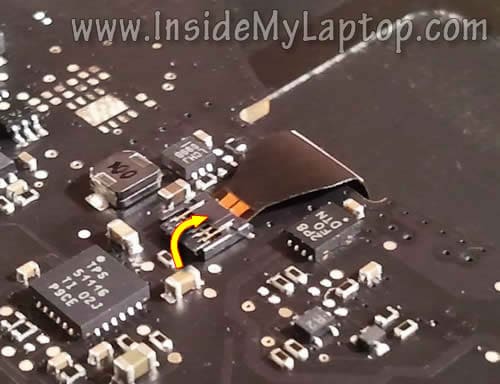
Now you can pull the keyboard backlight cable from the connector.
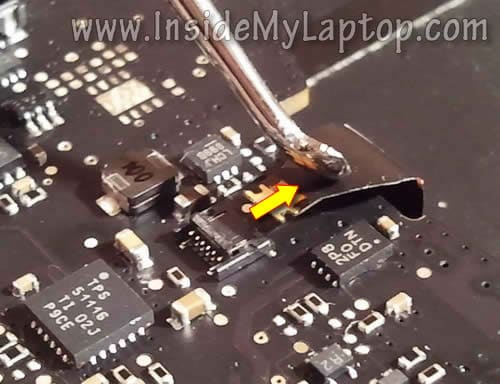
Remove the keyboard cable (connector 8) the same way.
First, lift up the connector retainer.
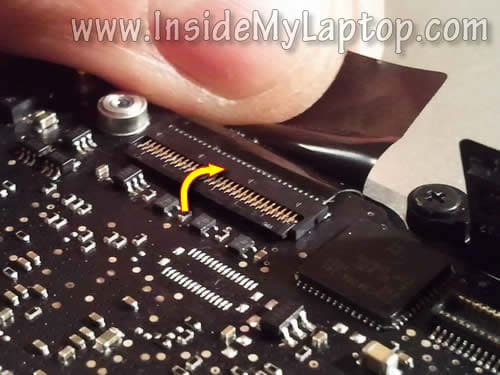
After that pull the keyboard cable from the connector.
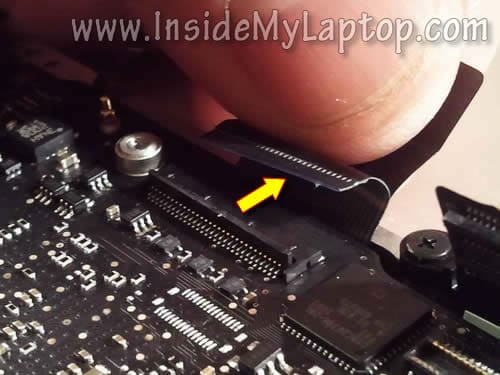
Lift up and disconnect the speaker cable (connector 4).
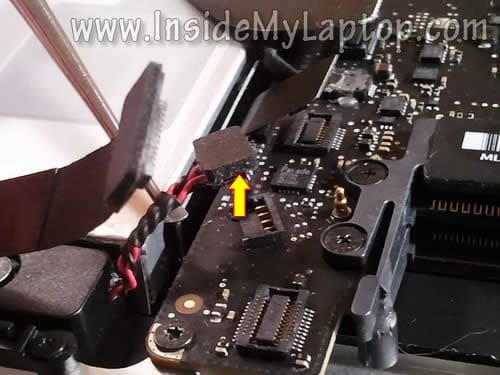
Lift up and disconnect the Wi-Fi/Bluetooth assembly connector. Unlock connectors 1,3,5,7,9 the same way.
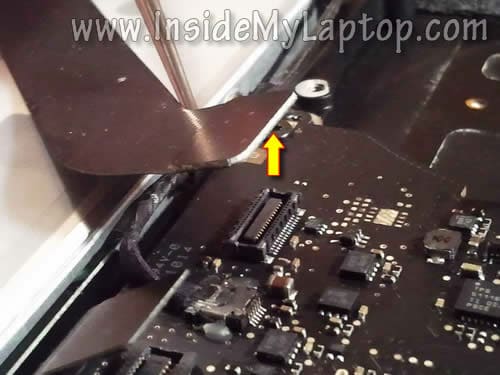
Unplug the camera cable form the connector on the motherboard.
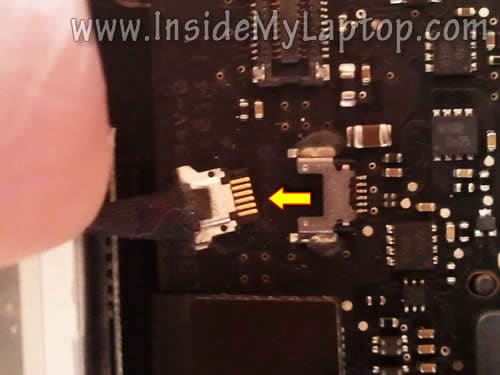
STEP 14.
Remove nine screws securing the motherboard and MagSafe board.
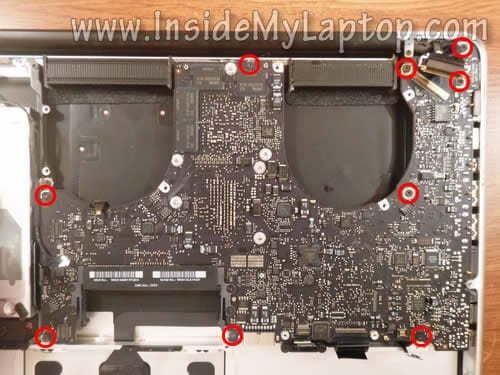
STEP 15.
Start removing the motherboard from the left side.
Lift up the left side and work the right side of the motherboard out of the notebook case.
Note: you can leave the MagSafe board connected to the notebook case but in this case you’ll have to unplug it from the motherboard.
I found it easier to remove the motherboard with the MagSafe board attached.
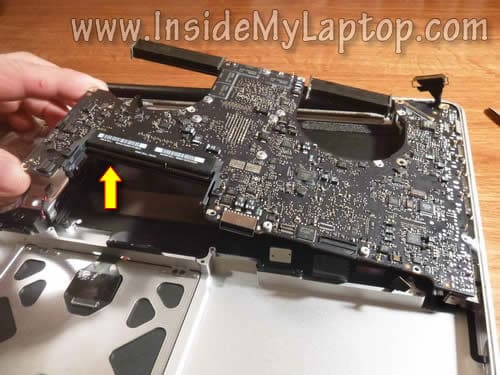
STEP 16.
Remove the motherboard.
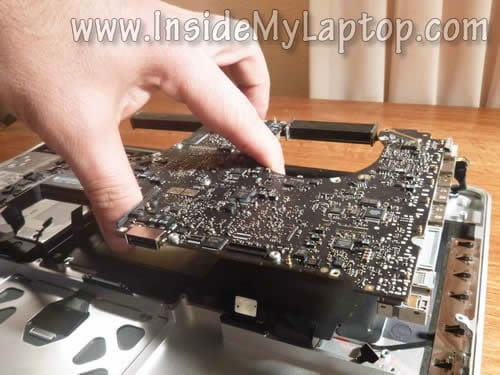
STEP 17.
Remove two screws securing the Wi-Fi/Bluetooth assembly.
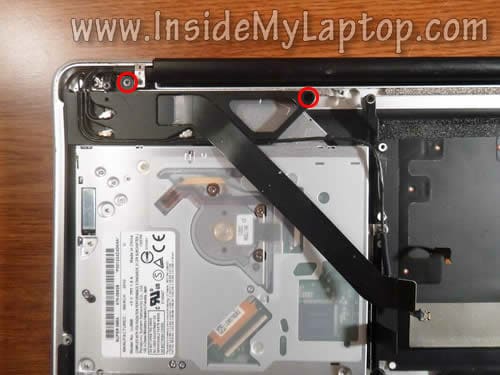
STEP 18.
Move the the Wi-Fi/Bluetooth assembly aside.
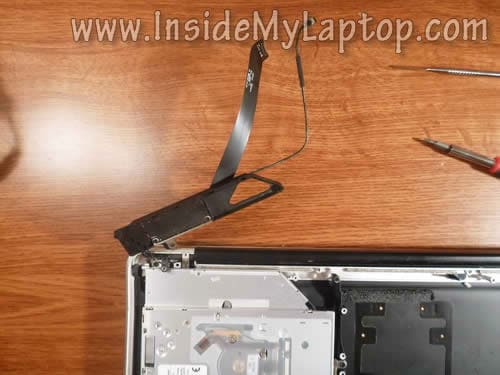
STEP 19.
Remove three screws securing the optical drive.
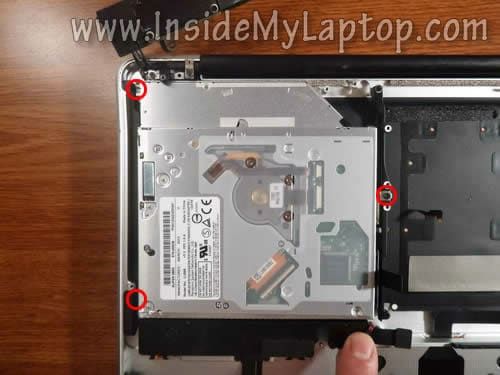
STEP 20.
Lift up and remove the optical drive.
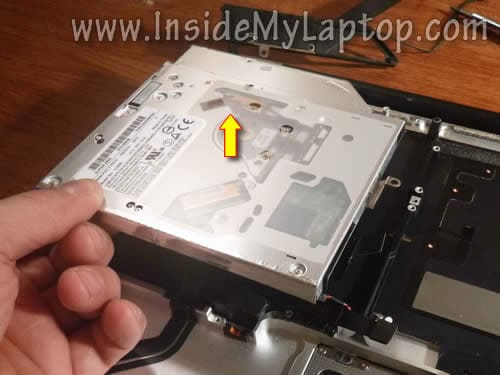
STEP 21.
Remove two screws securing the mounting bracket.
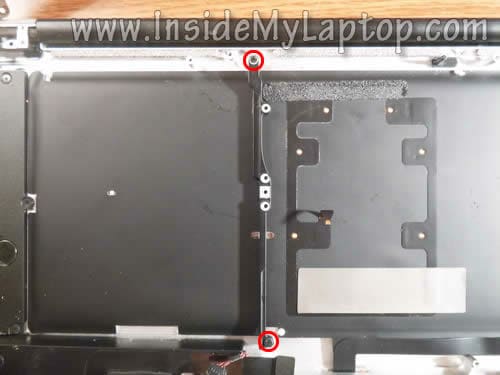
STEP 22.
Remove the mounting bracket.
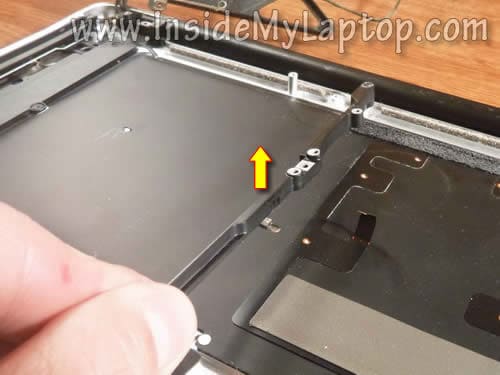
STEP 23.
The keyboard almost ready for the removal and replacement.
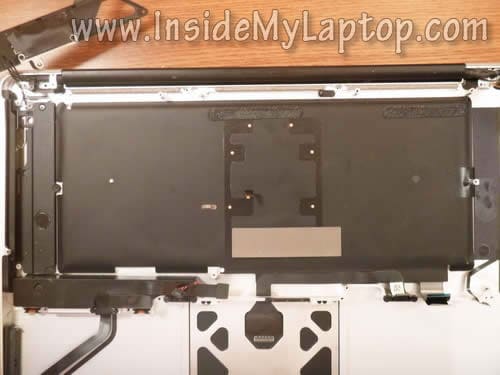
Carefully separate the trackpad cable from the keyboard assembly.
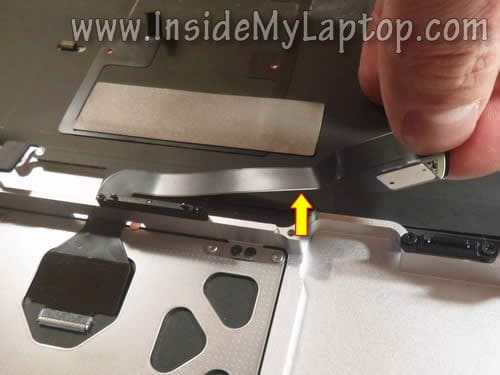
STEP 24.
Now you can start separating the keyboard backlight from the keyboard.
The backlight has a few layers. Do not separate them from each other.
Be careful if you plan to use the backlight with a new keyboard.
I purchased a new keyboard WITH backlight so I didn’t care much about the original backlight.
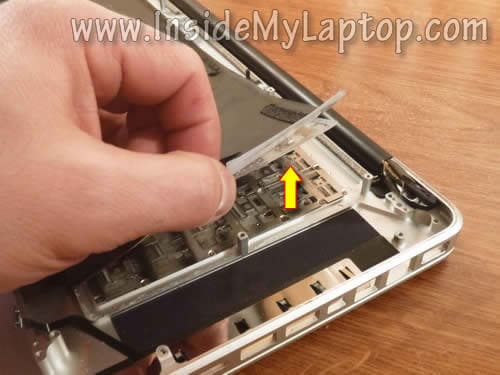
STEP 25.
Remove the keyboard backlight.
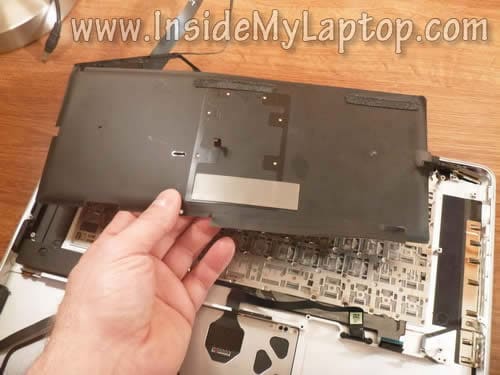
STEP 26.
Now remove about 70 very small screws securing the keyboard.
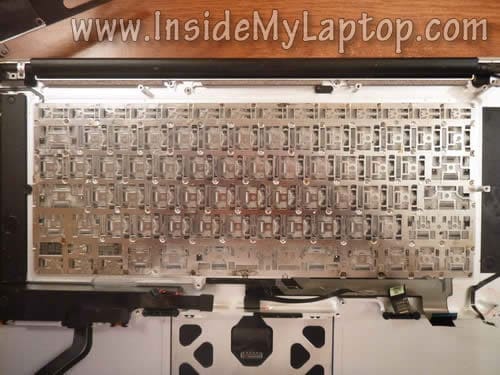
STEP 27.
Remove two screws securing the display cable mounting bracket.
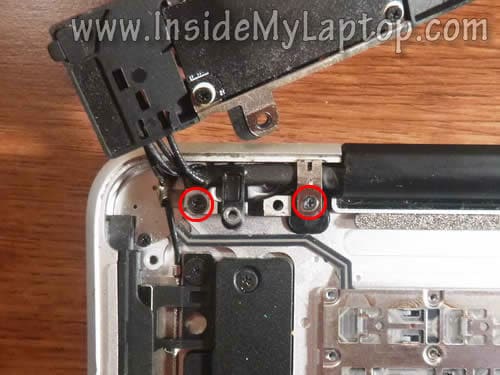
STEP 28.
Lift up and remove the bracket.
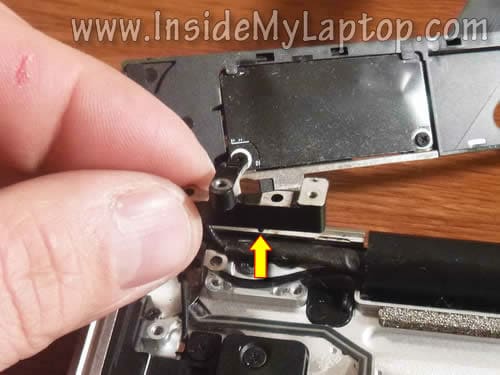
STEP 29.
Remove two screws securing the power button.
NOTE: the power button is permanently attached to the keyboard. It’s part of the keyboard.
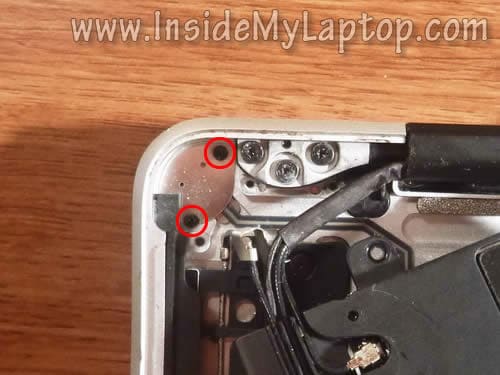
STEP 30.
Start removing the keyboard.
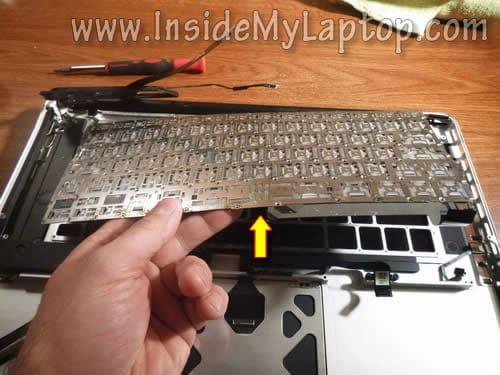
STEP 31.
While removing the keyboard pay attention to the power button.
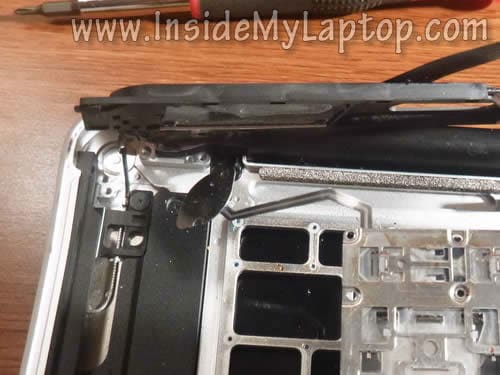
There is a metal ring (spring) located under the power button. Do not lose it. Do not forget to install this spring back in place under the new power button.
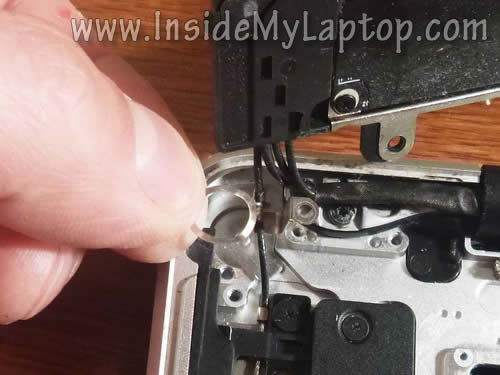
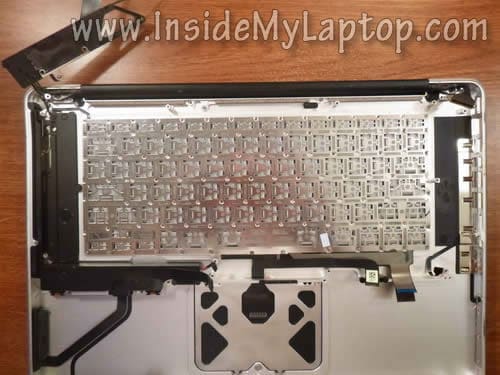
After the old damaged/failed keyboard removed you can install a new keyboard.
Install a new (or old) backlight on the keyboard and assemble the laptop following all steps in the opposite direction.
By the way, If you have damaged keys it might be not necessary to replace the entire keyboard. In some cases it’s possible to fix individual keyboard keys.
Related article:
Trish
Can you help? I had my Macbook magna-whatsit charger repaired because the lead going into the white box had frayed. I plugged it into my Macbook and nothing happened – no light came on and no charging took place. Thought I smelt a very faint electrical smell. Tried another charger which was not faulty (it works just fine on my other Mac) but still no charging. The Macbook was totally dead. Do you have any idea what might have happened? Could the “repaired” charger have blown some sort of fuse in the Macbook when I plugged it in? Any ideas gratefully received.
RickWV
You should take it to an Apple store and have them look at it. It’s free for them to look at it and tell you what is up. Bring the charger too.
Bryan Gibson
I had an issue with a Mid-2009 Macbook Pro (15″) where a few keys were not working. I thought replacing the keyboard would do the trick, but the same exact keys on the new keyboard aren’t working. Any idea if this might be a made keyboard connector or the logic board? The original issue was caused (i think) by spilling a very small amount of water on the keyboard. I’m no where near an Apple store, or I would have taken it in for inspection long ago.
IML Tech
@ Bryan Gibson,
Take a look inside the keyboard connector on the motherboard. Do you see any corrosion? If yes, try cleaning it up with a toothbrush and alcohol.
Also, inspect the motherboard for any corrosion. Clean it up if found.
Here’s how I troubleshoot Apple laptops after liquid spill:
https://www.insidemylaptop.com/steps-to-fix-macbook-pro-laptop-after-liquid-spill/
Zach
So, when trying to disconnect the keyboard connector, I mistakenly didn’t notice the flap that locks in the connector and didn’t unlock it. I pulled out the ribbon but not whatever it is that allows it to plug in correctly. Any ideas how to fix it? It doesnt look to bad necessarily, it just doesnt have the end piece on it (which I’m assuming is still in the connector).
IML Tech
@ Zach,
Not sure what you are talking about. If you pulled the cable without unlocking the connector, it shouldn’t have damaged the connector. There shouldn’t be anything left in the connector.
In order to plug the cable back, you’ll have to lift up the locking flap, insert the cable and close the flap.
J. Z.
I think I damaged the keyboard cable, what I screwed up is I didn’t think about the tab you pull away to take the ribbon cable out and I sort of bent it so than I used tweezers to make it straighter so I put it back into the connecter and now the keyboard doesn’t work at all. At the moment I am using an external keyboard, its a 2010 15inch MacBook pro.
david
Thanks for this tutorial! Worked out great!
jack
This is an OUTSTANDING tutorial. No-where else could I learn how to open those flat ribbon connectors which rotate 90 degrees. (it was not obvious merely from looking, and I didn’t want to force anything.)
Thank you!
Alok
Can you help? My keyboard is typing blank spaces or nothing at all, after an upgrade to Mavericks. I tried to rollback to Mountain Lion and even Lion but it did not help. I opened and cleaned up the MacBook 2009 of all the dust, but after reassembling it stopped starting properly. I have to repeatedly press the power button a few times to get it working. I can’t figure out what I did wrong. Do you think I could have damaged something while removing the motherboard? or is it the Mac firmware corrupted (BTW could the corrupted firmware be the cause of keyboard problem too since with KeyRemap4MacBook it works much better except for a few keys)..??
Your’s is the only tutorial I have found which shows the disassembly of just the keyboard… SUPERB…!! I have hopr that you’d be able to guide me too.
IML Tech
@ Alok,
Can you run Apple Hardware Test?
Matt
Hey.
I just wanted to thank you for this awesome guide.
It was very helpful for me and I replaced my keyboard no problem, and I’m typing from it now 🙂
Nathaniel Bannister
This helped me replace the keyboard in my 2010, THANKS 😀
Timothy
How do you remove and reinstall the black backing sheet? It looks like it is attached with adhesive.
Julian
Hey, I replaced my keyboard + backlight on my MBP 15″ 2010 laptop with new components from ebay. Unfortunately the backlighting is very uneven and only in middle as bright as it should be.
Wayne Antony Johnson
Good morning,
Thank you for the very informative guide, i currently have my MacBook 2010 90% disassembled, using the camera on my iPhone on zoom i was able to closely examine the board and found two small spots of corrosion, one on a small square contact, barely visible to the naked eye and the other on one of the ic’s near the fan cutout, i was able to clean both with a small amount of electrical cleaner, i am looking forward to reassembling the machine tonight and hopefully it will come back to life, i have not removed the keyboard as yet but other pics you have showing the power tabs will help a great deal should it not power on by itself after this “service” it has had i will be very interested to see if the small tabs can help, another thing, as the machine simply died one day (i have no idea what caused this), it has had no liquid spill that i am aware of, that being said i did purchase the machine second hand and there is a good chance there was moisture present which caused the problem through movement or heat creating further precipitation etc, thanks for the guide & i will definitely be bookmarking your site !!